How to Replace a Wheelbarrow Tire in 5 Minutes | Pretty Handy Girl

How to Replace a Wheelbarrow Tire in 5 Minutes | Pretty Handy Girl

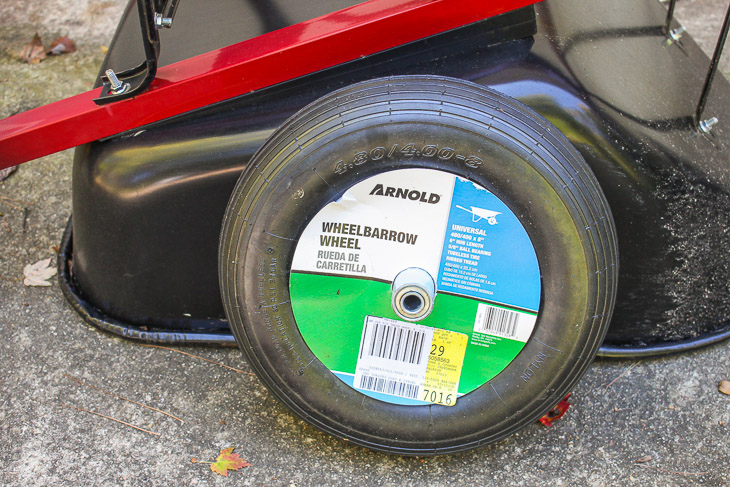
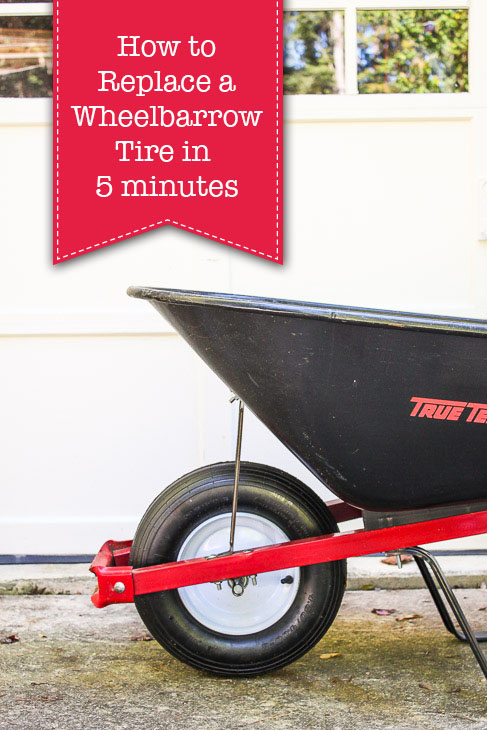
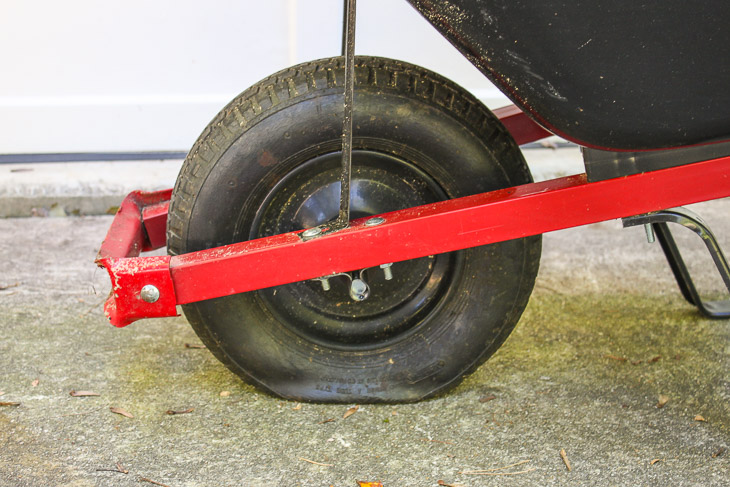
What happens when you are ready to do some work in the yard and discover your wheelbarrow has a flat tire? You pump it up. But, then you realize the tire is dry-rotted and no air will stay in the wheel. Trust me when I say you don’t want to muscle the tire off to replace it (because that is a pain in the “you know what” and it’s much faster to replace the whole wheel.) Have no fear, I have a tutorial for How to Replace a Wheelbarrow Tire in 5 Minutes!

How to Replace a Wheelbarrow Wheel in 5 Minutes | Pretty Handy Girl

Grab two items and let’s get to it.

(I’ve included affiliate links for your convenience. I earn a small percentage from a purchase using these links. There is no additional cost to you. You can read more about affiliate links here.)

Materials:

How to Replace a Wheelbarrow Wheel in 5 Minutes | Pretty Handy Girl

Instructions:

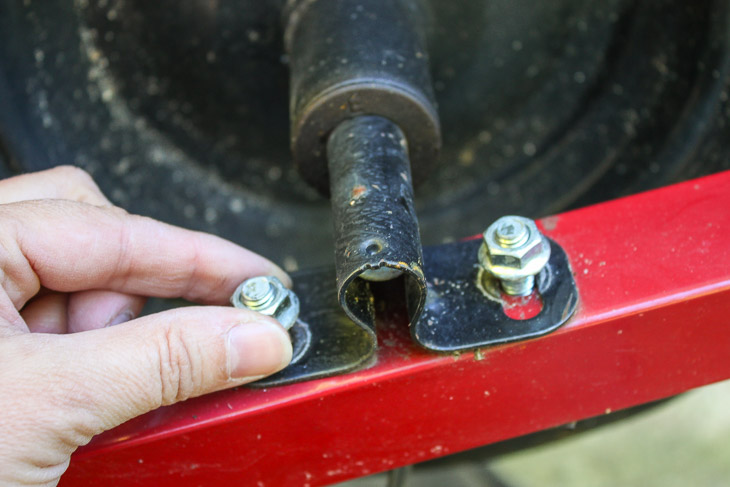
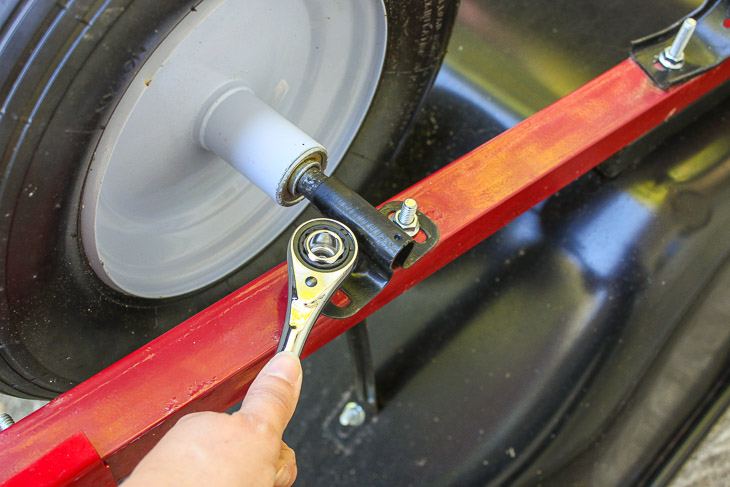
Flip the wheelbarrow over and loosen the nuts on the axle bracket.

How to Replace a Wheelbarrow Wheel in 5 Minutes | Pretty Handy Girl

Remove the nuts from the bolts. Repeat for the opposite bracket.

How to Replace a Wheelbarrow Wheel in 5 Minutes | Pretty Handy Girl

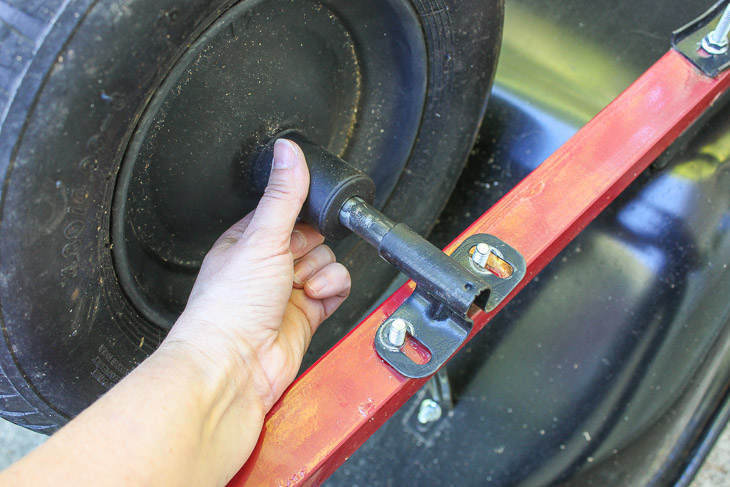
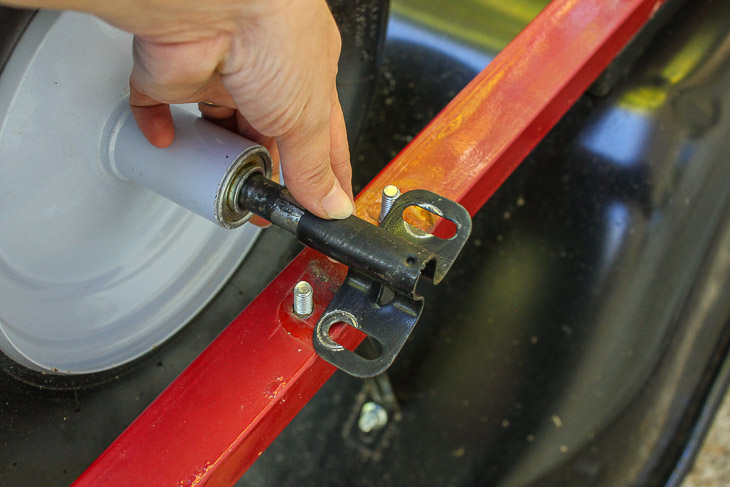
Lift the wheel off the wheelbarrow frame.

How to Replace a Wheelbarrow Wheel in 5 Minutes | Pretty Handy Girl
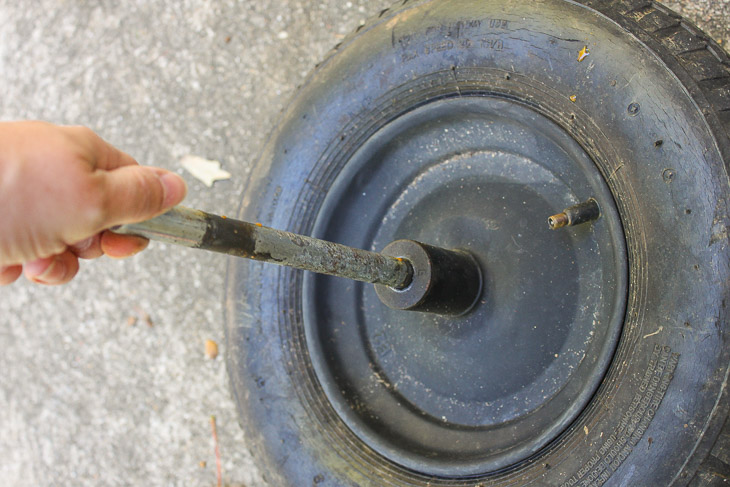
Remove the axle from the old wheel.

How to Replace a Wheelbarrow Wheel in 5 Minutes | Pretty Handy Girl

Slide the new wheel onto the axle.

How to Replace a Wheelbarrow Wheel in 5 Minutes | Pretty Handy Girl

Set the wheel back onto the frame, replace the bracket and the nuts. Tighten the nuts.

How to Replace a Wheelbarrow Wheel in 5 Minutes | Pretty Handy Girl

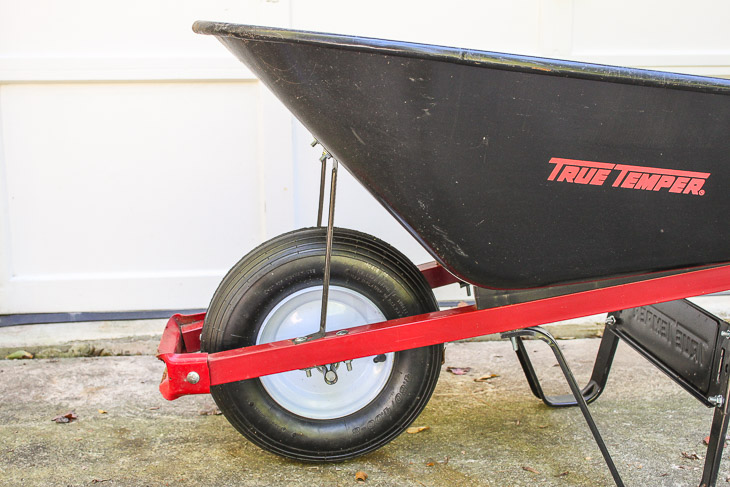
Flip the wheelbarrow back upright and get to work!

How to Replace a Wheelbarrow Wheel in 5 Minutes | Pretty Handy Girl

And that’s the easiest way to replace a wheelbarrow flat tire in 5 minutes or less.

PHGFancySign

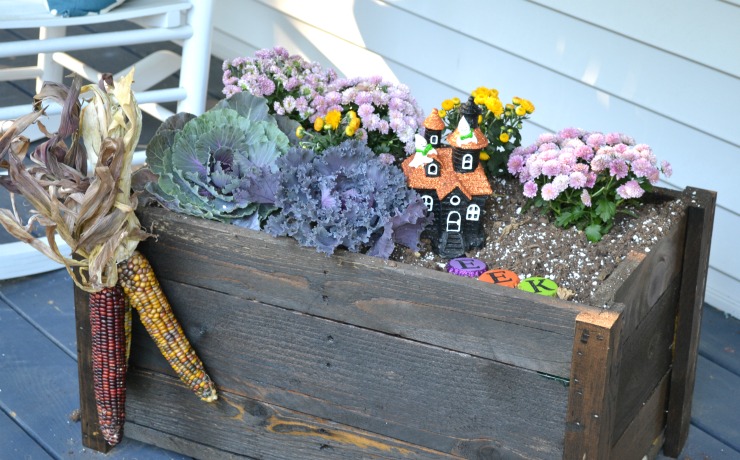
Ghostly Fairy Garden Planter

Ghostly Fairy Garden Planter

Hey everyone! It’s Jillian from I Am a Homemaker here today to share a little twist on the typical fairy garden with my Halloween Ghostly Fairy Garden Planter.

Fairy gardens are so fun and they add a little something special to your flower bed or planter.

I chose to add this one to a planter by my front door. It will be the perfect decoration to greet all my trick or treaters on Halloween.

Let’s get started.

(I’ve included affiliate links for your convenience. I earn a small percentage from a purchase using these links. There is no additional cost to you. You can read more about affiliate links here.)

Materials:

Instructions:

In the fall, you will typically find mums, cabbages and kale to add to your garden. These are great choices and can add perfect fall color to your porch or flower bed.

Choose flowers in a variety of coordinating colors and varying heights.

Add a fun Halloween Ghostly Garden to your fall planter. | PrettyHandyGirl.com

You can find fun fairy garden decorations for your planter online or in a craft or hobby shop.

I found some corn cobs and adorable ghost decorations but you could use tiny scarecrows and plastic vegetables to make a scarecrow garden or get a little more into the Halloween spirit with skulls and witches.  The possibilities are endless!

Add a fun Halloween Ghostly Garden to your fall planter. | PrettyHandyGirl.com

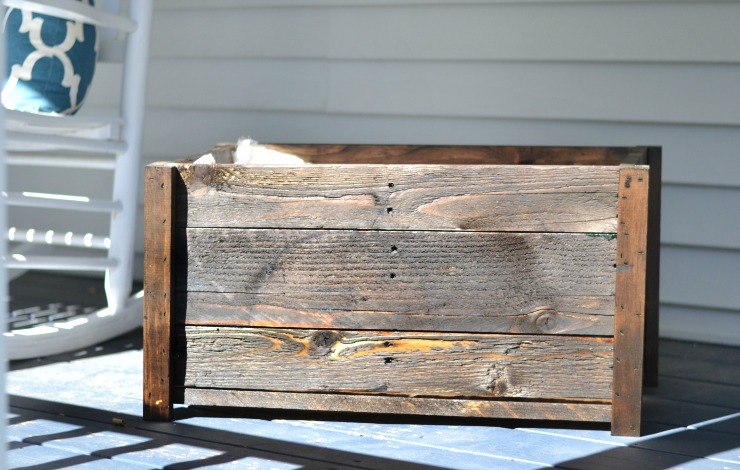
You will want a fairly large planter so you can accommodate the plants and the decorations. I made this one from some pallets and scrap wood.

Add a fun Halloween Ghostly Garden to your fall planter. | PrettyHandyGirl.com

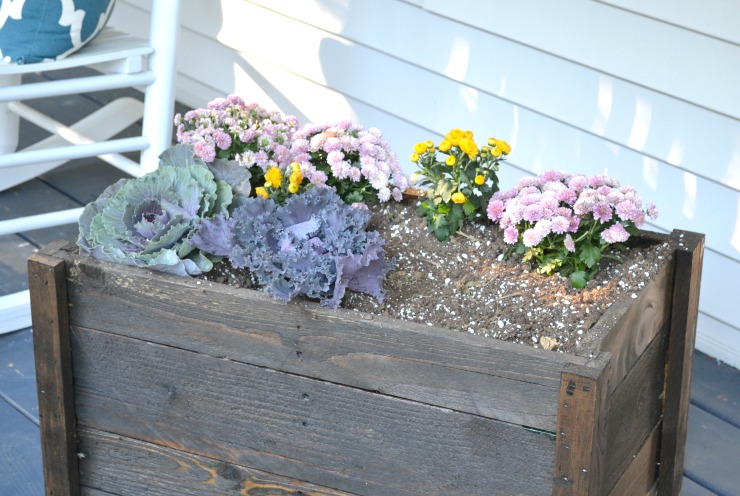
Once your planter is filled with dirt, dry fit your plants to see how they will fit with the decorations.

Be sure to plant taller plants in the back, taking into consideration their size when full grown (not just the size they are now.)

Add a fun Halloween Ghostly Garden to your fall planter. | PrettyHandyGirl.com

Nestle the plants into the dirt. Water the plants at this point to may make it easier for you to settle the dirt and place your decorations.

Add a fun Halloween Ghostly Garden to your fall planter. | PrettyHandyGirl.com

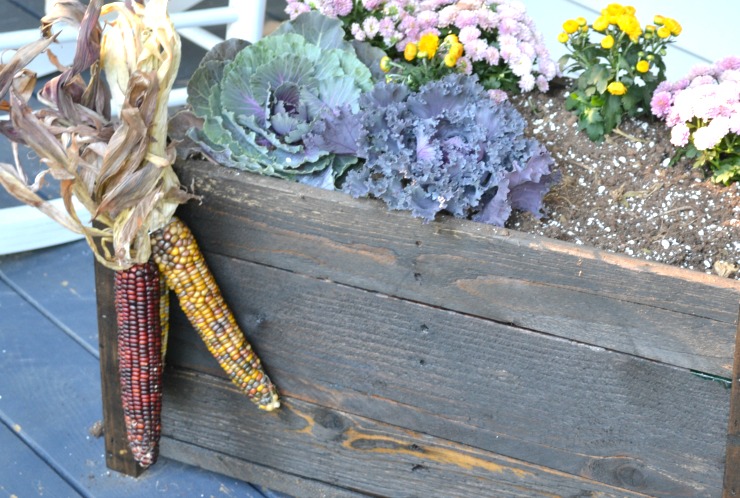
Place your corn cobs on the front of the planter with some floral wire. You can add a little nail on the inside of the planter to help attach the wire.

Add a fun Halloween Ghostly Garden to your fall planter. | PrettyHandyGirl.com

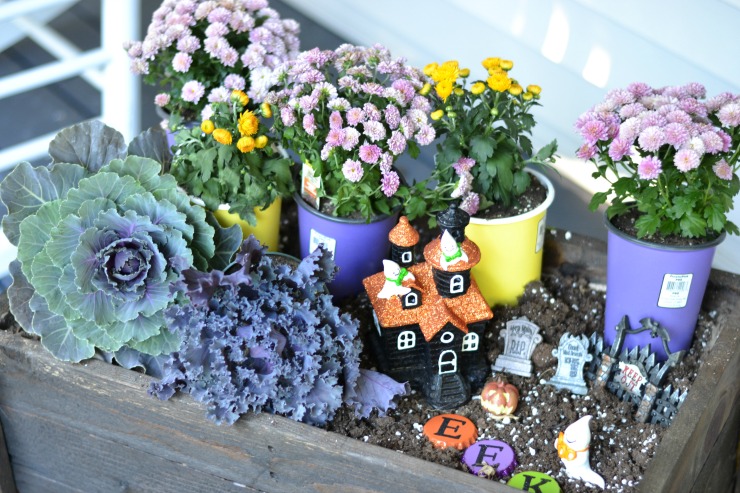
Place the large decorations first. These are your anchor pieces that will stand out the most and keep things from looking busy and cluttered.

Add a fun Halloween Ghostly Garden to your fall planter. | PrettyHandyGirl.com

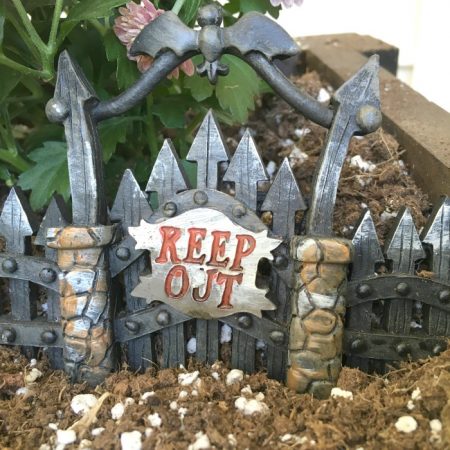
Add your accent pieces. I used gravestones, a jack-o-lantern and a “Keep Out” fence.

Add a fun Halloween Ghostly Garden to your fall planter. | PrettyHandyGirl.com

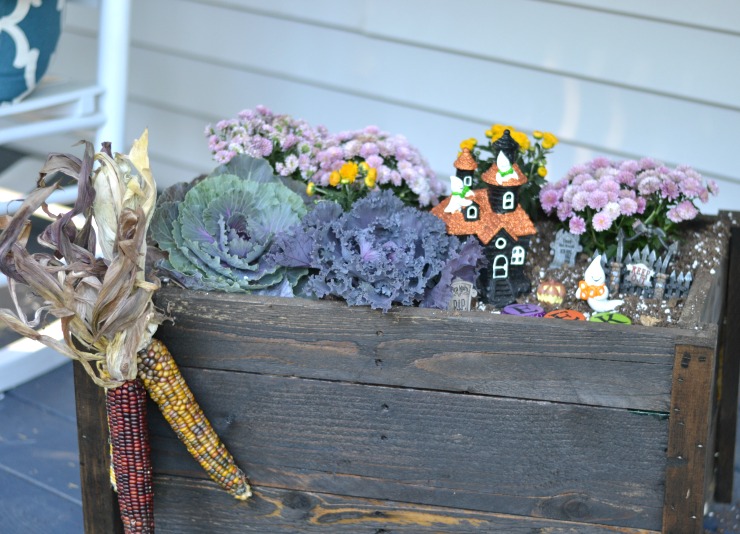
Don’t forget to include some residents! My house came with two cute ghosts sticking out, but having another in the “front yard” is fun too.

Add a fun Halloween Ghostly Garden to your fall planter. | PrettyHandyGirl.com

If you are using a house, a path is a great addition. For a planter like this you can use sand, glitter, rocks, fish bowl rocks or pre-made decorations. I found giant bottle caps on clearance last year turned them into a cute path. You could upcycle bottle caps of your own with spray paint and glitter.

Add a fun Halloween Ghostly Garden to your fall planter. | PrettyHandyGirl.com

Now all you have to do is remember to water your planter! I’m not so good at that. But the best part is, if all the plants die you can just say it’s part of your Halloween theme :).

Add a fun Halloween Ghostly Garden to your fall planter. | PrettyHandyGirl.com

What’s next on your Halloween list? Is the candy bought? If you dress up, I would love to hear what you are going to be!

Jillian's Signature

-Read more of Jillian’s tutorials-

Grown Up Swing Set | Pretty Handy Girl

Grown Up Swing Set | Pretty Handy Girl

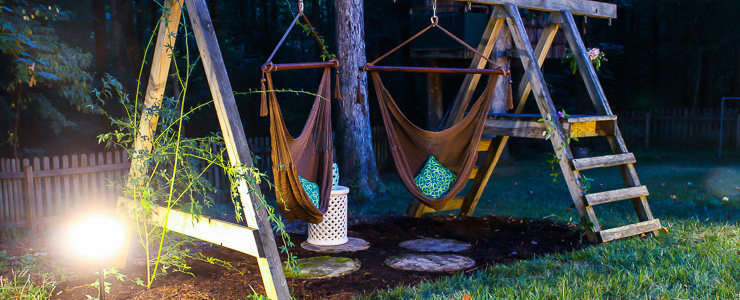
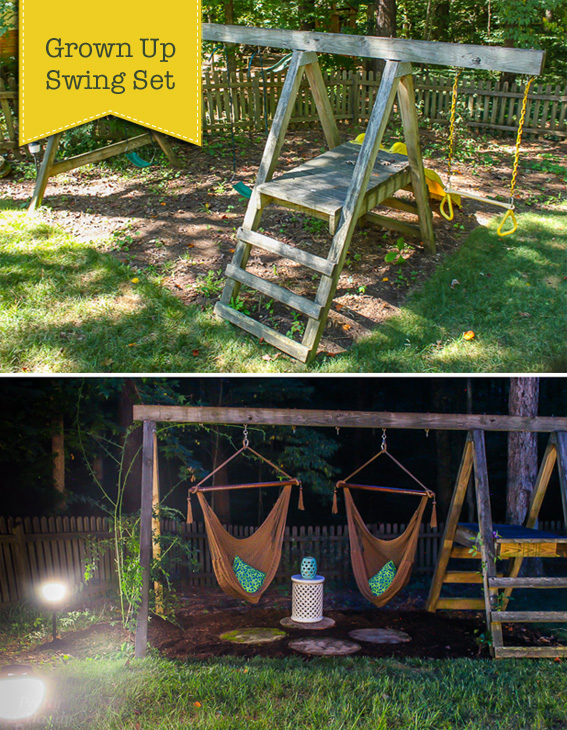
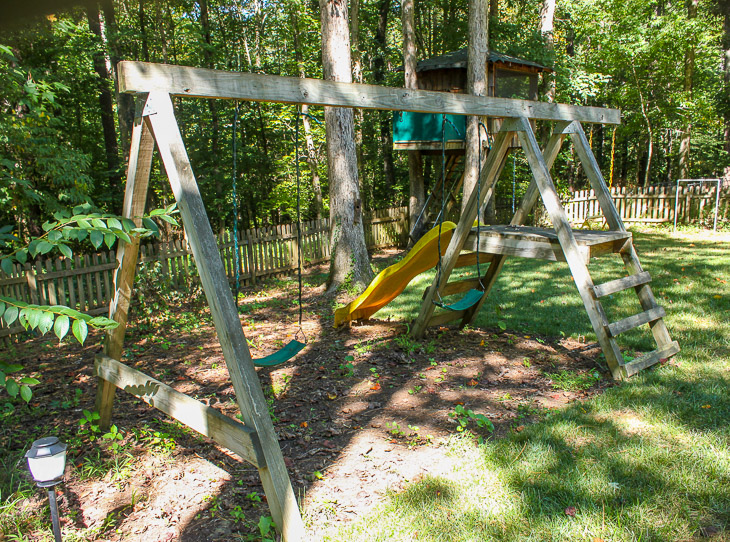
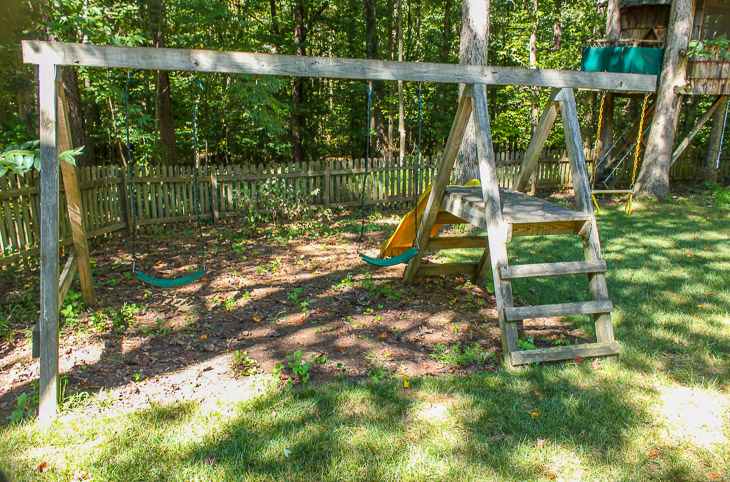
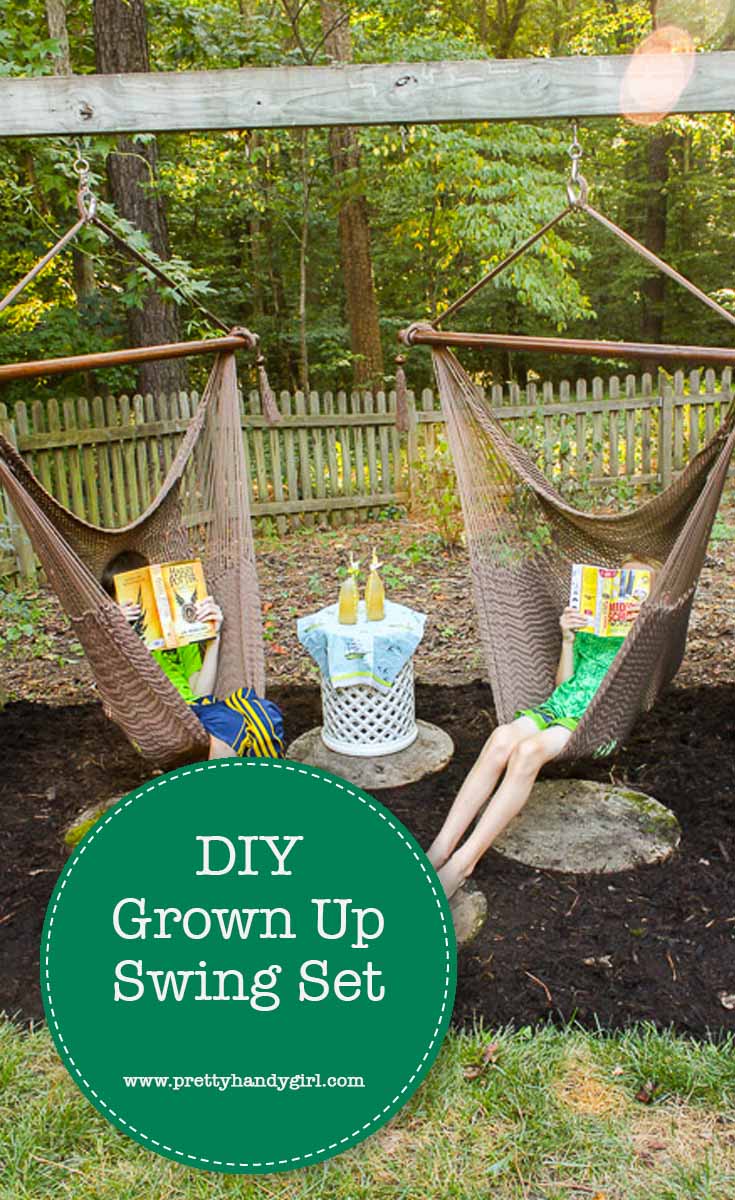
Are your kids still using that old swing set in your backyard or have they long outgrown it? After our major landscaping project, we’ve been spending more time outside enjoying our new backyard. But, this eyesore was blocking the view. It was time to make this a Swing Set for Grown Ups!

Grown Up Swing Set | Pretty Handy Girl

The landscape designer wanted us to remove the swing set. I thought we could still use it (or I was in denial that my children are growing up.) I decided to make it a swing set for grown ups (and tweens.) That way we can turn it back into a swing set one day when we have grandchildren (hopefully in the very distant future.)

(I’ve included affiliate links in this post for your convenience. I make a small percentage on the purchase, but there is no additional cost to you. You can read more about affiliate links in my disclosure.)

Swing Set for Grown Ups

Grown Up Swing Set | Pretty Handy Girl

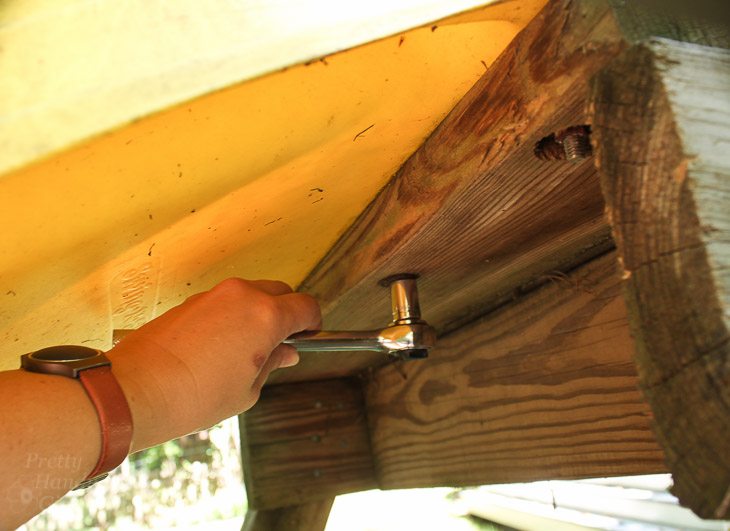
Here’s how you can convert your own swing set for the adults. Remove any slides and bright colorful objects (bright colors scream kid-friendly.) Most can be removed by taking out the bolts with a socket wrench.

Grown Up Swing Set | Pretty Handy Girl

Remove any swings, trapezes, or other hanging objects.

Grown Up Swing Set | Pretty Handy Girl

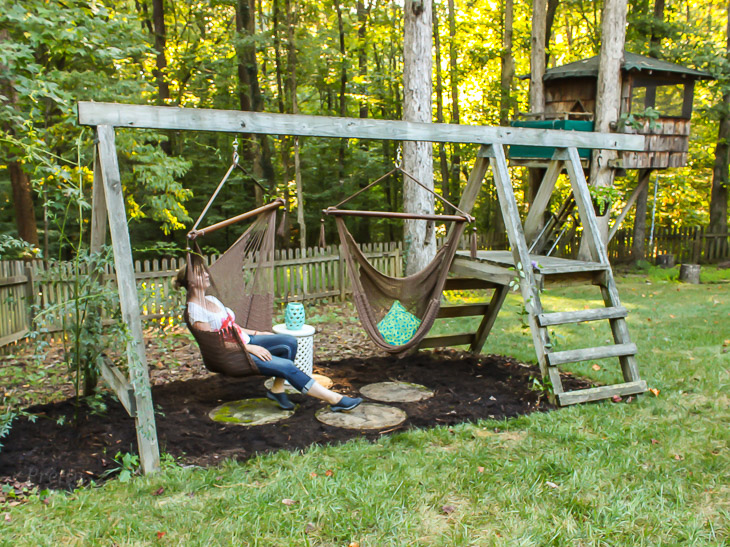
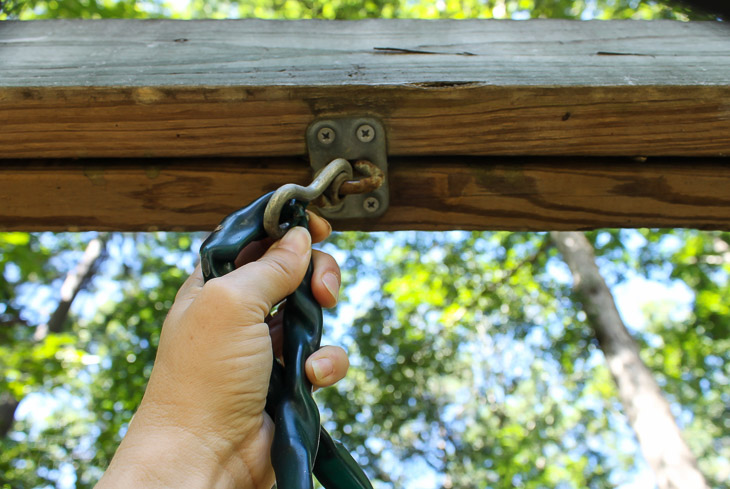
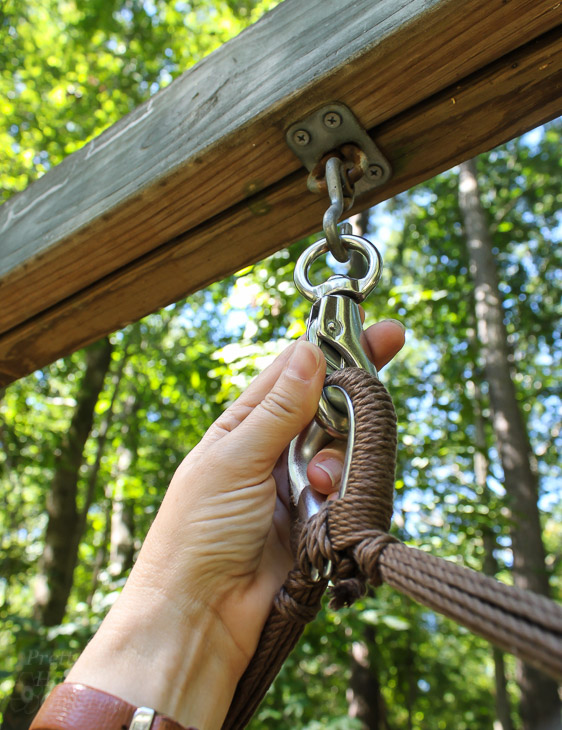
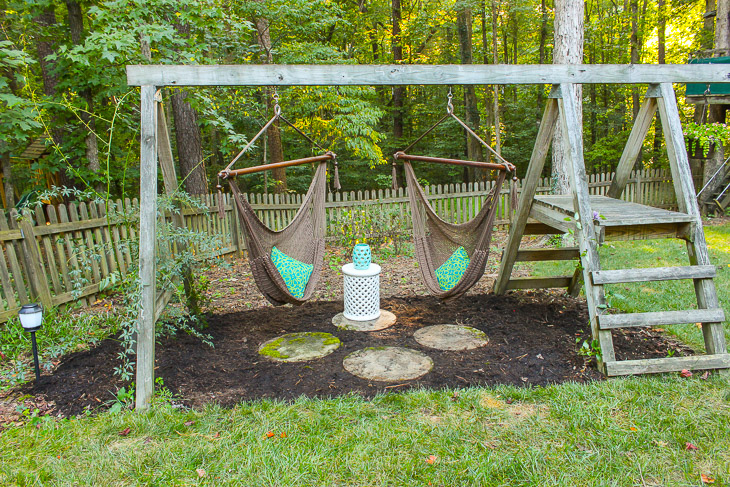
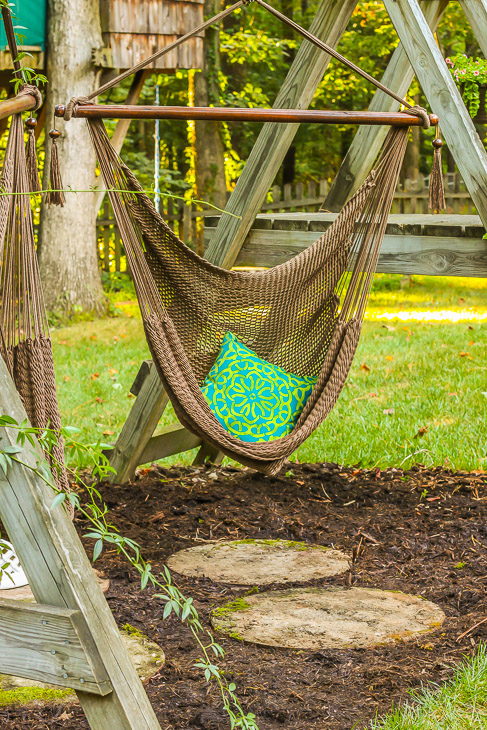
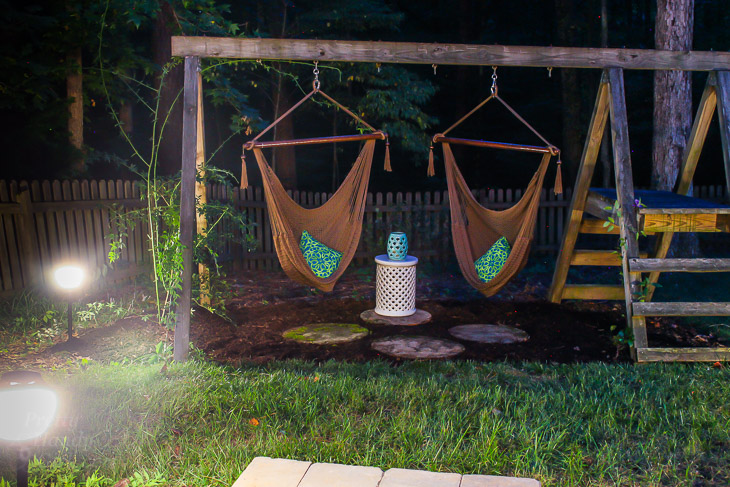
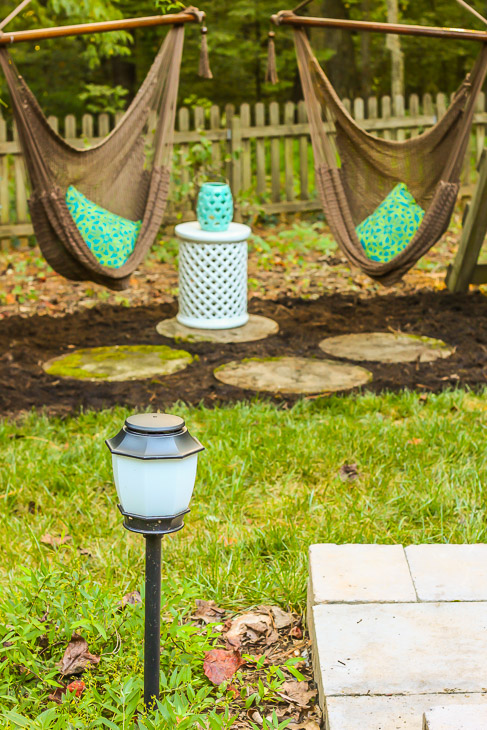
Replace the swings with two affordable chair hammocks using hammock swivel hardware kits.  If you have a swing set that accommodates three swings, you can usually fit two hammock chairs (but measure your set before you order.) You shouldn’t need to drill new holes, just hang the hammocks on the existing swing hooks (assuming they are securely fastened.)

Grown Up Swing Set | Pretty Handy Girl

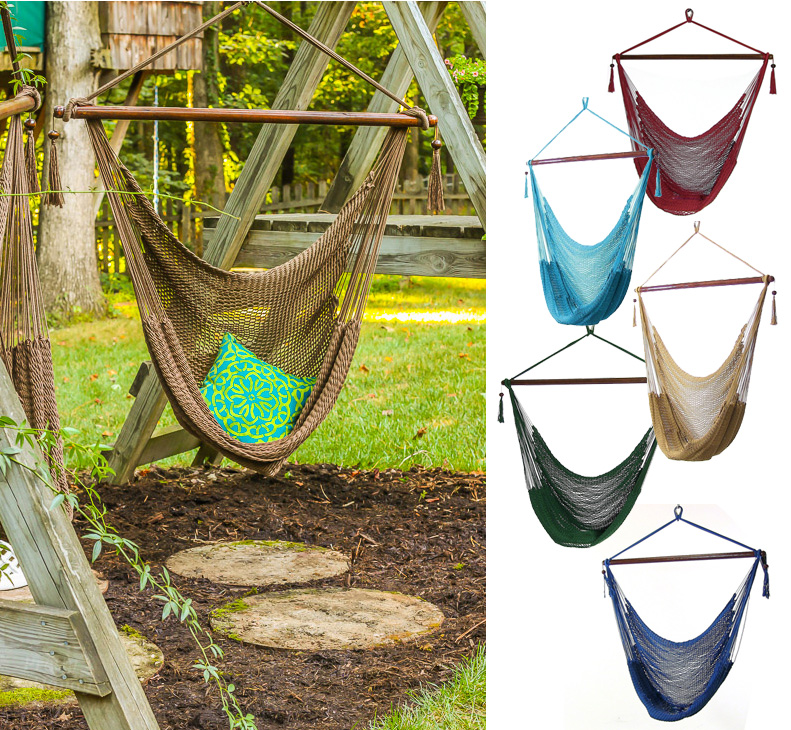
I purchased the Mocha colored hammock chairs to blend into the scenery, but there are several colors available. (affiliate link)

Grown Up Swing Set | Pretty Handy Girl

Plant some climbing flowering vines around the base of the swing set. I planted a Lady Banks climbing rose on one side of the swing set. It should offer some privacy and when it blooms and will be covered with delicate yellow flowers some day.

Grown Up Swing Set | Pretty Handy Girl

On the other side I planted a clematis that has pretty purple flowers.

Grown Up Swing Set | Pretty Handy Girl

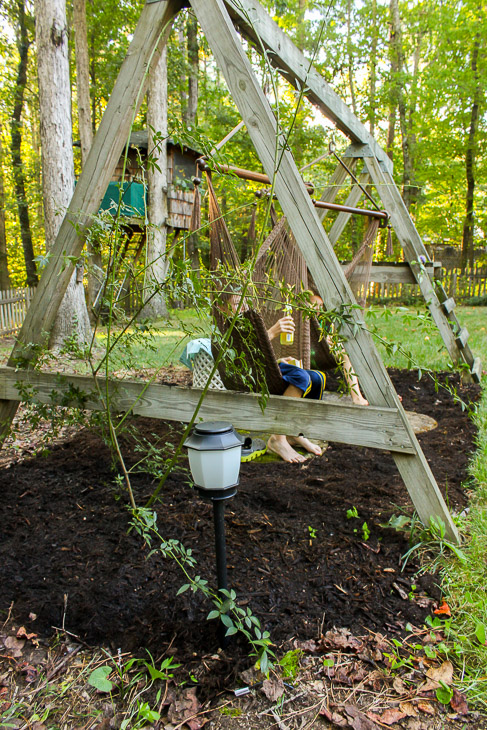
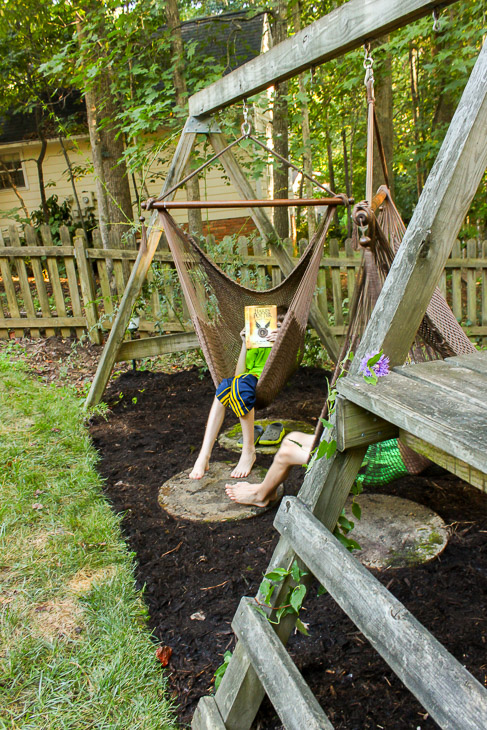
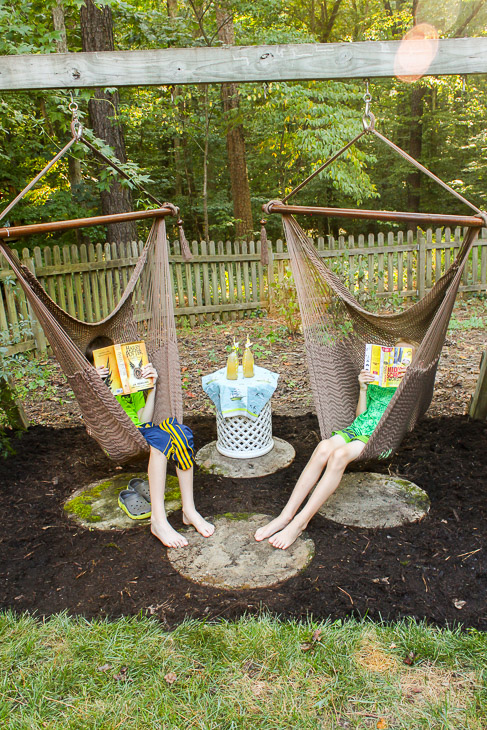
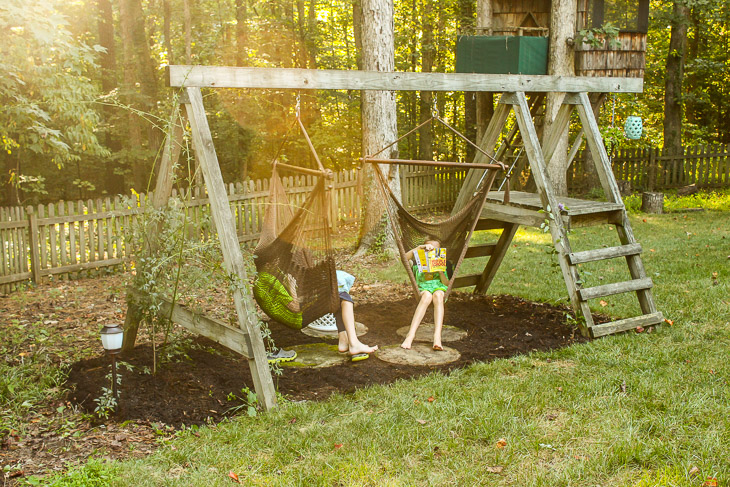
When you finish you’ll be surprised by the native species that flock to the new spot. Look I spot two book-reading skinny legged tweens right now! You’ll also probably notice that the bird will love hanging out on the hammock stretchers.

Grown Up Swing Set | Pretty Handy Girl

Our grown up swing set is the new favorite spot for my boys to curl up with a good book and a bottle of lemonade.

Grown Up Swing Set | Pretty Handy Girl

They haven’t missed the slide or the swings at all!

Before:

Grown Up Swing Set | Pretty Handy Girl

After:swing-set-for-grown-ups

I picked up the outdoor pillows at Lowe’s on clearance right now.

Grown Up Swing Set | Pretty Handy Girl

If you can’t find them at Lowe’s, I found some nice ones on Amazon that you might:

Blue Green Outdoor Pillows

Blue-Green Medallion & Striped | Turquoise Trellis  | Zig Zags | Elephant Dance

I think Pretty Handsome Guy and I are going to spend several evenings here with a glass of wine and some good conversation.

Grown Up Swing Set | Pretty Handy Girl

Want to add some lighting to your new favorite spot? I have a tutorial for installing low voltage landscape lighting.

Grown Up Swing Set | Pretty Handy Girl

We have all been using the swing set a lot more than before.

Grown Up Swing Set | Pretty Handy Girl

Hope you have a great time enjoying your grown-up swing set! I know we are.

PHGFancySign


Pin for later! 

Have your kids outgrown the swing set? Have no fear - transform it into a swing set for adults with this easy-to-follow tutorial from Pretty Handy Girl! | Swing set for adults | adult swing set | Pretty Handy Girl #prettyhandygirl #DIY #tutorial

How to Install Low Voltage Landscape Lights (that also repel mosquitos!) | Pretty Handy Girl

How to Install Low Voltage Landscape Lights (that also repel mosquitos!) | Pretty Handy Girl

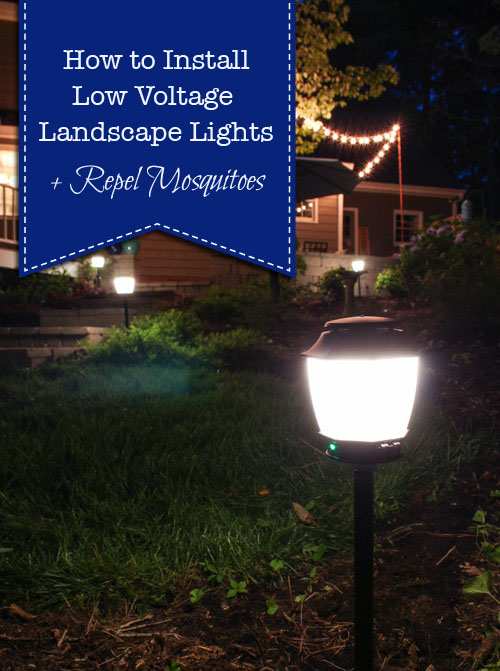
Pop Quiz: How can you beautify your yard AND repel mosquitoes at the same time?

Do you give up? Introducing the new NuTone Haven Backyard Lighting & Mosquito Repellent System.
How to Install Low Voltage Landscape Lights (that also repel mosquitos!) | Pretty Handy Girl

As a resident of the North Carolina, we fight a losing battle against mosquitoes for a better part of the year. My son and I seem to be especially attractive to those pesky suckers. With the Zika virus in the news, I was thrilled when NuTone asked me to install and review their Haven lights (via a sponsored post.) Today I’ll show you how to install these low voltage landscape lights (similar to most landscape light installation.) At the end of the summer I’ll check back in to let you know how I like them.

Ready to learn How to Install Landscape Lights and Repel Mosquitoes?

Materials:

(I’ve included affiliate links for your convenience. I earn a small percentage from a purchase using these links. There is no additional cost to you. You can read more about affiliate links here.)

Instructions:

Unpack your Haven Light & Repellent system from the box. Pull out the stake, stem and light to assemble.

Assembling the Fixture:
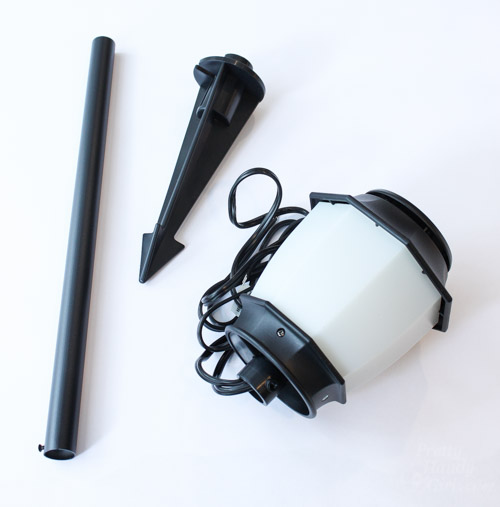
How to Install Low Voltage Landscape Lights (that also repel mosquitos!) | Pretty Handy Girl

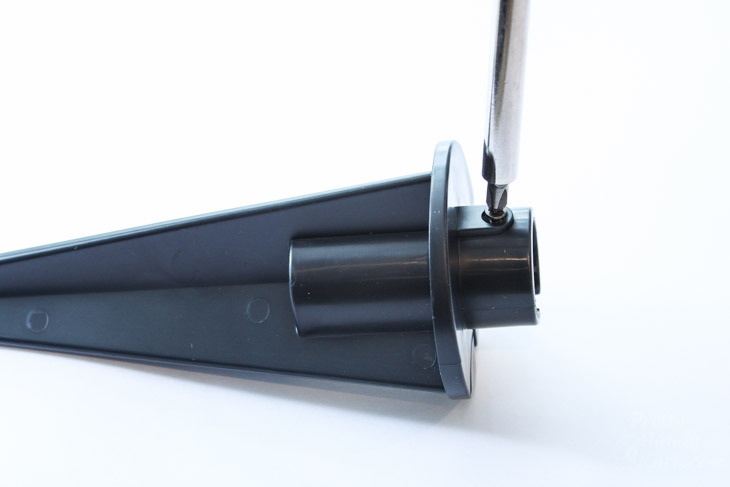
Loosen the screw on the stake.How to Install Low Voltage Landscape Lights (that also repel mosquitos!) | Pretty Handy Girl

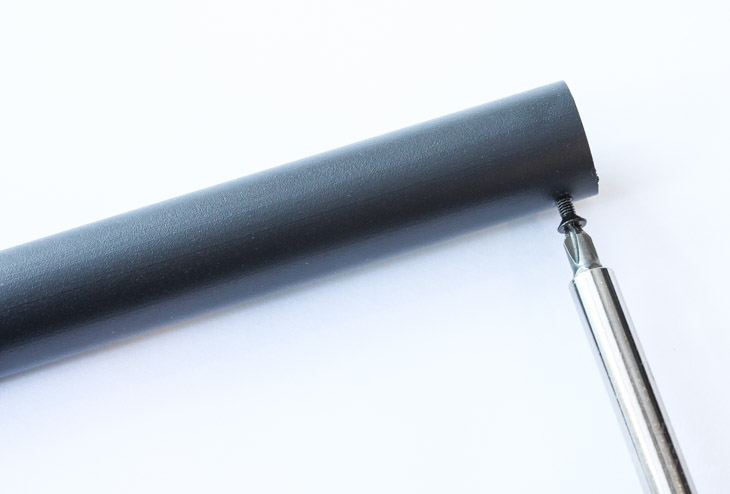
Loosen the screw on the stem.loosen-screw-on-post

Feed the wires from the light fixture through the stem.How to Install Low Voltage Landscape Lights (that also repel mosquitos!) | Pretty Handy Girl
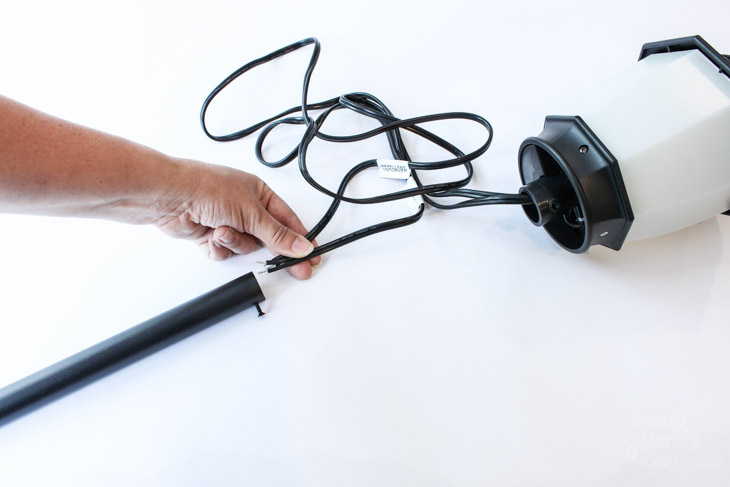
Pull the wires through the other end of the stem.
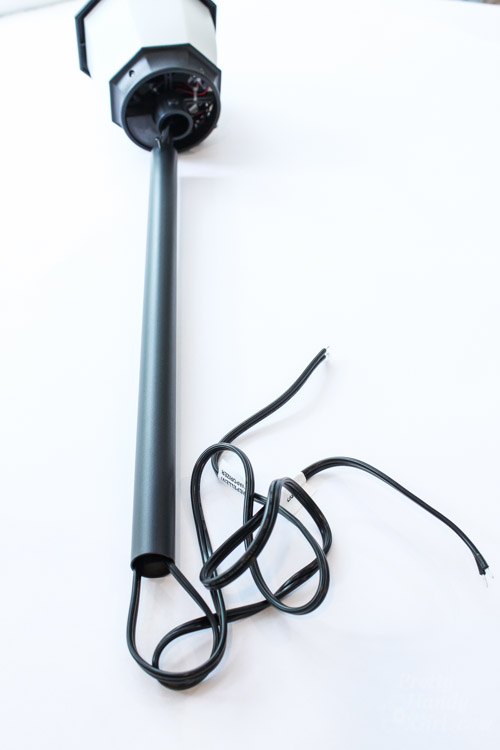
How to Install Low Voltage Landscape Lights (that also repel mosquitos!) | Pretty Handy Girl
Loosen the screw on the light fixture base and insert the stem into the light fixture. Tighten the screw.
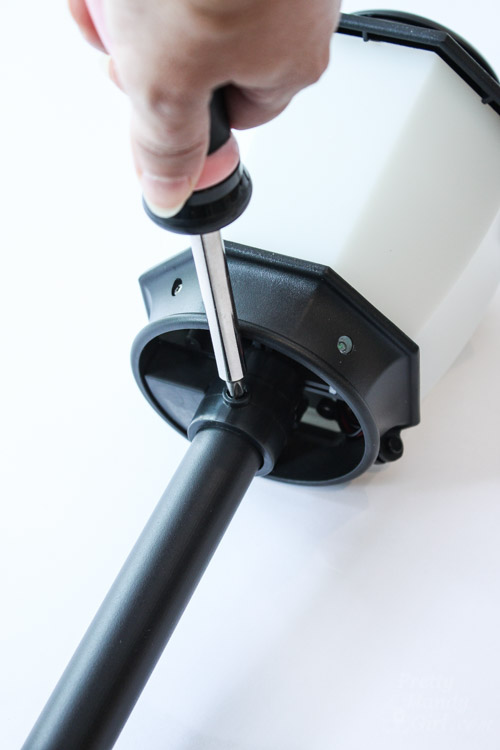
How to Install Low Voltage Landscape Lights (that also repel mosquitos!) | Pretty Handy Girl

Feed the other end of the stem into the stake and position the wires into the open slot in the stake.
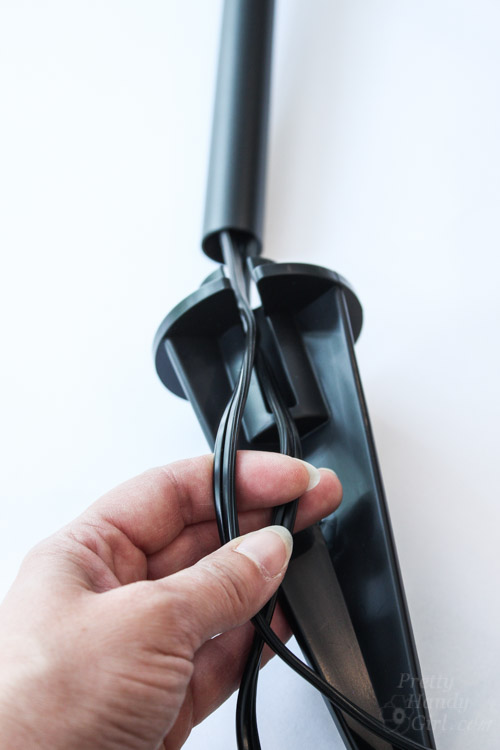
How to Install Low Voltage Landscape Lights (that also repel mosquitos!) | Pretty Handy Girl

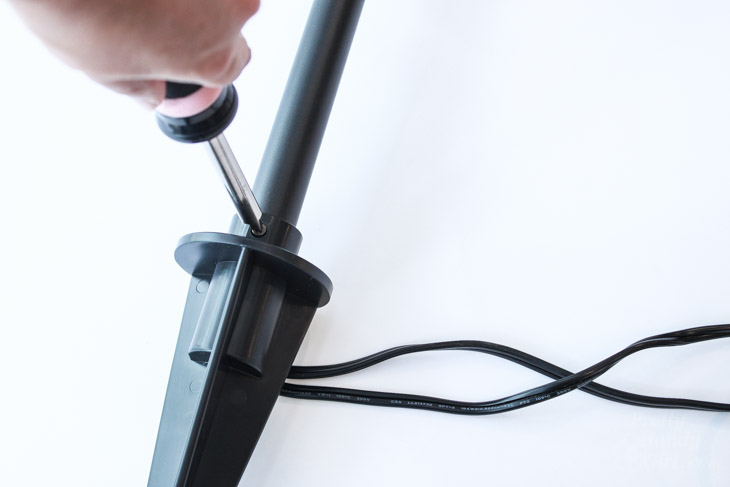
Tighten the stake onto the stem.

How to Install Low Voltage Landscape Lights (that also repel mosquitos!) | Pretty Handy Girl

How to Install the Repellent:

Locate the bottle of repellent. Remove the green protective cap. Attach the locking adaptor cap onto the bottle (make sure the spurs are at the bottom.) Twist the locking cap until secure.

How to Install Low Voltage Landscape Lights (that also repel mosquitos!) | Pretty Handy Girl

Loosen the screw just below the white shade on the light fixture.

How to Install Low Voltage Landscape Lights (that also repel mosquitos!) | Pretty Handy Girl

Tilt the fixture open to expose inside.
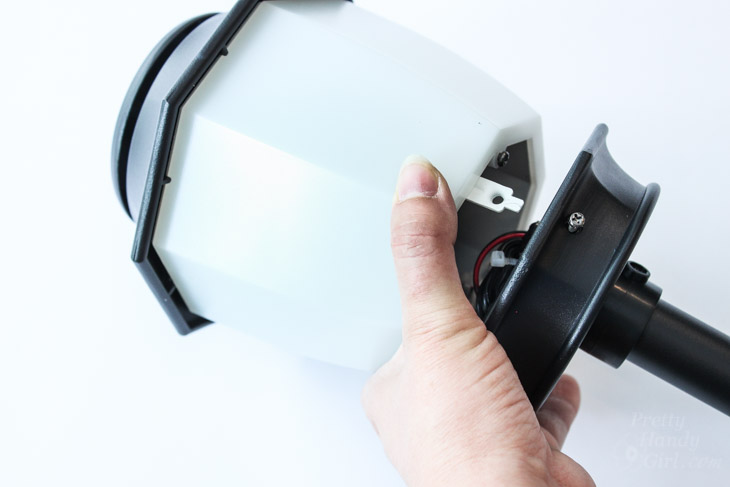
How to Install Low Voltage Landscape Lights (that also repel mosquitos!) | Pretty Handy Girl

Insert the repellent into the light fixture. The wick fits into the hole in the center of the fixture.
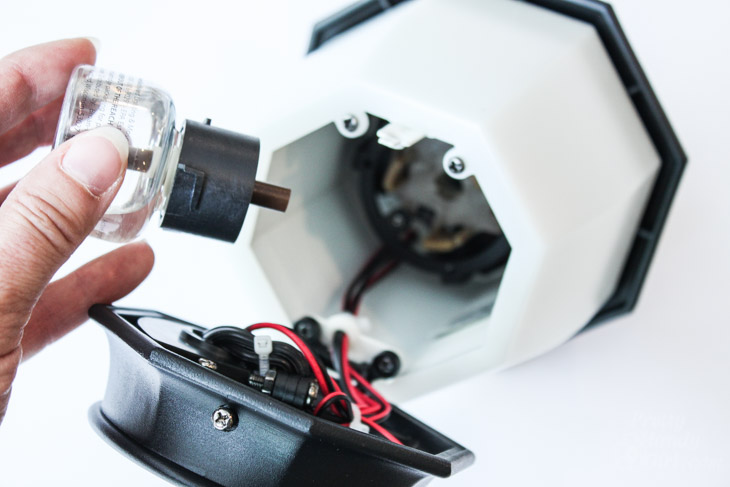
How to Install Low Voltage Landscape Lights (that also repel mosquitos!) | Pretty Handy Girl

Twist the bottle 30 degrees to secure in place.
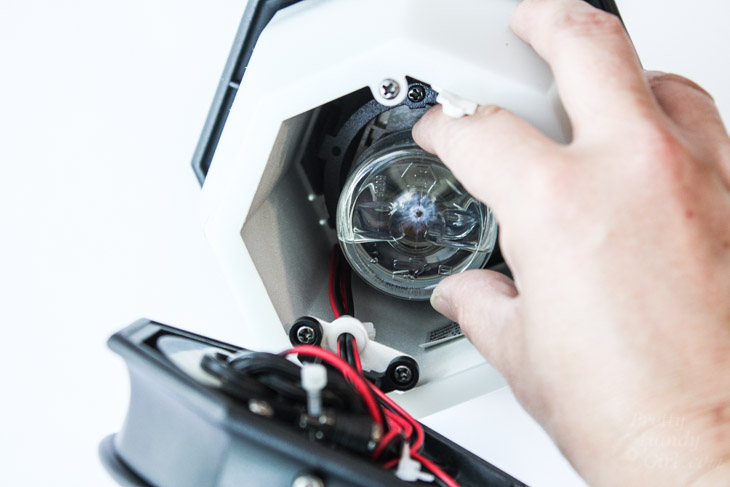
How to Install Low Voltage Landscape Lights (that also repel mosquitos!) | Pretty Handy Girl

Close the light fixture and tighten the screw.

How to Install Low Voltage Landscape Lights (that also repel mosquitos!) | Pretty Handy Girl

Repeat for any additional fixtures.

Installing Landscape Lights in Your Yard:

Set the fixtures in your yard and adjust the spacing (leave approximately 10 – 12′ between fixtures.)
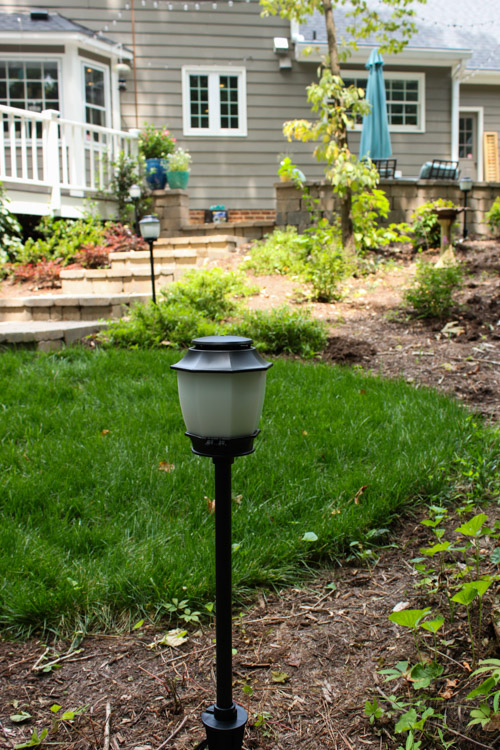
How to Install Low Voltage Landscape Lights (that also repel mosquitos!) | Pretty Handy Girl

When you are happy with the layout. Choose a location for your transformer (must be able to plug into a covered GFCI outlet.) Choose a path to connect your lights. (Ideally you’ll want to use the least amount of wire possible.) Run the first line of 12/2 low voltage wire from the transformer and around each light.
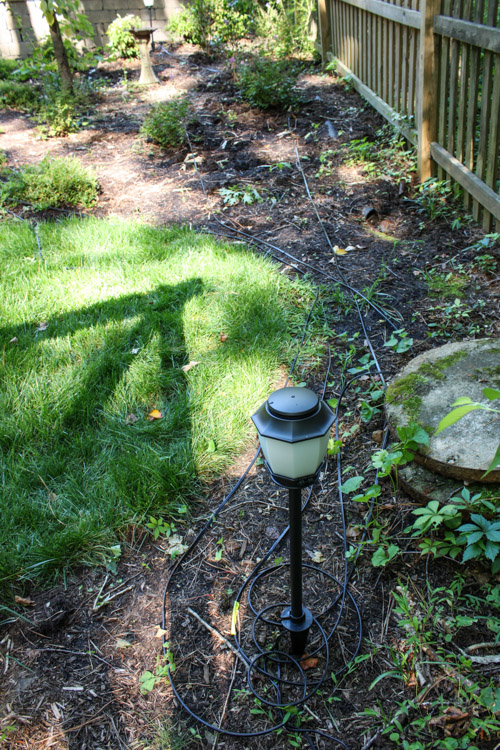
How to Install Low Voltage Landscape Lights (that also repel mosquitos!) | Pretty Handy Girl

Loosely loop the wire around each fixture. It’s best to allow some slack in the wiring in case you have to move anything. Or to prevent connections from coming undone should someone pull the wire. Wrap colored duct tape around this wire near each fixture. This will label your first wire as the lighting wire.
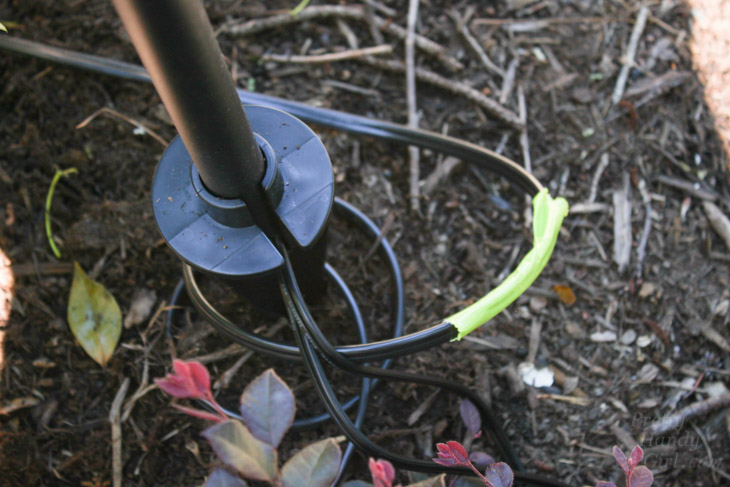
How to Install Low Voltage Landscape Lights (that also repel mosquitos!) | Pretty Handy Girl

Run a separate 12/2 low voltage wire around each fixture. Do not put tape on this wire.

Loosen the screw in the stake and remove the light fixture. Place the provided cap on each stake.
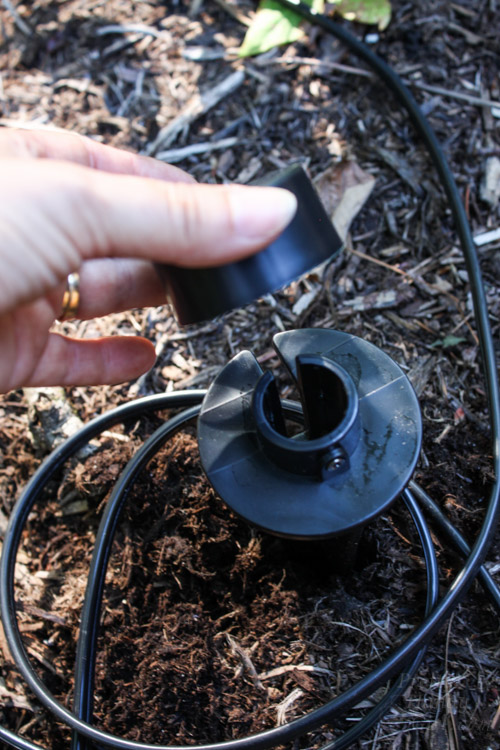
How to Install Low Voltage Landscape Lights (that also repel mosquitos!) | Pretty Handy Girl

Hammer the stakes into the ground until they are flush with the soil.
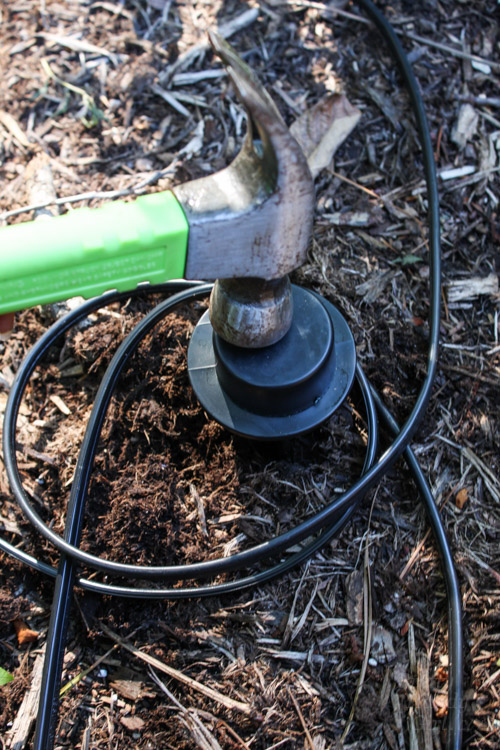
How to Install Low Voltage Landscape Lights (that also repel mosquitos!) | Pretty Handy Girl

Replace the light fixture into the stake and tighten the screw.

How to Wire Low Voltage Landscape Lights:

Please note that low voltage landscaping light connectors will differ. They are all similar in that there is a connector that has metal prongs to puncture and connect to the low voltage wire cable. The NuTone Haven Backyard Lighting & Mosquito Repellent System requires two separate wires (one for lights and one for repellent.) The Mosquito Repellent-Only fixtures (and most low voltage lights) only require one wire.

Locate the wire that was marked with colored duct tape.
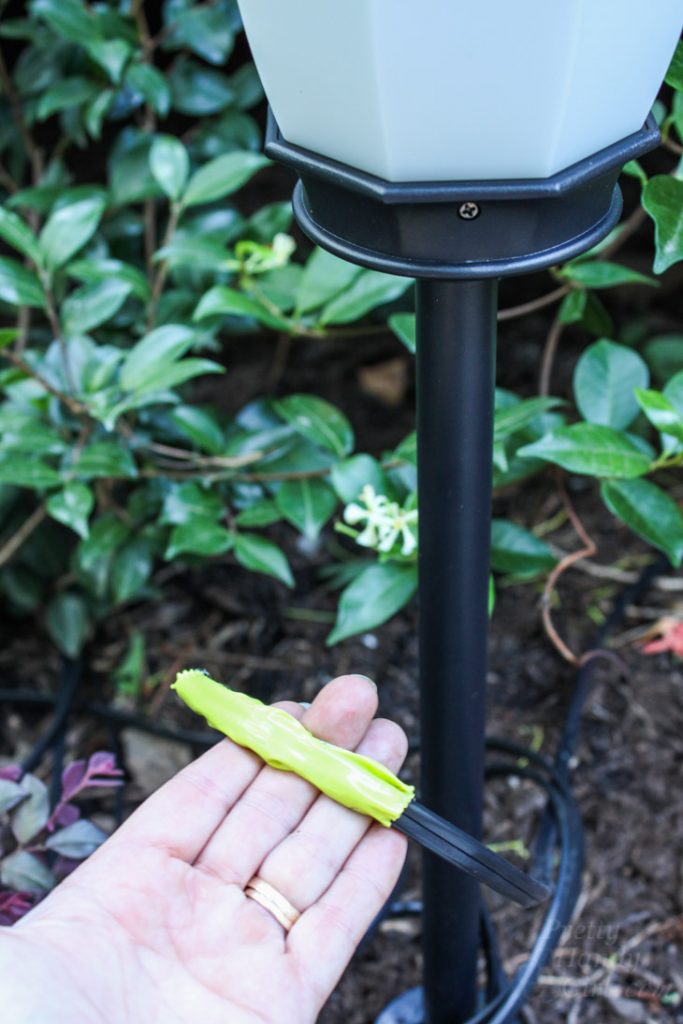
How to Install Low Voltage Landscape Lights (that also repel mosquitos!) | Pretty Handy Girl

Place some dielectric grease on the wire where you wish to connect the fixture.
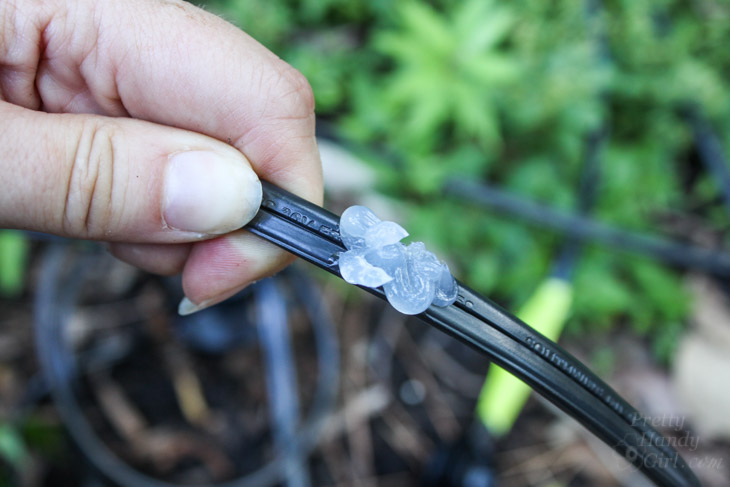
How to Install Low Voltage Landscape Lights (that also repel mosquitos!) | Pretty Handy Girl

Locate one connector. Unscrew the connector. Press the wire firmly (grease side toward the prongs) into the lower portion of the connector (has metal prongs). (I’m not sure if this is necessary or not, but I made sure the negative prong for all my fixtures was on the side that has writing on my low voltage wire cable.)
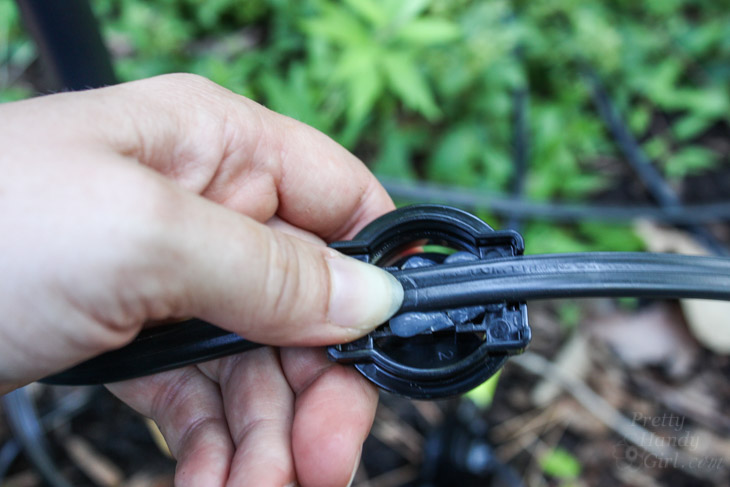
How to Install Low Voltage Landscape Lights (that also repel mosquitos!) | Pretty Handy Girl

Thread the upper half of the connector onto the bottom portion.
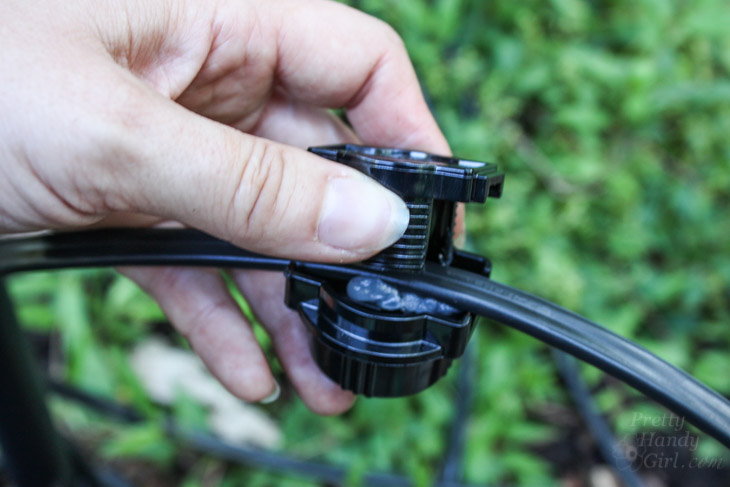
How to Install Low Voltage Landscape Lights (that also repel mosquitos!) | Pretty Handy Girl

Twist the ring until the connector is tight. To help get a good connection. Tug at the wire to help the prongs pierce the wire insulation. Then tighten the ring further.
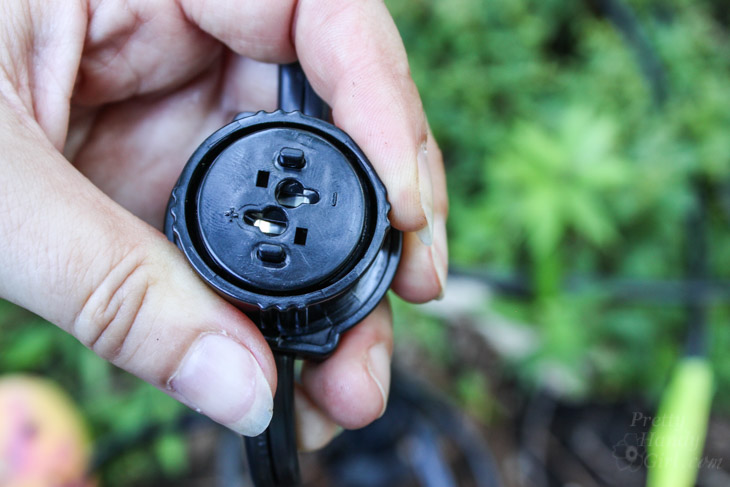
How to Install Low Voltage Landscape Lights (that also repel mosquitos!) | Pretty Handy Girl

Squeeze some dielectric grease into both holes on the connector.
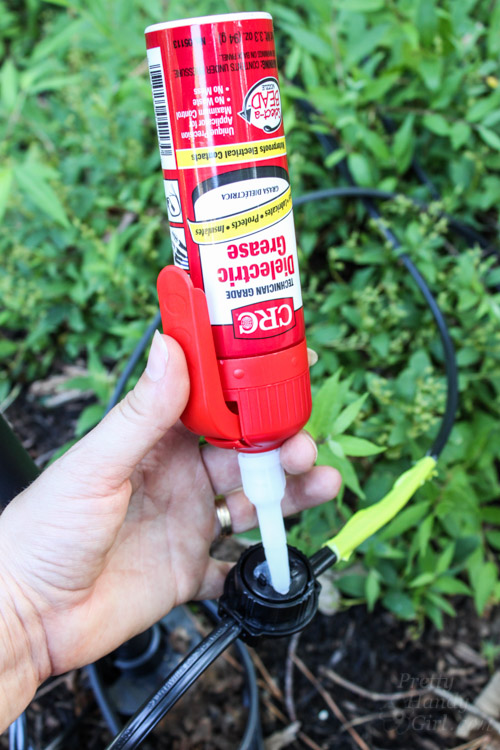
How to Install Low Voltage Landscape Lights (that also repel mosquitos!) | Pretty Handy Girl

Firmly press the lighting wires into the slots.
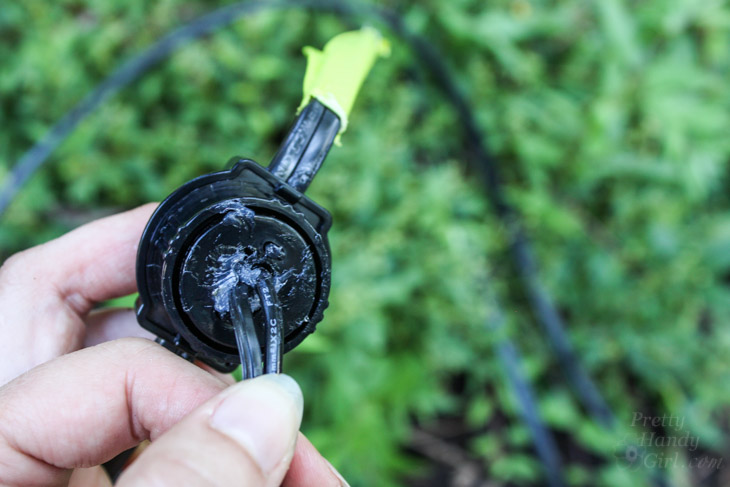
How to Install Low Voltage Landscape Lights (that also repel mosquitos!) | Pretty Handy Girl

Repeat these steps to connect the repellent wires to the non-marked low voltage cable wire. Connect all your fixtures to the light and repellent cable wires.

Installing the Low Voltage Transformer and Controller:

Install the controller and transformer near a covered GFCI outlet. For ease of connection, you may want to remove them from the mounting screws during wiring. Make sure the transformer is unplugged.
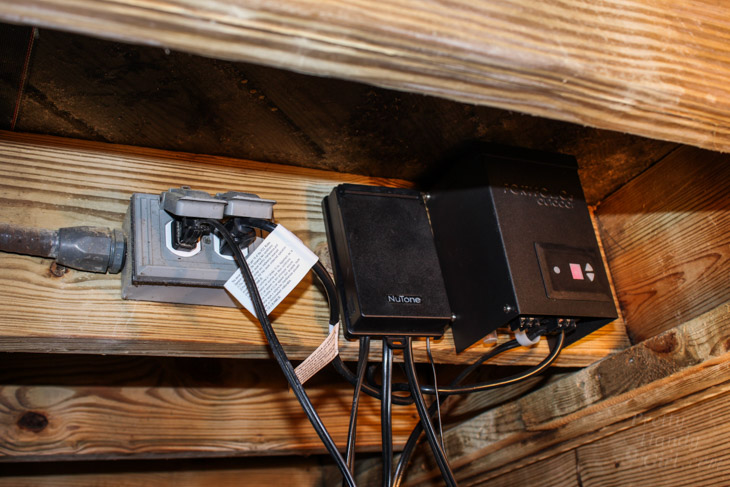
How to Install Low Voltage Landscape Lights (that also repel mosquitos!) | Pretty Handy Girl

Locate the light sensor. While pressing down on the green buttons with a screwdriver, press both wires into the green “CDS” slots on the controller. Release the buttons and tug gently on the wires to make sure they are secured.
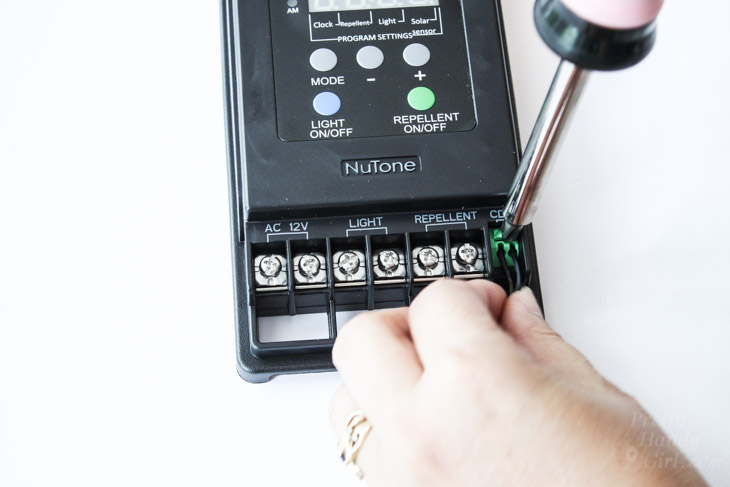
How to Install Low Voltage Landscape Lights (that also repel mosquitos!) | Pretty Handy Girl

Cut a 12″ length of 12/2 low voltage wire. Split the two wires by scoring the center with a utility knife. Repeat on the other end.
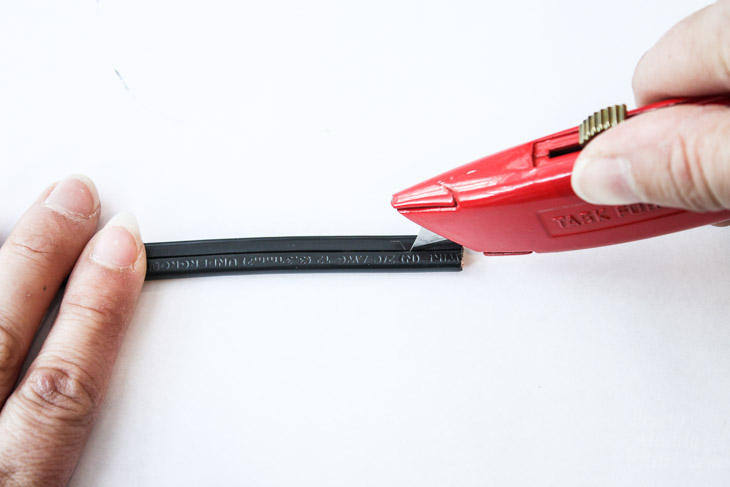
How to Install Low Voltage Landscape Lights (that also repel mosquitos!) | Pretty Handy Girl

Remove about 1/4″ from the end of both sides of the wire.How to Install Low Voltage Landscape Lights (that also repel mosquitos!) | Pretty Handy Girl
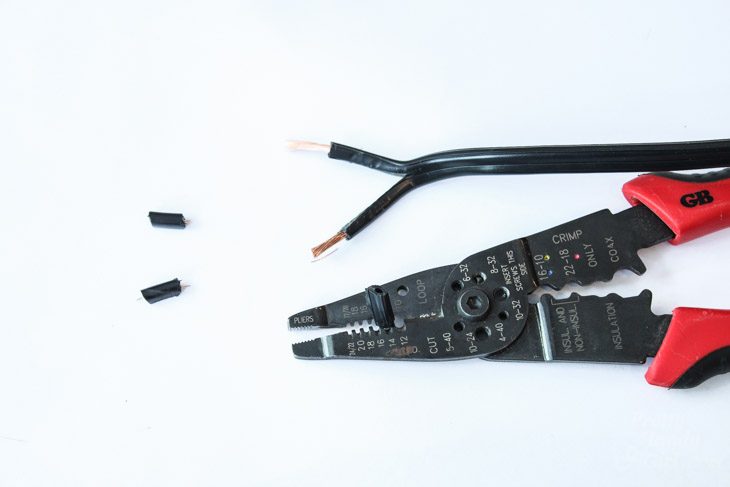
Attach one end of the cable wire to the transformer. Make sure the screws are tight over the wire ends.
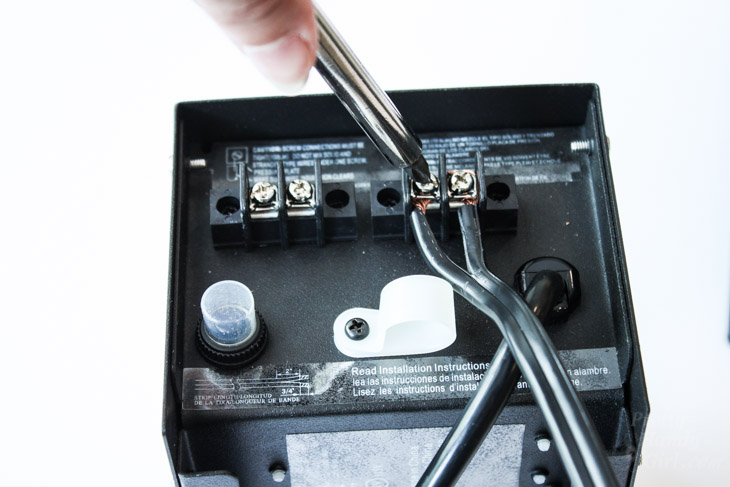
How to Install Low Voltage Landscape Lights (that also repel mosquitos!) | Pretty Handy Girl

Attach the other end to the “AC 12V” screws on the controller. This will supply the controller with power.How to Install Low Voltage Landscape Lights (that also repel mosquitos!) | Pretty Handy Girl
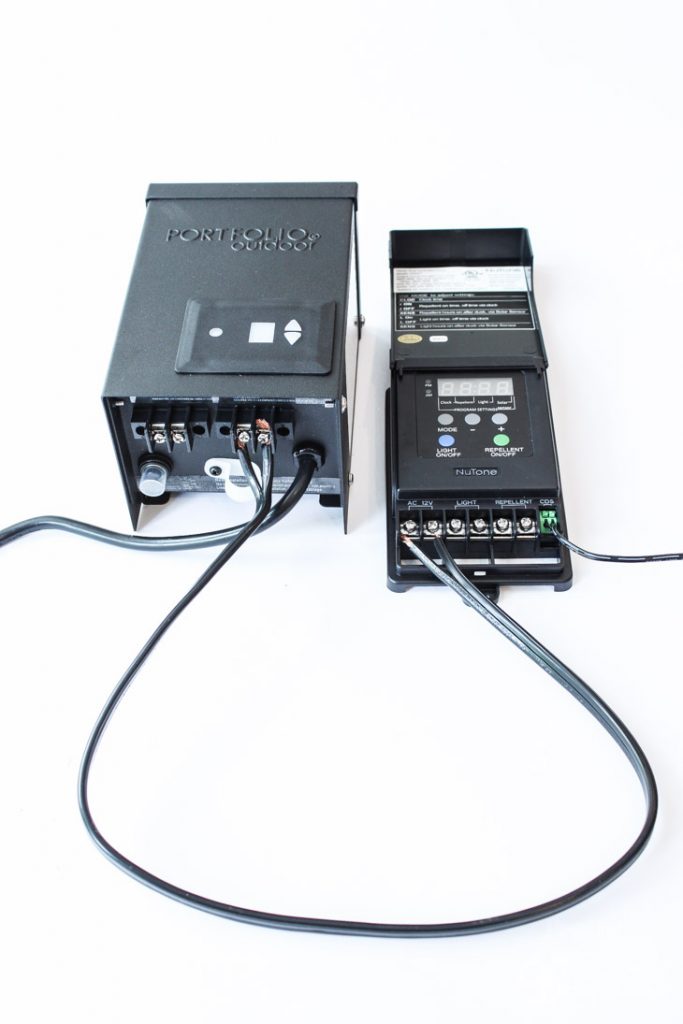
Connect the light wire cable to the “Light” screws on the controller. Connect the repellent wire cable to the “Repellent” screws.
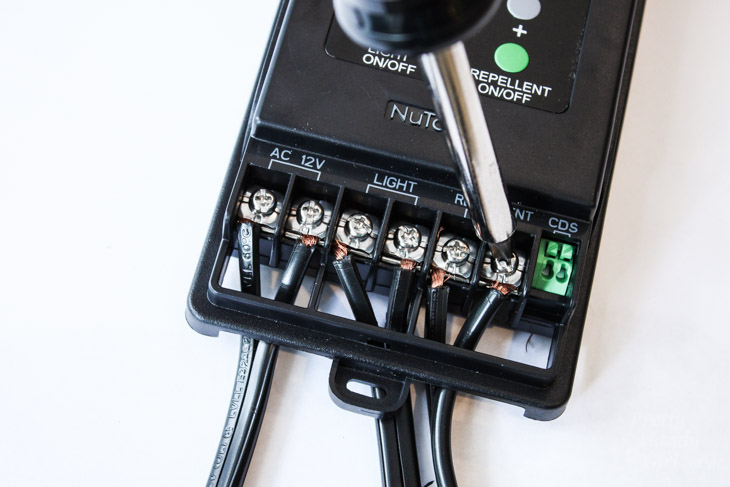
How to Install Low Voltage Landscape Lights (that also repel mosquitos!) | Pretty Handy Girl

Time to test your lights! Plug in the transformer and turn it on. Turn on the lights by pushing the light on/off button on the controller. Look around your yard and make sure all the lights are lit.
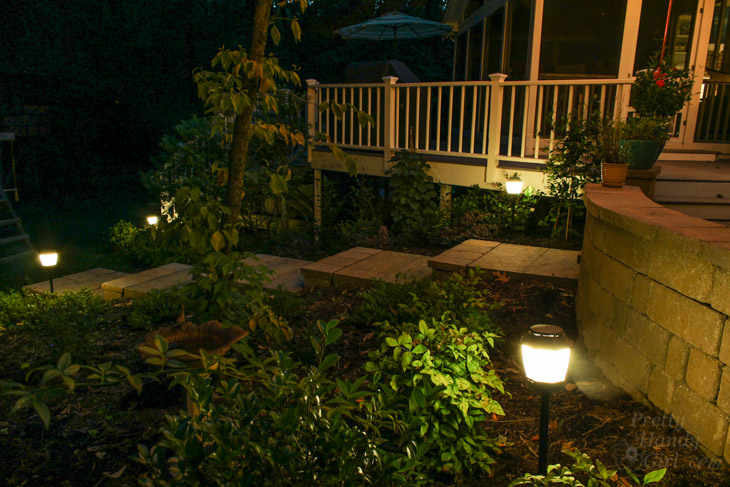
How to Install Low Voltage Landscape Lights (that also repel mosquitos!) | Pretty Handy Girl

Turn on the repellent by pushing the “Repellent On/Off” button. Check to see if the green light is illuminated at the base of each fixture.
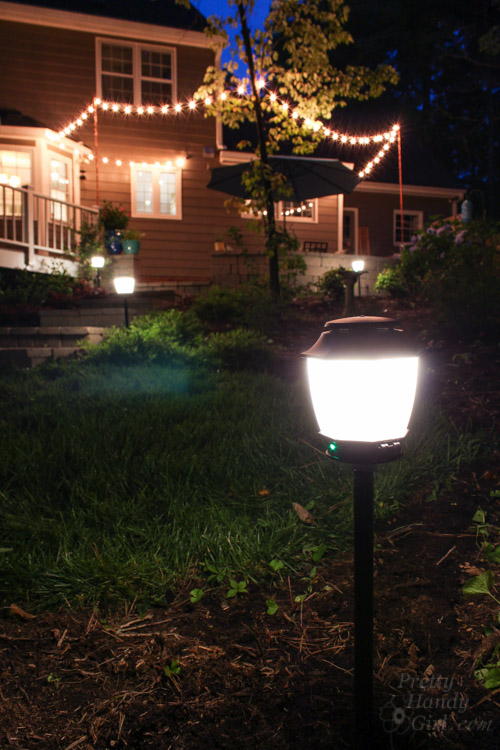
How to Install Low Voltage Landscape Lights (that also repel mosquitos!) | Pretty Handy Girl

If you have any fixtures that are not lit, check that the connections are tightened completely.

If everything is working, program your timer/controller per the instructions provided with the controller.

Burying the Landscape Wires:

Use the garden shovel to dig a trench 6″ deep next to the landscape wire (be very careful not to slice the wire.)
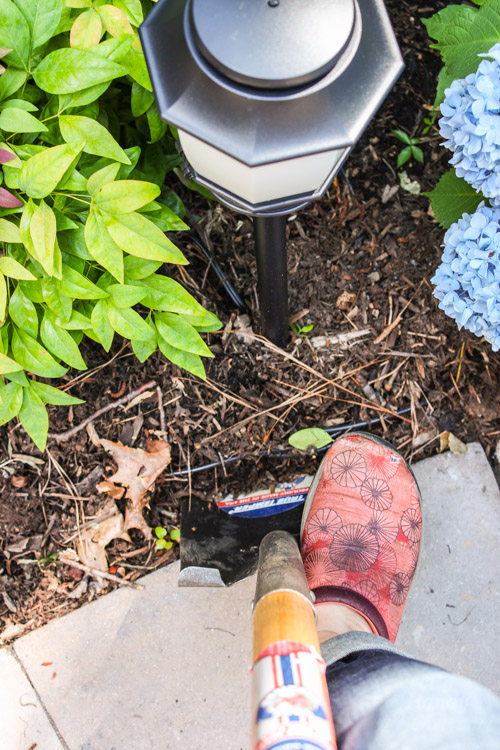
How to Install Low Voltage Landscape Lights (that also repel mosquitos!) | Pretty Handy Girl

Press the landscape wiring and connectors into the trench and replace the dirt.
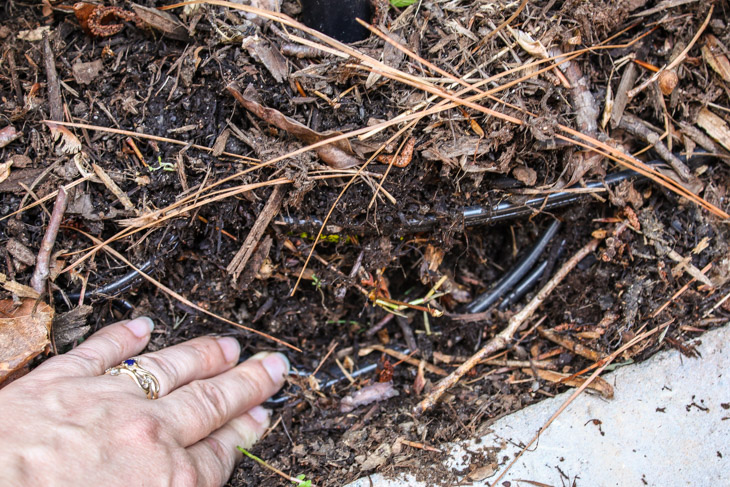
How to Install Low Voltage Landscape Lights (that also repel mosquitos!) | Pretty Handy Girl

Now stick your tongue out and say “Nah Nee Nah Nee Boo Boo, You Can’t Get Me!” to all the mosquitoes.
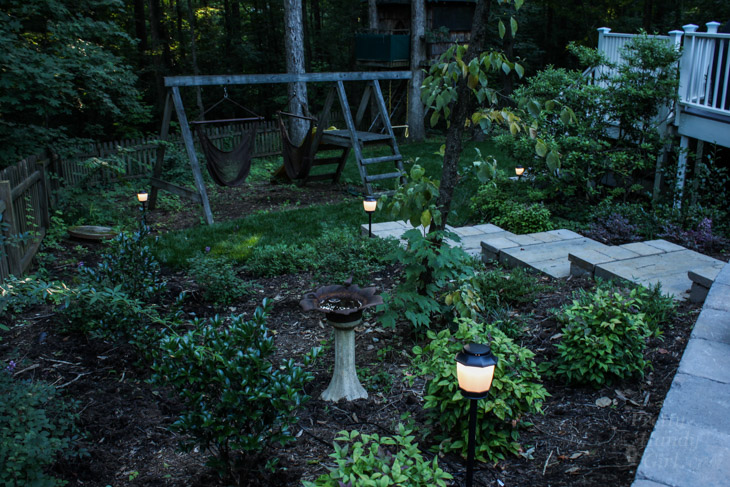
How to Install Low Voltage Landscape Lights (that also repel mosquitos!) | Pretty Handy Girl

And enjoy your beautifully illuminated yard!
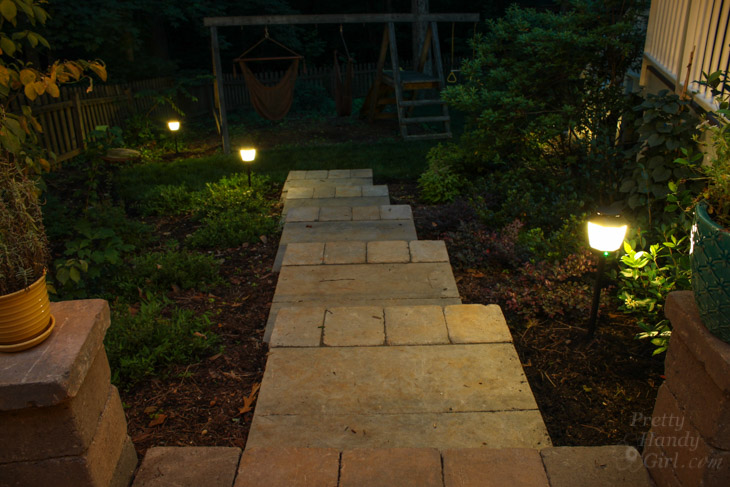
How to Install Low Voltage Landscape Lights (that also repel mosquitos!) | Pretty Handy Girl

According to the manual that came with the Haven Backyard Lighting and Mosquito Repellant, the repellant will last approximately 215 hours. You control how many hours the repellant is emitted per day which will either extend or shorten the number of days until you need to buy refills.
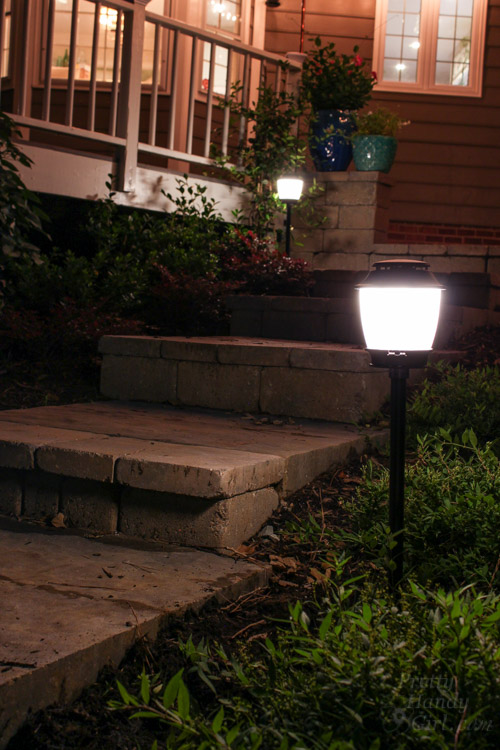
How to Install Low Voltage Landscape Lights (that also repel mosquitos!) | Pretty Handy Girl

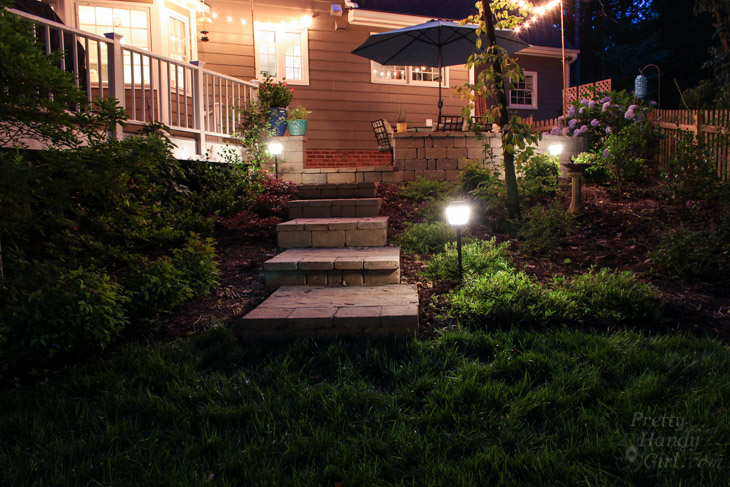
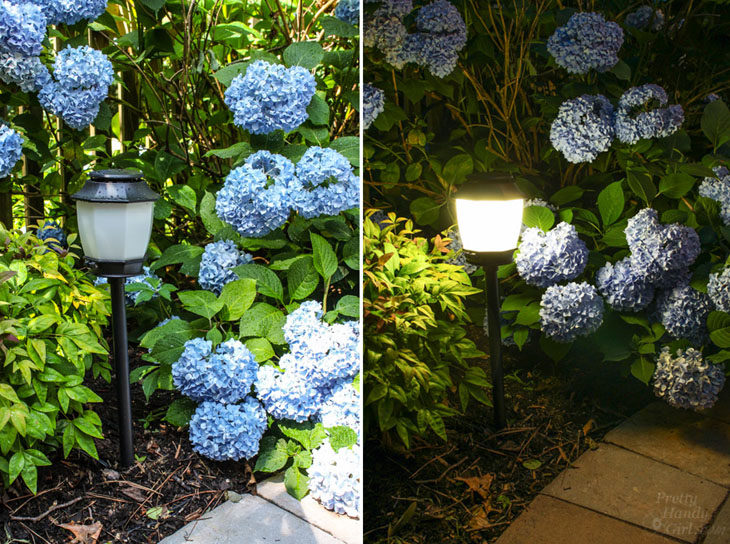
I definitely like the look of the landscape lights when they are lit…
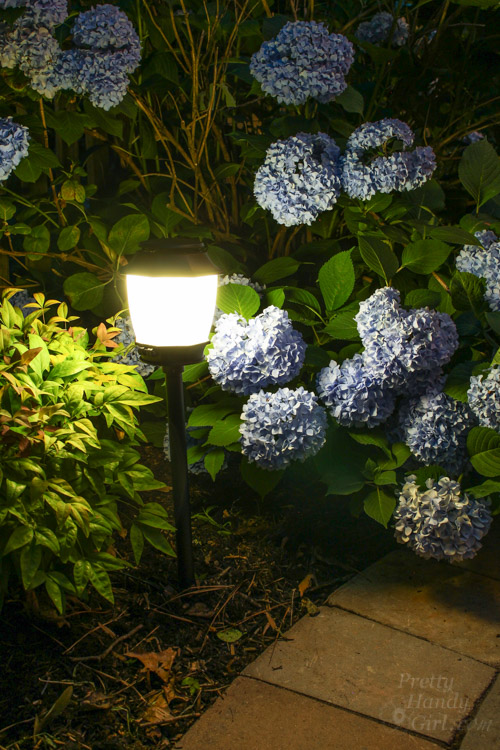
How to Install Low Voltage Landscape Lights (that also repel mosquitos!) | Pretty Handy Girl

…and not lit.

How to Install Low Voltage Landscape Lights (that also repel mosquitos!) | Pretty Handy Girl

Do you have a yard that could use some mosquito protection? NuTone has a stand alone repellant fixture. But, personally I like having the 2-in-1 fixture, because who doesn’t love having an illuminated yard at night.

PHGFancySign

Disclosure: This is a sponsored post for NuTone. I was provided with the landscape lights and compensated for my time. I was not told what to write. All instructions and opinions are my own. I have not had time to test these fixtures fully, but will write a review at the end of the summer.
Create a Living Wall Lattice Privacy Screen | Pretty Handy Girl

Create a Living Wall Lattice Privacy Screen | Pretty Handy Girl

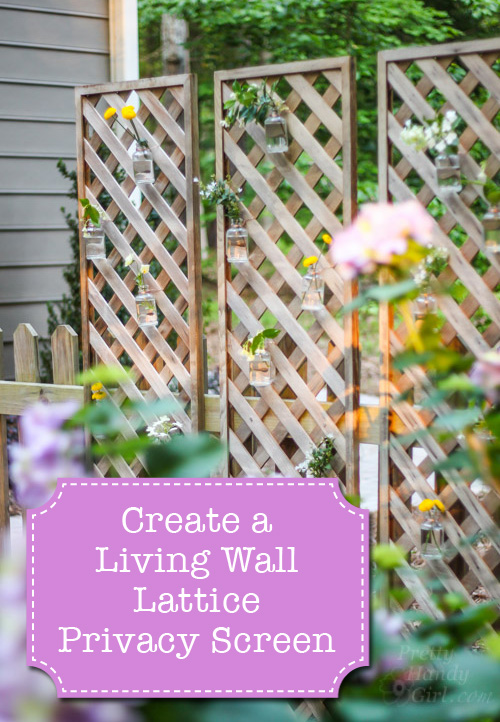
Did you see the Living Wall Lattice Privacy Screen I created for our new patio? It was so easy to install that I’m kicking myself for not thinking of the idea sooner. I’m just happy to have it now as it gives us a little more privacy and a cozy intimate feeling on our patio.

Create a Living Wall Lattice Privacy Screen | Pretty Handy Girl

I have to laugh because one of my subcontractors commented on it while repairing a complicated section of our deck railing (the tree guys destroyed it by dropping a large limb on it.) He said he thought it was cool and did I find the idea on Pinterest? I just laughed and told him, “No, but it will be on Pinterest soon because I rule on Pinterest.” I’m sure he had no idea what I was talking about.

Let’s get this tutorial going so you can pin it and help add it to that huge idea catalog in the cloud called Pinterest.

Materials:
(contains affiliate links)

Instructions:

Decide where you want to install your privacy screen. It’s best to install on a solid surface like a fence. If you don’t have a fence to attach to, you can set two 4×4 posts into the ground. (For permanence and rock solid construction, set the posts in a concrete base per the depth required by the building code for your geographical area.) Connect the two posts with two horizontal 2×4’s using steel hangers.

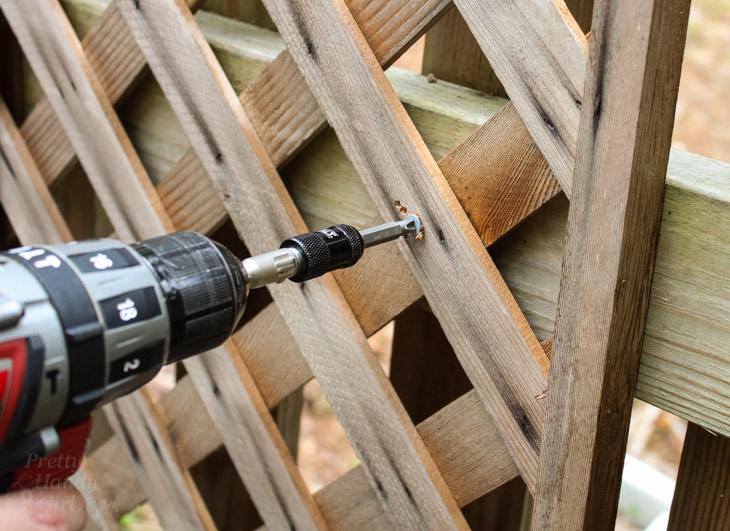
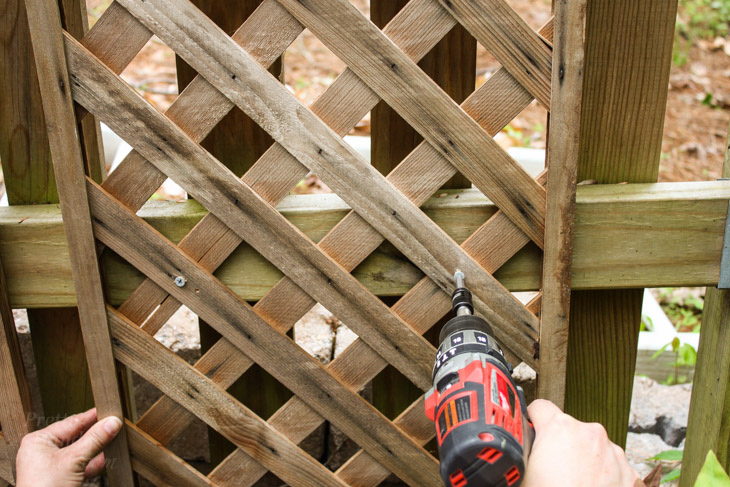
Drive one screw into the top horizontal rail to secure your first panel.

drive-screw-into-fence-post

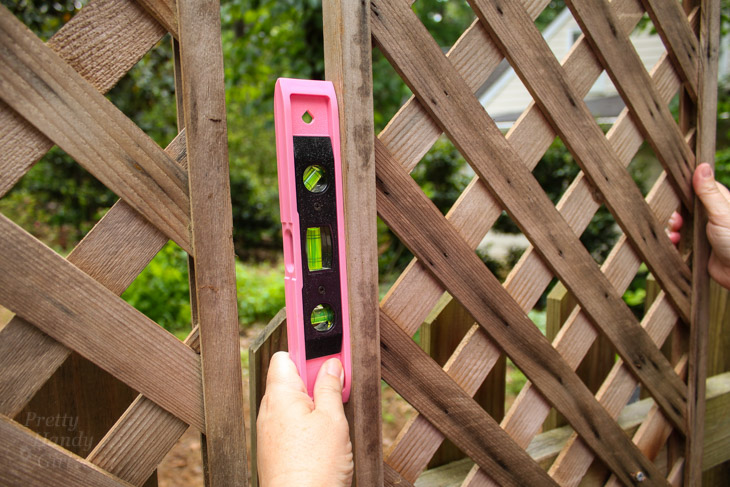
Check the lattice panel to make sure it is plumb.

level-lattice-screen

Drive a second screw into the other side of the panel. Repeat with two more screws attaching the panel to the lower horizontal 2×4 of your fence.

drive-2nd-screw-into-lattice-screen

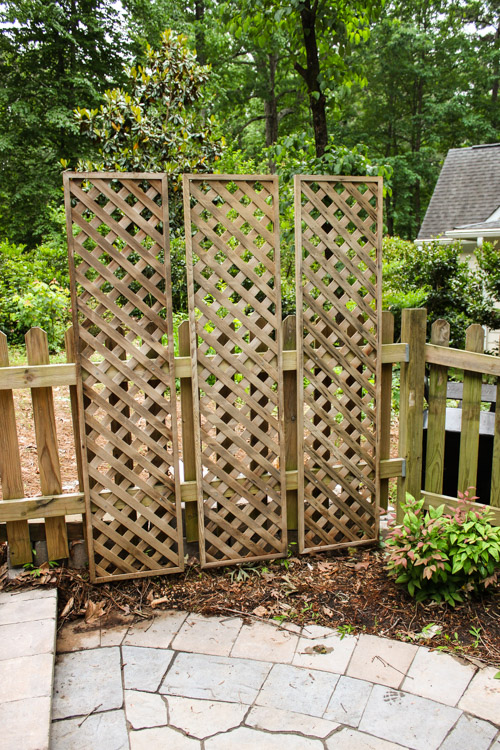
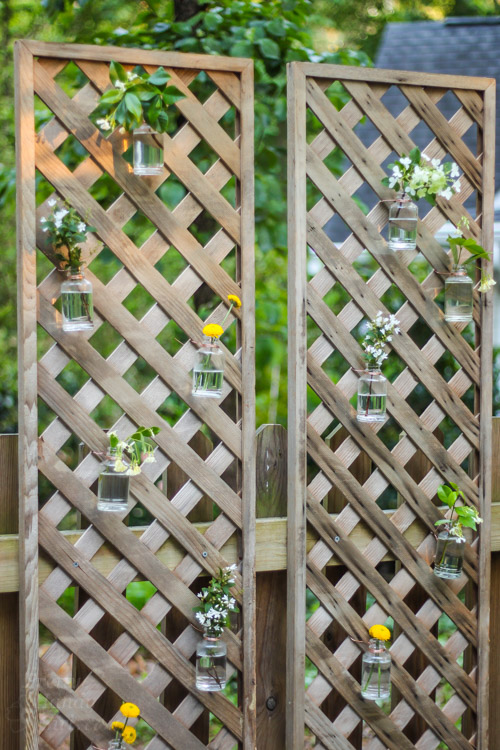
Hang your other panels using the same technique.

3-hung-lattice-privacy-screens

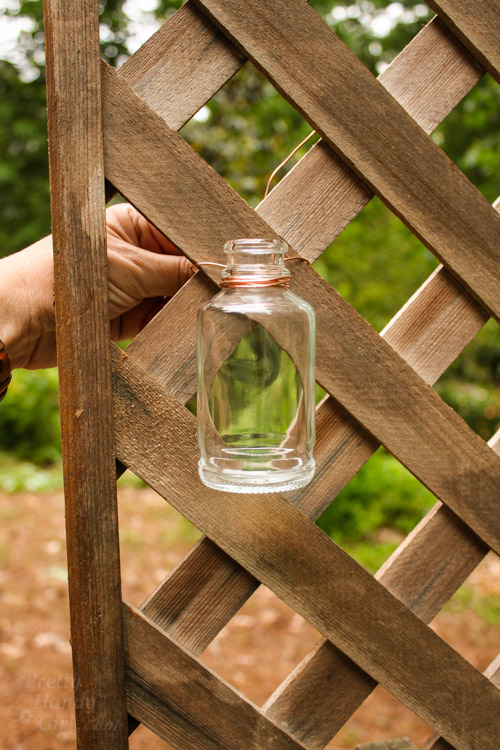
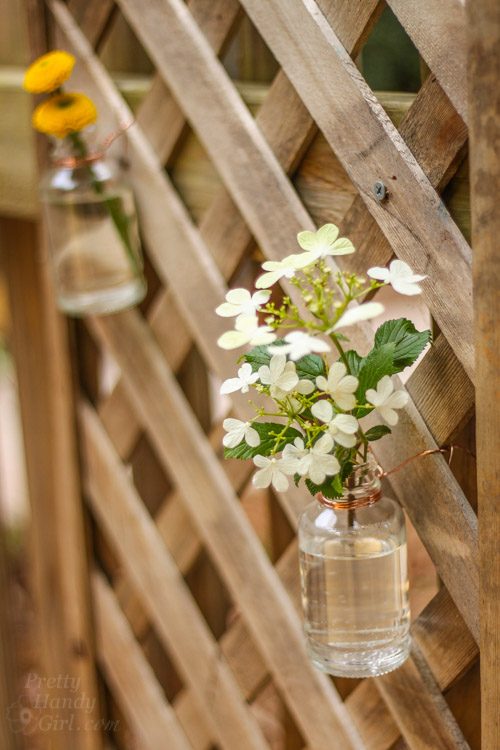
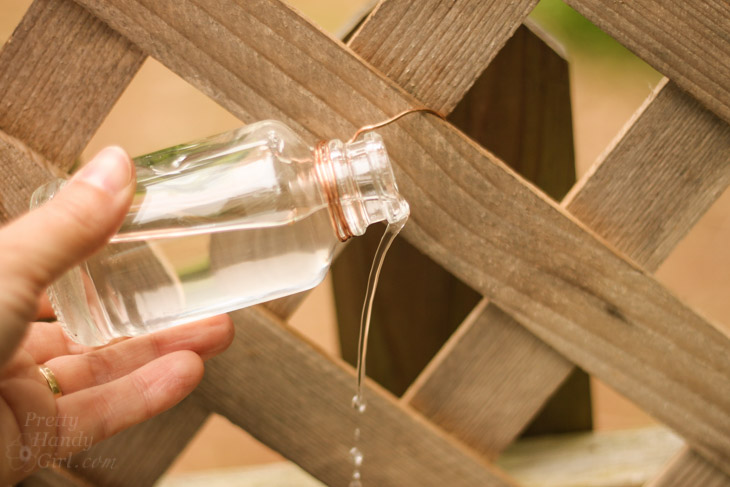
Wrap copper wire around the neck of your bottle or vase. Leave a couple inches of wire after twisting the ends. Hold the bottle up to the lattice screen and pull the wires through to the back of the screen.

thread-wire-wrapped-copper-bottle-through

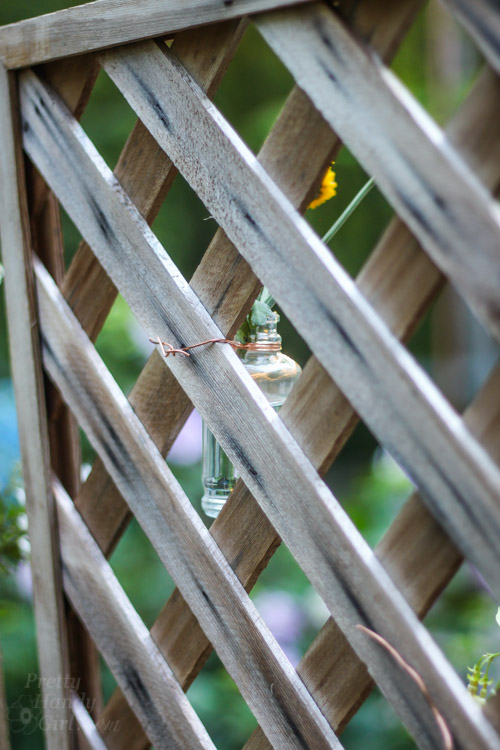
Twist the copper wire ends to secure the bottle.

Create a Living Wall Lattice Privacy Screen | Pretty Handy Girl

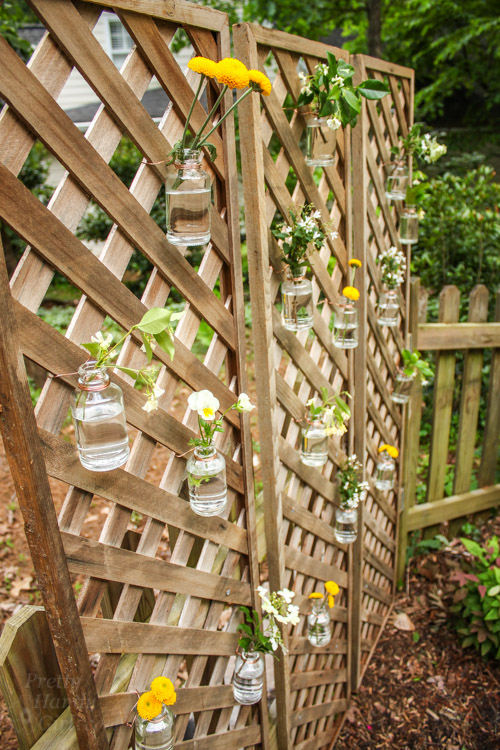
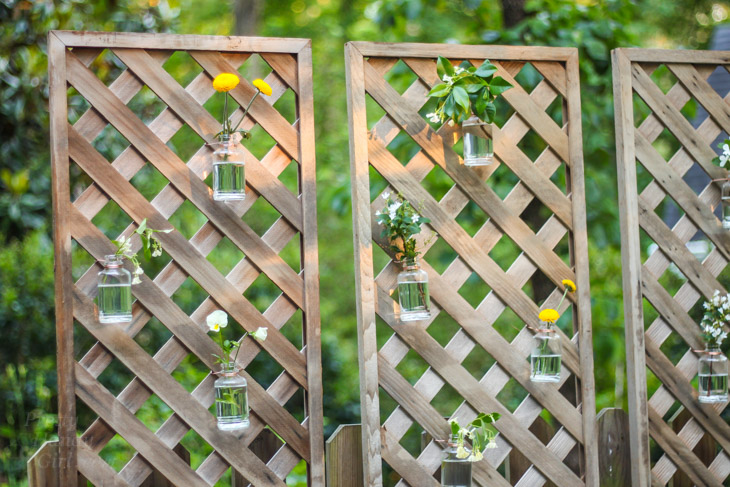
Hang as many bottles as you’d like. Add water (a small spout watering can works best) and fresh flowers.

Create a Living Wall Lattice Privacy Screen | Pretty Handy Girl

Enjoy the living wall lattice privacy screen you created.

Create a Living Wall Lattice Privacy Screen | Pretty Handy Girl

Create a Living Wall Lattice Privacy Screen

When the flowers are spent, remove them…

remove-dead-flowers

…and dump the water by twisting the bottle.

empty-water

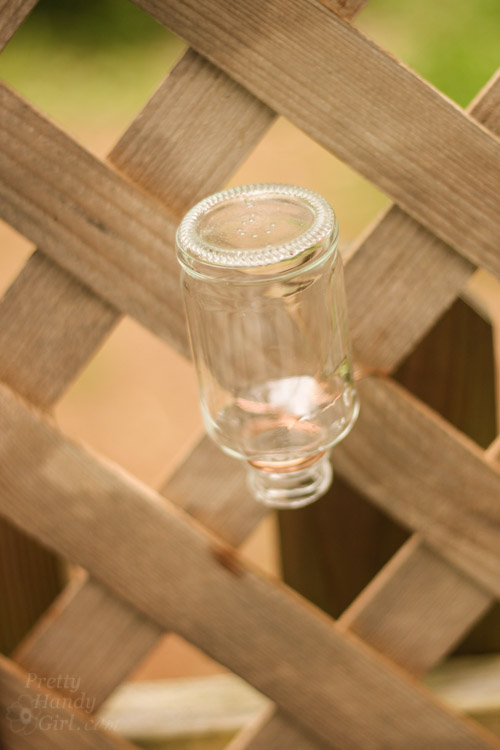
Leave the bottles upside down when not in use to prevent water from becoming a mosquito breeding ground or to prevent water from freezing and breaking the bottles.

store-bottles-upside-down

Do you have a spot you can enjoy a living wall? This is a super easy project that can be completed in under an hour!

Create a Living Wall Lattice Privacy Screen

PHGFancySign

Liked this tutorial? You’ll also love this temporary trellis pergola.

Build a Temporary Pergola with Trellises | Pretty Handy Girl