saving etta front view seeded and straw

Saving Etta: Front Yard Transformation
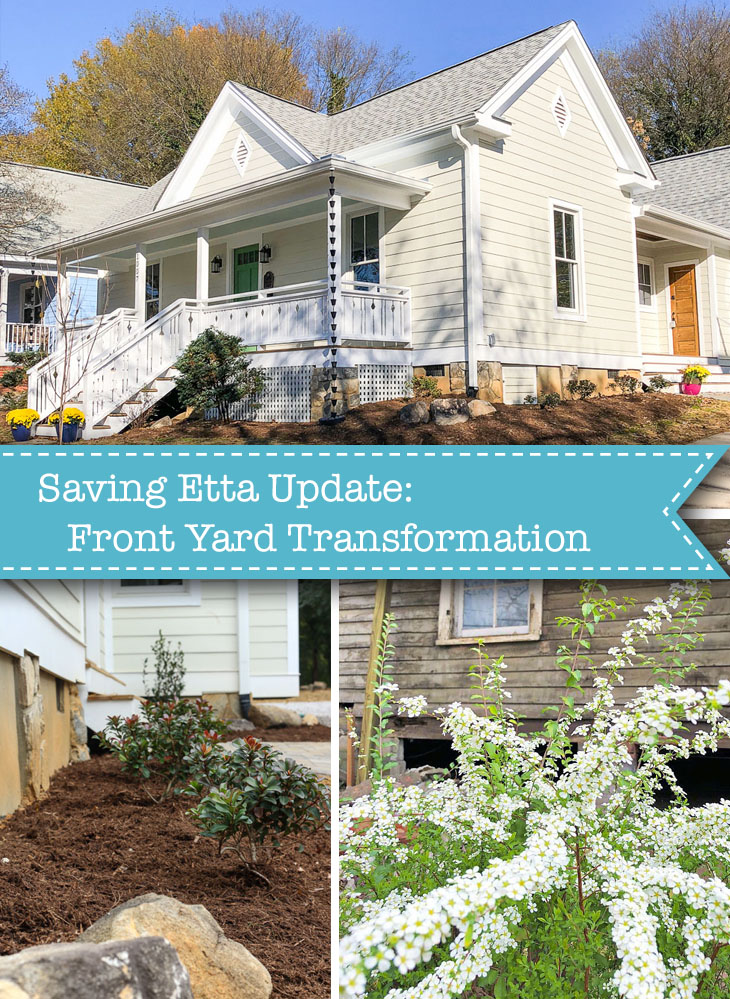
Saving Etta: Front Yard Transformation & Tips for Saving Money on Landscaping

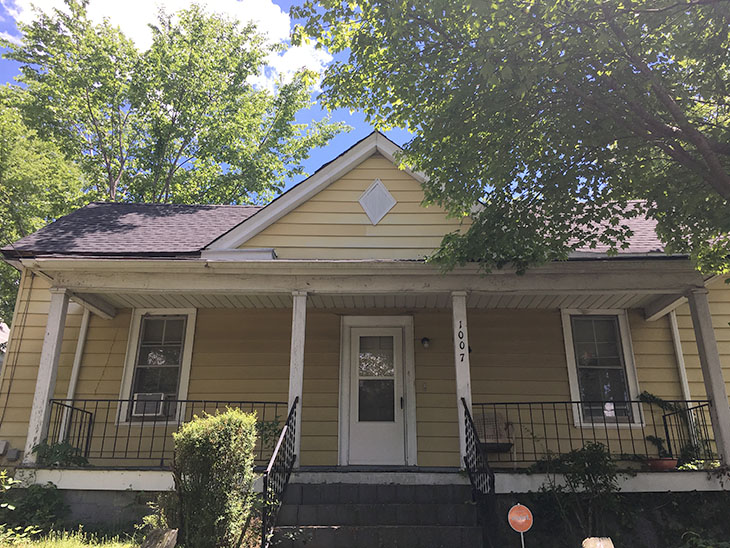
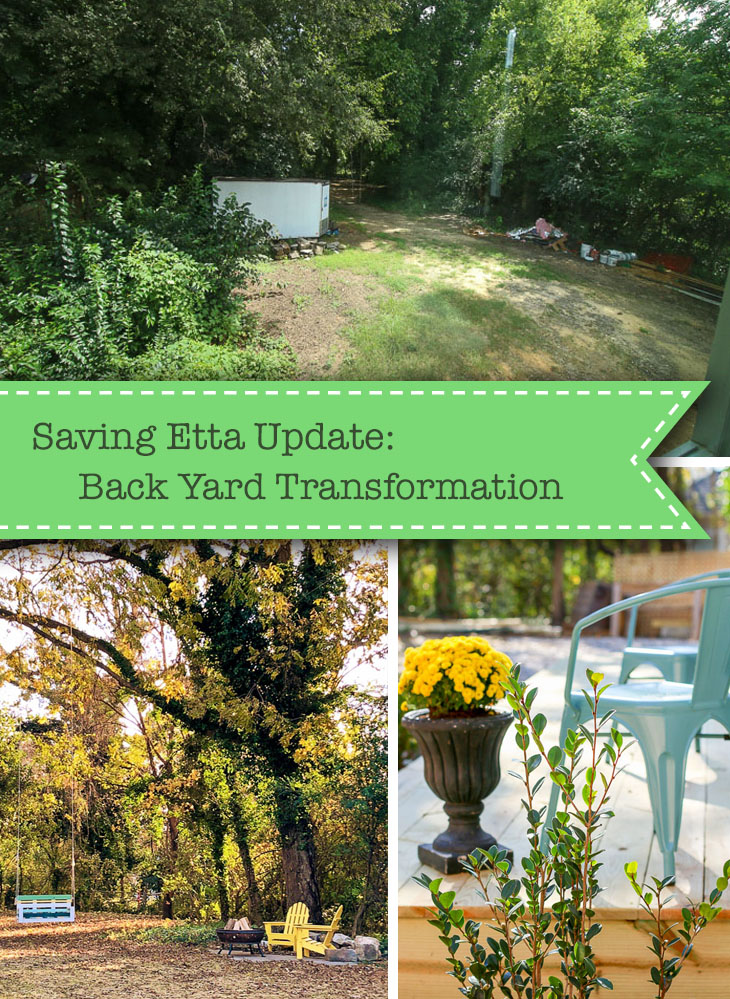
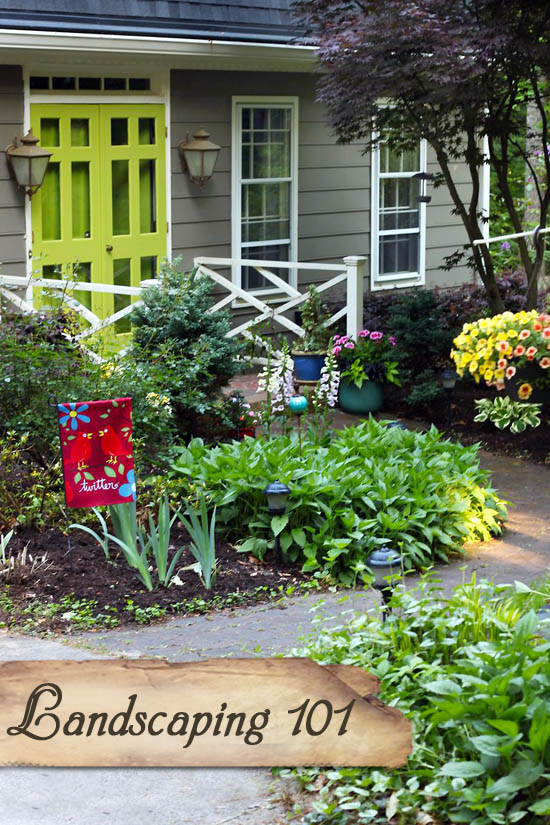
I hope you enjoyed the backyard transformation I shared on Monday. Like the backyard, the front has taken on quite the transformation of its own. One of the first things I knew I wanted to do at the Saving Etta house was to preserve the cottage charm curb appeal (especially around the front porch.) Sadly her charm had dwindled like the color of her faded yellow aluminum siding. The iron railings (that didn’t appear to be original) were barely attached to the porch columns. It was an easy choice to send them to the scrap metal yard.

1900 triple A frame house

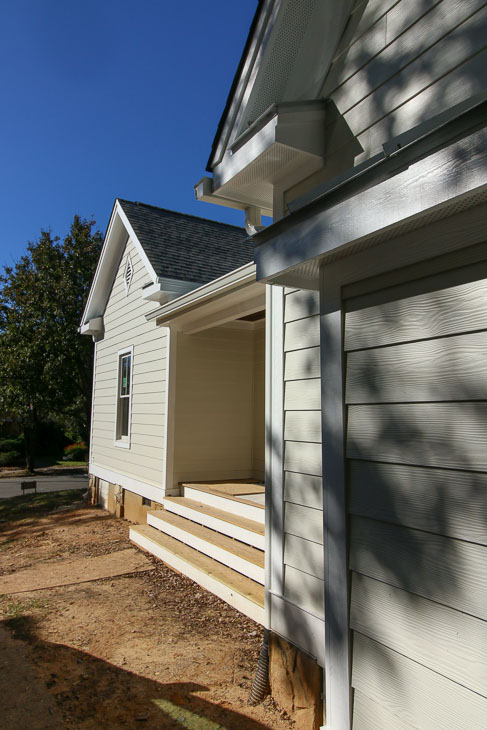
While removing the rotting porch floor boards, we realized we couldn’t save the porch framing. And in true “opening a can of worms” fashion, when exposing the porch ceiling rafters, we found the porch roof wasn’t flashed and it wasn’t tied into the house very securely. It was a sad day when I realized the entire porch had to be removed. Unfortunately, the demolition crew had finished months ago, so I had to try to get back on their schedule.

Front Yard Transformation

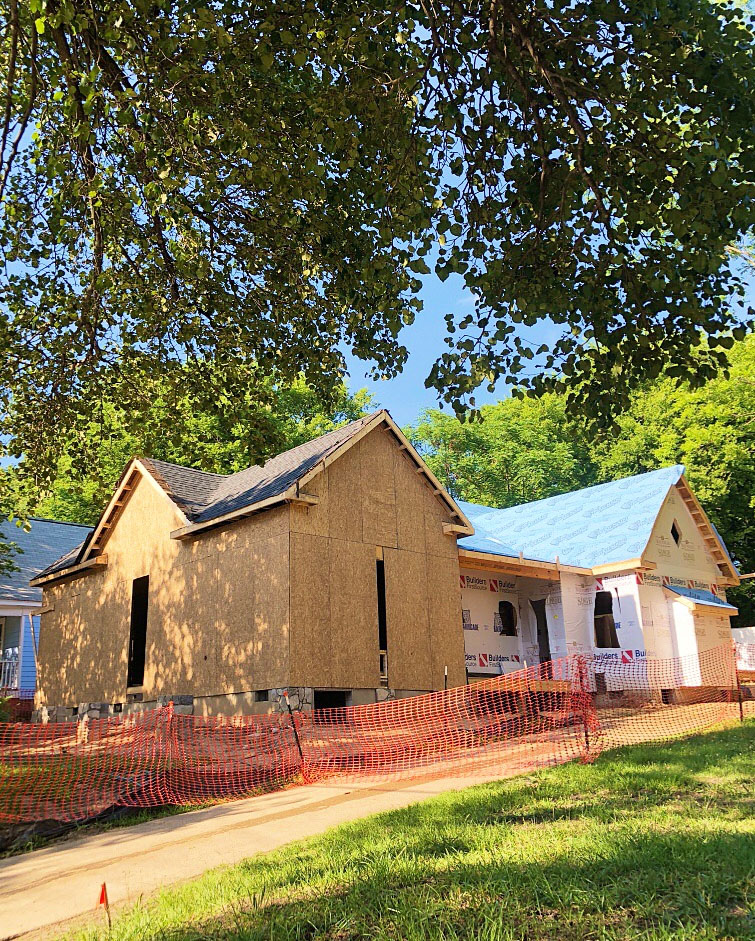
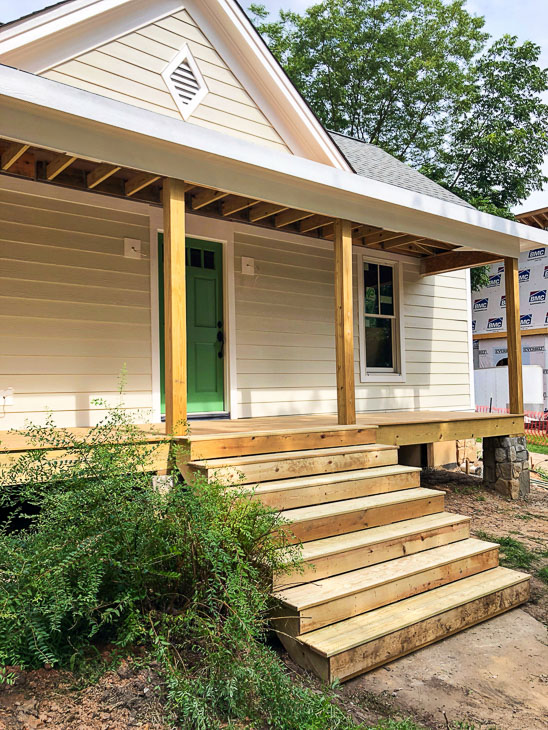
After the front porch was removed, new sheathing and house wrap was applied. Then my framers built the porch back to the same size. Before the siding and roofing materials were installed, the porch roof and band were flashed properly to prevent any water from seeping behind and causing rot or mold issues.

front porch before landscaping

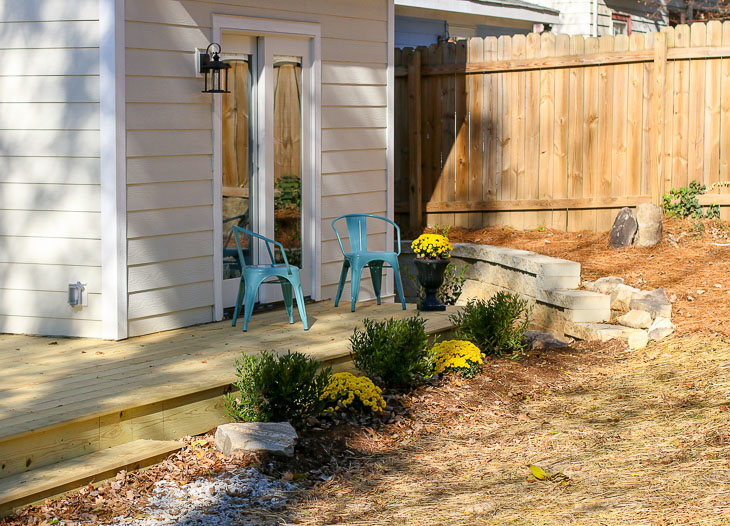
See that scraggly bush next to the stairs? I fought my subcontractors who wanted to cut it down. The framers in particular complained about it being in the way. Little did they know, that scraggly bush had a secret. In the spring it would look like this:

Bridal Veil Spirea original to house

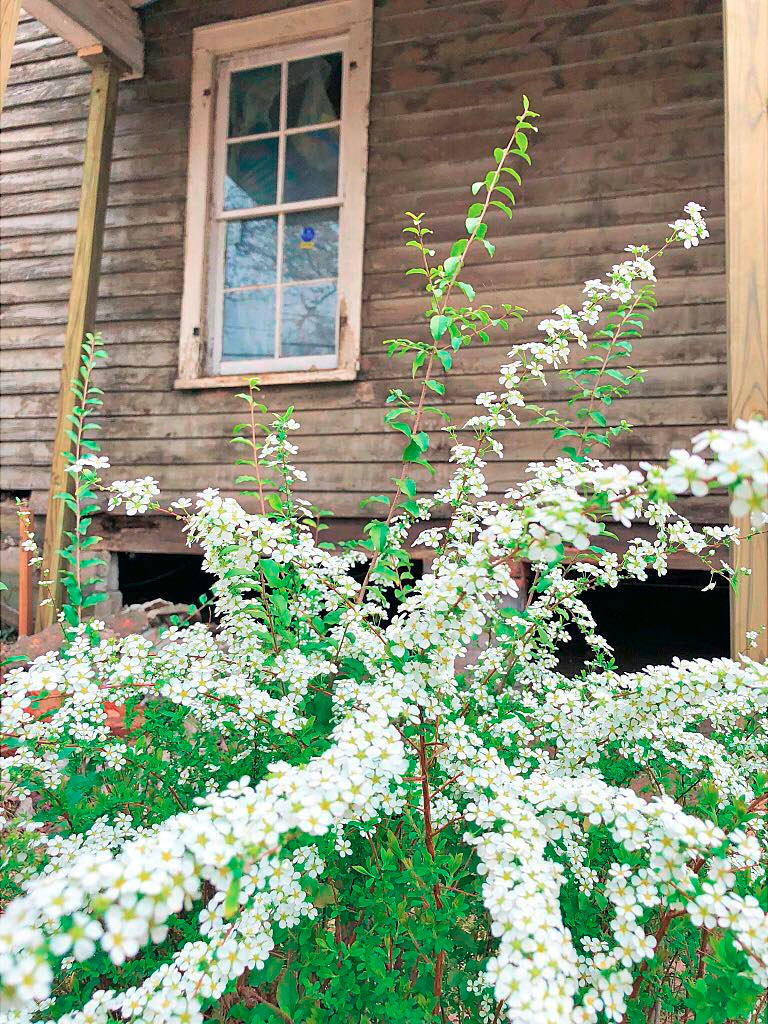
The white flowering bush is a Bridal Wreath Spirea with cascading white flowers once a year. Saving the spirea was part of my plan to save money on landscaping. I tried to reserve funds for landscaping, but surprises kept cropping up which cut into my landscape budget. Consequently, I put my thrifty thinking cap on and came up with a few strategies to make the most impact for the least amount of money.

7 Strategies for Low Budget Landscaping:

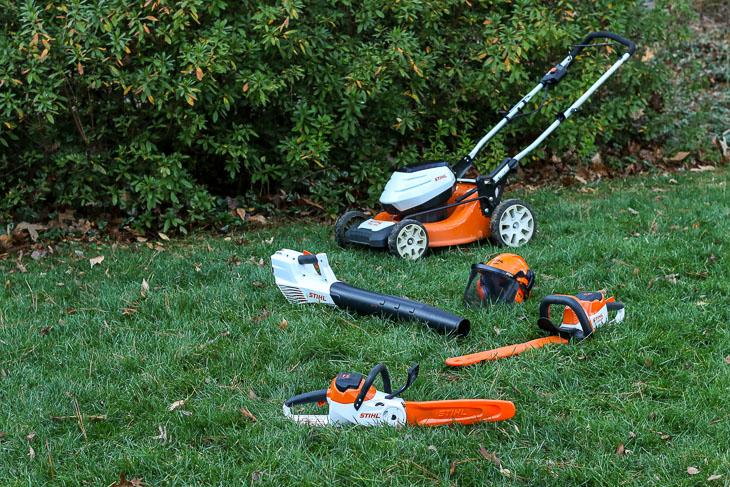
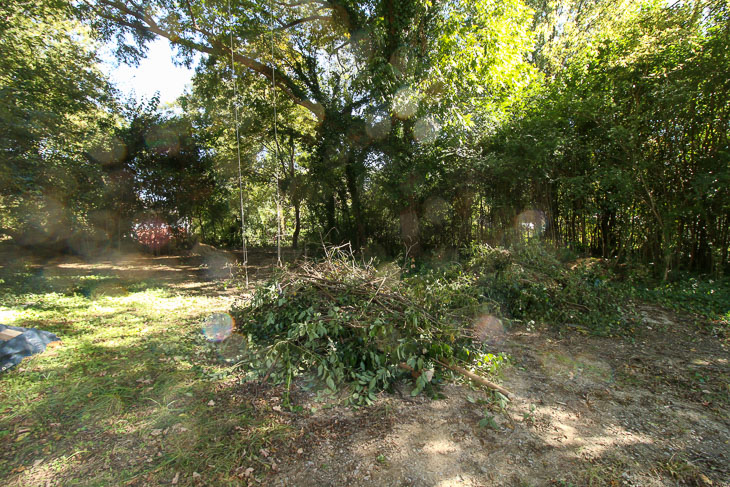
    1. Do as much labor yourself – As you saw in the backyard landscaping update, my family and I planned an entire yard work day. We cut back the weeds, trimmed bushes, hauled away brush, and mowed the lawn. This saved me the cost of paying someone else to do the work.
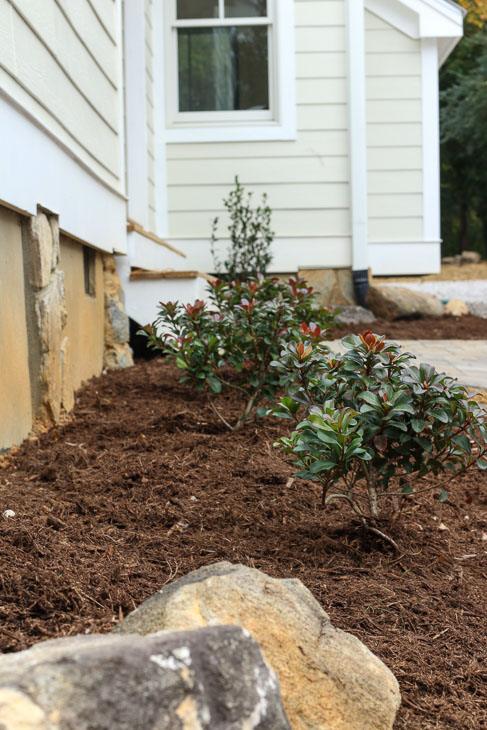
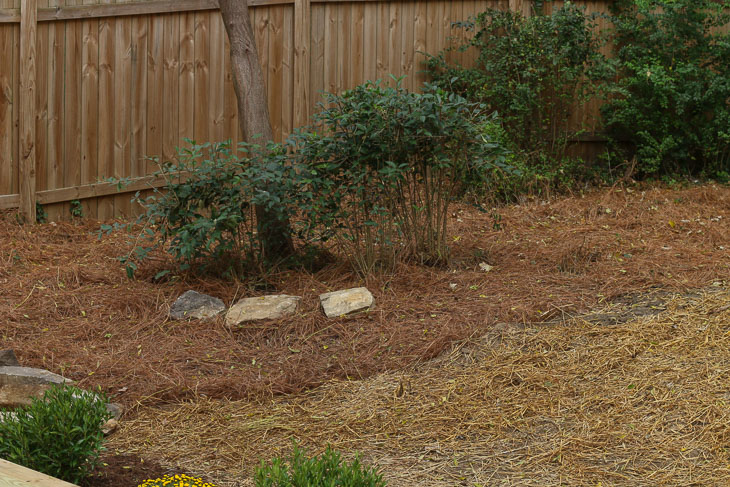
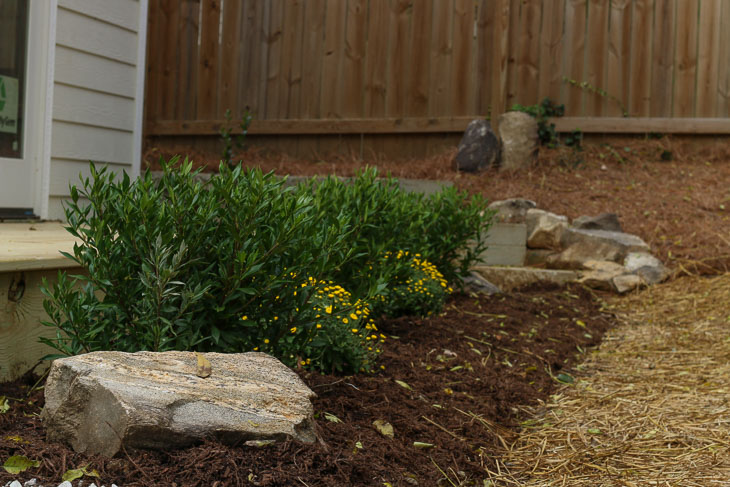
    2. Use plants you already have – As I mentioned above, I fought to save as many plants in the yard as possible. But, I’m also fortunate to have a healthy landscaped yard at home after years of hosting Free Plant Swaps in our neighborhood. Two of our bushes that have really thrived, are a pair of evergreen bushes by the front door. I’m not sure what type of bushes they are, but they might be in the juniper family. Regardless, they grew too big for the front of the house.overgrown bushes by front of my housePretty Handsome Guy and I dug them out—keeping the root ball intact—and loaded them into my truck. Then they were planted in front of the house.spruce trees loaded into back of truck
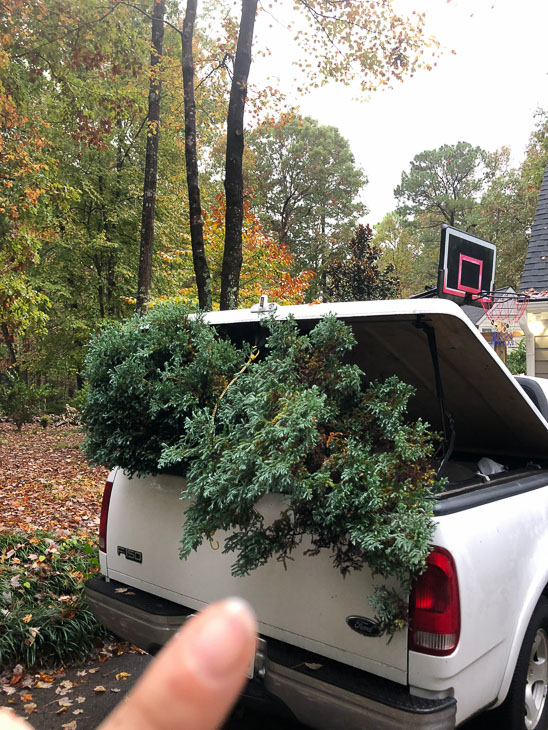
The bushes are much better suited in front of a raised porch. Best of all, they were free.blue spruce in front yard
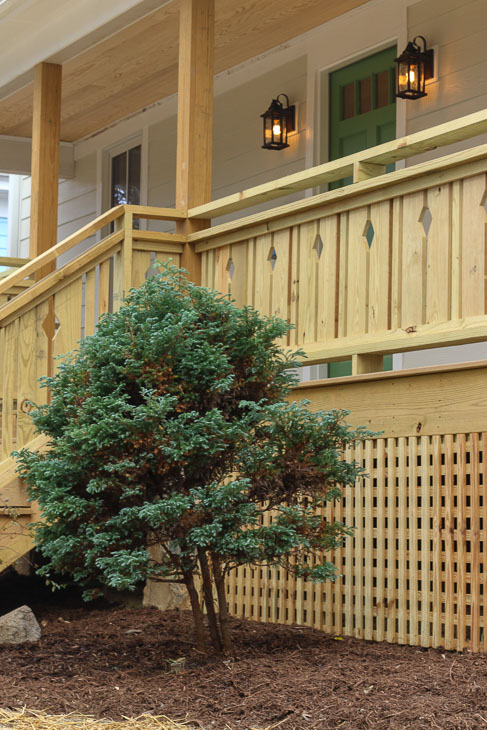
    3. Shop the discount section – Lucky for me, it was late fall when we got started on the landscaping. My local Lowe’s Home Improvement had a large selection of half off plants to choose from. I chose these evergreen abelia shrubs that have pretty red growth on the tips in the cold weather and will have flowers in the warm season. Always look for discounted plants in your local nursery. But, steer clear of dried out and stressed looking plants. If they appear healthy go ahead and purchase them.new foundation bushes
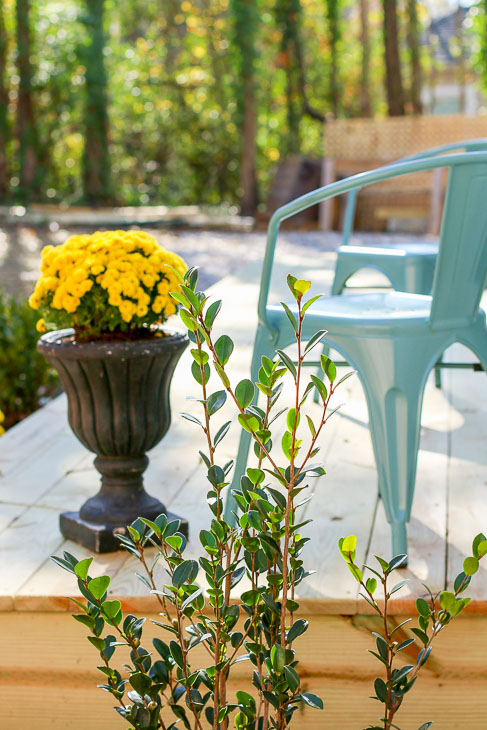
    4. Shop end of season flowers – Flowering perennials that have faded blooms are usually discounted as soon as the blooms start to die. But, if you’re lucky you might be able to cash in on a post-holiday sale. After Thanksgiving I stumbled upon a huge clearance of mums. Each pot was marked down to $1! Even big mum planters that were $30 a week ago were $1. I bought several mums and planted them throughout the yard to add some color. After the blooms finish, they can be cut back to encourage new growth. They’ll produce beautiful blooms again next year.
      back deck and back of house view after landscaping
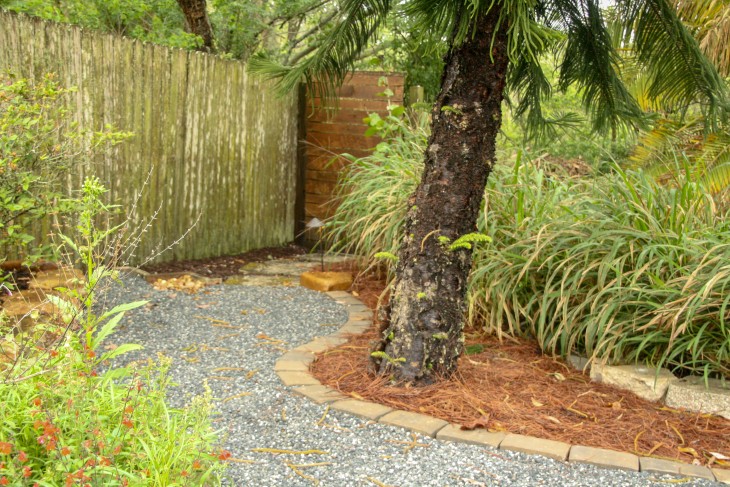
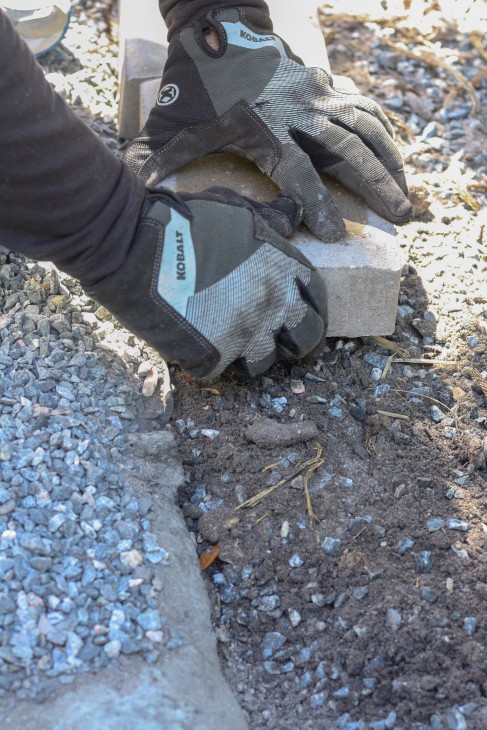
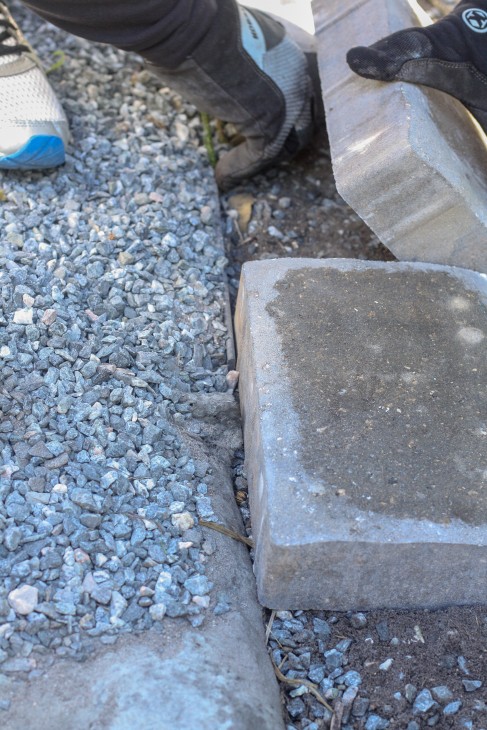
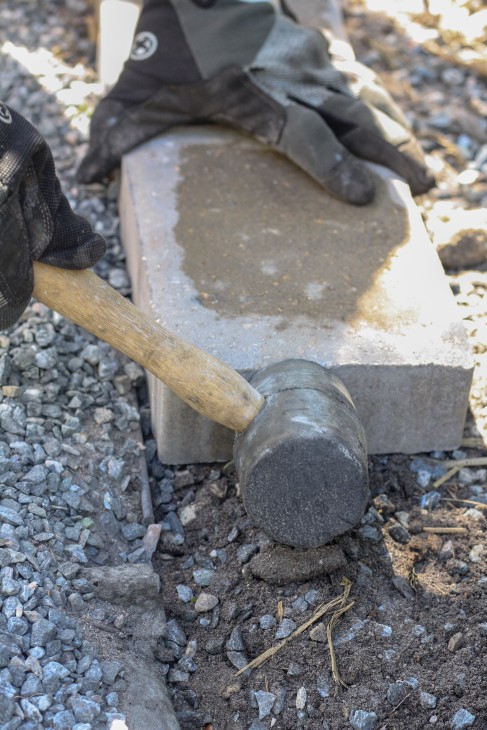
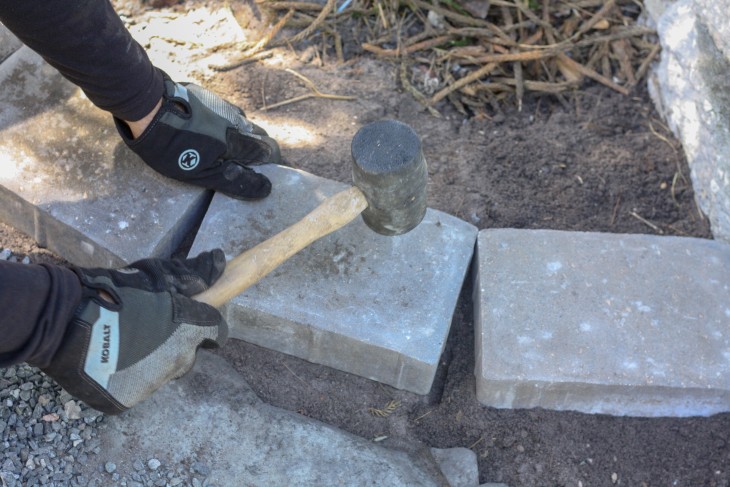
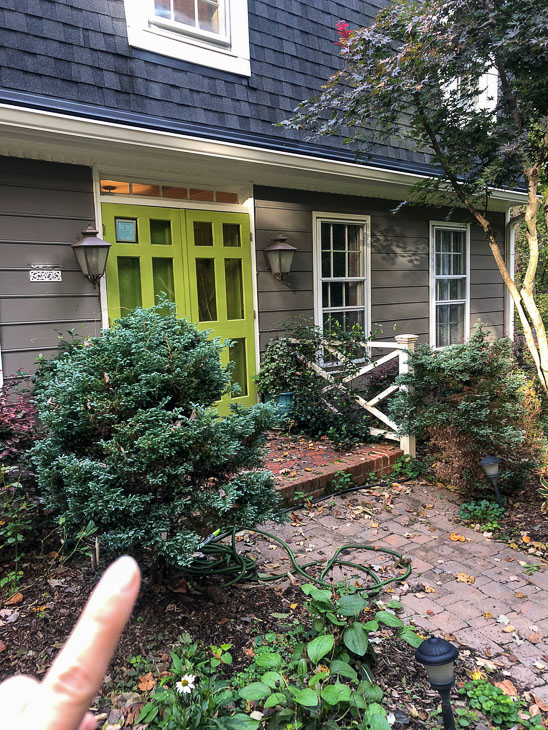
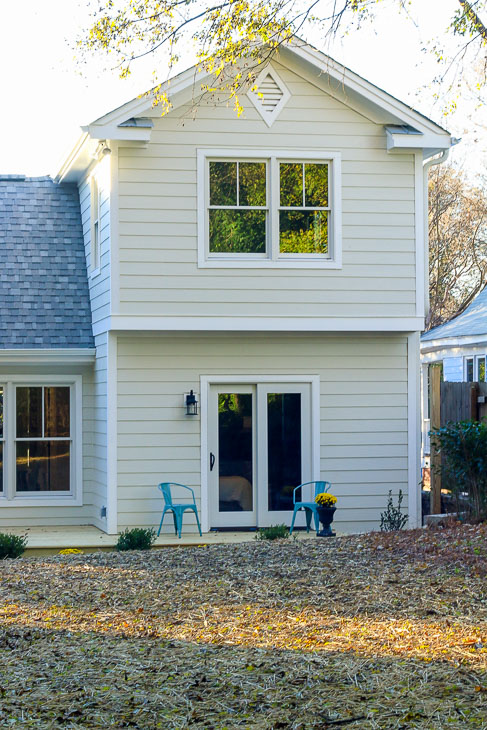
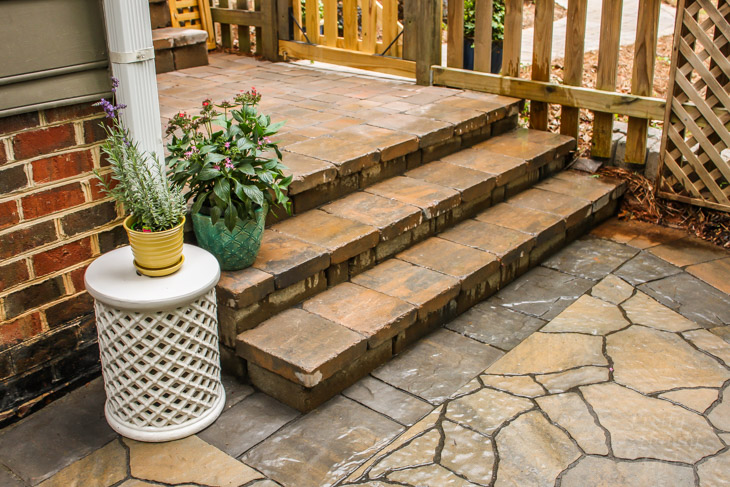
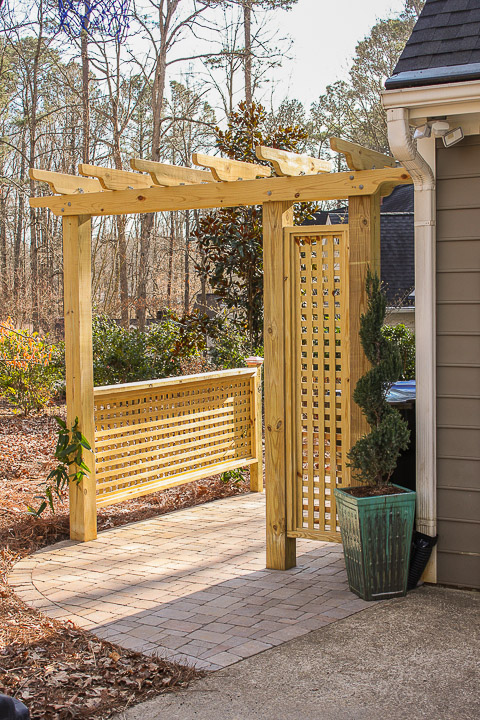
    5. Put money where it gets the most visibility – To get maximum visual impact in your yard, you’re going to have to spend some money. But chose to spend money on the show stoppers like a larger tree, a pergola (or make your own pergola or trellis), or spend on hardscapes like patios or walkways. On the side of the house, I chose to put a little more money toward the side entrance since this is the homeowner’s main entrance.before patio and landscapingThe landscapers installed a beautiful paver patio that will last decades and control mud and dirt from entering the house.side view with paver patio
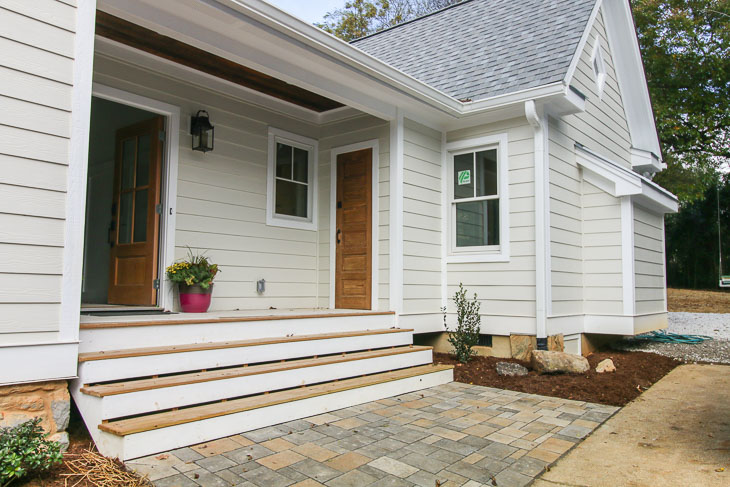
    6. Talk to your landscaper to see if they have extra materials or plants – Ask your landscaper if they have leftover materials or plants they would be willing to give you for a reduced price. When discussing my needs and budget with my landscaper, she told me if I was willing to be flexible she might have some leftovers she could use. Ultimately she installed an array of plants and the side entrance pavers at a discount, which gave me more bang for my buck.landscaper crew adding mulch and plantings
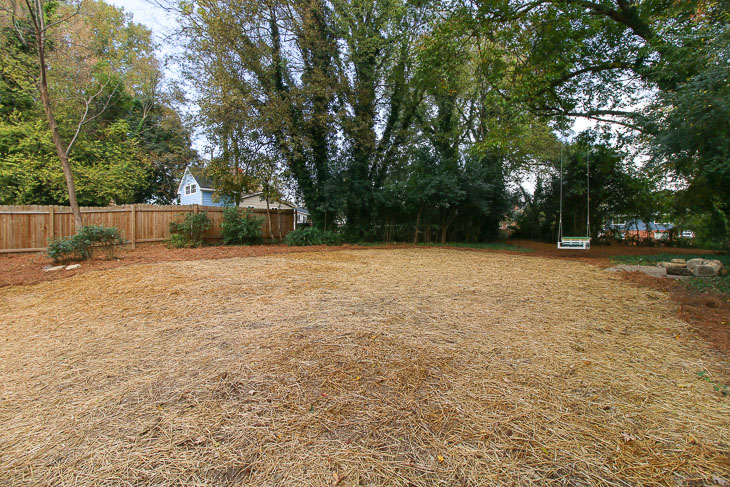
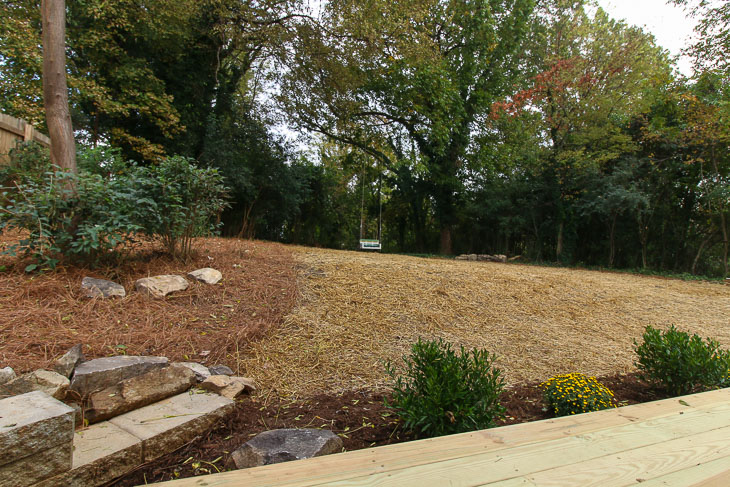
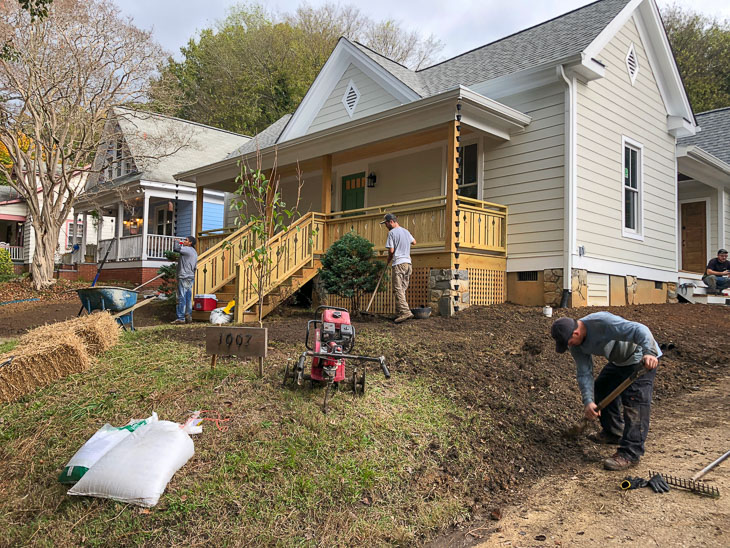
With four men and some big equipment, the landscapers were able to whip the front yard into shape quickly. The front yard was leveled and fresh dirt and grass seed was laid down. Finally, they planted a small tree where the old tree had been.Ugly Tree in front of Etta
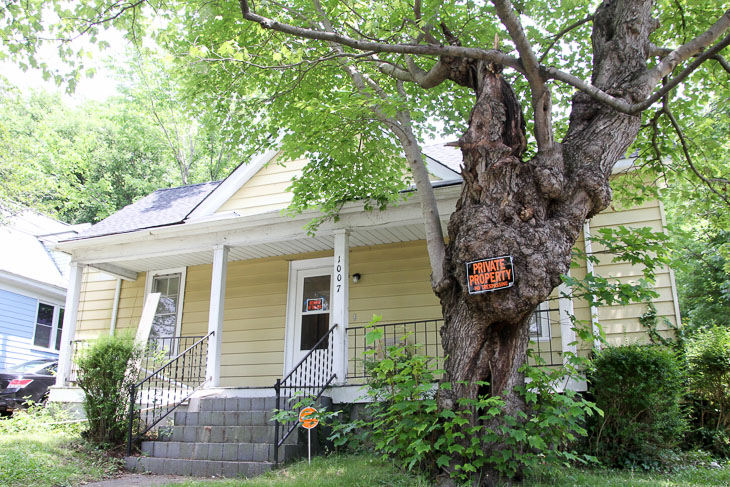
    7. Be patient – Save money by purchasing younger plants, trees, and bushes. Purchasing mature greenery can cost a lot more for those who want instant gratification. If you can wait a few years, the younger plants will get bigger. Same holds true for those scraggly clearance plants. They may have some broken branches or spent flowers, but if you cut them back they will grow back beautifully with time. You can also save money by planting grass seed instead of sod. If you can wait a few weeks, you’ll be rewarded with grass sprouts and more money leftover in your pocket. Better yet, if you continue to sow seed next season (fall or spring), you’ll fill in any empty patches.
      grass growing on front hill at Saving Etta house

Saving Etta: Front Yard Transformation

Ready to see the front yard transformation? For fun, let’s take a look back on where this whole journey started!

Ugly Tree in front of Etta

June 2017 – I purchased the property.
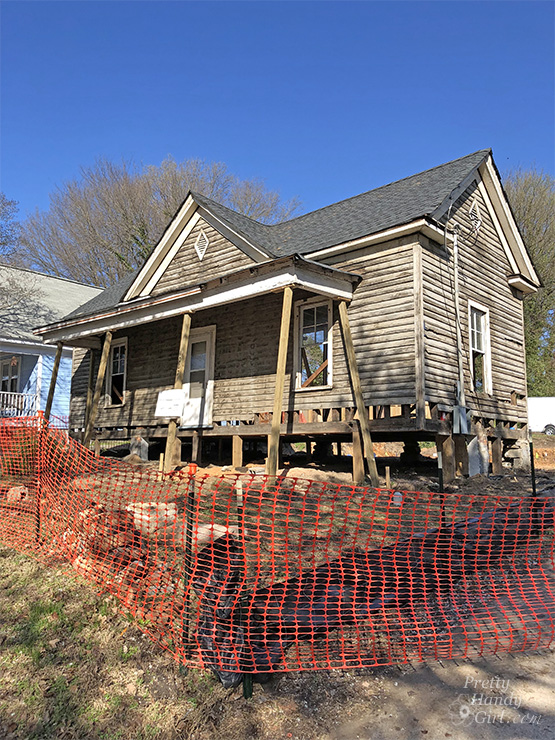
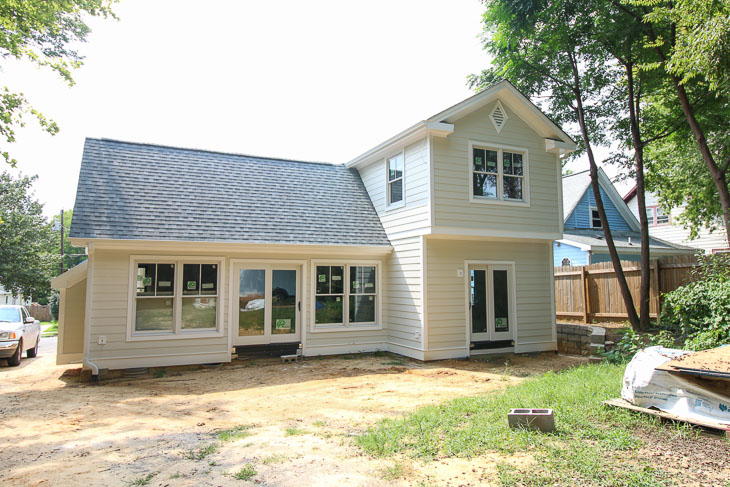
 

Front Yard Transformation

February 2018Demolition was completed by removing the poorly built additions in the back and removing all the siding and rotten framing.

Front Yard Transformation

May 2018 – New foundation, framing, and sheathing are completed.


dirt yard around house under construction

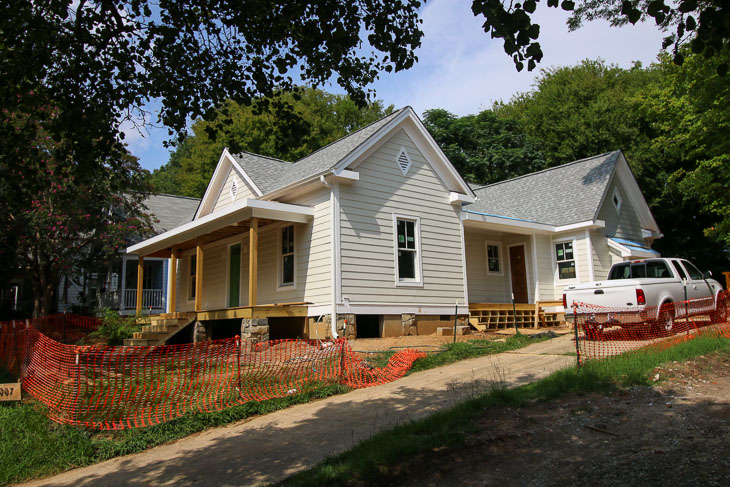
July 2018 – It’s finally looking like a house again. Siding, windows, roofing, and the new front porch are added.


no landscaping, saving etta house under construction

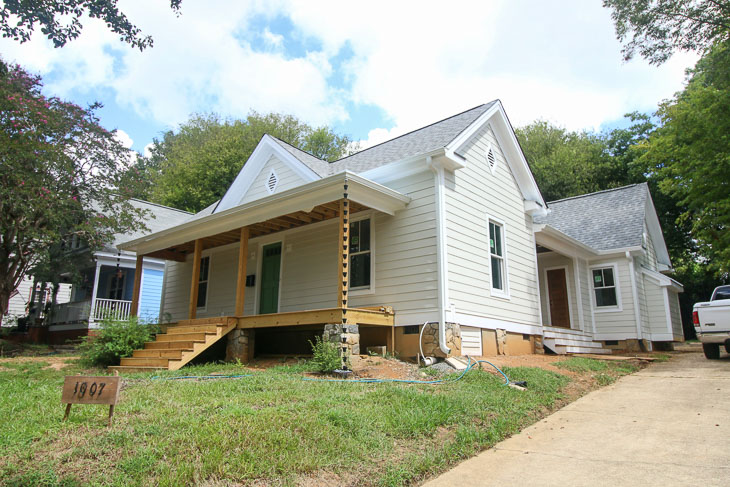
September 2018 – Side porch steps are completed. Gutters and the rain chains are added.


rain chain

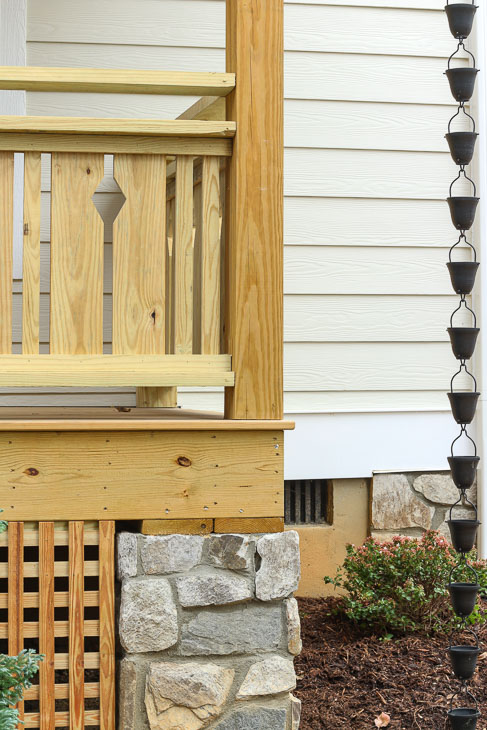
(This is where I bought the rain chains (affiliate link). They were the most affordable rain chains I could find, and I like how they look. The rain chains get plenty of compliments!

Front Yard Transformation

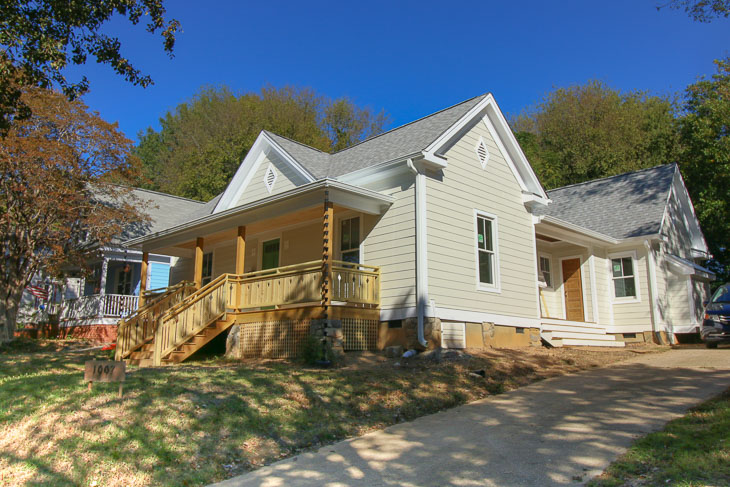
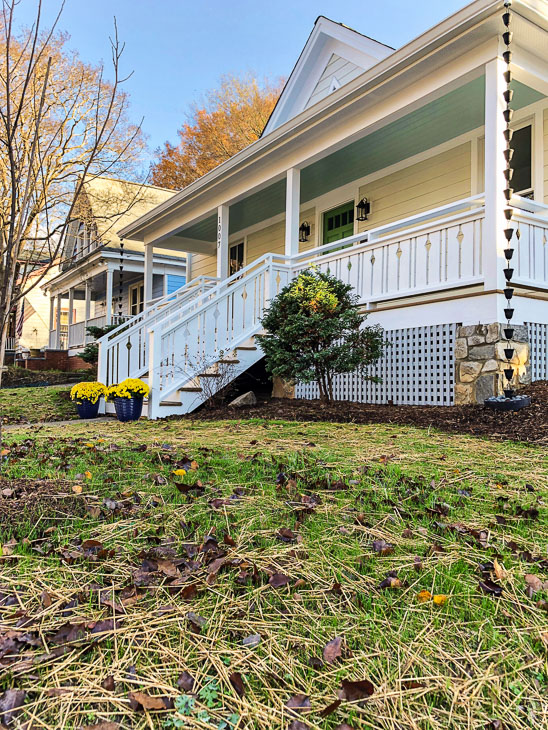
October 2018 – The front porch railings and ceiling are completed. My favorite addition are the flat sawn railings.


after landscaping side yard

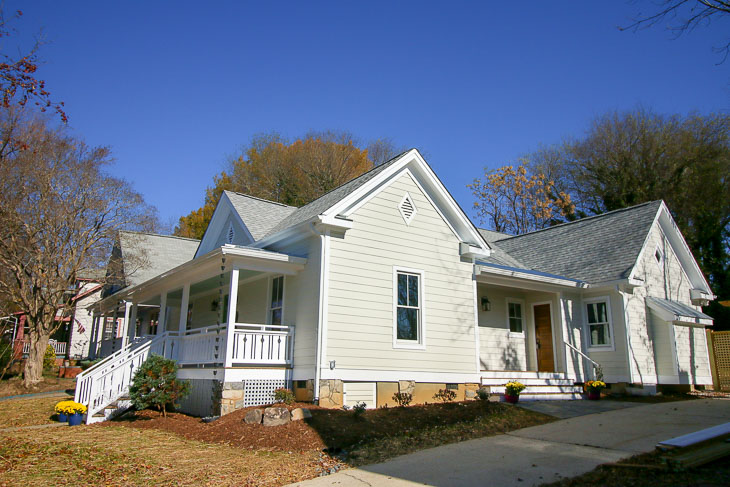
November 2018 – The house is completely finished and listed for sale. The first weekend we had it on the market we received multiple offers!


beautiful 1900 triple a construction house near downtown raleigh

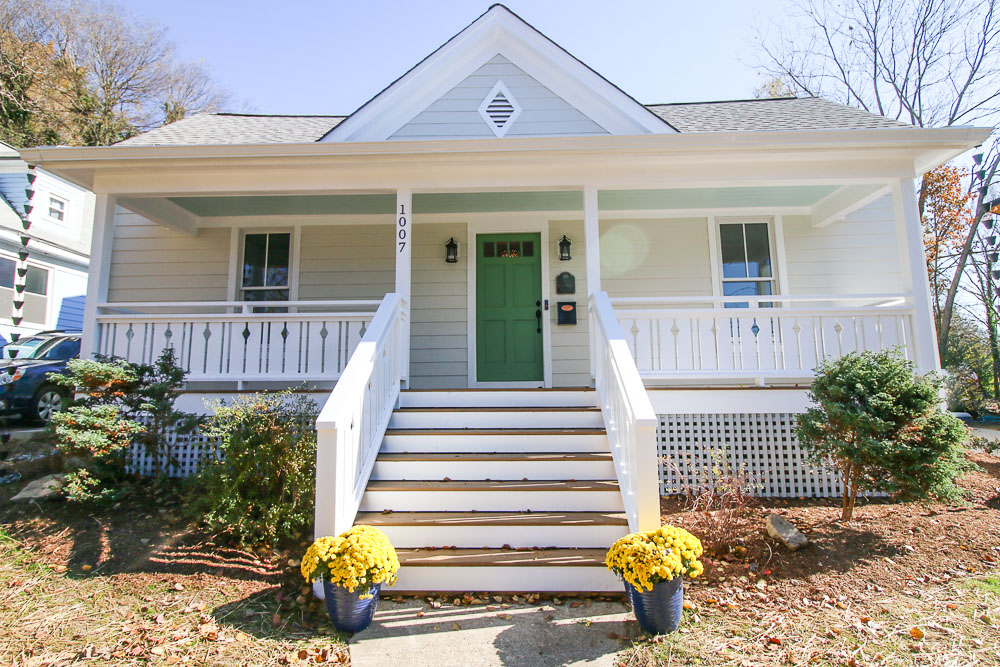
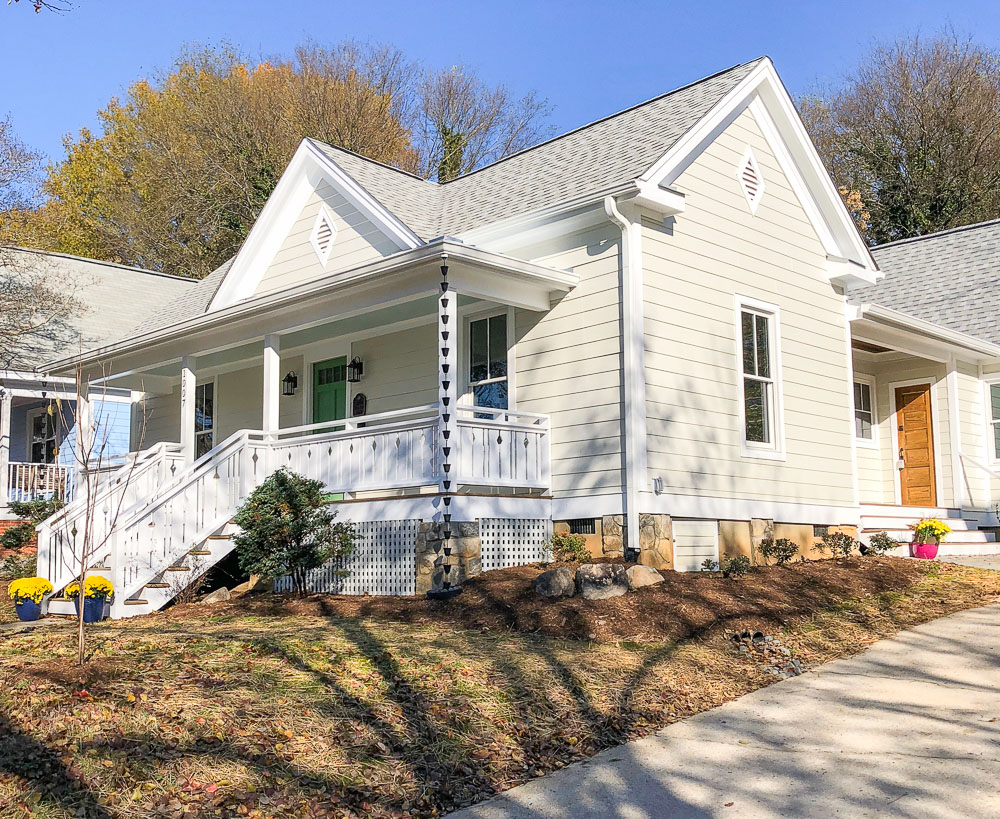
I can’t believe the house is finally complete. It took 18 months of hard work and patience while waiting for permits, subcontractors, and while I took a two week vacation with my family.

saving etta front view seeded and straw

In the end it was all worth it and I love that Etta has regained her cottage charm.

saving etta beautiful restored 1900 house near downtown Raleigh

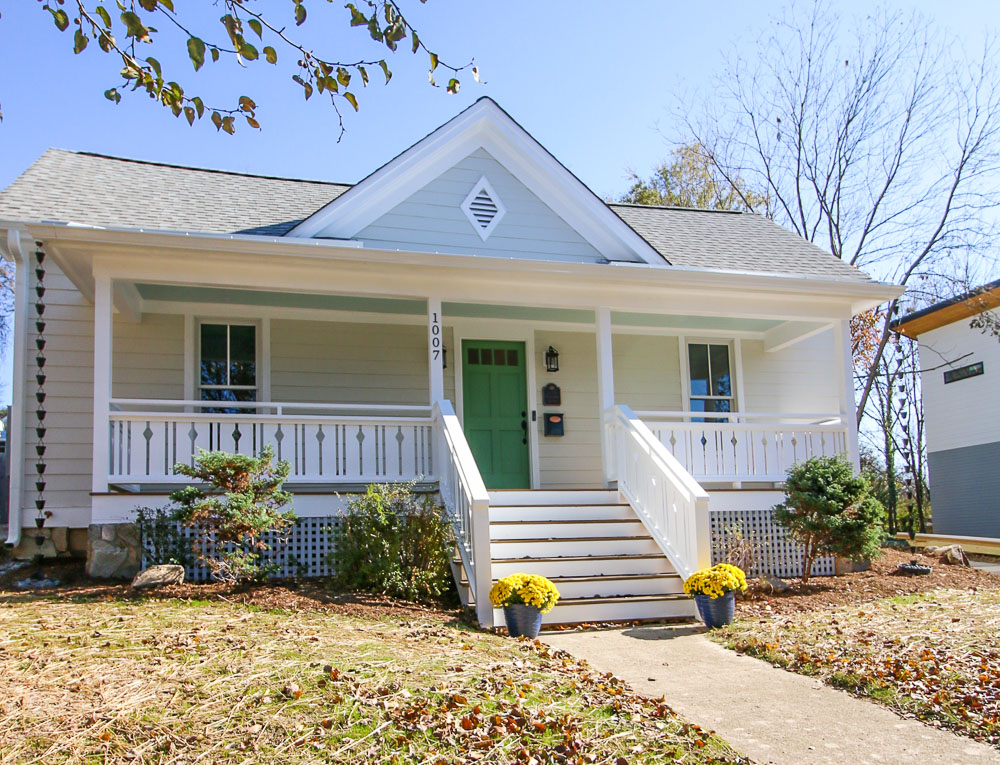
I can officially say Etta has been saved. Maintaining the same lines as the original 1900 house was very important to me. Wherever possible, I kept the original materials. When we had to replace old with new, I made decisions based on what looked closest to the original. I also tried to reuse materials whenever possible, like the old siding which found a new life on the side porch ceiling.

Stay tuned for more Saving Etta updates! There’s been a lot of work going on inside and I can’t wait to show you.

Front Yard Transformation

adirondack chairs around fire pit on old shed concrete pad

Saving Etta - Backyard Transformation

Saving Etta Update: The Backyard Transformation

This has to be one of the biggest transformations (besides the demolition and framing) at the Saving Etta project! The backyard was an unruly mess of vines, overgrown shrubs, and weeds. I resisted the urge to do any landscaping until all the crews were finished outside. No sense in spending any time on landscaping when it would get messed up by trucks, equipment, and foot traffic.

While construction was going on, the yard took a beating. One week the demolition guys were pulling the dump truck into the yard to fill up with the debris. The next week an excavator dug the crawlspace and hauled the rest of the dirt to the back of the lot. Then we used the yard as a staging area for building supplies. Plus it doubled as extra parking on days when we had more than one crew on site. Over time most of the grass was gone and I probably picked up 4,532 random nails and screws littered in the yard. Needless to say, it was a mess by the time exterior construction was done.

The Backyard Transformation

On a particularly beautiful fall weekend, Pretty Handsome Guy (aka my husband) and I decided to plan a family yard work day at the house. We’ve tried to involve our boys in as much of the process as possible. We agreed to pay them for their time after the house sells. This seems to have been the incentive it took to get two teen boys off their devices and out for a yard work day.

Although there was a lot to do, I felt confident we could knock out a big chunk of work, especially using the power tools my friends at STIHL sent me. When I approached STIHL about being a Saving Etta sponsor, I assured them we’d have plenty of landscaping and yard work to showcase their new battery-powered line of tools. To be completely honest, I was a little skeptical of the power behind battery-powered vs. gas-powered equipment. But after trying the tools, I was thrilled with their performance. These STIHL tools have quickly become my favorite yard tools for the Saving Etta project AND at my own home.

STIHL battery powered tools: mower, blower, hedge trimmer, and chainsaw

Before they were delivered I had the privilege to try a lot of the STIHL gas and battery tools at the STIHL headquarters in Virginia Beach.

brittany trying chain saw

Joining me were a bunch of other badass builders, like April from Wilker Dos and Sarah from Ugly Duckling House. It was invigorating hanging out with other like-minded women who have figured out how to build and DIY their homes one project at a time. (See, you can do it too!)

women of Stihl event

During the event, we got to try all the new STIHL power tools. The STIHL battery-powered yard tools were definitely a hit from the start. Most of the attendees found them less intimidating. Plus, the tools were lighter weight and easier to handle.

Three Series of STIHL tools to meet your yard work needs:

The AP Series is designed for professional landscapers and people that use the tools on a daily basis on a variety of different properties. The battery has a longer run time, but also weighs the most of all the STIHL batteries.

The AK series handles the yard work of a typical suburban homeowner. The batteries have a slightly shorter run time, but the battery isn’t as heavy (a good thing for those of us who don’t lift weights on a daily basis.)

The AI series is perfect for small yards and quick clean up tasks. The AI tools plug in to charge (no external batteries.) The trimmer, leaf blower, and hedge trimmer would work well for small yards or town homes. Because there is no external battery, they are the lightest weight of the battery tools STIHL offers. The trade off is battery life is shorter than the AK or AP series.

Here’s what I love about the STIHL battery-powered AK series yard equipment:

The tools STIHL sent me are all within the AK series, so I’ll share what I love about them specifically. All the AK tools use the same batteries. Which means you don’t have to store a bunch of random batteries for each tool (although the chainsaw and mower need the AK 20 or higher battery to run for any length of time.)

battery powered STIHL yard tools all run on same battery

Speaking of longevity, there are three different AK batteries (the AK10, AK20, and AK30), with the 10 having the shortest run time and the 30 the longest run times.

In contrast to the gas-powered tools, the AK battery-powered tools are much quieter. In particular, this appeals to me most when it comes to the leaf blowers. I happen to live in a neighborhood filled with big tree-filled lots. I wish all my neighbors had the BGA 56 battery-powered leaf blower, because my Saturday and Sunday mornings would be a lot more peaceful in the fall. The unmistakable high-pitched leaf blower whine is constant in our ‘hood come September – December (and sometimes well into springtime.)

Despite my dislike of noise, my biggest pet peeve about gas-powered lawn equipment is the odor that sticks to your clothes after doing yard work. Guess what! With battery-powered tools there is no gas or stinky fumes to make you smell bad! Plus, there’s no need to keep a plethora of gas cans around for the tools that require a different ratio of gas to oil (and I can’t ever remember which tool uses which ratio.) Personally, I’d love to get rid of all our gas cans in the garage. (Something about keeping a highly flammable liquid in a room attached to our house has always made me nervous.)

Did you know a battery-powered landscape tool can save you time? It’s true because you don’t need to winterize your battery-powered tools before the cold weather sets in.  And if you want to get technical, when your battery runs low, you can charge it while taking a quick little break. This saves time driving to the nearest gas station to fill up your gas can.

Finally, let’s talk about weight. No, not the holiday cookie weight I put on in December! The STIHL battery-powered tools weigh less than their gas-powered relatives. The mower was my personal favorite because it was so lightweight I could lift it into the truck by myself on days I needed to mow Etta’s front lawn. This was such a life saver since most of the time I was working solo at the house.

A little more about the STIHL AK tools I tried:

STIHL BGA 56 Battery-Powered Leaf Blower

  • STIHL BGA 56 Battery-Powered Leaf Blower: This is by far the lightest leaf blower I’ve tried (I’ve used two other brands, one was a gas-powered and one was another battery-powered leaf blower.) The gripping handle is in the perfect spot to automatically keep the blower balanced during use. This blower has plenty of power for moving leaves (both dry and wet.) One thing I noticed recently, is there is no vibration to tire your wrists (I can’t say that about our gas blower.) My teen sons love using this blower too, especially because it is lightweight. And as I mentioned before, the noise is definitely less than a gas-powered blower.

STIHL HSA 56 Battery-Powered Hedge Trimmer

  • STIHL HSA 56 Battery-Powered Hedge Trimmer: This trimmer packs quite a punch; in fact most of the skinny tree sprouts and thicker branches were easily cut by it. The HSA 56 made quick work of pruning and tackling the vines growing over the bushes. Noise and weight are both much less than a comparable gas hedge trimmer. And as I mentioned above, no gas, no mixing ratio, and easy to store for the winter!

STIHL MSA 120 C-BQ Battery-Powered Chain Saw

  • STIHL MSA 120 C-BQ Battery-Powered Chain Saw: We have a rule in our house that if a tree is too big for a small chainsaw, then we shouldn’t be cutting it down ourselves. The STIHL MSA 120 C-BQ Chain Saw is perfect for the homeowner who wants to take down some spindly trees or low branches. It has enough power to get through some small hardwood trees on our lot. I loved using the chainsaw to break down large limbs to a manageable length for curbside yard waste pick up. It also came in handy when the lumber delivery forklift couldn’t get past a low limb. 

STIHL RMA 460 Battery-Powered Mowe

  • STIHL RMA 460 Battery-Powered Mower: As I mentioned above, this is a surprisingly lightweight mower and yet it doesn’t disappoint when it came to mowing an overgrown jungle. After our summer vacation, I came back to knee high grass at the Saving Etta house. I wasn’t sure the mower would be able to handle it, but it cut through the grass with no problem. My husband has been cutting lawns since he was a teenager, so you can imagine the side-eyed look he gave me when I told him I thought he might like this battery-powered mower. One day I caught him trying it, and he told me he liked it. The one caveat is if you have a yard larger than about 1/3 of an acre, you may need a few extra batteries to replace when the first runs out. Of course it all depends on your lot size and mowing conditions. You might want to talk to your local dealer to find the mower that’s best for you. As a baseline, our lot is 1/2 an acre and mostly wooded, but we do have a fair amount of grass. The mower makes it through our lawn mowing on one AK30 battery charge. If we did run out, it’s not a big deal since we typically have one battery charging while the other is in use.

Although this post is sponsored by STIHL, I have to be totally honest when I tell you: We are in love with the STIHL battery-powered yard and lawn tools! If you were my neighbor, you’d see this to be true. We are frequently out in our yard using these pretty orange and white tools.

STIHL battery powered tools: mower, blower, hedge trimmer, and chainsaw

Now that you know a bit more about the STIHL tools I was using at the Saving Etta project (trying to SAVE the backyard); let me show you the transformation!

The Overgrown Mess of a Backyard:

Over the summer a healthy crop of weeds and brush took over most of the yard. After exterior construction was done, my husband and I loaded the boys into my truck and headed downtown. Luckily the weather was sunny and cool because it was a full day affair. Here’s the video of our work day:

By the end of the day we had cleared back at least 10 feet from each side of the yard and created three huge piles of yard waste.

piles of brush for yard waste

After removing the brush piles, the trailer, and leftover construction materials, we added some adirondack chairs and hung the porch swing I built using pallet wood. Isn’t this a peaceful scene? I could sit out on the swing for hours and take in the scenery.

fall colored trees in saving etta backyard

We staged the fire pit area on top of the old shed concrete pad. I decided to leave the pad should the homeowners want to build a shed in the future. Without a garage, a shed would be a good place to store additional yard equipment.

yellow adirondack chairs around fire pit

Or they might continue to enjoy it as a little patio and fire pit.

adirondack chairs around fire pit on old shed concrete pad

Hope you enjoy the rest of the before and after photos.

Before:

before backyard transformation with trailer and dirt hill

overgrown bushes back side of yard

After:

backyard after transformation view toward privacy fence

My favorite view of the backyard can be seen from the upstairs bedroom window.

two story side of house backyard transformed

It helps when the black Plygem Mira windows frame the view so nicely!

backyard view through windows

Before:

view from upstairs window before landscaping

After:

view from upstairs bedroom window of yard with tree swing and adirondack chairds

Before:

back of saving etta house before landscaping

After:

back deck transformation and landscaping

Adding a deck off the back of the house really extended the living area. I had always envisioned a little bistro set outside the master bedroom.

back deck outside master bedroom with blue chairs and landscaping

lovely photo of deck and low landscaping plants around deck

If I lived here I’d spend mornings sitting out there with a cup of coffee enjoying the view.

beauty shot of camellia bush and mums outside master bedroom

Before:

before backyard transformation

After:

after view of backyard with straw and pine straw

after view of landscaped saving etta yard

If you have a keen eye, you may have noticed all the big rocks in the landscaping.

pile of pier stones ready for reuse

These were the pier stones from under the original 1900 portion of the house. The mortar between them had crumbled to dust and some weren’t offering any stable support to the house. Instead of hauling them away, I decided to keep them to incorporate into the landscaping.

three pier stones from original house used as landscaping rocks

This one with the stripe on it is my favorite. If I lived here I’d have to give it a name, like “spot!”

new foundation bushes by back deck

Isn’t it amazing how much this yard has been transformed? It feels so private and secluded despite being within walking distance to downtown Raleigh.

view from back yard at saving etta house

A few weeks later, with the help of lots of rain in North Carolina, the grass blades started coming up!

grass growing in backyard at Saving Etta project
I hope you enjoyed seeing the backyard transformation. What do you think? Do you dream of a yard this big and beautiful?

I can’t thank the folks at STIHL enough for helping make this construction site into a dream yard. If you need to upgrade yard equipment (or buy your first yard tools), I highly recommend the STIHL battery-powered yard equipment. They are a joy to use and more environmentally friendly than gas-powered tools. You should check out the STIHL equipment at a retailer near you.

The Backyard Transformation

Disclosure: STIHL is a Saving Etta (and Pretty Handy Girl) sponsor. I was provided with STIHL tools and safety equipment to makeover the Saving Etta yard. In addition, I was provided with an expense paid trip to visit STIHL headquarters. I was not told what to write. All opinions and words are my own. I will always let you know if you are reading a sponsored post. 

Want to know the basics principles for landscaping? Read this article I wrote to learn how to give your yard a mini (or mega) makeover yourself:

Landscaping 101: Tools, Planting, and Adding Color to your Landscaping | Pretty Handy Girl

DIY Firepit and Seating | Pretty Handy Girl

46 Awesome DIY Projects for Outdoor Spaces Pinterest image

Awesome DIY Projects for Outdoor Spaces

One great way to enjoy more time outdoors is to make your outdoor spaces useful, attractive, and functional! Here are 46 Awesome DIY Projects for Outdoor Spaces that will help you to create a personalized oasis on your property. Some are so simple you’ll wonder why you didn’t think of them.


Diy living wall planter by pretty handy girl
Make a beautiful Living Wall Planter on a fence or porch wall.


How to Build Rot Resistant Raised Planter Bed
Rot-Resistant Raised Planter Beds are a great way to get your garden started!


How to Build a Scalloped Planter Box Centerpiece

A Scalloped Planter Box Centerpiece would be a beautiful addition to a patio table.


Outdoor Planter From an Ice Bucket

Make your own Planter from an Ice Bucket to display beautiful flowers on your porch.


DIY Patio Umbrella Utensil Station

 This Utensil Holder for patio umbrella is a great addition when hosting a party!


DIY mini PlantersThese Mini Planters would work on any table or small outdoor shelf.


How to Build a Beer GardenMake an Outdoor Beer Garden to add some fun to your next party!


How to Build a Wood Storage Shed

Build a Wood Storage Shed and enjoy s’mores around your fire pit without looking for more wood.


DIY Marble Toss Game

This Marble Toss Game would entertain the kids during your next outdoor party!


Dressing up a Patio Table
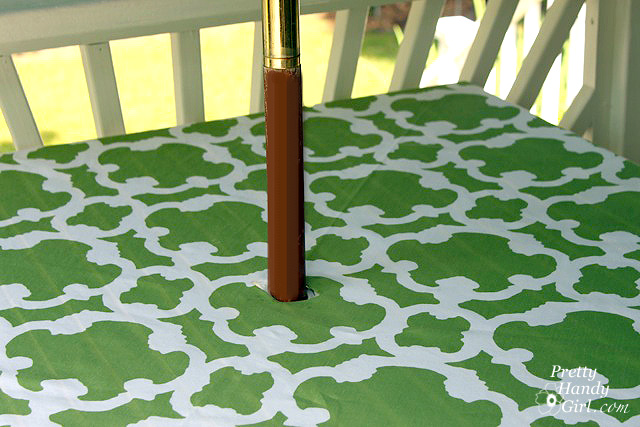
Dress Up a Patio Table for your next brunch.


Turning a Bed Frame into a Patio Bench

Turn a Bed Frame into a Patio Bench and curl up with a good book outside.


DIY Firepit and Seating

Create an amazing Firepit and Outdoor Seating space to entertain all year long.


DIY Fence Trellis

A Fence Trellis is a gorgeous way to turn those climbing plants into art.


DIY Giant Mandala Tattoo for Deck

This Giant Mandala Tattoo is a unique way to beautify your deck.


How to Build Adirondack Chairs from Scratch

Use these Adirondack Chair Plans for more outdoor seating.


DIY Gravel Patio

Install a Gravel Patio for a great seating spot!.


Build a Porch Swing with Pallet Wood

This Porch Swing from Pallet Wood is a perfect spot to enjoy the beauty of every season.


Install Concrete Paver Edging

Install Concrete Paver Edging around your flower beds.


Create Living Wall Lattice Privacy Screen

A Living Wall Lattice Privacy Screen provides beauty and some privacy from your neighbors.


How to build a Raised Garden with Cucumber Trellis

Build Garden Bed with Cucumber Trellis to keep your plants healthy and productive.


Air Conditioner Screen from Pallets

An Air Conditioner Screen from Pallets will hide that hideous—but oh so necessary—appliance.


How to Install Low Voltage Landscape lights

Learn how to Install Low Voltage Landscape Lights along your walks for nighttime lighting.


How to Install your own Sprinkler System

A DIY Sprinkler System can keep your landscaping thriving.


DIY Washer Toss Game

This Washer Toss Game would be fun at your next barbecue!


Little Red Wagon Planter

A Little Red Wagon Planter is a cute feature in any garden.


How to Tile a Small TABLETOP

Tile a Small Tabletop to add a pretty table to your patio.


Painting Metal Patio Chairs

Re-Painting Metal Patio Chairs handles rust and keeps them fresh and new.


No Sew Patio Tablecloth with Umbrella Hole

A No Sew Tablecloth for Table with Umbrella will come in handy every night of the week.


Scrap Wood Planter Box

Scrap Wood Planter Boxes are quick and easy projects to make for your flowers.


Repurpose Vintage Milk Jug into Side Tables

Repurpose Vintage Milk Jugs into Side Table for a farmhouse addition to your porch.


Tips to Create Knock Out Container Gardens | Pretty Handy Girl

Tips for Creating Knock Out Container Gardens will come in very handy this year.


DIY Yard Dice

Make DIY Yard Dice and have fun rolling them with the kids.

MORE DIY projects for outdoor spaces

How to Build a Solid Gate

Learn How to Build a Rock Solid Gate and keep the dogs in or people out.


Tall Cedar Planter by Jaime Costiglio

Make some DIY Tall Fence Planters for just $10 each, they’ll look modern and sleek in your landscaping!


How to Fix Window and Door Screens

Knowing How to Fix Window and Door Screens will save you lots of money.


Inspiration for Backyard Landscaping

Check out this post for Inspiration for Backyard Landscaping this year.


DIY Large Farmhouse Planter by PinSpiredto DIY

Create a gorgeous Large Farmhouse Style Planter  for your back deck.


Make a Grown Up Swing Set

Kids grown up? Make a Grown Up Swing Set and have more fun than the kids.


Marimekko Decorative Tin Can Planters by Pillar Box Blue

Add some gorgeous color to your patio by making these Easy Upcycled Marimekko Tin Can Planters.


Build a pergola with Trellis Screens

Build a Pergola with Trellis Screens to hide your trash cans and add beauty to your walkway.


Easy Solar Light Stand DIY

Easy Solar Light Stands creates an inviting spot and they will keep those solar lights from falling over.


DIY Rolling Plant Caddy Tutorial

Build a Rolling Plant Caddy so you don’t have to lift your heavy planters.


DIY Recover Outdoor Pillows

Save money by learning how to Recover Outdoor Pillows and add some comfort to your outdoor space.


DIY Concrete Wood Planter

A DIY Concrete and Wood Planter is a modern and sleek way to hold succulents for your porch or deck.


DIY Outdoor Dining Bench

This Indoor/Outdoor Dining Bench is perfect for some quick and easy seating.


DIY Hose Hiding Planter by Jaime Costiglio

Make a DIY Hose Hiding Planter to keep your landscaping looking sharp.

I hope you loved this roundup of DIY Projects for Outdoor Spaces! Which was your favorite? Share in the comments!

Pin the image below for reference and show all your friends these great ideas!

46 Awesome DIY Projects for Outdoor Spaces Pinterest image

If you liked this list of outdoor ideas, you’ll love these beautiful Dreamy Screen Porches:

DIY Screen Porch Makeovers

cut off old hose end

how to fix a leaky garden hose
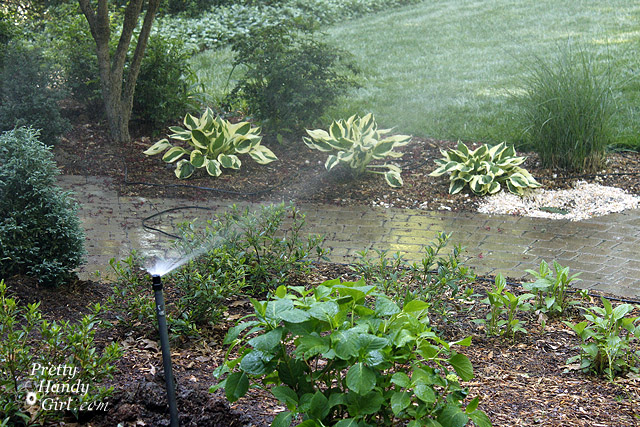
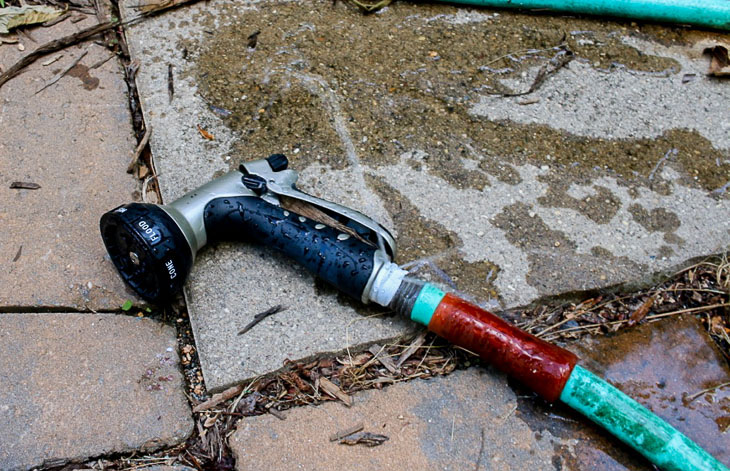
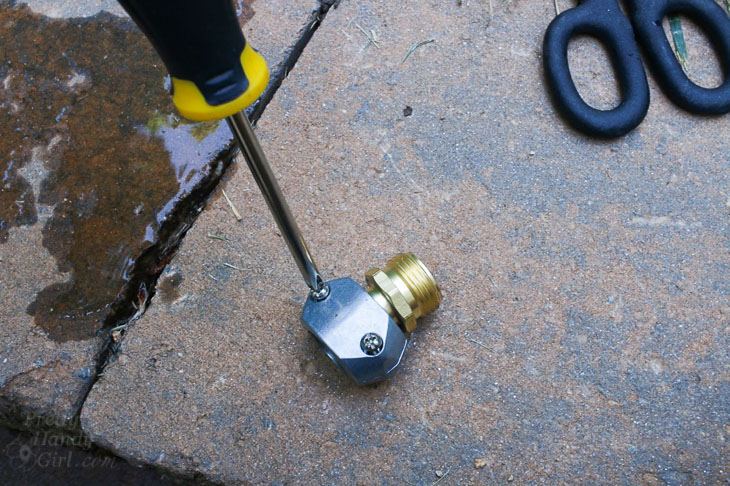
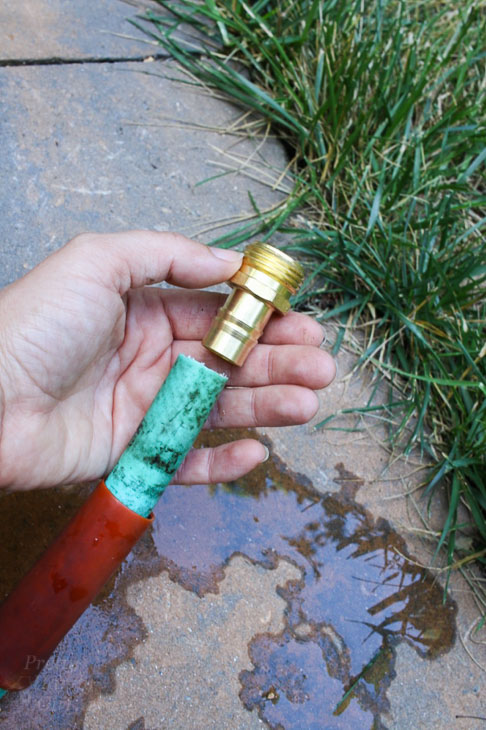
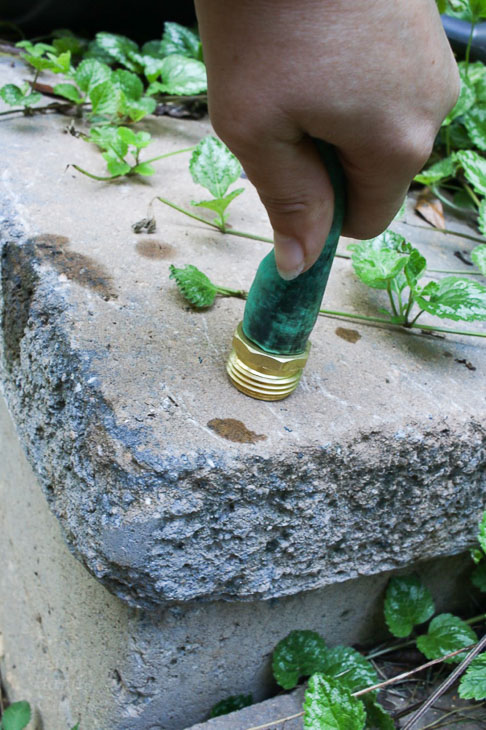
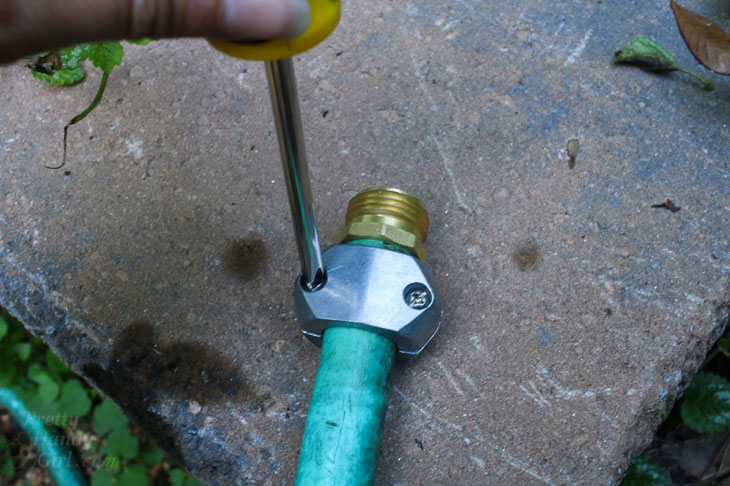
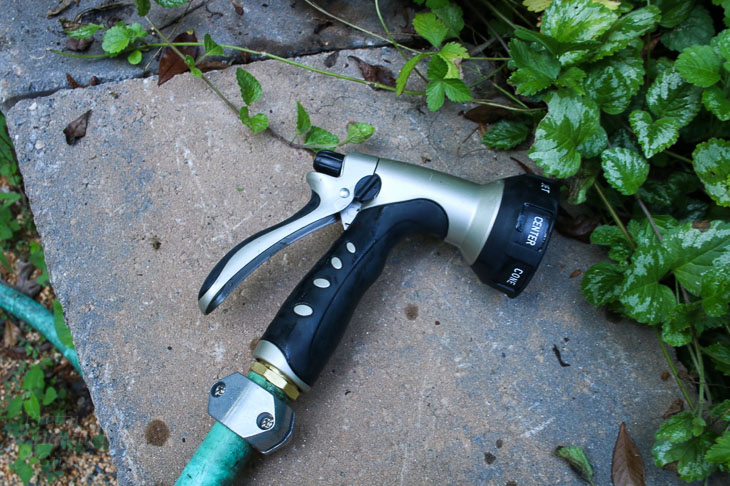
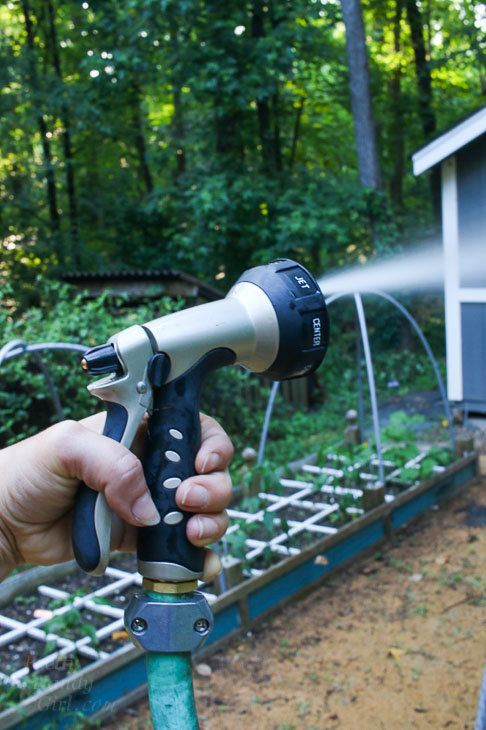
How to Easily Fix a Leaky Hose

A garden hose is a valuable tool around my yard in the summertime. It’s vital to keep my yard looking beautiful, keeping plants watered, and occasionally for a fun water fight with my kids. But what happens when that very useful hose springs a leak? Not only is it frustrating to use but it is a complete waste of water (not to mention that you get wetter than the person you intend to soak in a water fight.) It may be tempting to throw it out and buy a new one, but did you know it’s fairly simple to fix a leaky garden hose? It is! I have the solution for you in this tutorial on How to Fix a Leaky Hose!

Ready to save money and water? Great! Let’s get to it!

Materials:

(I’ve included affiliate links for your convenience. I earn a small percentage from a purchase using these links. There is no additional cost to you. You can read more about affiliate links here.)

Instructions:

The first step is to cut off the leaky end of the hose using your heavy duty snips. Be sure to cut perpendicular to the hose.

Remove the two screws from the hose repair coupling clamp using your screwdriver.

Insert the threaded coupling piece into the cut end of your hose.

Have patience, this can be the hardest step. Push it down against a hard surface until the coupling is completely inserted into the hose.

Next, take the two parts of the clamp and put one piece behind the hose, as pictured. Hold it in place while you add the second clamp piece. Line up the screws with the holes on the back piece.

Tighten the screws. It may be easier to set it on a hard surface, as shown here.

Now connect your sprayer to the end and give it a test try!

Hooray! No more leaky hoses. Now where are those crazy boys of mine? Time to start a water fight on this hot summer day. ;-D

This was a simple fix to a frustrating problem and it only cost a few dollars. Definitely worth it! I hope you liked this tutorial and it comes in handy should you need it. Do you have a leaky hose you need to fix? Or have you repaired a leaky hose with this method?

If you liked this post, you’ll love:

How to Install Sprinkler System

How to Install a Sprinkler System


Tips to Create Knock Out Container Gardens | Pretty Handy Girl

Tips to Creating Knockout Container Gardens

Installing Concrete Paver Edging

Installing Concrete Paver Edging

Have you ever wanted to learn about Installing Concrete Paver Edging?

Edging can be a beautiful and decorative addition to your landscaping. It can delineate two different landscape materials, but can also prevent lighter weight materials (like mulch and fine gravel) from washing out during rain storms. Ultimately landscape edging is one element that easily adds value and a professional touch in your yard. Hello, it’s Diane + Dean back again to share how to install concrete paver edging around an area in your backyard.

There are many types of edging you can chose from. Landscape edging is available in many materials: plastic, steel, poured concrete, stone, and wood. It’s up to you to choose materials that will fit with your landscape style. But, today we’ll be showing you how to install concrete paver edging, which is beautiful, long lasting, and can be a very affordable choice for edging around your flower beds or garden. Ready to learn how to install your own concrete paver edging? You can definitely do this!

Installing Concrete Paver Edging Materials:

(I’ve included affiliate links for your convenience. I earn a small percentage from a purchase using these links. There is no additional cost to you. You can read more about affiliate links here.)

Installing Concrete Paver Edging Instructions:

Installing Concrete Paver Edging

In the above photo we used plastic edging at first. We installed it while building out this gravel pathway but it wasn’t performing the way we had hoped for in this particular area. Anytime we had a lot of rain, the gravel would wash over the plastic. We decided to scrap the plastic edging and use some extra concrete pavers to provide more stability between the two areas.

Step 1: Use a shovel or use your hands to dig out an area slightly wider than the pavers. Dig down about an inch so the pavers will be slightly raised above the ground level.

Installing Concrete Paver Edging

Step 2: Level the dirt (base) so that the pavers will be level when laid next to each other. (You may need to remove any leaves or fallen tree debris to achieve a nice level surface.

Installing Concrete Paver Edging

Step 3: Starting at one end, begin laying your pavers next to each other.

Installing Concrete Paver Edging

Work one paver at a time, adjusting the soil underneath to level it with the adjacent stones.

Installing Concrete Paver Edging

Step 4: Using the rubber mallet, strike the end of each paver to secure it as tightly as possible to the previously laid one. To help achieve a level paver line, you may use the mallet to pound the top of the pavers as well.

Installing Concrete Paver Edging

Step 5: When you arrive at a curve in your design, create a gradual bend. Make sure the corners of the pavers meet at one point. You may have to re-position the pavers a few times to get it to fit just right!

Installing Concrete Paver Edging

Tips for working with curves:

  • Equal the spacing between pavers, so that the gap is similar for each paver. Instead of a large gap between two pavers, spread the gap over multiple pavers (5 or 6) so it isn’t as drastic a turn.
  • Use a garden hose or string to lay out curves, but you can also use spray marking chalk to help with the layout. Draw a curve on the ground using the marking paint and step back to take a look. If you don’t like it or want to fix specific areas on the curve, scratch the paint off with your foot and re-draw your line.
  • Check your work as you go along! Step back, take a deep breath and see if you need to make adjustments. Don’t try to conquer Rome in a single pass! We have found that by stepping back to look at the projects as you go is a great way to make adjustments instead of having to go back when you think everything is done. It is also a great way to appreciate the work you have completed so far and gain a greater sense of accomplishment.

Installing Concrete Paver Edging

Step 6: Fill in the gaps with landscape gravel if creating a pathway.

Installing Concrete Paver Edging

Where the pavers do not meet completely, fill in with small landscape gravel to give a cohesive look.

Installing Concrete Paver Edging

Fill your second area with a contrasting material (like mulch, pine straw, soil, grass or other natural elements.

Installing Concrete Paver Edging

If you liked this post on concrete paver edging you may also want to see how we built a concrete paver walkway.


Installing Concrete Paver Edging

Want more landscaping ideas? See how to add a mulch and stone path in a few hours:

How to Create an Inexpensive Stone & Mulch Walkway

Or learn the basics of landscaping your yard:

Landscaping 101: Tools, Planting, and Adding Color to your Landscaping | Pretty Handy Girl


Pin for later!

Installing Concrete Paver Edging | Pretty Handy Girl