WORX JawSaw Review | PrettyHandyGirl

WORX JawSaw Review | PrettyHandyGirlWORX JawSaw Review | PrettyHandyGirl

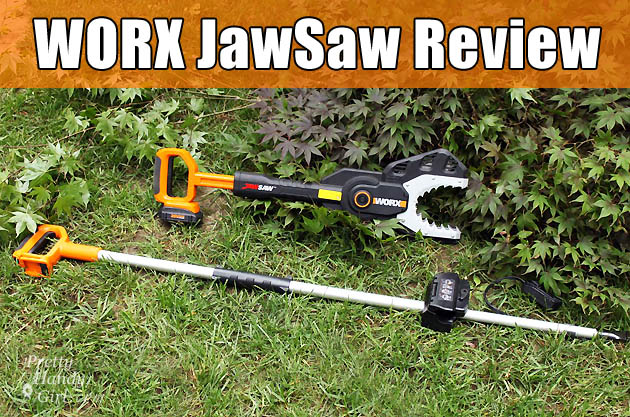
A few months ago WORX sent me their WORX Lithium Cordless Chainsaw with Extension Pole for a product review. Our property is very wooded and we have so many trees that I’ve lost count. I do know that they need pruning and maintaining on a regular basis (at least every six months.) I knew our yard was a good test environment that would put the JawSaw through a rigorous test on our hardwoods and ornamental trees.

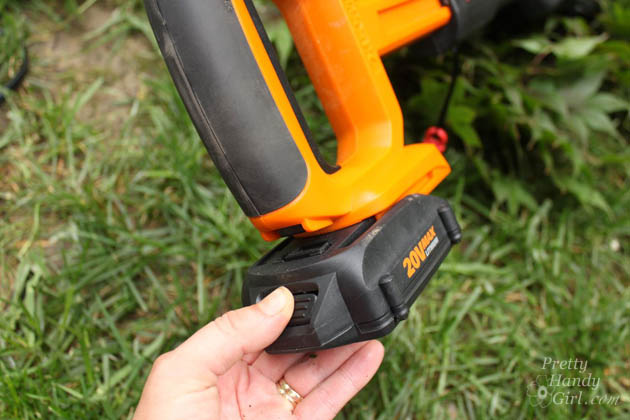
Recently one of our smaller trees died and needed to be removed. I charged up the JawSaw battery and snapped it in place after it was fully charged.

WORX JawSaw Review | PrettyHandyGirl

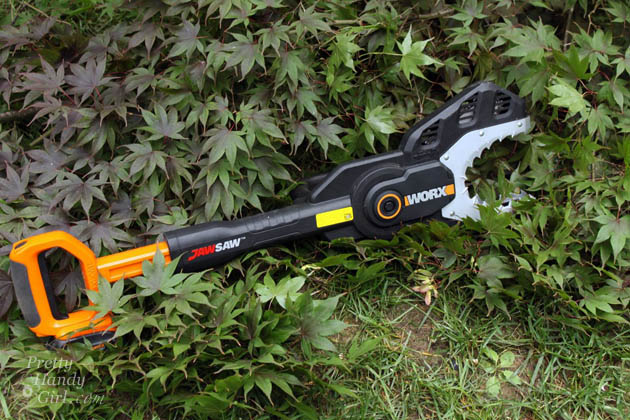
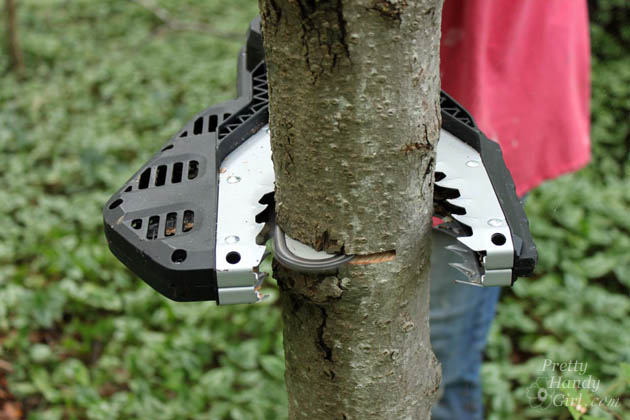
As is always the case, as I got closer, that little tree didn’t look so small. I honestly doubted I’d be able to use the JawSaw for this task. But, I was pleasantly surprised when the jaws fit around the trunk.

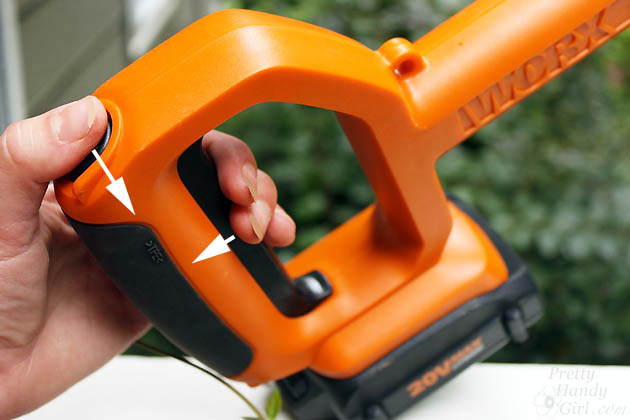
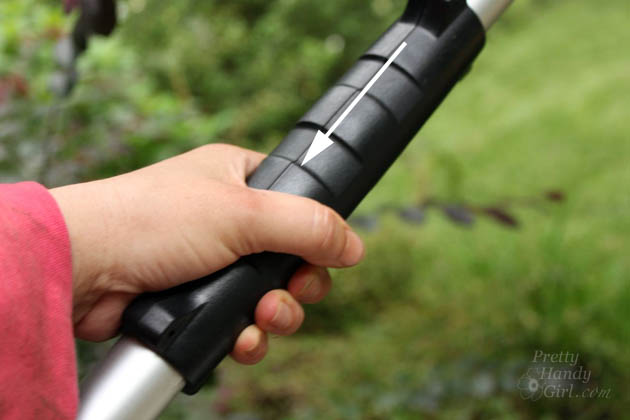
To work the JawSaw, you have to push the button with your thumb and pull the trigger at the same time. To start the saw moving, you push the handle in towards the shaft.

WORX JawSaw Review | PrettyHandyGirl

The blade easily cut through the tree trunk. And within about fifteen minutes I was able to cut the tree down and cut it into manageable pieces.

WORX JawSaw Review | PrettyHandyGirl

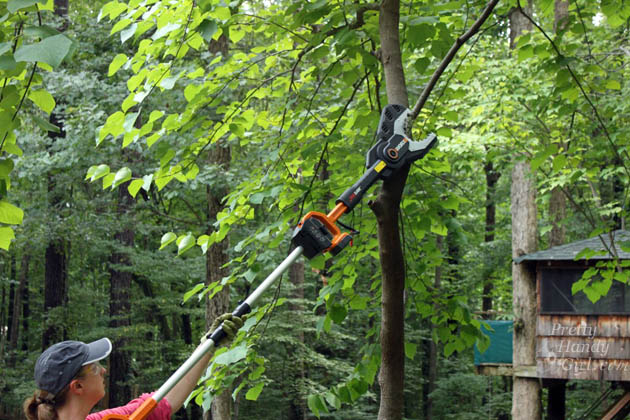
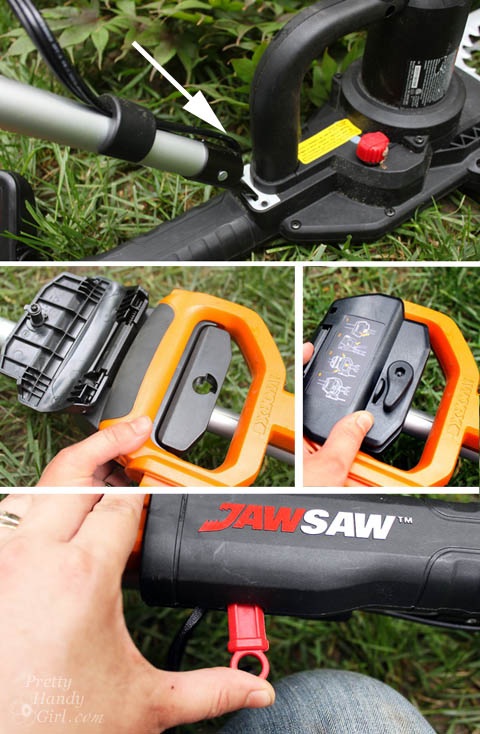
Next I added the pole attachment to trim branches up to 12 feet high. The pole slides into the slot near the black handle. The handle snaps into the handle clamp on the pole. The JawSaw handle needs to be pressed into the shaft and the red bar is inserted into the bottom to lock it in place.  The power pack slides into the battery slot on the JawSaw. The battery pack is then inserted below the handle on the extension pole.

WORX JawSaw Review | PrettyHandyGirl

The pole extension has a 12 foot reach, but you will need to position one hand on the black shaft to operate the JawSaw.

WORX JawSaw Review | PrettyHandyGirl

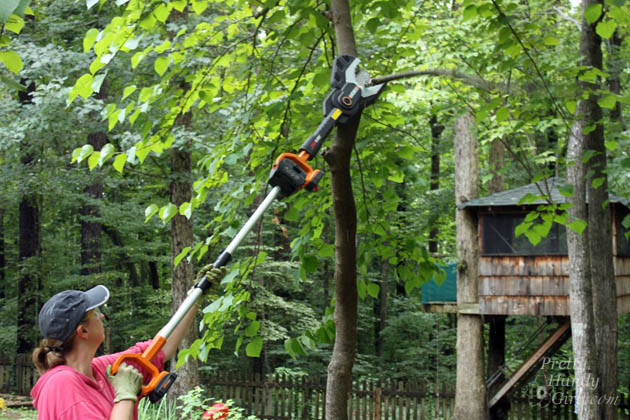
After positioning the JawSaw “jaws” around the branch…

WORX JawSaw Review | PrettyHandyGirl

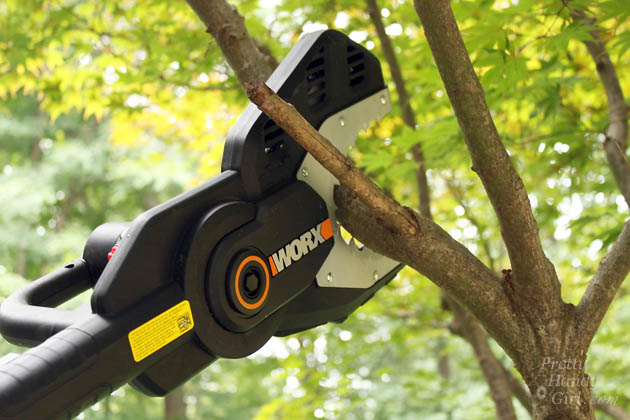
…pull back on the black shaft to set the blade in motion.

WORX JawSaw Review | PrettyHandyGirl

The JawSaw does all the work for you while you remain safely on the ground. I also like the JawSaw because it gives the user a safe distance from the blade. With a regular chainsaw kickback is always a concern.

Logs and branches can be cut directly on the ground because the “jaws” blade guard holds the blade just above the ground. You can’t do that safely with a regular chainsaw.

WORX JawSaw Review | PrettyHandyGirl

The only negatives about the JawSaw is that you will need to have a battery charged ahead of time (but I much prefer the cordless vs. a corded yard tool.) And you are limited to a 4 inch cutting diameter.

Using the JawSaw on the extension pole is a bit awkward, but I don’t have the strongest arm strength. However, once the jaws are around the branch you don’t have to support the saw the entire time.

WORX JawSaw Review | PrettyHandyGirl

Overall, this is one yard tool that I’m happy to have in our tool shed. It is invaluable for safely removing limbs and cutting up small trees. I highly recommend the WORX Lithium Cordless Chainsaw with Extension Pole for tree trimming and small tree removal over a chainsaw.

PHGFancySign


Disclosure: This is a product review for the WORX JawSaw Cordless Chainsaw. I was provided with the tool at not cost to me. However, I was not swayed to write a positive review or write anything at all. This is NOT a sponsored post. As always I am very particular about the brands and products I choose to showcase on this blog.  

Flying Yellow Jacket | Pretty Handy Girl

Honeybee vs. Yellow Jacket | Pretty Handy Girl

Summertime is here and I can’t keep shoes on the kids…

Honeybee vs. Yellow Jacket | Pretty Handy Girl

…or clothes for that matter.

Honeybee vs. Yellow Jacket | Pretty Handy Girl

I think my kids inherited it from me. I have fond memories of running around our backyard as a child barely clothed. I also have a not so fond memory of stumbling upon a yellow jacket nest. I ran until my little legs gave out and I hit the ground face first as those little devils stung my backside several times. Nothing puts a damper on summer fun like a bunch of yellow jacket stings on your hiney. Two years ago, my oldest son had the unfortunate experience of stumbling upon a nest in our yard. If I could have taken the stings for him, I would have. Lucky for us, he didn’t experience an allergic reaction on top of the stings. But, allergic or not, yellow jackets are not welcome in my yard!

That summer that I got stung, I learned to tell the difference between yellow jackets and honeybees. Do you know how to tell the difference? It’s important to stop and take a moment to identify which you are dealing with. Did you know that honeybees and yellow jackets are very different in appearance? Once you know what to look for, you can easily identify them: Read more

3 Step Wagon Planter Tutorial | Pretty Handy Girl

3 Step Wagon Planter Tutorial | Pretty Handy Girl

Container gardening is easy and great for instant color gratification. But, it’s especially fun to find “unconventional” objects to use as a planter. You may have noticed my little red wagon planter in the Landscaping 101 post. My 3 Step Little Red Wagon Planter is sure to bring color to your landscaping while also providing some fun and whimsy. Plus, it’s easily rolled to a new spot if you want to change your view. But, the best part is, you can make this planter in 3 steps!

Materials:

  • Drill
  • Large drill bit
  • Little wagon or other container
  • Rocks
  • Soil
  • Plants
  • Hand trowel

Instructions: Read more

Jaime here from That’s My Letter to share an easy project that will make your landscaping look clean and neat. Today we are going to talk about how to install landscape bed black edging.

edging3-1

We just moved into a new home with tons of landscaping, it’s full and lush and mature AND lacks definition from the grassy yard.

edging 6

With help from the folks at True Temper® I installed landscape edging using the round point shovel and black plastic edging to create that defining line between grass and plantings: Read more

How to grow Happy Tomatoes

How-to-grow-incredible-tomatoes

Last spring we completed my raised bed stack stone garden.  It served as an incredible place for me to try my hand at growing vegetables.  I planted green peppers, strawberries, onions, basil, oregano, jalapeños, and 9 tomato plants. Yup, you read that right N-I-N-E tomato plants in three different varieties.  To be fair, most of the plants looked very sad and I really thought half of them would die.  Much to my surprise they not only lived but they thrived to insane proportions and produced over 2 bushel, which is equivalent to over 100 lbs of tomatoes.  That’s a whole lot more than I expected!  I was knee deep in tomatoes and quickly taught myself how to can tomato sauce.

Last year I chose to stake the tomatoes using 5′ plastic garden stakes and garden support tape.  It worked great for a little while but when the tomatoes got to a certain size, the stakes started to bend from the weight of the plants.

This year I am doing things differently to make sure my plants get the full support they need for their growing bodies ;-).

Planting and Staking Your Tomatoes Read more