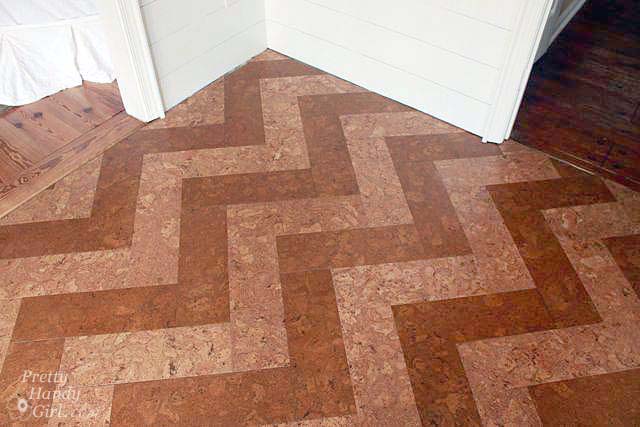
One of the best decisions I made in our kitchen renovation was adding cork tile flooring. I was exuberant when Globus Cork agreed to work with me on my kitchen renovation! Now that they are installed, I am in total love with the cork flooring. It is warm, water resistant, cushy under foot, attractive, and best of all the two tone tiles help tie the different wood floors in our home together.
The light pine flooring in the living room matches nicely with the lighter natural floor tiles. And the darker golden oak color tiles match our darker heart pine floors in the rest of our home. It’s as if the differing wood floors in our home are woven together in the kitchen.
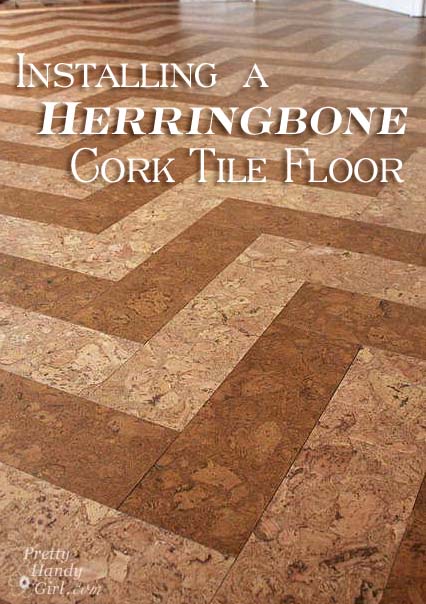
The installation of the cork tiles was fairly easy (if you are precise). The prep work was a bit tedious, but worth the effort. Read more
One of the biggest decisions I had to make on our kitchen renovation was what flooring to install. We have always had linoleum flooring and I was happy with it. But, when I was shopping for new linoleum I couldn’t find a pattern or flooring that I really loved. One of the things I was looking for was a flooring that had a matte finish. And I wanted it to have enough pattern that it wouldn’t show dirt easily.
Because of our water issues, I completely nixed the idea of wood flooring. Especially because we have two different colored wood floors in adjoining rooms. So, picking one color would always make the “odd floor out” feel disjointed.
I also didn’t want porcelain or stone tile flooring because I don’t like how cold it gets (which is why I installed radiant heat under our mudroom tiles.) And I didn’t want our dishes to shatter every time the boys dropped one (which happens a lot in our house.)
At one point I was considering installing groutable vinyl tiles. I loved the look and thought it would have the warmth and comfort of vinyl but the look of tile. But, then I read this article by Mike Holmes, he explained why he didn’t recommend groutable vinyl tiles. Apparently, there is a tendency for the grout to crack over time. At this point, I was really feeling stressed about flooring and was considering just picking a linoleum that I liked (but didn’t love.) Then I saw this:
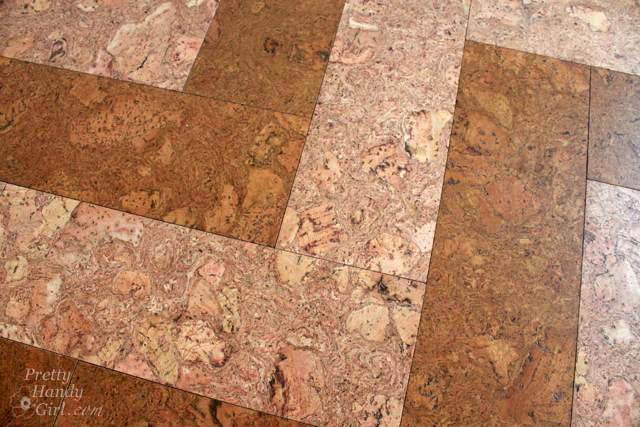
Those are cork tiles! They have the look of wood, and the comfort of linoleum. And as a bonus, they are eco-friendly! Cork is harvested from the trees every 9 years. The tree is not cut down or harmed. The bark is simply cut off. And the tree regenerates new bark. Within 9 years that tree will be ready to be harvested again. This process can continue for hundreds of years without killing the tree. Did you know that most of the cork trees are in Portugal? And the cork forests provide habitat for many endangered species? You can learn more by watching this video:
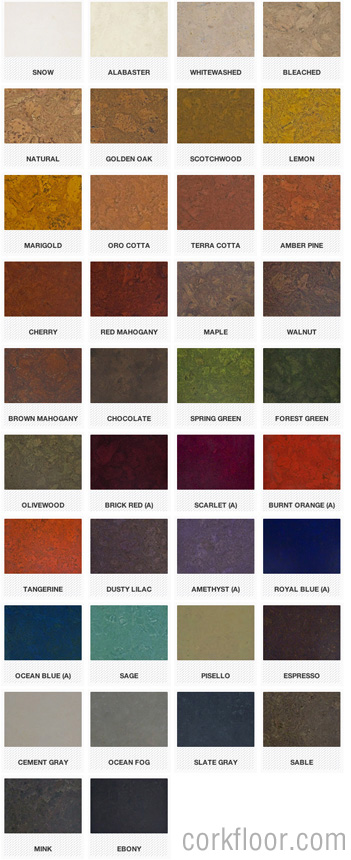
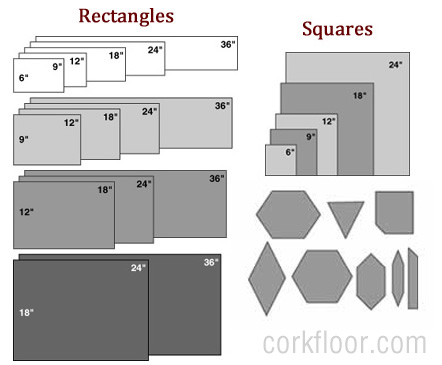
There are many manufacturers of cork flooring. But, I was drawn to Globus Cork (and ultimately partnered with them) because of the variety of tiles they sell. Not only do they have 38 colors to choose from…
…but they can produce custom colors as well! Oh the possibilities.
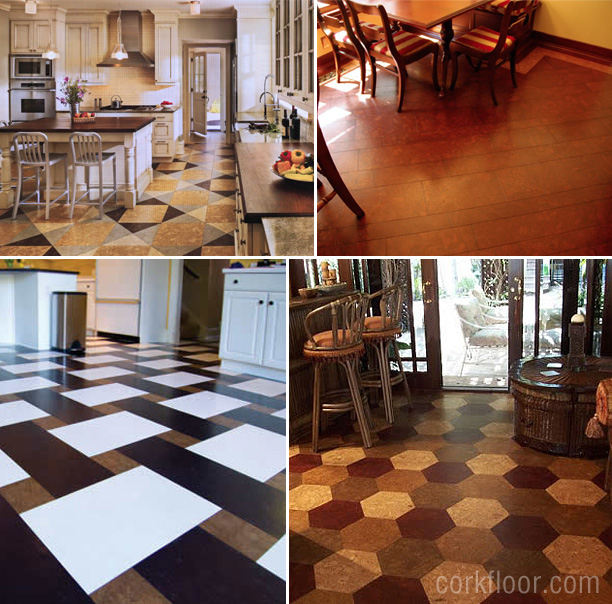
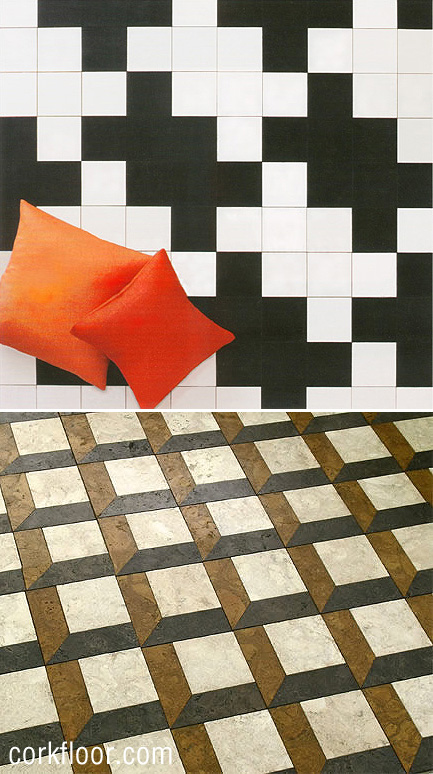
I browsed through some of their installed flooring photos and was instantly in love with the idea of cork flooring. I found a few kitchen examples you might find inspiring:
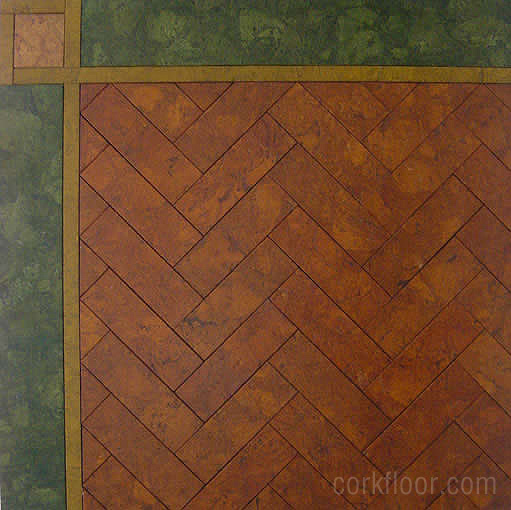
For the more modern and daring homeowner, how about these:
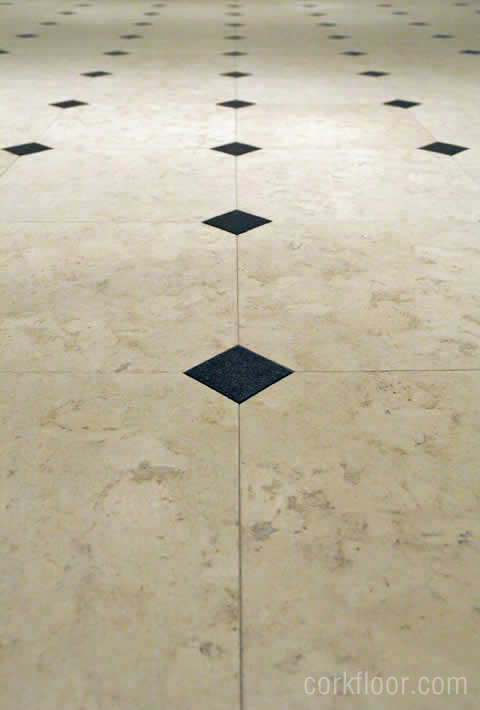
If you prefer classic patterns, you’ll appreciate these:
In the process of researching flooring for the kitchen, I read through several forums online about cork floors and pets. The consensus seemed to be that if you have an animal that likes to dig and scratch, you might want to steer clear of cork flooring. We never had any problems with Buddy, so I figured we were safe.
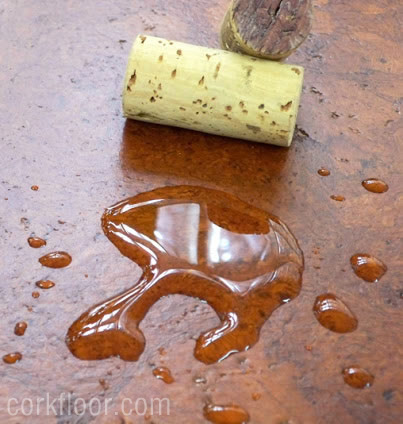
Another concern that several people asked about was if cork floors were water resistant and stain resistant. Cork is naturally water resistant which is why they are used as wine stoppers. And the Globus Cork tiles come pre-sealed, but they sell a sealer to add a final coating after the installation.
Disclosure: After lots of research, I selected Globus Cork because I liked their products and their customer service. I approached them about working with me on my kitchen renovation. They agreed to partner with me. I received complimentary products, but I was not told what to write or share. Please know that I am very selective about which companies and products I chose to work with.
https://prettyhandygirl.com/wp-content/uploads/2013/04/water_beaded_on_cork_tiles.jpg424403Brittany Baileyhttps://prettyhandygirl.com/wp-content/uploads/2021/07/PHG-logo-tagline-2020-1030x211-R.jpgBrittany Bailey2013-04-15 07:00:312021-09-14 10:35:28Kitchen Floors {How I Decided to Use Cork Tiles}
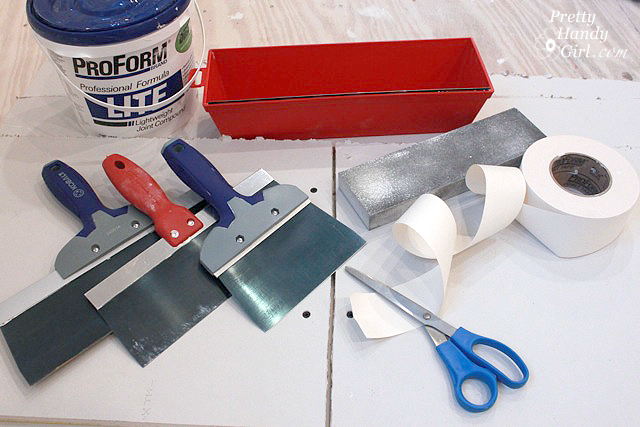
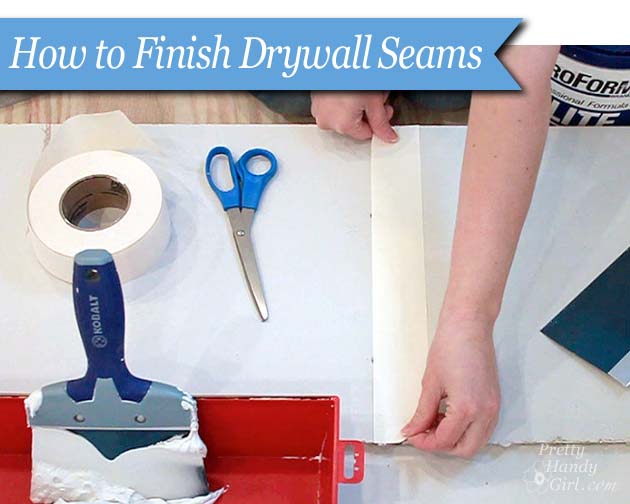
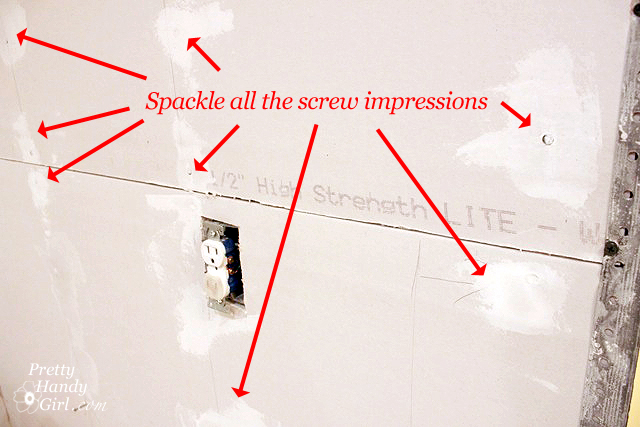
Finishing drywall seams has been compared to frosting a cake. But, as anyone knows, the first time you frost a cake, it doesn’t usually come out Cake Boss worthy. I figured it would be helpful if I gave you a few tips and tricks to get you on the fast track to learning how to finish a sheetrock joint like a pro.
As you might remember, we had to tear down our kitchen walls after we found termite damage inside. In all honesty, although it was a set back, I am really glad that we discovered it before we finished the kitchen.
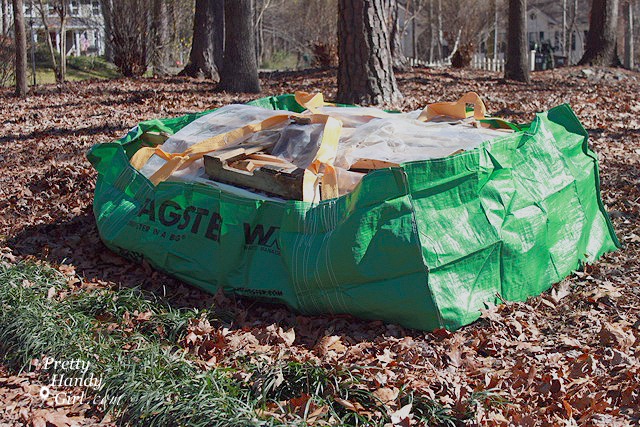
I’m also thankful that Waste Management offered to set me up with one of those low profile Bagster® Bags. It was spacious enough to hold ALL of our construction debris.
I seriously think a little boy lives inside me because I could watch this all day.
Use a small taping knife and spread just enough joint compound to fill in the hole impression. Scrape off any excess.
To show you the proper technique for finishing those seams, I made a short video (if you can’t view the video below, click here.)
I hope that helped you learn how to finish drywall seams like a pro! Just remember, it might take a little practice, but you’ll get the hang of it quickly. 😉
Have a great weekend!
Disclosure: This is a sponsored post.Waste Management partnered with bloggers such as me to participate in its The Bagster® Bag Blogger Challenge. As part of this program, I received compensation to cover the cost of the Bagster bag and pick-up as well as my time. They did not tell me what to purchase or what to say about the products used for the The Bagster® Bag Blogger Challenge. Waste Management believes that consumers and bloggers are free to form their own opinions and share them in their own words. Waste Management’s policies align with WOMMA Ethics Code, FTC guidelines and social media engagement recommendations. A winner will be chosen by random and voucher fulfillment will be handled by a third party.
The winners of the D. Lawless Hardware giveaway are:
Mary Glidden & Lora Wikle!
Congratulations gals, I hope you have an easier time deciding on what you’ll purchase with your gift certificate.
For the rest of you, Mr. Lawless himself has been kind enough to give y’all a discount code you can use to get 10% off your order! Simply use “prettyhandy” in the coupon code field at checkout. Visit DLawlessHardware.com to see all the beautiful hardware they sell.
Thank you so much for helping me decide which cabinet hardware I wanted for my kitchen. I appreciate each one of your suggestions and votes. I think I chose the ones that received the majority of the votes, but honestly it was more helpful to read your responses and realize that I either agreed or disagreed. It’s like when you go to a restaurant and you ask the waiter which of two meals he would recommend. And when he answers mac & cheese and you suddenly feel let down because you really wanted the hamburger. Yup, it was kind of like that situation.
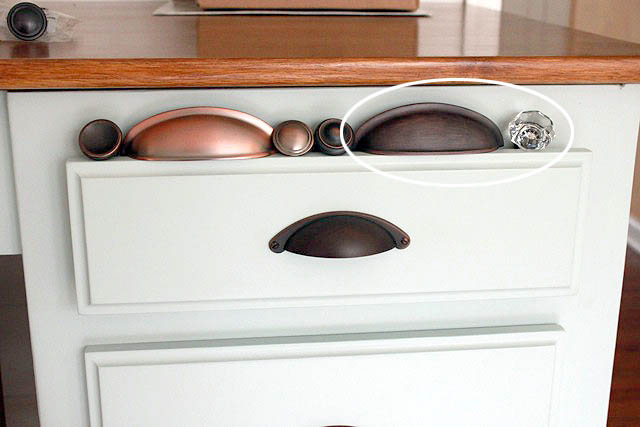
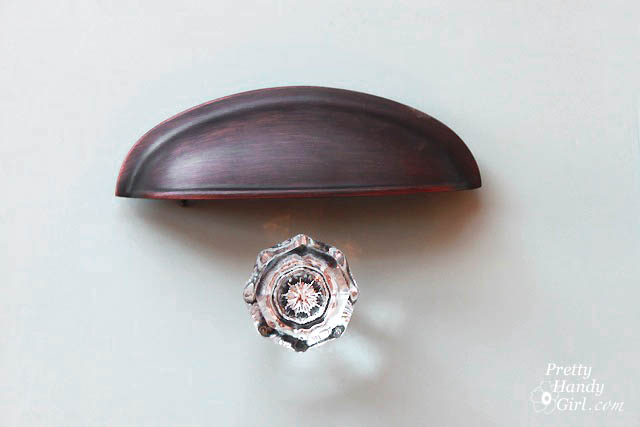
And…the hardware I chose is:
If you can’t tell from the photo, I chose choice E! I really liked the little screw head pulls, but ultimately I liked the feel of the larger bronze pull in my hand. And you knew I couldn’t resist the bling! It will be glass octagonal knobs for this girl.
I’m also very honored that D.Lawless has agreed to work with me and supply the hardware for my kitchen. It was really nice of them, but I want you to know that I approached D.Lawless Hardware because they are all about quality, service and price. I’d recommend D.Lawless Hardware to my friends (which means all of you.)
Have a great rest of your week! I’ll be crawling around on all fours installing flooring in our kitchen if you are looking for me.
Disclosure: I will be receiving hardware for my kitchen cabinets in exchange for posting about D.Lawless hardware. I was not influenced or told what to write about D.Lawless.
https://prettyhandygirl.com/wp-content/uploads/2013/03/chosen_drawer_pulls.jpg427640Brittany Baileyhttps://prettyhandygirl.com/wp-content/uploads/2021/07/PHG-logo-tagline-2020-1030x211-R.jpgBrittany Bailey2013-03-26 09:25:402021-09-14 10:38:57Cabinet Hardware and Winners of the D.Lawless Giveaway
Work is progressing in the kitchen and I finished painting the upper portion of the wall a very light greige (a cross between beige and gray.)
Light Greige
Our Kitchen Command Center – Sherwin Williams Aesthetic White
With the abundance of light colors in the kitchen, I was craving a little dark paint for some drama. A small accent wall near the mudroom and pantry seemed like the perfect spot. I knew I wanted a chalkboard wall, but my sister (my interior design consultant) worried that black might be too dark. I filed her feedback in the back of my head as I headed to Lowe’s to buy primer. The paint gal tinted my primer with black to achieve a 50% shade of gray. (It is easier to paint dark colors if your primer isn’t a stark white.)
After applying the primer, I thought, “Hmmm, I kind of like this.” But decided to sleep on it. In the morning, that wall had a message for me: Read more