Family Organization Door | Pretty Handy Girl

Family Organization Door | Pretty Handy Girl

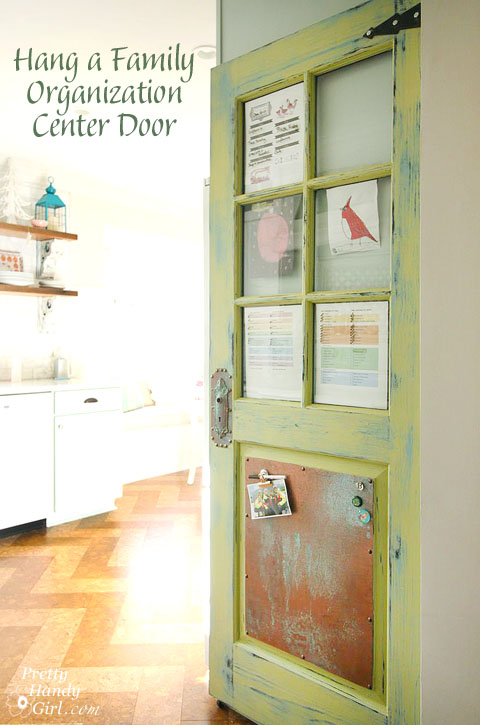
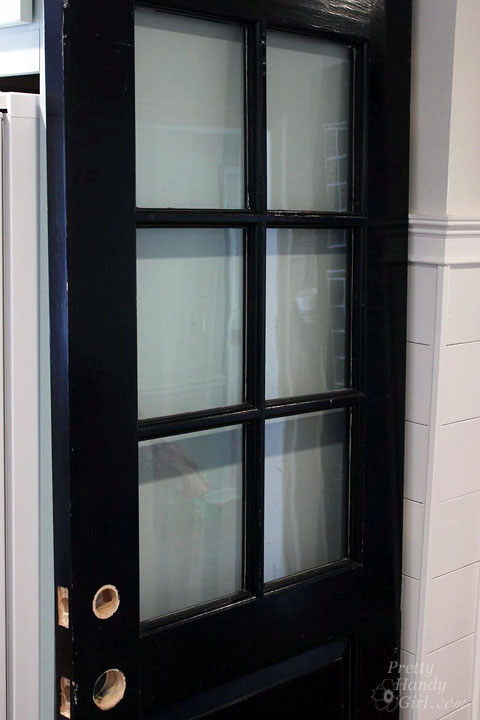
It’s hard to stay organized when you are a DIY blogger, Mom, wife, cook, cleaner, taxi driver, and a student (taking evening classes for the general contractor exam.) I’ll be the first to admit that I’ve dropped a few balls in this massive juggling act. But, I strive to improve and part of that effort involved hanging a Family Organization Center Door next to the refrigerator.  Did you know there was such a thing? Ha, me either until I saw this half window door at our local Habitat ReStore.

Family Organization Door | Pretty Handy Girl

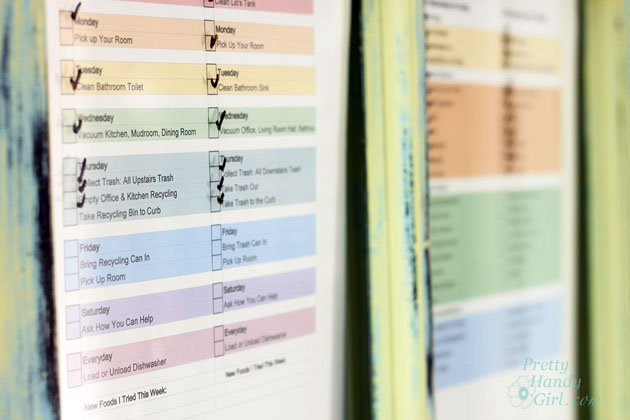
A vision of a place to plan meals, keep track of chores and keep reminders became clear in my head when I first saw it. Want to see how I took this old door and turned it into a family organization center? Hang around for a few minutes to find out.

Materials:
(contains some affiliate links)

Optional:

Instructions:

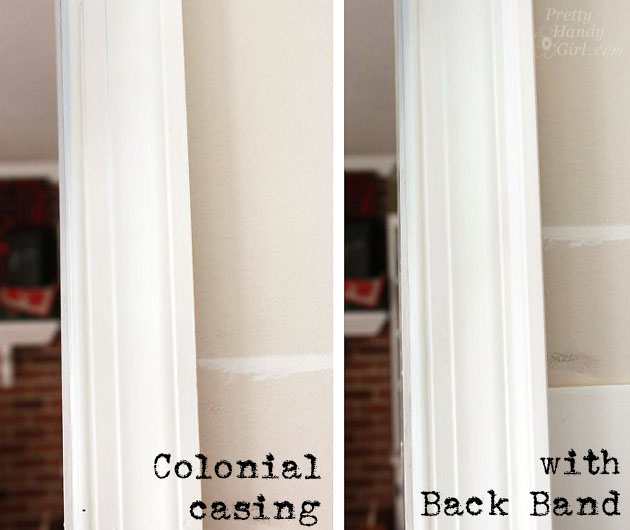
After finding a door for your organization center, you may need to trim down the sides to fit your space. I had to trim an inch off each side of my door to fit on the side of our refrigerator cabinet. Use a circular saw to trim the door. Using a Kreg Rip Cut will help keep the saw straight.

Family Organization Door | Pretty Handy Girl

For extra stability, you may want to add a caster on the bottom of the door (opposite the hinge side). This is not necessary, but will add extra support.

Family Organization Door | Pretty Handy Girl

Cut scraps of coax cable to fit into the tops of the windows. Read more

Beef Up Door and Window Casing with Back Band | Pretty Handy Girl

Want an easy way to add more architectural interest to your standard colonial door and window framing? Adding an extra piece of moulding, called back band, can add that extra boost of architectural interest.

Add Architectural Interest to Casing | Pretty Handy Girl

And the good news is that you can do this to your existing trim moulding. No need to remove or start fresh! The only thing you will need is paint on hand to paint the moulding after you BEEF it UP! In essence, We’re gonna PUMP it UP!

Materials:

  • Back band moulding
  • Finish nailer
  • 2″ finish nails
  • Caulk
  • Paint
  • Miter saw or  hand saw with miter box

Instructions:

There’s really not much to this tutorial. Line up the back band against your existing door or window frame. Measure or mark the back band where you need to cut your miter. Read more

Are You Sure You're Ready to Take on a Home Renovation? | Pretty Handy Girl

Today I wanted to approach a subject that is often questioned by homeowners. The folks at Allstate Insurance have graciously sponsored this post, which will help you decide if now is a smart time to start that home renovation project.

When do you know if it’s time to embark on a home renovation? Is it a good investment? Do you have the desire? Can you handle upheaval? I can tell you from experience that there are times when a home renovation is a smart decision and there are times when it makes more sense to deal with your home as is for a while.

I hope this article helps you make your own decision as to whether now is a good time to start that home renovation. I do know that it is wonderful to be able to create the home that you will enjoy living in. Hopefully you’re up for the challenge!

Do You Really WANT to Renovate?

I’m going to be totally blunt about this, having your home renovated is NOT FUN. It’s a huge upheaval for you and your family. Having walls torn out or even just painted creates dust, chaos and a mess. You can forget about privacy because while the renovation is going on, you will have workers (almost complete strangers) traipsing through your house. Even if you do the work yourself, you still have to be ready to have inspectors show up unannounced to approve any work for which a permit was pulled.

Depending on the room you are renovating, you will likely need to make arrangements to avoid using that room. Where will the furniture go? If it’s in your kitchen, how can you cook and do dishes during the kitchen renovation? If it’s a bathroom, do you have other bathrooms you can use in the meantime?

How long can you wait for the renovation to be completed? In today’s era of extreme home makeovers, oftentimes a homeowner subconsciously thinks a home renovation is a quick and easy process. I can tell you that much of the process on those makeover shows happens behind the scenes and off camera.

If I haven’t scared you off yet, let’s tackle some of the other factors that will help you decide whether or not you should proceed with that home renovation project. Read more

Faux Weathered Gray Wood Grain Tutorial | Pretty Handy Girl

A year has flown by since I laid our Globus Cork glue down tiles in our kitchen. I wanted to check back in and let you know how they are holding up.  I must say this is one of my favorite (if not THE favorite) fixture in our kitchen. I had some minor doubts because some people feared that dogs and cork floors don’t go well together. Or that rambunctious boys would ruin them. Well, I’m here to report that after a year they still look the same as when they were installed!

Update: Our Cork Floors One Year Later | Pretty Handy Girl

I can tell you that there has been lots of chair scraping. Lots of matchbox car races. Lots of wrestling and plenty of Buddy sliding on them as he runs to retrieve balls.

Update: Our Cork Floors One Year Later | Pretty Handy Girl

I have yet to see a scratch anywhere! The only mark that I did manage to make was a small dent when I dropped one of the heavy corbels and it hit the floor right at the pointy edge. But, I can’t even find that dent to be able to check on it.

There is also one dip where I must not have filled a knot hole in the underlayment. But, it is barely noticeable unless the light hits it just right: Read more

How I Re-Built My Own Kitchen (after a leak) | Pretty Handy Girl

2013 Could be called the year of the kitchen renovation in our house. Or the year that nearly killed me. Or the luckiest year of our lives. I’m still debating the title. What I do know is that, I decided to take on my biggest DIY project to date. I re-built my own kitchen from bare studs and subfloor.

It started one morning as I was confronted with a foul odor. It’s only describable as that odor that usually lives in the high school gym locker room. I thought my 9 year old son’s feet were starting to stink. Unfortunately a stinky pair of shoes wasn’t the culprit, it turned out to be a very minor leak that turned into a very big kitchen renovation. We persevered through 45 days without a washer and dryer and many months without a kitchen. But, it was like being a contestant in Survivor. I lasted the year of construction; the set backs and sore muscles; and in the end I was rewarded with a brand new kitchen!

Today, I walk into our beautiful kitchen and I know it was all worth it! It was worth all the sweat equity, the daily Advil doses, and the tree falling on the house. If you want to reminisce with me as I recap my kitchen renovation of 2013, here’s your ticket to all the tutorials and posts: Read more