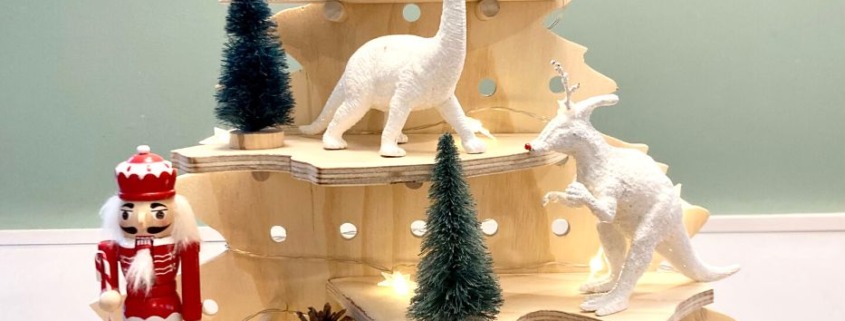
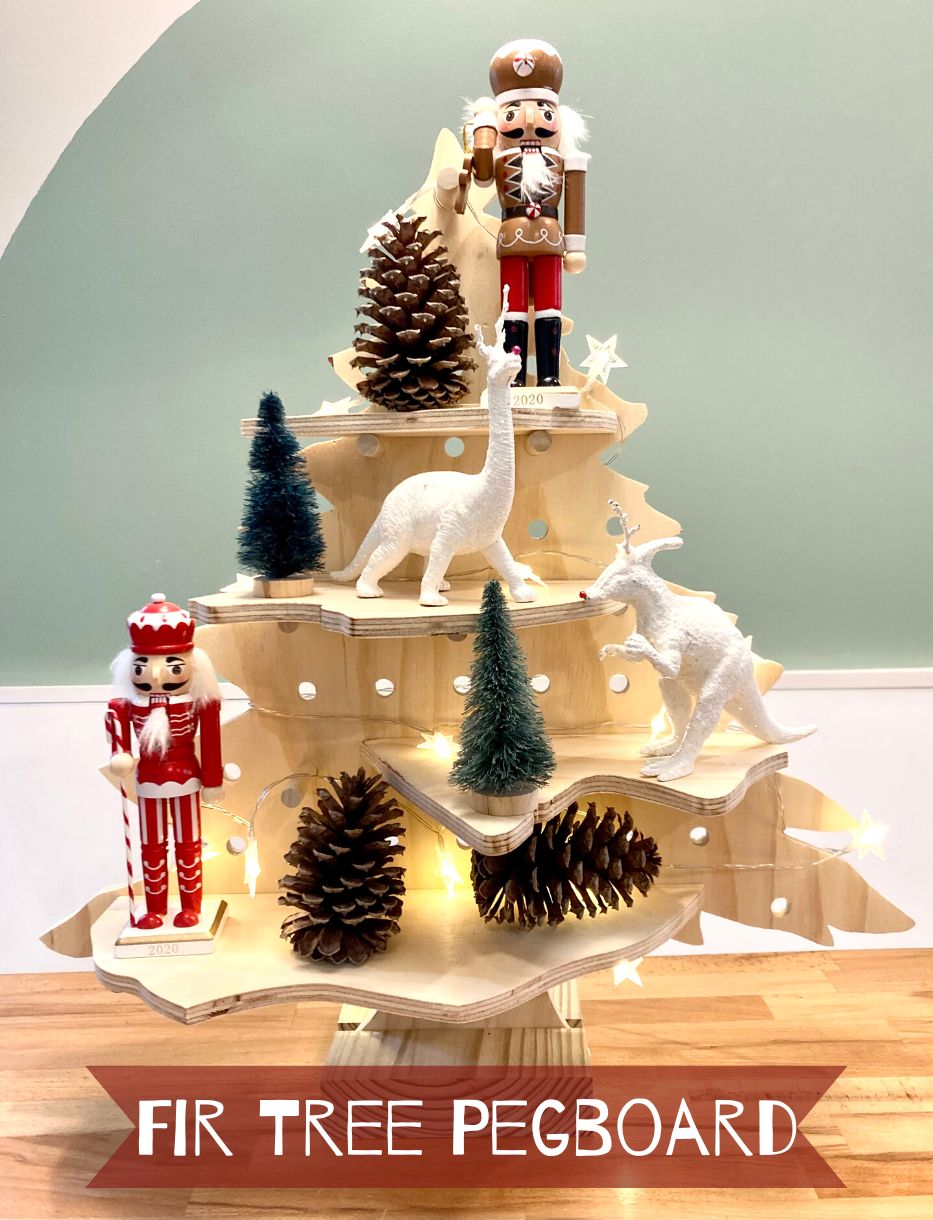
Looking for a last-minute holiday craft you can do with your kids (or alone in your own quiet spot)? How about a fir tree pegboard! This is a festive, fun project you can make in an evening.

Plywood tree with

How to Make a Fir Tree Pegboard

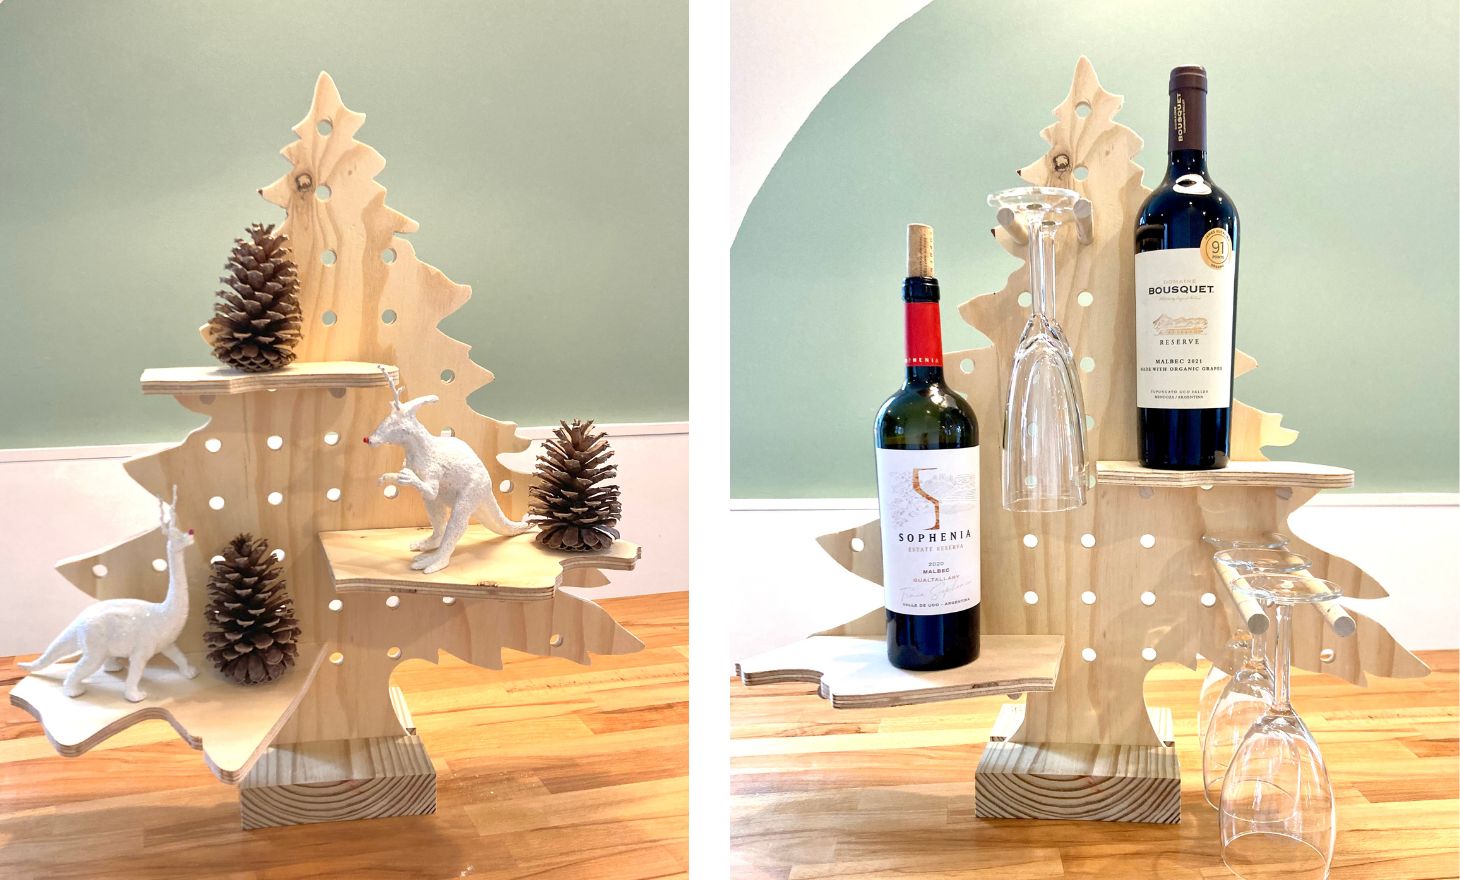
There are so many fun ways to use this pegboard tree! We’ve made a dino tree, a wino tree, and have big plans for a charcuter-tree (a.k.a. a vertical tree-shaped meat and cheese tray). I imagine even the Elf will find a “shelf” or two to relax on over the next few weeks. When the holidays are over, this tree can shed its twinkle lights and function as a nature-themed table display or become a donut tree! What are your creative ideas for this pegboard? Leave a comment below!

Materials:

  • 1/2” plywood (only need a 2X2-foot piece)
  • 1/2” dowel at 5 feet long
  • 2×6 at 7 inches
  • Paint (optional but not recommended)

(I’ve included affiliate links for your convenience. I earn a small percentage from a purchase using these links. There is no additional cost to you. You can read more about affiliate links here.)

Tools:

Instructions:

Step 1: Determine the desired size of your fir tree peg board. I wanted something 2 feet tall and approximately 2 feet wide at the base with a 7-inch stump at the bottom. Using a table saw or a circular saw, trim down your plywood to a square or rectangular that will fit the outline of your tree. If you purchase plywood from your local hardware store, you can ask them to cut it down to your specifications.

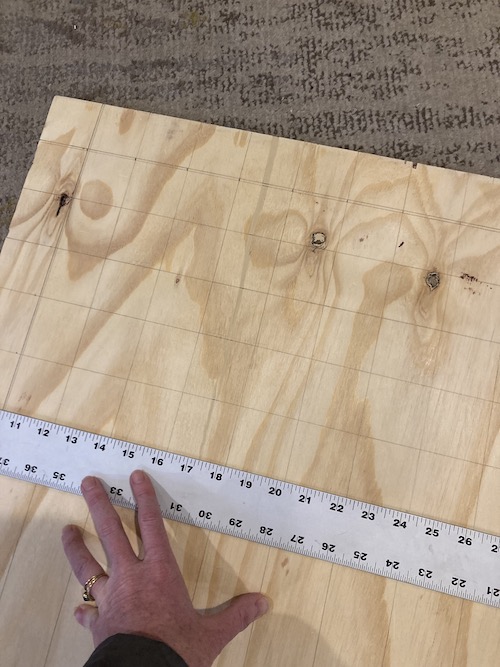
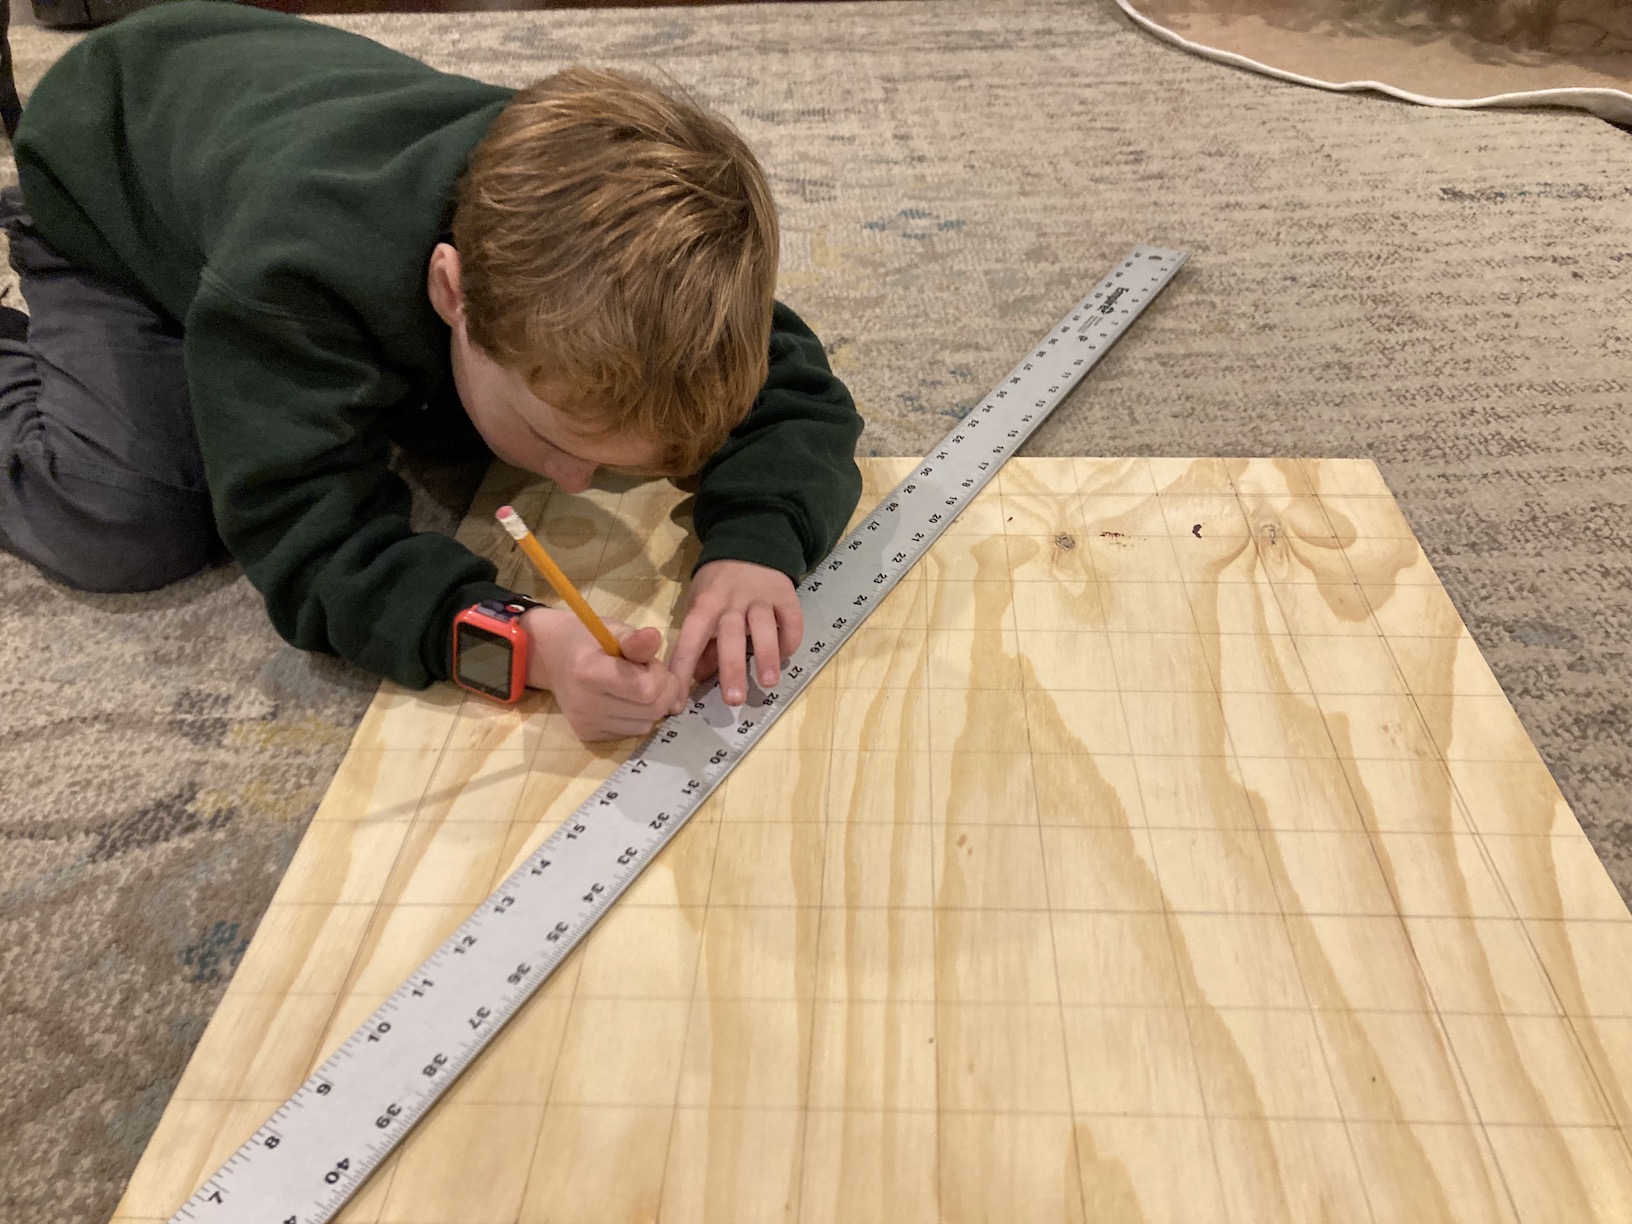
Step 2: With your plywood cut, determine how far apart you want your peg holes. Mine are spaced 2 inches apart from the center of each hole. Unpro tip: If you make the dimensions of your plywood section evenly divisible by the distance between the holes (for example, 24 inches wide with 2-inch hole spacing, or 21 inches wide with 3-inch hole spacing), this process is a breeze. If not, be prepared to do some 8th grade level math. Use a pencil to mark the hole spacing along each edge of the plywood, then use a straight edge to connect the marks from side to side.

Step 3: You should have a grid on your 1/2” plywood. If you are artistically inclined, use a pencil to freehand sketch the shape of a tree, starting from the center point at the top. The intersection of each grid line is where you will place a 1/2” hole, so plan the edges of your tree accordingly. Of course, you always have the option of omitting holes too close to the edges. If you aren’t artistically inclined, make a guide by drawing a triangle from the center at the top and down to each bottom corner.

Then sketch the tree branches following the lines on each side. I made a stump at the bottom because my son couldn’t fathom a flat bottom tree (dramatic gasp!). I am NOT a gifted sketcher, but doing it this way was nearly foolproof. Alternatively, a simple triangle pegboard could make a stunning minimalist tree and I love that for those of you who are overwhelmed by the thought of drawing and then cutting fir tree branches.

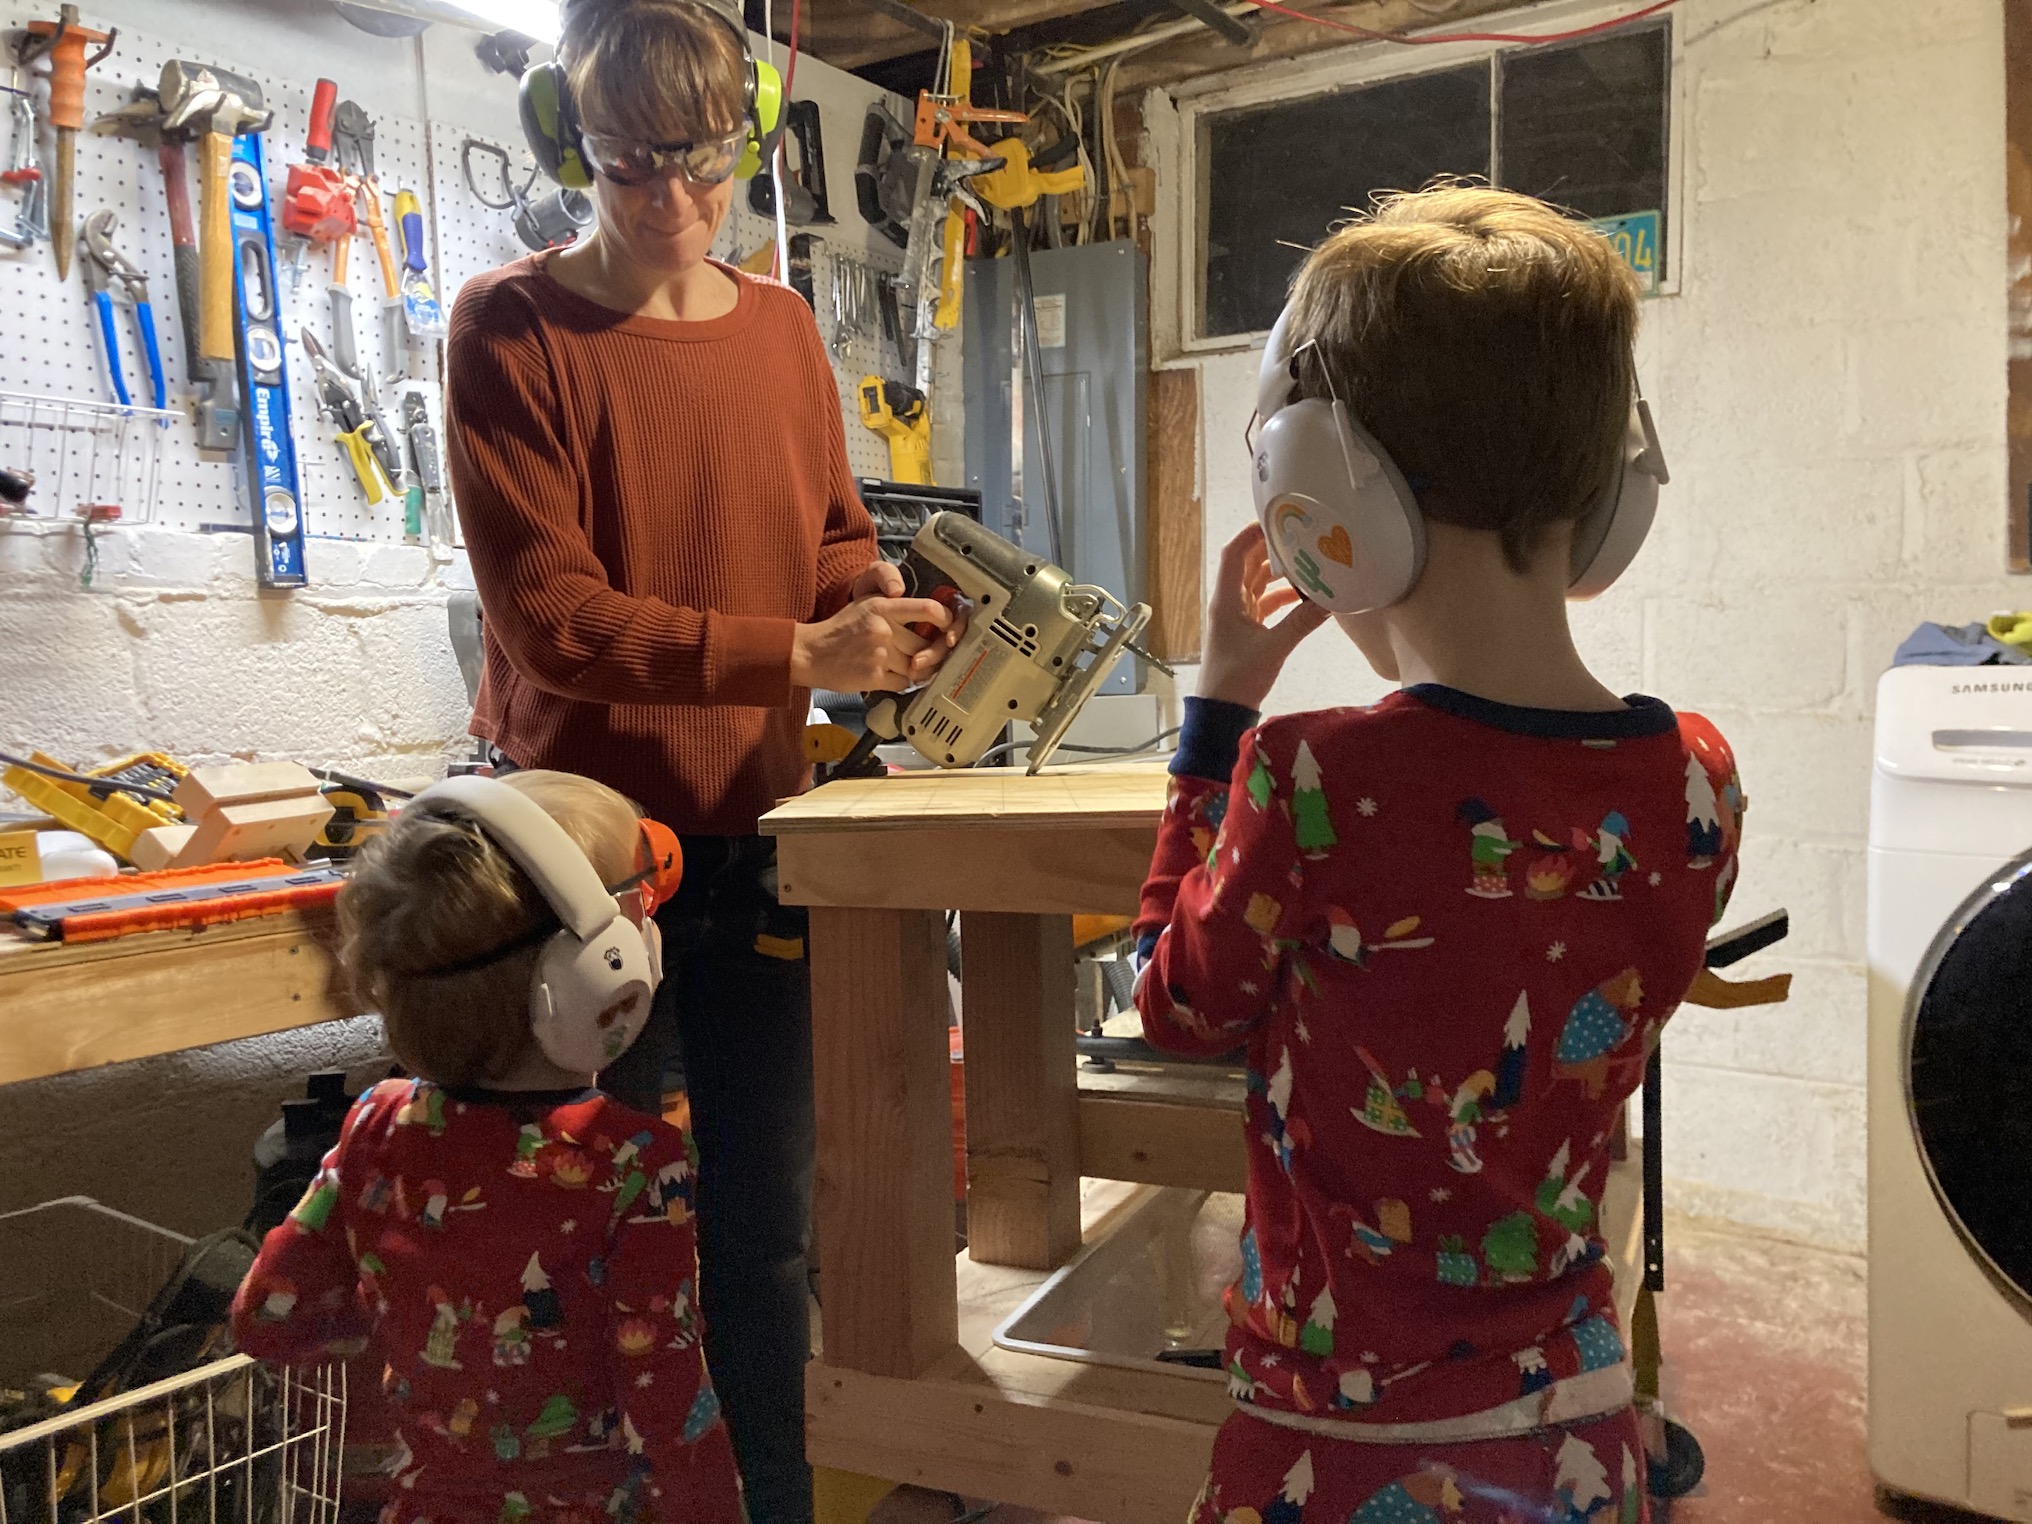
Step 4: Now for the tools. Both of my kids are notorious for following me into my workshop dungeon and I encourage it! But we have strict rules to keep everyone safe.

Rule number one is that no matter which tools we are using, everyone wears properly fitted (i.e. kid-sized) ear and eye protection. This creates good habits from an early age and prevents those “whoops!” moments when you use the miter saw for “just a quick second” and now everyone’s ears are ringing. A quick hearing fact for the DIYers with kiddos: 1 in 6 school-aged in the children in the US suffers from noise-induced hearing loss. This is permanent hearing loss that can impact their social development and academic success and will ultimately need to be treated with hearing aids to offset the increased risk of early on-set dementia. Take a moment to let that sink in. This is why I am so cautious with my kids around loud tools (not to mention at loud events and on airplanes). My kids wear hearing protection made specifically for children. We use Wise Little Ears hearing protection from an audiologist and educator-owned company. In full disclosure, I am the educator half of this mom-owned business! We assure each pair is high quality and comes with guidance for how and when to use them. If you have children, I hope you’ll look into our Wise Little Ears protective products for your little ones.

Now, with your safety gear on, clamp the plywood to a sturdy surface and use a jigsaw to cut out the shape of the tree on one side, then on the other side. Go slowly and make extra cuts to get into tight turns. Save the scraps, you’ll use them for branch-looking shelves later.

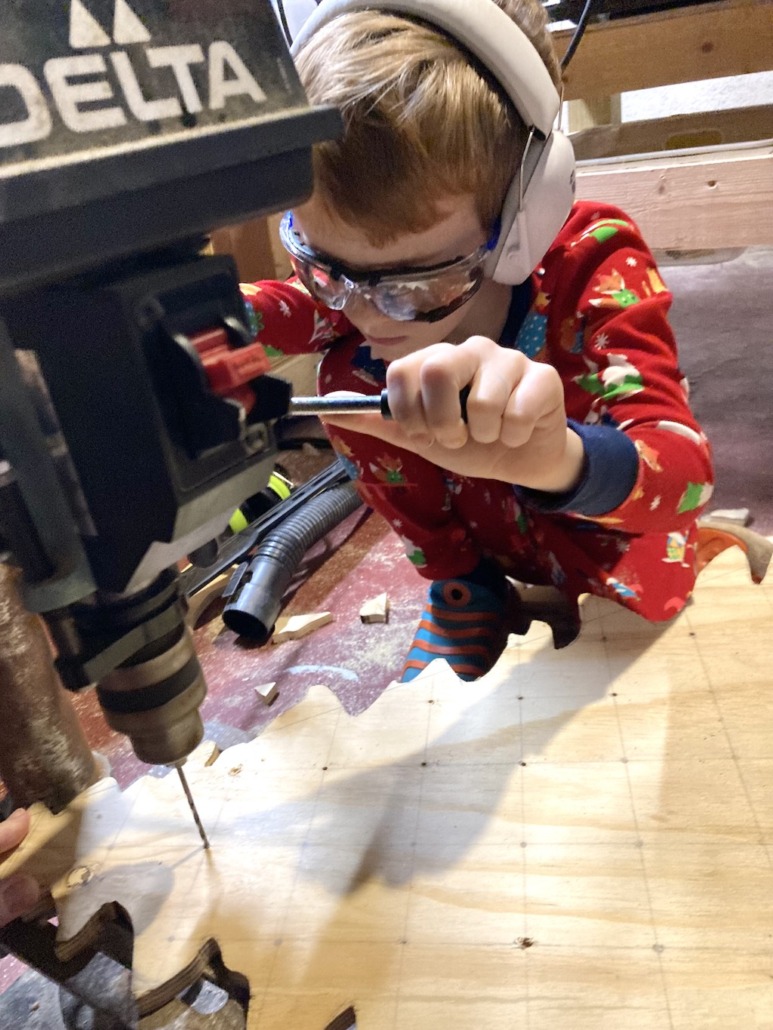
Step 5: You should have the outline of your tree with gridlines. Using a pencil, make a mark at all the intersections that are not close to an edge. Remember that the peg holes will be a 1/2” in diameter, so they need a little space. Skip any hole that is too close to the edge. Using a drill, make small pilot holes at each mark. Pilot holes are optional, but they help guide the forstner bit.


(Drill press not necessary, a hand held drill would work fine.)

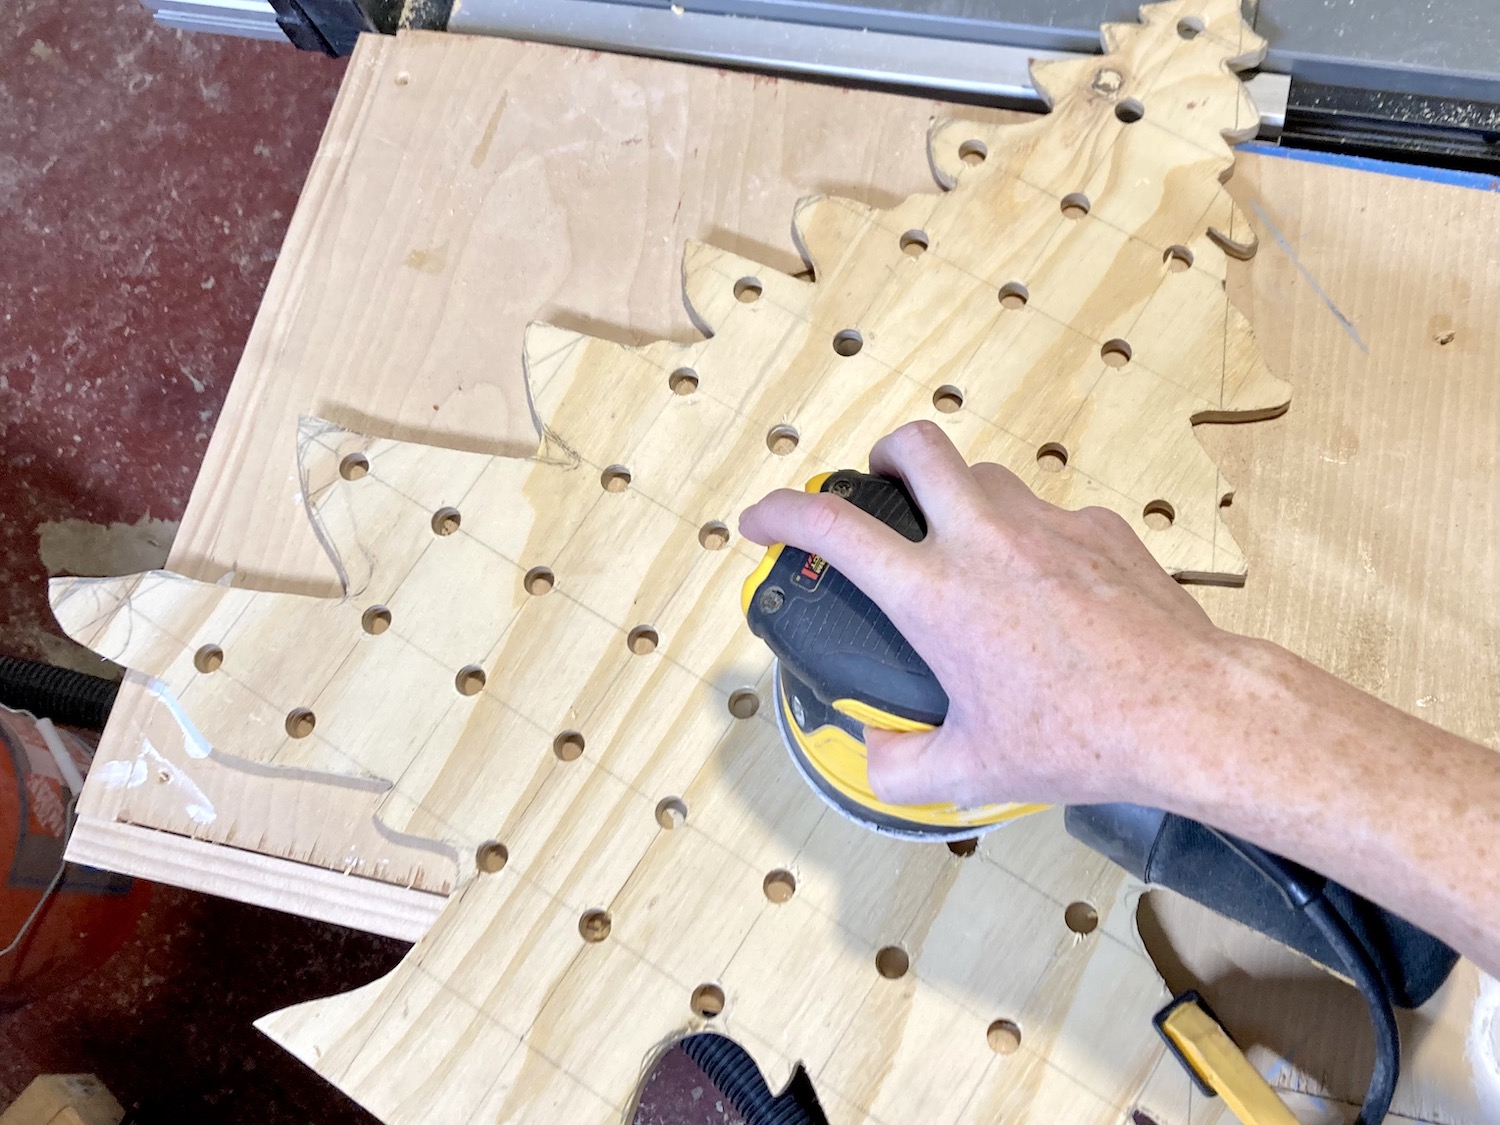
Then, using a sharp 1/2” forstner bit, place the center of the bit into the pilot hole, drilling slowly at first, then speeding up through the plywood and out the back. When all the holes are drilled, lightly sand both sides of the plywood with 180-220 grit sandpaper to clean up and remove the pencil lines. Then lightly sand the edges and the bottom to remove splinters or sharp edges.

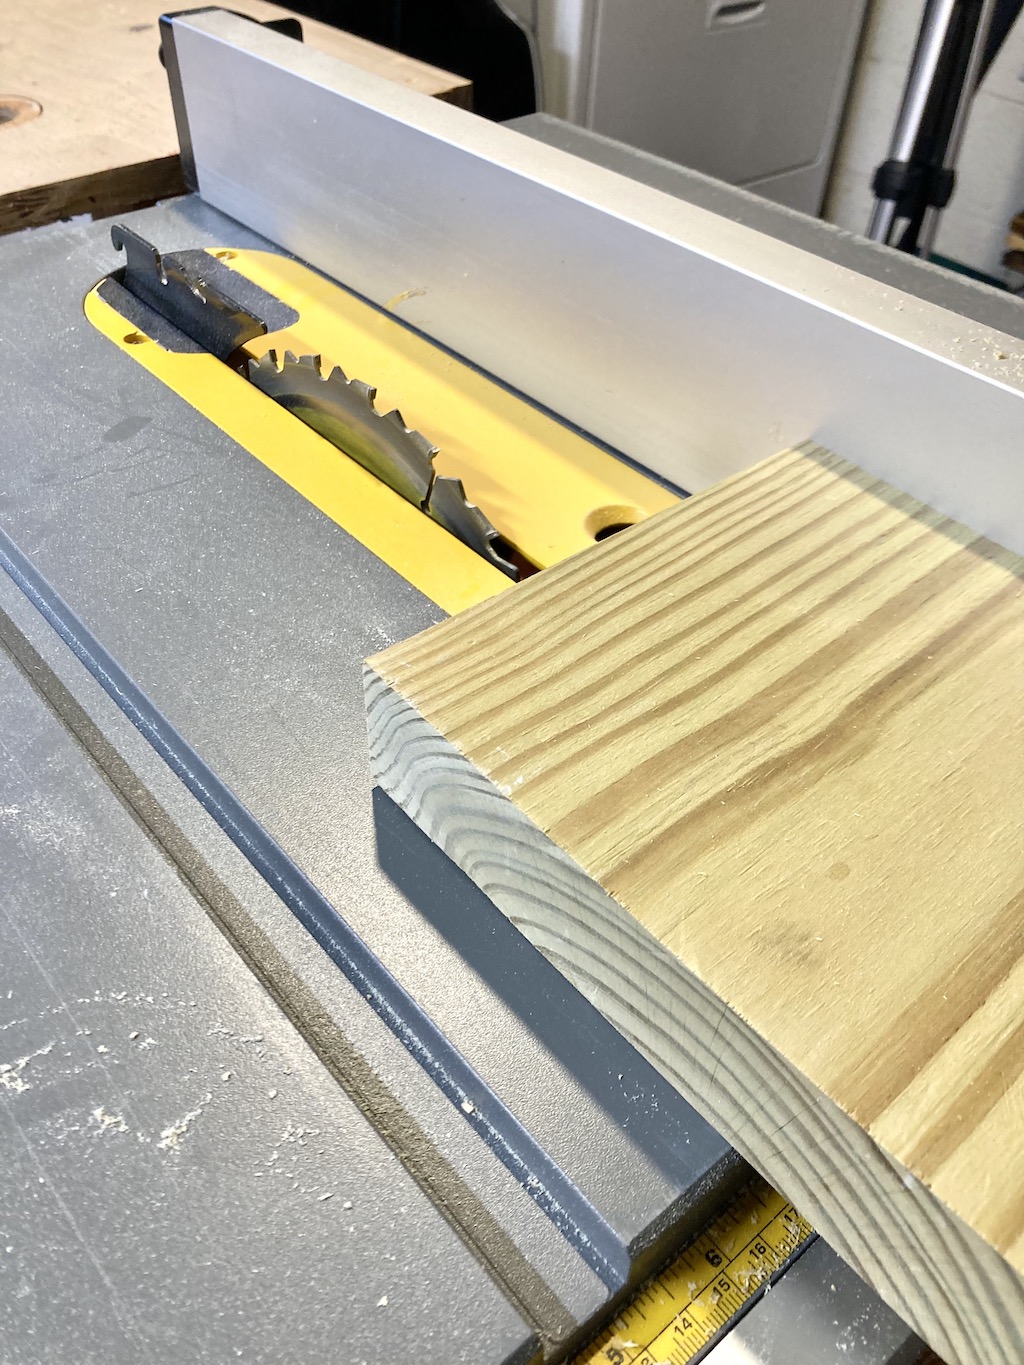
Step 6: To make a stand for your pegboard, cut a 2×6 the length of the bottom of your tree or stump and make a deep groove (also called a dado) through the middle of the 2×6 that is the same thickness of the plywood. You can do this with a router and a 1/2” strait bit (be sure to clamp your wood for a hand held router. Alternatively, you can use a table saw.

To use a table saw, set the blade depth to about one inch so that when you pass the 2×6 flat over the blade, it cuts a channel instead of cutting all the way through the wood. Set the saw fence to the middle of the 2×6 (this doesn’t have to be exact) and make your first pass over the blade. Turn the saw off, move the fence over slightly less than the width of the blade (typically 1/8”), then run your board in for another pass. Continue this process, checking the width of the groove after each pass with a scrap piece of the tree cutout, until the channel is the same thickness as the plywood. It is important that the tree fits snugly into the base, otherwise the tree will tip to one side or the other.

If you went big with the size of your tree, like REALLY BIG, you will need to modify the base to make it sturdier. For example, if your tree is in the 2-to-3-foot range, a 2×6 will work. Tree peg boards that are larger than 2-3 feet wide will need a larger base or create additional feet on the front and back.

Step 7: Now it’s time to make your shelves and cut your pegs! Collect your leftover plywood scraps and determine which pieces would make good shelves. A good shelf must be longer than the distance between at least two peg holes and have a flat side that will sit flush against the tree. I picked the longest sections with interesting, branch like curves. If you didn’t manage to get anything that fits this description, you can use your jigsaw to create a shape in any piece with at least one flat side. Or, if you prefer, you can cut standard 90 degree shelves.

Cut your pegs according to the depth of your shelves. The pegs should extend to the edge of the shelf for more stability. Cut a few long pegs to hang wine glasses and short pegs to hang coffee mugs, ornaments, or to string lights.

Optional step: Paint. Here’s the thing about paint and peg boards. Painted surfaces, especially with sheen, will stick together. There is also a good chance that a painted peg will fit not fit into painted hole because paint adds thickness to both surfaces, making the pegs slightly bigger and the holes slightly smaller. The easiest solution is to leave the tree and pegs completely unfinished. But if that’s not an option for you, your kids, or your wine glass, here are a few suggestions:

  • Pick a paint with a matte finish so there is less stick.
  • Don’t paint the pegs OR the inside of the holes. Unpainted pegs and hole edges would look fun!
  • Thin out the (matte) paint and do a paint wash.
  • Sand the pegs and the holes. This is a risky option because if you sand too much, the pegs won’t be tight in the holes and if you don’t sand enough, they won’t fit.
  • Use a sponge to make a textured accent rather than a solid coat of paint.

And there you have it! A fun festive project with endless options. Remember to check out Wise Little Ears for more information on protecting your little builder’s ears.

Build scrappy and be safe!

~See More of Lara’s Tutorials~

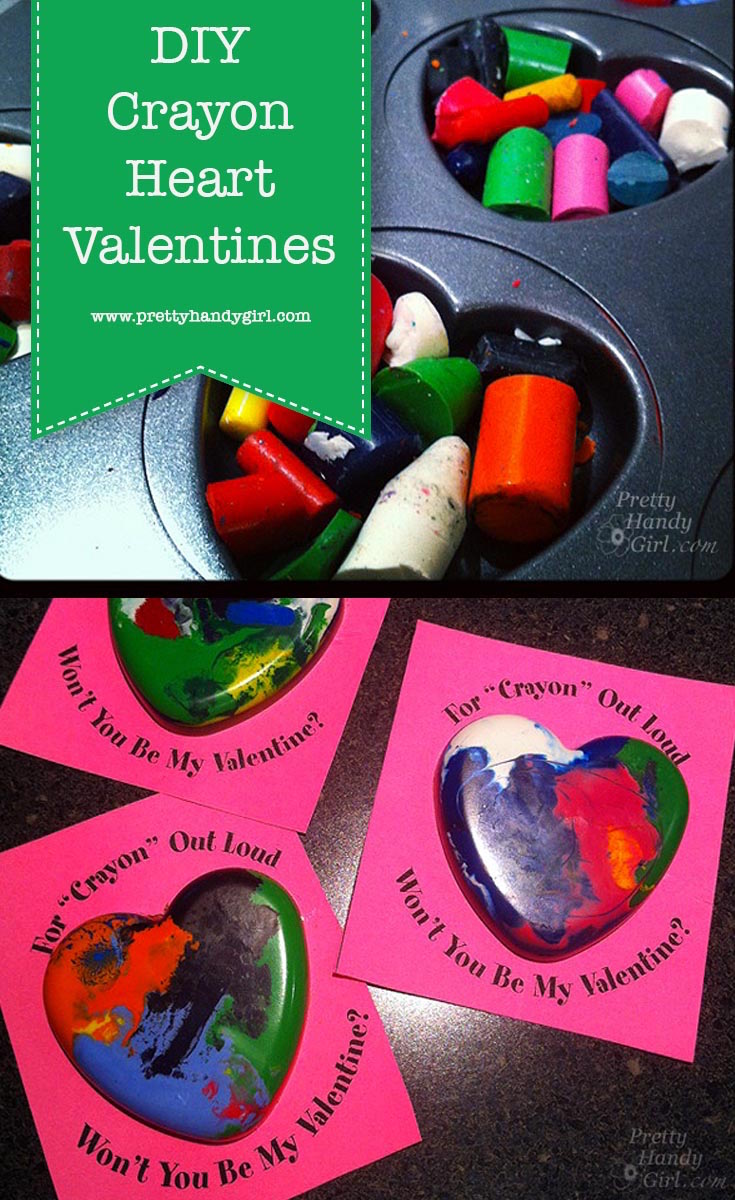
Looking for a simple and fun craft to do with the kids? These melted crayon hearts are just the thing. Make them for Valentine’s or just to reuse old broken crayons.

Melted Crayon Heart Valentines

After the abundance of candy and cookies consumed over the holidays, I cringe at the idea of more sweets finding their way into our home. Especially candy with artificial colored dyes added. Valentine’s Day and Halloween are the two holidays where I have to brace myself for the inevitable influx of dye-laden candies. I don’t have concrete proof, but I’m fairly certain that one of my sons has a dye sensitivity. This sensitivity manifests itself in behavior issues.

Because of this, I try to make Valentines that don’t use candies. Years ago, I made these Melted Crayon Heart Valentines! They were a big hit with the kids. This year my boys are too old for swapping Valentine’s (and they are enrolled in virtual school until the Fall), but I thought this would be a fun craft for those of you with little ones looking for easy crafts to fill the time.

How to Make Melted Crayon Heart Valentines

Materials:

(I’ve included affiliate links for your convenience. I earn a small percentage from a purchase using these links. There is no additional cost to you. You can read more about affiliate links here.)

Instructions:

  1. Start by collecting all those broken crayons (or sacrifice some worn down ones.)
  2. Pre-heat your oven to 300 degrees Fahrenheit.
  3. Peel the labels off all the crayons.
  4. Break the crayons into small pieces.
  5. Optional: Separate into colors if you want to create monotone heart crayons
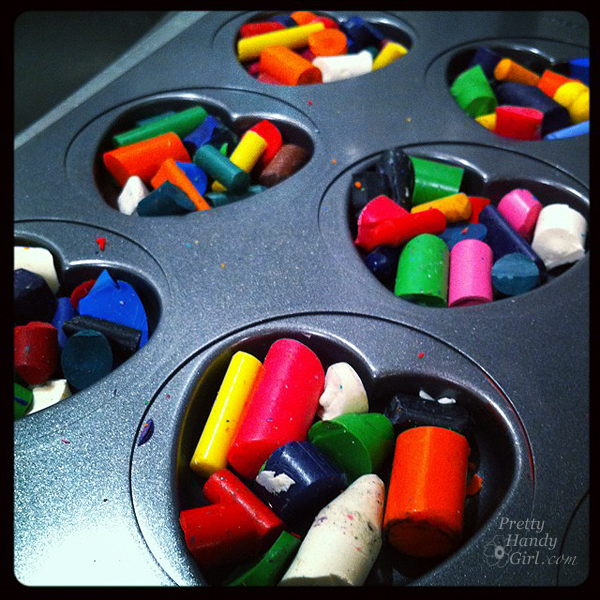
  6. Fill the bottom of the muffin tin with the broken crayons.
  7. Place in 300F oven for 15 minutes.
  8. Once the crayons are liquified, remove them carefully from the oven.
  9. Set out to cool for about 15-20 minutes.
  10. Pop them out of the tins and glue to cardstock for Valentine’s or let the kids color with them.

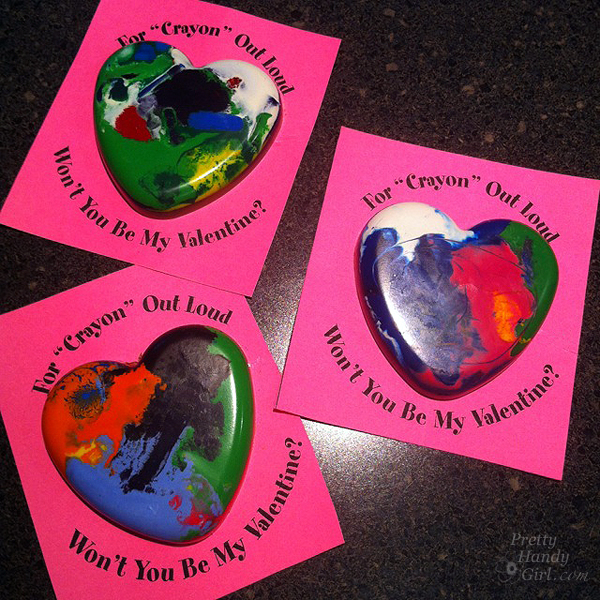
We attached them using Elmer’s glue dots to cards that said “For Crayon Out Loud, Won’t You Be My Valentine.”

Kelly added some glitter to her crayon hearts:

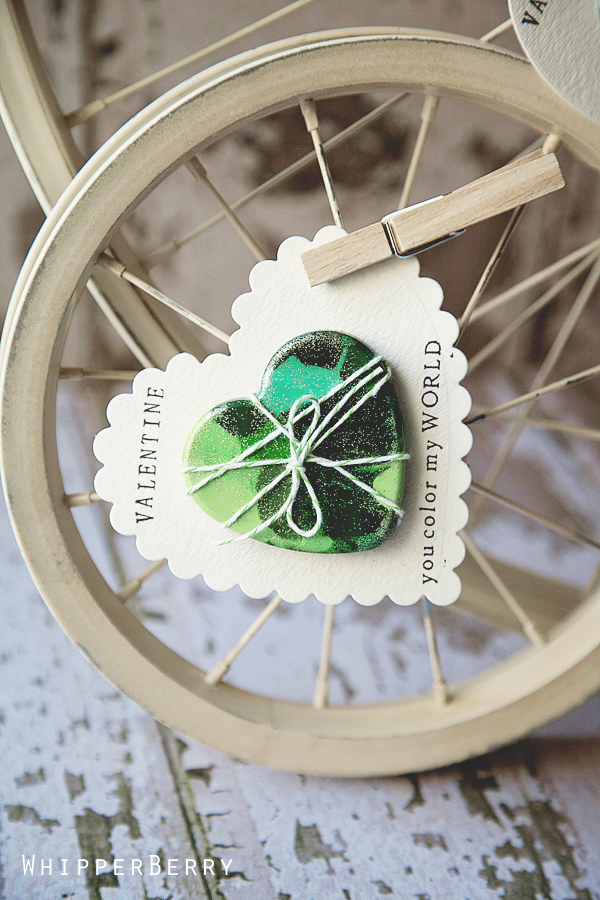
And Heather of Whipperberry paired her melted crayon hearts with these adorable Valentines using a cutting die:

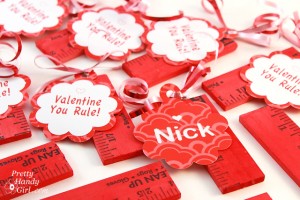
Want another candy-free Valentine idea? Make these adorable “You Rule” Valentines:

You Rule Valentines | Pretty Handy Girl

Now tell me, how are you all doing? Made it through 2020? I hope you are having a happy new year so far.

Pin for later!

Skip the candy with these DIY melted crayon valentines from Pretty Handy Girl! | DIY Valentine's Day gifts #holidaygifts #prettyhandygirl

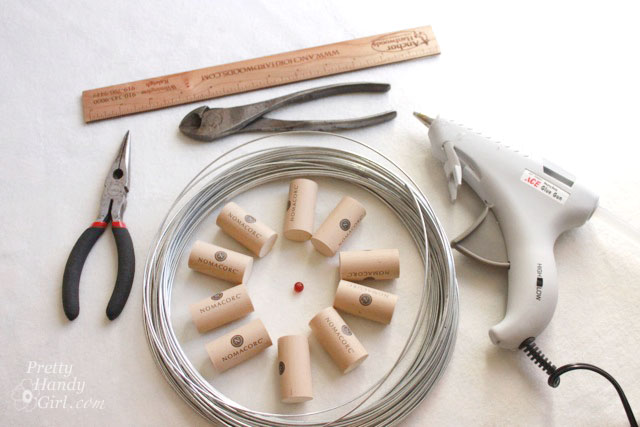
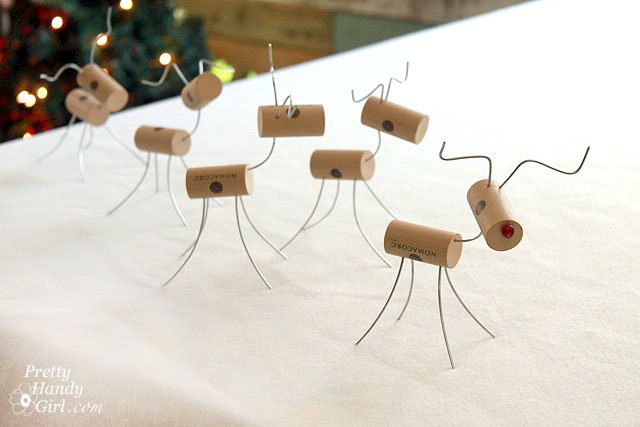
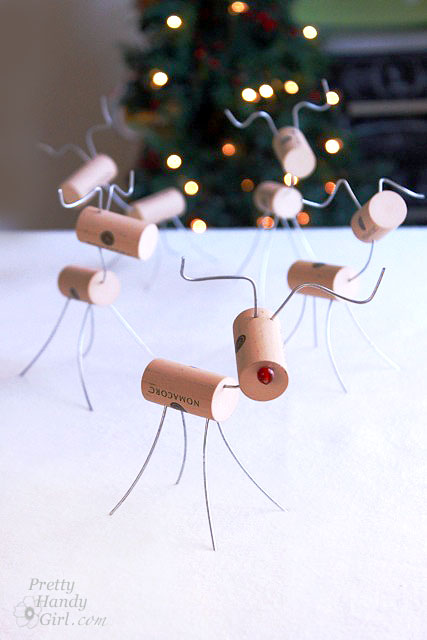
Grab a few wine corks and some wire, we’re going to make wine cork reindeer with those two supplies and some hand tools.

Wine Cork Reindeer

Looking for a little craft to do with the kids and maybe you’ve been drinking a little more wine this year and have some leftover wine corks. (Hand raised here!) Today I have the quickest and easiest holiday craft for you. I made one of these while I was talking on the phone. It started while I was doodling with some leftover wire from the Plumbing Parts Holiday Decor project and suddenly I was looking at a cute little stick reindeer. And then he asked me to make him some friends, so I did.

Materials:

(I’ve included affiliate links for your convenience. I earn a small percentage from a purchase using these links. There is no additional cost to you. You can read more about affiliate links here.)

Instructions:

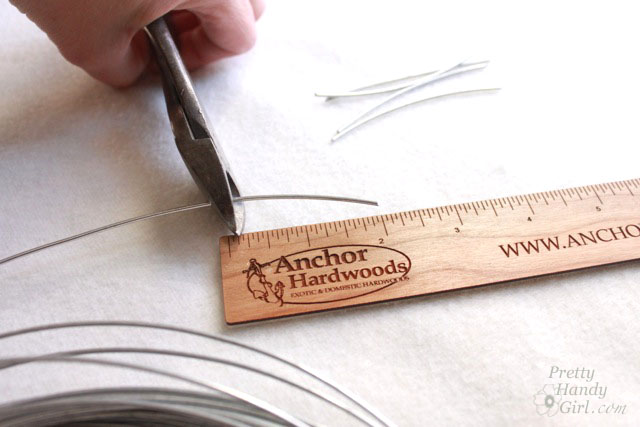
Cut four 3″ lengths of wire. Two 2.5″ lengths and finally cut one 2″ length of wire.

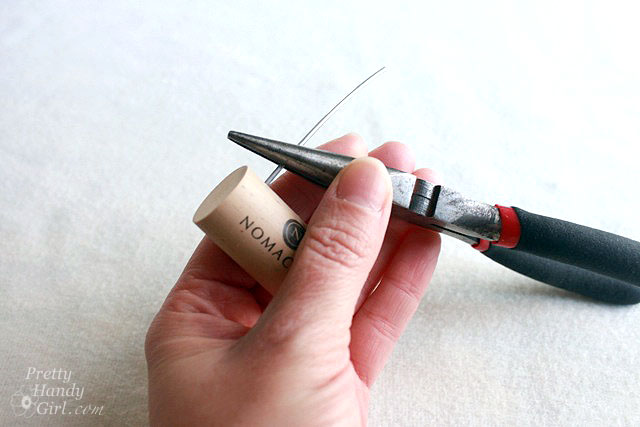
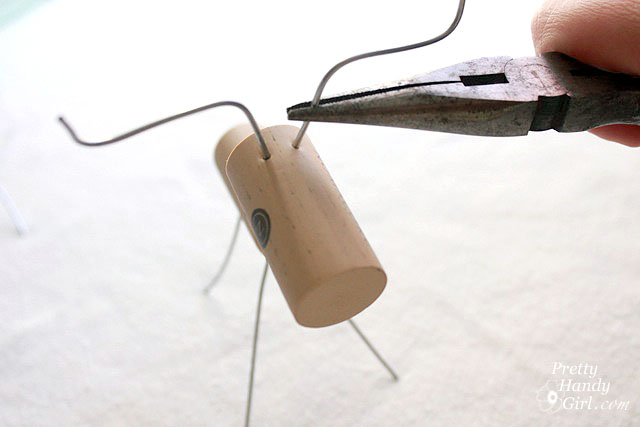
Use the needle-nosed pliers to grasp one of the 3″ wires (for the legs). Push it into the side of a wine cork.

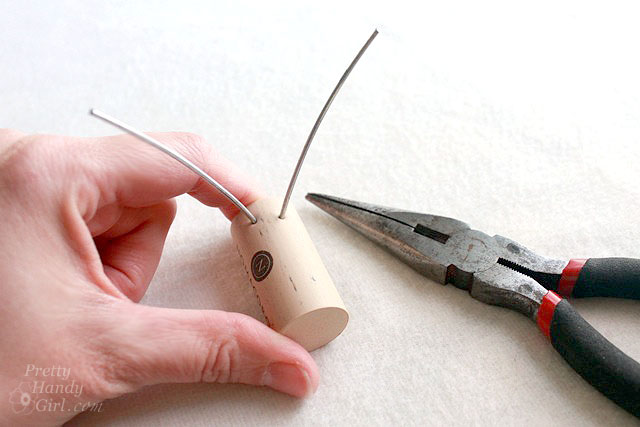
Continue pushing the other 3″ wires into the wine cork.

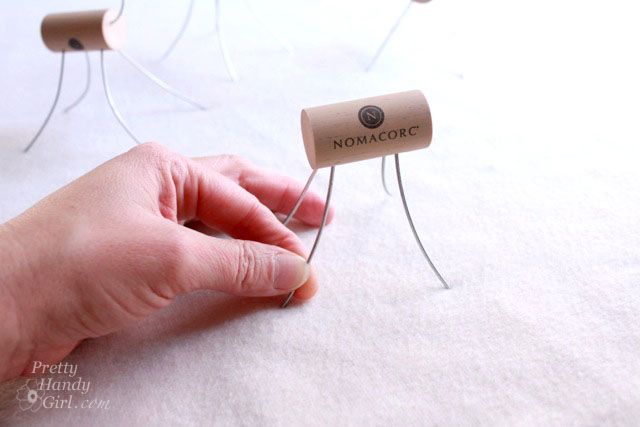
Adjust the legs so all four feet rest on the ground. You can bend and arch the legs if you wish.

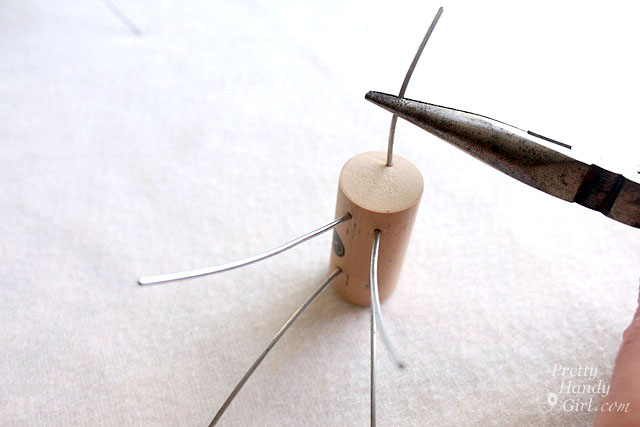
Take the 2″ section of wire and insert it into the top of the wine cork.

Push the second wine cork onto the 2″ wire and bend the wire to shape the reindeer’s neck.

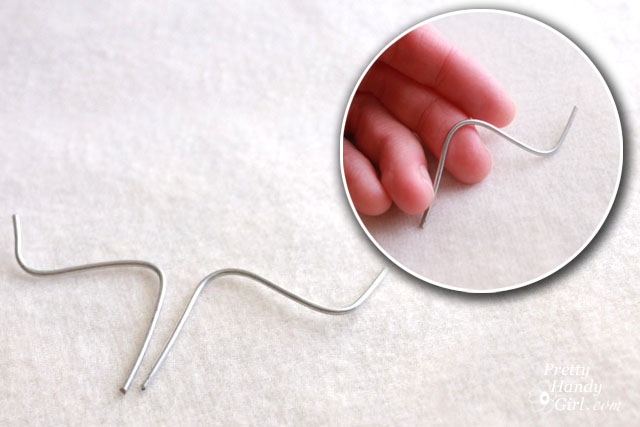
Take the remaining wires (2.5″ wires) and bend them into the shape below (like cattle horns.)

Grab the horns with the pliers and insert them into the head of your reindeer.

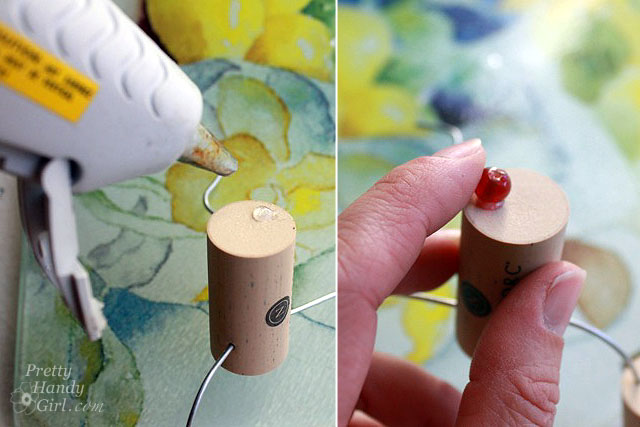
Only one of my reindeer was given a red nose (you and I know there is only ONE Rudolph!) Add a dab of glue onto the end of the wine cork head and press the red bead into the glue.

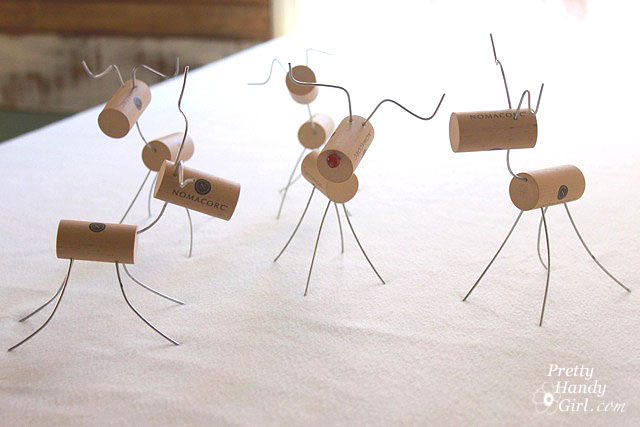
Then make a few friends for Rudolph…

…and have fun posing them and making them line up for Santa.

These would make a fun gift for the wine lovers in your family or the kids who are old enough that they don’t pose a choking hazard.

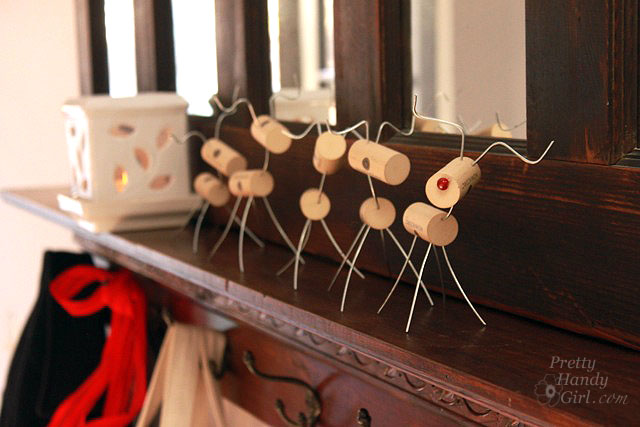
I have Rudolph and friends lined up on our mudroom coat rack.

Aren’t they cute?

Yes, I took 100 photos of these cuties — what are you trying to say? And yes, I may have drank a bit too much wine in 2020, but these were actually in my craft stash.

Have a Happy Holiday from me and Rudy!

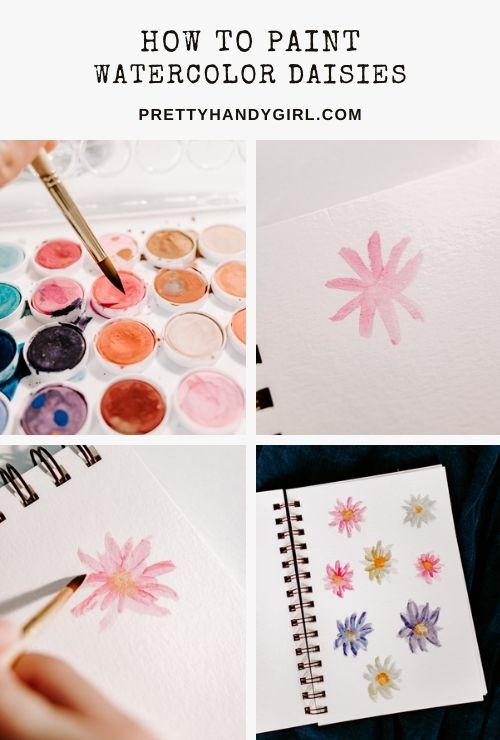
how to paint watercolor daisies

Learn how to paint these watercolor daisies with this easy tutorial!

tutorial for painting watercolor daisy flowers

Easy to Paint Watercolor Daisies

Hello, Pretty Handy Girl Readers! Guess what? I found my box of watercolors. If you remember, last month I moved from Seattle to NC and things were a bit crazy there (still are, actually.) I’m back with another watercolor tutorial and this one is easy. Well, actually, they’ve all been pretty easy so far, right?

watercolors with a paintbrush

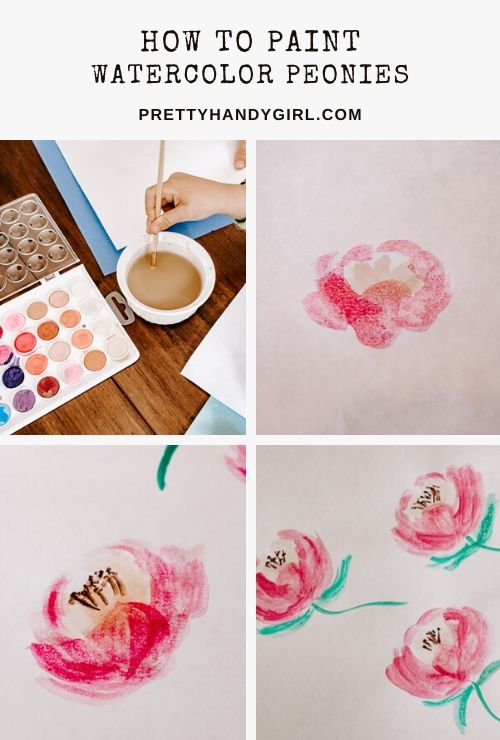
As a reminder, we’ve learned how to paint pink peonies:

How to Paint Watercolor Peony Flowers

Then I taught you how to paint lavender in watercolor:

How to Paint Watercolor Lavender

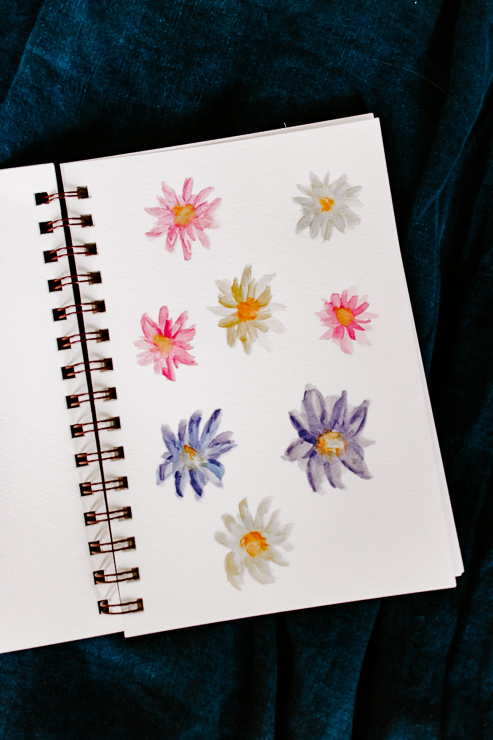
Now let’s learn how to paint these daisies. Call them coreopsis. They are the cutest little flowers and so easy to create.

Let’s get started!

How to Paint Watercolor Daisies

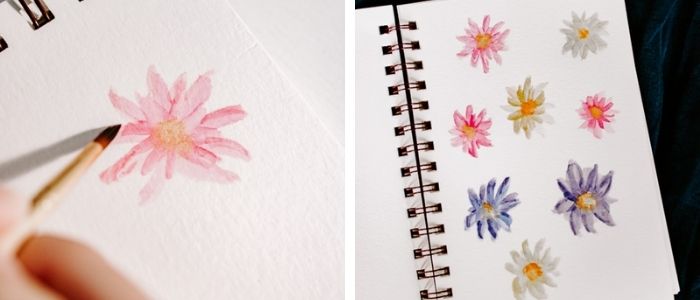
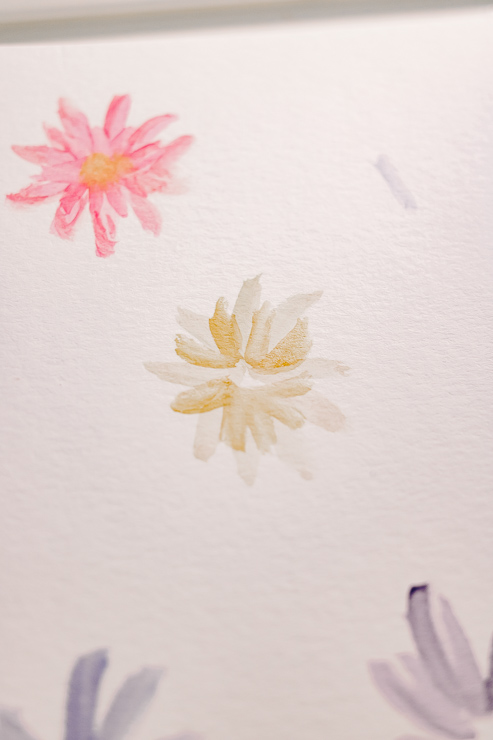
a page of yellow, purple and pink watercolor flowers

Materials:

(I’ve included affiliate links for your convenience. I earn a small percentage from a purchase using these links. There is no additional cost to you. You can read more about affiliate links here.)

Instructions:

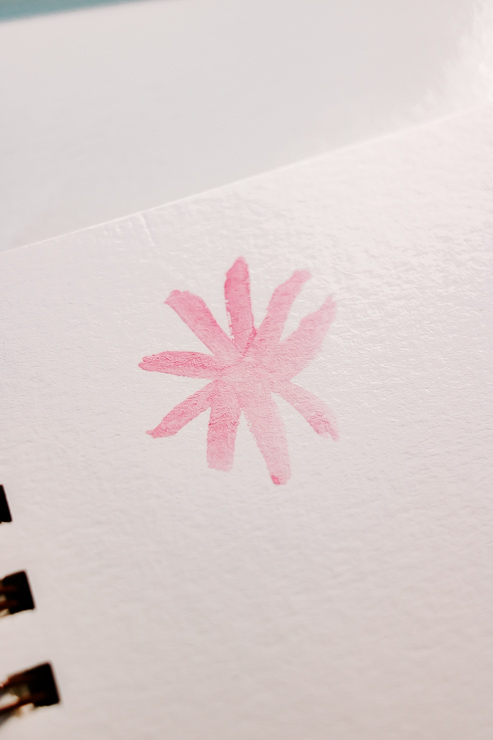
Step 1: Create a basic star flower shape

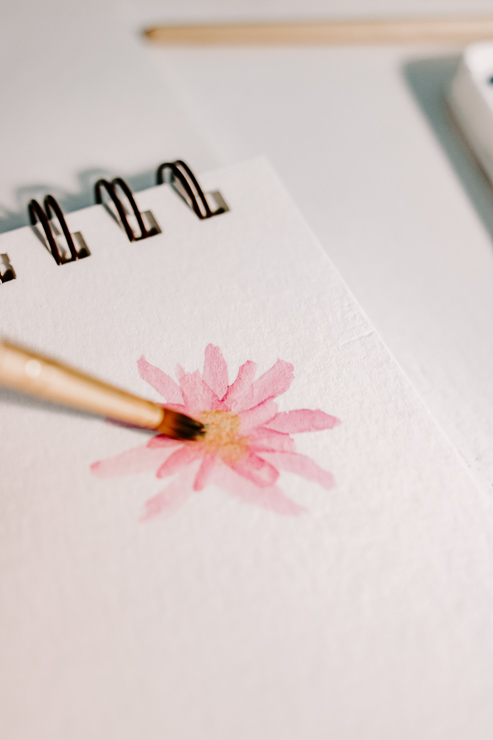
a pink watercolor flower being painted

Using a medium-sized brush, dip your brush in the water and then the color, and paint a few runny lines in a star shape. This is going to serve as the base for our flower. Don’t worry if the petals don’t look perfect right now. We are going to define them a little more at the end. Remember, watercolor is supposed to be kind of runny and imperfect.

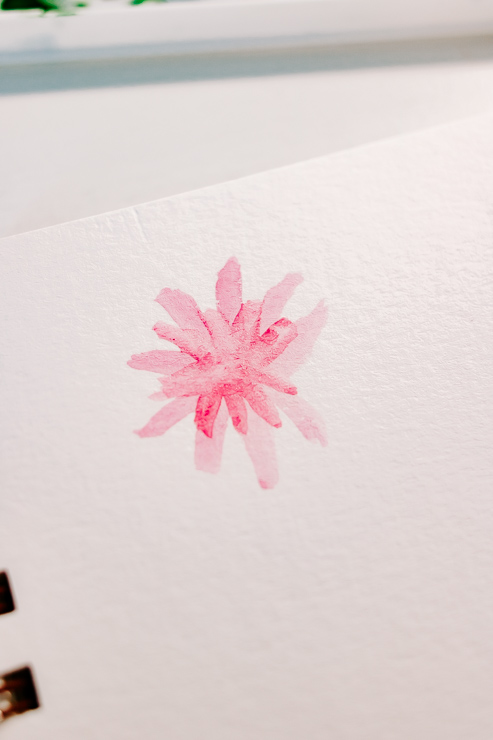
Step 2: Create more petals deeper in color

a pink flower being painted with watercolors

Working with the same brush we used in Step 1, grab some of the same watercolor paint. We want a richer, deeper color here so don’t use as much water. Paint a smaller star shape on top of the star shape you painted in Step 1. Try to go in between the petals previous petals. We are creating dimension and depth of the flower.

Step 3: Create the center of the flower

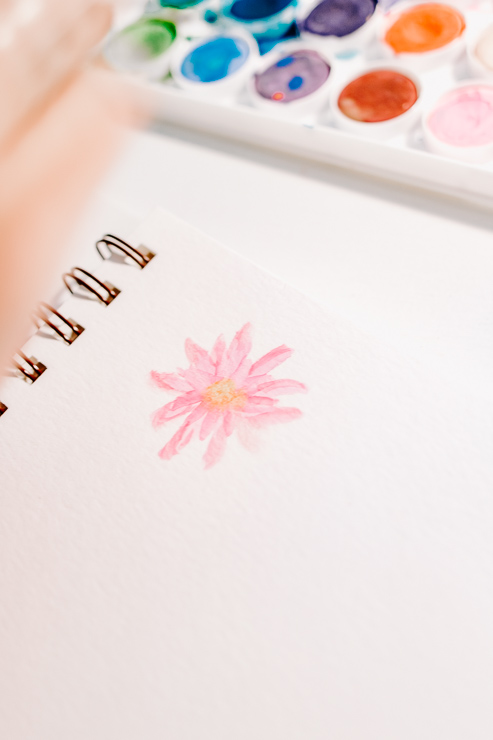
painting a pink watercolor daisy

Now we need to define that center part of the flower. Take a smaller brush and add a bit of yellow/orange color to it. Dot it in the center of your flower, using kind of a stippling motion. You can do this several times to create a deeper, darker center. Don’t fret, it should look somewhat messy and imperfect.

Step 4: Define your petals

painting a watercolor petal on a daisy flower

Finally, let’s take some of the petal color and define our petals a little more. You will want to use a smaller round brush for this. Dip a bit of water on the end of your brush, then dip it in the petal color. Define the ends of a few petals by outlining them. I don’t think you need to outline all of them. Use your artist’s eye here and determine what looks good.

pink watercolor daisy with yellow center

That’s it!

Put on some music and just let your brushes carry you away for a little bit. Forget about the world for a moment. We could all use a little escape.

yellow and pink watercolor daisy flowers

Thoughts on Paper:

Watercolor paper really does make a difference in how your final art looks, but you can still just use regular paper until you find the time and budget to buy some. In other words, don’t let not having the right materials hold you back. Watercolor painting is very relaxing and therapeutic.

If you make a page of these little flowers, you have yourself a little piece of frameable art for your walls. I hope you are enjoying these tutorials. Let me know if you are enjoying these watercolor tutorials in the comments below.

Stay safe out there, my friends! I’ll see you next month!

karen signature

See More of Karen’s Tutorials ~


karen from decor hintHello!  I’m Karen, the creator of the Home Decor and DIY Blog: Decor Hint. I’m a Native of the East Coast, but I currently live in beautiful Seattle with my hubby, our two wonderful children, and our spunky wheaten terrier.

You can usually find me with some sort of craft in one hand and a coffee in the other. And I’m always rearranging furniture or moving lamps from room to room. I have a passion (read: obsession) for decorating, DIY, and gardening. In short, I love making my house into a home.

Like many, I’m inspired by what I see in home decor magazines, but I’m not so inspired by the price tags.  Consequently, I love finding and creating beautiful budget-friendly home decor items. In a head to head competition, I bet you’d never know the difference between the designer items and my DIY creations!  Many of my DIY projects focus on sewing, crafting, upcycling and organizing. Some of my favorite projects have been making pretty wreaths, sewing my own tassel hand towels, and crafting these trendy wood bead garlands. I can’t wait to inspire you and spark your creativity through my DIY projects.

You can always connect with me on Pinterest, Twitter or Instagram.

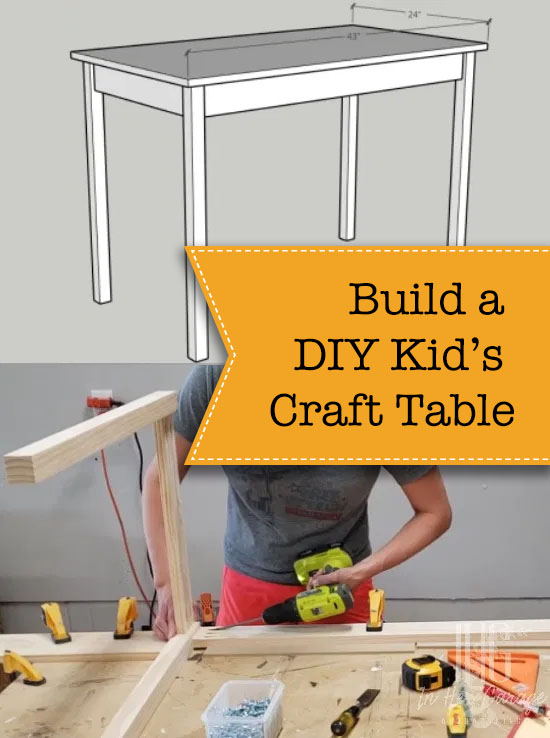
Have the kids taken over your kitchen table or island? Need somewhere to let the kids get creative? Today I am going to show you how to make a simple DIY kid’s craft table (or desk). Let’s get building.

Build a DIY Kid's Craft Table

DIY Kid’s Desk and Craft Table

If your children are going to be home this fall for distance learning or you just want a spot they can call their own, then it is time to get a space ready for them!! This DIY Kid’s Craft Table is the perfect size for whatever your child will need and it is small enough to fit in a spare corner in your home. Let’s make it!

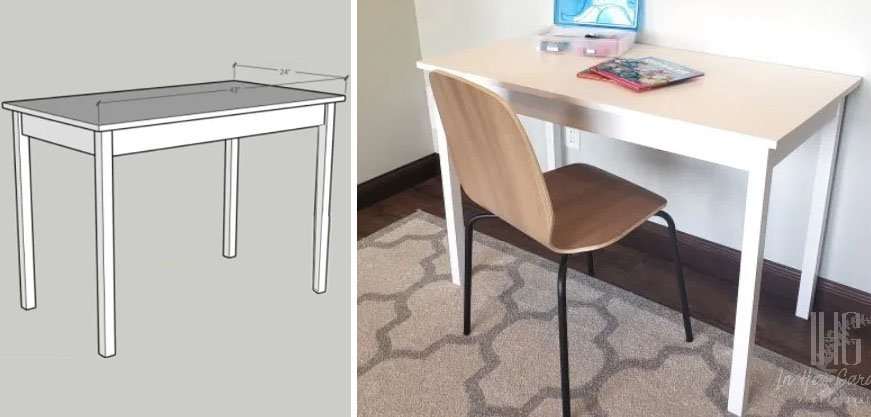
I made this particular table for a client and it measures 30”h x 43”w x 23”d but you can modify these measurements to fit your needs. Of course, the quality of lumber you use is your choice but I used clear pine from my local big box store because it paints better than using common pine boards. It may be more expensive but the boards tend to be straighter, it saves time on sanding, and I feel it yields a better-finished product. It doesn’t matter what wood you use as long as you love it.

Materials:

(I’ve included affiliate links for your convenience. I earn a small percentage from a purchase using these links. There is no additional cost to you. You can read more about affiliate links here.)

Tools:

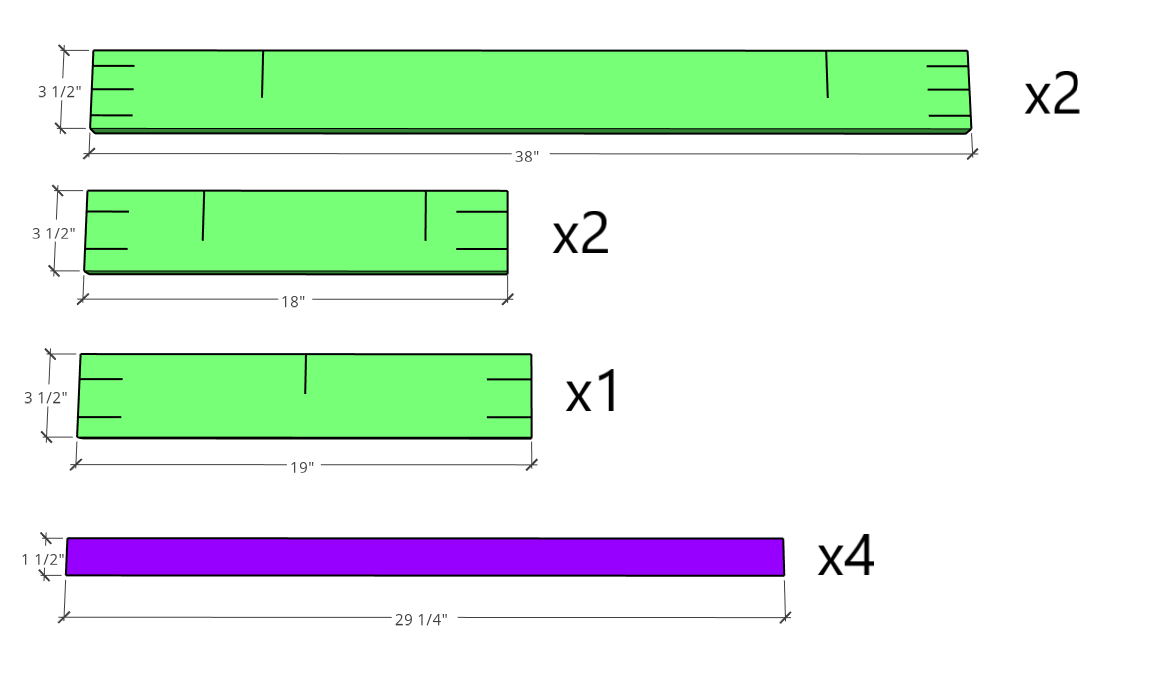
Cut list and pocket-hole placement:

  • 4- 2×2 @ 29 ¼”
  • 2- 1×4 @ 38” (3 pocket-holes in each end)
  • 2- 1×4 @ 18” (2 pocket-holes in each end)
  • 1- 1×4 @ 19” (2 pocket-holes in each end)
  • 3/4”x 43”x 23” birch plywood

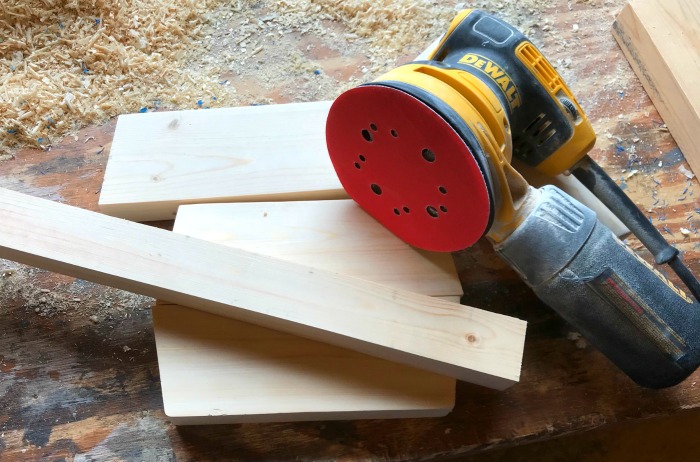
Step 1: Sand table components

  • I know it seems odd to start with this step but trust me when I tell you it is much easier to sand these boards before they are in place. Depending on how rough your lumber is, begin using 60-80 grit sandpaper and incrementally work your way up to 220 grit sandpaper.  I chose to use clear pine found at my local big box store so I was able to start with 120 grit sandpaper, which cut down my sanding time. This makes the extra money spent, well worth it!

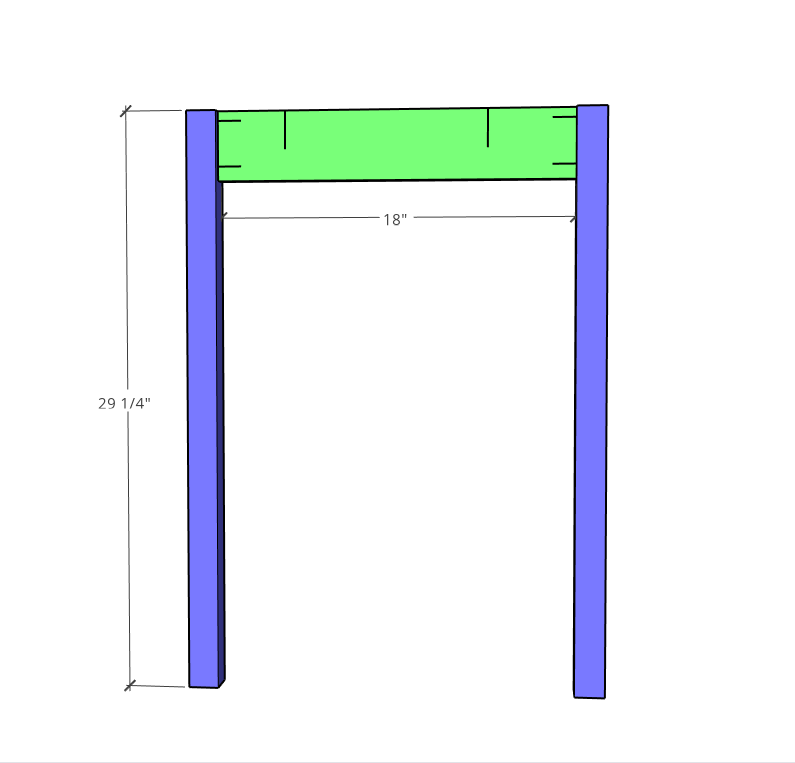
Step 2: Assemble both table sides

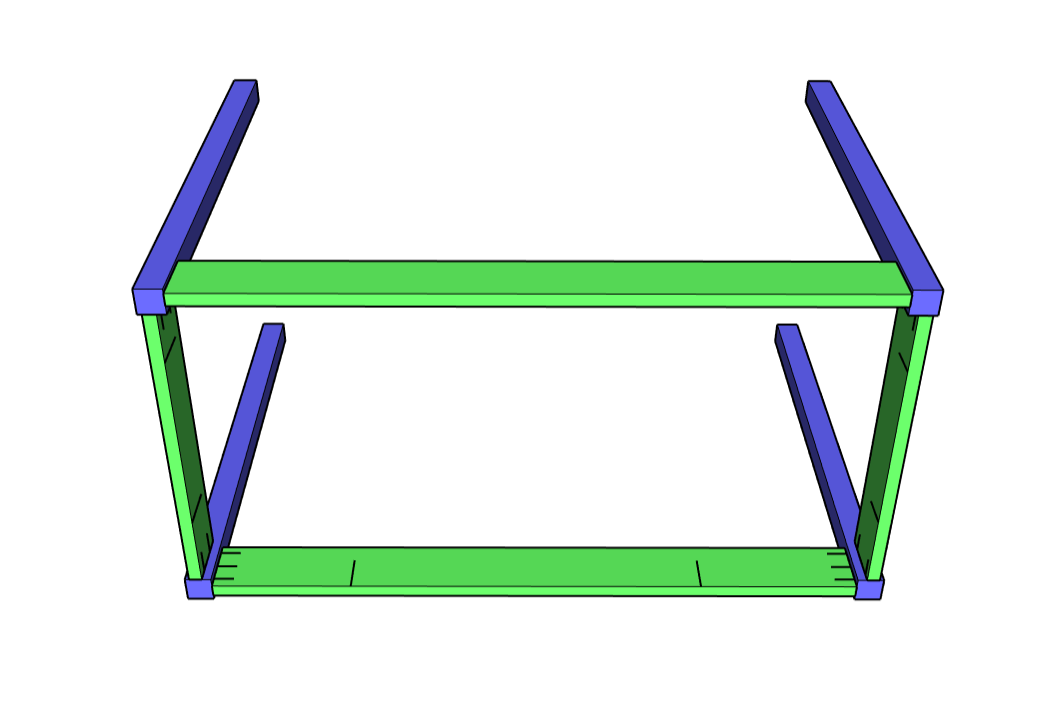
  • Sandwich one 1 x 4 x 18” (apron) board between two 2 x 2 x 29 ¼” (leg) boards. Pocket-holes should be facing up.
  • To add a little detail, place a ¼” piece of scrap beneath the 1×4 board to inset it slightly. This will create a shallow reveal looks nice and also gives you a little grace because now the three boards don’t have to be flush to the same surface perfectly.
  • Clamp the legs and apron boards together and join them using wood glue and 1 ¼” pocket screws.
  • Repeat these steps for the other side of the table.

Step 3: Attach the front and back table aprons

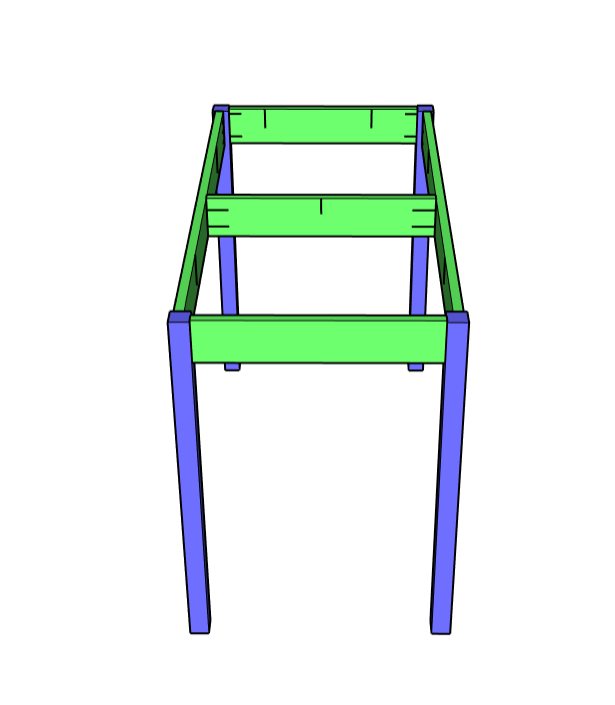
  • With both side components standing on their sides sandwich a 1 x 4 x 38” (apron) board between them, again placing a ¼” board beneath the apron to inset it slightly.
  • Align the top of the 1×4 with the top of the side components.
  • Clamp and attach using wood glue and 1 ¼” pocket screws.
  • Carefully flip the piece over and repeat the above steps to attach the second 1 x 4 x 38” apron board.

Step 4: Attach center support

  • Attach the center support using wood glue and pocket screws between the two 1 x 4 x 38” boards centered in the middle.

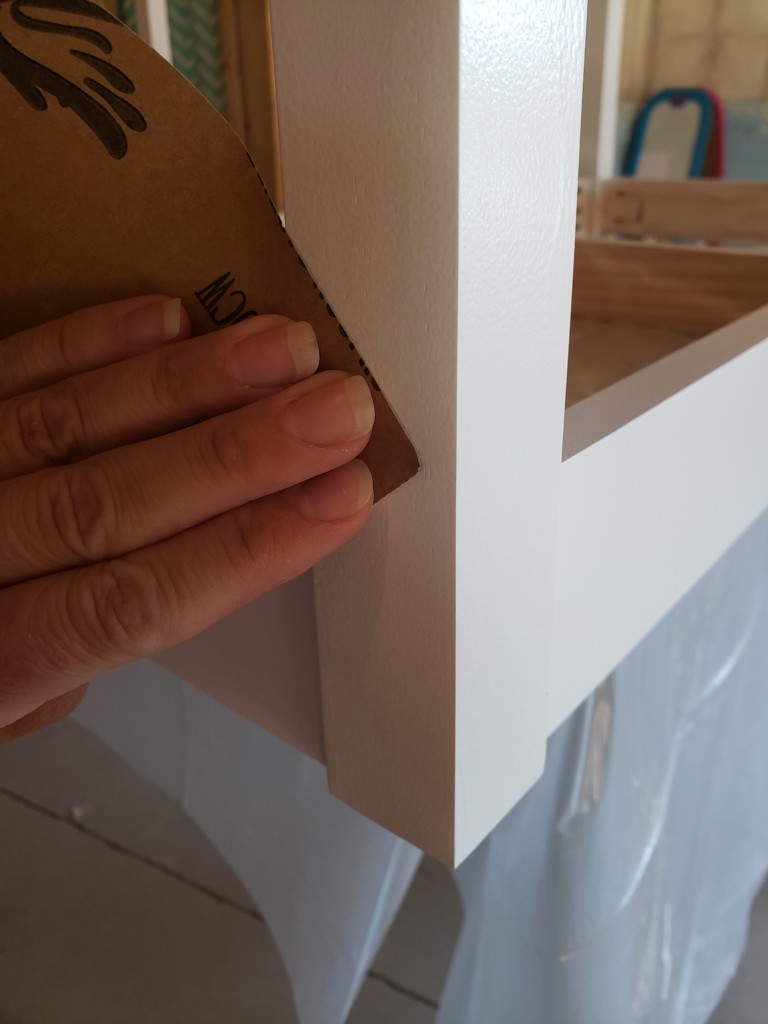
Step 5: Clean up

  • With a putty knife or chisel gently remove any glue squeeze out and sand smooth.

Step 6: Edge banding

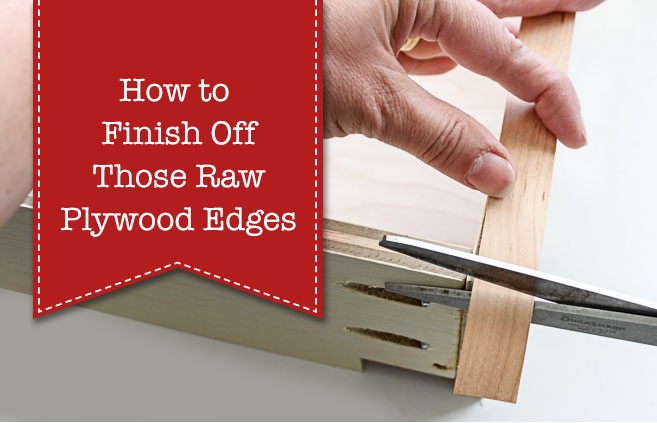
  • Once the plywood top is cut to size you will need to edge band to cover up the unsightly edges. I won’t go over all of the steps here but if you are new to edge banding please check out this tutorial on How to Finish Raw Plywood Edges.


Step 7: Finish

  • Time to paint or stain and topcoat!! My client wanted this piece painted white, so I chose a premium latex paint and used a water-based topcoat to protect the paint and prevent yellowing of the finish in the future.

Step 8: Attach the top

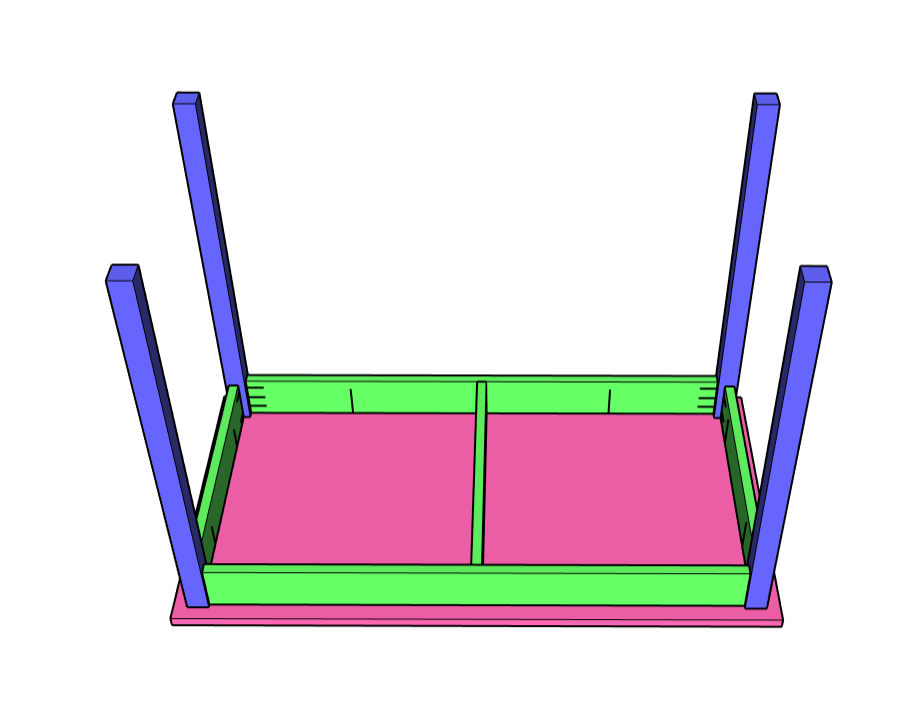
  • Place the tabletop on a flat surface (bottom side up) and center the base over the top upside down.
  • This plan allows for a 1” overhang of the top on all sides of the table base.
  • Using the pocket-holes that are shown in the diagrams below, attach the top with 1 ¼” pocket screws.

    • Note: Normally I would not recommend attaching a tabletop using pocket screws IF that top were made of solid wood because of wood’s tendency to expand and contract. However, this top is made of plywood and the amount of expansion and contraction that will happen over time is negligible and should not affect the structure of the table base.  If you are uncomfortable using pocket-holes to attach the top then feel free to attach it in some other way, such as with figure-8 fasteners or Z-clips.

Flip it over and admire your handy work!! Isn’t this DIY Kid’s Craft Table adorable?!

Check out my latest blog post about building a DIY Folding Craft/Sewing Table! This table is large enough for any craft project but folds down when you don’t need it. Perfect for anyone with a small space but large crafting ambitions!

Hi! I’m Kristen, from In Her Garage, and I am a self-taught woodworker and DIY fanatic from Minnesota where I live with my husband and our two daughters. Between being a wife, mom, and registered nurse, I try to make as much time for DIY as possible. My love for building came after our family built our current home in 2015. After we moved in, we needed furniture, and instead of spending massive amounts of money to order the items we wanted I decided that I would build them myself. I started with a buffet table plan from the fabulous Ana-white and quickly set out to remodel my entire home office.

Since then I have started a side business building furniture for the people in my community. I love hearing my clients talk about the pieces they wish they had whether it be a rustic buffet table, a one drawer side table, or a toy box and then making it a reality for them. While starting my small business it made perfect sense that I would document my building journey so I simultaneously launched the In Her Garage blog and I love sharing my plans, tips, and tricks.


I am so glad that you found me here and please feel free to connect with me on PinterestInstagram, and Facebook to see what I am working on right now.


If you enjoyed this tutorial and are looking for other cute ideas for kid’s desk or craft table check out these two fun projects. Both of these could be great projects you could do with the kids to keep the fun going.

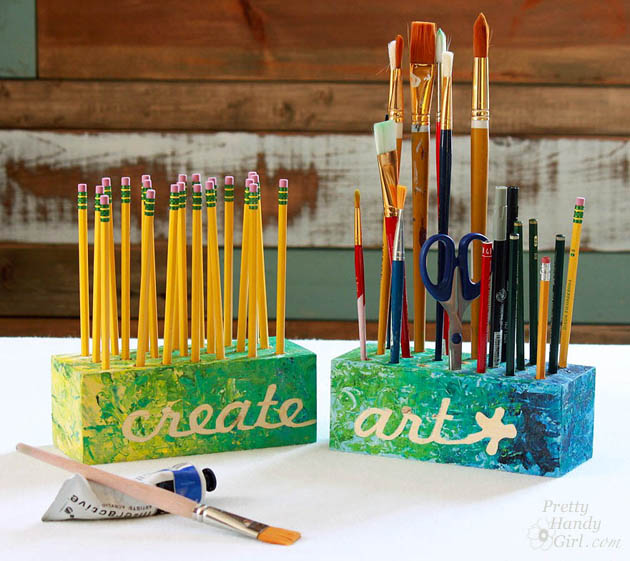
Creative Block Desk & Art Utensil Holder

create_art_block_holders_sm

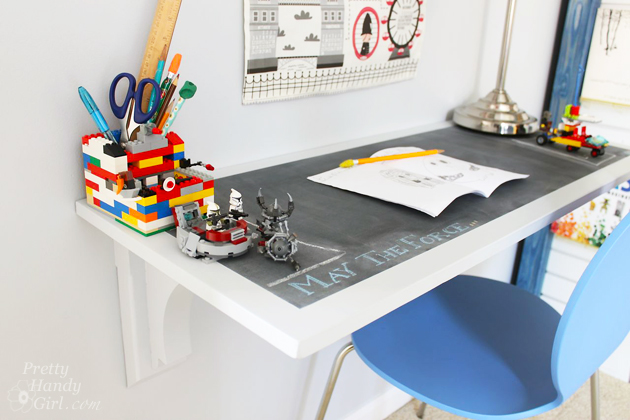
Creating a Chalkboard Desktop.

How to Make a Chalkboard Surface Desk | Pretty Handy Girl