Pretty Handy Girl's Holiday Home Tour 2014

Pretty Handy Girl's Holiday Home Tour 2014

Welcome to my Holiday Home Tour 2014! If you are just arriving here from The DIY Showoff, welcome! If you came here first, be sure to catch up on the other tour participants by following the links at the end of my post. A special thanks to Chris from Just a Girl for putting together this fabulous tour.

I’m thrilled to be able to open my door and let you in to see all the decorating I’ve been working on. I admit to you that my home doesn’t normally look this clean. And there may be a pile of papers or shoes behind a door, so watch your step.

Pretty Handy Girl's Holiday Home Tour 2015

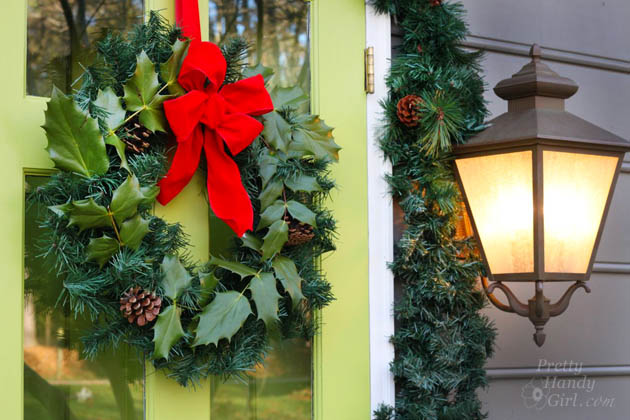
I love to update fake pine wreaths every year by tucking new elements inside. This year I used some tree picks from Lowe’s. You can see my old Presto Chango Christmas wreath if you want some more quick ways to dress up a cheap wreath.

Pretty Handy Girl's Holiday Home Tour 2015

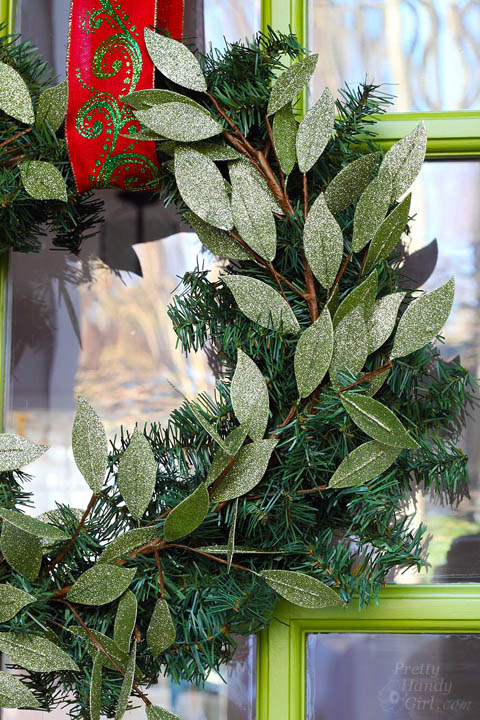
The front door wreaths benefited from a few sprigs of cut holly from the yard.

Pretty Handy Girl's Holiday Home Tour 2015

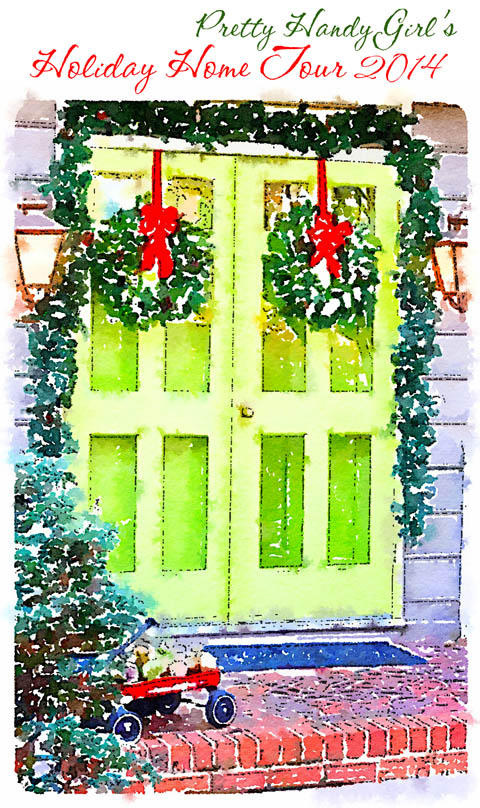
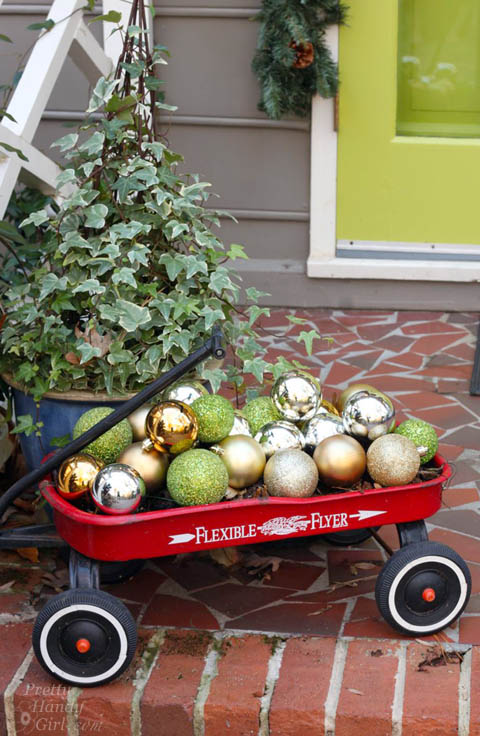
Adding some ornaments to my little red wagon planter will take the place of plants until the spring.

Pretty Handy Girl's Holiday Home Tour 2015

Come on inside the foyer, I know it’s a little cold outside.

Pretty Handy Girl's Holiday Home Tour 2015

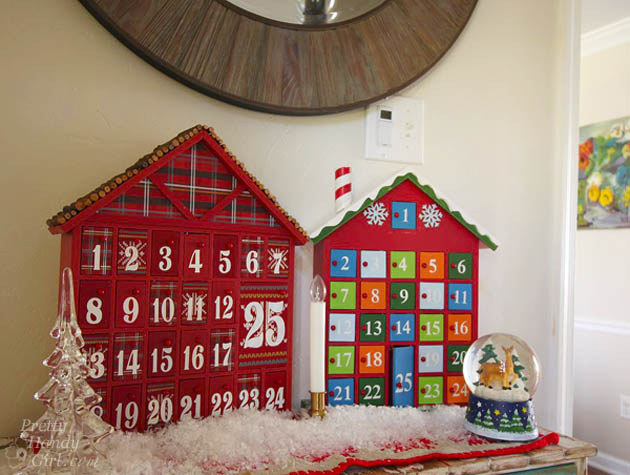
The kids’ advent calendars are filled and await their eager hands each morning. The colorful little houses look right at home on my IKEA hacked cabinet.

Pretty Handy Girl's Holiday Home Tour 2015

This year I wanted to add a lit garland onto the stair railing! If you look closely you might see a white cord taped around the baseboard leading into the office. I refuse to be dissuaded by the lack of a nearby outlet. Read more

Sport Gear Storage in a Small Space | Pretty Handy Girl

My home is protected by ninjas! Well, actually Tae Kwon Do athletes, but they are ninjas in training. So, don’t even think about breaking into our house or they will open up a can of whoop ass on you! 😉

Unfortunately, where my boys are plentiful in kicking and punching skills they lack in the picking up your stuff department. Which means that the bottom of the stairway to our bonus room is usually the dumping ground for their gear bags, clothing and gear.

Sport Gear Storage Shelves in a Small Space | Pretty Handy Girl

I knew I could “up” the amount of storage we had in this small unused space by going vertical. I designed and created Sports Gear Storage Shelves in the small space at the base of our bonus room stairs. Adding mesh siding gives the storage system a locker vibe and allowed for better air flow around stinky sports gear.

Sport Gear Storage Shelves in a Small Space | Pretty Handy Girl

Want to know how to build your own Sport Gear Storage Shelves? Hang out for a while and I’ll walk you through the step-by-step tutorial.

Materials:

Cut List:

  • 5 – 15″ x 24″ plywood (shelves)*
  • 5 – 1 x 3 x 15″ (shelf cleats)
  • 5 – 1 x 3 x 23″ (shelf cleats)
  • 2 – 1 x 3 x 88″ (sides of support frame)
  • 2 – 1 x 3 x 4.5″ (top & bottom of support frame)
  • 1 – 5.5″ x 84″ piece of wire mesh
  • Rip edge banding 1/4″ thickness from one 1 x 3″ board

* You should be able to get a sixth shelf cut from your plywood if you wish to use it for a base.

Instructions:

Before beginning to build, sketch out your design with painter’s tape. Take note of the height of any baskets or gear bags you will store on the shelves. This should give you the ability to visualize the storage shelves and make any alterations to your design before you build. Once you are happy with the layout, write down your shelf heights.

Sport Gear Storage Shelves in a Small Space | Pretty Handy Girl

You may wish to clad the walls in wood planks like I did before you build the shelving. If you decide to add the planks, here’s the tutorial for planking your walls.

Sport Gear Storage Shelves in a Small Space | Pretty Handy Girl

Measure and mark the heights of your shelves.

Sport Gear Storage Shelves in a Small Space | Pretty Handy Girl

Using a level, draw a pencil line where the shelves will rest.

Sport Gear Storage Shelves in a Small Space | Pretty Handy Girl

Secure the 1×3″ cleats below the pencil line using 2 1/2″ wood screws into studs.

Sport Gear Storage Shelves in a Small Space | Pretty Handy Girl

Continue securing shelf cleats to the wall with screws into available studs.

Sport Gear Storage Shelves in a Small Space | Pretty Handy Girl

Paint or stain the cleats to match the wall color.

Sport Gear Storage Shelves in a Small Space | Pretty Handy Girl

Building Curved Shelves with Edge Banding: Read more

Screen Porch Decorated for Fall | Pretty Handy Girl

Fall Accessories for the Screen Porch | Pretty Handy Girl

This fall I’ve spent a lot more time on our screen porch.  It all started with a new ceiling fan. We call it the trickle down effect in our house. You bring something new, nice and beautiful into a room and all of the sudden everything else looks old, dated and ugly. I often find myself wanting to give the whole room a new look. It’s a true “If You Give a Blogger a Cookie” problem.

Screen Porch Decorated for Fall | Pretty Handy Girl

Then I built a folding writing desk so I could work outside.  Now my family knows I’m most likely on the porch when they can’t find me in the house.

Folding Laptop Writing Desk | Pretty Handy Girl

Because Autumn had arrived, I decided to add some new colorful accents to the existing blue and white palette. A Target herringbone throw and feather pillow are a cozy invitation to kick up your feet and relax.

Screen Porch Decorated for Fall | Pretty Handy Girl

I rolled up the painted bamboo rug and replaced it with a simple sisal rug.

Screen Porch Decorated for Fall | Pretty Handy Girl

All the new pillows are from Target:

Screen Porch Decorated for Fall | Pretty Handy Girl

To play up the colorful accents, I filled a wooden vessel with colorful antique croquet balls.

Screen Porch Decorated for Fall | Pretty Handy Girl

This is definitely the spot to sit while the weather is still warm.

Screen Porch Decorated for Fall | Pretty Handy Girl

Unfortunately, we’re supposed to get an Arctic blast next week. You know I’m spending as much time this weekend soaking up the last of our North Carolina warm weather.

Screen Porch Decorated for Fall | Pretty Handy Girl

I hope your weather continues to be nice and you are enjoying being outside.

PHGFancySign

Rustic IKEA Hack Cabinet Transformation | Pretty Handy Girl

Rustic IKEA Hack Cabinet Transformation | Pretty Handy Girl

Rustic is not usually a word used to describe IKEA. IKEA is better know for their modern furniture, simple lines, meatballs and funny Swedish words. Today I’m going to change how you perceive IKEA furniture forever! Are you ready for this? Well, hang onto your hästes (Swedish for horses) because you’re going to see a transformation nothing short of amazing! You too can customize your plain jane furniture by adding legs and cladding the exterior with reclaimed picket fence wood.

This tale starts with a hunter green stained IKEA storage chest that I bought for our first apartment and stained myself (can you tell what decade it was? Hint: hunter green, honey pine, throw some burgundy in there and I’m sure you’ll be guessing no more.) It moved from room to room each time we settled into a new home. But, it never really fit in.

ikea chest in guest room

The cabinet was short and not very deep. Plus, it bore the mark of the popular 90’s hunter green. It was ugly. Why didn’t I get rid of it years ago? Maybe I was attached to it because it was the first piece of furniture I ever stained myself. And it brought back fond memories of calling the fire department because I smelled gas. Turns out you aren’t supposed to use an oil-based stain indoors, especially if you have a gas stove. Lesson learned.

Rustic IKEA Hack Cabinet Transformation | Pretty Handy Girl

Fast forward two decades and it’s still hanging around. The other day as I was lamented the fact that our foyer is too small to fit a cute dresser, I found myself looking at this sad little IKEA chest. I picked it up and put it in our foyer. The fit was perfect in the small space behind the front door! But, it was short and let’s not mention the hunter green again. Plus, it just wasn’t cute. And it doesn’t reflect my warm and weathered style. But, you know me, I wasn’t deterred.

I did some mental gymnastics and began to hatch a plan to create a marriage that would last longer than two decades.

Old picket fence pieces

It began with some pieces of old picket fence that I found by a dumpster. They were perfectly chippy and rustic! Luckily the 3M Lead Check results were perfectly negative. I carefully took the fence apart and removed all the nails.

Lead check picket fence paint

Ready to see how I convinced the two polar opposites that they belonged together — rustic and modern — to create a match made in heaven? Let’s explore this couples’ counseling further:

Read more

Updating a Knotty Pine Nightstand | Pretty Handy Girl

Updating a Knotty Pine Nightstand | Pretty Handy Girl

The best way to give your room a makeover on a budget is if you can use your existing furniture. Notice that I didn’t say using it “as is”. Heck no! Update your solid furniture by adding moulding, paint and new feet!

Updating a Knotty Pine Nightstand | Pretty Handy Girl
(Pretty Handy Dog is already staking his claim on his preferred spot on the new bed.)

When I decided to build our new bed, I wanted to use our existing nightstand and vanity to save money. But, the nightstand was a little too short for the new bed height. By adding new feet and painting it the same color as our new bed, I was able to give the knotty pine nightstand a second life.

(I’ve included affiliate links for your convenience. I earn a small percentage from a purchase using these links. There is no additional cost to you. You can read more about affiliate links here.)

Materials:

Optional:

Instructions:

Start with a solid night stand. She may have some dated curves, but that’s nothing a little baseboard moulding can’t fix!

Updating a Knotty Pine Nightstand | Pretty Handy Girl

Remove the drawers. Clean out any dust bunnies and lost love letters out of the back.

Updating a Knotty Pine Nightstand | Pretty Handy Girl

Cut an interior facing 45 degree angle into one end of the baseboard moulding. Line up the bevel against one end of the front of the nightstand. Mark the opposite corner of the base where you need to cut. Read more