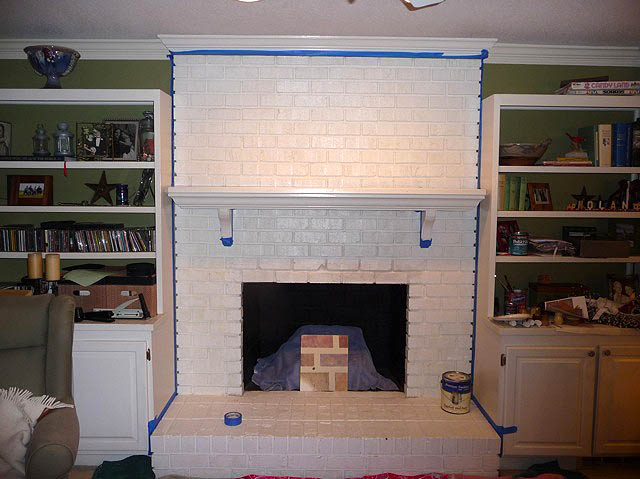
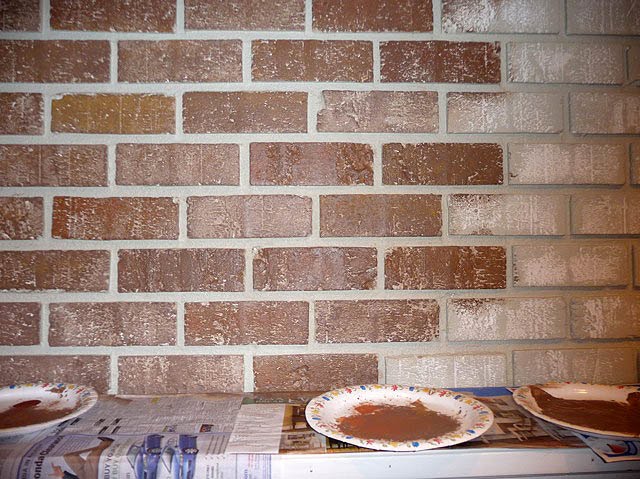
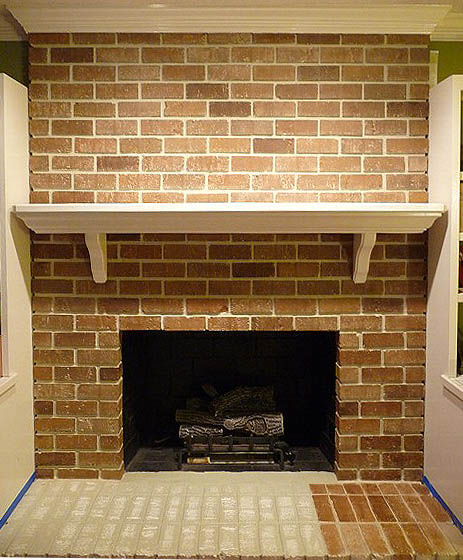
On Monday I showed you my fireplace painting from white paint back to brick. This was only one step in our major living room renovation. I hope you will hop back again this week to see some of the other transformations we made to this room.

1. Faux painting brick over a previously painted white brick fireplace
2. Lightening up a room in 5 steps (this post)
3. Painting decorative graphics on a wall
4. Preparing to Install Antique Heart Pine Floors (and living to tell about it!)
5. Installing Heart Pine Floors and the Final Reveal

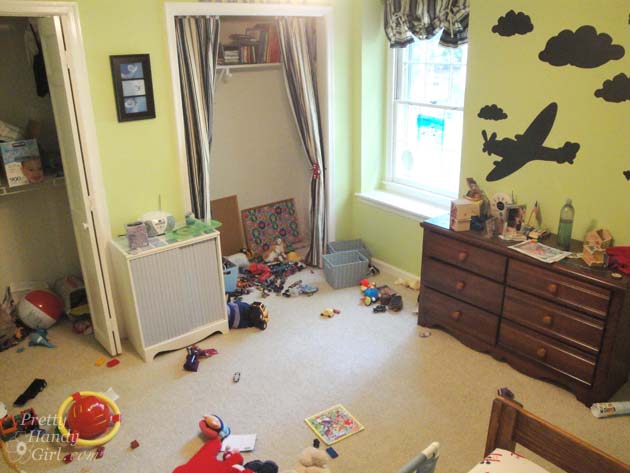
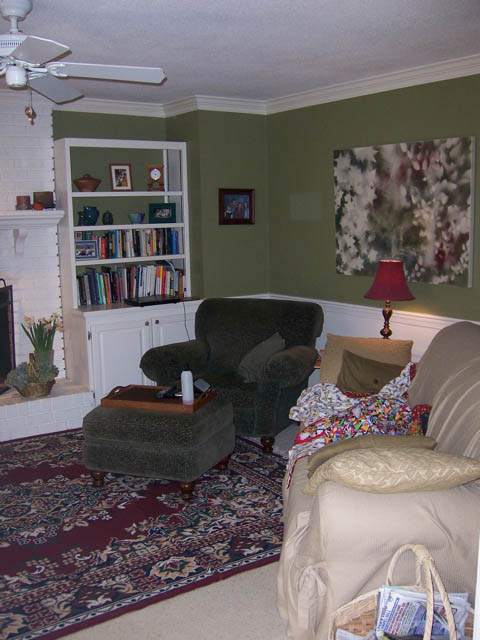
After the bricks were painted, I enjoyed the results for a few months, but I had bigger ideas for this room. The first was to lighten up the room. This room has no windows, only a sliding glass door that opens to a screened porch. No ceiling lights except two eyeball lights aimed at the fireplace.  Add to that a deep pine green paint on the walls and this room was one dark cave.

These pictures were taking before we moved in:


Years ago Pretty Handy Guy and I learned that the first thing you need to do to increase light in your room is to scrape the popcorn ceiling and repaint it using Valspar’s Ultra Bright Flat White Paint.

Photo courtesy of DIYNetwork.com

This always makes a dramatic difference in how much light is reflected (as opposed to being absorbed by the popcorn texture and dull builder’s white paint.)

Okay, so if you are thinking that I scraped the ceiling myself, think again.  I may be pretty handy – and there isn’t much I can’t do – but this is one job I choose NOT to do. I scraped our pantry ceiling and it was easy, but my neck hurt for days! Do yourself a favor and hire someone to scrape, spackle and sand for you if you have neck or shoulder issues like I do. Then you can prime and paint with a roller on an extension pole.

Ceiling scraped, spackled, sanded, primed, and painted with ultra white paint. Wow, that is bright white!

Just kidding. I didn’t take a picture of the ceiling.

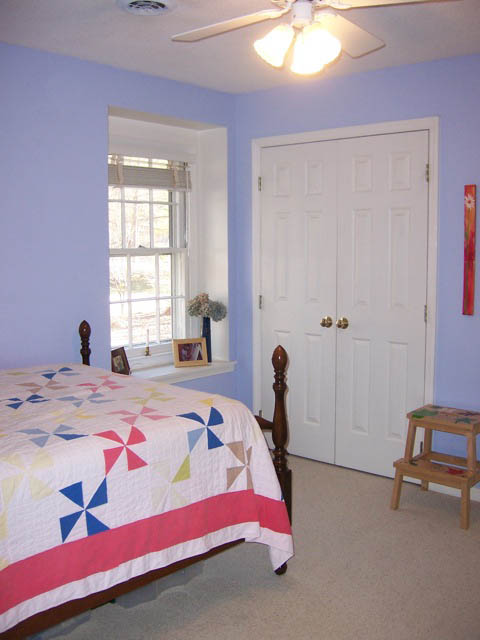
Most people know that adding a lighter color to a room increases the amount of light. Dark colors absorb light while lighter colors reflect them. (Remember the wisdom of not wearing black on a hot sunny day).

After much deliberation*, (because I liked the green color that was already there) I chose a lighter green for the walls. Wasabi Powder by Behr. But I had my favorite “paint guys” at Ace Hardware match the color in a Benjamin Moore Satin Aura Paint.

*When I deliberate, I bring home about 50 different swatches from many brands for each room I am trying to decide for. Then I put up a few at a time stuck in door jams, light switches, etc. I move them around on different walls at different times of the day. Then weed out the ones I don’t like. I live with the colors for at least a week, taking time to narrow my choices down to three. Then I run to buy the little sample paint jars of the colors I chose or have the paint department at Lowe’s mix one ($3 for a sample of ANY color! Woot!)

At this point I am so gung-ho about painting that I grab my brush and paint big 3′ x 1′ patches of the finalists on all four walls right up against the white trim (so I have one edge against white not the existing wall color). But, If you aren’t quite ready to paint on your walls, you can paint your swatches on big pieces of poster board instead. Usually within a day I can decide on “The One.”

Since this was my first experience with Benjamin Moore Aura paint. I was shocked when the paint covered the deeper green with only one coat! Pretty Handy Guy and I are perfectionists about painting, so we have always used two coats on any room we paint. We both agreed that this time we couldn’t see ANY spots showing through with this paint!

Legalese: Of course, your results may vary.
We have since painted the office from a dark sienna color
to a light stone color and definitely need the two coats.

One more thing about Aura paint, it really is super low odor. It is more expensive, but you don’t have to use as much since it covers better, no roller marks, and …hey, it is good for you and the environment!

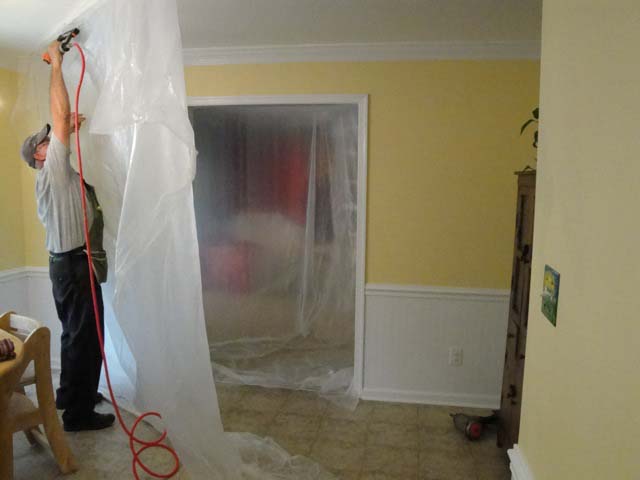
The new color made a difference, but the biggest unexpected change in light happened when we widened this doorway:

This was a measly 4 feet opening from the kitchen to the living room.

I had been trying to convince Pretty Handy Guy for eons months that we really needed to open up the doorway. I wanted to be able to see what our two screaming boys were up to while struggling to pull dinner out of the oven. Or be able to participate in conversation with guests when they sat in the living room and I was busy in the kitchen.

I tried taping up cardboard to show him the new width. But, he just couldn’t see the potential. Luckily, he finally gave in.

The next day, I hired a contractor to open up the doorway. This guy was worth his weight in gold, especially when he proposed a brilliant idea:

“Why not add sconce lights to each side of the opening in the living room since I have to cut holes to move the wiring in your wall anyway?” YES! I yelled. I could kiss that contractor. To this day, I still love those sconces and the light they add to the room. But, most of all, I loved the expression on Pretty Handy Guy’s face (sheer quizzical skepticism) when he heard “sconces”. I found out later that Pretty Handy Guy didn’t have the same vision as I did:

Opening up that wall had an unexpected bonus. It allowed all the light from the kitchen bay window to spill into the living room. So, to recap, here are the light altering changes we made:

  1. Scrape Ceilings
  2. Repaint Ceilings Ultrabright White
  3. Repaint Walls Lighter Green
  4. Add Sconce Lights to both sides of the wall opening
  5. Open Doorway

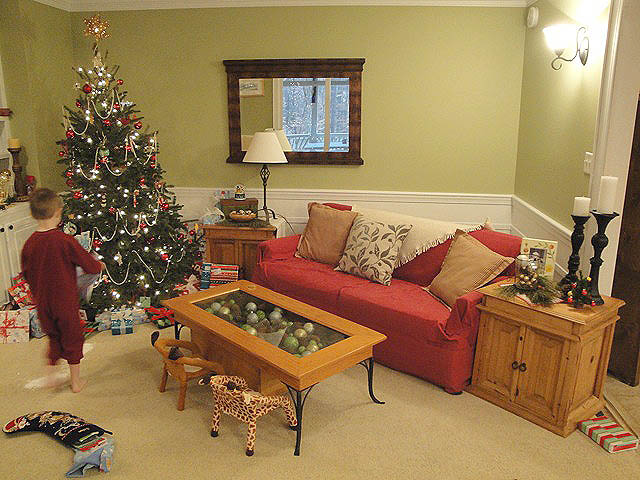
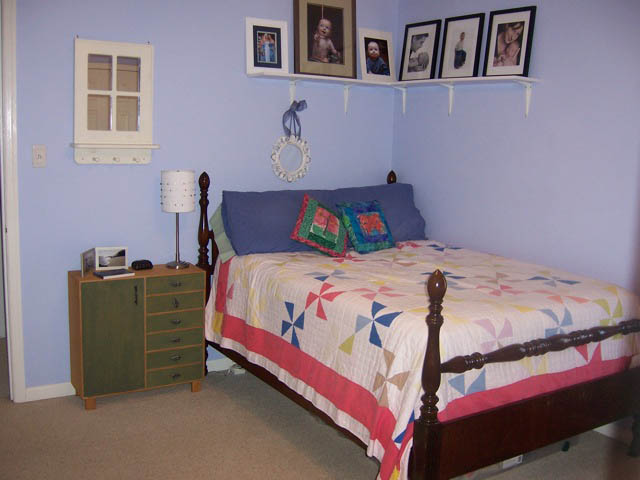
And the results speak for themselves!

Before shot: Living room during daylight with table lamp lighting


After shot: Nighttime room lit by fireplace lights
(gotta love Santa’s magic North Pole footprints made with baking soda!)


After shot: Nighttime room lit by fireplace lights, sconces
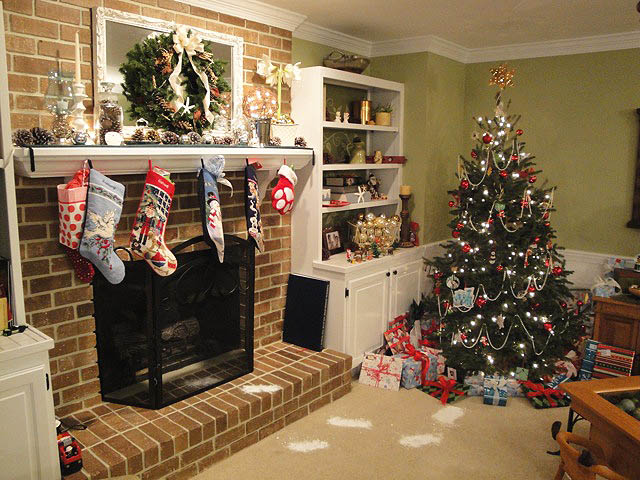
and (okay) a few Christmas tree blinkies

Before shot: 4 foot doorway looking into living room


After shot: Same doorway widened to almost 8 ft. (doorway looking into kitchen)


Final shot: Way too early Christmas morning!
Stay tuned!
And then…Dec. 26th 2009…Christmas is over, take down the tree and remove everything from the room. Make way for reclaimed antique heart pine floors! You gotta see this (coming soon.)

Painting Brick Fireplace

This is the first in a five part series on renovating our living room:

1. Faux painting brick over a previously painted white brick fireplace (this post)
2. Lightening up a room in 5 steps
3. Painting decorative graphics on a wall
4. Preparing to Install Antique Heart Pine Floors (and living to tell about it!)
5. Installing Heart Pine Floors and the Final Reveal

I know the trend lately is to paint fireplace brick white. Especially if the brick is an ugly bright red or some other ugly color. I’m pretty sure that is why our fireplace was painted in the first place.

Painting Brick Fireplace
Before Shot

Painting Brick Fireplace

But, the fact that our fireplace, mantle and the built-in bookshelves on both sides of our fireplace are white, made for an overwhelming amount of white on that one wall. I thought about painting the mantle, but only briefly. I really wanted the warmth and contrast of bricks to set off all the white in our living room.

I stumbled across a few websites showing painted brick here and here. Then I thought, “If someone can do it, then there is a 95% chance that I can do it too!”

I wasn’t sure how it would turn out, but in the end I am amazed by how real it looks. And, how easy it was to do! The true test came when I fooled the builder of our house (he has lived on our street for over 30 years) into thinking I had stripped the paint off the bricks! Sweet success.

This is a relatively easy project. It took several hours, but can be done in sections.

Painting Brick Fireplace Materials Needed:

TSP cleaner
Scrub brush for use with TSP cleaner
Drop cloth
Newspapers
Painters Tape
Paint Roller and Tray
Stiff 2″ paint brush
Car wash sponge or large 6″ x 3″ sized sponge
Spray bottle with water
7 paper plates
Rags for clean Up
Acrylic Paint (see below for colors)

Before you do anything, buy some TSP (tri-sodium phosphate) cleaner at the hardware store and follow the directions to clean your brick. Be forewarned that you may actually like the color of your bricks once they are clean and dry! If you still hate the color, proceed…

After working up a test board by playing with several color combinations, I chose a warm brown brick color. I also tweaked my mortar color before painting it on my fireplace.

Painting Brick Fireplace

I covered the mantle and bookcases by taping newspapers to them. Then, covered the floor with a drop cloth.

I mixed up a small container of my mortar color. I used some leftover latex satin taupe paint from our other house and added some black and a little dark brown to achieve the perfect mortar color.

My color looks like this warm gray cement color:

Painting Brick Fireplace

I painted all the mortar areas between the bricks with a 2″ paint brush.

Painting Brick Fireplace

As the mortar color dried, I mixed up a bucket of my base color for the bricks. Then poured it into a paint tray.

Painting Brick Fireplace

Then, I laid out my seven paper plates and filled the first one with a deep chocolate oops paint (Valspar Latex Eggshell Chestnut).

And poured a half dollar size of the following colors onto the other plates (one color per plate).

Painting Brick Fireplace

I used a paint roller to roll the base color onto small 3′ x 3′ sections of my fireplace. (Don’t worry if the paint doesn’t soak into all the grooves. Some of the white showing through made my bricks look old and rustic.)

While the base color was still wet, I covered my sponge with the Chestnut color. Then dipped the sponge into one or two of the brick tint colors. I sponged one brick at a time using the same color tints sporadically around the wall. Keeping the brick colors varied and random make them look real!

Painting Brick Fireplace

When the sponge needed to be reloaded with paint, I began with the chestnut color first, then added one or two new color tints to the sponge. You will have to refill the paper plates as you use up the paint.

I kept working in small sections, to be able to work while the base color was still wet (use the spray bottle of water to lightly wet the bricks if it dries too quick).

Painting Brick Fireplace

The best part was that if I didn’t like a color, I could go back over it and try a different tint. Notice how I randomly dispersed the darker brown bricks. This is key to having a realistic look.

Painting Brick Fireplace

On the hearth I had to press more gently with the sponge since the mortar lines on our hearth were almost level with the bricks. I kept a wet rag near by to wipe up any wandering brick paint.

Painting Brick Fireplace
Close up picture of the bricks.
Notice how the white specks showing through really make the bricks
look like they are re-claimed and rustic.
Painting Brick Fireplace
After Picture
Painting Brick Fireplace
Daylight picture after decorated for the holidays.
I can’t believe what a huge difference painting the bricks made in our living room. It warmed up the space and actually made our fireplace recede into the room. Let’s take one more look at the before and after:
Painting Brick Fireplace
Side note: The latex and acrylic paint has held up great (even after several fires using our gas logs.)  If you need to paint the bricks inside the firebox, you will need to use paint that is heat tolerant.

And for those wondering how long this took. Including the prep work (cleaning, taping, mixing colors) it took about 5 hours total. Not too bad since I’m a night owl and could watch DIY network while painting!

Be careful not to put anything heavy on the hearth for a few weeks while the paint hardens.

Next up in the series: 5 Ways to Lighten up a Dark Room. 
Followed by: Painting Decorative Graphics on Your Wall.
And I saved the best for last (coming soon): Installing Antique Reclaimed Heart Pine Flooring

Having guests over is such an exciting opportunity to catch up and show off your home. Here’s a tour of our guest room for you to enjoy. Come on in, kick your shoes off and stay overnight if you wish!

CountryLiving

The room had humble beginnings. These are the before pictures.

GuestBefore1
Not a bad color, but just not what I had in mind.
There were several holes that needed patching in the walls.
That gave me another reason to re-paint.

GuestBefore2 What was I thinking?! That little ikea dresser just does not fit!

Before I show you the after pictures, I have to explain. As the mother of two boys (and the only female in our home), I am careful to keep my decorating from being too flowery, frilly, and – well – girlie. But, after a week of sleeping in the guest room because everyone had the flu except me (you know Mom’s can’t afford to be sick!), I decided to throw my femininity into just this one room. I told Pretty Handsome Guy that it was the one room that I needed to be girlie! He knew better than to protest. I guess he figured it was better if I got it out of my system in just this one space.

So, here she is, all gloriously girlified:

Roses
Fresh roses, I wish you had smell-o-vision. Freshly cut roses, displayed in a recycled jelly jar.

Doorknob
Detail of doorknob from the nightstand made from a curbside door and picket fence.

3.4Nightstand
Better view of the nightstand. The lamp is from Goodwil

BirdSeedPillow
The center pillow was a sack of birdseed that I ordered from here.
Then I washed it and stuffed it with stuffing and just re-tied the top.
The patchwork rose pillow was purchased in a gift shop during our visit here.
 
GuestBed
The painting over the bed was painted by the very talented, Shari MacFarlane (who also happens to be my Mom.)

FootofBed

The bed frame was rescued from the curb when we lived in Charlottesville, VA. The side rails were broken, but I found sturdy new ones at a rummage sale the very next week!
I sanded the rails down and stained them to match the headboard and footboard.

Daisyart
You can just barely see this piece of art from the previous picture. I purchased this little painting from a gallery in Asheville, NC on my first getaway weekend after having kids. The artist signed it Cap Man 2005. It is painted on a salvage floor board.
I just love it and the Jimi Hendrix quote

Flowerscloseup
Spray painted floral vases and a peek at my birthday gift from a dear friend.
It was her grandmother’s hand towel!
She was the recipient of this present for her birthday a few years ago.

WindowsonWall

Daisy, the rescued chair and an adorable kidney shaped desk. I think it fell off a pick up truck because it was busted up and upside down on the side of the road.
The desk matched the style of my bed perfectly!

DaisyDesknFlowers
I glued the broken pieces, and re-stained it. Then added a ribbon and bead pull.

Salvage windows. The larger one was a gift from a friend and fellow blogger. I cut mat board to fit in each individual pane and then used double stick tape to mount family photos on the boards. Then pressed the boards in the back of the window and hot glued around the edges.

WindowDetails

Close up of chipped salvage window. I painted one coat of flat white paint on top of the window and then used packing tape to peel off some of the paint.

downshot

Sweet smelling soaps in a bowl. Pitcher and silver tray from Goodwill. Top view of the upholstered bench.

bench3.4view

Can you believe it? The bench was also a curbside find!

This concludes my guest room tour. Did you enjoy? You can view my full home tour here. Thanks for visiting.

PHGFancySign

Closet Reading Nook | Pretty Handy Girl

Come see this Closet Reading Nook Transformation! Learn how I turned this closet into a Reading Nook in a weekend. This area could also become a built-in desk area at a later date.


Boy's Red, White & Blue Themed Room | Pretty Handy Girl

When is a Closet not a Closet? Reading Nook Transformation!

Have you seen all those cute closets on Pinterest? The ones that were closets but are now a new space like a reading nook or a home office? Well, today I’ll show you how you can give your closet a makeover by turning it into a reading nook!

Boy's Red, White & Blue Themed Room | Pretty Handy Girl

The Back Story:

My husband took the boys camping! Translation: A free weekend – by myself – peace and quiet!

{insert sound of hammers, jigsaw, table saw, and more hammering}

Well, forget the quiet part, I decided to tackle another DIY project I have been thinking about for almost two years. My son’s closet!

My three year old has two full-size closets in his room. And, yet, his toys were always strewn around the room. Here is the “keeping it real” BEFORE picture:

Boy's Room Before | Pretty Handy Girl

Last year I took the doors off one of the closets and put up some curtains so he could have a little hideaway. That was an easy task, but I wanted to give him more storage and a fun spot to sit and read books during quiet time. When I saw this picture in a magazine, I knew I had the perfect solution.

Kym, the homeowner, turned her son’s closet into a private nook. I thought, no problem, I’d complete this project in an easy 2 days. After all, how long can it take to renovate one 6′ x 2′ closet? During stopping points I could squeeze in a pedicure, swim some laps and possibly have a friend over for wine and some chat one evening.  Truth be told, it ended up taking a full 3 days (and nights). If I had a helper, I probably could have knocked it out in a day and a half.

Before and After:

Ready to see how I transformed a standard 2′ x 6′ closet into a multi-functioning reading nook, toy storage, sleepover bed, and creative play space?

How to Turn a Closet Into a Reading Nook:

First (after cleaning up all those toys, of course), is removing hardware, base molding, and patching holes. (This is where I found I didn’t know my own strength and ended up having to patch a larger drywall hole after trying to remove the closet cleats.)

Once the closet is empty it’s time to build!

Materials:

(I’ve included affiliate links for your convenience. I earn a small percentage from a purchase using these links. There is no additional cost to you. You can read more about affiliate links here.)

Optional: trim molding & shelving

Home Office Desk Option:

If you want a home office in your closest, skip the base and only build the framing for the bench, but install it at 29 inches (standard desk height).

Measure and Cut Lumber:

Measure the floor of your closet to determine the size for your base and bench.

Cut all your lumber to size, then build two frames. One for the base and one for the bench.


Your base frame only has to have one center support because it doesn’t have to hold much weight. The bench seat frame needs two center supports at 2′ intervals.

Find and mark the studs in the wall. (Here are 5 different ways to locate studs without a stud finder.) Then secure the base frame to the studs using a few screws.

Cut your finish grade plywood to top the base and bench frames.

Scribing Around Molding:

Here is a little trick for scribing the profile of trim or other obstacles onto your board. Use a compass and set the width to the same distance from the wall to the outside of my door casing. Then draw a line around the casing being careful to keep the compass perpendicular to the casing. Then you can cut out the profile with a jigsaw.


Set the plywood on top of the base. Secure the plywood to the base with a few screws (or wood glue and trim nails.)

Next build the second frame the same way (but add two center supports for the bench.)

To simplify things, you may want to prime as much of the framing as you can before nailing it into place. It is easier to prime wood on sawhorses.

Installing the Bench:

If you have a helper, this process will go easier. If not, you need to temporarily hold the framing before securing it. Cut some scrap blocks to hold the bench or temporarily drive in a few screws.

Measure up 18″ from the floor. This is standard bench height.

Use a level (both a carpenter’s level and laser level if you have them) and level the bench platform before screwing it into the studs. Use at least two screws on each side and several into the back and one on either side of the door frame to secure the bench in place. Set the plywood on top of the bench framing. Secure it with a few screws or wood glue and  trim nails.


Remeber that note about having a helper? I wish I had one because at some point the right hand side of my bench shifted while I was securing it, which resulted in a slight slope. Seriously, I really did level it! I even have the pictures to prove it! Shhhh, don’t tell anyone! My lesson learned is that next time I will either screw the frame in place to hold it or put a brace underneath to keep it from slipping.


Bench Cushion:

Cut the foam cushion for the bench seat. If you haven’t heard, the best way to cut foam is with an electric carving knife! (Huge thank you to my friend and neighbor Karen for the use of her 1970’s electric carving knife.)


You can sew a bench cushion later to cover it. Here’s how to sew a simple bench cushion with piping.

Decorative Molding:

Sewing will have to wait, for now we’re going to finish off this closet reading nook with some decorative molding. This is a personal preference, but I chose to install board and batten molding for the back like I did in this bathroom.

But, if you don’t want to use board and batten, you may like the DIY shiplap look instead.

Then I added decorative molding under the shelves. Did you know that some of the molding in your home, especially crown molding, is made up of several different molding profiles? You can make molding more decorative by using several different pieces and then caulk seams to hide the edges?

Painting Prep:

Before priming all your wood, caulk all the seams and let it dry.


This is the Pretty Handy Girl’s tried-and-true caulking method:

  1. Squeeze out your bead of caulk with a caulk gun.
  2. Keep your finger at the front of the tip of the caulk and use a baby wipe smooth the caulk as it’s dispensed.
  3. Follow up with a clean baby wipe if necessary to smooth any spots.

It’s easy to caulk like a pro if you follow my tutorial.

Once the caulk dries, prime all the wood and trim. Let it dry.

How to Tint Primer:

After trying some Benjamin Moore paint swatches, I settled on a deep navy blue called “Symphony Blue”. I knew I’d need to use some tinted primer before trying to paint such a dark color on the light walls. You can save money by tinting your primer. Simply add 1 part paint to 3 parts primer.


Isn’t the marble effect pretty! Mix well.

Painting:

Always use at least two coats of paint. This makes it easier to clean the walls and eliminates any missed spots.

Paint the trim first. Then cut in around trim with a good quality angled brush.

Use a paint roller to paint in between your cut in lines.

So, are you ready to see this Closet Turned Reading Nook?? The drumroll please…

Boy's Red, White & Blue Themed Room | Pretty Handy Girl
Can’t you hear the Symphonic Chords playing?


The copper wall sconce was also from the Habitat for Humanity ReStore. I scored that gem for only $5! It has a cord that I snaked around the molding and then plugged into the outlet just outside the closet. Click Here to Learn How to Add a switch to a Hard-Wire Light.


Plenty of storage bins for all the toys a three-year-old can hoard.


Star pillows were super easy to make with cloth napkins and fabric I had on hand.


Finally, a nook built for reading, sleepovers…


…or just hanging with big brother.

Wall-mounted IKEA LILLÅNGEN Mirrored Cabinet turned Stuffed Animal Storage | Pretty Handy Girl
Boy's Red, White & Blue Themed Room | Pretty Handy Girl

Boy's Red, White & Blue Themed Room | Pretty Handy Girl
That’s all folks! Bye-bye!

Did you like this transformation? If so, you’ll love more custom spaces in my home!