How to Install Cable Railings | Pretty Handy Girl

How to Install Cable Railings | Pretty Handy Girl

Today I have a special tutorial for you! Have you ever fallen in love with cable railings but worried you couldn’t install them yourself? I have great news. You can learn How to Install Low Visibility Cable Railings from this tutorial!

How to Install Cable Railings | Pretty Handy Girl

(This tutorial is sponsored by Feeney. I approached them about working with me on this screen porch makeover because they had great reviews about their products.)
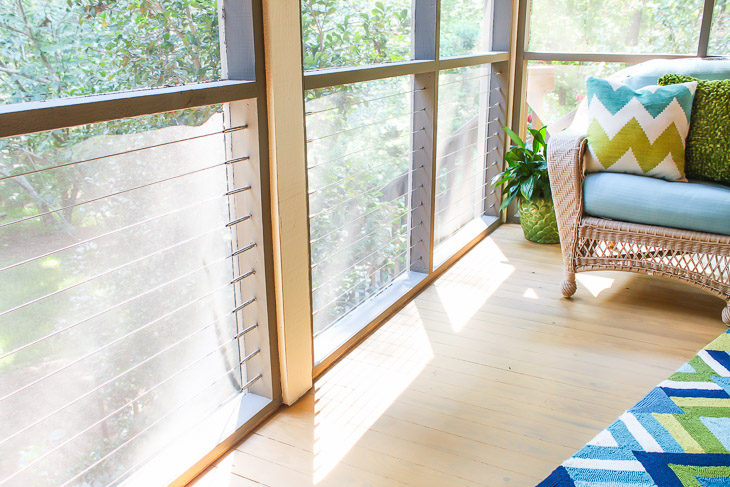
How to Install Cable Railings | Pretty Handy Girl

This is one makeover that has been in my head for almost two years. My much loved stepmom has a screen porch that needed a facelift. We started with a dark, dated and drab porch. All the porch surfaces were painted brown. The furniture had a monotone brown look. The only different color on the porch was from a very faded and dirty blue carpet that was glued to the porch floor. It was so dirty you could probably call it brown too!

How to Install Cable Railings | Pretty Handy Girl

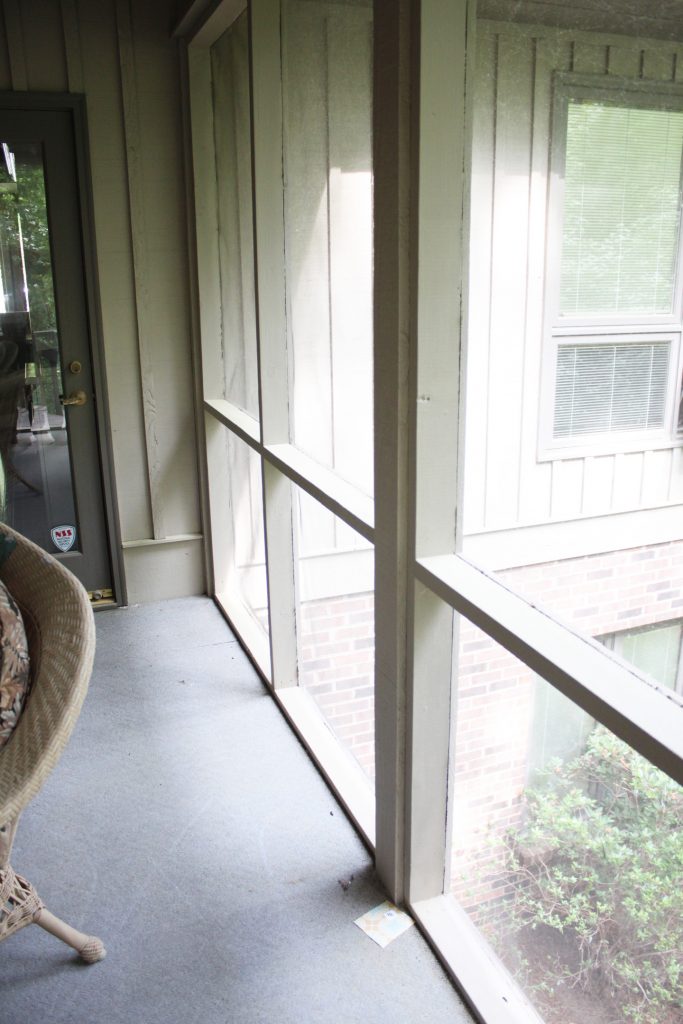
In addition to an appearance upgrade, this screen porch needed a safety solution. This is the issue that has bugged me since my stepmom moved into her home. Can you spot it?
How to Install Cable Railings | Pretty Handy Girl

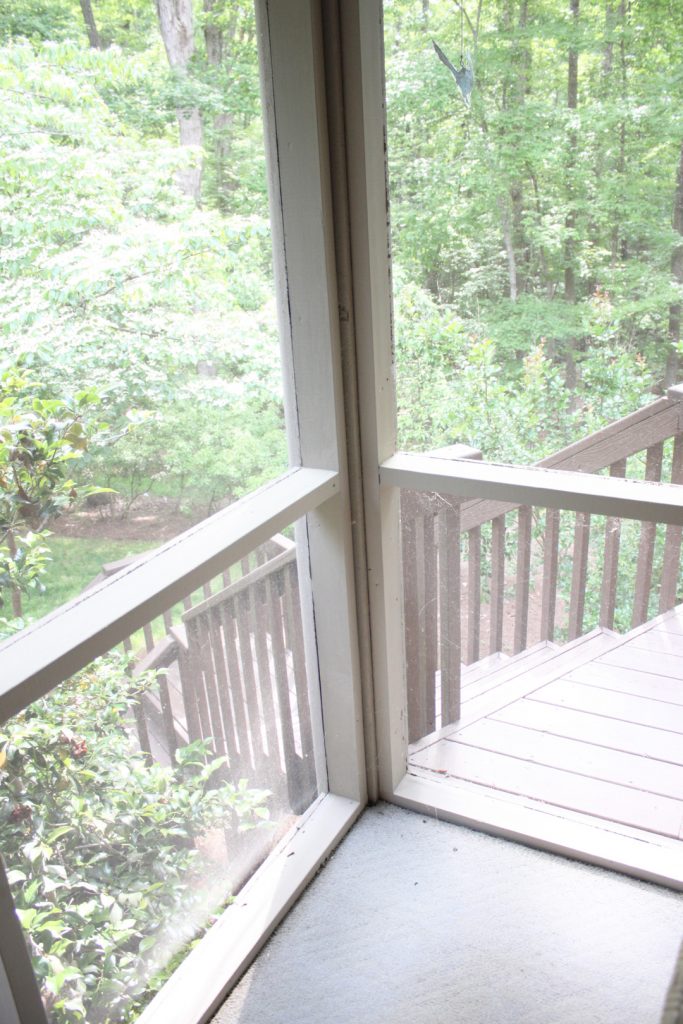
This side of the screen porch has always made me cringe. Can you see the problem from this angle?
How to Install Cable Railings | Pretty Handy Girl

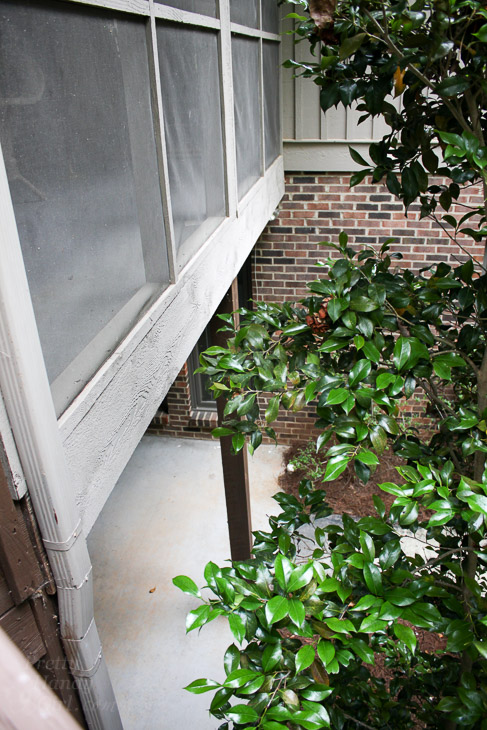
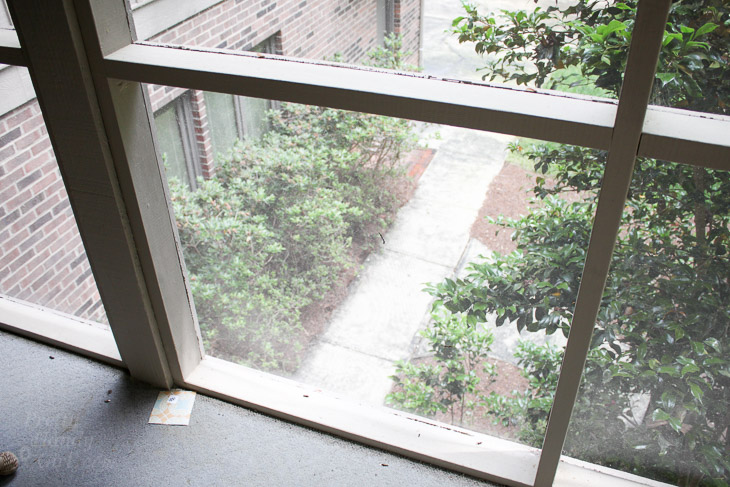
There is a 10′ drop down from the screen porch. The only thing between this drop and people is a thin screen. For the record, this is not how you build a screen porch, it is not to code. There is supposed to be a railing on the lower sections.
How to Install Cable Railings | Pretty Handy Girl

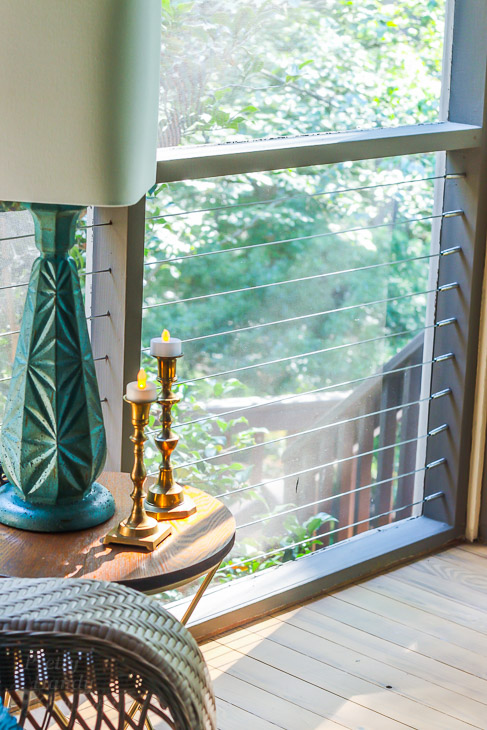
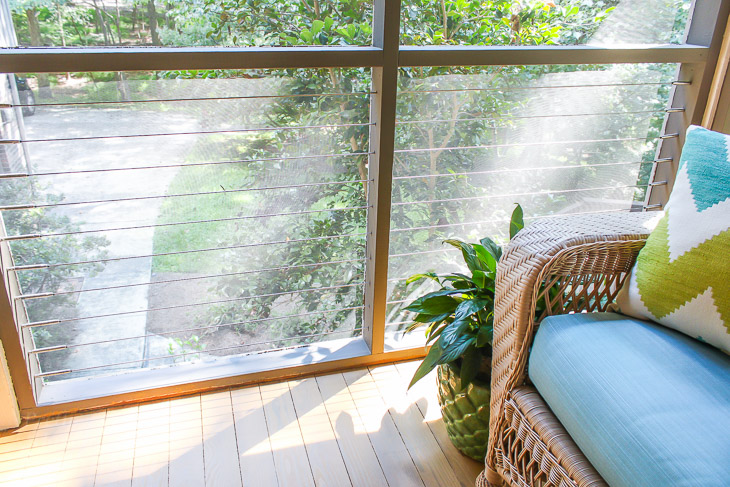
I finally convinced my stepmom to let me solve the problem. One requirement she had was it couldn’t block the view. Luckily I had the perfect solution. Feeney CableRail System!
How to Install Cable Railings | Pretty Handy Girl

They are sleek, modern and nearly disappear. Feeney’s CableRail system with their special easy-to-use Quick-Connect® cable fittings can be installed by any homeowner. Ready to learn How to Install Low Visibility Cable Railings? This tutorial is for installing the cable railings on an existing structure. Installing cable railings on stairs, new construction decks and other applications can be learned about from the Feeney’s website.

Let’s get to it.

Materials:
(contains affiliate links)

Instructions:

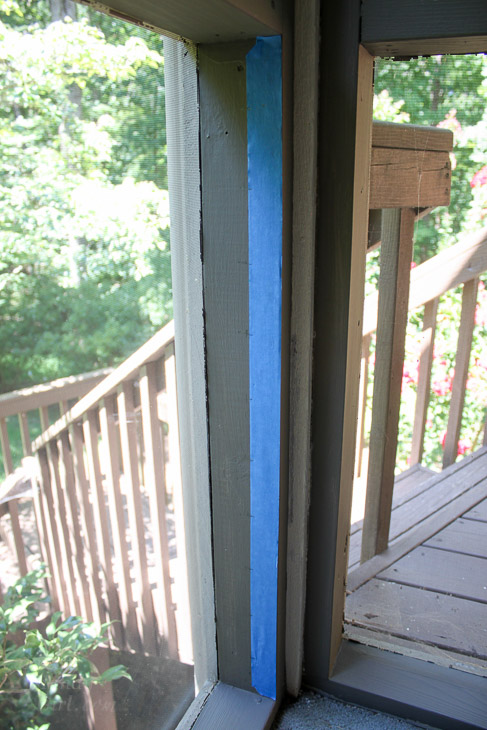
Cut a piece of painter’s tape to fit against the porch’s end supports where the Quick-Connect® fittings will be installed.
How to Install Cable Railings | Pretty Handy Girl

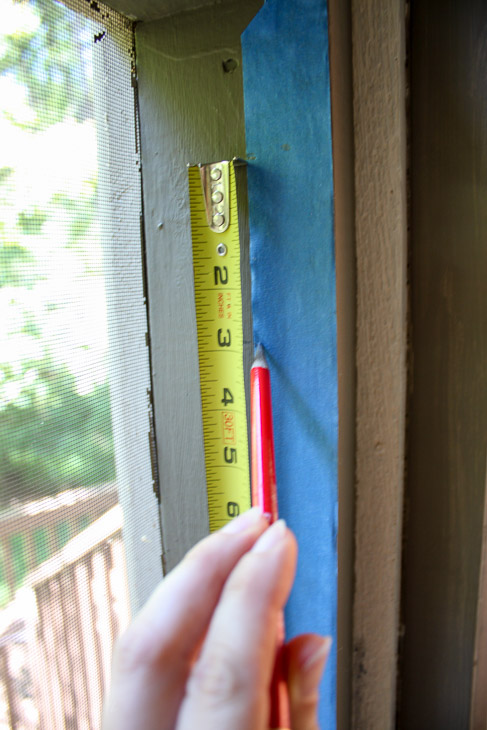
Find the vertical center. Mark 3″ increments along the painter’s tape.
How to Install Cable Railings | Pretty Handy Girl

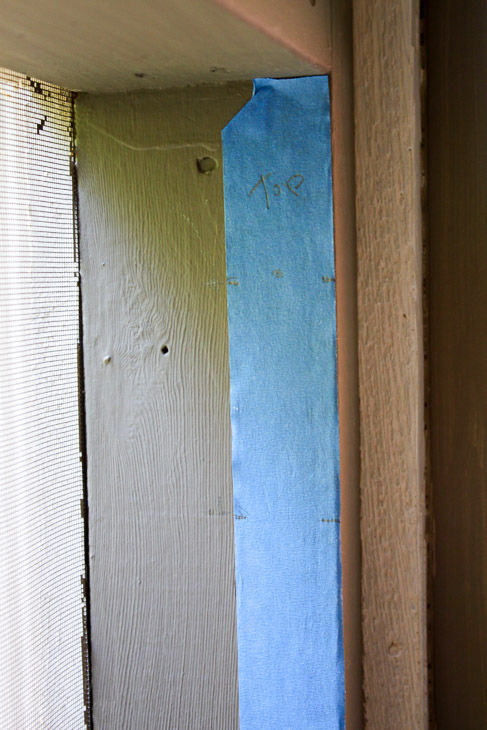
Label the top of the tape for reference.
How to Install Cable Railings | Pretty Handy Girl

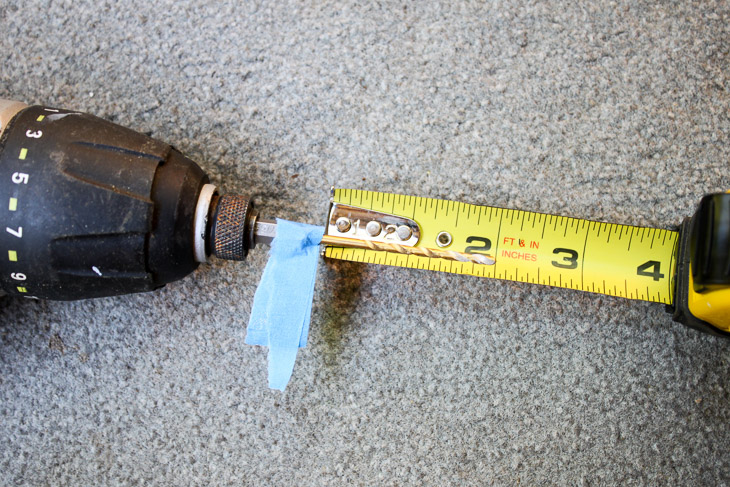
Mark 2″ on your 7/64″ drill bit with a piece of painter’s tape.
How to Install Cable Railings | Pretty Handy Girl

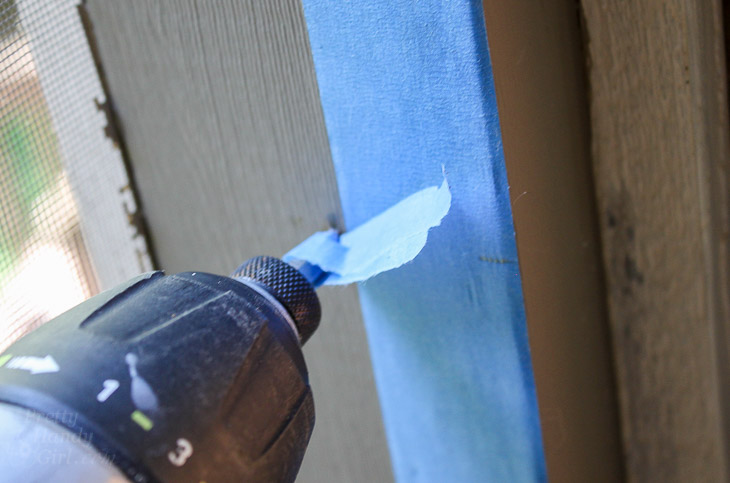
Drill holes at the marked locations into the porch supports. Stop when the painter’s tape flag meets the frame.
How to Install Cable Railings | Pretty Handy Girl

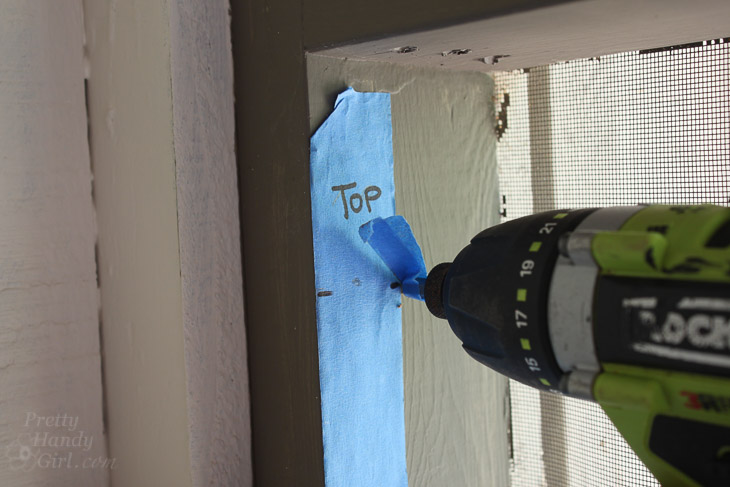
When you finish drilling all the holes on one side, remove the marked painter’s tape and place it on the other end support. If the height differs, center it vertically.
How to Install Cable Railings | Pretty Handy Girl

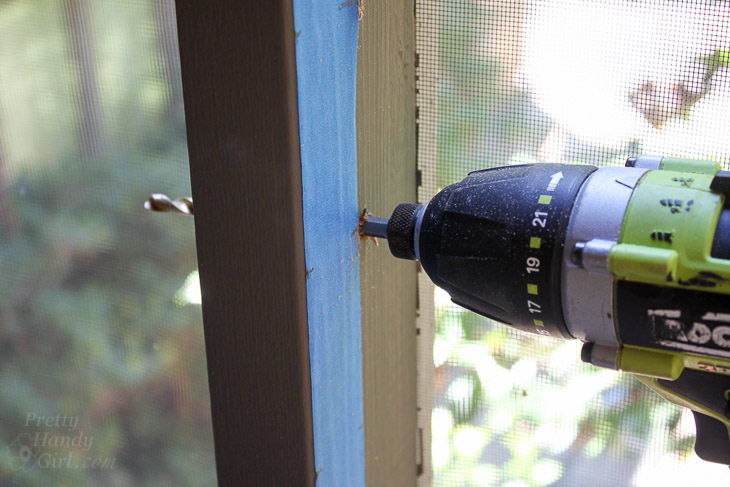
To drill through the center supports, switch to the 1/4″ drill bit and drill completely through the support.
How to Install Cable Railings | Pretty Handy Girl

How to Install the Lag Hanger Bolts:

The lag bolt installation tool makes installing the lag bolt a breeze. One word of caution: go slow and steady with this tool or you will risk getting it stuck on the lag bolt.
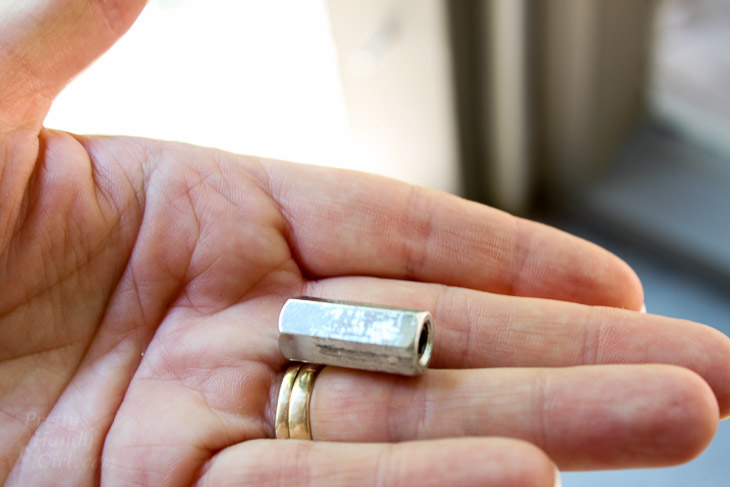
How to Install Cable Railings | Pretty Handy Girl

Place the lag bolt installation tool into the drill. Tighten the chuck.
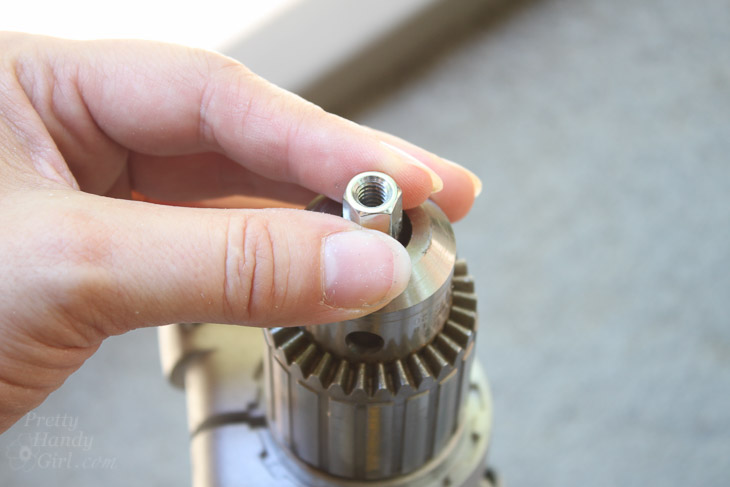
How to Install Cable Railings | Pretty Handy Girl

Select the lag bolt you need for your application. If you are securing into a wood post directly you can use the shorter screw. If you are securing into a post that has a wrap or sleeve you have to use the 2 1/2″ lag screws.
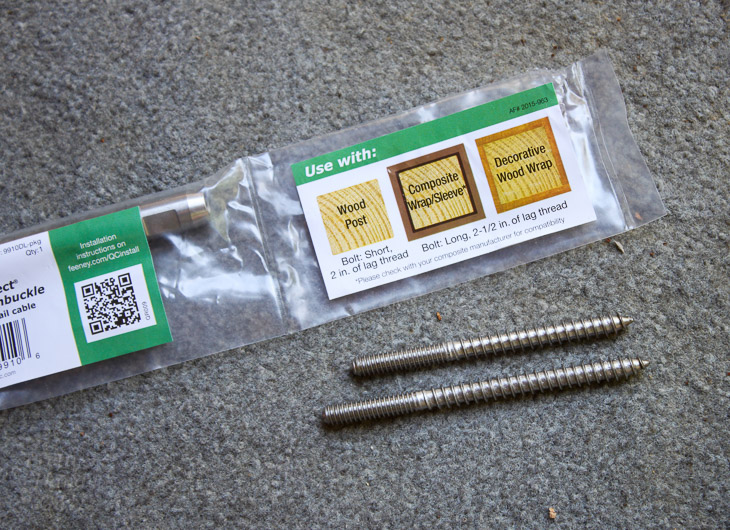
How to Install Cable Railings | Pretty Handy Girl

Thread the lag bolt into the installation tool in your drill.
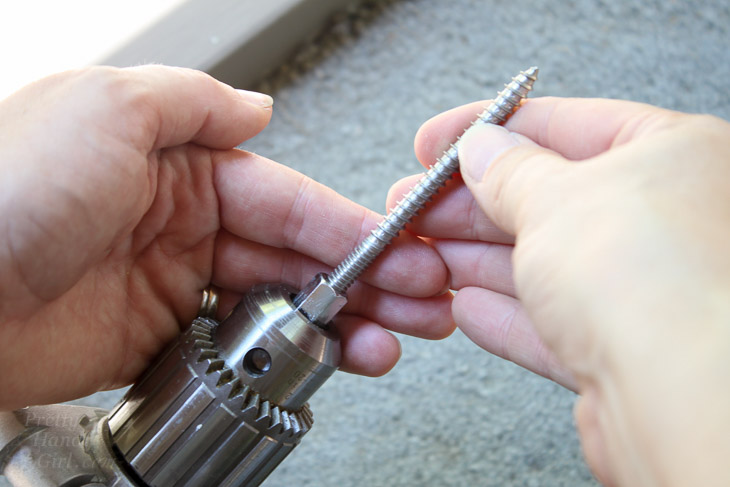
How to Install Cable Railings | Pretty Handy Girl

Slowly drive the lag bolt into the porch support. Stop when you reach the fine threads (exactly 1″ exposed.)
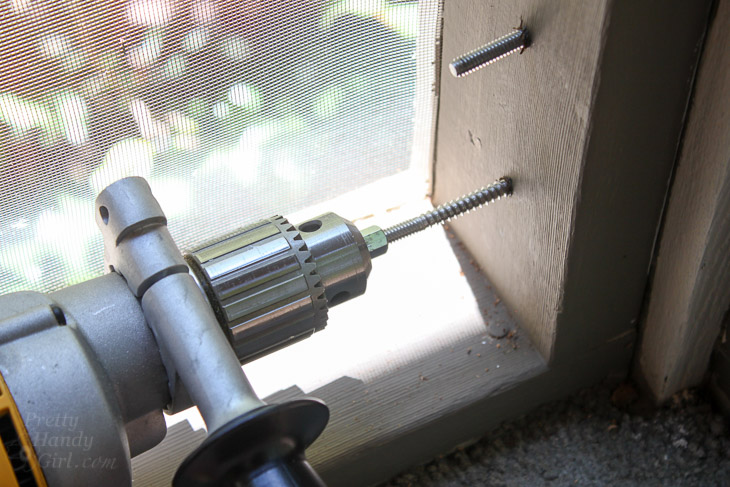
How to Install Cable Railings | Pretty Handy Girl

Repeat until you’ve installed all the lag bolts into both end supports.
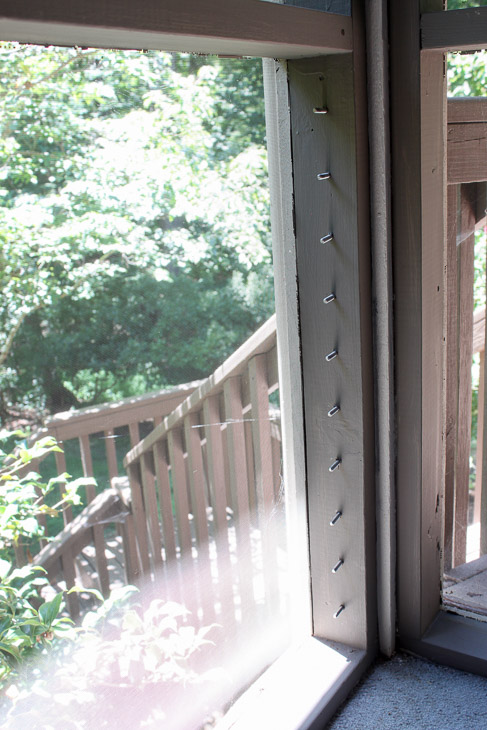
How to Install Cable Railings | Pretty Handy Girl

Squeeze a small amount of thread locking compound ONLY onto the lag bolts that will receive the Quick-Connect® Lag Fittings.
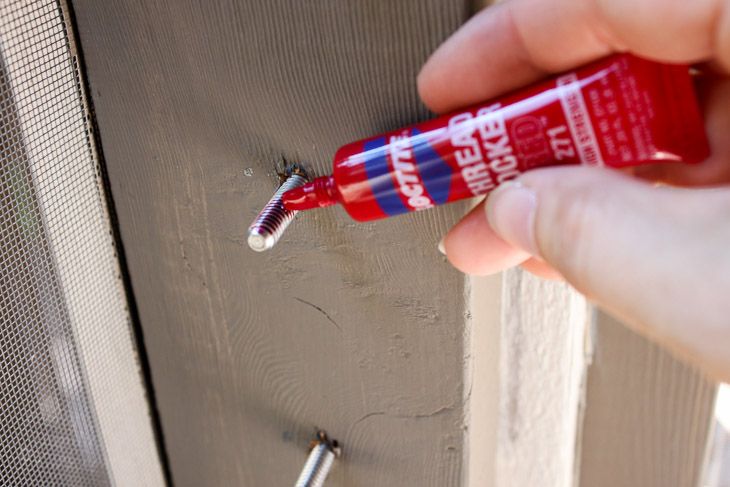
How to Install Cable Railings | Pretty Handy Girl

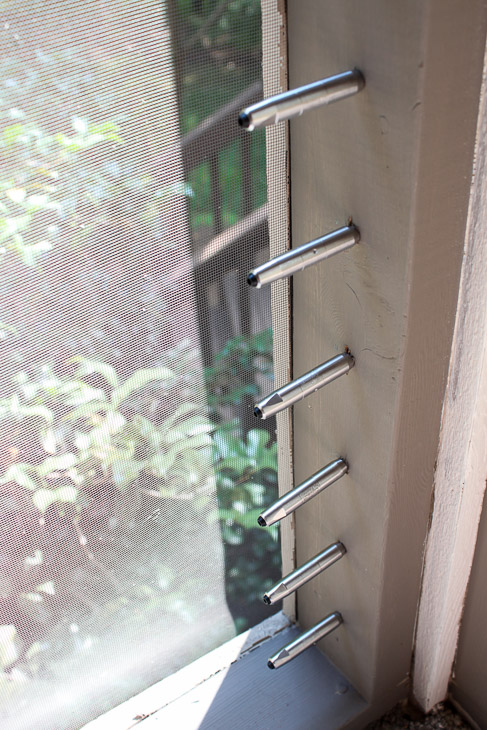
Turn the Feeney CableRail Quick-Connect® Lag Fitting onto the bolt until it stops against the wood.
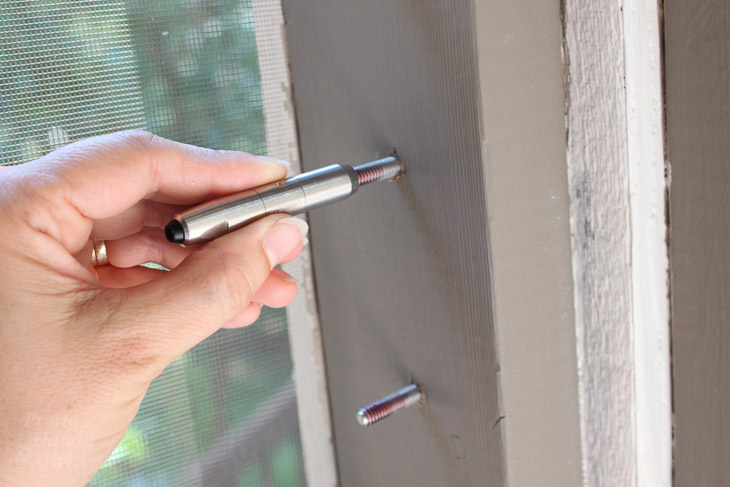
How to Install Cable Railings | Pretty Handy Girl

Repeat until all the lag fittings are installed on one side of the porch.
How to Install Cable Railings | Pretty Handy Girl

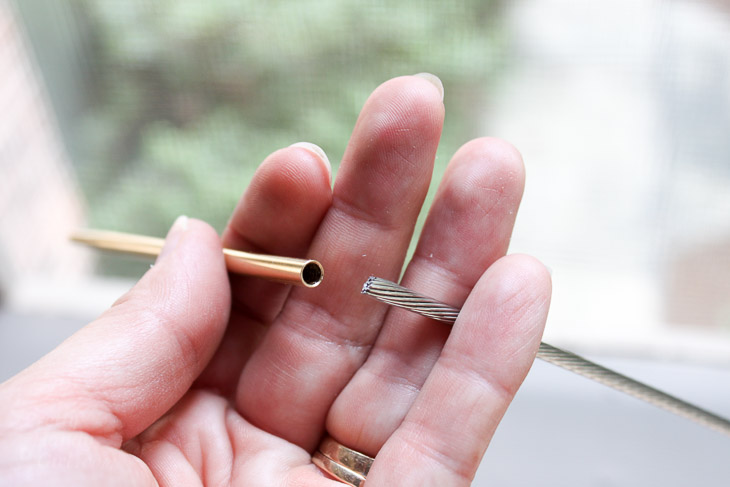
If you have a middle support, thread the cable through the support before connecting to the Quick-Connect® Lag Fittings. Locate the cable needle. Slip it onto the cable end.
How to Install Cable Railings | Pretty Handy Girl

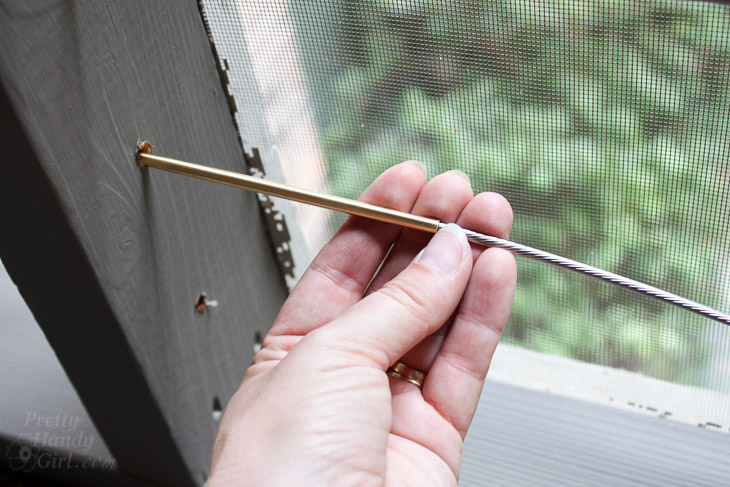
Thread the needle through the center support post toward the lag fittings.
How to Install Cable Railings | Pretty Handy Girl

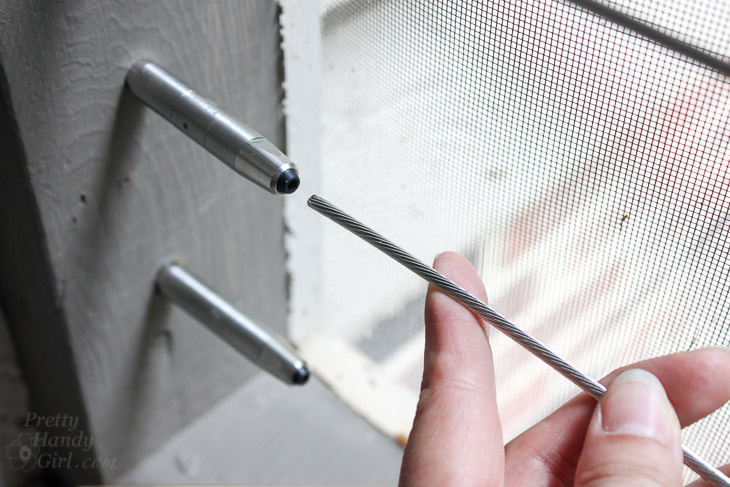
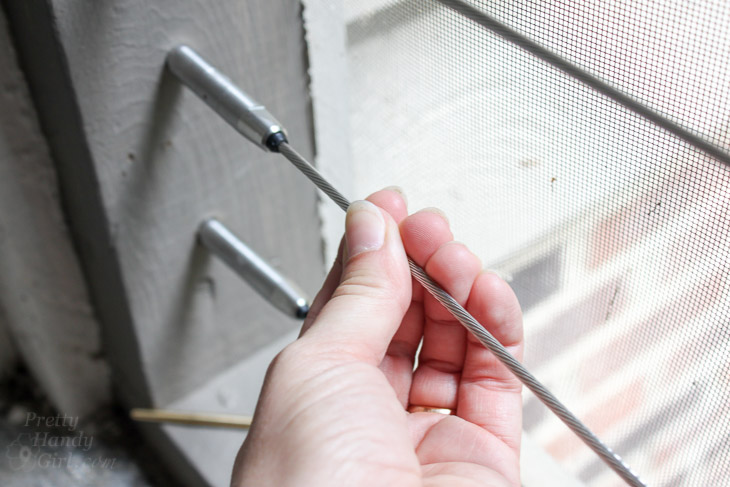
Once the needle and cable have passed through the support, remove the needle. Press the cable straight into the Quick-Connect® Lag Fitting. It should slide in smoothly. Don’t force it in.
How to Install Cable Railings | Pretty Handy Girl

When the cable bottoms out, pull back to make sure it has locked into place.
How to Install Cable Railings | Pretty Handy Girl

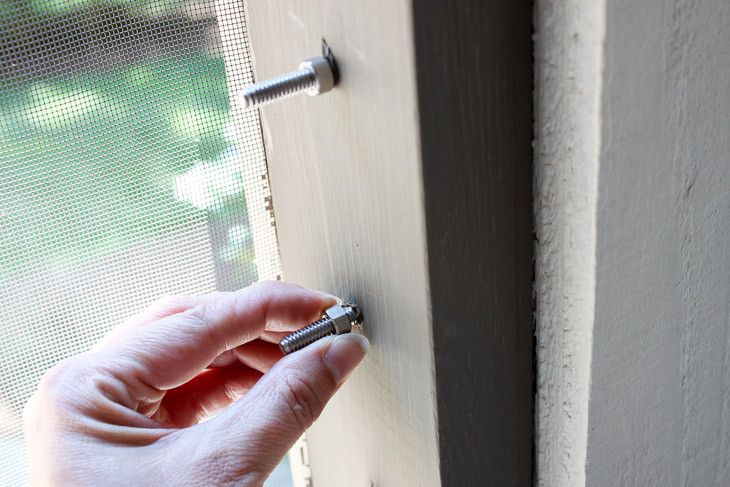
Head to the opposite side of your porch. Thread the lock nuts onto the lag bolts until it touches the wood.
How to Install Cable Railings | Pretty Handy Girl

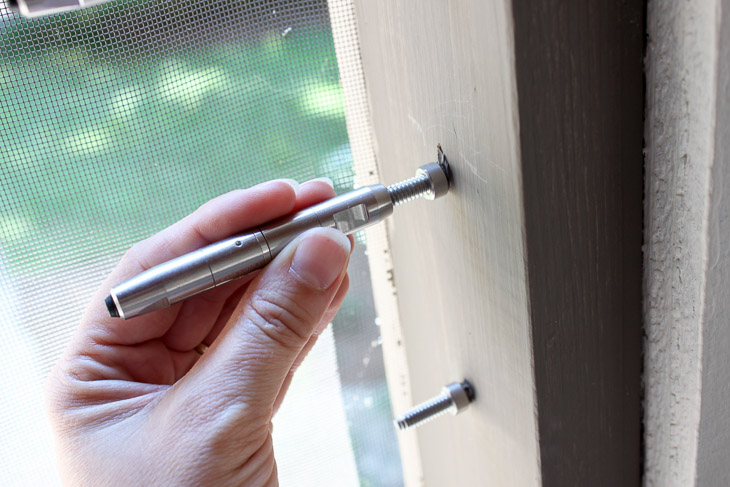
Thread the Quick-Connect® Lag Swivel Turnbuckle four full rotations onto the lag bolt.
How to Install Cable Railings | Pretty Handy Girl

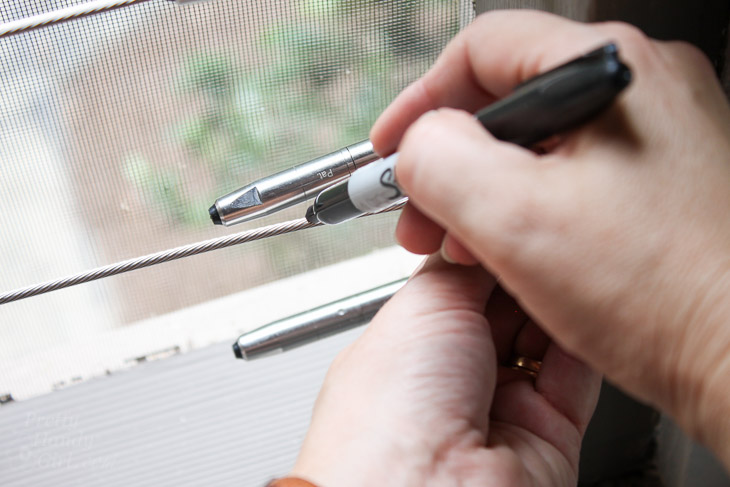
While pulling the cable tight use a Sharpie to mark the cable against the mark on the turnbuckle fitting.
How to Install Cable Railings | Pretty Handy Girl

Use the cable cutters to cut the cable at the mark.
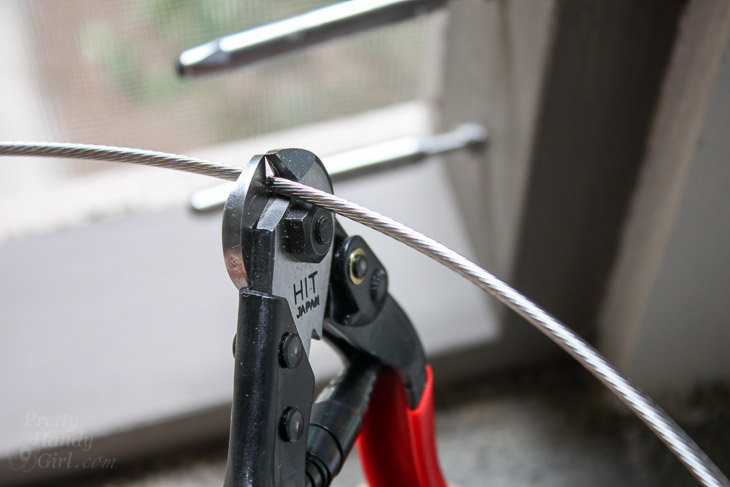
How to Install Cable Railings | Pretty Handy Girl

Loosen the turnbuckle two full rotations.
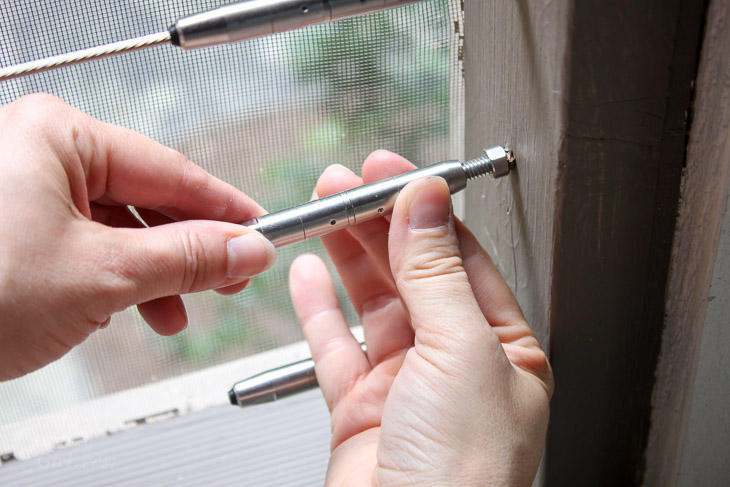
How to Install Cable Railings | Pretty Handy Girl

Insert the cable into the turnbuckle fitting.
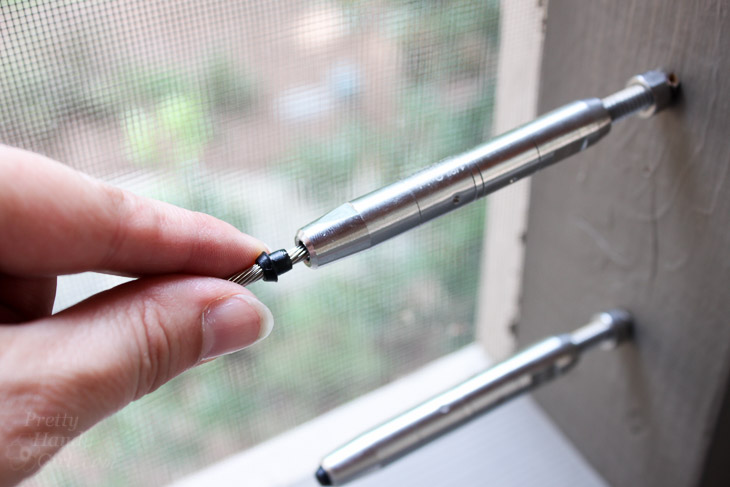
How to Install Cable Railings | Pretty Handy Girl

If you make a mistake and need to remove a cable, don’t stress. Use the cable release tool.
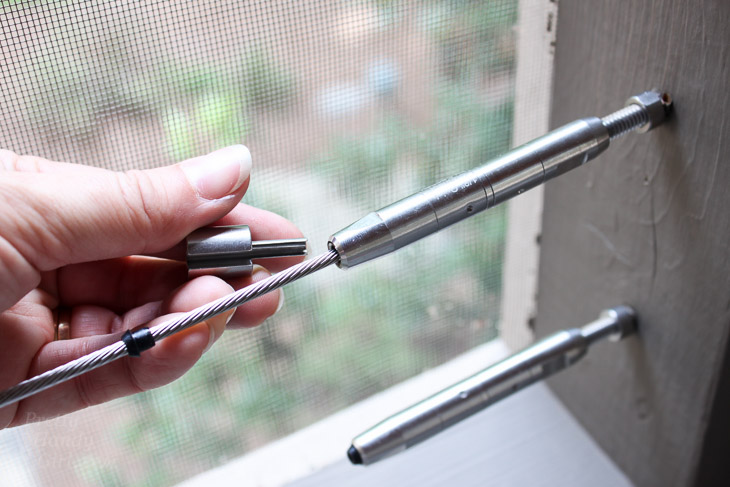
How to Install Cable Railings | Pretty Handy Girl

Press the release tool into the connector.
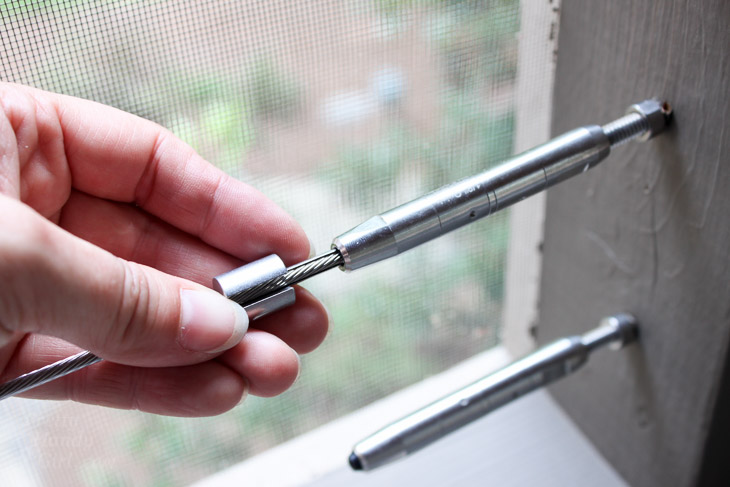
How to Install Cable Railings | Pretty Handy Girl

You might need to tap the connector lightly with a hammer to get the tool to release the cable (especially if you already tightened the cable.)
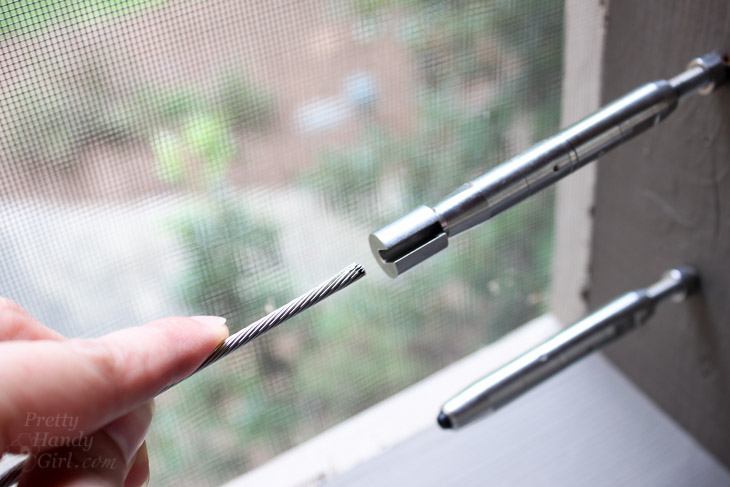
How to Install Cable Railings | Pretty Handy Girl

Hand tighten the Quick-Connect® Swivel Turnbuckles. Use two wrenches to grasp the connectors at the notched ends. Hold the end with the cable steady and tighten the side closest to your post.
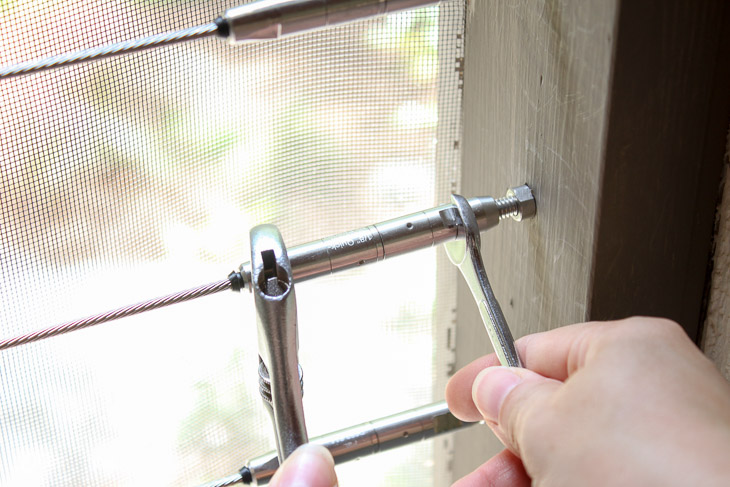
How to Install Cable Railings | Pretty Handy Girl

Follow the sequence for tightening as shown below:
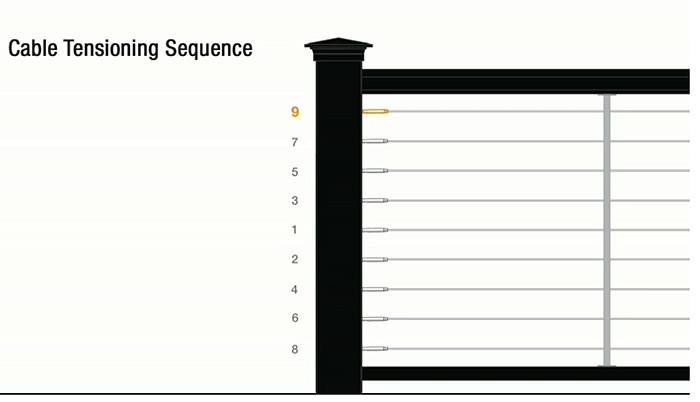
How to Install Cable Railings | Pretty Handy Girl

Once the cables are all fully tightened, turn the nut until it is secure against the connector.
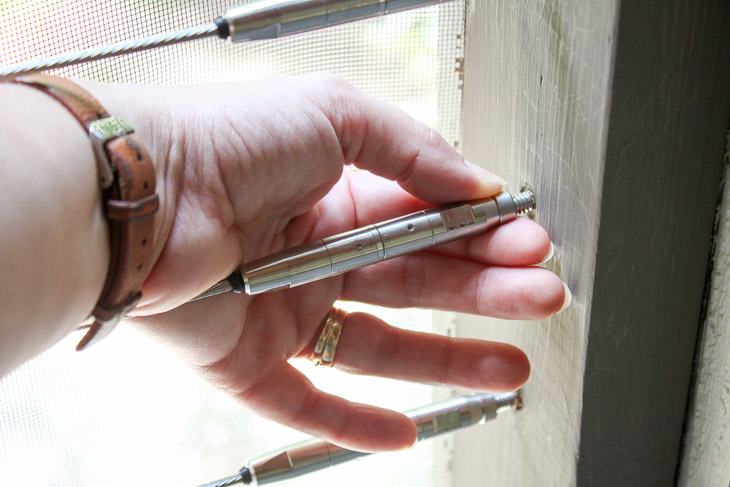
How to Install Cable Railings | Pretty Handy Girl

Secure the nut against the fitting with your wrenches.
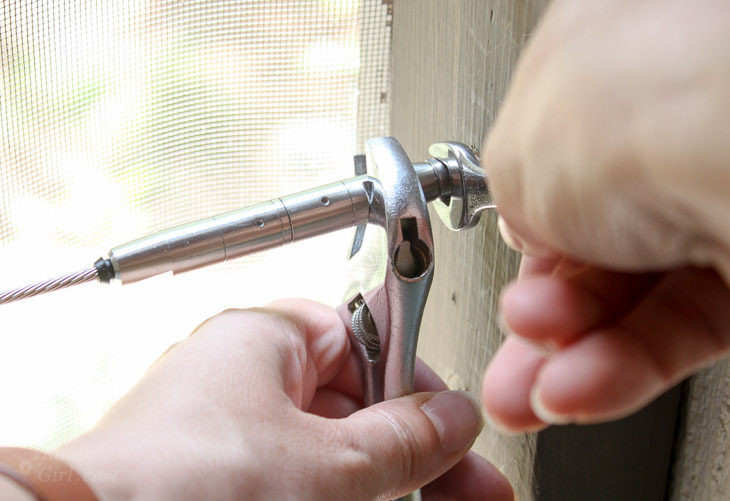
How to Install Cable Railings | Pretty Handy Girl

For more detailed installation instructions, watch this video for Installing Feeney CableRail System to a Wood Post with Sleeve or browse these Feeney video tutorials for more installation tips and help.

Ready to see the difference? Behold the scary, unsafe…

Before:
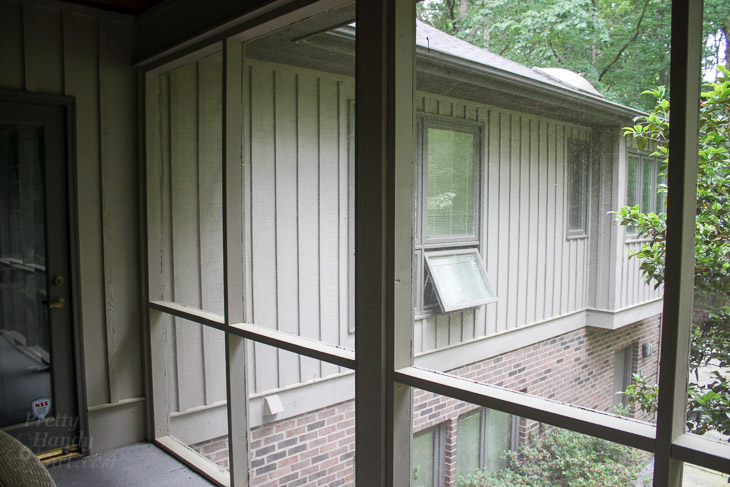
How to Install Cable Railings | Pretty Handy Girl

And the sleek, beautiful and safe…

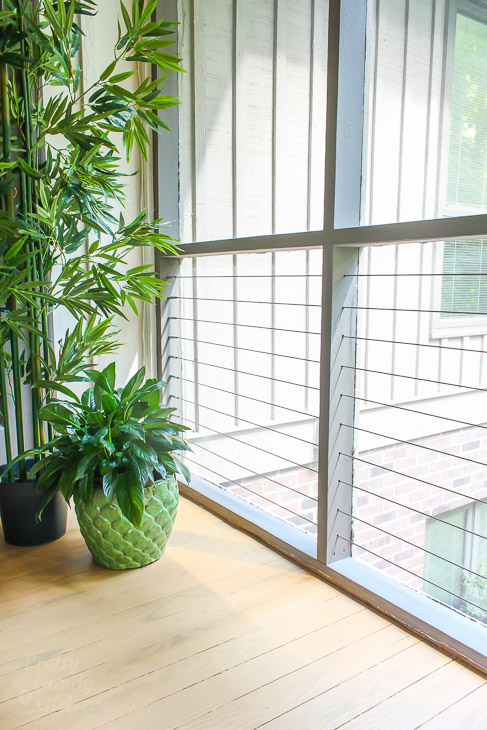
After:
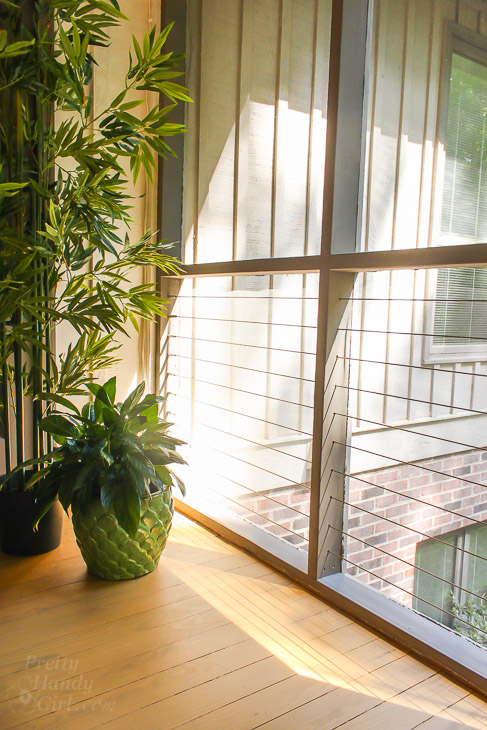
How to Install Cable Railings | Pretty Handy Girl

Another before:

How to Install Cable Railings | Pretty Handy Girl

And after:How to Install Cable Railings | Pretty Handy Girl

How to Install Cable Railings | Pretty Handy Girl

Don’t you love the look of Low Visibility Cable Railings? Now you can install them in your own home!

How to Install Cable Railings | Pretty Handy Girl

Want to see the full screen porch reveal, take a look here.

If you use any Feeney systems, be sure to share your photos with Feeney to be entered to win cash prizes! The next deadline is in November!

Enter Feeney Photo Contest

PHGFancySign

Disclosure: This is a sponsored post for Feeney Cable Rail. I was provided with materials and compensation for my time. I was not told what to write. All opinions are my own. As always I’m very particular about the brands I partner with. 


Pin for later!
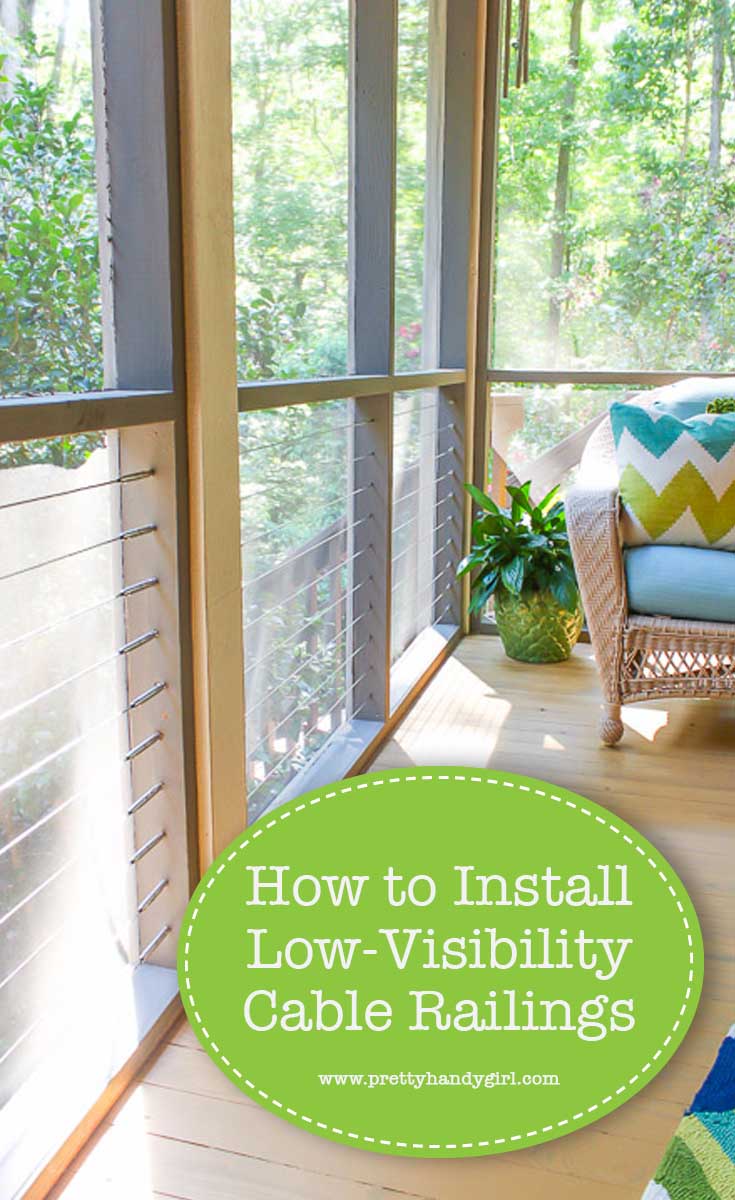
Learn How to Install Low Visibility Cable Railings from this tutorial from Pretty Handy Girl! | #prettyhandygirl #DIY #homeimprovement

12 Ways to Burglar Proof Your Home

Thanksgiving is next week and it’s the biggest traveling holiday of the year. Taking steps to burglar proof your home can put your mind at ease as you travel and keep your home and valuables safe.

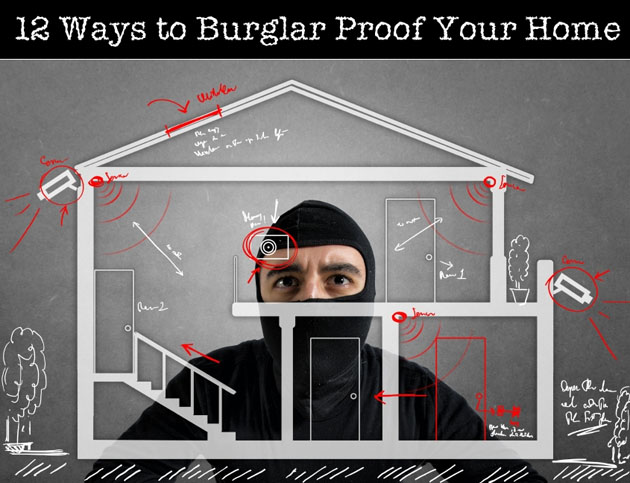
The experts at Allstate have offered 12 Ways to Burglar Proof Your Home for the holidays. Of course, these tips will keep your home safe 365 days of the year!

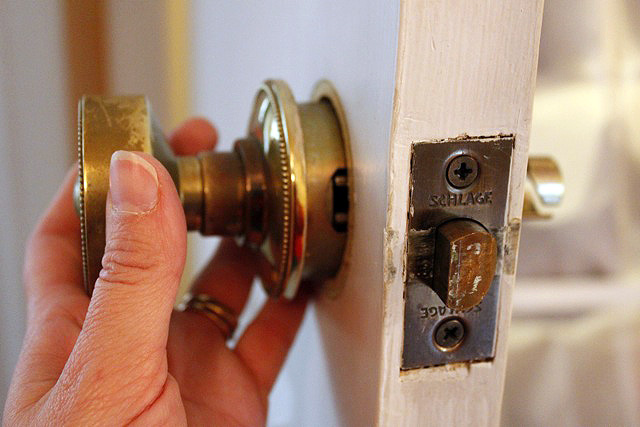
1. Change the locks – Remember to change all the locks when you move into a new house. You’ll never know who had access to the keys before you moved in. If you lose the keys to your house, you should also replace all the locks for the maximum home security.

Changing_out_brass_door_knob

2. Invest in an Alarm – There are many companies that will install and monitor a home alarm system for a very little monthly fee, however sometimes you do not need an additional monthly expense. If an alarm company is not an option for you, you can visit your local hardware store to invest in home alarms that take seconds to install. They will make very loud and obnoxious sounds if the doors or windows are open. This is a very inexpensive option but can be a large deterrent from theft. Read more

How to Install an Exterior Security Light | Pretty Handy Girl

How to Install an Exterior Security Light | Pretty Handy Girl

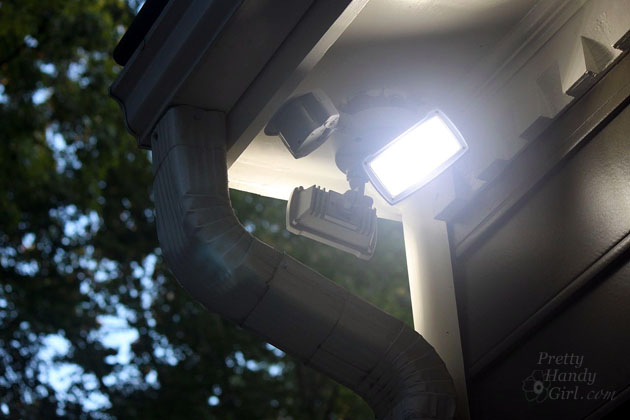
Nothing deters a thief like a well lit area. But truth be told, I needed this light to illuminate the path when taking out the trash. There is nothing like walking out the door with the trash in your hands after dark and realizing that you forgot to turn on the exterior light. I should mention that our neighborhood is popular with the copperheads. Need I say more?

Installing any light fixture is a relatively easy DIY project, and installing an exterior light is no exception if you have a junction box or light already installed.

Materials:

Optional: Drill

Required Safety Instruction: 
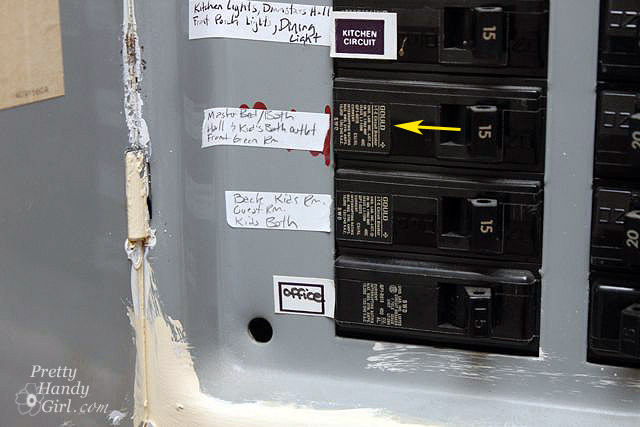
Turn off the power to the light fixture you are working on. I highly recommend turning on the light you will be working on, then shut off the circuit at your circuit breaker and check to see that the light has gone out. Also note that just because the light fixture power is turned off, it doesn’t necessarily mean that other outlets or lights in the same area are on the same circuit. Always check for the presence of power before you work on it.

flip_circuit_breaker

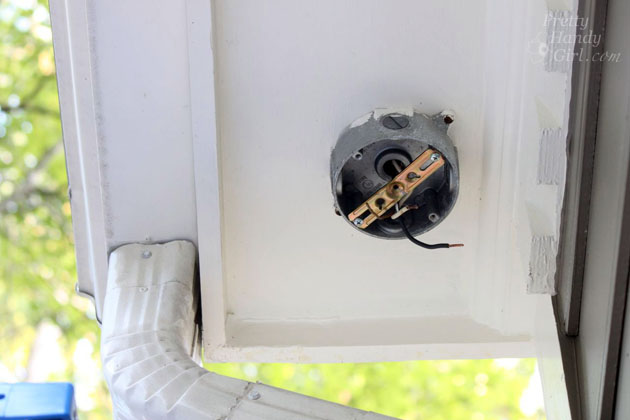
If you have an existing light fixture remove it before installing the new fixture.  For this tutorial, we’re starting with a bare junction box:

How to Install an Exterior Security Light | Pretty Handy Girl

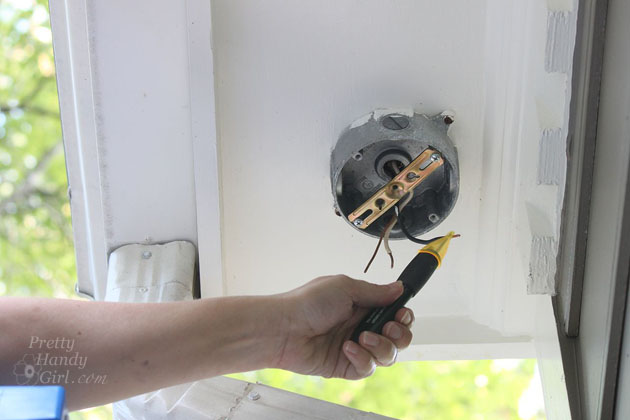
Test the black or hot wire with the voltage tester to be certain the power is turned off.

How to Install an Exterior Security Light | Pretty Handy Girl

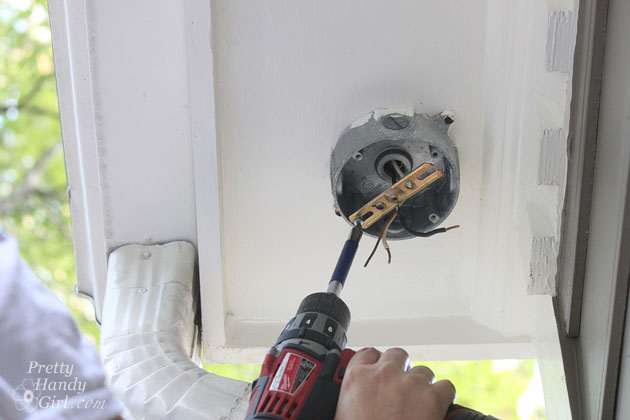
Remove the existing mounting bracket if there is one installed.

How to Install an Exterior Security Light | Pretty Handy Girl Read more

Smoke Detector Maintenance | Pretty Handy Girl

31 Days of Handy Home Fixes | Pretty Handy Girl

Happy Halloween! Trick or Treat, smell my feet! Now, give me something good to eat. Are you ready for the trickery tonight? Ahhh, good. What about the time change in the US? On Sunday, November 2nd be sure to turn your clocks back one hour. Are you ready for that? What’s to be ready for? Well, this is one of two times a year you need to maintain your smoke detectors.

I don’t have to tell you how tragic not having a working smoke detector can be. All you have to do is read the news to hear many stories about homes burning to the ground and many lives consumed by the fire because they slept through it. Let’s commit to each other that we will reduce the statistics of fire fatalities.  All you have to do is maintain your smoke detectors twice a year when you change your clocks.

Day 31 – Smoke Detector Maintenance Tips:

Smoke Detector Maintenance | Pretty Handy Girl

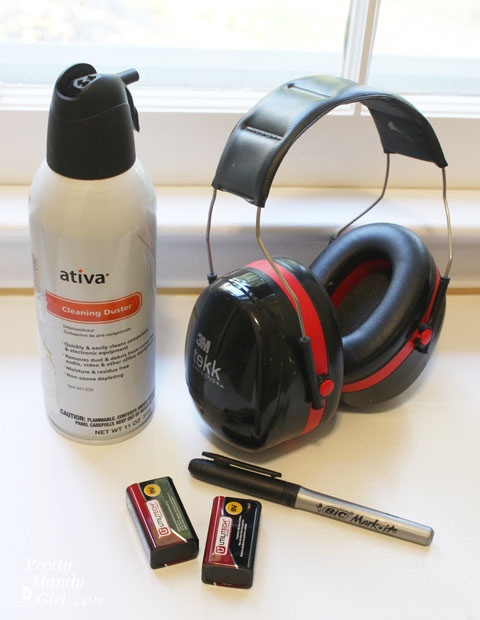
First, gather a few supplies and then we can whip through this maintenance task.

Materials:

  • Can of compressed air
  • NEW 9 volt batteries
  • Permanent marker
  • Hearing protection
  • Electrical tape (or other tape)

Instructions:

Put on your hearing protection. (I finally got smart this year and wore hearing protection while replacing the batteries and testing the smoke detector. No need to damage my hearing or get a headache from listening to the alarm one foot away from my head!)

Begin by removing your smoke detector. Don’t forget to check your hardwired smoke detector, it might also use a back up battery.

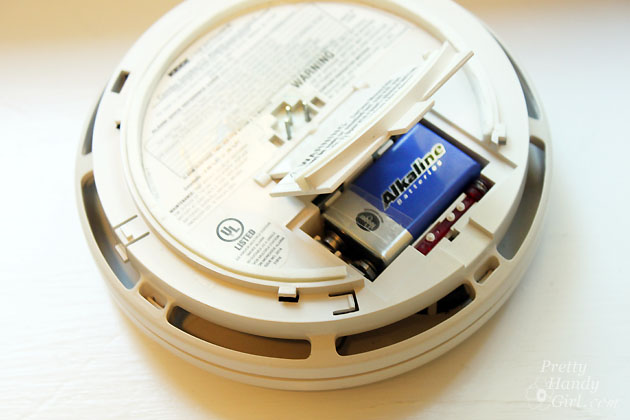
Open the battery compartment and remove the old battery.

Smoke Detector Maintenance | Pretty Handy Girl

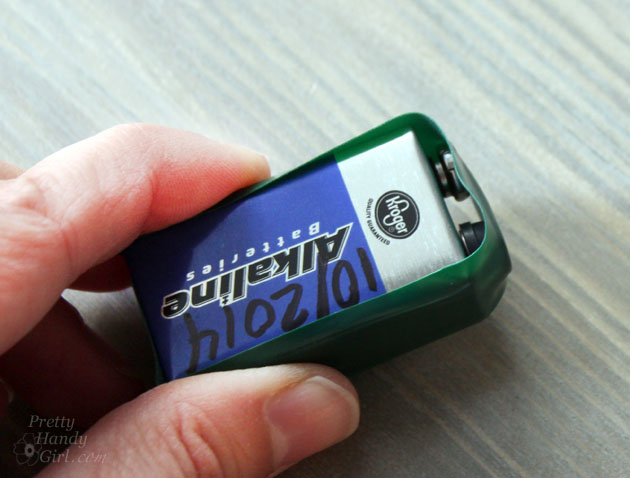
If you want to reuse that 9 volt battery, mark the month and year on the battery. That way you know that this was removed from the smoke detector. Don’t EVER reuse the battery in your smoke detectors, but it’s fine to use for your toys and electronics.

Smoke Detector Maintenance | Pretty Handy Girl

If you are going to throw away the battery, it’s important to cover the terminals with tape. If you don’t a fire could start if something metal touches both terminals at the same time.

Smoke Detector Maintenance | Pretty Handy Girl

Put a new battery into the smoke detector (pay attention to where the + and – terminals go.)

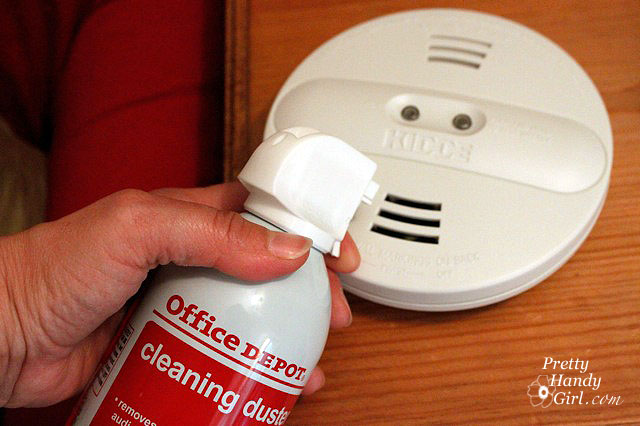
Use the can of compressed air to blow out around the sensor and inside the smoke detector. Keeping a clean detector is important for it to function properly.

Smoke Detector Maintenance | Pretty Handy Girl

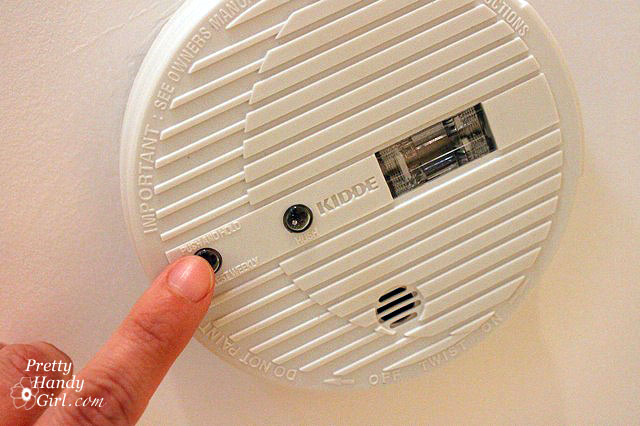
Replace the smoke detector and press the test button. After the alarm has stopped you can take off your hearing protection.

Smoke Detector Maintenance | Pretty Handy Girl

Move on to the next smoke detector.

Okay, tell me honestly, am I the last human being to figure out wearing hearing protection while maintaining your smoke detectors is a great idea?

That’s it! Day 31 of Nester’s 31 Days Challenge! I’m done and have to let out a big breath of air. Posting for 31 days straight was tough, but I’m glad I made it. Did you enjoy the series? How many other series did you follow?

I’m planning on taking it easier in November, so I hope you’ll excuse me if I miss a day or two out of my normal 3 day a week schedule.

PHGFancySign


How to Add Security Film to Glass Doors & Windows | Pretty Handy Girl

How to Add Security Film to Glass Doors & Windows | Pretty Handy Girl

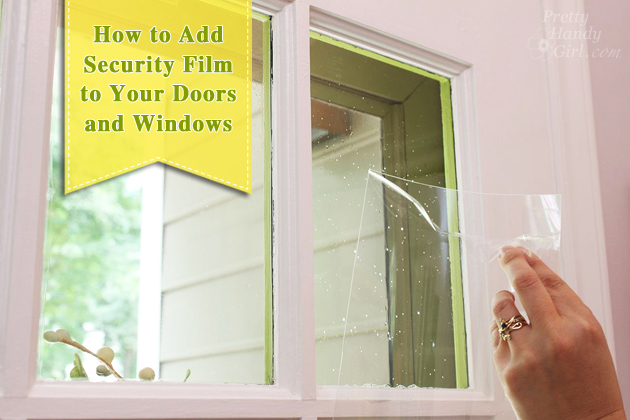
The folks at Allstate Insurance have graciously sponsored this post, which will help you learn how to install security film to safeguard your doors (or windows) from a potential break-in! It’s a simply DIY solution that could potentially save you the heartache of having your home burglarized.

I’ve noticed an unsettling trend in our area. There are more thefts popping up around our neighborhood. Luckily the majority of them are burglaries with no violence. But, it’s still unsettling. If you want the latest on crimes around you, sign up for SpotCrime.com. Simply enter your address and you’ll get emails when crimes are reported around you. Then again, this could lead to a bit of paranoia {raising hand.}

SpotCrime.com map

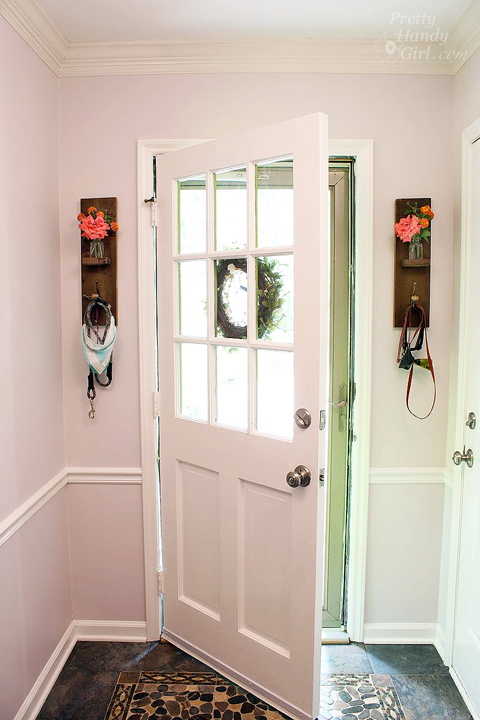
Regardless, there are two doors in our home that have always caused me some concern. We have two half window doors that needed some added security measures. The first one is the entrance to our mudroom. The second one is the back door to our garage (and you know I’d be heartbroken if anyone stole my power tools!)

How to Add Security Film to Glass Doors & Windows | Pretty Handy Girl

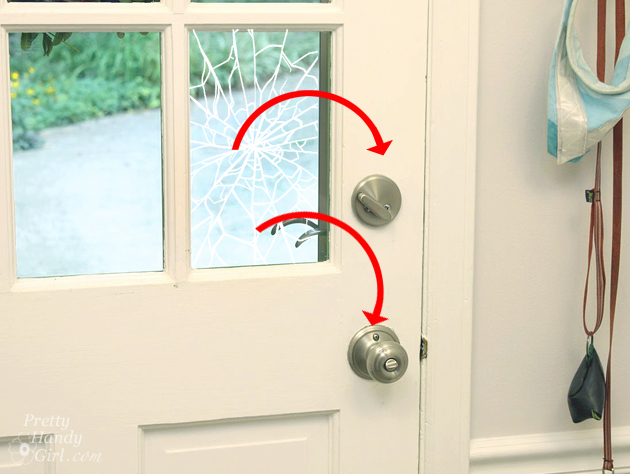
If you have a door like this, a burglar can simply break the pane of glass closest to the knob, reach in and turn the deadbolt and handle. One option is to install a two-sided keyed entry deadbolt lock. Because we have little children, I worried about them not being able to find the key and get out of the house in the event of a fire.

How to Add Security Film to Glass Doors & Windows | Pretty Handy Girl

This past week I happened to hear about security film and did a little research. I was skeptical until I tested the material myself. The results seriously amazed me! You can watch my test in the video later in this post.

In the meantime, here are the supplies you’ll need and the very simply installation instructions!

(I’ve included affiliate links for your convenience. I earn a small percentage from a purchase using these links. There is no additional cost to you. You can read more about affiliate links here.)

Materials:

 Instructions:

1. Begin by removing the grill if you have one solid piece of glass with faux dividers (see my video below for more details on removing the grill.) If you have true divided light, move on to the next step.

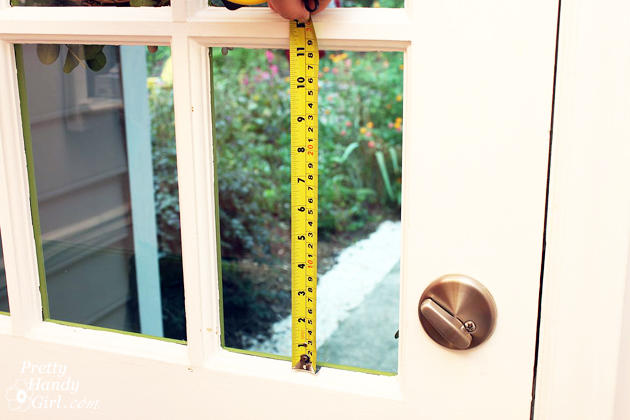
2. Measure your windows. Reduce the size by 1/8″ to leave space at the edges for the water to escape. Transfer the measurements onto the film with pen. Cut the window film with the x-acto knife and ruler. (You could use scissors in a pinch.)

How to Add Security Film to Glass Doors & Windows | Pretty Handy Girl Read more