Many of you have suddenly found yourselves transitioning to a home office during this period of social distancing and feeling overwhelmed. No matter how much or how little space you have to work with, I’m here to help you create a cheerful and practical work space with these DIY Ideas for Setting Up a Home Office.

13 DIY Projects for Setting Up A Home Office
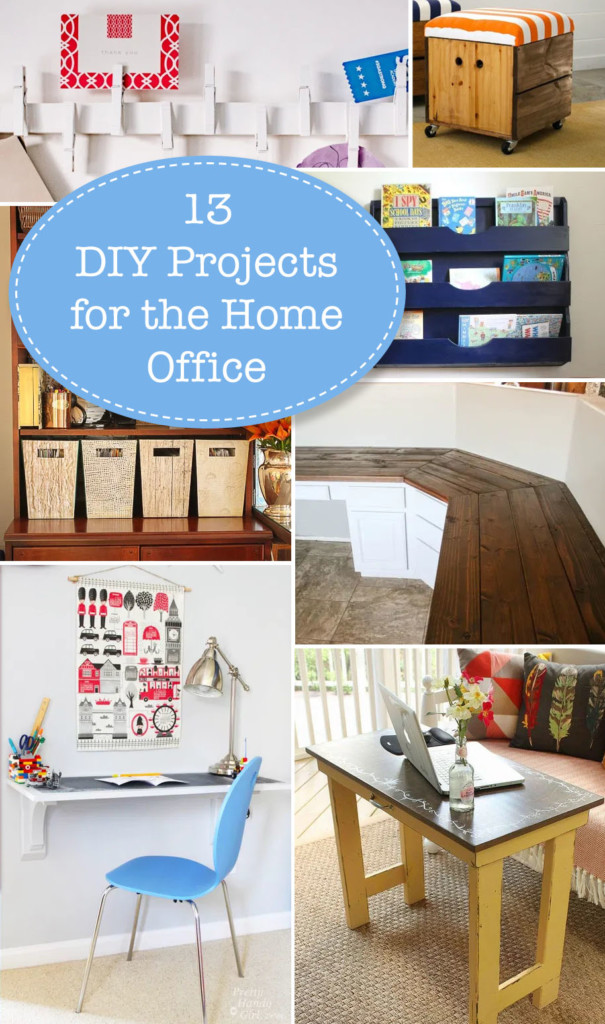
DIY Ideas for Setting Up A Home Office

I have been working out of a home office for quite a while now, so I thought I would share some of my most valuable ideas for getting organized to work at home. For inspiration, here are 13 easy, inexpensive, and practical projects to get you started.  Who knows, after you get set up, you may not want to return to your corporate office.

Wall-Mounted Desk Tutorial | Pretty Handy Girl

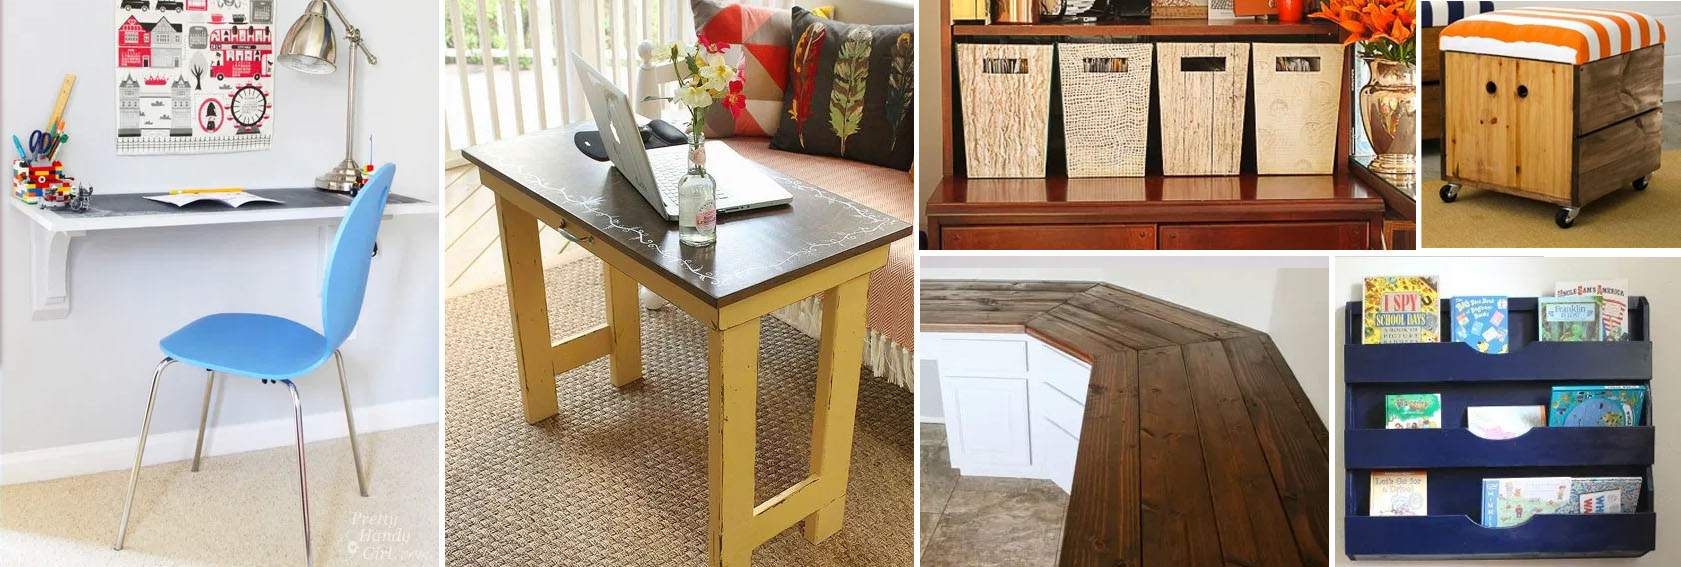
The great thing about this Wall-Mounted Desk is it can be small or large and it won’t take up any floor space!


Folding Laptop Writing Desk | Pretty Handy Girl

This Folding Laptop Writing Desk is the perfect height, and can fold up and store away when you’re not using it.


Build a Wood Plank Desktop for about $40

Here’s how you can create a simple (and most importantly, inexpensive) Wood Plank Desktop for about $40!


Magazine File Box Facelift | Pretty Handy Girl

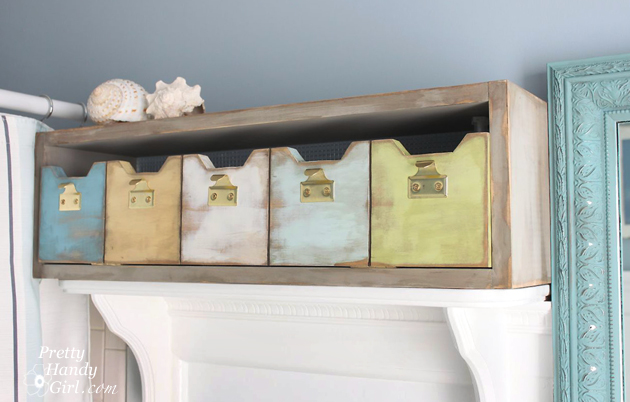
Tired of your boring home office decor? Within minutes you could give a Magazine File Box a Facelift (or a storage box)!
I saved a lot of money reusing the old. Put ‘er there fellow savers!


DIY Wood Wall Organizer

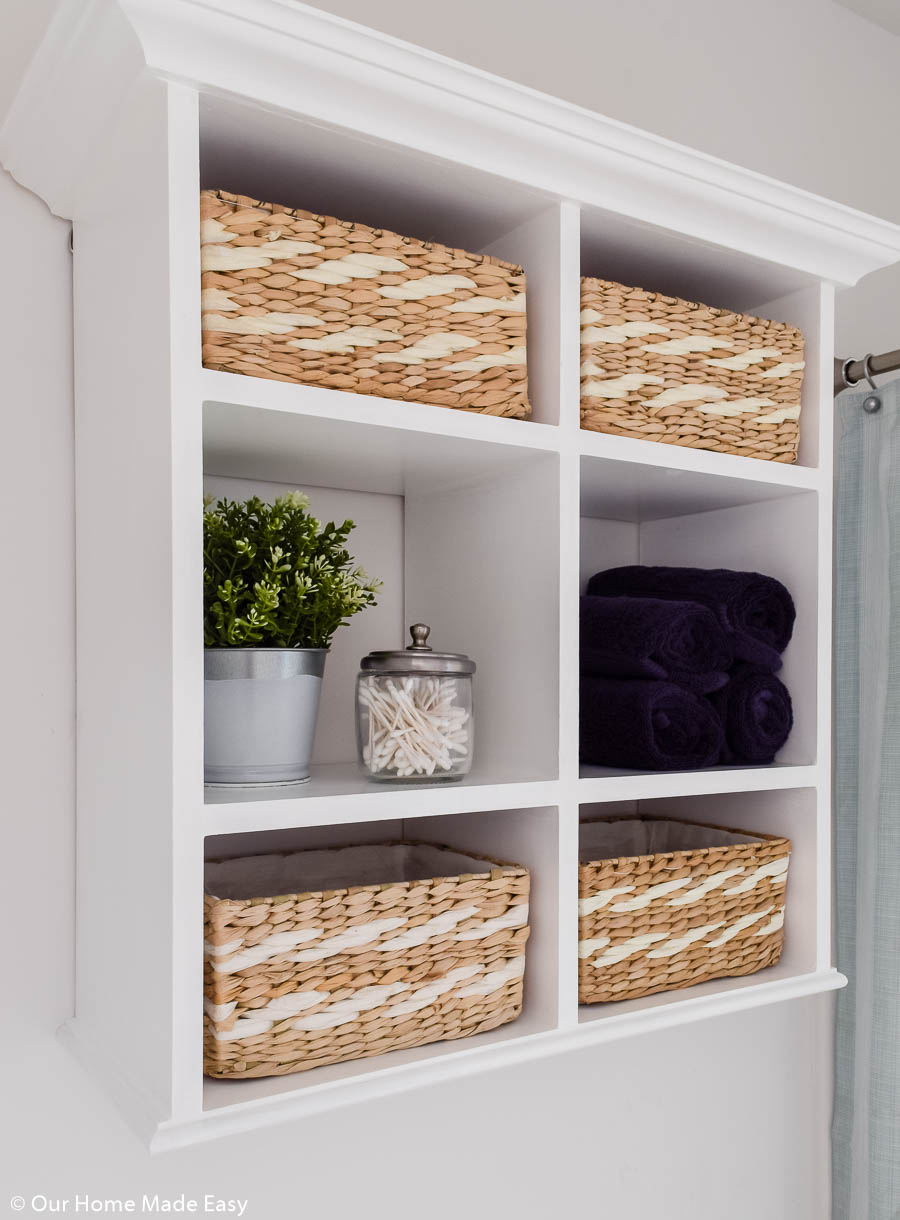
If you’ve seen these cute Wall Organizers and thought: “I could totally make that,” I’m here to tell you, you can!


29 hacks to help you get more organized social media image

Here are 29 hacks to help you get more organized and help you transition to a better organized home office!


DIY Wall Bookrack

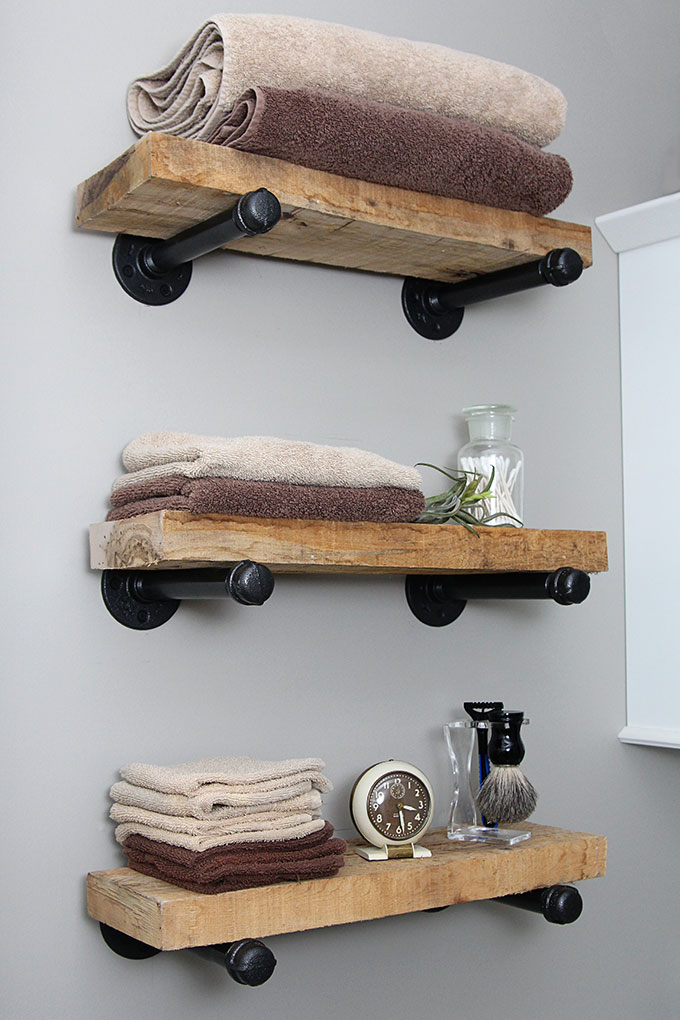
This Bookrack Building Project will have you organized and will free up space in no time.  The shelves are tapered and have plenty of depth for multiple books, files, or magazines.


File Cabinet Makeover Using Chalk Paint

Give a boring beige File Cabinet a SUPER cheap and quick makeover using chalk paint! I bet you can score a free file cabinet on your local buy, sell, or trade group. Or look on FreeCycle.org or Craig’s List.


12 DIY Home Storage Tutorials | Pretty Handy Girl

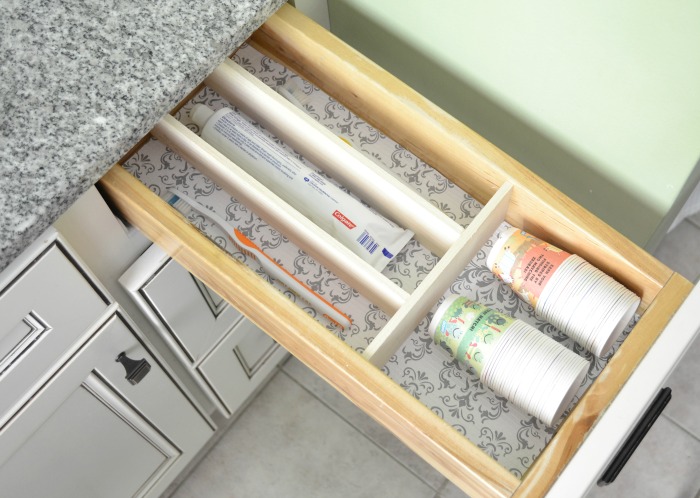
I’m taking advantage of these days at home to do a big “clean out”!  You’re sure to find one of these 12 DIY Storage Projects to help you organize your home useful.


Wall-Mounted Hutch Tutorial

This charming Cottage Style Desk and hutch is where I keep our lives organized! It takes up otherwise wasted space in the corner of our kitchen.


Scrap Wood iPad Tray

If you are accustomed to DIY projects, you probably amassed quite the stockpile of leftover wood. You’ll love this quick, easy, and cheap DIY iPad Holder!


rolling storage stool final

What’s better than getting organized with more storage? How about combining it with additional seating! Check out this easy tutorial for how to build a Rolling Storage Seat.


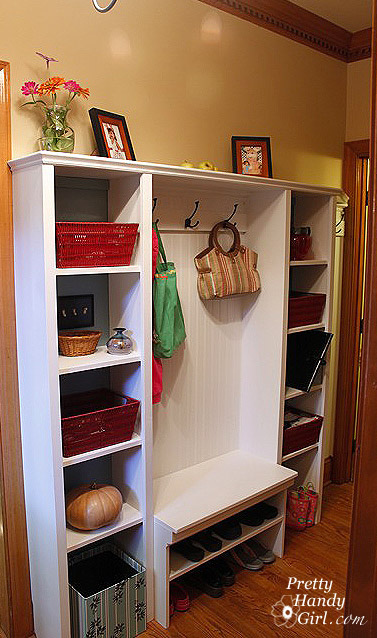
Although this wall Storage System was built custom for a mudroom, you can easily adapt it for a home office!

I hope you found some of these DIY Ideas for Setting Up a Home Office helpful. Gotta run and get set up for working tomorrow from home. Good luck to all of you, especially if you have family members who like to interrupt your workflow.

Spring Wreath hanging on front door

DIY Spring Wreath

Hello, Pretty Handy Girl Readers!

I’m back today with a fun project for your front doors! This beautiful baby breath’s wreath – perfect for Spring. I love making my own wreaths because I can customize them exactly the way I want. And I can save a bunch of money by making them myself, too.

The first thing I do before making any wreath is to collect some inspiration. I look at a bunch of shops, like Pottery Barn and Etsy to get an idea of what kind of wreath I want to make. I’ve learned the hard way that it can be extremely overwhelming (and easier to overspend) when you don’t have a plan in place first.

Close up of a grapevine wreath

To make a wreath like this one all you need is a simple, inexpensive grapevine wreath and some faux flowers of your choice. In this case, I used all baby breath stems to keep a uniform look. Michael’s and Afloral.com seem to be the best places to get these materials at the best price. In fact, Michael’s is almost always running a sale on their floral department and you can usually find an additional 40% off coupon online. However, Michael’s can be overwhelming as I said before. They have so many options! It’s important to know what kind of wreath you want to make first so you can easily gather the flowers you need. Otherwise, you might be there all day! 🙂

Close up of Faux Baby's Breath Floral

Here’s another tip for you. While I really enjoy making wreaths, I don’t have the room to store a lot of them. So, I tend to make each wreath somewhat temporary. Meaning, I don’t permanently attach the florals. I like to have the option to change up the look using the same Grapevine Wreath. Another way to save a little bit more money!

So let’s get started.

Materials:

(I’ve included affiliate links for your convenience. I earn a small percentage from a purchase using these links. There is no additional cost to you. You can read more about affiliate links here.)

Materials needed to make a Spring Wreath

Grapevine Wreath (I used brass gift toppers from Target, Amazon and craft stores sell bells too.)
Scissors or Wire Cutters
Faux Florals of your Choice
Floral Wire – (optional, you may not need this)
Ribbon for Hanging

Instructions

Follow these steps to make this lovely Spring Wreath.

Step 1: Prepare your Floral Pieces

Cut floral stems

When you buy faux flowers, most of the time they come in bunches or with a very long stem attached. We need shorter stems and mainly individual flowers when making a wreath. Using your wire cutters, cut your floral bunches into individual flowers and cut any long stems a bit shorter.

Don’t cut stems too short! You do want some stem to be able to insert them snugly into your grapevine wreath.

Step 2: Start Attaching your Florals to your Wreath

Insert Faux Florals into Grapevine Wreath

Now, you can attach your florals fairly securely just by pushing the stems snugly into the intertwined branches of the grapevine wreath. That is why you may not need any floral wire at all! I only ended up needing a little bit of wire to secure a few pieces. Use your wire cutters to snip off a piece of wire. With the wire holding your stem to the wreath, twist the back to secure it. You can carefully use your wire cutters to help twist the wire in the back. Be careful, the floral wire can be sharp!

insert florals into grapevine wreath

Periodically pick up your wreath to make sure that your floral pieces are secure and not falling off.

Use floral wire to secure florals to wreath

That’s pretty much all you need to do to make this pretty wreath!

Step 3: Hang up your new Spring wreath

Close up of jute ribbon used for hanging wreath

It’s time to hang it up! I use a command hook made especially for hanging wreaths.

Spring Wreath hanging on front door

I just attach a little loop of ribbon or string to the back of the wreath. Then, I just hang the loop directly on the hook.

Spring Wreath hanging on Front Door

It works really well and has never fallen off (even with young kids slamming the door one too many times!)

Spring wreath hanging on front door

I really hope you enjoyed this project and it brings some Spring joy to your homes. If you love making wreaths, check out my other DIY Spring hoop wreath project here on Pretty Handy Girl.

Thanks so much for reading and being here today.  I’ll meet you back here next month!

karen signature

~ See More of Karen’s Tutorials ~


karen from decor hintHello!  I’m Karen, the creator of the Home Decor and DIY Blog: Decor Hint. I’m a Native of the East Coast, but I currently live in beautiful Seattle with my hubby, our two wonderful children, and our spunky wheaten terrier.

You can usually find me with some sort of craft in one hand and a coffee in the other. And I’m always rearranging furniture or moving lamps from room to room. I have a passion (read: obsession) for decorating, DIY, and gardening. In short, I love making my house into a home.

Like many, I’m inspired by what I see in home decor magazines, but I’m not so inspired by the price tags.  Consequently, I love finding and creating beautiful budget-friendly home decor items. In a head to head competition, I bet you’d never know the difference between the designer items and my DIY creations!  Many of my DIY projects focus on sewing, crafting, upcycling and organizing. Some of my favorite projects have been making pretty wreaths, sewing my own tassel hand towels, and crafting these trendy wood bead garlands. I can’t wait to inspire you and spark your creativity through my DIY projects.

You can always connect with me on Pinterest, Twitter or Instagram.

Can you think of anything more spring-like than a nest full of blue eggs? Today I want to show you how to make Faux Blue Speckled Bird Eggs and a Nest!

Faux Blue Bird Eggs and Nest

Spring has arrived in North Carolina and I want to dance and sing and tiptoe through the tulips. Now that Valentine’s Day has come and gone, it is the perfect time to start decorating for Easter! A nest of Blue Speckled Bird Eggs makes a beautiful centerpiece! Mother Robin sure does create beautiful blue eggs, but we’d never think of disturbing those precious eggs.

Instead, I’ll show you how to turn regular chicken eggs…

…into a beautiful nest of blue speckled eggs to decorate for Easter or Spring.

Materials:

(I’ve included affiliate links for your convenience. I earn a small percentage from a purchase using these links. There is no additional cost to you. You can read more about affiliate links here.)

Instructions:

It’s time to get messy. Put down a drop cloth or tarp to cover your work area (and beyond.) First, I’ll show you a magic trick! Learn how to remove the white and yolk out of eggs without breaking the shell. Rest an egg inside the empty carton. Gently tap a nail into the top of your egg.

Turn the egg upside down and put another hole into the other side. Typically you’ll need one hole slightly larger.

Faux Robin's Egg Spring Nest | Pretty Handy Girl

Pucker up and blow through the smaller hole until the egg white and yolk drain out the larger bottom hole. (Of course, you’ll probably want to save the eggs for omelets or scrambled eggs.)

Once you have emptied your eggs, clean them off. Then close your egg carton and flip it upside down to create a raised support for your eggs.

Faux Robin's Egg Spring Nest | Pretty Handy Girl

Gather your blue, black, and white acrylic paints. Paint the egg a robin’s egg blue color and allow them to dry.

Put on rubber gloves. Pour a small amount of black acrylic paint onto a paper plate. Add a little water to create a runny consistency. Dip the toothbrush into the paint mixture. Aim the toothbrush at the eggs and stroke your finger along the bristles to spatter black dots all over the eggs.

Allow the black speckles to dry and repeat the process using the white paint.

While the eggs are drying, pull out your pasta maker. (Am I the only one who never uses my pasta maker for making pasta?) Cut the paper bag into sections wide enough to fit into the pasta maker.

Feed the paper bag through the pasta maker to shred it. (You can shred the bag with a paper shredder or scissors if you don’t have a pasta maker.) Arrange the shreds into a nest form in a bowl, urn, or basket.

Set your faux blue bird eggs into the nest and admire your beautiful Spring décor!

This centerpiece can be left out until you are tired of looking at it. Then store the eggs in the carton and bring them out again next year.


Have a great week! I hope the weather is warming up where you are!


Pin for later!

This DIY nest of Blue Bird Eggs makes a beautiful centerpiece for your Easter decor! | DIY Easter table centerpiece | Pretty Handy Girl #prettyhandygirl #easterdecor #tablecenterpiece

Tired of your sponge or soap taking up valuable sink space in your kitchen? Turn thrifted or dollar store glassware into a functional DIY pedestal kitchen sponge holder that doubles as beautiful decor.

DIY Pedestal Kitchen Sponge Holder pin image

DIY Pedestal Kitchen Sponge Holder

It’s Amanda from Domestically Creative and I’m back with a new way to organize or declutter your kitchen sink space! If you are anything like me, you don’t like a lot of clutter sitting around your kitchen sink. Things like dish soap, hand soap, sponges, and dishcloths sitting around my kitchen sink drive me insane!

Unfortunately, you have to have them out to be easily accessible. I decided to make a pedestal sponge holder as a functional place to keep the sponge, dishcloth, and even hand soap (if you want). This holder also serves as a beautiful decor item too. It’s easy to make your own sponge holder from dollar store or thrift store items, let me show you how.

Materials:

(I’ve included affiliate links for your convenience. I earn a small percentage from a purchase using these links. There is no additional cost to you. You can read more about affiliate links here.)

Instructions:

Step 1: Prep the surfaces for paint

Clean both pieces really well with soap and water, and let them dry completely. If either piece came from a thrift store, it may be extra dirty. Consider using a mild degreaser or Murphy’s Oil Soap first. Then clean well with regular soap and water. Don’t leave any sticky or greasy spots behind because the paint will not stick in the next step.

diy pedestal sponge holder pieces before painting

Step 2: Spray paint both pieces

Give each piece two to three coats of white spray paint. Using a high gloss paint gives the glass pieces a Milk Glass look. 

Tips for Even Spray Painting:

  • Paint outdoors on a calm, mild day, or use a painting tent to protect the wet pieces from debris and bugs.
  • Keep the nozzle 12-15” away from the surface you are painting.
  • Spray in short, even, horizontal lines across the surface, working top to bottom. The burst of spray should start and end just slightly off the sides of the object being painted.
  • Avoid drips by doing multiple light coats, allowing the paint to dry between coats.

painted pedestal pieces

Step 3 – Attach pieces together

Before doing this step, it is very important that both pieces are completely dry and the paint is cured.

overview before attaching pedestal pieces together with construction adhesive

Use construction adhesive to attach the base to the top. To do this, place the plate or tray face down on a flat even surface. Using the caulk gun, add a small amount of construction adhesive to the top of the candle holder. Place the candleholder adhesive side down onto the bottom of the plate or tray.

attach the pieces together with construction adhesive

Hold a small amount of pressure on the candle holder for about a minute. Let the adhesive dry for about 24 hours before using your new DIY pedestal sponge holder.

Finished pedestal sponge holder

Use your new pedestal stand to keep your sponge and dishcloth in the kitchen and clear up some of that sink space!

Clean and decluttered kitchen sink

You could make one of these pedestal stands for a bathroom or to hold jewelry on your dresser top! It doesn’t just have to hold sponges, the possibilities are endless. I plan to make one for our guest bath to hold a few mason jars we have cotton balls and Q-tips in. It could also serve as a place to keep soap.

Finished sponge and soap holder for the kitchen

What would you use one of these DIY Pedestal Kitchen Sponge Holder stands for in your home?

Don’t forget to pin this to save for later!

DIY Pedestal Kitchen Sponge Holder pin image

I’m Amanda, and I am the creator and voice behind the food and DIY blog, Domestically Creative. What started as a place to share updates with friends and family after we moved from Illinois to Tennessee and then to Texas, turned into a passion for finding creative and frugal ways to feed us and decorate our homes.

I have always had the “make it myself” attitude and I’m not afraid to bust out the power tools or get creative when it comes to decorating our home on a budget. You can usually find me scouring the local thrift stores, garage sales and estate sales looking for my next makeover (like this litter box cabinet), or dreaming up ways to make our new house feel more like home. My most recent project was giving my home office a much needed facelift. Some of the plans included creating a fun inspirational accent wall and adding pegboard to store my craft hoards.

I currently call Missouri home, where I live with my husband, dog, and 2 cats in a pretty dull, late 90’s split level. My husband and I both love to travel the U.S and recently purchased a small travel trailer to tag along in our journeys. In our free time together we can usually be found working together on a home project, exploring a new place, or just lounging with our pup, Delilah.

I’d love for you to connect with me on social media via Facebook, Instagram, Pinterest and Twitter!

See all of Amanda’s tutorials HERE.

Does your bathroom need a little sprucing up? If you’re anything like me, you get a little tired of the same boring thing year after year. The 33 projects in this collection are inspiration for how you can DIY Bathroom Upgrades!

Bathroom Upgrades You Can DIY

If your how was built with builder-grade materials and you’re looking for ways to upgrade different things to make it more personalized and beautiful, today is the day to get some inspiration to make a change in your bathroom. The good news is these are all projects that you can put together with just a few supplies and a little time and elbow grease.

Create more beautiful storage in your bathroom with these easy bathroom shelves.


Provide a little privacy without blocking light by applying this privacy film to your bathroom windows.


Build this DIY bathroom wall cabinet to create another place to store toiletries and towels.


Learn how to install cement tiles on your own so you can create the floor of your dreams!


If you need a place to hang some towels, build this simple rustic ladder for your bathroom.


Plenty 'o Storage from One Board | Pretty Handy Girl Plenty 'o Storage from One Board | Pretty Handy Girl

Build a simple storage box to put bathroom essentials out of sight using only ONE BOARD!


diy rolling racks by hazel and gold designs

Another option for towel storage is this rolling bathroom towel rack; perfect if you don’t have ample wall space.


Learn how to install and update cabinet hardware for a more modern look to your bathroom.


Rustic Wood Bathtub Tray | Pretty Handy Girl

Make this beautiful and useful wooden bath tray that will hold your phone while you bathe. It’s great decor too!


Update your bathroom with customized towel hooks rather than rods.


If you’re looking to change your mirror, consider learning how to hang a frameless oval mirror.


If you like the rustic look, consider updating with unique things like this branch towel bar.


 A oyster shell mirror is perfect way to upgrade a coastal themed bathroom.


Add a beautiful rustic and warm touch by planking one wall in your bathroom.


Install a beautiful backsplash inside a cabinet or on a wall.


Repurpose an old window to update your bathroom with an awesome bathroom storage cabinet.


Upgrade your plain walls with DIY shiplap in your powder room.


If you’re looking for more organization, update your bathroom drawer storage with DIY drawer dividers.


Give your bathroom walls an upgrade by installing beadboard on the bathroom walls.


Decorative industrial shelves are the perfect upgrade for your bathroom.


This stick-on bathroom mirror frame makes such a huge impact and you can absolutely make it yourself.


Build your own small DIY bathroom vanity so you have exactly what you need.


diy-drawer-dividers

Add built-in dividers to your bathroom drawer to improve organization.


Upgrade your old cabinets by doing a vanity makeover with paint!


If you love modern rustic decor, these DIY bracket shelves would be a perfect bathroom upgrade!


Change up your bathroom by painting a faux concrete wall and making it look more customized.


Apply floral wallpaper to one bathroom wall to make a huge visual impact without overwhelming.


Build an awesome wooden DIY rustic mirror frame to upgrade a simple mirror.


Add some simple storage by installing creative organization to the walls.


Want to change your floors without tiling? Use floor stickers to update your bathroom flooring with a whole new look.


Apply tile to the walls in your bathroom for a beautiful, classy upgraded look.


Use stencils on the bathroom walls to create a faux wallpaper look.


Create simple wall frames to upgrade those plain walls and make them prettier.


Give your bathroom a whole new look by applying these beautiful patterned tile stickers.

I hope you loved these ideas and found inspiration on how you can create something similar for your home. Comment and let me know what you think! Which is your favorite?

Hi, I’m Sheri from Hazel + Gold Designs. Here are a few fun stats about me: I like love chocolate and peanut butter (together of course.) If you like stats, I have been crocheting for about 16 years, crafting for 20, and woodworking for about 4 years. I found a passion in making and being creative and began documenting my projects online at Hazel + Gold Designs.

When not working on projects, I enjoy spending time with my husband, four children, perfect dog, and ornery cat. You can find me on Facebook, Pinterest, Instagram and Twitter.

Read all of Sheri’s tutorials.

~Find more of Sheri’s projects here ~