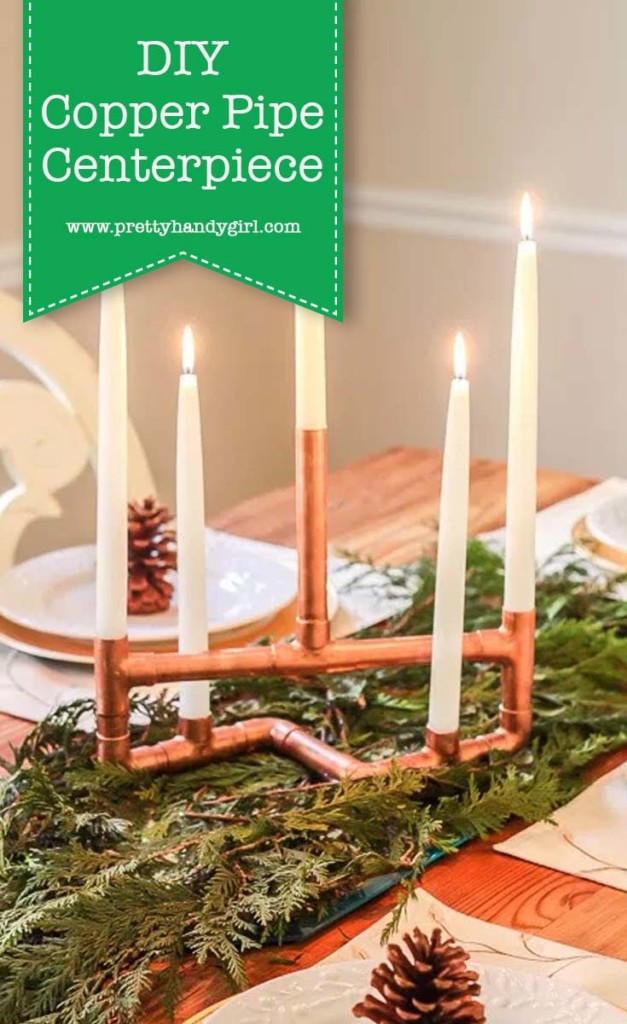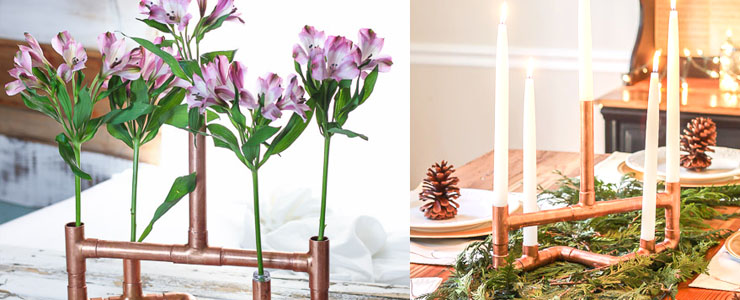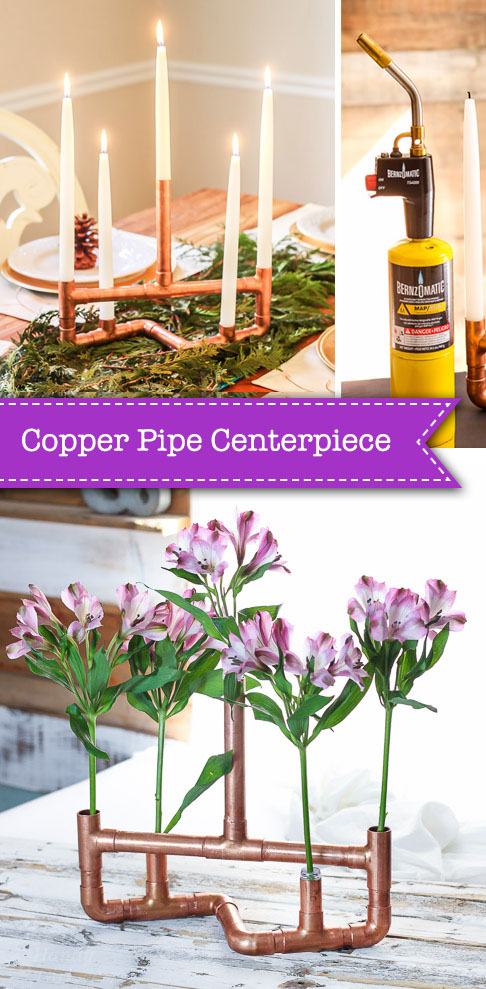
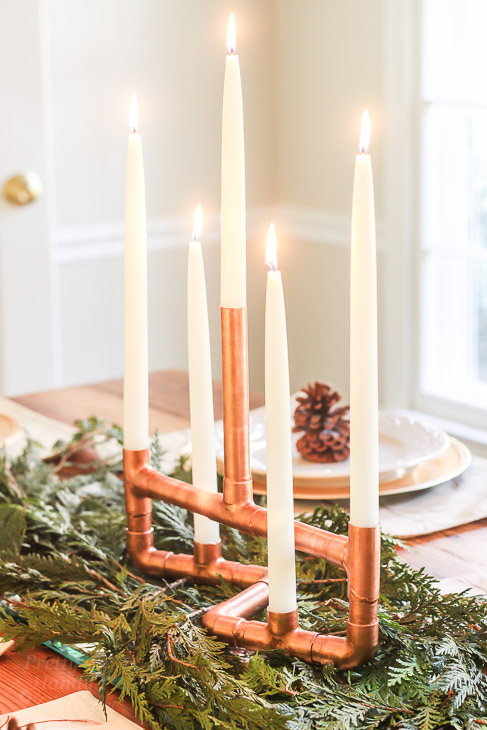
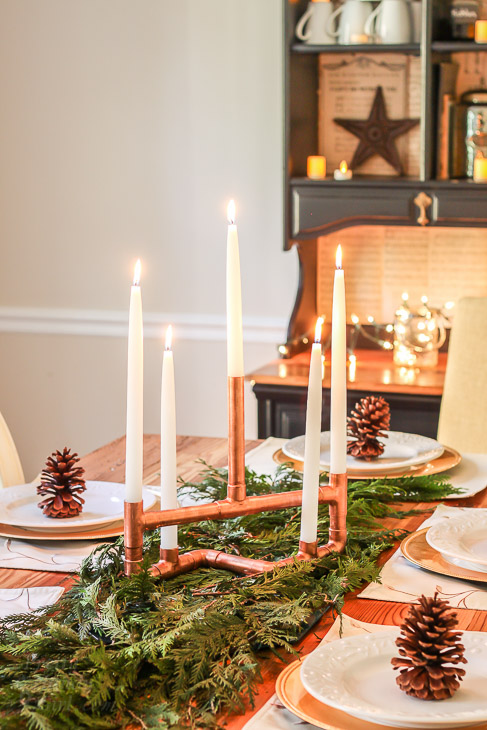
I’m super excited to be back with another fun copper pipe tutorial for you to make for the holidays! Today let’s make this unique DIY Copper Pipe Centerpiece that acts as a candelabra . . .
. . . or a floral centerpiece.
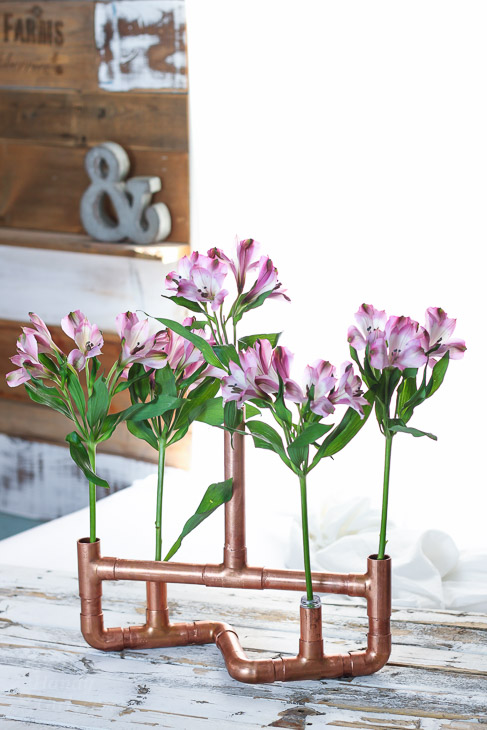
This is such a versatile project that can be used for your dinner table, a wedding centerpiece or a vase to hold flowers. If you wanted to alter the design, you could shorten the center pipe and use for a pencil holder. Regardless of how you use it, this DIY Copper Pipe Centerpiece is sure to be a conversation starter!
If you had fun getting used to using a Bernzomatic torch last week while making DIY Copper Ring Jewelry, then you’re going to love using a bigger torch to make this DIY Copper Centerpiece.

Not only that, you’ll be honing your soldering skills should you need to use them for a plumbing repair. I’m honored to be part of the Bernzomatic Torch Bearers program. Bernzomatic has sponsored this post to help you with some holiday decorating ideas.
Materials:
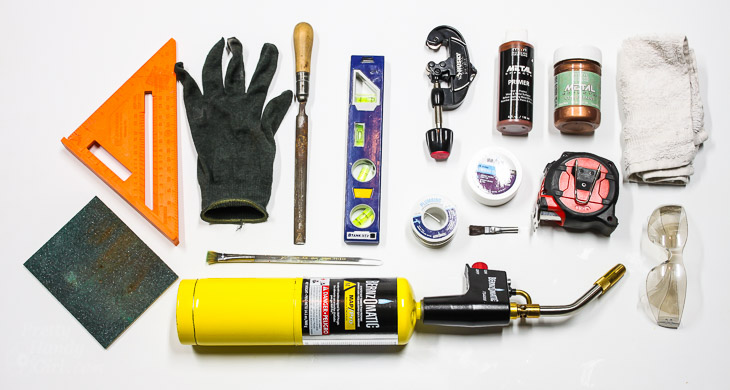
Materials:
(I’ve included affiliate links for your convenience. I earn a small percentage from a purchase using these links. There is no additional cost to you. You can read more about affiliate links here.)
Optional: Florist tubes
Cut List:
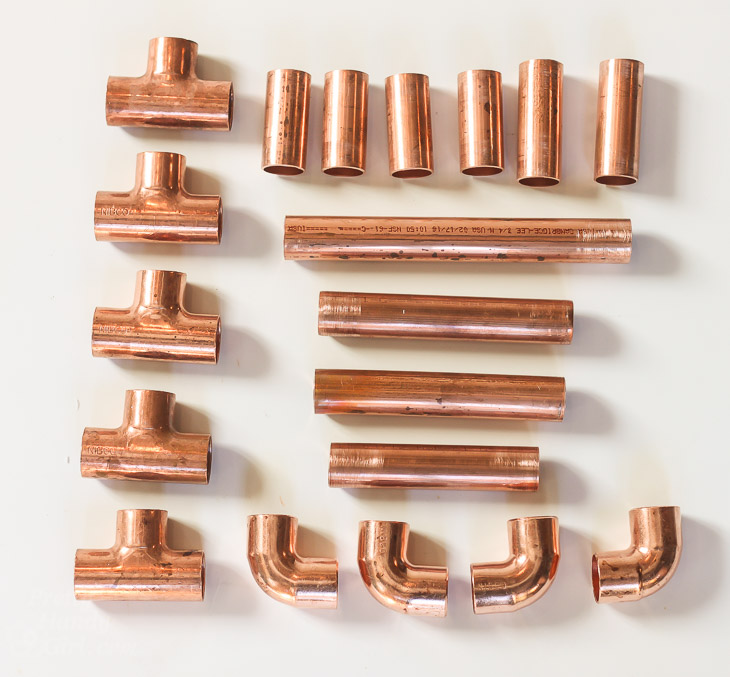
- 2 – 2 3/8″ pipes
- 4 – 2″ pipes
- 1 – 7″ pipes
- 2 – 5″ pipes
- 1 – 4″ pipe
Instructions:
Cut your pipes to size. If you’ve never cut with a pipe cutter, you can watch this video to learn how.
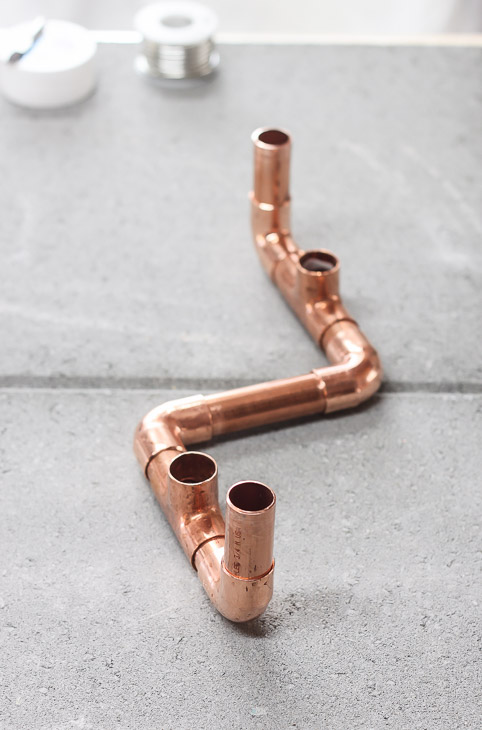
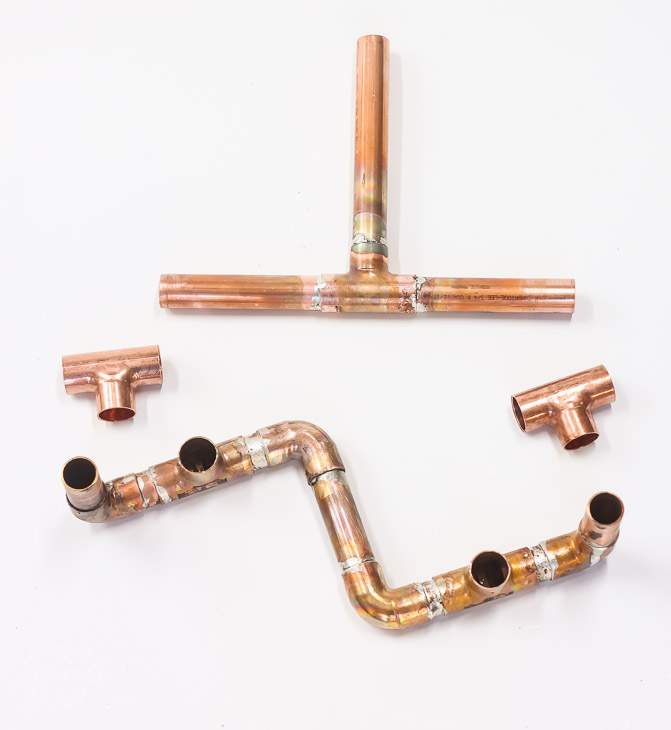
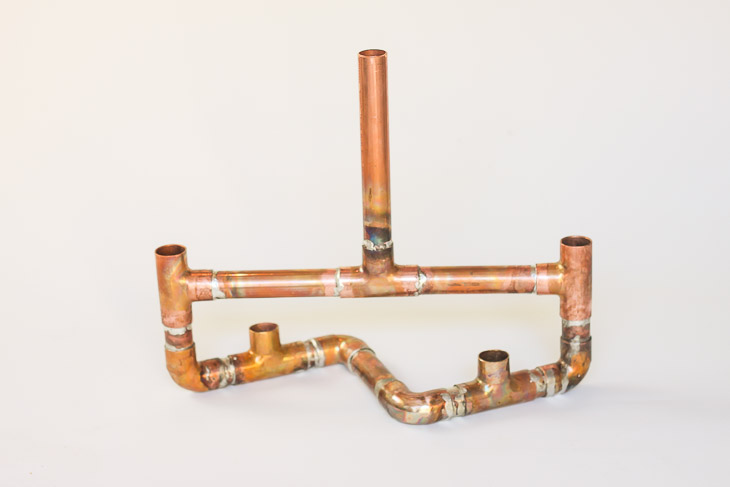
Dry fit your pieces together as shown:
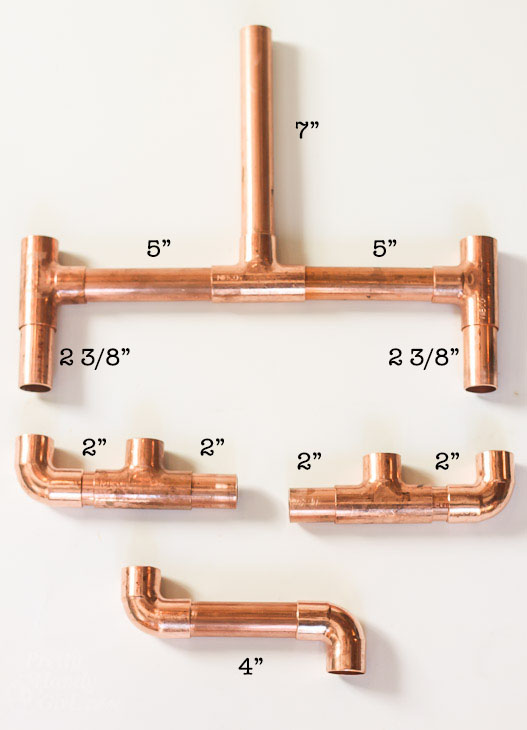
Then piece the centerpiece together completely as shown below. (The 4″ section with elbows connects the base pieces.)
The two 5″ pipes will not sit completely inside the “T” fittings. This will provide wiggle room to line up and assemble the top parts with the base. Feel free to adjust the 4″ base pipe until you fit everything together.
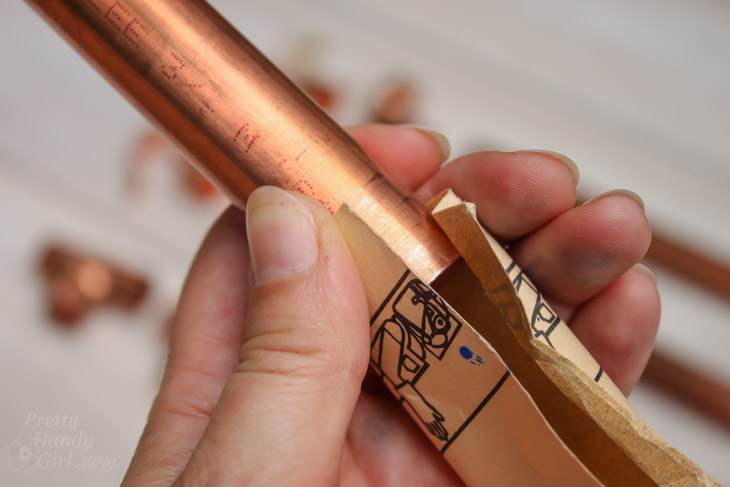
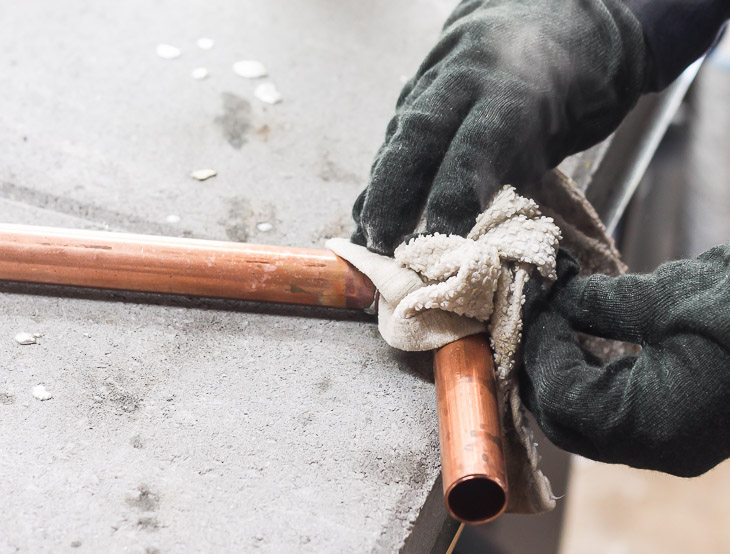
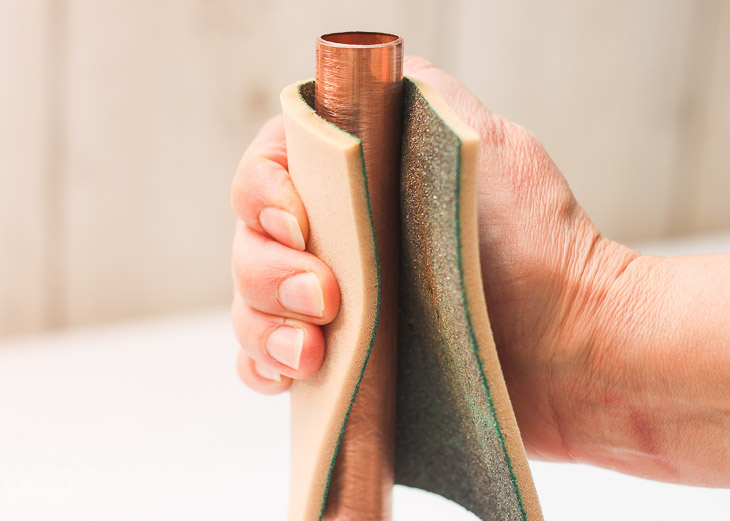
Sand all pipe ends with sandpaper.
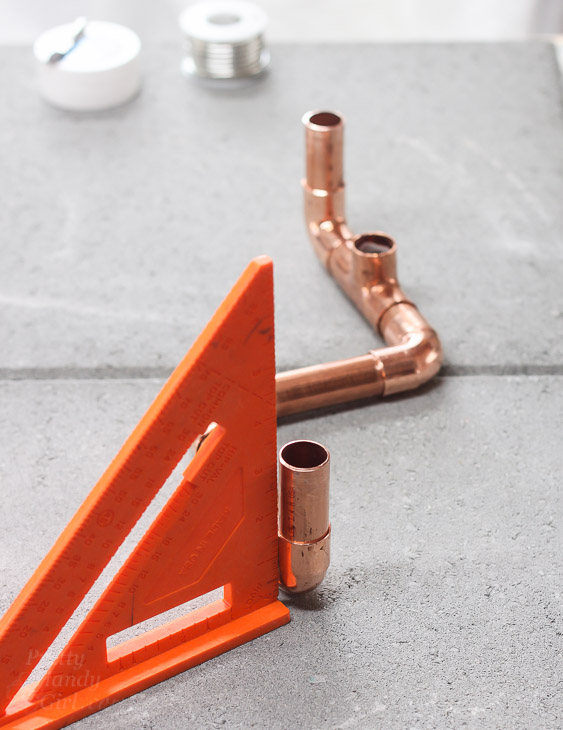
Pull apart the top and bottom of your centerpiece and place the base on your fireproof work surface to start. (I bought two paver blocks from Lowe’s to use for larger torch projects.)
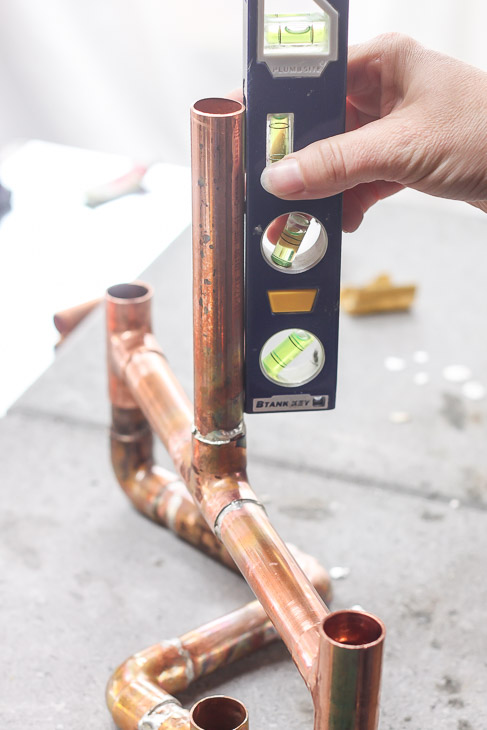
Use the speed square to make sure all the pipes and fittings are plumb.
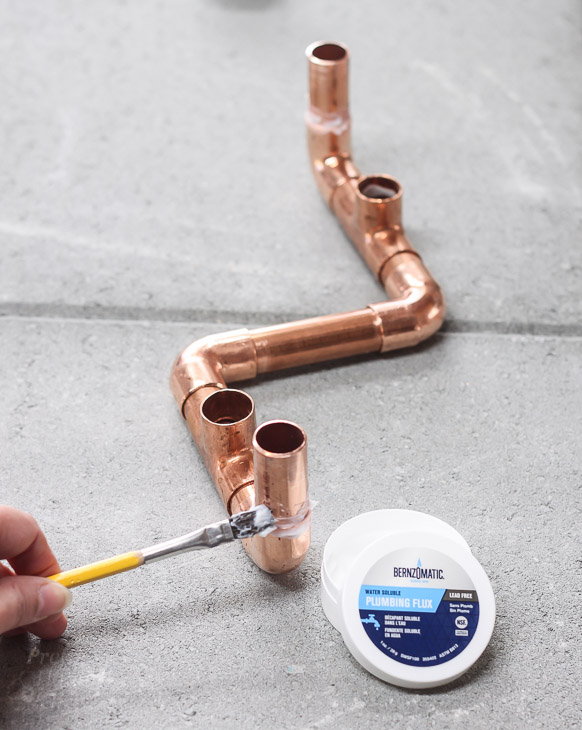
Apply a liberal amount of flux to all the connections.
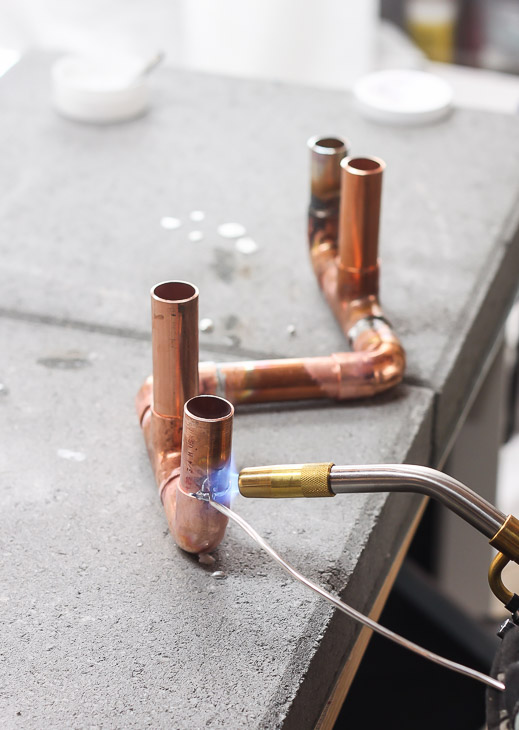
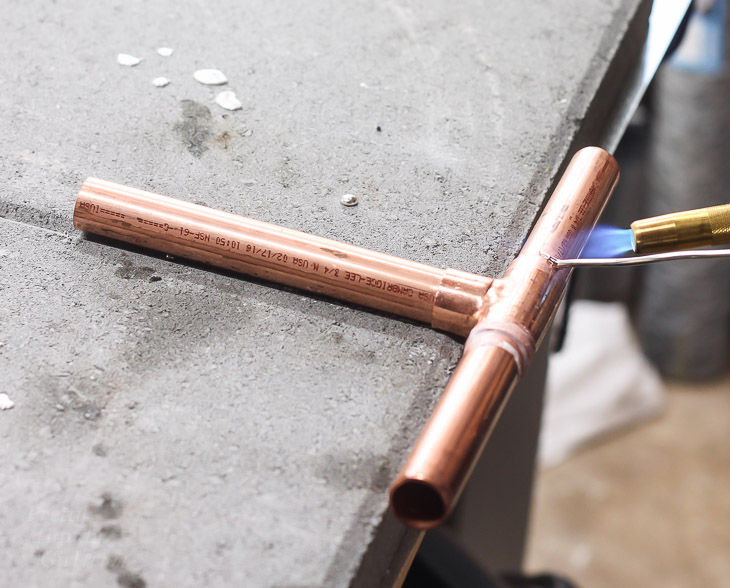
Start your Bernzomatic TS4000 Trigger Start Torch with the easy trigger start button. Heat each connection until the flux melts. Then hold the solder at the connection until the solder begins to flow. (You may need to solder one spot at a time or re-heat the solder and tilt the piece to help it flow around the connection.)
Lift the base with gloves on or pliers and drop in the bucket of water to cool. Alternatively you can cool the pieces with a cold wet rag.
Set the base aside and join the top assembly (1- 7″ pipe, 2 – 5″ pipes and 1 – 90˚ T connector.) Repeat the process of applying flux, heating and spreading the solder.
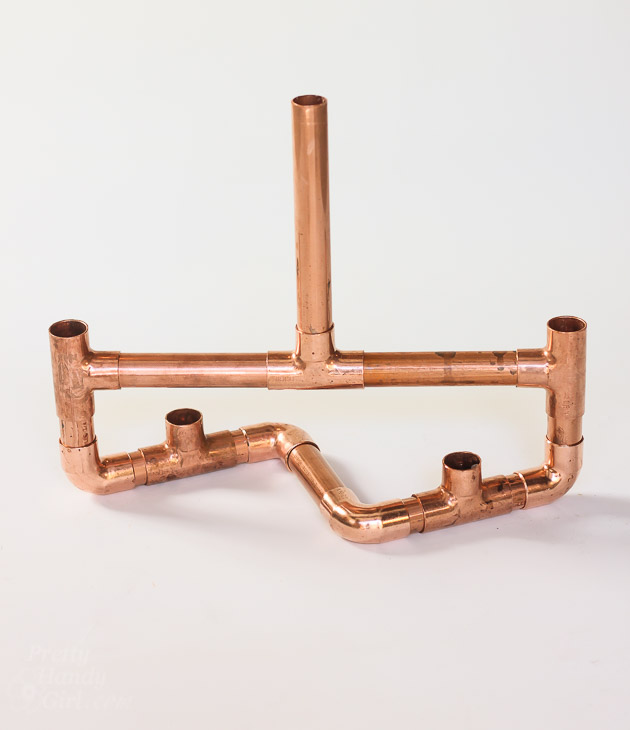
At this point your parts should be assembled like this:
Slide the two “T” connectors onto your soldered top assembly. Slide the “T” connectors onto the base. Center the 7″ pipe and make sure it is plumb.
Solder the connections around the two side “T” connectors. Your soldering is now done. Cool off the centerpiece with a cold wet rag or in the bucket of water.
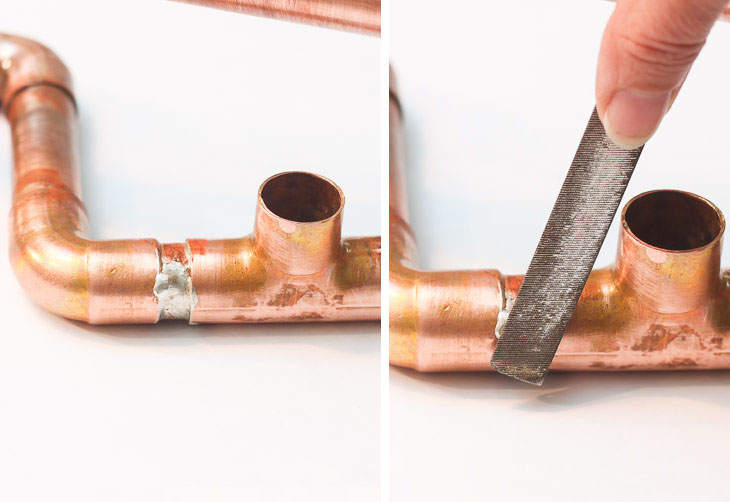
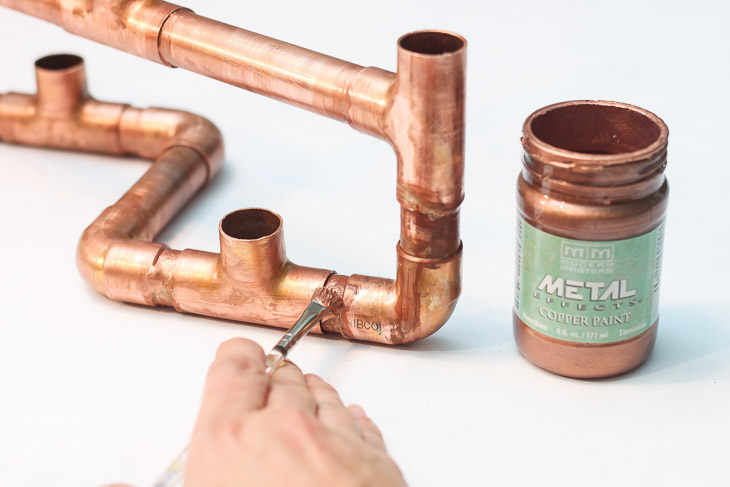
Don’t stress if your soldering joints aren’t beautiful, I’ll show you how to cover them. Sand the entire centerpiece to remove any heat marks.
File any bumpy solder until smooth.
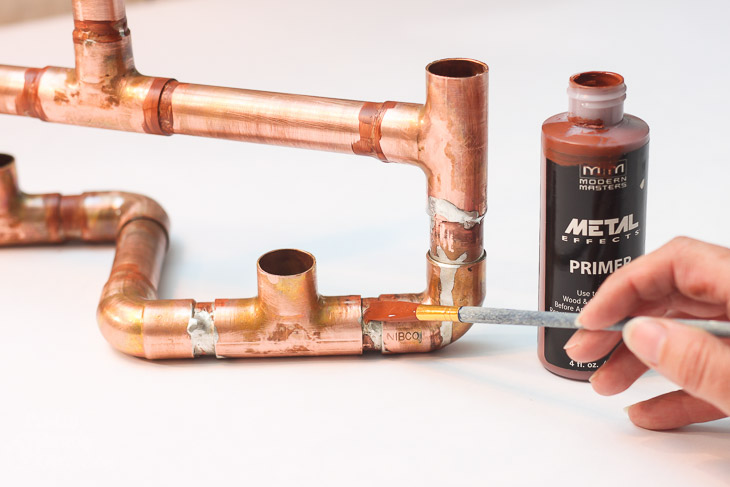
Wipe off the centerpiece with a wet rag to remove any metal shavings and dust. Paint Modern Masters Metal Effects Primer on all the soldered joints. Let the primer dry and add a second coat.
After the primer has dried, paint Modern Masters Metal Effects Copper Paint onto the primed solder joints. Feather the paint onto the copper pipes and cover any imperfections. Let dry and apply a second coat.
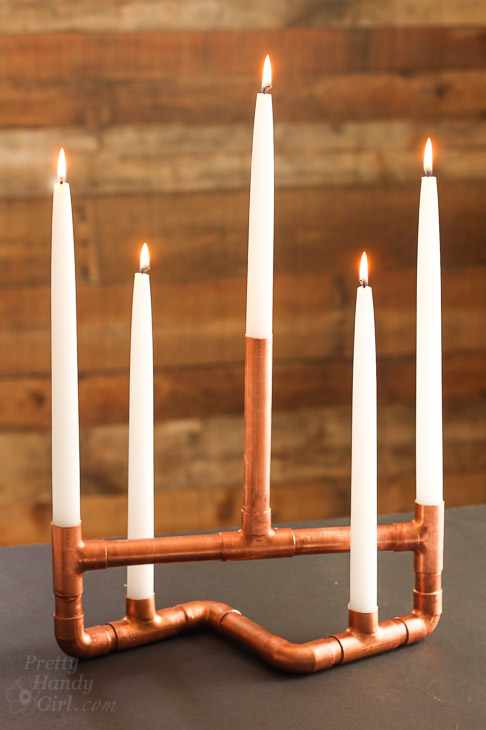
You are done! Time to show off your new DIY Copper Pipe Centerpiece! Add hand-dipped candles to the open fittings. For the center pipe, you’ll need to trim your candle and gently twist the candle into the pipe.
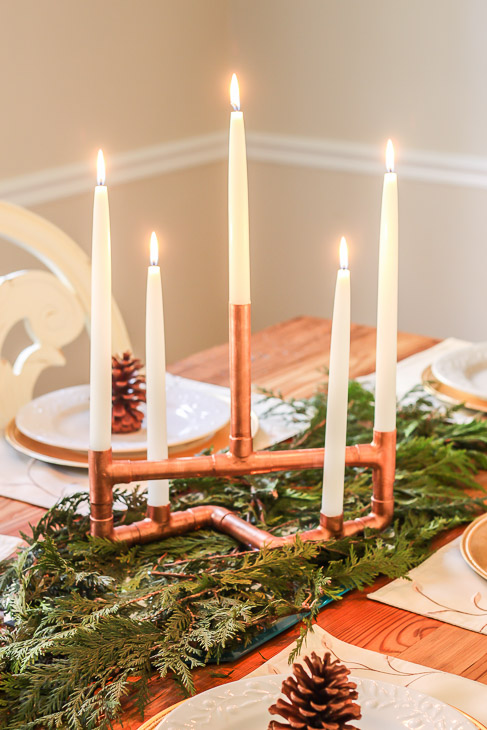
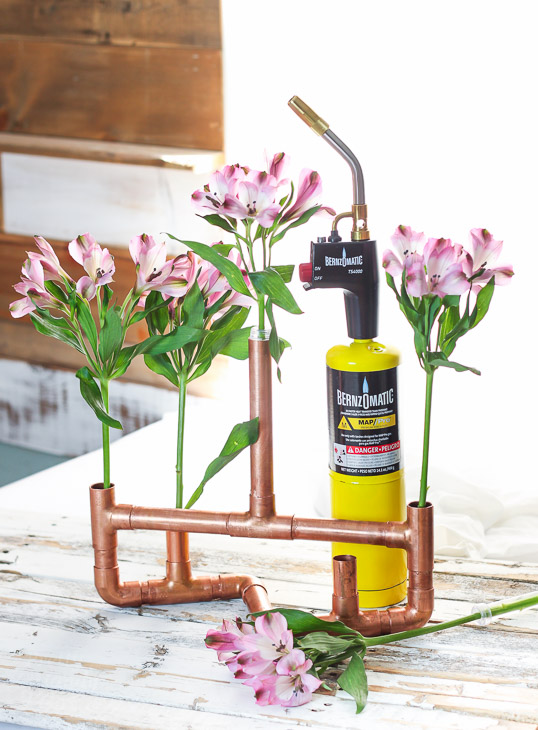
If you want to use the centerpiece for a floral display, fill floral tubes with water and drop them into the openings. (Note: I slipped two 2″ copper pipe pieces into the shortest openings to hide the floral tubes. But, you could just add water to the centerpiece and put your flowers in directly.)

Add your flowers and enjoy!
How fun is this DIY Copper Centerpiece? It would look great as a centerpiece for a rustic or industrial themed wedding or party! You could change the configuration of the pipes and fittings if you like.
Add four more extensions and fitting openings to create a beautiful menorah for Hanukkah!
Don’t walk, run to the plumbing section at your local hardware store and get creative!
Until next time…

Disclosure: This is a sponsored post for Bernzomatic. As a Bernzomatic Torch Bearer, I was provided complimentary torches and was compensated for my time and efforts. I was not told what to write. All opinions are my own. I am particular about the brands I represent and will always let you know when you are reading a sponsored post.
Pin for later!