Pottery_barn_like_organizational_box

I love a challenge. If you hold an object up to me and ask me how it can be transformed, I can usually name a few different things. So, when the Elmer’s #Look4Less Challenge was introduced, I jumped at the opportunity!

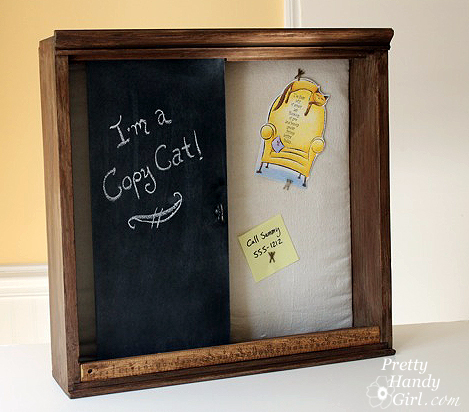
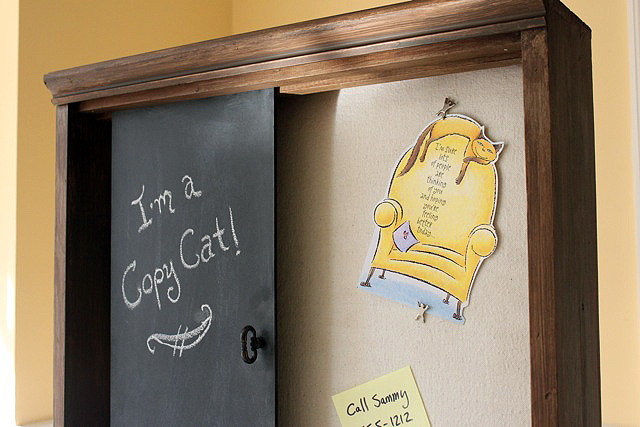
For this challenge I chose to recreate Pottery Barn’s Sliding Chalkboard Wall Organizer. I loved the idea of a sliding board and a bulletin board in the back. But, I especially loved the rustic wood look.

However, I wasn’t crazy about the price. (Obviously that didn’t stop the item from selling out!) So, if you want one for yourself, I’ll save you $100 and show you how to make your own!

My version cost approximately $30 (cost estimate based on materials used. If I used a 1/2 can of spray paint I calculated half the cost.) Personally, I spent about $10 out of pocket on this project because I had a lot of the supplies already. Plus, Elmer’s was kind enough to sent me some of the materials to make the project (shown as links below.)

Be sure to read the end of this post to learn how you can win your own Elmer’s materials!

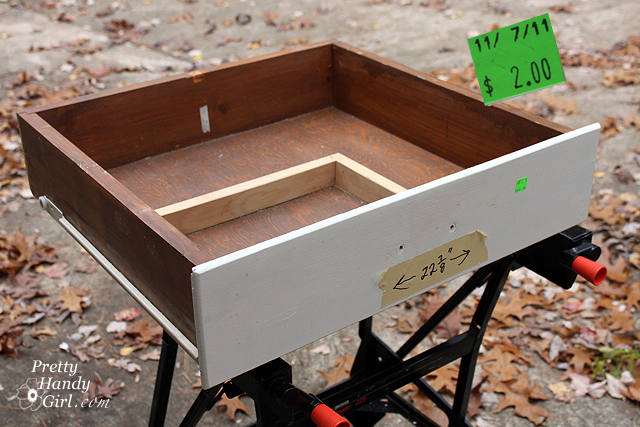
In addition to the new art supplies, I bought an old drawer to use for the structure of my organization unit. I paid — are you ready for this — two dollars at our local Habitat ReStore! Seriously, only $2 for the main component of my wall organizer unit.

Here is a list of the rest of the supplies I used:


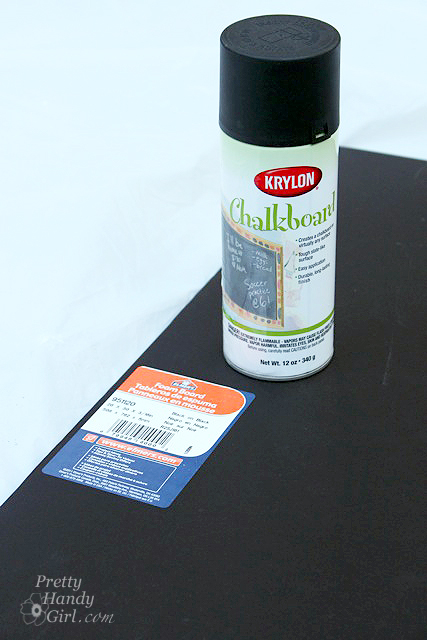
  • Krylon chalkboard spray paint
  • Drawer
  • Damp rag
  • Painter’s drop cloth
  • Batting
  • Wooden ruler
  • 1 Knob
  • Washers
  • Rustoleum brown spray primer
  • Behr glazing liquid
  • Valspar mocha glaze
  • Acrylic or latex paint (dark brown tester sample)
  • Acrylic or latex paint (light tan tester sample)
  • Wood putty
  • Saw
  • Hammer
  • Drill and drill bits
  • Handsaw
  • Brad nails
  • Finish Nail
  • Construction glue
  • Clamps
  • Pencil
  • Trim molding
  • 1″ x 1″ wood strips (or square dowels)
  • Duct tape

Prepping the drawer:

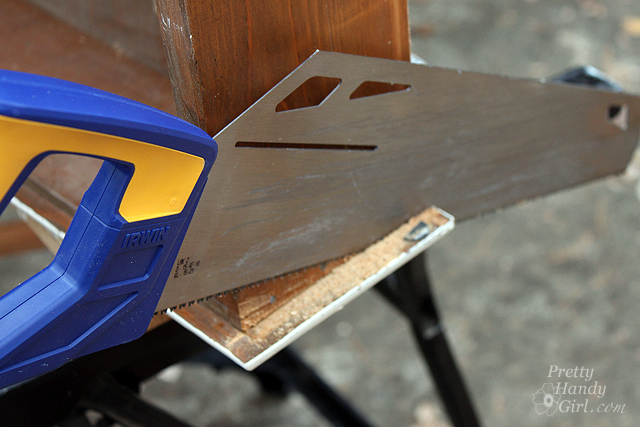
Remove any hardware from the drawer. Use a handsaw to trim off the sides of the face of the drawer. You want the sides to be flush with the sides of the drawer. The top and bottom of the face can extend beyond the drawer.

Orient the drawer so the face is now the bottom of the wall organizational unit. The rear panel of the drawer is now the top of the unit.

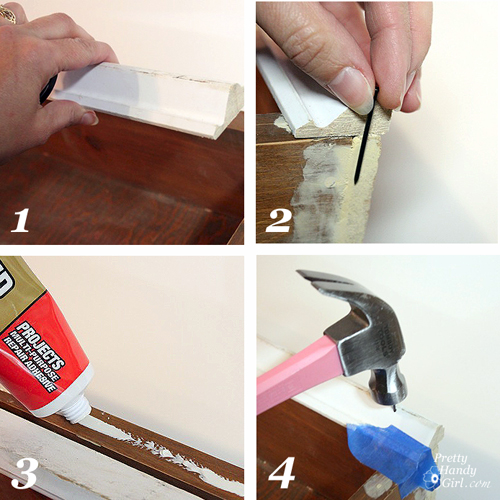
Add decorative trim molding to the top as shown:

  1. Cut decorative trim molding to the width of the top of the unit/drawer. (Check with your local Habitat Restore for inexpensive trim.)
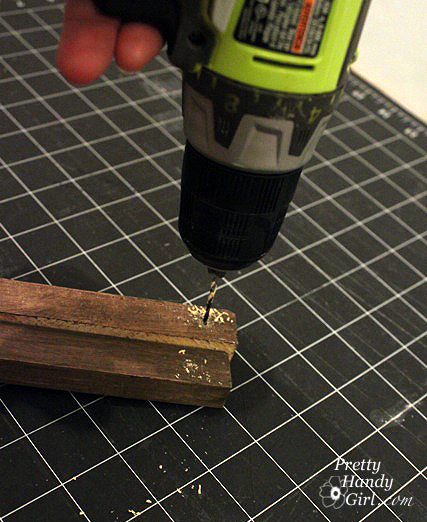
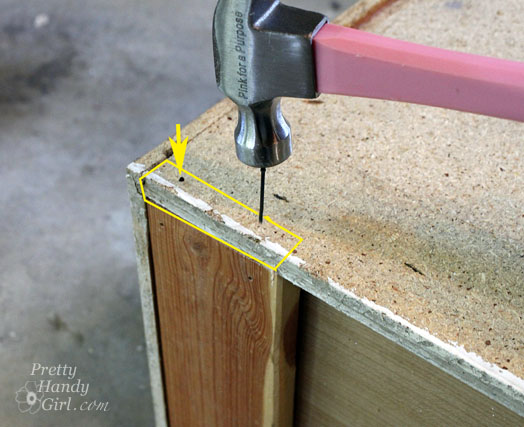
  2. Choose a finish nail that is long enough to go through the molding and into the drawer. Drill a few pilot holes into the molding (to avoid splitting the wood when you hammer a nail into it.)
  3. Run a bead of construction glue on the top of the drawer. Lay the molding on top of the glue.
  4. Use finish nails to hammer through the pilot holes and attach the molding to the drawer.

Wipe off the drawer/unit with a wet rag.


Faux painting the unit:

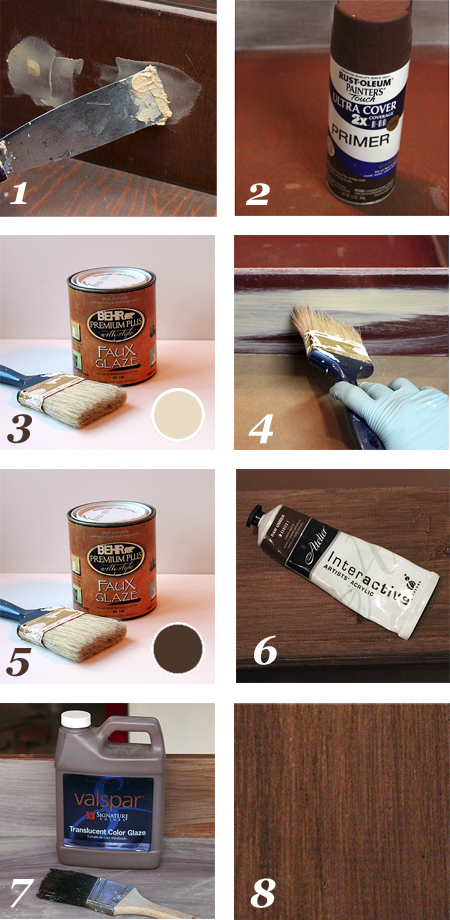
If you are dealing with a mixture of wood finishes (some paint, some stain), you will want to prime and paint your unit. I decided to give mine a faux rustic wood treatment (because I love that rustic wood look!) Here are the basic steps:

  1. Use wood putty to fill any holes or cracks. After the putty has dried, sand it smooth. Wipe off any dust from the wood using a damp rag.
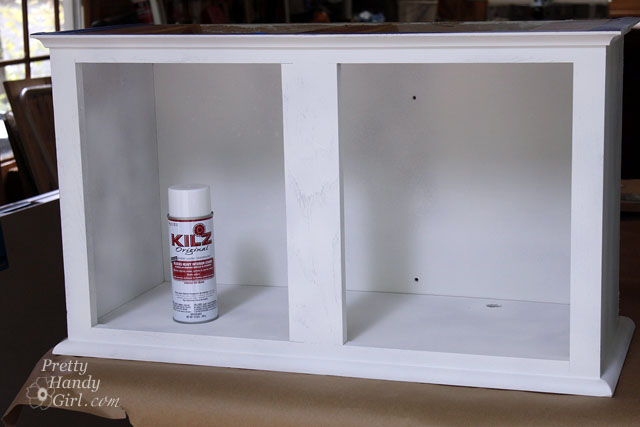
  2. Prime the entire box (minus the back) with Rustoleum brown primer.
  3. Mix 1 part glaze to 2 parts light tan paint.
  4. Brush the mixture onto the unit using a tattered paint brush. Keep the strokes in long lines to mimic wood grain.
  5. Let that layer dry. Mix 1 part glaze to 2 parts dark brown paint.
  6. Brush it on the unit using the same technique as step 4.
  7. Finish up by brushing a coat of Vaspar Mocha glaze over the entire unit.


Creating the bulletin board:

After the glaze has dried, cut a piece of Elmer’s White Foam Board the dimensions of the inside of the drawer/unit.

Cut a piece of batting the same size as the foam board.

Cut a piece of painters’ drop cloth 2-3″ wider (on all sides) than the foam board.

Layer the drop cloth, then the batting and top it with the foam board.

Wrap the edges of the drop cloth around the foam board and secure it with duct tape.

Add a few Elmer’s CraftBond Glue Spots Pop-up Medium to the back side of the foam board and press the board into the back of the unit. Instant bulletin board!


Adding a graphic letter to the bulletin board:

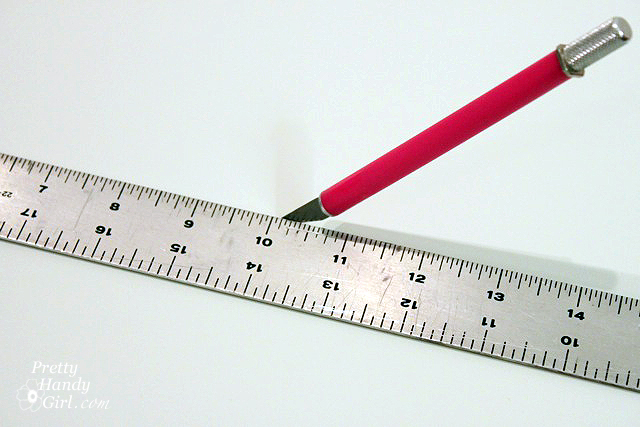
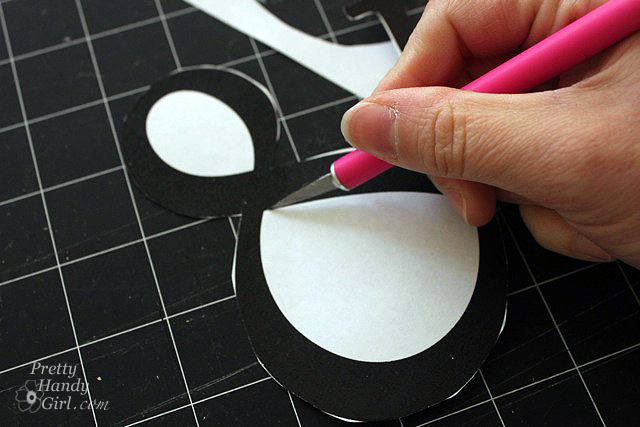
Print out a large letter, number or symbol. Cut out around the shape using an x-acto knife.

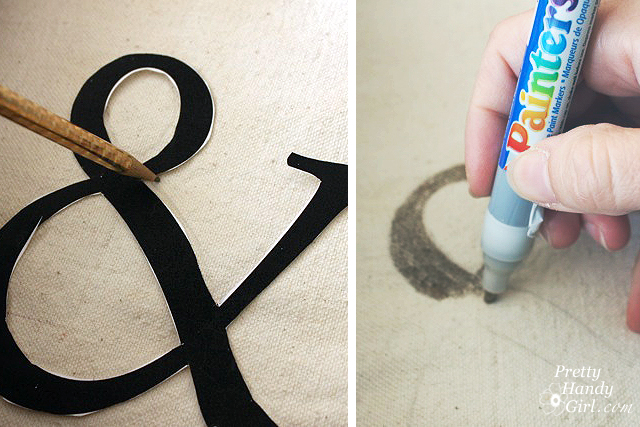
Position the cut out onto the bulletin board and trace around the edges lightly with pencil.Use an Elmer’s Painters gold paint marker to color inside the pencil tracing.


Creating the sliding chalkboard:

Cut the Elmer’s Black Foam Board the height of the interior of the drawer/unit and about 1/3 the width.

Spray the black foam board with the chalk paint. Add 1-2 more light coats per the directions on the can.

Measure the interior width at the top and bottom of the organizational unit. Cut two 1″ x 1″ strips of wood (or square dowels) for the top and 2 strips for the bottom. Drill a hole in each end of the strips.

Measure out 1″ from the bulletin board, on the bottom of the unit. Mark this location. Repeat for the top . Run a bead of construction glue onto the bottom of the wood strip and then adhere it to the bottom of the unit at the 1″ measurement mark.

Hammer brad nails into the predrilled holes. Repeat for the top of the cubby. (Two 1″ square strips are shown, but only install the back ones at this time.)

If the chalkboard paint has dried, rub a piece of chalk all over the board to season it. Wipe it clean with a dry cloth.

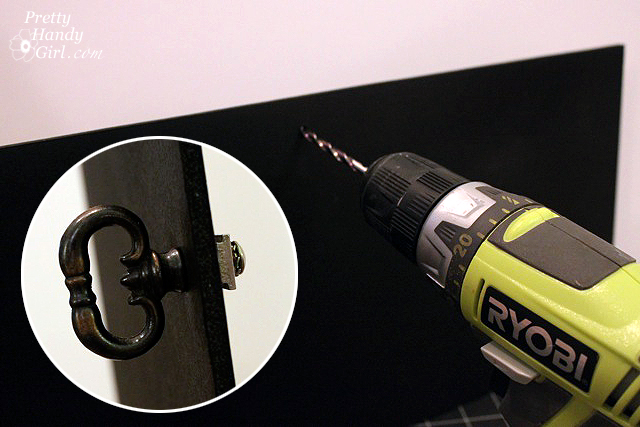
Drill a hole into the chalkboard where you want the handle. Feed the handle through. Add washers to the backside of the chalkboard if you need to take up some of the slack on the screw.

Insert the chalkboard into the wall unit and rest it against the first strip. Add the second strip in front of the chalkboard and attach it the same way you did above.

Be sure that the wood strips are not too snug against the chalkboard. The board should have enough freedom to slide back and forth freely.


Finishing touches:

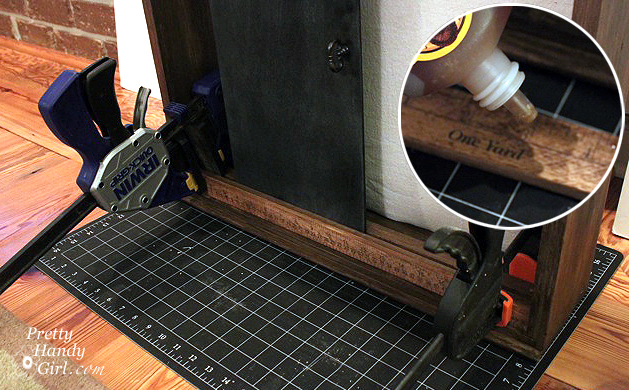
If you want to give your ruler some age, rub a walnut stain onto the wood. Let it dry. Glue the wooden ruler to the front of the wood strip on the bottom using construction glue.

Clamp the ruler in place and let it dry overnight.

Add your pushpins and a message to the chalkboard and enjoy your efforts! You just saved yourself $100!!! Woot!

If you want instructions for hanging the unit, check out this post on hanging objects on the wall (the right way) the first time.

I’m pretty pleased with my Pottery Barn copy cat. Not to be mean or anything, but I like mine better because of the ruler,

the decorative crown molding,

and most of all for the price!!!
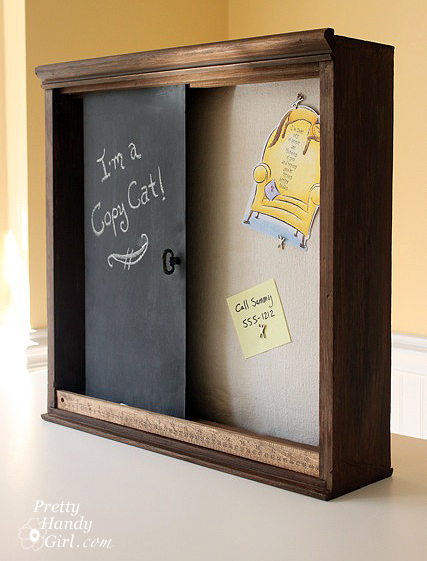

Do you like my Pottery Barn knock off? Or does it still look like an old discarded drawer to you?


Disclaimer: This project has been compensated as part of a social shopper insights study for Elmer’s #gluenglitter #collectivebias #CBias. I was paid a small fee and sent some Elmer’s products. However, the ideas and opinions expressed in this post are solely mine.

Sharing with Sawdust and Paper Scraps – Build{hers} Link Party

Did you like this post? Want to be notified when there are more fantastic tutorials by Pretty Handy Girl? Sign up to receive emails in your inbox:

Enter your email address:

Delivered by FeedBurner

Or follow me on Twitter or Facebook so you can be the first to know!


We had a great turnout at the Habitat ReStore demonstration on Saturday! Thank you to everyone who showed up. It was nice meeting some new friends. There will be another talk at 1 pm on Saturday, December 10th at the Cary, NC Habitat ReStore! I hope you can make it, because I’ll be showing how to turn some common ReStore items into holiday gifts and décor.

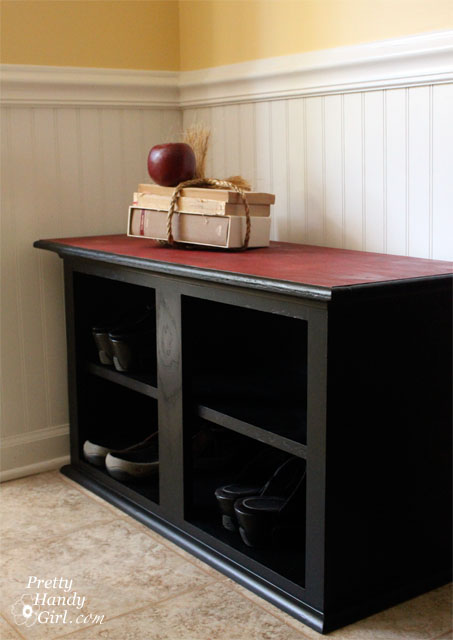
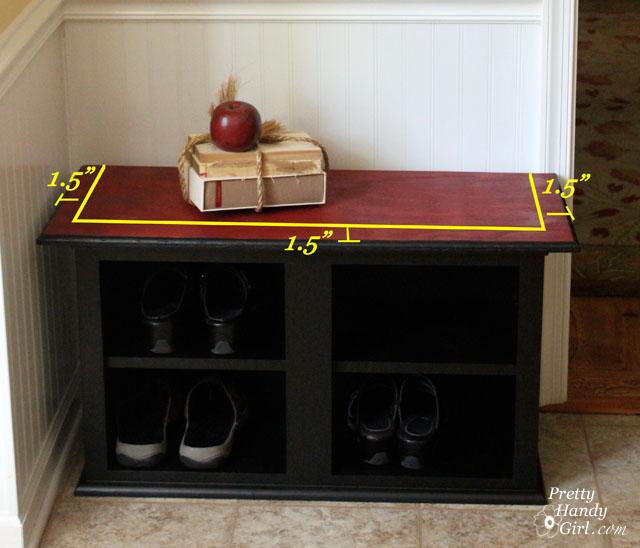
And now for the tutorial that you really wanted to see — but couldn’t make it to see — making a shoe storage bench out of an kitchen wall cabinet!

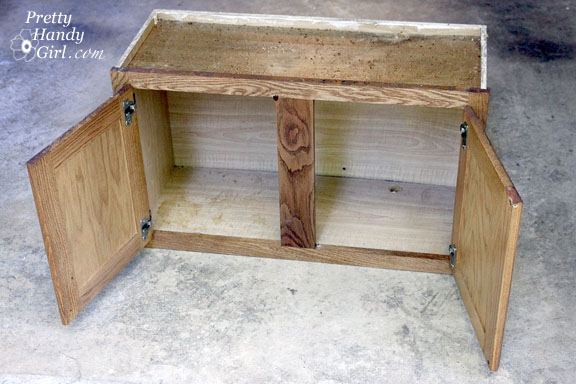
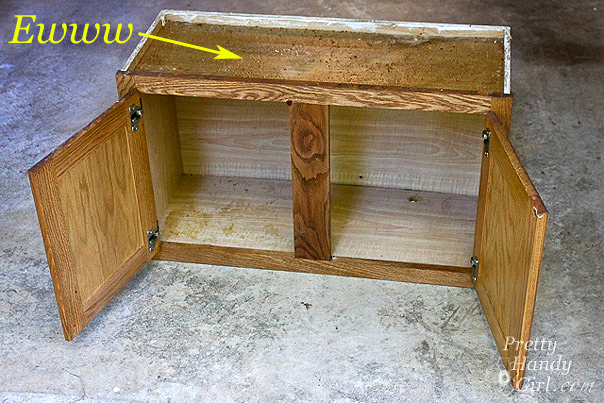
Wall cabinets that fit over your fridge or stove work really well for this shoe storage bench project. Ideally the cabinet will be 18″ in height (standard seat height). If it is shorter, you can build a base for your bench to raise it up a little.

It is more than likely that these cabinets will be coated with about 5 lbs. of grease. But, have not fear, I found THE BEST cleaner for removing grease. Hot water and ammonia! You must work in a well ventilated area when working with ammonia. Sponge on the ammonia and hot water concoction and wait about 10 minutes. Wipe off the cabinet and repeat until clean.

Materials:

  • Ammonia, hot water and a sponge or rag (to clean off grease)
  • Screwdriver
  • Hammer
  • Nail set
  • Miter saw
  • Pencil
  • Level
  • Tape measure
  • Wood putty
  • Sandpaper
  • Construction or thick wood glue
  • Primer
  • Paint
  • Paint brush
  • 2″ finish nails
  • 1 and 1/4″ finish nails
  • Quarter round moulding for base of cabinet
  • Cove moulding for top of cabinet
  • 1″ thick board (cut to fit inside cabinet dimensions)
  • 1×4″ pine firring strips
  • Plywood or pine board cut to fit 3″ wider and 1.5″ deer than finished dimensions of the cabinet (after moulding is added.)
  • Optional: Thin plywood to use as a filler strip


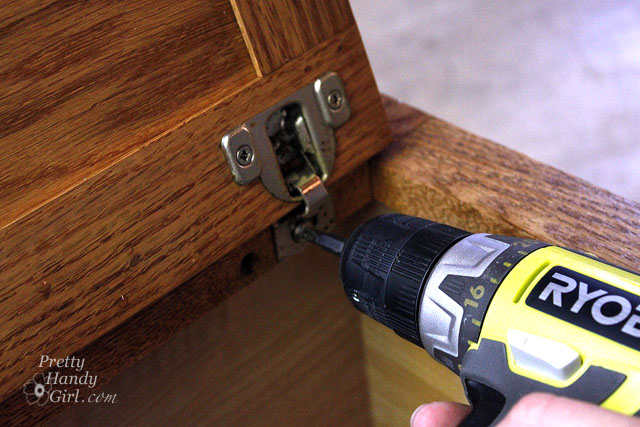
Remove all the hardware and the doors. Remove any nails that are poking out or hammer them flush with the wood.

Measure the inside depth of the top of your cabinet.

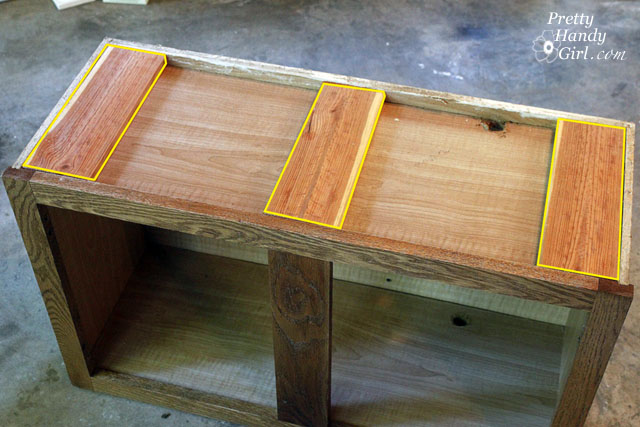
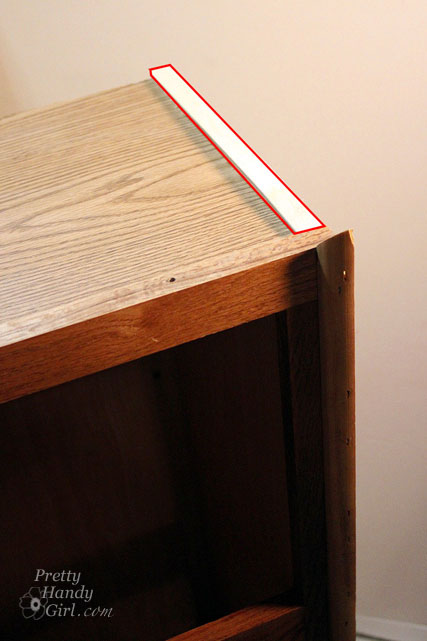
Cut three 1×4″ boards to sit on top of the cabinet and use for the bench support and to give your nails something to grip when attaching the bench top. (Without these supports it would be very difficult to nail or screw into the particle board cabinet without it flaking and chipping.)

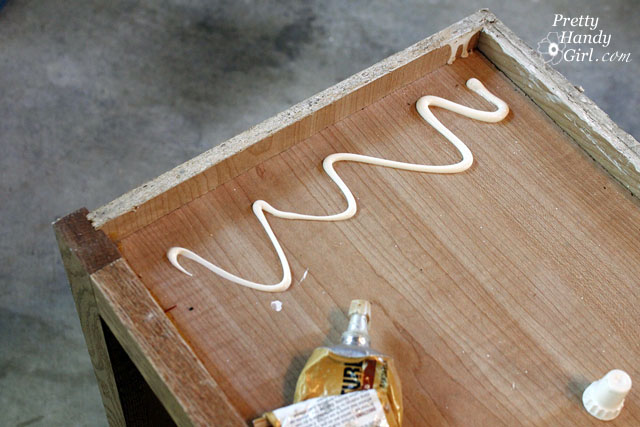
Use thick construction glue to attach the boards. (Glues that have a toothpaste consistency.)

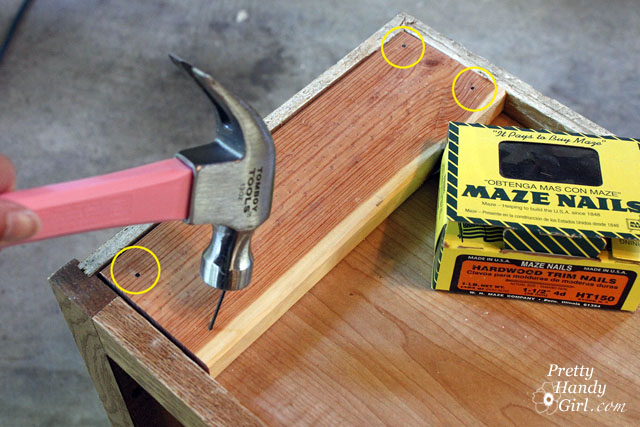
Nail finish nails into the boards at an angle to secure them.

For good measure, nail two more finish nails through the back of the cabinet and into the ends of the support boards.

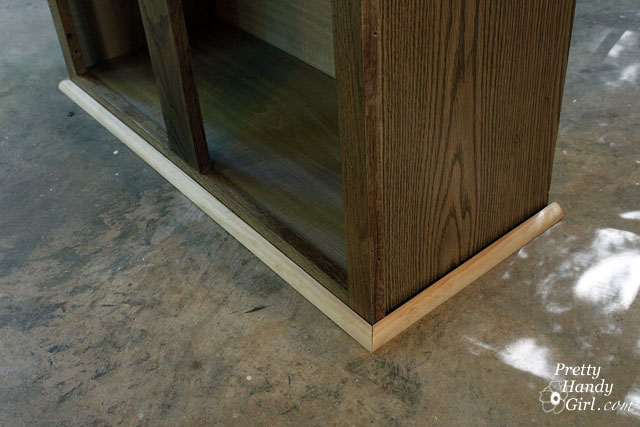
Measure your cabinet sides and front. Cut quarter round (convex shape) for the base of your cabinet and cove moulding (concave shape) for the top of your cabinet.

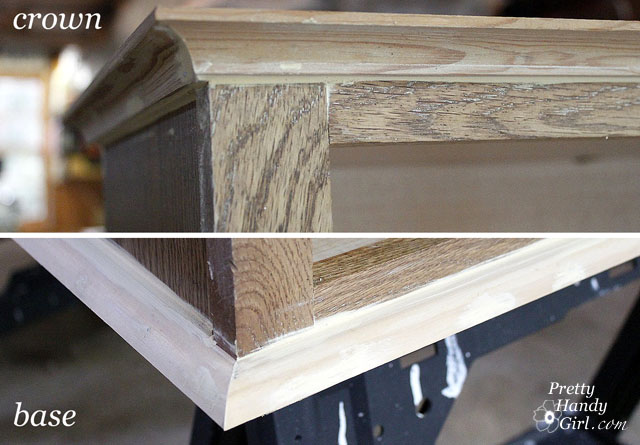
Here is a close up of the moulding I used for the base and crown of the cabinet.

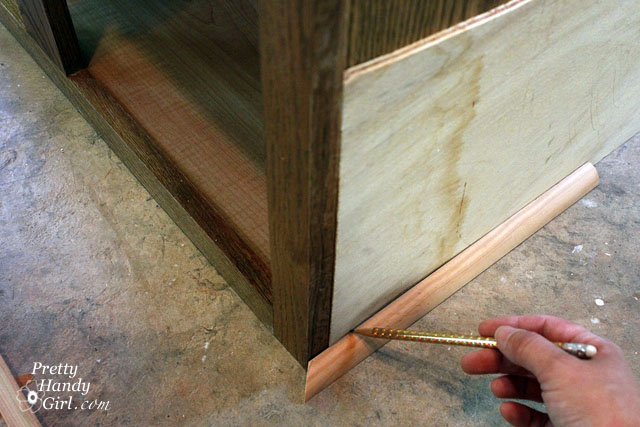
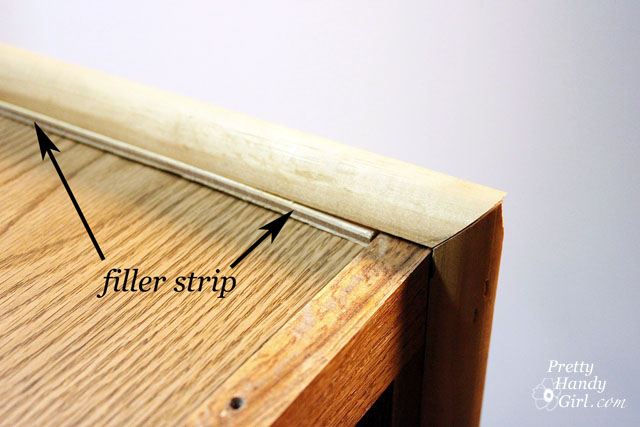
If the face frame of your cabinet juts out past the side, you’ll have a gap (see below). No worries, we can fix that!

Slip a piece of thin plywood to fit behind the quarter round (and cove moulding). Draw a line at the top of your quarter round (and bottom of the cove moulding). Cut the plywood piece with a jig saw.

Glue the thin plywood strip onto the cabinet.

Rest your moulding on top of the filler strip.

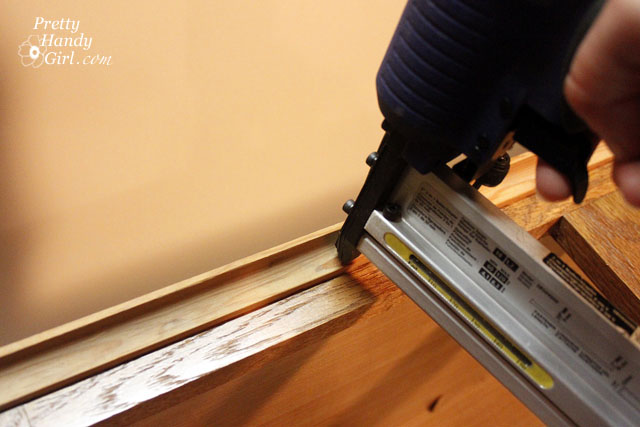
Predrill holes in your trim moulding, then hammer finish nails to secure the trim. If you are using a finish nailer to secure the moulding pieces, you won’t need to pre-drill.

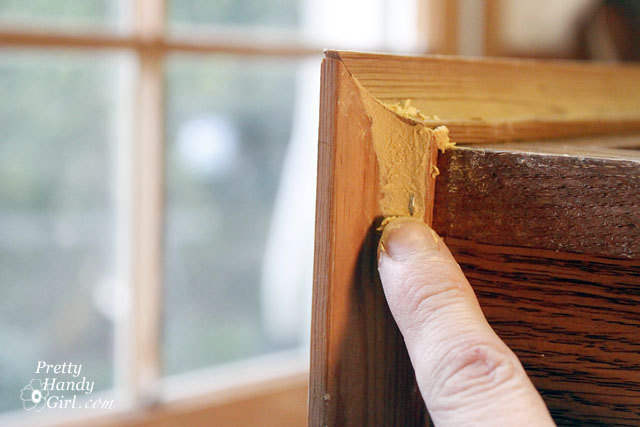
Fill any nail holes or cracks with wood putty.

Fill the seams of the filler strips with wood putty too.

Allow the wood putty to dry and then sand it smooth.

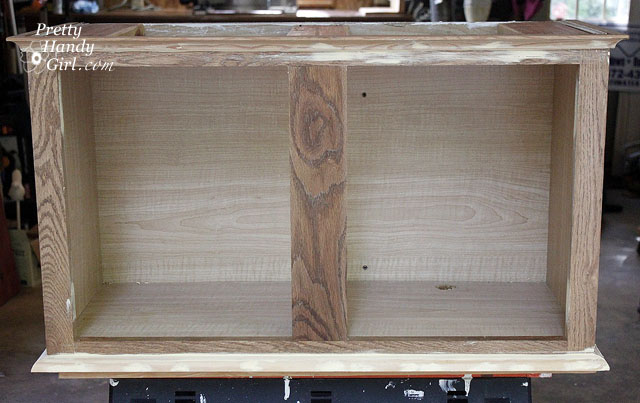
Your cabinet should look something like this:

For the top of your bench, cut a piece of wood that is 3″ wider and 1.5″ deeper than the top dimensions of the cabinet (be sure to measure to the edge of the crown moulding.) Sand it smooth. Stain or paint the bench top.


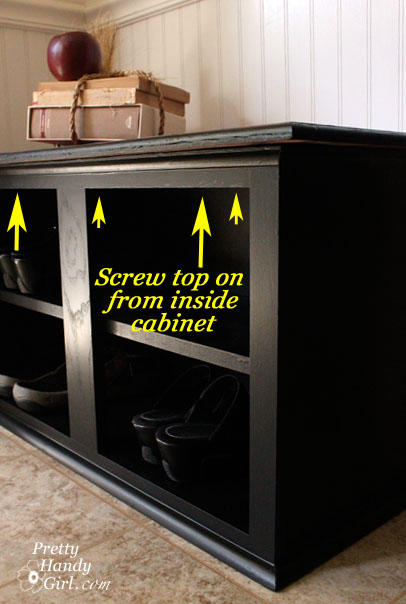
At this point, you can attach your bench top by screwing a few screws from inside the cabinet up through the support pieces and into the bench top.

*For demonstration purposes, the video will show how I attached the bench top with glue and finish nails from the top: Add some construction glue to the wood supports. Then, nail the top into the three support boards on top of the cabinet. Fill the holes left by the nails. And touch up the spots with stain or paint. Either way will work, but the screws from below will save you the work of adding wood putty and/or touching up the nail holes.

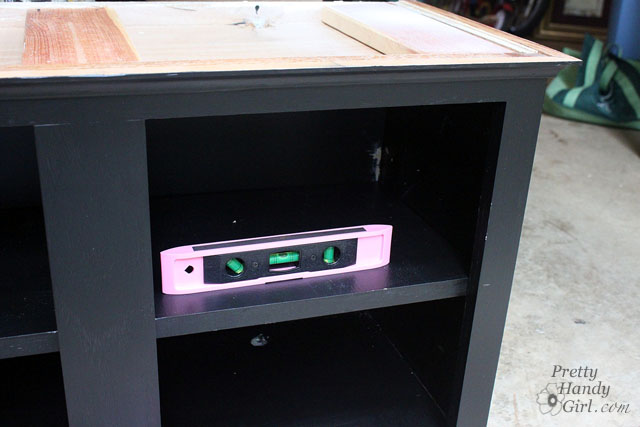
To install the shelf, level the board you cut to fit inside the cabinet (or shall I call it a bench since we are almost done!)


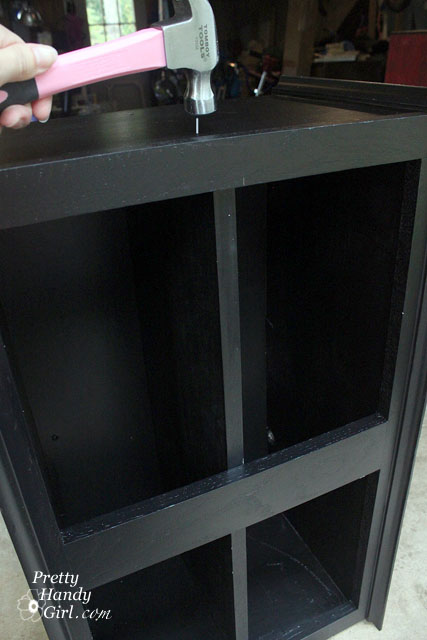
Use either “L” brackets inside the cabinet to hold the shelf or hammer nails from the side and into the ends of the shelf to secure it. Luckily shoes aren’t super heavy, so you can get away with using finish nails to hold the shelf in place.


Use a nail set to sink the nail below the wood surface.


Add a small amount of wood putty to the nail hole.


Gently sand the cabinet and shelf to scuff up the surface and give it a “tooth” for the primer to adhere to. Prime the cabinet and bench.


Paint the cabinet, shelf and bench.


Protect your bench with a few coats of polyurethane and you are done!


Room for about 8 pairs of shoes! If you wanted a larger bench or more storage, you could attach two cabinets side by side.


Here is the video from my Habitat ReStore talk. (I apologize about some of the background noise.)

By the way, thanks to my sponsors Bogs Footwear (boots) and Tomboy Tools (tool belt.) I need to lower that belt a little ;-). I was rushing in and just buckled it on me without adjusting it.


Sharing this tutorial with Home Stories A2Z Tutorials and Tips Link Party and The Shabby Creek Cottage’s Transformation Thursday

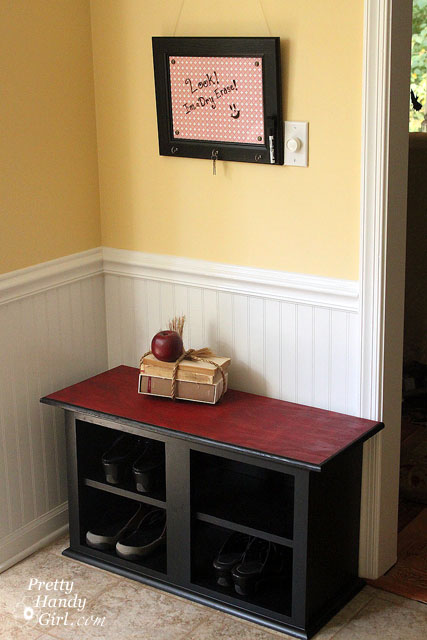
Happy Monday morning y’all! I’ve been working like a busy bee this past month. So many projects! I need to clone myself so one of us can work on the projects like this dry erase message board and the other can write the posts. (Luckily I had an extra hour yesterday thanks to switching back to standard time.)

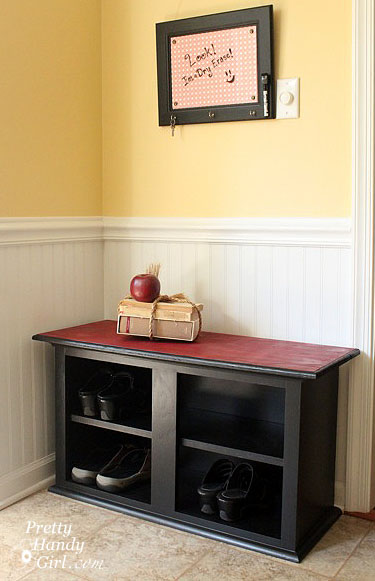
One of the reasons I’ve been so busy is that I will be giving my first demonstration at the Raleigh Habitat for Humanity ReStore this Saturday at 1pm. If you are in the area, I’d love to see you. Here is the address and more information about the  ReStore. I will be demonstrating how I turned a truly nasty greased wall cabinet into this charming shoe storage bench.

I’m not the type who can throw something away, so when I removed the cabinet doors to make the shoe bench, I decided to salvage them and make message boards. The first one was transformed into a cute chalkboard frame.

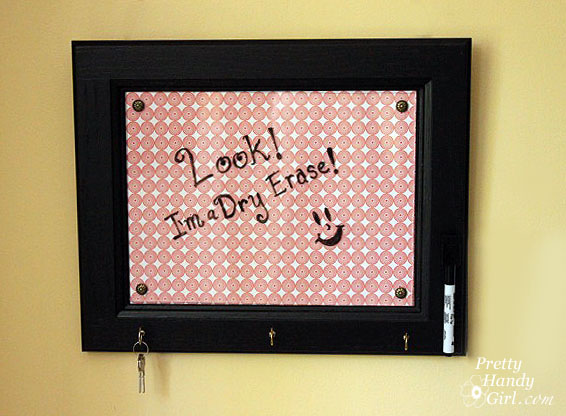
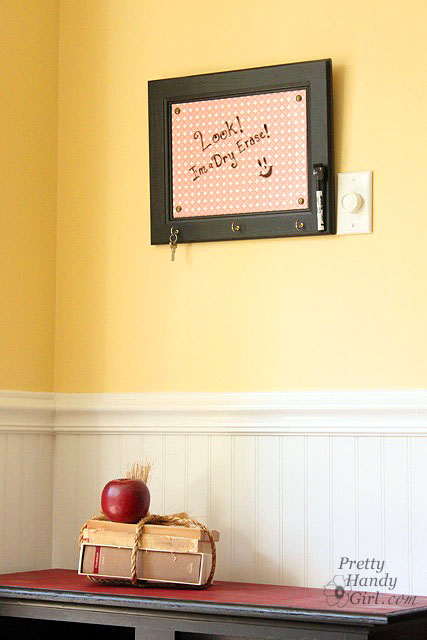
The other one was turned into a — you guessed it —  a dry erase message board!  And of course (because I love you), I’ll share with you how I made it.


Materials:

  • Cabinet door (pre-primed and painted)
  • Plexiglass cut to the interior panel dimension
  • Scrapbook paper (choose a light color that dry erase marker will show up on top of)
  • 4 Nail head trim tacks
  • 3 Cup hooks
  • X-acto blade
  • Metal ruler
  • Sharpie marker
  • Drill and bits
  • Scrap of wood
  • Hammer
  • Needle-nosed pliers
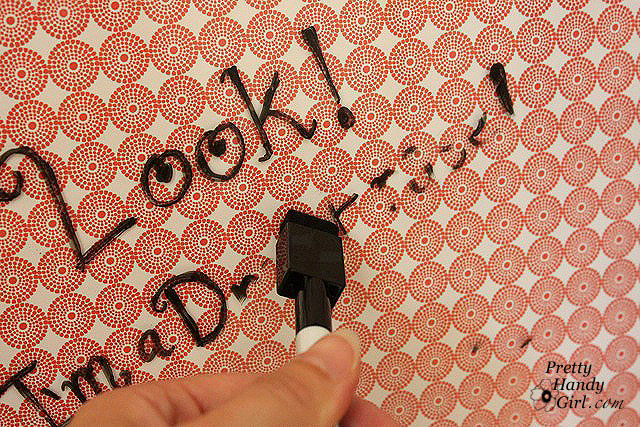
  • Dry erase marker
  • E-6000 glue

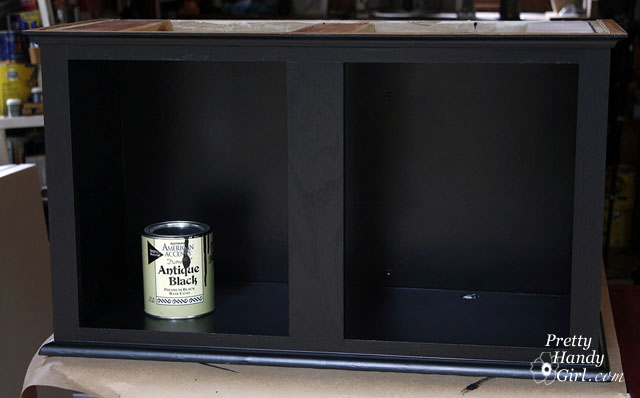
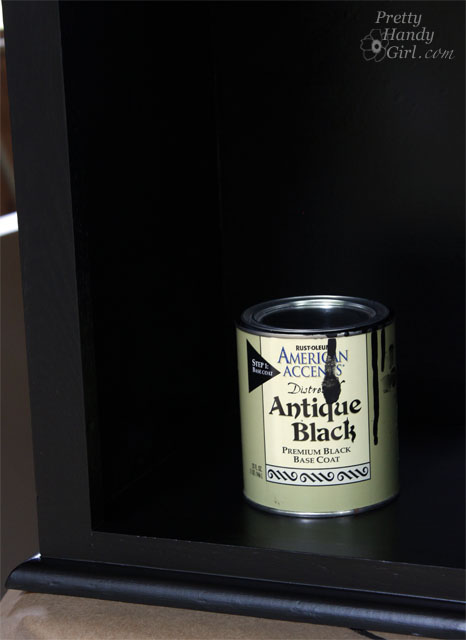
1. If you haven’t already: clean, prime and paint your door. It isn’t necessary, but if you want to give your cabinet door a new look, go ahead and paint it any color you like! The sky is the limit on color. I used American Accents Antique Black.

2. Now, cut your scrapbook paper to fit inside the cabinet door panel. As always, be sure you are using a fresh new x-acto blade and a metal edged ruler.

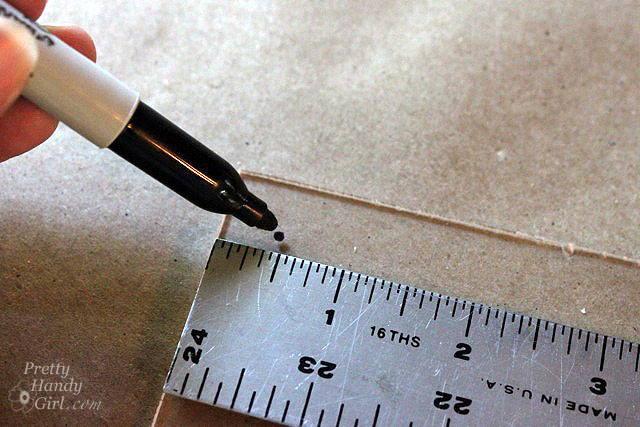
3. Next mark a dot 1/2 inch from the corners of the plexiglass.

4. Drill a small hole through the plexiglass at each dot. Use a drill bit that is slightly larger than the nail on your nail head tack.

5. Lay your scrapbook paper into the panel, then rest your plexiglass on top of the paper. (I purposely didn’t glue the scrapbook paper so I could change it out when I want a décor change.)

6. Set a nail head into each corner hole in the plexi. Hold the nail with the needle-nosed pliers as you hammer each tack into the cabinet door.

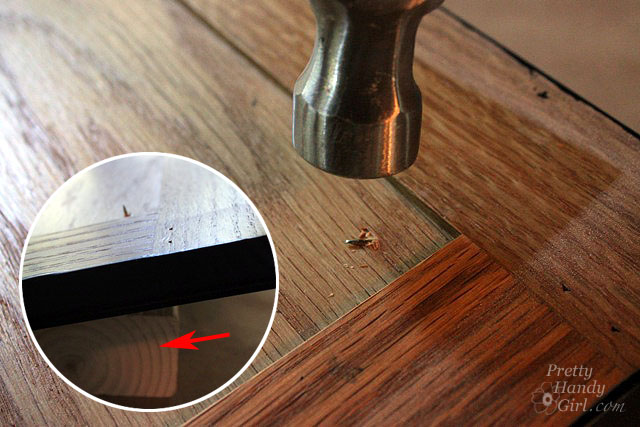
7. If your tacks go through the back, flip over the cabinet door. Set the piece of scrap wood (red arrow) under the nail head and hammer the point of the nail to bend it to the side (so no one gets poked!)

8. Use a ruler to mark where you want your cup hooks mounted. Pre-drill holes for your cup hooks using a drill bit slightly smaller than the cup hook screw end. Then screw them into the holes.

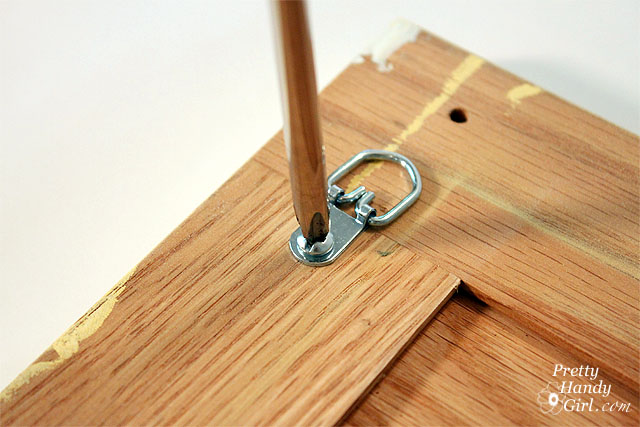
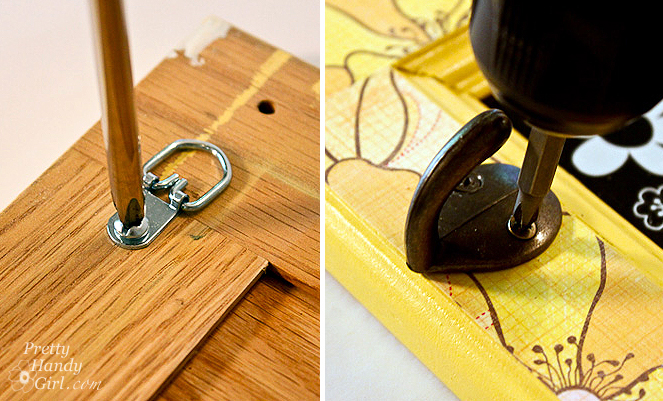
9. Attach D-ring hooks to the back of the door.

10. Attach a dry erase pen to the board using string. Or if you find a marker with a magnetic cap, you can glue a magnet to the board using E-600o. Now you can hang the marker back on the board when you’re done writing a message.

11. Hang that cute little dry erase board up on the wall! Did you see this and this tip for hanging frames that have two hooks? Genius!

That is how you can make a custom dry erase board out of an old cabinet door! I love how it matches the bench colors and can match anything I want it to by changing out the scrapbook paper. Shoot, I could probably put photos behind the plexi too!


Okay, so who is coming out to join me on Saturday? Please don’t let me show up and give a talk to the crickets. 😉


“It’s a Party and I’ll Paint if I Want to…Paint if I Want to… Paint if I Want To…You Would Paint Too if you had Scotch Bluuuueee!”
I think I’m going to call 3M ScotchBlue right now and suggest this as their new jingle. Kind of catchy isn’t it?!

Check out my project tutorial on revamping an old cabinet door below.

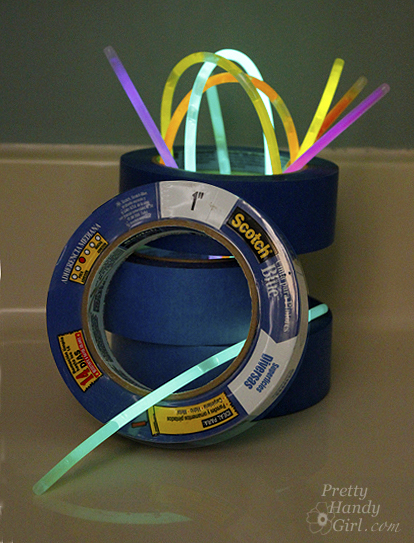
Go ahead, grab your paint and brushes — and don’t forget a roll of ScotchBlue painter’s tape!

I have been using ScotchBlue painter’s tape for a while and I really like it. I am not being paid to say this (even though they did send me a few free rolls of painter’s tape.) You’d know I like ScotchBlue tape if you have read the backlit bookcase post, painting the bamboo rug post and the painting like a pro post (where I share some tips for using ScotchBlue Painter’s Tape!)

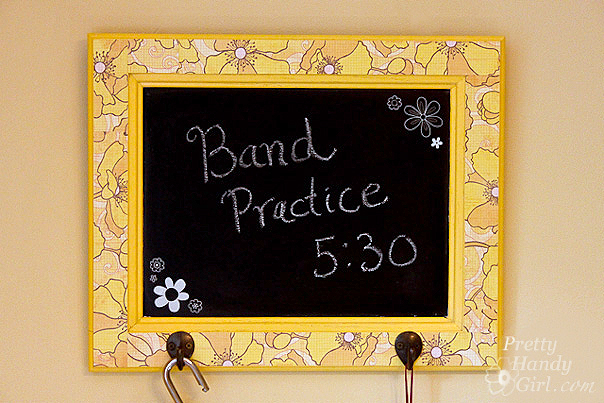
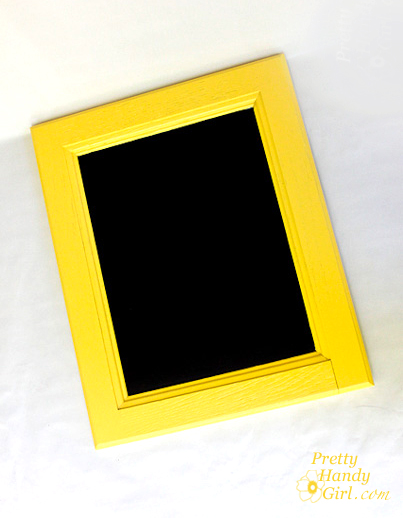
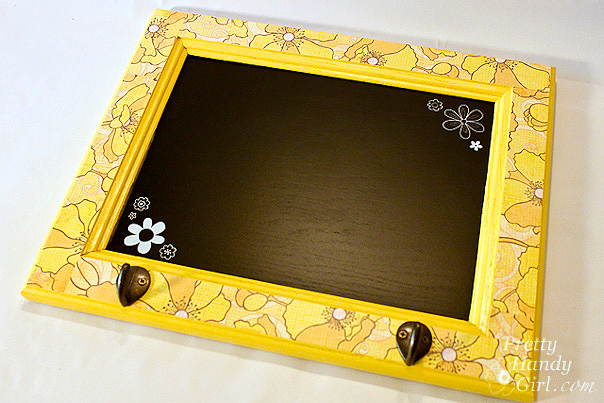
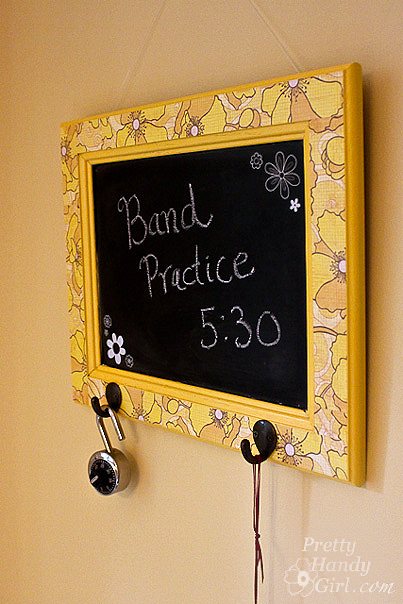
But, enough looking back, I want to share with you how to make something out of a disgustingly filthy grease covered discarded cabinet door. So, let’s hop to it! While building my mudroom bench, I took off the doors and kept them in the hopes of being able to use them another day. I’m working on a new bench for my Habitat ReStore demonstration, so I have more cabinet doors now! I devised a plan to reuse the doors in a creative way, a way that would be fun and yet help us keep track of our comings and goings. Meet my cabinet door turned into a chalkboard message board with hooks:
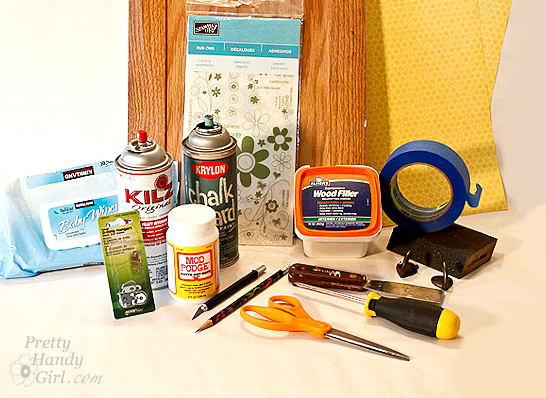
Materials:

(I’ve included affiliate links for your convenience. I earn a small percentage from a purchase using these links. There is no additional cost to you. You can read more about affiliate links here.)

Instructions:

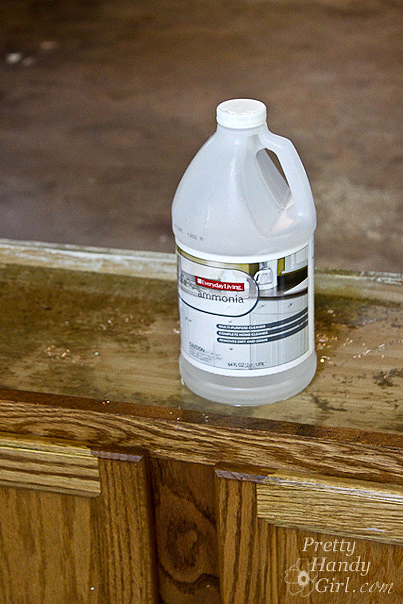
Clean the doors! If you have a cabinet that has finished it’s first life as a kitchen cabinet, and has so much grease on it that you could grease a pig…well, you need to clean it off. I experimented with several different techniques (GooGone, Dawn Detergent, Shakelee DeGreaser Spray, and Ammonia), but the one that worked best was inexpensive ammonia mixed with hot water.


I saturated the cabinet with the ammonia mixture. Let it sit for a few minutes and voila! The grease came off like butter (no pun intended.)
 

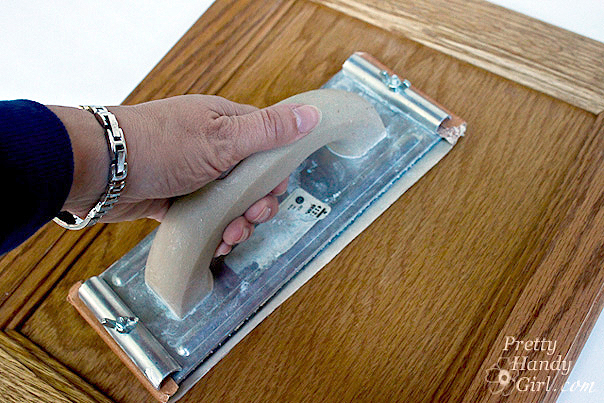
Dry the cabinets and gently sand all the surfaces to rough them up slightly. (Don’t rough ’em up too much boys, we need him to be alive. LOL! Spoken like a true Western character.)


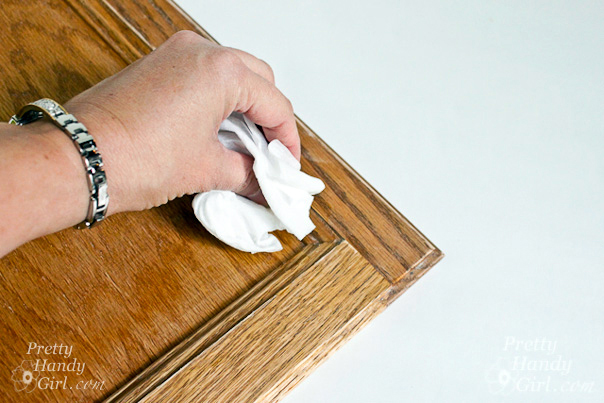
Wipe off the door thoroughly with a damp baby wipe.


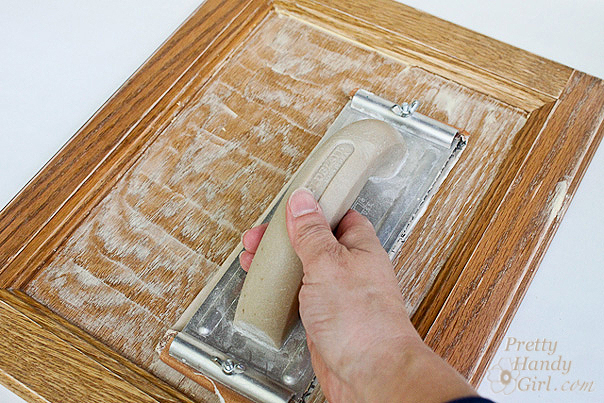
Use wood putty to fill in the wood grain on the middle panel of the cabinet. (You could also fill in the cracks on the frame of the cabinet too, but I have other plans for the frame.)


Let the putty dry for about 10 minutes. Sand the panel until it is smooth.


Wipe off the cabinet door again. Be sure to get all the sawdust off.

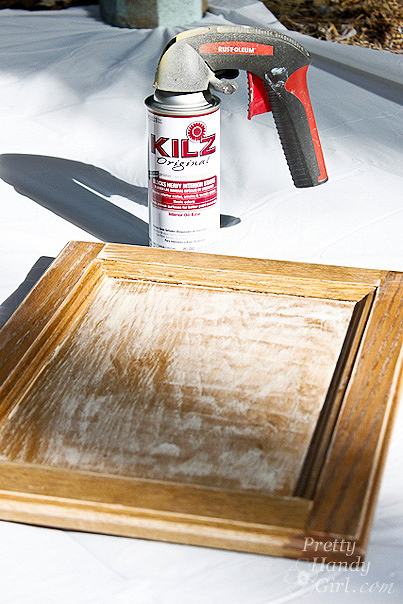
Spray your cabinet door with spray primer. One coat should be enough to cover the door. It helps to elevate the cabinet with a block or two underneath so it doesn’t stick to your drop cloth.


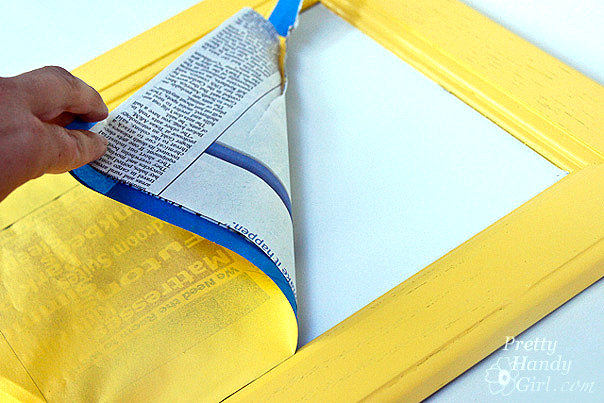
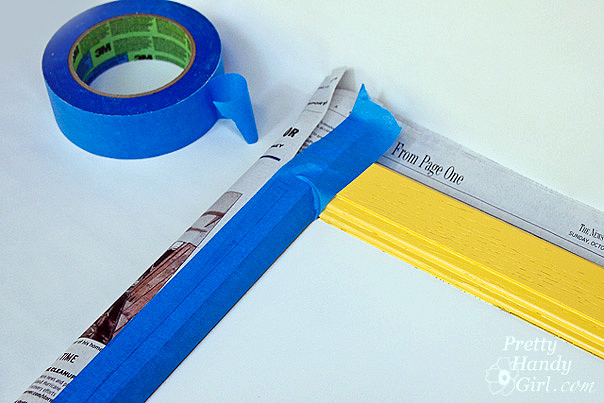
Mask off the middle of your door with newspaper and ScotchBlue Painter’s Tape. Press the edges down firmly by running a finger along the edge. (If your cabinet door is very textured, you can seal the edges by brushing matte medium where the tape meets the door.


Spray the frame with 2 even coats of the summer squash yellow color (allowing the paint to dry between coats.)


Remove the mask, now ooo and aaaa over that clean edge! Give the paint about an hour to cure before the next step.


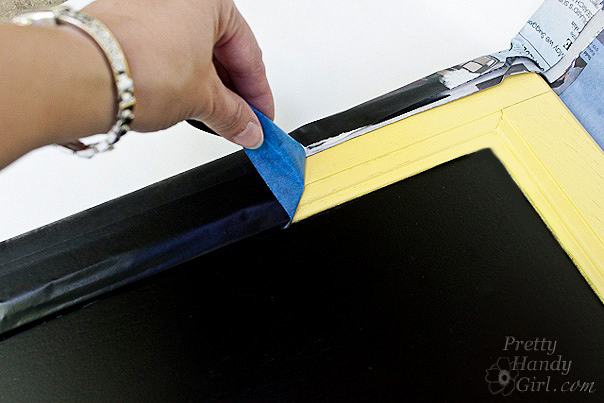
Wrap newspaper around the back of the cabinet door and fold the edges up. Use ScotchBlue painter’s tape to tape the edges of the frame off (cover all the yellow with tape or newspaper.)


Spray the inside panel with 2-3 even coats of the chalkboard paint. Let it dry throughly before you remove the tape and newspaper mask.


It is starting to look rather purrrrdy, ya think?! Feel free to stop here and say that you are done…


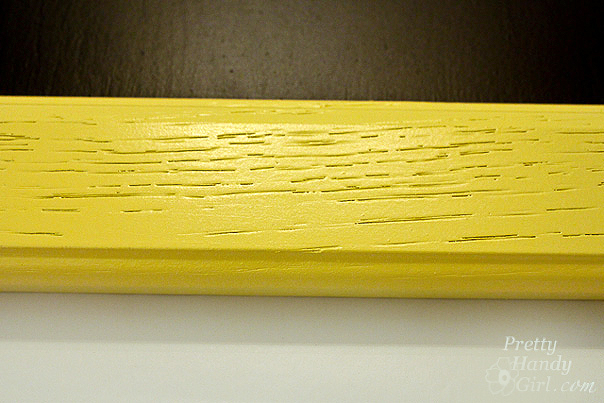
…or if you are a perfectionist (like me), you will want to cover the woodgrain on the frame with scrapbook paper.


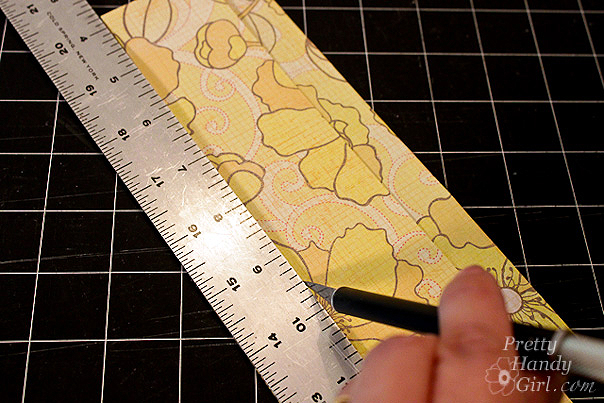
Simply measure your border and cut scrapbook sheets to that width. It is okay if your sheets aren’t long enough to fit on one length, you can tile them.


Brush one layer of mod podge onto the frame then lay the scrapbook paper on top of the mod podge. Press out all the air bubbles. Let the mod podge/paper dry for a few minutes.


Then brush 1-2 coats of the mod podge on top of the scrapbook paper borders to seal the paper.


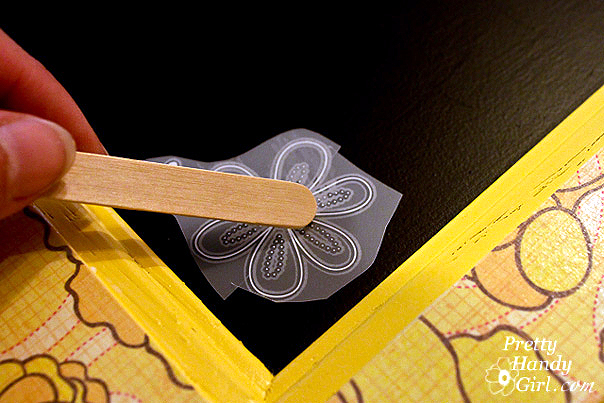
If you want to embellish your chalkboard frame, you can rub on transfer decals (or paint some decorations using white acrylic paint.)


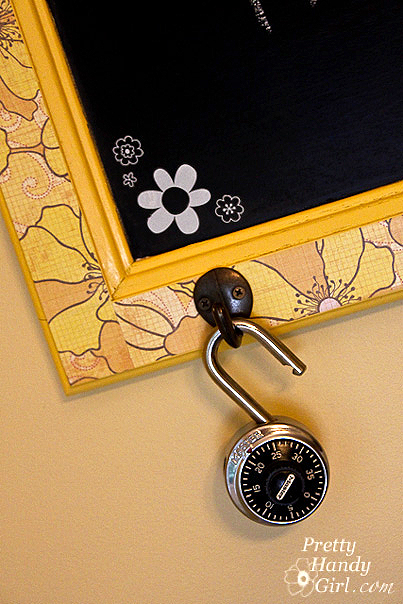
To make your chalkboard frame more functional, add 2 D-rings on either side of the back for hanging purposes. Then add some garment hooks to the front.


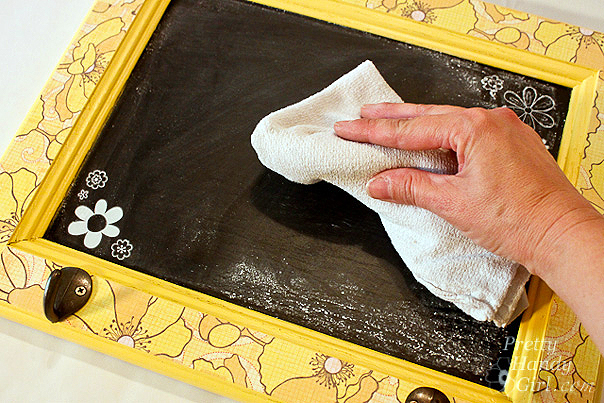
Don’t forget to season your chalkboard. (I prefer Old Bay seasoning…just kidding! I always wanted to say that.) Rub a piece of chalk on its side all over the surface and then wipe it off with a dry rag.


And that concludes the tutorial. Don’t you think the results are sweet! Especially because it is made from something that would have otherwise been discarded.


I envision a wall with several of these chalkboard frames lined up, one per family member. That way a message can be written to each person. I guess I better get busy and make 3 more.


I love how the hooks add additional storage! Be sure to use two picture hangers (one for each D-ring hook.) If you have good eyesight you might have noticed my fishing line that is hanging the cabinet above. This was for photography purposes only. Unless you want your frame to rip the drywall and land on the floor the first time your child wants to hang something heavy on the hooks, do as I say, not as I do.


Awww, isn’t she just a perfect little slice of sunshine on a blank wall? She makes me happy.


You made it through another one of my insanely long tutorials! Congrats!


Disclaimer: I was one of the bloggers chosen to host a ScotchBlue Painting Party. I was not paid or compensated for this post. I was sent a few rolls of ScotchBlue painter’s tape, but I honestly can’t remember if it was 2 or 3 or 5 because they promptly got added to the collection of ScotchBlue tapes I already own.

2011 Fall Home Tour

Fall is here, fall is here! Finally the cooler temps are near!

I’m not sure about your area of the world, but this summer seemed a little too hot for my liking. My husband told me about the term “Global Weirding“. It seems fitting for all this nonsense Mother Nature is throwing at us lately.

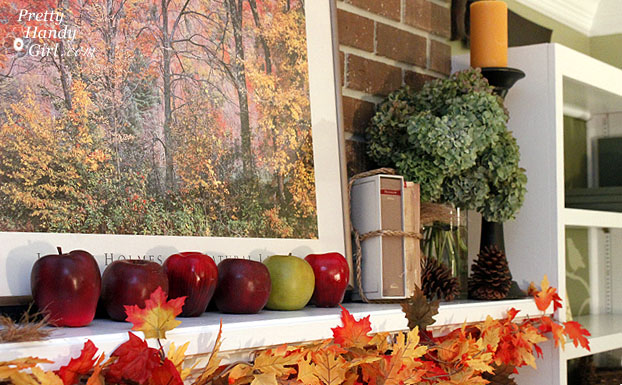
Luckily fall seems to have come just on time. Fall is my favorite time of year. Maybe it is the painter in me that loves all the colors. Or maybe it is the nature lover in me that longs to be outdoors in the fresh crisp air. Whatever it is, I love FALL!

I spent some time this past week putting out some autumn inspired décor. Although I’m definitely self conscious about my decorating skills, I tried to abide by my words from last year about not striving for perfection. So, now I’m taking a big breath and pressing the publish button to share my home looking warm and cozy (in my opinion.)

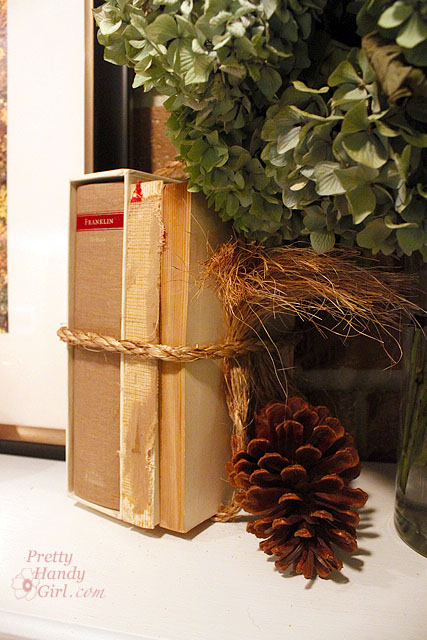
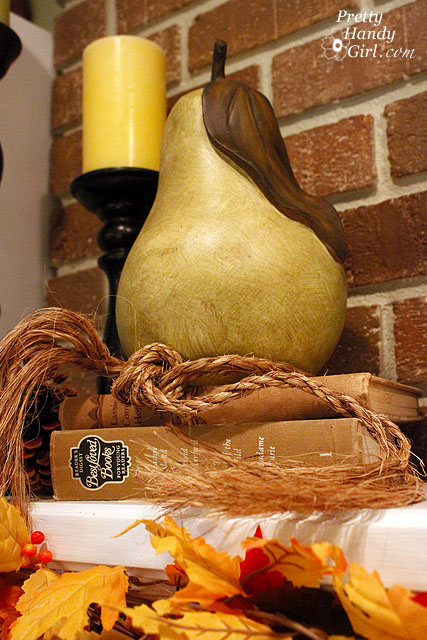
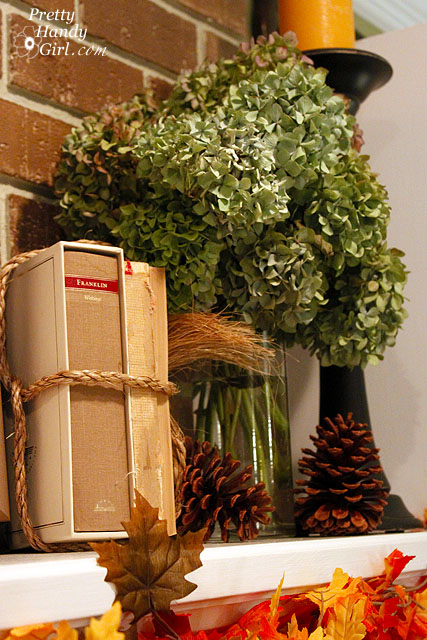
Antique books are my go-t0 decorating objects. I love books and I love those old linen covers. Even a torn and tattered book looks nice lassoed together with some friends.

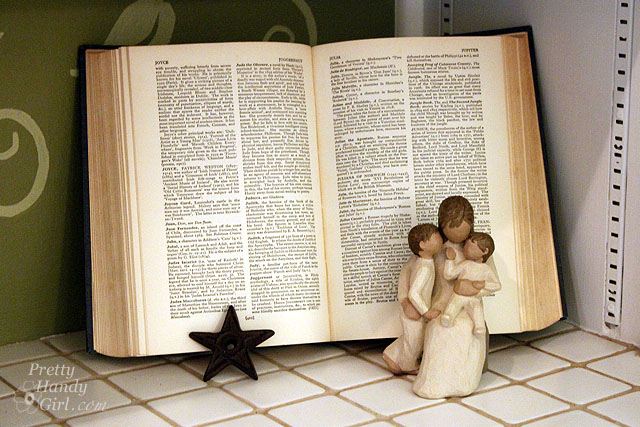
Sometimes, even an open book can look warm and inviting.

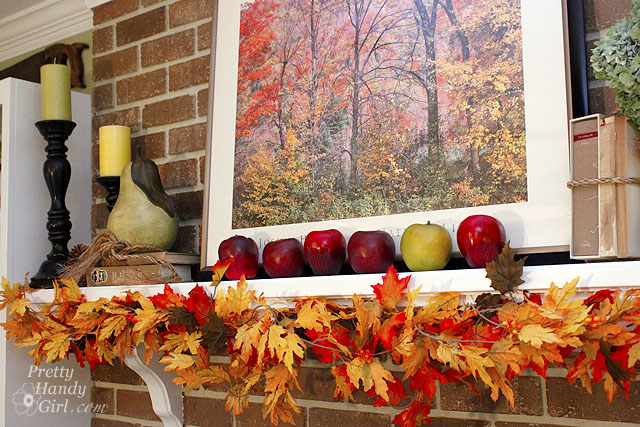
I was so happy to bring my Ballard knock off painted pear out of storage. He really looks handsome with the autumn colors.

I love all the colors in this photo! I can’t imagine having a monotone autumn mantle.

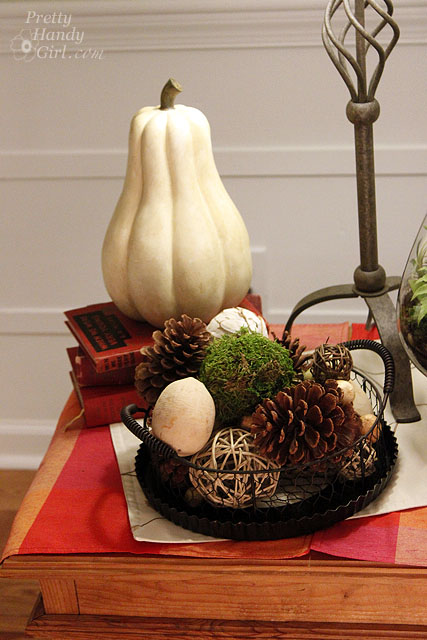
Of course, Mr. Gourd looks handsome too. (Shhh. I don’t want to hurt his feelings, but I do love the pear more.)

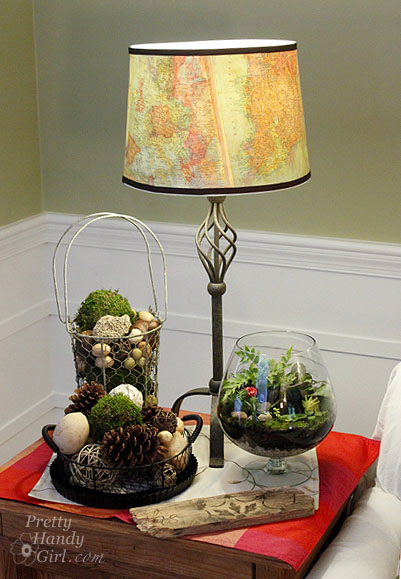
Yes, I’m still switching things in and out like a high school football coach. I actually like the gourd, so he’s back in but the chicken wire basket is out. However, I wanted to show you the vintage map lampshade I made. The tutorial will be served up before you know it! Hopefully I’ll have a new lamp by then. This one is just a substitute for one on injured reserve.

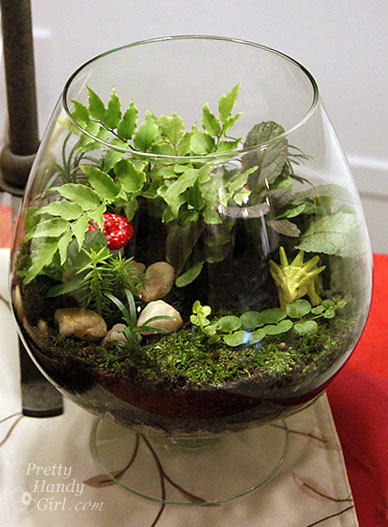
You may have noticed this little terrarium on the side table. I was inspired by some insanely expensive versions here. Never fear, I will have a tutorial so you can make your own soon!

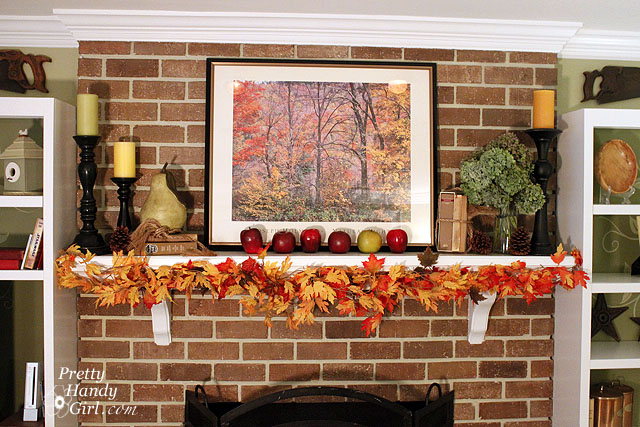
A full view of the mantle decorated. It is hard to believe that in a few months the stockings will need to be hung.

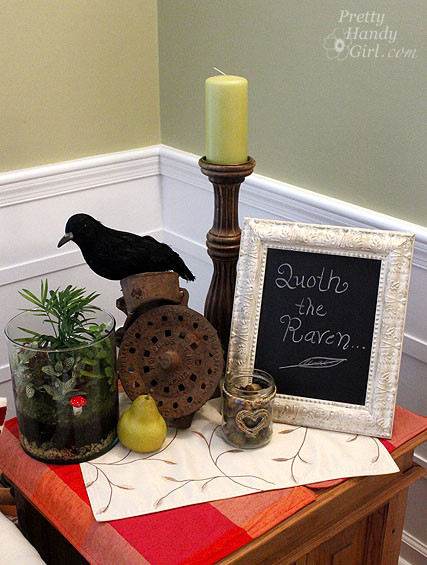
I had fun with this little vignette. A crow in an antique corn grinder? Now that is pretty silly. And another terrarium that makes me smile.

Quoth the Raven “Nevermore”

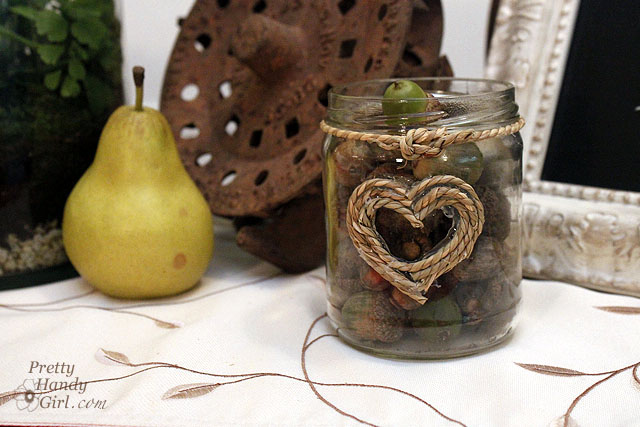
The acorn jar was an afterthought. It was just a quick little hot glue craft. Speaking of which, if you haven’t read my post about hot glue gun safety, it is a must! Your fingers will thank me.

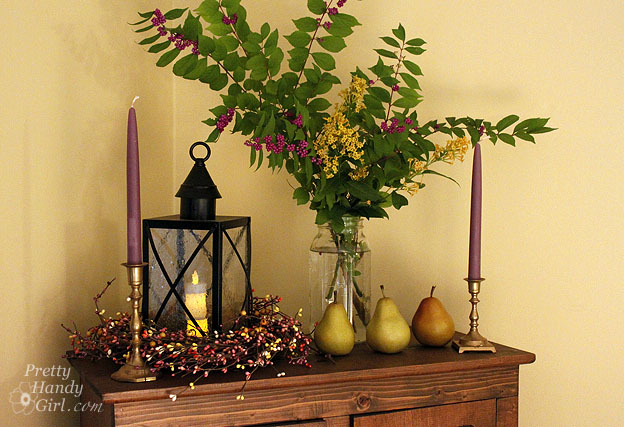
It is fun having another surface to decorate. The top of our armoire (also known as the family command center) has some pretty purples and greens.

My Pottery Barn knockoff lantern makes a re-appearance.

Beautyberry and Orange Peel Cestrum from our yard.

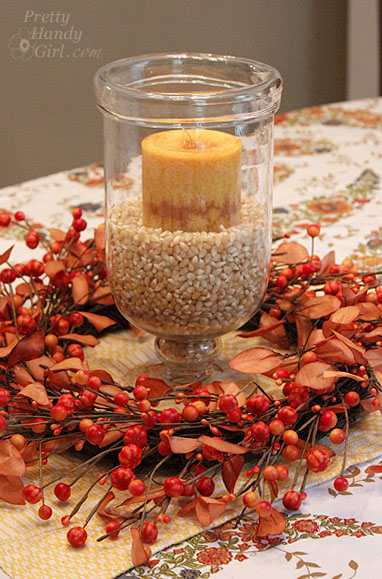
The dining room has a simple centerpiece made with corn kernels and a candle.

But, I might be switching it out once I get this beauty back from my friends at the Habitat ReStore. Can you guess what it used to be? I’ll give you a hint: Hollywood glam never looked so good.