12 Father's Day Gifts - Way Cooler than a Tie | Pretty Handy Girl

12 Father's Day Gifts - Way Cooler than a Tie | Pretty Handy Girl

Father’s Day is coming up next week. The conundrum of what to get your Dad or your spouse is waging war in your mind. I scouted far and wide on the interwebs to come up with 12 Father’s Day Gift Ideas that are Way Cooler than a Tie!

(I’ve included affiliate links for your convenience. I earn a small percentage from a purchase using these links. There is no additional cost to you. You can read more about affiliate links here.)

 For the Music Lover:

10 Father's Day Gifts - Way Cooler than a Tie | Pretty Handy Girl

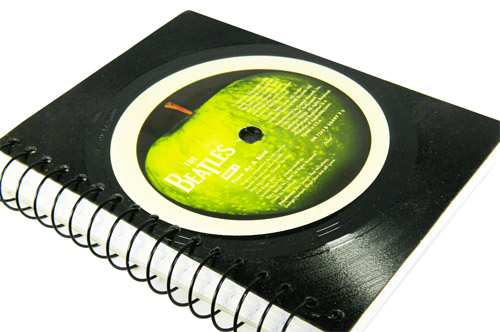
Upcycled Vinyl Record Notebooks

What to get the music fan that has everything? How about an upcycled vinyl record notebook. Real records were harmed (some scratched too much to listen to anymore) to make this one-of-a-kind spiral bound notebook.


10 Father's Day Gifts - Way Cooler than a Tie | Pretty Handy Girl

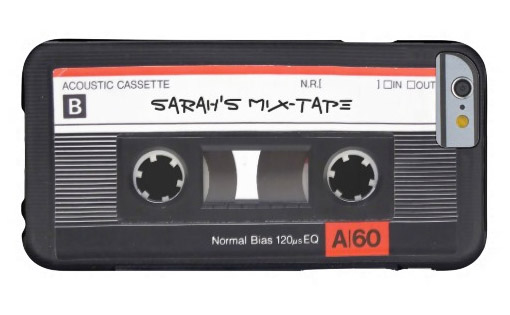
Cassette Tape Mobile Phone Case

Remember the old days with this fun cassette mix tape mobile phone case. You can customize the words to add your guy’s name or his favorite album.


10 Father's Day Gifts - Way Cooler than a Tie | Pretty Handy Girl

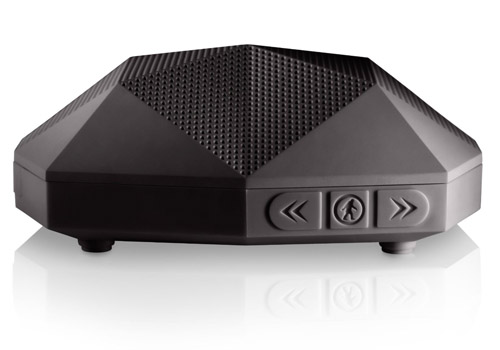
Outdoor Water-Resistant Blue Tooth Wi-Fi Speaker

Need tunes while washing the car; camping; lounging by the pool; at the beach or outside playing basketball? The number of places you can play music are now infinite. This water-resistant speaker can also be used in the shower or on your back deck during your next BBQ.


For the Tech Geek: Read more

Dragonfly Garden Decor using a Dollar Store Whisk and Skewer | Pretty Handy Girl

Dragonfly Garden Decor using a Dollar Store Whisk and Skewer | Pretty Handy Girl

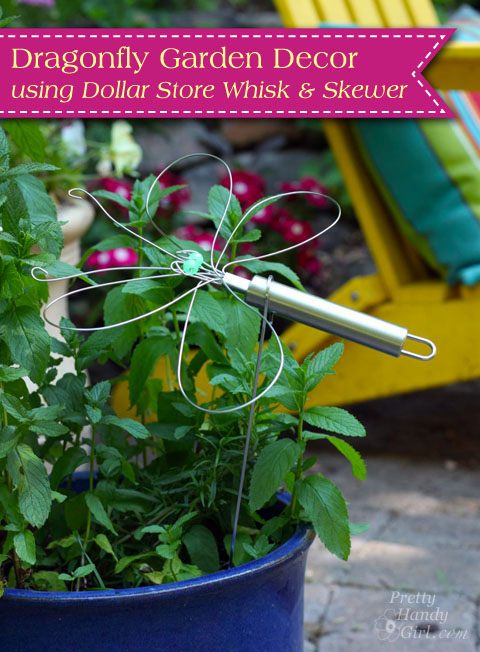
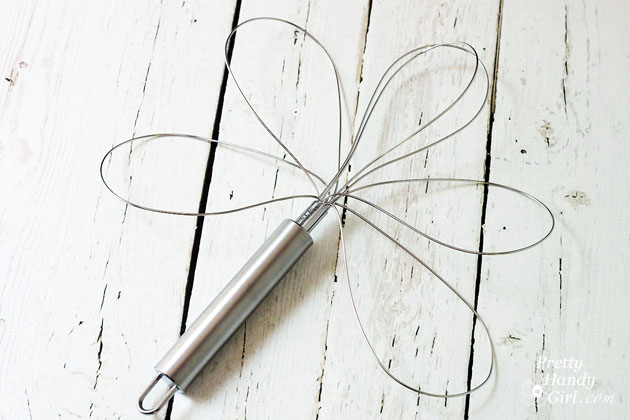
Summertime is coming and I’m enjoying spending more time in our garden. I’m always looking for cute craft ideas that I can do with the kids while school is out. When I saw this great idea for making a wire whisk dragonfly on Morena’s Corner, I knew I had to try it. I altered Morena’s plans slightly using plastic beads and used a skewer for the plant stake. The cost and materials are minimal to make this Dragonfly Garden Decor using a Dollar Store Wire Whisk and Skewer. This craft can be done with the kids, but you’ll need to be the one to cut and bend the wires and watch out for the pokey edges with real little kids.

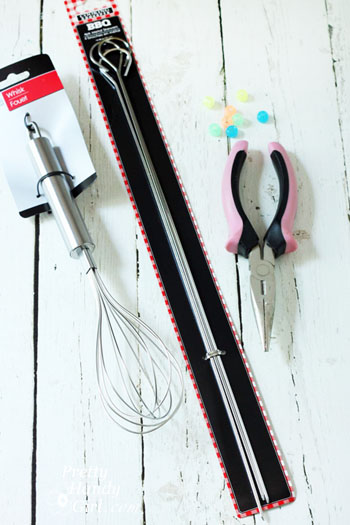
Dragonfly Garden Decor Materials:

Dragonfly Garden Decor using a Dollar Store Whisk and Skewer | Pretty Handy Girl

  • Wire whisk
  • Wire skewer
  • Beads
  • Needle-nosed pliers

Dragonfly Garden Decor Instructions:

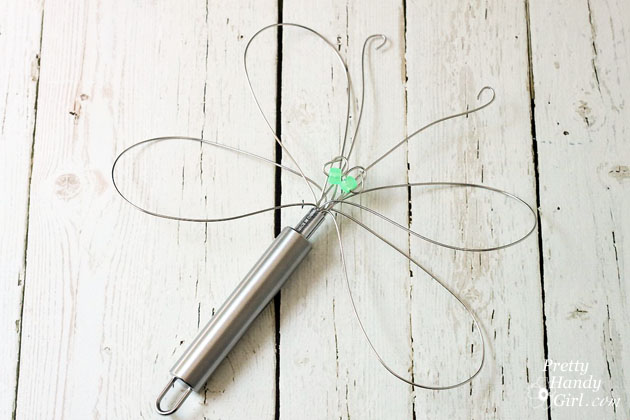
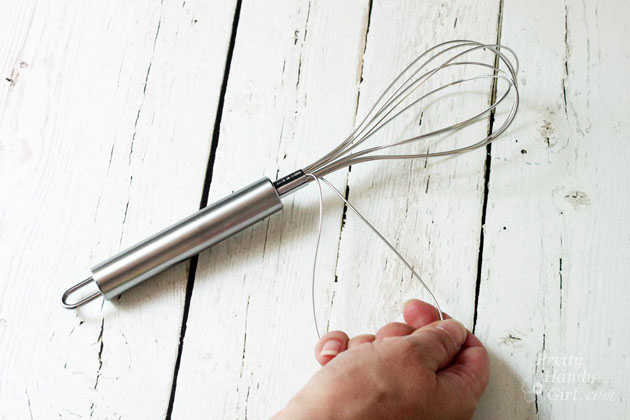
Begin by bending the first wire loop out to the side to create a wing.

Dragonfly Garden Decor using a Dollar Store Whisk and Skewer | Pretty Handy Girl

Repeat with three more loops (2 on each side).

Dragonfly Garden Decor using a Dollar Store Whisk and Skewer | Pretty Handy Girl

Use the needle-nosed pliers to cut one wire loop into two short pieces as shown below. (You might need to twist the pliers back and forth to cut the wires.) Read more

cut out tray title

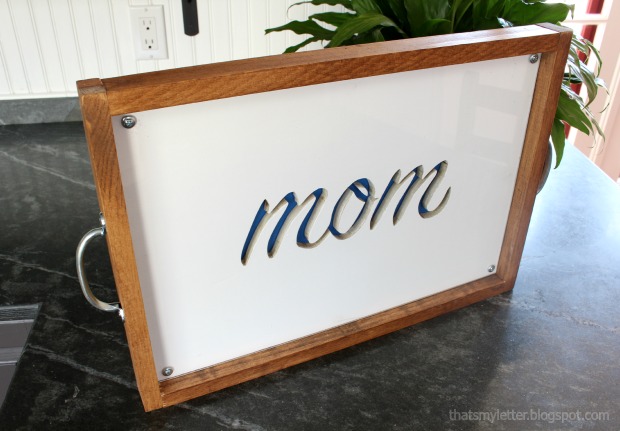
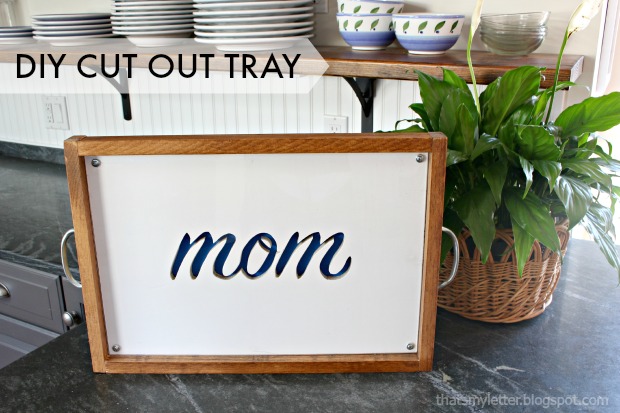
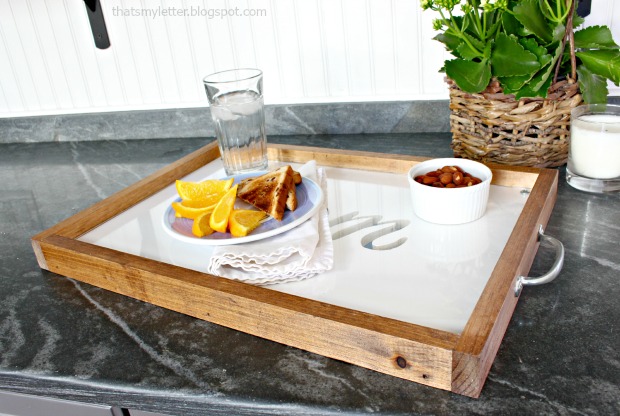
Happy Wednesday Pretty Handy readers.  Jaime here from That’s My Letter to share a DIY project that makes a great anytime gift or (an even better idea) for Mother’s Day.  I’ll show you how to make this wood cut out tray which you can personalize with any name or shape.

The wood cut out makes for an unexpected design element.  I painted bright blue behind the cut out, but any contrasting color will look great.

cut out tray 3

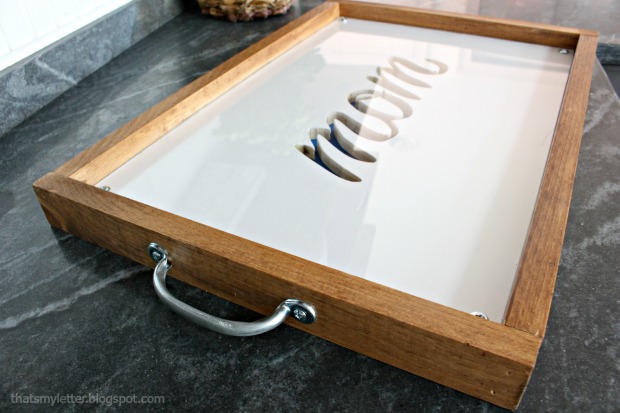
Plexiglass installed over the wood cut out provides a solid flat surface.  The plexiglass also adds a bit of shine and fancy!

cut out tray 2

Below are the step-by-step instructions to make this tray.

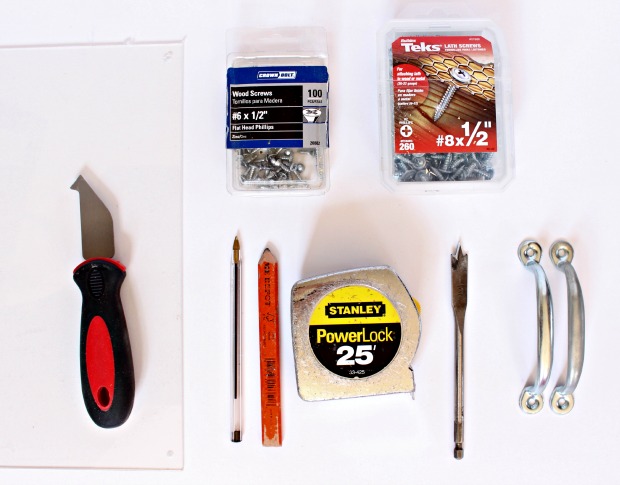
Materials:

cut out tray supplies

  • 1/2″ plywood 18″ x 12″
  • 1/4″ plywood 18″ x 12″
  • 1 sheet plexiglass (18″ x 24″ –  makes 2 trays)
  • 1 – 1″ x 2″ x 6′ pine board (cut 2 @ 18″ length and 2 @ 13 1/2″ length)
  • white paint
  • blue paint
  • stain
  • 2 handles
  • 1/2″ wood screws
  • 1/2″ lath screws
  • plexi/glass cutter
  • jig saw
  • sandpaper
  • ballpoint pen
  • measuring tape & pencil
  • drill, bits & 1/2″ spade bit

Instructions:

cut out tray step 1

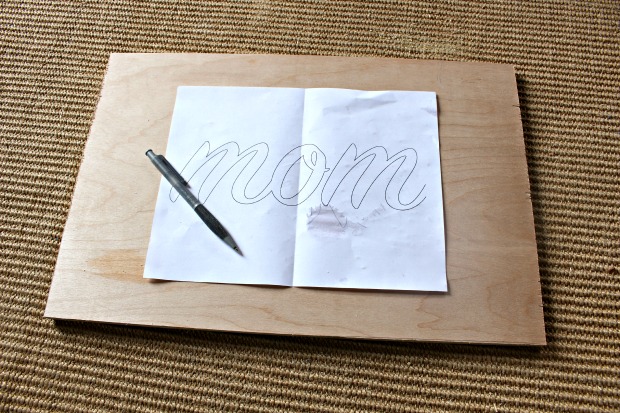
Step 1: Print out your name or word.  (I used Sign Painter – housescript font at 475 point.  Any font will do as long as it’s thick enough to cut out.)

cut out tray step 2

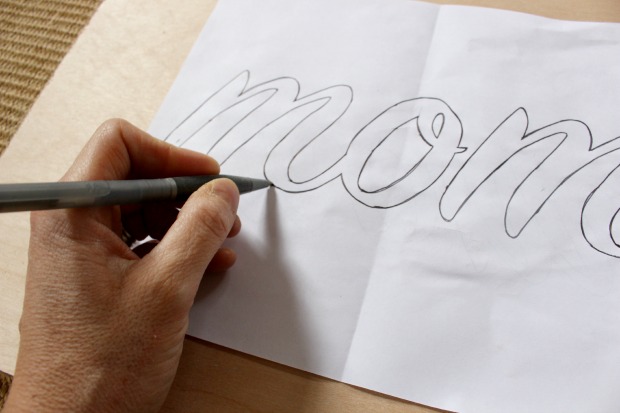
Step 2: Center the printout on the 1/2″ plywood and trace around letters with a ballpoint pen.  Use heavy pressure to create an indent in the wood. Read more

How to Build a Rustic Crate Centerpiece (No Power Tools Needed!) #DIYCourage | Pretty Handy Girl

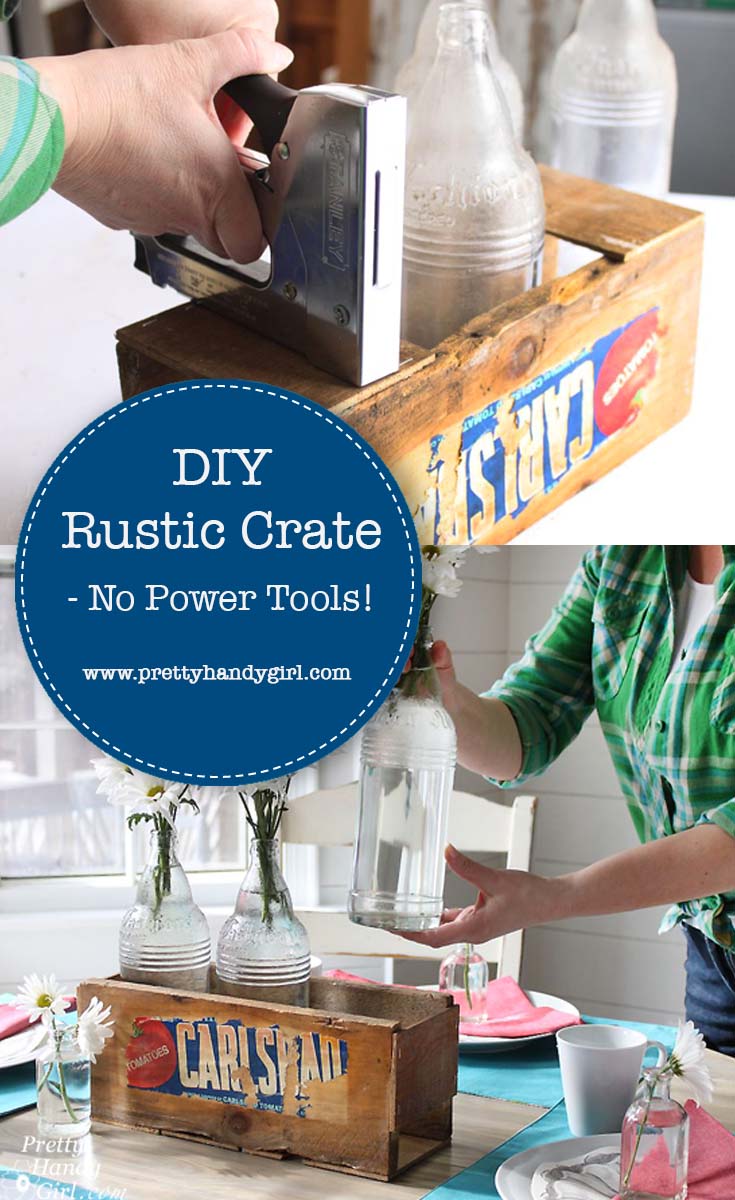
It occurred to me the other day that many woodworking projects may deter people simply because they don’t have power tools or they don’t know how to use them yet. For that reason, I created this tutorial to help you Build a Vintage Produce Crate Centerpiece using no power tools!
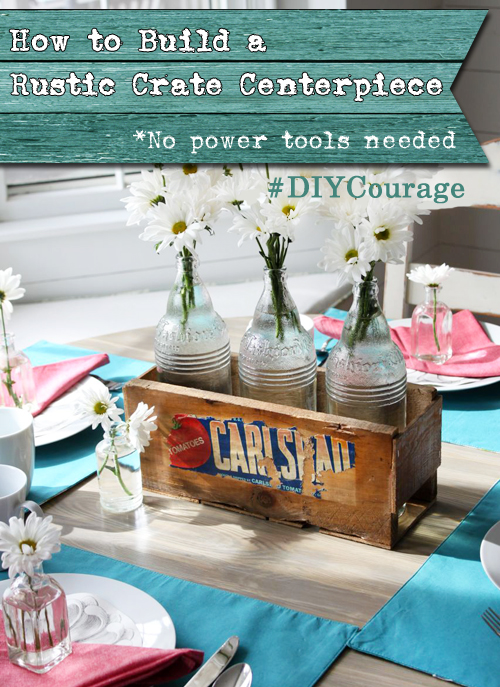
How to Build a Rustic Crate Centerpiece (No Power Tools Needed!) #DIYCourage | Pretty Handy Girl

Build a Vintage Produce Crate Centerpiece – No Power Tools!

Many people are turned off by DIY projects because they fear using a power tool. Although I can tell you, I know you can learn how to use power tools safely, let’s go ahead and skip them today so you can get your hands busy creating a beautiful crate. This little vintage produce crate can be used anywhere in your house on display. Use it as a centerpiece, or in the office to hold files or utensils, or fill it with flowers or small items to give as a gift.

Regardless of how you use this little vintage crate, you’re going to love making it.

Materials:

(I’ve included affiliate links for your convenience. I earn a small percentage from a purchase using these links. There is no additional cost to you. You can read more about affiliate links here.)
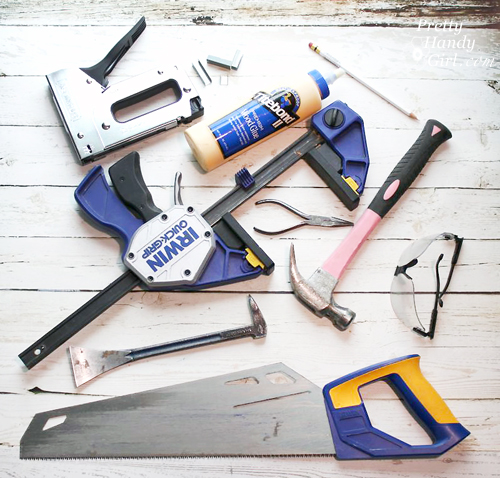
How to Build a Rustic Crate Centerpiece (No Power Tools Needed!) #DIYCourage | Pretty Handy Girl

Optional: 

Instructions:

I happen to stumble across this vintage produce crate and vintage bottles that a neighbor was giving away. If you don’t have a neighbor who periodically gives away vintage produce crates, you can ask your local grocery store for produce crates you can salvage. Or you can purchase a produce crate on Amazon. Or look for thin slats at the hardware store to use for this crate. (Then you can learn how to fake the Aged Wood Look yourself.)
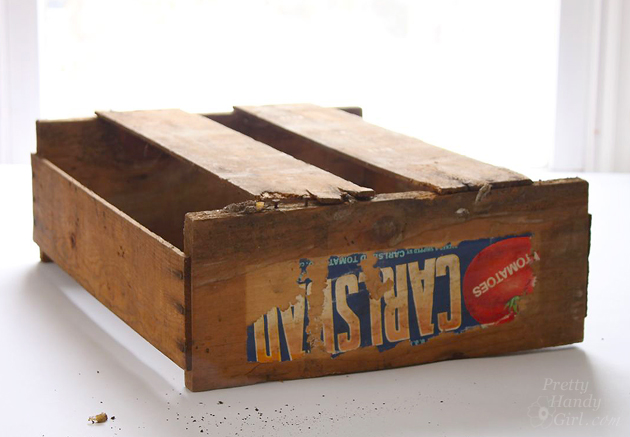
How to Build a Rustic Crate Centerpiece (No Power Tools Needed!) #DIYCourage | Pretty Handy Girl

The crate I had was very rustic. So rustic, that I was able to pull the bottom slats off the crate with my bare hands. (In hindsight, I should have been wearing my gloves to avoid splinters.)
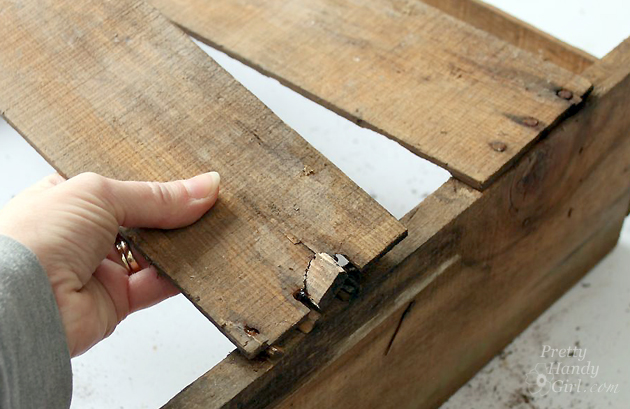
How to Build a Rustic Crate Centerpiece (No Power Tools Needed!) #DIYCourage | Pretty Handy Girl

If you want to spare your hands, use a handsaw to remove the slats. Set them aside for use later.
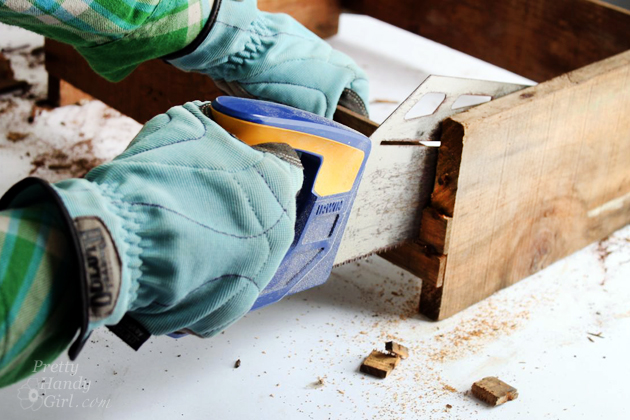
How to Build a Rustic Crate Centerpiece (No Power Tools Needed!) #DIYCourage | Pretty Handy Girl

After removing the slats, pry up the nails with a prybar. Be sure to wear gloves to protect your hands. Stubborn nails can usually be wiggled out with the needle-nosed pliers.
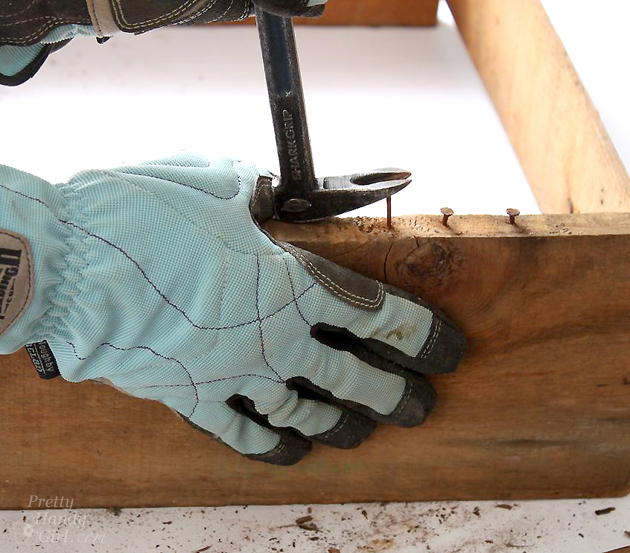
How to Build a Rustic Crate Centerpiece (No Power Tools Needed!) #DIYCourage | Pretty Handy Girl

Any nails that are too rusty to remove can be hammered into the wood.
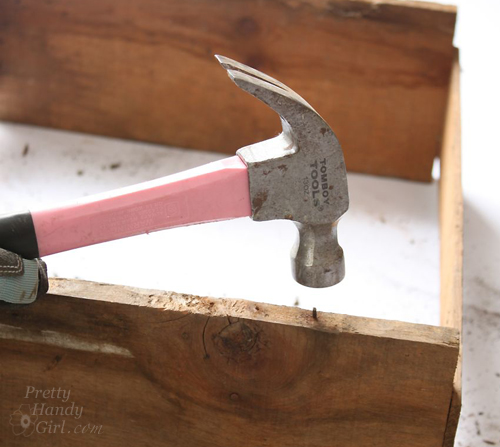
How to Build a Rustic Crate Centerpiece (No Power Tools Needed!) #DIYCourage | Pretty Handy Girl

Align the front and back of the produce crate with the bottles or vases you will display in your crate. Or use 5″ as a general measurement from the outside front to outside back. Measure the distance to cut your sides, or just lay one of the slats next to the front and back and mark where to cut it with a pencil.
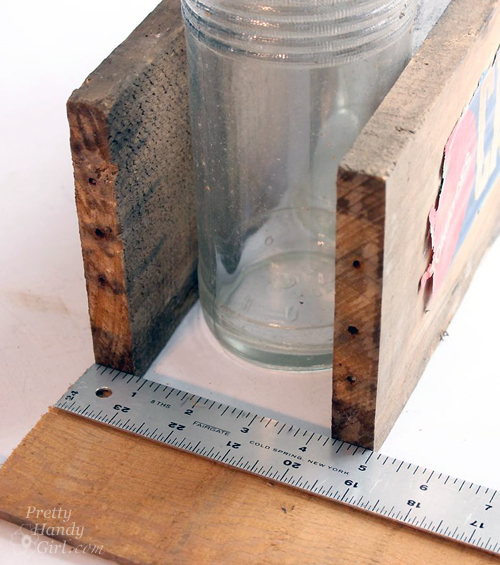
How to Build a Rustic Crate Centerpiece (No Power Tools Needed!) #DIYCourage | Pretty Handy Girl

Cut down the salvaged slats to 5″ widths (or your own bottle measurement). Using a miter box will help keep your cuts square.
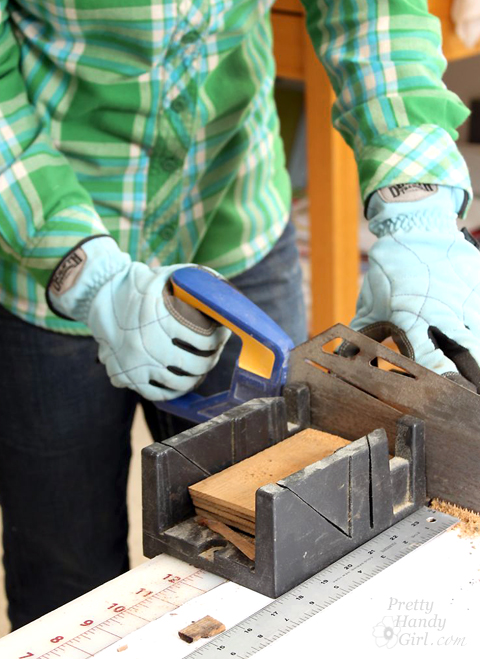
How to Build a Rustic Crate Centerpiece (No Power Tools Needed!) #DIYCourage | Pretty Handy Girl

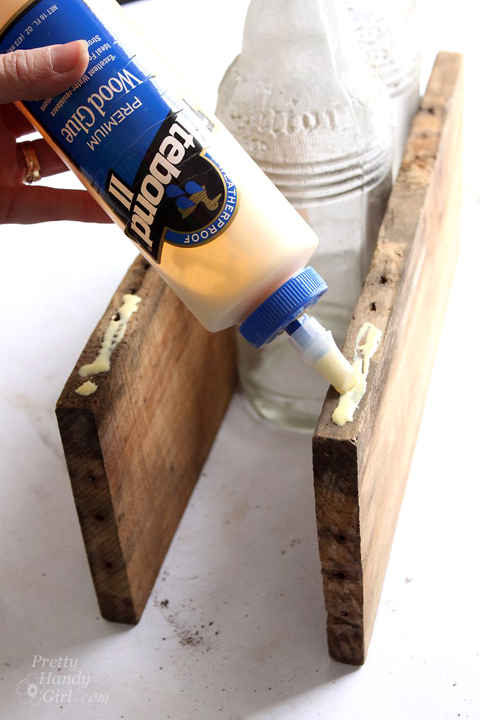
Squeeze wood glue onto the bottom of the produce crate front and back pieces.
How to Build a Rustic Crate Centerpiece (No Power Tools Needed!) #DIYCourage | Pretty Handy Girl

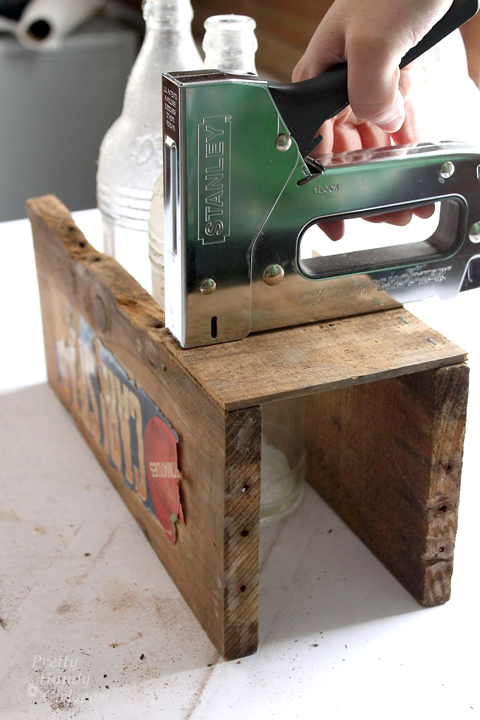
Set one of the 5″ slats into the glue and staple the slat into the crate front and back. Three staples per side should hold the slat while the glue dries. If the slat doesn’t lie flush with the crate, you might need to clamp the slat while the glue dries.
How to Build a Rustic Crate Centerpiece (No Power Tools Needed!) #DIYCourage | Pretty Handy Girl

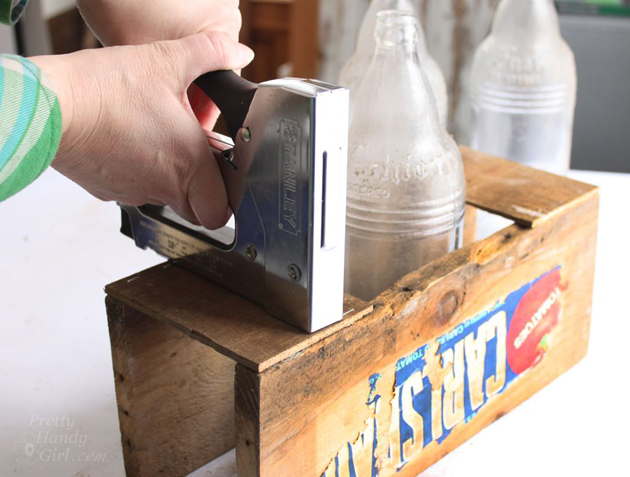
Repeat for the opposite side by stapling the slat to the bottom. Continue working toward the center of your crate.
How to Build a Rustic Crate Centerpiece (No Power Tools Needed!) #DIYCourage | Pretty Handy Girl

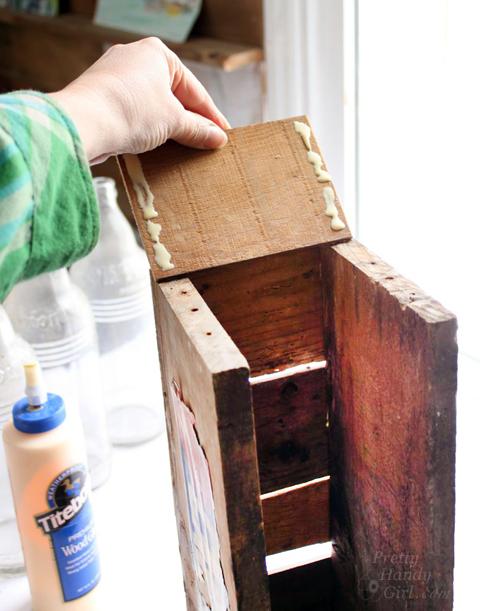
Attach one slat to the sides of the crate with wood glue and staples.
How to Build a Rustic Crate Centerpiece (No Power Tools Needed!) #DIYCourage | Pretty Handy Girl

You’ll notice I left spaces between the slats for that vintage produce crate look. If you want, you can butt the slats tight up against one another. Clamp your crate as the wood glue dries.

If you have a true vintage produce crate, you might need to secure what is left of the label. Gently wipe the crate and label with a damp rag.
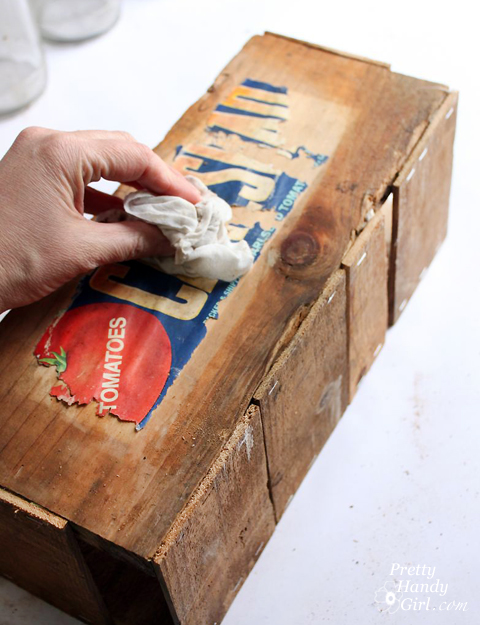
How to Build a Rustic Crate Centerpiece (No Power Tools Needed!) #DIYCourage | Pretty Handy Girl

Apply a coating of Mod Podge to the underside of any parts of the label that are peeling up. Then apply a second coat of mod podge over the entire label to seal it to the crate.
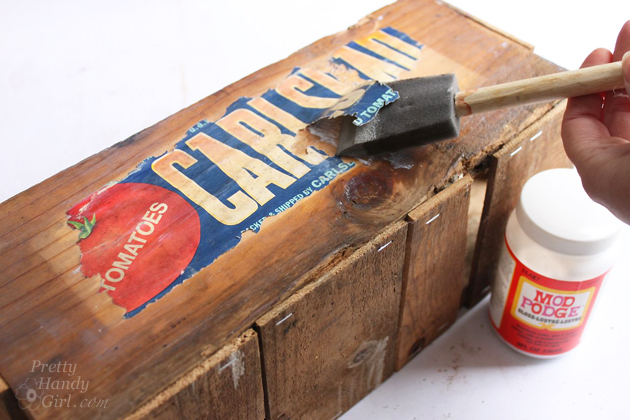
How to Build a Rustic Crate Centerpiece (No Power Tools Needed!) #DIYCourage | Pretty Handy Girl

When the crate is dry, load it up with vintage bottles filled with fresh flowers.
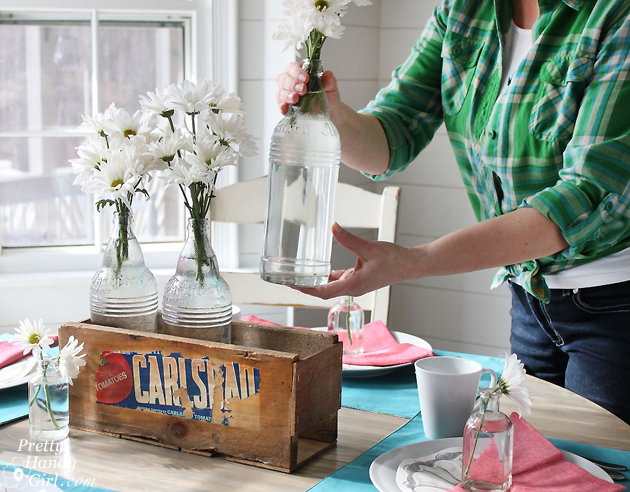
How to Build a Rustic Crate Centerpiece (No Power Tools Needed!) #DIYCourage | Pretty Handy Girl

Place it on your table and invite a friend for lunch.
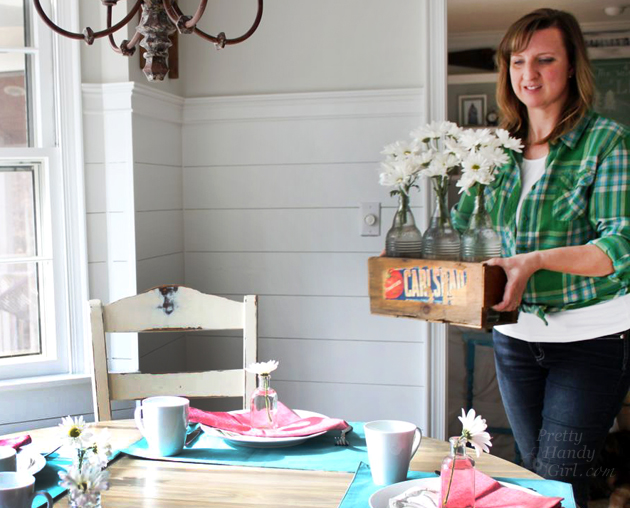
How to Build a Rustic Crate Centerpiece (No Power Tools Needed!) #DIYCourage | Pretty Handy Girl

The conversation will surely turn to your Rustic Produce Crate Centerpiece you made yourself.
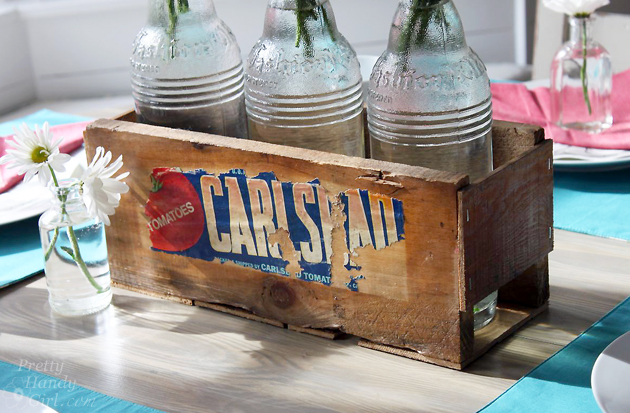
How to Build a Rustic Crate Centerpiece (No Power Tools Needed!) #DIYCourage | Pretty Handy Girl

Which you can proudly say you made…by hand…without any power tools.
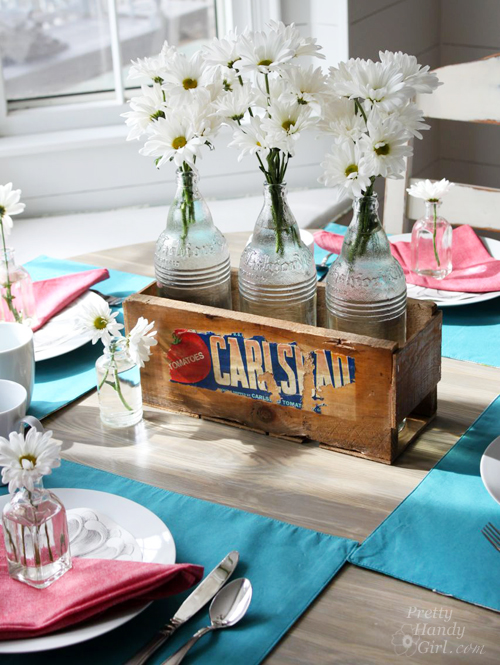
How to Build a Rustic Crate Centerpiece (No Power Tools Needed!) #DIYCourage | Pretty Handy Girl

Want to know where I got my shirt? The Duluth Trading Company Crosscut Performance Flannel Shirt is super comfortable. It’s like wearing your PJs all day. The flexible gussets in the back give you more freedom of movement while working. FYI, the crosscut flannel shirt is on clearance right now. If you don’t see the color you want, check back in early fall to snag your favorites (but don’t wait, they go fast.)
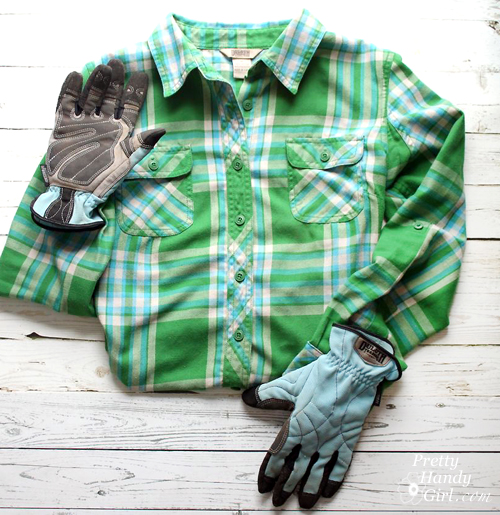
How to Build a Rustic Crate Centerpiece (No Power Tools Needed!) #DIYCourage | Pretty Handy Girl

PHGFancySign


Pin for later!

Build a Vintage Produce Crate Centerpiece using no power tools whatsoever! | Pretty Handy Girl #DIY #rusticcrate #DIYcrate

Heart Shaped Topiary | Pretty Handy Girl

Heart Shaped Topiary | Pretty Handy Girl

The season of love is upon us. Have you embraced it? Or are you struggling to find something cute but not cutesy. Or something non-red or pink? Today I have a tutorial to show  you how easy it is to create a heart shaped topiary. Keep it for yourself or give it to the one you love. As the vine continues to grow, the heart will be embraced by the leaves and fill out.

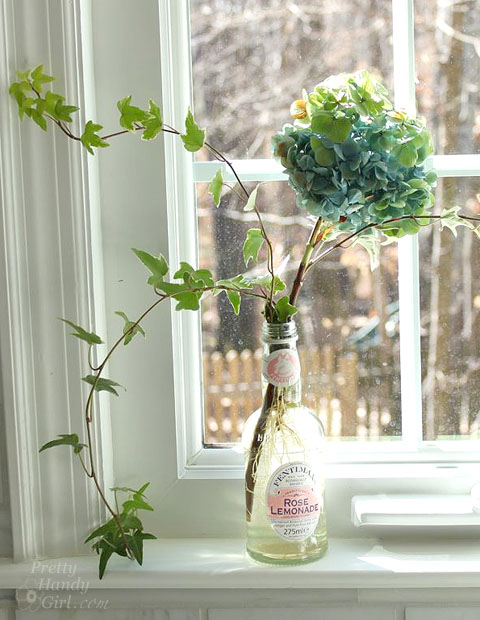
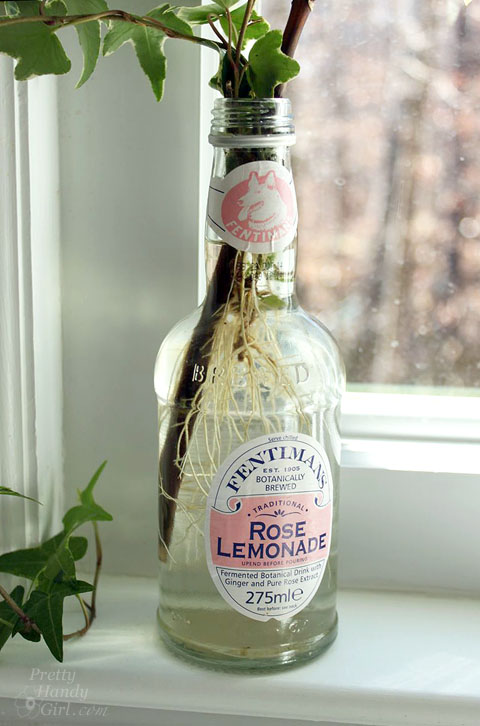
In late Autumn, we had a final blue bloom on our hydrangea bush. I clipped it and brought it inside before the impending cold snap arrived. To keep the hydrangea company, I put a few snips of variegated ivy into the vase too.

Heart Shaped Topiary | Pretty Handy Girl

Over the winter, the ivy grew a healthy root system. Ivy is an easy plant to root. Simply put some clippings in water and keep it watered. After the ivy has rooted, you can create a beautiful topiary plant for a kitchen window sill.

Heart Shaped Topiary | Pretty Handy Girl

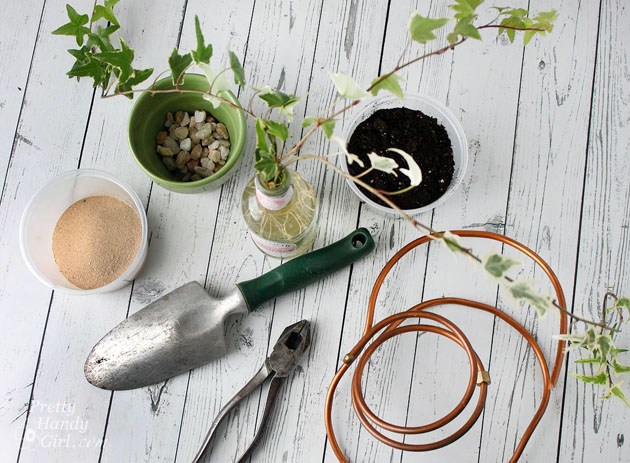
Begin by collecting your materials.

Materials:

Heart Shaped Topiary | Pretty Handy Girl

  • Ivy with roots
  • Copper water line or thick wire
  • Wire cutters
  • Pot
  • Rocks
  • Sand
  • Potting Soil
  • Trowel
  • Water

Optional: string, floral wire or a twisty tie

Instructions:  Read more