Fixing Common Gift Wrap Problems | OMG! So funny, you have to read this. | Pretty Handy Girl

Fixing Common Gift Wrap Problems | OMG! So funny, you have to read this. | Pretty Handy Girl

Hi all, Pretty Handsome Guy here filling in for Brittany. Last night Brittany and I were wrapping presents and I thought I’d share with you some common gift wrap problems and how to deal with them.  Think of this as the polar opposite of her Creative Gift Wrapping series of posts.

The Squish and Tape and Tape and Tape

Fixing Common Gift Wrap Problems | OMG! So funny, you have to read this. | Pretty Handy Girl

Do you ever end up with a present that hangs out of the wrapping paper?

Fixing Common Gift Wrap Problems | OMG! So funny, you have to read this. | Pretty Handy Girl

No problem, simply squish the gift inside the packaging as far as you can…

Fixing Common Gift Wrap Problems | OMG! So funny, you have to read this. | Pretty Handy Girl

…and quickly fold over the end and slap on some tape. Then use some more tape to close the gaps,

Fixing Common Gift Wrap Problems | OMG! So funny, you have to read this. | Pretty Handy Girl

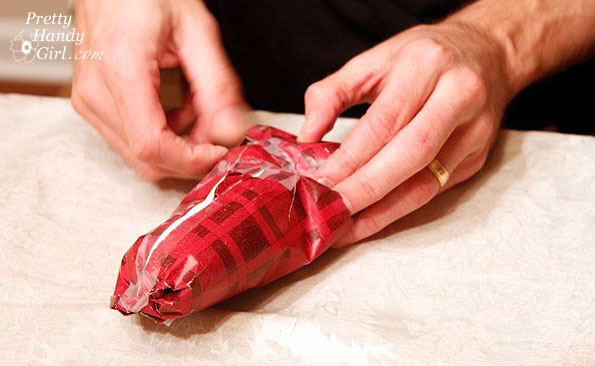
and just for good measure add some more tape. Hey, tape is cheap, no need to be stingy with it!

Fixing Common Gift Wrap Problems | OMG! So funny, you have to read this. | Pretty Handy Girl

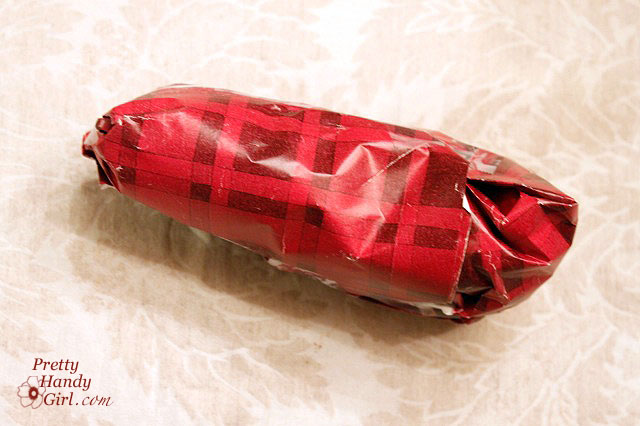
All done, and the goal of hiding the present has been achieved!

The Panel (not to be confused with the type of pants pregnant women wear.)

Fixing Common Gift Wrap Problems | OMG! So funny, you have to read this. | Pretty Handy Girl

How many times have you cut your wrapping paper only to realize that it is too short to go around the package? When it comes to wrapping presents I adhere to the adage “measure never, just cut it”.  I mean seriously people we aren’t building a house here, what you are wrapping is meant to be destroyed anyways.

Fixing Common Gift Wrap Problems | OMG! So funny, you have to read this. | Pretty Handy Girl

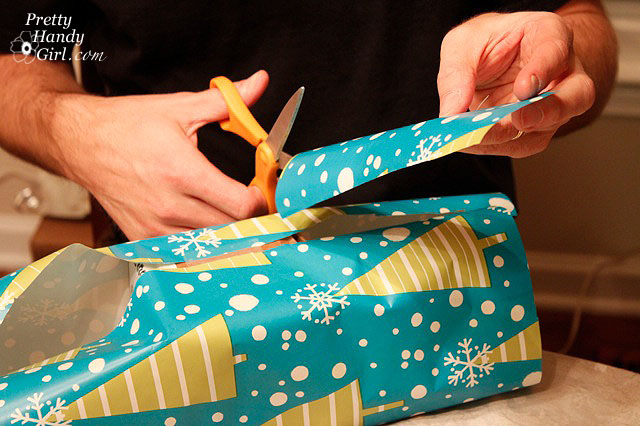
Here is the solution! It is called the panel. Simply cut another piece of wrapping paper the width of the gap (or maybe a little wider.)

Fixing Common Gift Wrap Problems | OMG! So funny, you have to read this. | Pretty Handy Girl

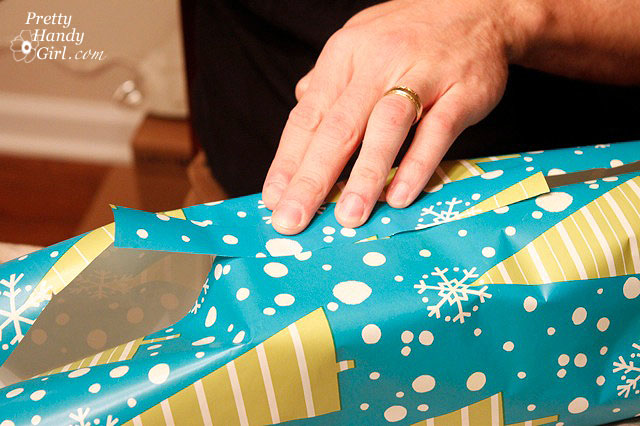
Tape it on (no need to match up the pattern, no one will see the bottom when it is under the tree.). Bonus points if you can manage to use 2-3 different types of wrapping paper – just tell everyone it is a “holiday medley”.

Fixing Common Gift Wrap Problems | OMG! So funny, you have to read this. | Pretty Handy Girl

Super easy solution and the best part is that you don’t have to go back and cut a whole new piece of wrapping paper.  The environment will thank you for this one.

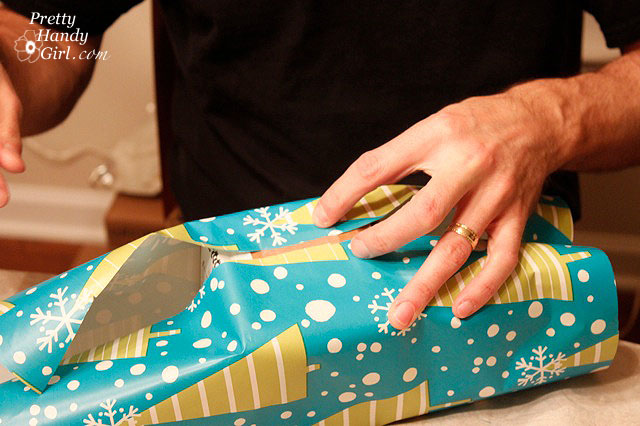
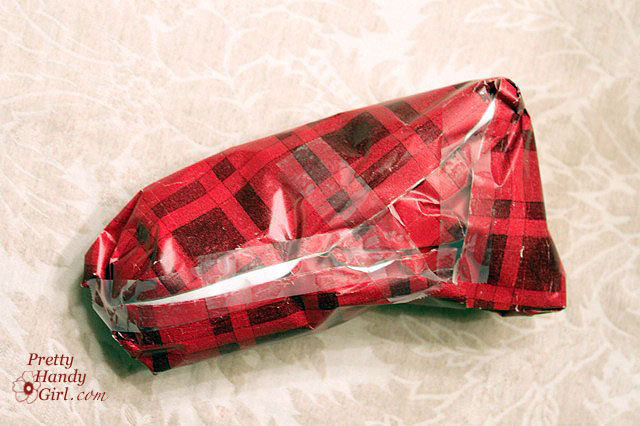
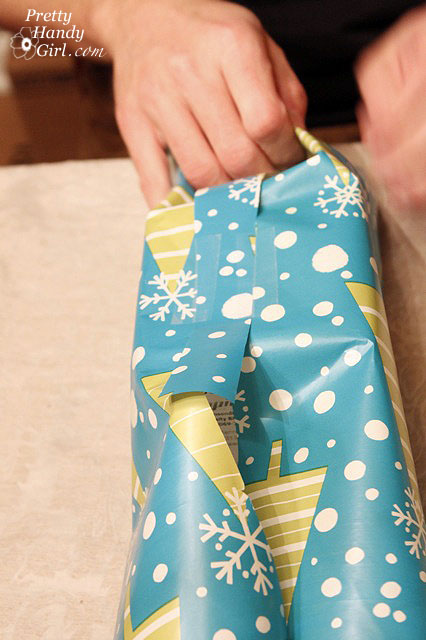
The Nip, Tuck & Roll

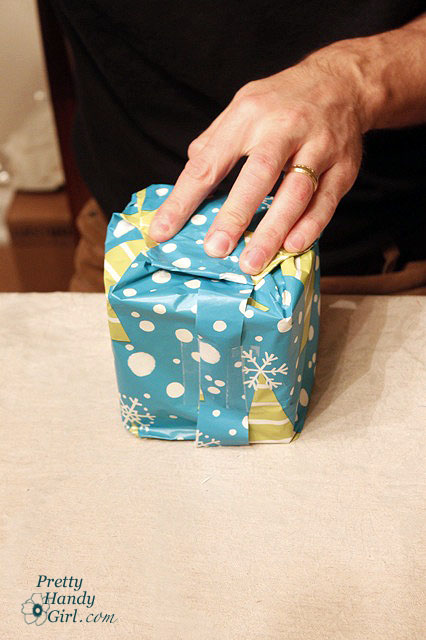
Now we are down to one of the most common wrapping problems. What to do when you have too much wrapping paper on the ends of your package.  And yes I realize most of these “problems” are a function of not measuring in the first place but whatever.

Fixing Common Gift Wrap Problems | OMG! So funny, you have to read this. | Pretty Handy Girl

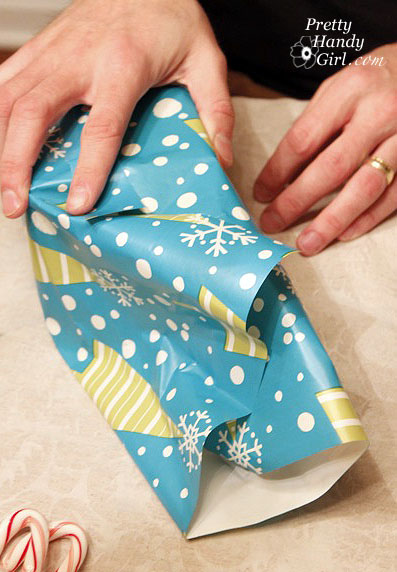
Normally I would simply roll the sides in until they meet the package, but in an effort to neaten things up a bit, you can simply gather the end in your hands and snip off the excess.

Now simply fold in the end towards the box.
Fixing Common Gift Wrap Problems | OMG! So funny, you have to read this. | Pretty Handy Girl
Continue to roll the paper in…

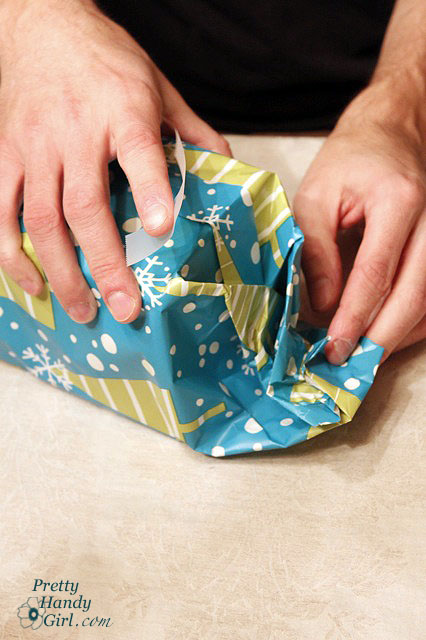
…until you reach the box, then smash the end down with your hand to flatten it.

Fixing Common Gift Wrap Problems | OMG! So funny, you have to read this. | Pretty Handy Girl
And tape your end down.
Fixing Common Gift Wrap Problems | OMG! So funny, you have to read this. | Pretty Handy Girl
Done. Problem solved, any questions?
Adding a Gift Tag (bet you’ve never seen it done this way!)
Fixing Common Gift Wrap Problems | OMG! So funny, you have to read this. | Pretty Handy Girl
I found the little key tags that Brittany bought for tagging her presents. Creative idea and all but sheesh a lot more work than a stick-on “To/From” tag.  But I devised a new way to attach them to the gift without ribbon.
Simply grasp a corner of your package and use a hole punch to make a hole in the gift wrap.
Fixing Common Gift Wrap Problems | OMG! So funny, you have to read this. | Pretty Handy Girl

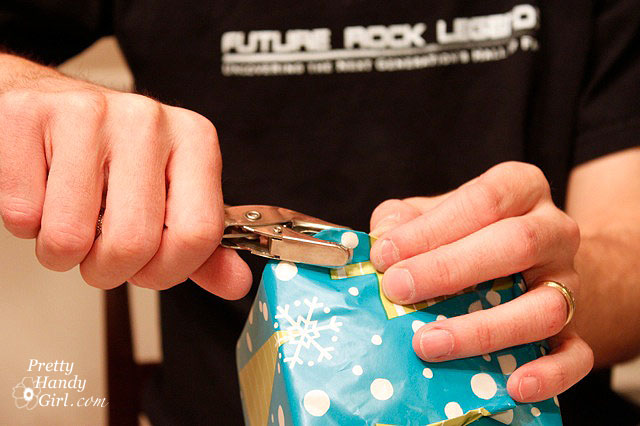
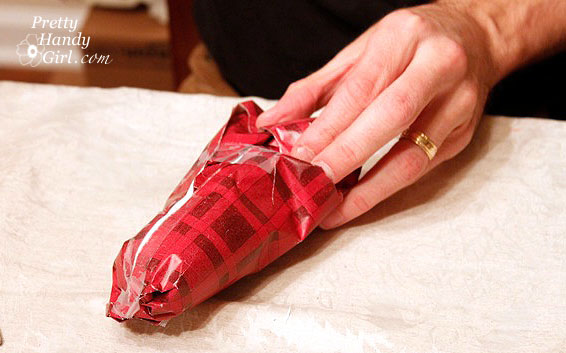
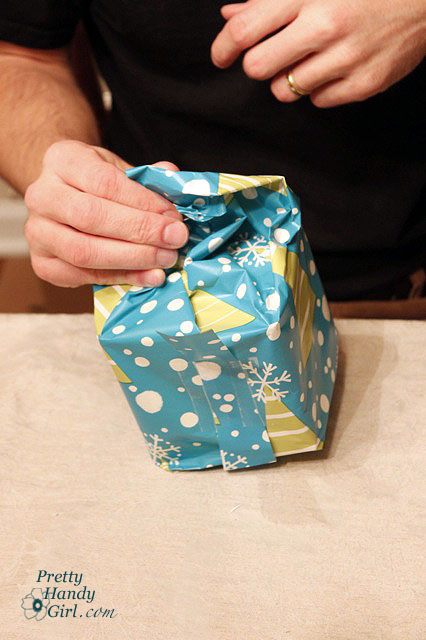
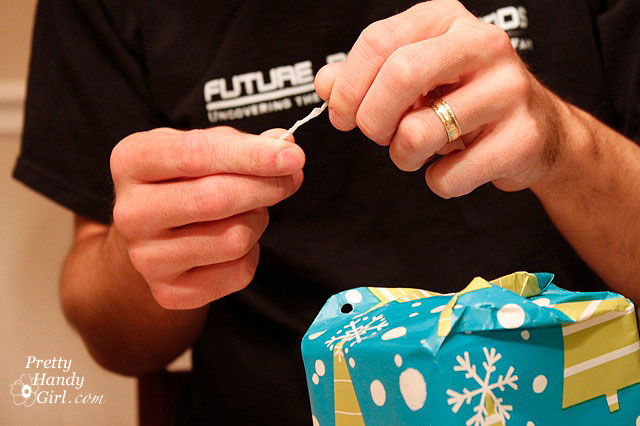
Then take a piece of tape and twist it into what I call a “tapepick” (looks like a toothpick.)
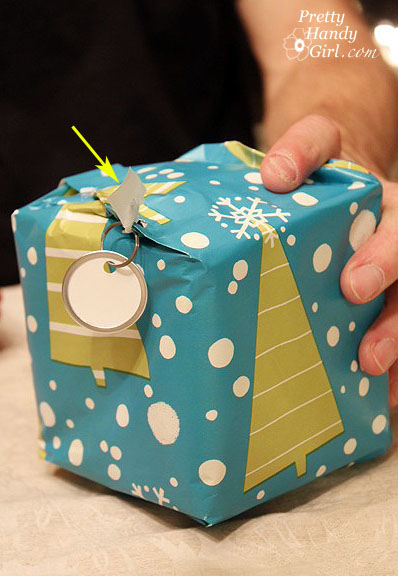
Fixing Common Gift Wrap Problems | OMG! So funny, you have to read this. | Pretty Handy Girl
Thread the “tapepick” into the hole you made in your gift wrap.
Fixing Common Gift Wrap Problems | OMG! So funny, you have to read this. | Pretty Handy Girl
Then grab another piece of tape and fold it over the ends of your tapepick to secure them.
Fixing Common Gift Wrap Problems | OMG! So funny, you have to read this. | Pretty Handy Girl
That’s it. Thanks for reading my post today. Hopefully Brittany will invite me back to show you how I make a bed in less than 10 seconds!
– Pretty Handsome Guy

Pin for later!

how to fix common gift wrapping problems

Quick & Easy Peppermint Oreo Recipe : Great for last minute cookie exchanges or gifts


Want a quick and easy holiday recipe you can make with the kids? When you don’t have time to bake, but you still want to give a homemade holiday treat, try this recipe for Peppermint Oreos!

Quick & Easy Peppermint Oreos

Ingredients:

  • 1 Pkg. of Oreo cookies
  • 1 Pkg. of peppermint candies
  • 1 Pkg. of white chocolate chips

Instructions:

Place the peppermint candies in a double ziploc bags. Let the kids hammer them to smithereens! (I placed scrap wood under the peppermints to protect the countertop.)

While the kids are pounding away to their heart’s content. Melt white chocolate chips in a double boiler (or in the microwave. But, the double boiler will keep the chocolate from hardening as fast.)

Pry the hammers from your kid’s hands. Place the crushed peppermints into shallow bowls (one for each child.)

Roll the edge of the oreo cookies into the white chocolate.

Then roll them into the crushed peppermints.

Lay the cookies onto wax paper to cool.


After they cool, eat them, gift them or save them for a snowy day.

A bunch of oreos would fit nicely in one of these decorated gift bags made from a cloth napkin, don’t you think?

drawstring gift bags made from cloth napkins

Want more 15 Minute Gift Ideas?


Happy Holidays!


Pin for later!

Want a quick and easy holiday recipe you can make with the kids? When you don't have time to bake, but you still want to give a homemade holiday treat, try this recipe for Peppermint Oreos! | Pretty Handy Girl #prettyhandygirl #oreorecipe #holidayrecipe

DIY Copper Ring Jewelry | Pretty Handy Girl

DIY Copper Ring Jewelry | Pretty Handy Girl

The holidays are here and you know what that means: It’s time to check off items from your gift list. I don’t know about you, but I detest braving the mall traffic and chaos. I’d much prefer to stay indoors and make gifts for the ones I love. Not only is it more peaceful DIYing gifts, but it saves money too! Why not make beautiful DIY Copper Ring Jewelry for the bling lovers on your list. Or you could use a ring or two and make a unique key chain fob.

DIY Copper Ring Jewelry | Pretty Handy Girl

I’m honored to be part of the Bernzomatic Torch Bearers program. Bernzomatic has sponsored this post to help you with your holiday gift ideas.

This fun project is sure to keep you warm and cozy with a little fire and heat using a Bernzomatic ST2200T Detail Torch.  The ST2200T is a great torch to start with if you’ve never used one. The small size fits in the palm of your hand and produces a small fine tip flame that’s perfect for jewelry making (among other small projects.)

DIY Copper Ring Jewelry | Pretty Handy Girl

To make the copper ring jewelry, you’ll need a few supplies. You can pick most of them up at your local hardware store or online.

DIY Copper Ring Jewelry | Pretty Handy Girl

Materials:

(I’ve included affiliate links for your convenience. I earn a small percentage from a purchase using these links. There is no additional cost to you. You can read more about affiliate links here.)

Instructions:

Use the pipe cutter to cut several rings (approximately 1/8″ thick) off the end of your copper pipe. You may need to cut several to get ones the same thickness. (For more details on how to use a pipe cutter, you can watch my video here.

DIY Copper Ring Jewelry | Pretty Handy Girl

Select the rings you wish to use for the necklace.

DIY Copper Ring Jewelry | Pretty Handy Girl

Use the metal file to file off any sharp edges on the copper rings.

DIY Copper Ring Jewelry | Pretty Handy Girl

Sand the edges until they are smooth (I turned my power sander upside down in a clamping table and turned it on while holding the rings onto the sandpaper to speed the process of sanding.)

DIY Copper Ring Jewelry | Pretty Handy Girl

Start by laying two rings side-by-side.

DIY Copper Ring Jewelry | Pretty Handy Girl

Apply a generous amount of flux to each ring where you wish to join them.

DIY Copper Ring Jewelry | Pretty Handy Girl

Start your Bernzomatic ST2200T torch and heat the rings where you added the flux.

DIY Copper Ring Jewelry | Pretty Handy Girl

As soon as the flux melts, touch the solder wire onto the spot where the flux was. (Make sure the rings are still touching. If not, nudge them back together with the pliers.) Hold the solder in place until it flows onto the copper rings.

DIY Copper Ring Jewelry | Pretty Handy Girl

Let the rings cool (or drop them in a container of cold water.)

DIY Copper Ring Jewelry | Pretty Handy Girl

Solder the next ring by following the steps above (add flux, heat, and solder.) If you mess up, you can reheat the solder to remove it and start over.

DIY Copper Ring Jewelry | Pretty Handy Girl

Curl a piece of copper wire to form a circle.

DIY Copper Ring Jewelry | Pretty Handy Girl

Cut off the copper circle.

DIY Copper Ring Jewelry | Pretty Handy Girl

Open the circle slightly. Add flux to the wire ends and the copper ring where you want to join them. Heat the area, let the flux melt and touch the solder to the ends of the copper wire. (This step may prove a little difficult to control the solder. If you are having trouble, try to add the solder to the copper ring, then guide the wire into the molten solder. Hold the wire in place with pliers until the solder hardens.)

DIY Copper Ring Jewelry | Pretty Handy Girl

To hide the shiny silver solder, use copper Rub n’ Buff on the joints. Or coat the entire necklace pendant with gold Rub n’ Buff for gold jewelry.

Feed a chain through the loop . . .

DIY Copper Ring Jewelry | Pretty Handy Girl

. . . or sew some suede leather cord to the loops.

DIY Copper Ring Jewelry | Pretty Handy Girl

Then sew clasps to the other end.

DIY Copper Ring Jewelry | Pretty Handy Girl

Behold beautiful new necklaces that you made yourself!

DIY Copper Ring Jewelry | Pretty Handy Girl

These necklaces would look great with any bohemian or casual outfits.

DIY Copper Ring Jewelry | Pretty Handy Girl

They are super fun to make and will surely delight anyone who loves jewelry.

DIY Copper Ring Jewelry | Pretty Handy Girl

What could you make with a Bernzomatic Torch and some copper pipe? The possibilities are only limited by your mind.

PHGFancySign

Disclosure: This is a sponsored post for Bernzomatic. As a Bernzomatic Torch Bearer, I was provided complimentary torches and was compensated for my time and efforts. I was not told what to write. All opinions are my own. I am particular about the brands I represent and will always let you know when you are reading a sponsored post.

Want more frugal gift ideas for the holiday season?

Tres-frugal_diy-gifts4


Pin for later!

This DIY copper ring jewelry is the perfect idea for a handmade gift! | Pretty Handy Girl #prettyhandygirl #giftidea #DIYgift #DIYjewelry

DIY Tool Tote Gift Idea | Pretty Handy Girl

tool tote gift

Jaime here today from That’s My Letter dropping in to say hello to all you Pretty Handy Girl readers.  I’m sharing this DIY tool tote gift idea. It’s perfect for Father’s Day, a Honey-Do Shower, New Homeowners, or basically any occasion — because who doesn’t love tools?!!

You can use any scrap wood, I used a piece of 1×6 cedar and a 1″ dowel to built this tool tote.  Then simply fill with all the essential basics one might need or want:

tool tote gift 2

You could go crazy at the hardware store pulling together all your favorite tools and supplies.  I stuck to the basics with a hammer, screwdrivers, measuring tape, level, paint brushes, painter’s tape, super glue, spray insulation, chair felts and picture hanging hooks.

Of course you don’t have to fill the tote with tools, it’s perfect for any gift basket contents:

tool tote gift 3


Below are the step-by-step instructions to build this tool tote.

tool tote gift 1

Always follow all safety precautions when operating power tools.

Materials:

  • 1 – 1″x6″x8′ cedar board
  • 1 – 1″ dowel
  • saw
  • measuring tape
  • pencil
  • drill and 1″ forstner bit
  • nailer and 1 ¼” finish nails
  • wood glue
  • sander
  • clear polyurethane

Cut List:

tool tote gift cuts

  • 2 – 1×6 @ 18″ (sides)
  • 2 – 1×6 @ 12″ (ends, dog ear the corners as pictured)
  • 1 – 1×6 @ 16 ½” (base)
  • 1 – 1″ dowel @ 17 ½” (handle)

Step 1: Using a 1″ forstner bit, drill a hole for the handle about 1/2″ deep into center top of each dog-earred end piece.

tool tote gift step 1

Step 2: Assemble the handle into the ends. Attach the ends to the base using wood glue and 1 ¼” finish nails.

tool tote gift step 2

Step 3: Attach the sides using wood glue and 1 ¼” finish nails.  Sand smooth.

Applying clear satin polyurethane will make the cedar wood grain pop. It not only looks beautiful, but will protect the wood from wear and tear.

tool tote gift step 3

Are you ready for Father’s Day?  Do you have a certain someone who could use a tool tote gift?

tool tote gift 4

I hope you enjoyed this DIY project idea.

Jaime signature~ read more of Jaime’s tutorials ~


Pin for later!

Check out this DIY tool tote gift idea. It's perfect for Father's Day, a Honey-Do Shower, New Homeowners, or basically any occasion — because who doesn't love tools?!! | DIY gift ideas | Father's Day gift idea | Pretty Handy Girl | #prettyhandygirl #DIYgift #handmadegift #fathersdaygift

10 Cool DIY Gifts for Handy Guy or Girl on Your List

10 Cool DIY Gifts for Handy Guy or Girl on Your List

As an avid DIYer, I know that Father’s Day is a good time to pick up great bargains on DIY tools and more. Sometimes picking out the right gift for that handy person in your life can be a little daunting. Therefore, I’ve created a list of cool products that I love and I know your “handy” person would too. And, hey, if this list is for the handy gal instead, then so be it!

Here are 10 Cool Gifts that Every Handy Guy (or Gal) Would Love, to fit any budget (contains affiliate links.) Read more