Easy Step by Step Guide to Decluttering Your Home

Need some help getting started on decluttering your home? This is an easy step-by-step guide with simple actionable steps to take. I’ll start you out with small steps and before you know it, you’ll be finished and loving your home again! Let’s work together taming the clutter!

easy steps to declutter home

Easy Step-by-Step Guide to Taming the Clutter

Okay, we’ve all seen an episode of Hoarders by now. The guy that hasn’t seen the carpet in his home in 5 years or the woman who saves everything! We see those extreme examples of clutter and can’t imagine how they can live like that.
You’ve also likely stumbled upon Marie Kondo and the KonMari method of organizing. Wherever you fall in the spectrum of hoarder vs. minimalist, you can likely benefit from this Easy Step-by-Step Guide to Taming Clutter.

Ask Yourself one Question:

Do you see clutter in your own home?

Are you so immune to that pile in the corner that you don’t see it anymore? Keep reading to find out why this small pile might not help your brain.

Visual Clutter:

I admit I have clutter. Not, the “OMG! Call Hoarders” type clutter. But, I do have small piles of things with no home. A few extra knick-knacks, some papers that need to be filed, or those horrid happy meal toys! This is an example of small visual clutter. It’s not “bite you on the nose” noticeable most of the time. Did you know even the smallest bits of clutter are noticed by your eyes, and your brain has to process it. This is why sometimes you stop seeing it. I call anything that sits out visual clutter.

In college, I used to have to clean my entire room before I could start on my illustration assignments. I do the same thing in our garage (which is cluttered now) before I can start on a new project.

You need the visual calmness of a clean room to be more creative and more productive. It helps focus your mind on the task you are doing.

This week, I want you to pick one room. Preferably the room you spend the most time in. Is it your kitchen or your home office? Whatever it is, this is the room that will make you happy when you are done. It is the room that will allow you to “Fall in Love with Your Home.”

Easy Step-by-Step Guide to Taming the Clutter:

I’m going to share with you a simple step-by-step guide to reducing clutter in your home. This process works in any area of your home.

Materials:

  • Four Boxes (or laundry bins)
  • Large Trash Bag
  • Different Colored Sheets of Paper (if possible)
  • Thick Marker
  • Cleaning rags
  • Windex or general cleaners

Step-by-Step Guide to Reducing Clutter:

Begin by gathering your four boxes. If you are working in an area with larger items, you can set areas just outside the room instead of boxes.

Label each one with these labels:

  • KEEP
  • DONATE or SELL
  • RECYCLE
  • TRASH

I like to use a different color for each label so I don’t accidentally toss something in the wrong bin.

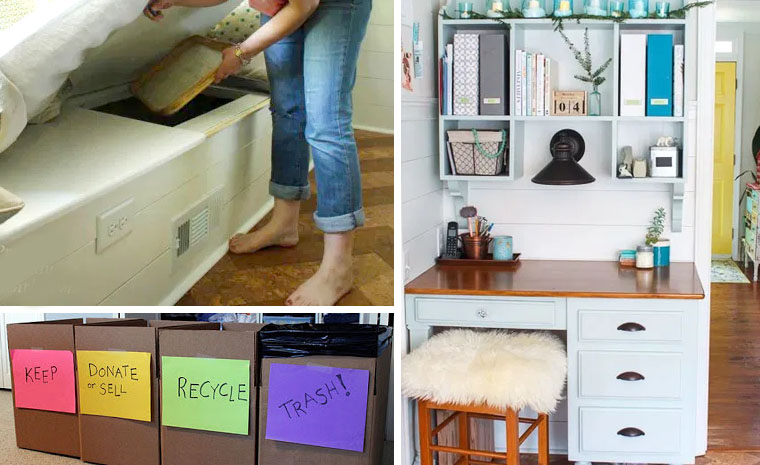
cardboard boxes in front of closet labeled keep, donate/sell, recycle, trash

  • KEEP – Things that don’t belong in that room or to be stored away somewhere else
  • DONATE or SELL – Goodwill, Thrift store, or FreeCycle.org donation. Or sell by having a yardsale, on Craig’s List or Facebook Marketplace, eBay, or consignment shops.
  • RECYCLE – paper, glass, cans, and other curbside recycling. Also, dry-cleaner hangers, plastic bags, or other items that can be re-used. (Old cloths or linens can be cut up for cleaning rags)
  • TRASH – Anything worthless in value. I like to line the trash bin with a big plastic bag to make it easier to empty.

Where to Start:

Start in one area of the room. If you want to be systematic, start from one side and work clockwise around the room. Put things away or add them to the labeled box.

Once the zone is clear, clean off all the surfaces. Then move on to the next area in the room.

If you find yourself stuck ask yourself these questions:

  1. Have I used or worn it in the last 6 mos? 1 year?
  2. “Will this item help me create the home I want” – Peter Walsh
  3. Is this item irreplaceable?
  4. Do I need it?
  5. Okay, and finally if you like to KonMari, “Does it spark joy?”

If the answer to any of those questions is “No”, then say adieu to it now!

1 Year Box Rule:

If you still feel stuck, try the 1 year box rule:

Create another box and put anything you are undecided about inside. Seal it up and write a note on the box to assess it one year from today. Next year when you find that box in storage, get rid of it. Don’t even open it. If you didn’t miss the items inside then you don’t need them. Just donate it.

Get It Out of Your House!

When you have finished going through the whole room start removing the bins from the room. Empty the trash, dump the recycling in your recycling bin.

Do not leave the boxes in your home. Put items in your car to recycle or donate while you are running errands (dry cleaner hangers, grocery store plastic bags, packing peanuts to a local shipping store, batteries etc.)

The Keep Box:

Assess the “KEEP” items and decide which ones can go back in that zone or need to go elsewhere. When you put them away, be sure to store them out of sight. Don’t allow items to become visual clutter. Here are some ideas for finding additional storage in your home.

Storage Ideas:

Maybe your home lacks enough closets or storage areas. I get it, some homes don’t have plenty of storage. If you don’t have an attic, basement, or storage spots I have some ideas for you!

  • Pie Safe or armoire
  • Cabinet
  • Dresser
  • Hutch
  • Desk
  • Bins
  • Storage bench
  • Shelving

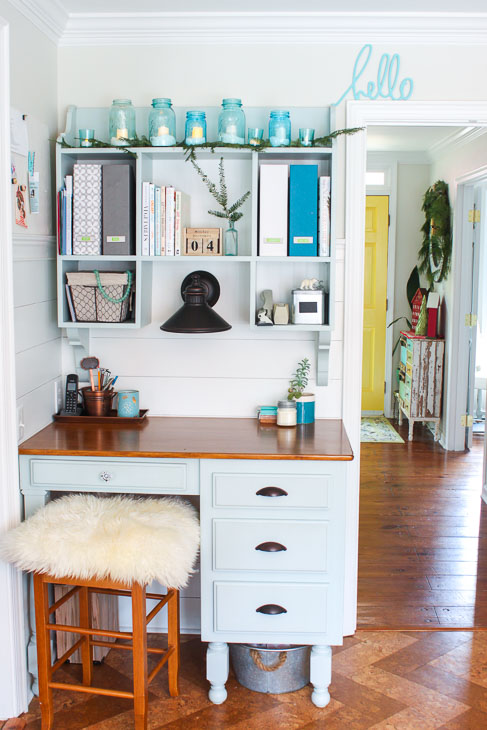
After our kitchen remodel, I bought an old desk from the Habitat ReStore and built a wall-mounted hutch over the desk. This area is my command center and it’s prefect for paying bills, storing papers, chargers and mail.

Holiday Home Tour 2017 | Pretty Handy Girl

Before the command center, I used a pie safe in the corner of the kitchen.


Although it is a small piece of furniture, there’s lots of storage inside.

Top Shelf:

  • school papers
  • school work
  • kids artwork
  • Workbooks
  • Coloring Books
  • Favorite Magazines
  • Coupon Binder Sleeves

Next shelf:

  • charging station (tutorial to come)
  • Cell phones
  • Cameras
  • Battery chargers
  • Walkie Talkies
  • Recipe Box

Drawers:

  • Left: Pretty Handsome Guy’s mail
  • Rigth: Pretty Handy Girl’s mail

Bottom shelf:

  • Cookbooks

My friend Renee found a credenza from Craig’s List and she utilized this piece of furniture for mail and her daughter’s art supplies.


We also built a wall-mounted mudroom cubby and shoe storage bench in her small entryway from the garage.
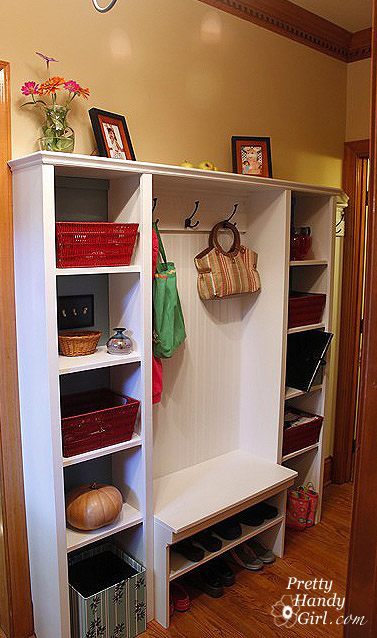

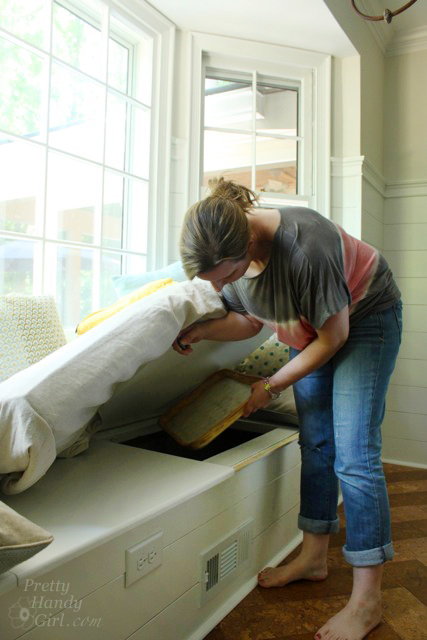
Build a built-in bench in a bay window and store linens, games, or large pots and appliances.

Shelving:

Any closet, corner, or nook in your house can store more if you build or purchase a set of shelves.

Sport Gear Storage in a Small Space | Pretty Handy Girl

This sports gear storage area takes up only a small footprint, but it holds more equipment than a soccer team! See how I built these shelves in a small area at the bottom of our bonus room steps.

Garage Corral:

Sometimes you just need an area to corral items that are tall or tend to roll around. In our garage, I built a corral for tools and sports gear using scrap wood and large PVC pipes.

Install Cabinets:

Cabinets are the best storage solution for visual clutter. They look uniform and hide everything inside. You can shop for used cabinets at a ReStore location, look on Craig’s List, or purchase unfinished cabinets, or unassembled cabinets to save money. My favorite storage cabinets in our house are the ones that can be easily reconfigured on a hanging slat wall. You can read how I installed them in our laundry room first, then loved them so much I used them in our bonus room.

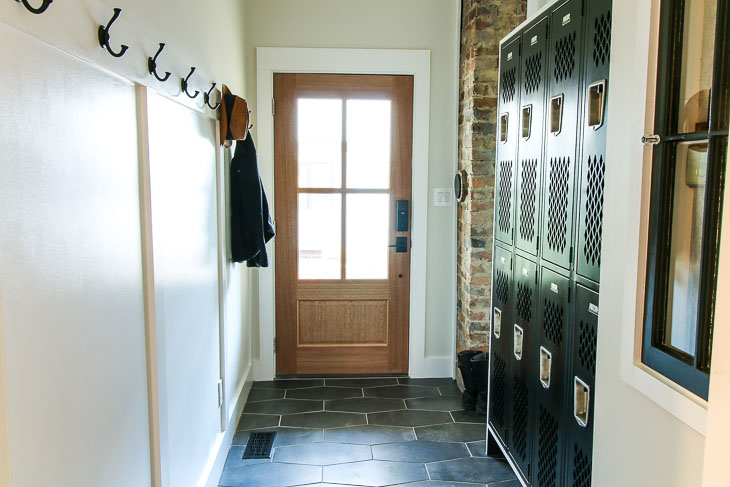
Storage cabinets don’t necessarily have to be cabinets. This set of old gym lockers adds loads of hidden storage in the mudroom at my Saving Etta project.

What to Do with the Donate/Sell Box:

Sort through the Donate/Sell box. Grab a notepad to jot down anything you will be donating. Then put that pile in a bag and put it in your car as well. Be sure to run by Goodwill or the thrift store one day this week. Put the items you intend to sell in a dedicated spot in storage. Make a commitment to yourself to sell them within 3-6 months or donate them if you haven’t after that time frame. (I might have been slacking on this rule. Pretty Handsome Guy might be calling me out on this one.)

cardboard boxes in front of closet labeled keep, donate/sell, recycle, trash

Keep Box:

Finally, sort through the remaining items in the KEEP box. Walk around the house with the box and put items away. Go room to room until all the items are put away. (If you have to, go ahead and leave items in the room where they belong, and put away later. Remember today you are only tackling the one room!
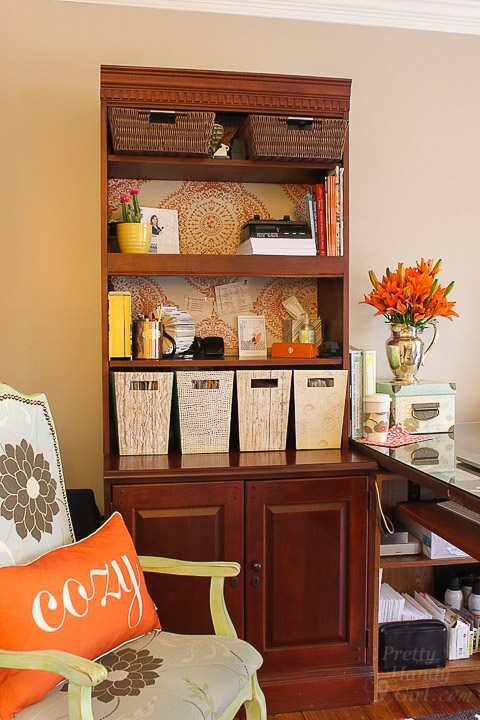
Magazine File Box Facelift | Pretty Handy Girl

Go back to the room you just de-cluttered. Sit there and breathe in. Allow yourself to enjoy the calmness of a clean and clutter-free space. Let yourself fall in love with this space. Anytime you find yourself disgusted with your home, go back to this space and rekindle that flame! Or start on the next room to declutter.

I hope you found this Easy Step-by-Step Guide to Taming the Clutter helpful! Please pin it for later or to help a friend declutter.

easy steps to declutter home


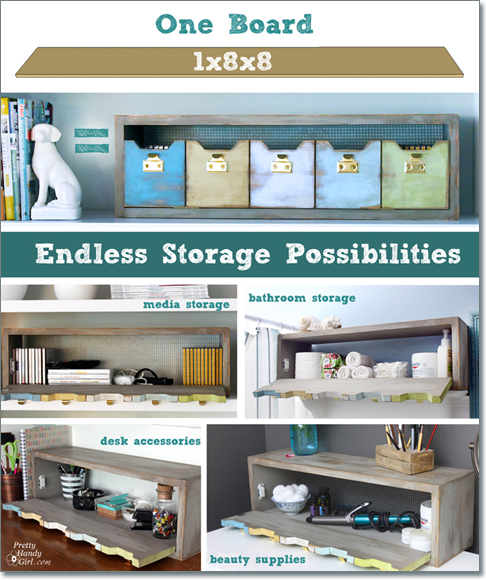
Looking for a quick way to hide small items? Use one board to create this adorable storage bin:

one-board-organization-storage

Or use one of these 16 DIY Built-In ideas to add more storage to your home.

16 diy built in storage and shelving ideas pinterest image

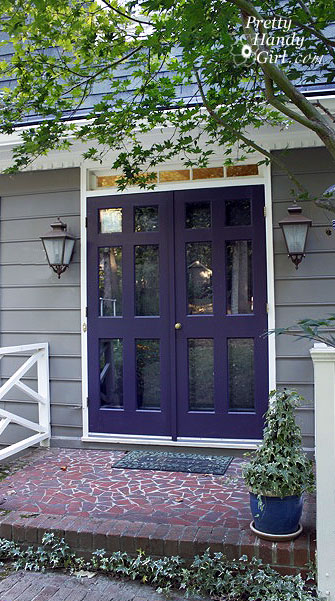
Purple_Honor_front_doors

Sprucing up your entryway. If your home is like ours, we have two entrances. The front door,

and the door near our driveway. The latter is used about 95% of the time by us and our friends.

Creating an inviting entrance for yourself is so important for falling in love with your home. Start sprucing up your entryway!

Think about it this way: How many times do you go in and out of your home through that one doorway? How many times do guests go in and out of that doorway? Do you follow me? So, it is you who should be welcomed home to your lovely home first and foremost!

This is what our family entrance looked like a few months ago:

How I lived with that ugly brown aluminum door for 3 years, I will never know. And let’s not even talk about that little red CPI security sticker!

Lucky for us, a neighbor sold us her full view storm door when they added a garage onto their home. Had they not, I probably would still be scouring the Habitat ReStore. Or at least I would have painted the old door to match the house or use a more inviting color than doo-doo brown.

After I installed the storm door, I made sure to repaint the threshold as well. What?! You can’t see behind “Doo Doo Brown” above, is this?

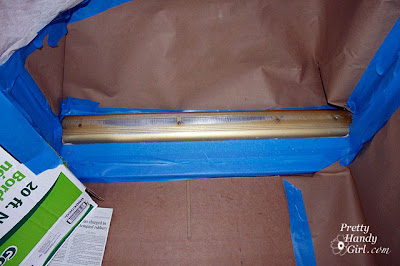
Niiiiiice. Gold threshold with silver metal showing through. Not exactly my favorite rustic look. The easiest way to repaint it would have been to remove the threshold and spray paint it in the yard on a tarp. But, those screws weren’t going to budge for me. So, I masked off the entire doorway…

…storm door, floor, and…

…the mudroom to spray paint  one piece of threshold brushed nickel. Okay, call me crazy, but I was on a mission to make my entryway more inviting for myself. And I wasn’t about to get brushed nickel on any other surfaces.

Much better, don’t you think? And I can honestly say that after using automotive primer and then the Rustoleum Brushed Nickel metallic paint, the threshold still looks like new!

But, I didn’t stop there. I added a kick plate in matching brushed nickel. And replaced the door sweep as well. And splurged on a new door mat. {Love my new mat!}

Finally, looking beyond the doorstep, I add some pumpkin topiaries, plants, wreath or other decorations (depending on the season) to greet you – errr, I mean me.

My good friend has this adorable planter near her side entrance (that she uses about 95% of the time, too.) It is the perfect place to switch out plants, or other decorations depending on the season.

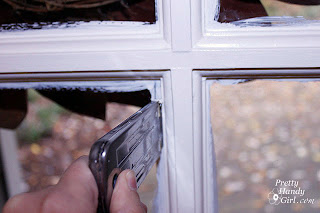
So, that takes care of the exterior, but don’t neglect the inside! I added a new coat of paint to the inside of the door (that my sweet departed maniacal dog had left claw marks all over it.) I was so anxious to freshen it up, I didn’t even tape off the windows.

After the paint dried, I used a razor blade to score…

…and then scrape off the paint.

And as a final, welcome home, I hung my message center just inside the door.

I’m so happy to be home! And you should too so start by sprucing up your entryway.

So, what do you think? How does your home greet you? Does it welcome you with open arms or is it more of just a brief, “hi?”

Welcome back. Today, I’m going to show you how to maximize the amount of light that comes in your windows.

In my last post I talked about scraping and painting your ceilings to help reflect more natural light into your home. As we learned, more light can boost  your mood, making you happier and helping you love your home.

Today, as part of my continuing series “Fall in Love with Your Home February”, we will be focusing on the windows in your home.

If you have mini-blinds (well, in my case I had maxi-blinds), they can block up to 25% of the light coming in your room, even when they are raised! Look at your window blinds, curtains and/or valance. Do they cover more than half of a window pane? Or more than 3-4″. If they do, they are blocking light.

Take a look at this photo taken today in our bathroom. The “maxi-blinds” were completely pulled open (picture on the left), but look how much light they were blocking when I took them down (picture on the right). You can see there is more light being reflected on the ceiling and the door. And it is a cloudy day. Can you imagine how much light is blocked on a sunny day?

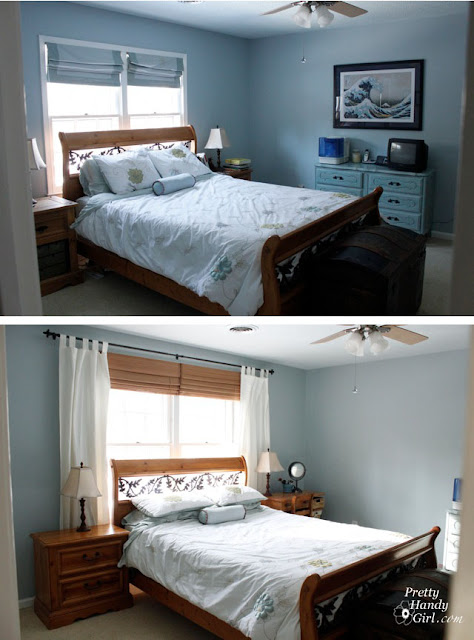
Next up, take a look in our master bedroom. The top pictures show the room with roman shades that covered one whole pane height, or almost half of the upper window. The bottom photo is taken around the same time of day with new shades hung much higher. The amount of light increased in the room is dramatic!
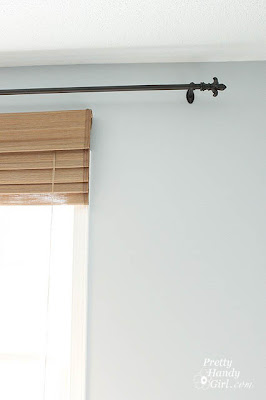
As you can see below, I hung the shades above the window, and they only overlap the window by about 3-4″.


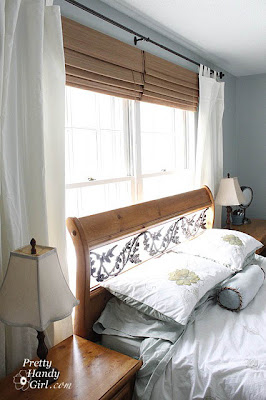
I also added curtains to the windows, but the rod extends far enough to the sides that the curtain doesn’t cover the window.
When opened, they only slightly cover the window casing.
What you saw above is akin to cheating the size of your window. If you install the blinds  and hang the curtains  outside the window, it makes your windows appear larger than they are.
Now, I’d like to bring in a professional interior designer so she can show you some of the rooms she has redesigned to maximize the amount of light coming into the windows.
Introducing Caitlin Campbell from Symmetry Designs in San Jose, CA:
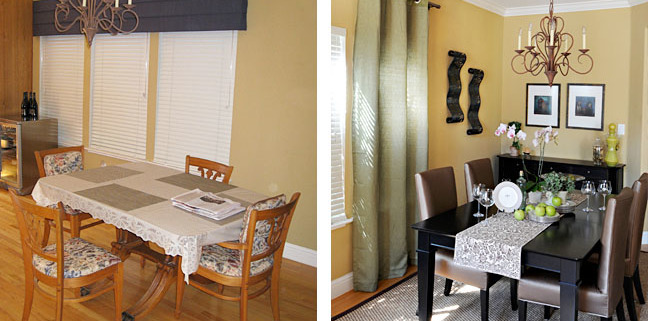
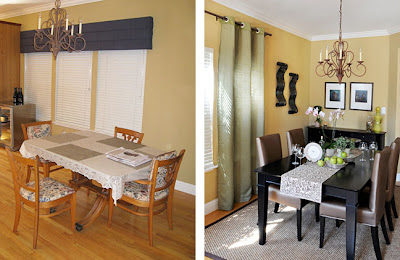
The photo below is from her portfolio. Believe it or not, the two pictures are from the same dining room. The photo on the left is the before picture. And the photo on the right shows the room with the bulky valance removed and curtains hung on the outside of the windows. Even with the new dark dining set, the room has a much brighter feel.
photo courtesy of Symmetry Designs
This living room that Caitlin designed, was a bit drab and dark
(even with an exposed glass door).
photo courtesy of Symmetry Designs
But, after removing the valance and opening the mini-blinds, this room beckons us to enter and enjoy. Look at all that natural light flooding in.

I understand that we all need privacy sometimes. So, feel free to draw your curtains or blinds at night. But, I beg of you, please open them every morning! Invite in a little sunshine to brighten your day. And find yourself falling in love with your home.

Disclosure: Those of you that know me, know that Caitlin is my sister, but she REALLY is a talented interior designer. Besides if I told you she was my sister from the get go you wouldn’t have paid attention to her fantastic room makeovers. But seriously, she is NCIDQ Certified and an Industry Member of ASID. So, if you live in the San Jose, CA and need some expert design advice, look her up!

A few products you might be interested in (commission based links):

Leaf Curtain Rod - Wrought Iron Leaf Curtain Rod – Wrought Iron
~Allow 3-4 weeks. Cannot express ship or ship to Alaska or Canada.


Acorn & Leaf Curtain Rod Acorn & Leaf Curtain Rod
Wrought iron acorn and leaf curtain rod. Available in three different sizes; 1/2″ Diameter. Made in the U.S.A. Curtain brackets sold separately (see link below). ~Allow 3-4 weeks. Cannot express ship or ship to Alaska or Canada.


120x60 Spring Summer 2011 New Collection

Welcome back. Many of you may participate or read a weekly WIWW (What I Wear Wednesday). Those women in blogland, they really know how to put an outfit together. I am seriously jealous because sometimes I feel wardrobe challenged. Maybe you can help me. Here is what I wore Wednesday:

Ladies, if you want to copy my looks, here is the breakdown:
1. Hooded Knit T-shirt Top bought 15 yrs. ago at Gap
2. Gap Jeans bought about 5 yrs. ago. Those are authentic knee rips!
3. Dansko Clogs with the heels worn down to a hollow core.
4. Latex gloves (the better to paint with.)

This Pretty Handy Girl can’t wear her good duds on a painting day (although I’ve been known to do that occasionally.)

Painting is a nice segue into the first secret for “Falling in Love with Your Home”. Our home started out dark and dreary on the inside. Most of the rooms had dark wall colors, but the biggest problem was the dingy white popcorn ceilings. Those suckers are light sponges! They absorb the natural light and keep it all to themselves.

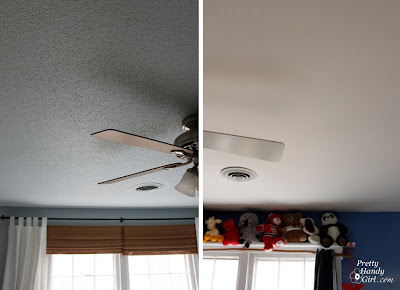
Here is a good example of the light difference between a smooth ceiling and a textured ceiling:

Both pictures were taken minutes apart in adjoining rooms that have the same south facing windows. The rooms are identical in size. The room on the left (master bedroom) has popcorn ceilings and light blue walls. If you look closely, you can see how each pock has a shadow. The texture effectively stops the light from being reflected. Meanwhile the ceiling on the right is smooth but the walls are a dark blue (son’s room). Despite the darker walls, the ceiling appears lighter because the light is reflected due to the lack of texture.

As you can see, we are able to lighten our rooms about 10 – 15% by scraping and painting just the ceilings! (Imagine what painting the walls a lighter color will do!)

Two more benefits of a smooth ceiling:

  • A smooth ceiling will visually raise the ceiling, while the textured ceiling draws your focus to the texture and makes the ceiling feel lower. You’ll have to trust me on this one.
  • And, a smooth ceiling will not collect as much dust. I don’t have to tell you how important that is for allergy sufferers (ahhh- choo! I’m allergic to dust mites.)

In summary, why do you want a bright and smooth ceiling? Because, it will reflect more light and natural light is a mood booster.  And during the seemingly never-ending winter months, we all need more sunlight to avoid mild depression or gloom. Translated: Better mood = Loving Your Room!

This is how we do it:

We have the popcorn (textured) ceilings scraped. Notice how I said, “Have” them scraped. I am handy – as you know – but there are certain tasks that I won’t do. I successfully scraped the ceiling in our pantry, but my neck was in pain for a week afterwards. I vowed never again. It is also a good idea to pay a professional if you live in an older home. Textured ceilings may contain asbestos. (Thank goodness ours didn’t.)

Now, even if you don’t have textured ceilings, you likely can still benefit from adding a fresh coat of paint. Ceilings are usually neglected for years. They are often painted with a builder’s grade white paint. The builder’s white is a dingy off white color compared to an Ultra Bright Flat White. It also doesn’t age as well and will tend to yellow or dull over the years. Here is an approximation of how a builder’s white might look next to an ultra bright white color:

AND, let’s say you really don’t want to mess with those texture ceilings, if you buy a thick nap roller and repaint the ceiling with an Ultra Bright White, you will still notice a big difference. (One word of caution when painting textured ceilings. Paint over one spot and move on. If you go back over that spot while it is still wet it can pull the texture down.)

Tutorial for painting ceilings like a pro

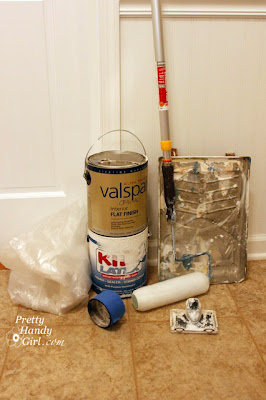
Materials:

  • Valspar Flat Ultra Bright White Latex Paint
    (this is the brightest white we have found. Valspar is sold only at Lowe’s)
  • Latex Primer
  • Paint tray
  • Paint roller
  • Roller extension rod
  • Edger
  • ScotchBlue Painters tape
  • Tarp
  • Fine grit sanding block
  • Car Wash sized sponge and bucket
  • medium size flat artist’s brush

Begin by covering every bare inch of floor with plastic or thick canvas tarps. And cover any furniture left in the room (although you should try to remove everything from a room when you paint, it is just easier that way, trust me.)

Remove blades on a ceiling fan, simply unscrew the arms from the motor:

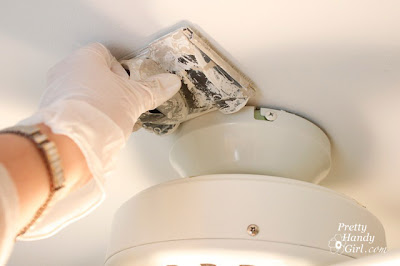
Then cover your light fixture with a plastic bag and painter’s tape.

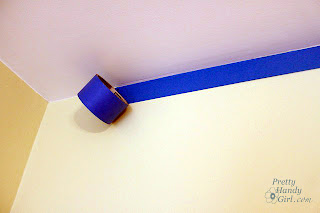
Next, apply painter’s tape around the top of the walls of your room. If you are going to re-paint your walls after the ceilings, you can skip this step.

Start with the primer (a must for newly scraped ceilings, but not necessary for previously painted smooth ceilings).

1. Use your edger around the perimeter of your room. I like this handy-dandy edger that has a hole for the extension pole (especially helpful if you have high ceilings or neck issues.)

2. After the perimeter of the ceiling is done, edge around any light fixtures or vents.

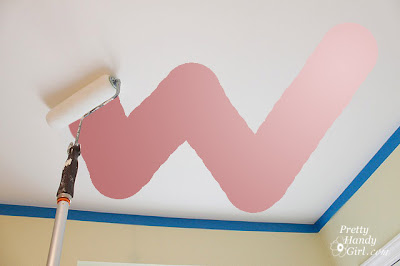
3. Reach for your roller. I like to work in 5′ sections. Start by rolling out a letter “W”. Then roll back and forth, up and down and in random directions until you have that section of ceiling covered.

This will insure that you don’t have racing stripes on your ceiling.

4. Continue working next to the section you just finished. Try to work into the previous section while the paint is still wet. Otherwise, let that section dry before trying to roll into tacky half-dry paint.

5. Allow the primer to dry, then lightly sand your ceiling to remove any specks that got into the paint. Wipe the ceiling with a damp sponge.

Now repeat steps 1-5 using the ultra bright white paint.

Let your ceiling dry and then add a second coat of the ultra bright white (yes, definitely use two coats to leave your ceiling looking like it was painted by a pro! Don’t skimp.)

When you are done, remove the painter’s tape and pull out a small flat artists brush.

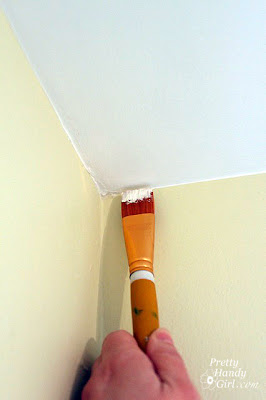
Pour some wall color paint into a small cup (I like to keep spare paint for each room in small jelly containers or jars. That way if one of my boys (adult and child alike) should happen to mar a wall, I can fix it in a jiffy.) Use the flat brush to create a smooth line at the top of your wall. Then finish by touching up any ceiling spots that were missed.

Take a look at the difference in our office! The top picture shows the room right after the ceiling was scraped. During the day!

And this next picture was taken of the same windows (different angle) at night!

Wow, brighten my world! View more pictures of this room HERE.

Okay, so I really like the ultra bright smooth white ceilings, but I did come across this gorgeous ceiling over at Not Just a Housewife, that would also make you swoon over your room if you were to try it. Check out Stacy’s tutorial HERE.

P.s. If you are renting, please don’t despair. I will have some tips that don’t involve painting your home.
I leave you with a glimpse of hope for those of you snowed in this week:

Daffodils Popping Through the Ground
Daphne Buds Getting Ready to Sprout

I just took those pictures yesterday, February 2nd! I live in Raleigh, NC, so thankfully spring is on its way. (Don’t hate me.)


5-Piece Nonstick Coated Paint Tray Set

00500 - Premium Paint Edger 00500 – Premium Paint Edger[635870] UPC: 022384005006 10L x 7.63W x 9.5H 0.2 LB 0.42 Cubes


Hooray, February is here. This is the month of love (and chocolate!!! But, I digress.)

I have a funny story to tell you about our home. We actually fell in love with our house before we owned it.

This story starts during a torrential downpour in 2001. We were driving around with our realtor looking at homes in Raleigh. The rainstorm turned ugly and our realtor pulled into the first neighborhood he could find. As he drove carefully down the tree lined streets, we saw a For Sale sign ahead.  As we drove closer, we saw a handsome two story home on a hill.

The landscaping was well manicured and there was an adorable little side porch.

Our realtor called the office to find out the details on the home. It turns out that the owners were asking 5K over our maximum search. The interior was equally well cared for, so the next day we put an offer on the house and moved in within 2 months.
We didn’t realize how lucky we were to have found this house on a perfect little cul-de-sac. As the months progressed, we got to know all our neighbors on the street. Each and every one of them were warm and welcoming and oozed southern charm.

As the years went by we welcomed our first son into our house and then a second.

The home office, that we had renovated and installed built-in cabinets and a window seat into, became the nursery.

Feeling the pinch of squeezing all four of us, a dog and a home business into a three bedroom house, we began to look at other homes in the neighborhood, but dreaded having to move away from our location (did I mention how much we love our street?)

None of the other houses lived up to our picky needs (again, loved our street!)

Pretty Handsome Guy and I talked between ourselves about the one house on the street that we would love to live in. It was the charming dutch colonial house across the street.

He said, “Heaven forbid that our neighbors would ever move, but if they did we’d have to buy their house.”

And one day that is exactly what happened. It was such a bittersweet moment because we really adored our neighbors and their children. And we didn’t want them to move away. But, we basically said, “Tell us how much you want for your house.”

Three months later, we literally backed out of our old driveway and straight into our new one! (Sadly we didn’t win the Guiness Book’s shortest move on record.)

Our new home needed some updating and a little TLC, but we still loved it! It fits our style (old, casual, comfortable.)

We have slowly transformed one room at a time to fit our personality and allow us to “love” the inside of our house as much as we love the outside.

Office Before

Office After

Living Room Before

Living Room After

Guest Room Before

Living Room After

This month I’ll be sharing some ideas for turning your house into your dream home. Plus, I have a special giveaway announcement as well. But, you’ll just have to be patient.

I hope you’ll come back for some a-moré.