Crochet Market Bag

21 Ways to Make and Decorate Tote Bags | Pretty Handy Girl

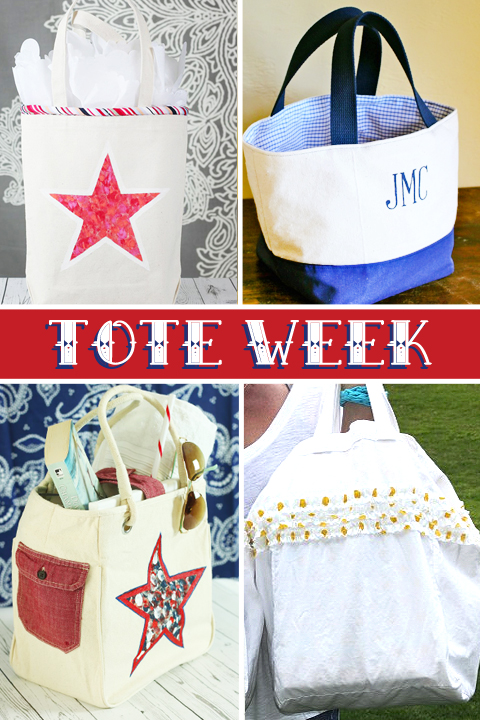
Have you been enjoying all of the awesome tote bag tutorials this week? Today we’ve rounded up even more sewing tutorials, decorating ideas, and an amazing crocheted tote bag. Let’s talk about 21 ways to Make and Decorate Totebags.

How To Sew Totebags:

canvas-tote phg

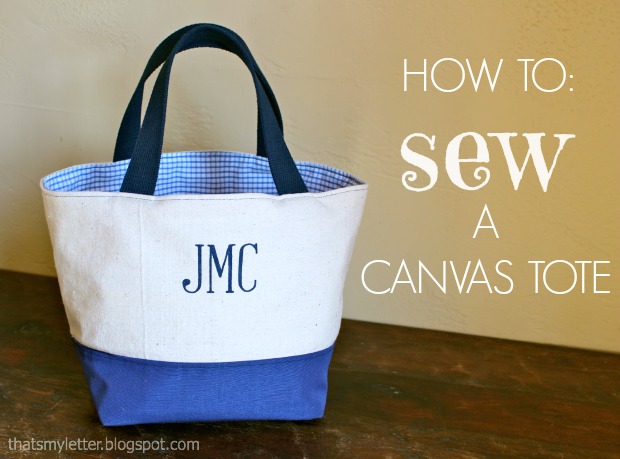
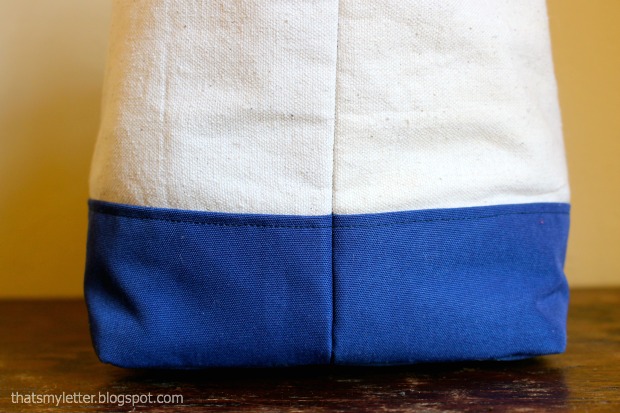
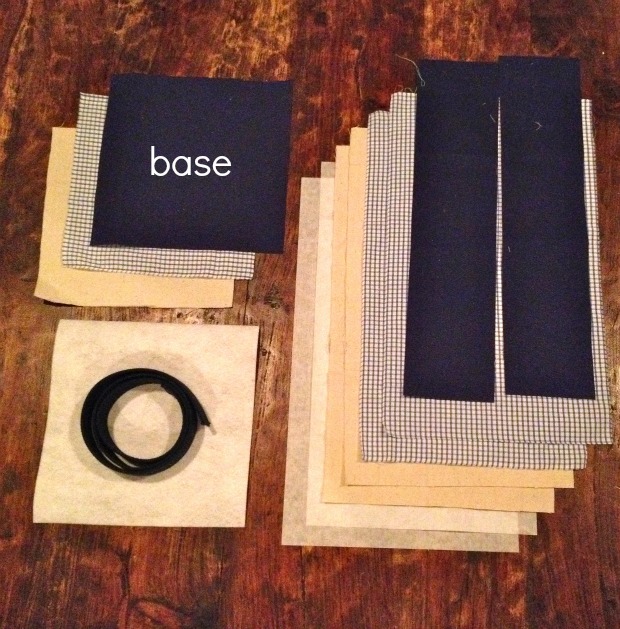
Who can resist an adorable lined tote bag with a monogram. Can you believe this beauty is all DIY! Jaime of That’s My Letter whipped up a classic monogrammed canvas tote.

Quick-Easy-Tote-Bag

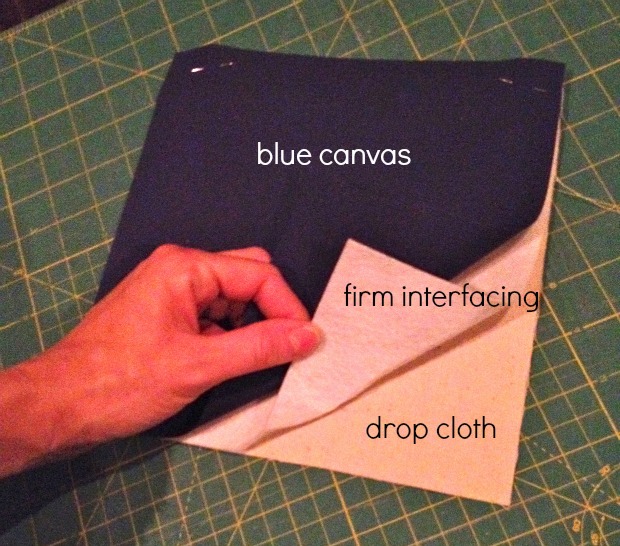
Drop cloths aren’t just for catching paint anymore! Heather of The Sewing Loft shows how to make an Easy Canvas Tote Bag out of painter drop cloths!

Fox book bag

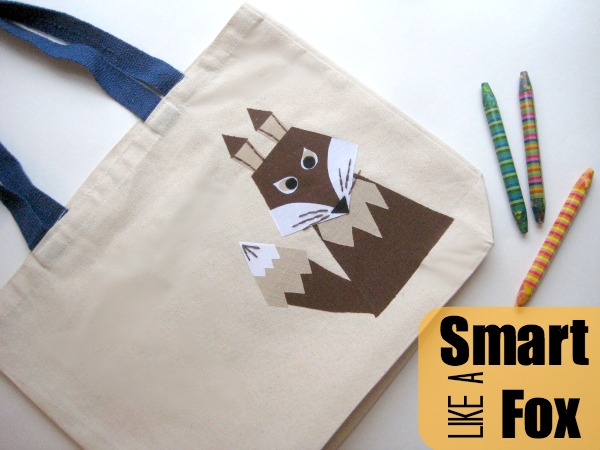
What does the fox say? He’d say he’s head over heels in love with this tote bag. Perfect for back to school, Heather shows how to sew or iron on this fox applique with sweet embroidery details.

reversible-reusable-tote-tutorial

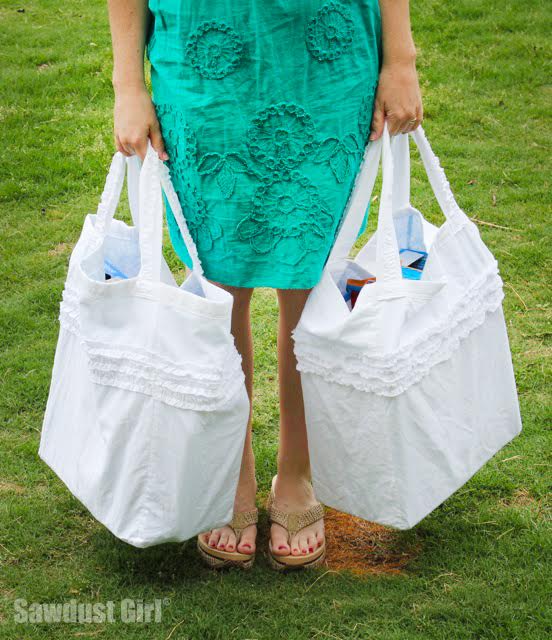
Sandra from Sawdust Girl is famous for her amazing woodworking so it should be no surprise that she has a fabulous tutorial for Reversible Reusable Ruffled Grocery Bags.

how-to-make-a-piped-edge-totebag

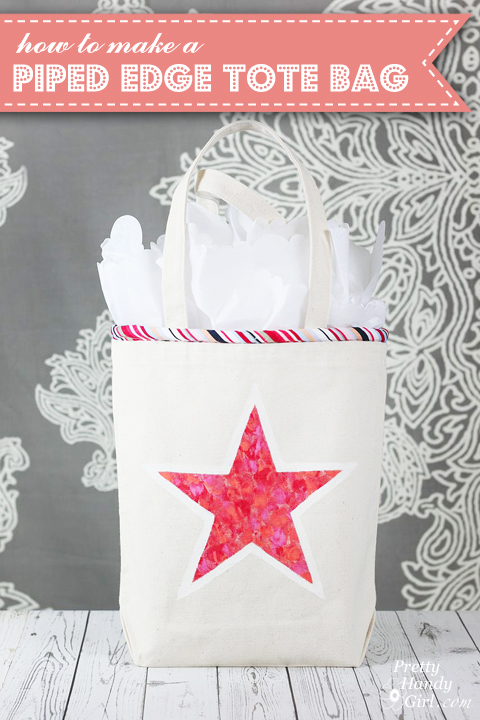
It’s okay to cheat a little. Grab a store bought tote and dress it up that plain tote bag with piping. This tutorial also shows a cheat for the non-sewer!

decorate tote with old shirt

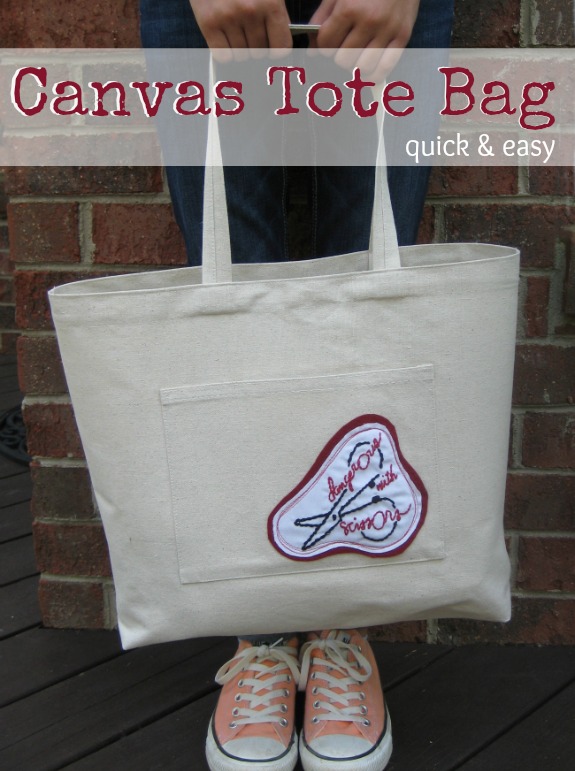
Old shirt + another store bought tote = Adorable! Customizing a Totebag With an Old Shirt in an hour.
This goes straight on my Christmas to-do list!

T-Shirt-to-Library-Tote-Bag

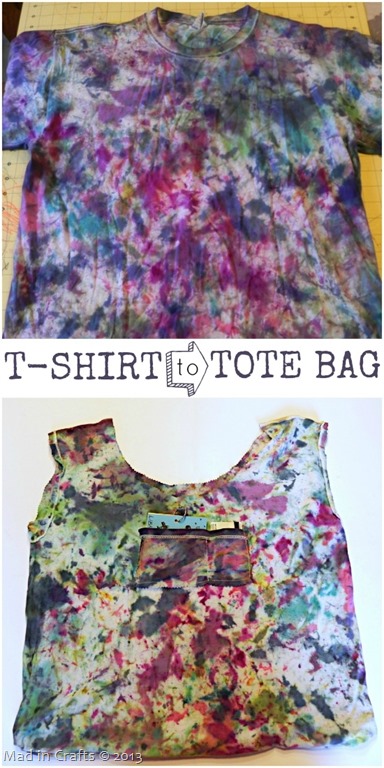
I know, it’s hard to discard that favorite t-shirt. Now you don’t have to! Repurpose that favorite tee into a library totebag? Jessica from Mad in Crafts shares how easy it is in her step-by-step tutorial.

tote bag from tee shirt

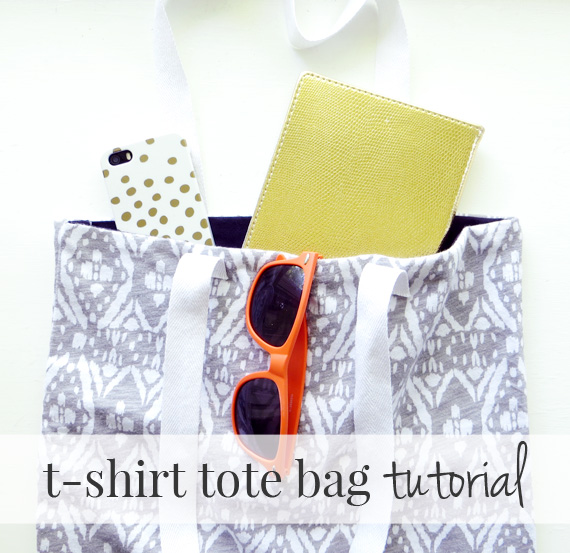
What’s better than repurposing one t-shirt? Of course, recycling two shirts! On Creative Green Living, Carissa shares another t-shirt-to-totebag tutorial using two shirts. One makes a stylish liner.

PostBreakblue

No-Sew Totebags: Read more

How to Sew a Custom Tote

Tote Week | Pretty Handy Girl

Hey guys! Do you know what today is? It’s the beginning of Tote Week! What, you had no idea? Tote Week here on Pretty Handy Girl is five days devoted to Tote Bags! Learn how to sew adorable tote bags and how to customize store bought tote bags.

If you’re just joining in here’s the line up:

To start us off, Jaime is here to give you the basic sewing tutorial to make your own lined (and monogrammed) tote bag. Jaime is from That’s My Letter, a blog filled with DIY Tutorials. Today, she’s showing you How to Sew a Custom Canvas Tote complete with painted monogram:

canvas tote

This tote makes a great everyday bag or purse, just big enough for all the important stuff but not too bulky.  The finished size is 16″w x 9″h x 8″ square at the base, and the handles extend about 6″ in height.

canvas tote 13

The tote is fully lined and includes an interior zippered pocket.  The zipper is easy as pie I promise!  I’ll show you how down below.

You can add any monogram or name to personalize the tote.  Then you’ll be making canvas totes as gifts for all your friends.

canvas tote 3

The square base makes for a nice wide tote and the canvas is super durable:

canvas tote 2

Materials:

  • drop cloth canvas (1 yard)
  • blue canvas (1/2 yard outdoor patio fabric Sunbrella or the like)
  • lining (1 yard)
  • medium weight fusible interfacing (1 yard)
  • firm interfacing – 9″ x 9″
  • 1 1/2″w cotton webbing (1 yard)
  • 9″ zipper
  • lightbox
  • small paintbrush
  • acrylic paint
  • sewing machine, thread to match, iron, seam ripper

Materials Cut List:

Base:

  • 1 – blue canvas 9″ x 9″
  • 1 – lining 9″ x 9″
  • 1 – drop cloth canvas 9″ x 9″
  • 1 – firm interfacing 9″ x 9″

Body:

  • 2 – drop cloth canvas 10″h x 17″l
  • 2 – med. fusible interfacing 10″ x 17″
  • 2 – lining 10″ x 17″
  • 2 – blue canvas 4″h x 17″w

Handles: 2 – 1 1/2″w cotton webbing @ 17″l

Instructions:

canvas tote fabric cuts

Step 1: Cut materials (see cut list above).

canvas tote base

Step 2: Prepare base.  Sandwich drop cloth, firm interfacing then blue canvas. Read more

Hang Stockings Without a Mantel

Hang Stockings Without a Mantel

Hello, it’s Jessica here from Decor Adventures, back this month with a simple solution for holiday decorating. These days we see all kinds of lovely homes with Christmas stockings hung beautifully from the mantel or staircase. But what if you don’t have either in your home? I’ve come up with an easy way to display stockings that you can put together in less than an hour. Here is how to hang stockings without a mantel – frame them!

Materials:

Hang Stockings Without a Mantel

  • Large empty picture frame
  • Foam board
  • Fabric
  • Chicken wire
  • Wire snips or sharp scissors
  • Gloves
  • Paint (optional)
  • S-hooks
  • Glazier’s points and tool (or a wide flat head screwdriver)
  • S hooks
  • Stockings

Instructions:

1. For this project you’ll use a large empty picture frame that doesn’t have glass. You can find them at thrift stores, craft stores, or just reuse one of your own. You can paint or stain the frame to your liking, but that is optional depending on your style.

2. Cut a piece of chicken wire one inch larger on all sides than the inside of your frame where the glass would rest. Make sure to wear gloves for this part as the wire can be sharp. Most chicken wire comes with natural lines where the wire is twisted. You can use those as your edges. If you want to spray paint the wire to blend in, that would create a nice look too.

Hang Stockings Without a Mantel

3. Place the frame front side face down on a table and insert the wire into the back of the frame. Set that aside for the moment. Read more

How to Recover a Butterfly Chair | Pretty Handy Girl

How to Recover a Butterfly Chair | Pretty Handy Girl

Happy St. Patrick’s Day! Do you have a butterfly chair that is sun-faded or has hideous fabric on it? I bet you thought it was a lost cause, right? Nope! With a sewing machine, some new fabric and a little spare time you can recover that ugly butterfly chair and have a new one. Okay, so I didn’t recover it with green fabric in honor of St. Patrick, but what could be greener than a good old upcycling project! Believe it or not, this was a much easier project than I had anticipated, so don’t get scared by the curves. You can “sew” do this! 😉

How to Recover a Butterfly Chair | Pretty Handy Girl

I stumbled upon this chair at Goodwill for $9.99. Normally I wouldn’t spend this much for a sun-faded chair, but because I was working on the school library makeover project — and we needed more comfortable seating — I bought it.  After all, we would have had to pay at least double for another comfy chair.

How to Recover a Butterfly Chair | Pretty Handy Girl

Luckily, I had some soft leftover fleece fabric that I could use to recover the chair. I wish I had measured how much I used, I think it was a little less than 2 yards.

Materials:

  • 2 yards of fabric
  • Coordinating thread
  • Pins
  • Scissors
  • Old butterfly chair + old cover

Instructions:

1. Remove the old cover from the butterfly chair frame. Lay it on top of your fabric (both right sides up.) Read more

I love making unique garden flags. My go-to material for these outdoor accessories are Dollar Tree placemats! You read that right. $1 fabric placemats! But, if you don’t live near a Dollar Tree and you have old placemats, you could upcycle them into a Valentine’s Day garden flag!

A few years ago, I made this Let it Snow flag:

Although it doesn’t seam to convince Mother Nature to bring us some white powder, it has held up nicely in the cold and rain. I’ve since set out to create a garden flag for each season. I have a Fall themed flag and a Summer flag. So, why not a Valentine’s Day flag?!

Start by collecting some supplies. Feel free to substitute what you have on hand.

Materials:

  • Dollar Store placemat
  • Ruler
  • Soap sliver (pencil or disappearing fabric marker)
  • Letter stencils (I chose a set by Martha Stewart Plaid)
  • Round paint brush
  • Tulip Fabric paint (white and black)
  • Tulip glitter fabric paint
  • Tulip glitter transfer sheets
  • Fabric scraps (red, pink and white)
  • Polyester stuffing
  • Scrap fabric, towel or rag (for ironing the glitter iron-ons)
  • White thread
  • Scissors

Begin by ironing the fabric you will be using (including the placemat). Use caution when ironing the placemat, the DollarTree ones I bought are polyester and needed a cooler iron. Read more