“It’s a Party and I’ll Paint if I Want to…Paint if I Want to… Paint if I Want To…You Would Paint Too if you had Scotch Bluuuueee!”
I think I’m going to call 3M ScotchBlue right now and suggest this as their new jingle. Kind of catchy isn’t it?!

Check out my project tutorial on revamping an old cabinet door below.

Go ahead, grab your paint and brushes — and don’t forget a roll of ScotchBlue painter’s tape!

I have been using ScotchBlue painter’s tape for a while and I really like it. I am not being paid to say this (even though they did send me a few free rolls of painter’s tape.) You’d know I like ScotchBlue tape if you have read the backlit bookcase post, painting the bamboo rug post and the painting like a pro post (where I share some tips for using ScotchBlue Painter’s Tape!)

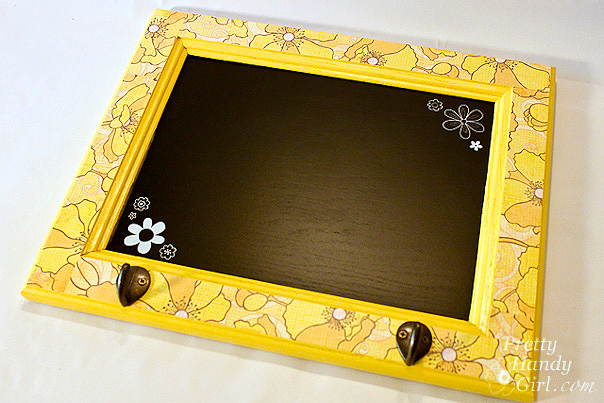
But, enough looking back, I want to share with you how to make something out of a disgustingly filthy grease covered discarded cabinet door. So, let’s hop to it! While building my mudroom bench, I took off the doors and kept them in the hopes of being able to use them another day. I’m working on a new bench for my Habitat ReStore demonstration, so I have more cabinet doors now! I devised a plan to reuse the doors in a creative way, a way that would be fun and yet help us keep track of our comings and goings. Meet my cabinet door turned into a chalkboard message board with hooks:

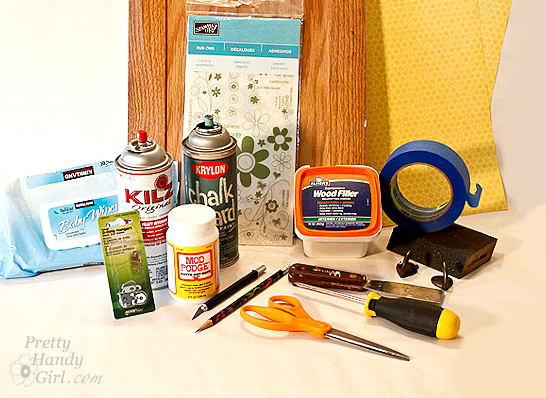
Materials:

(I’ve included affiliate links for your convenience. I earn a small percentage from a purchase using these links. There is no additional cost to you. You can read more about affiliate links here.)

Instructions:

Clean the doors! If you have a cabinet that has finished it’s first life as a kitchen cabinet, and has so much grease on it that you could grease a pig…well, you need to clean it off. I experimented with several different techniques (GooGone, Dawn Detergent, Shakelee DeGreaser Spray, and Ammonia), but the one that worked best was inexpensive ammonia mixed with hot water.
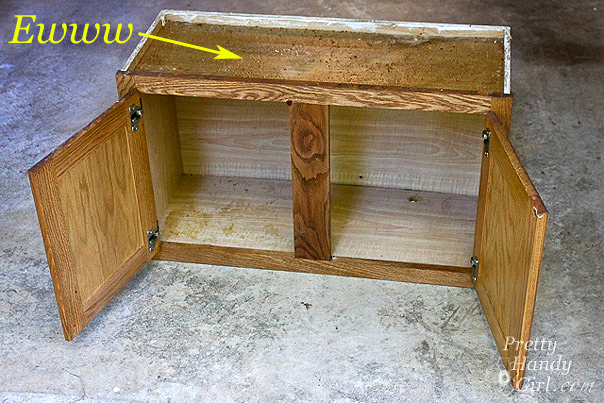
 

I saturated the cabinet with the ammonia mixture. Let it sit for a few minutes and voila! The grease came off like butter (no pun intended.)
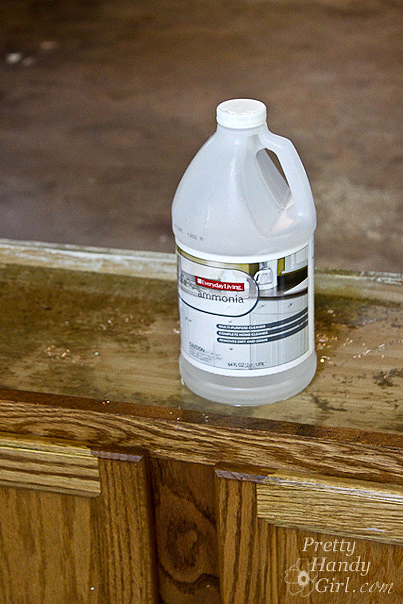
 

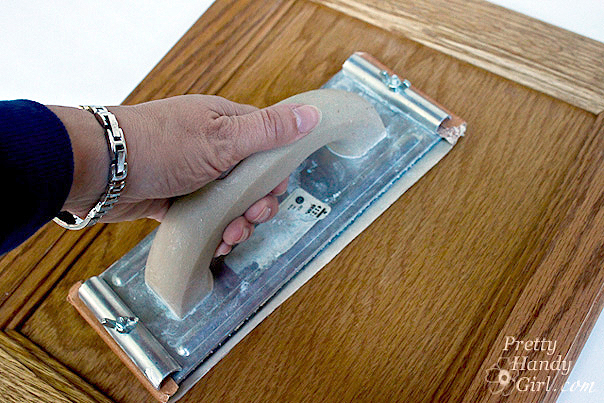
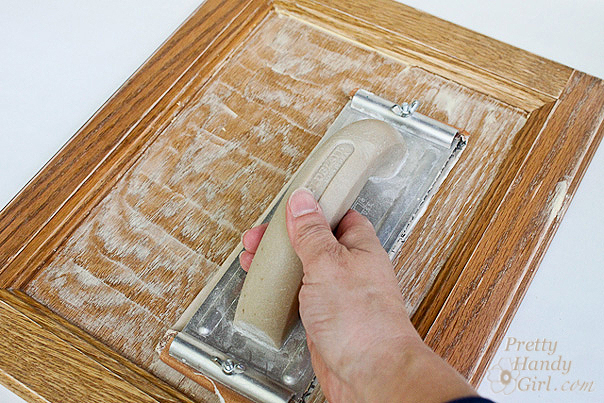
Dry the cabinets and gently sand all the surfaces to rough them up slightly. (Don’t rough ’em up too much boys, we need him to be alive. LOL! Spoken like a true Western character.)


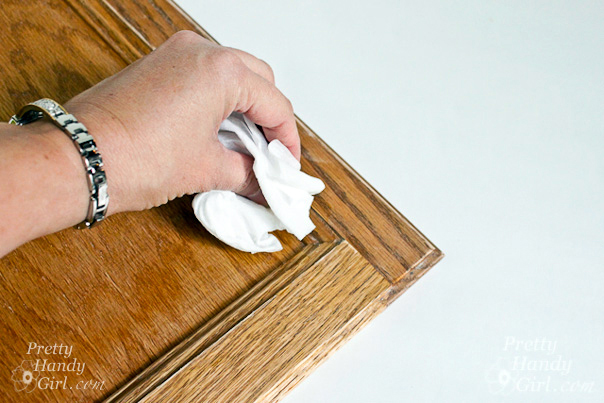
Wipe off the door thoroughly with a damp baby wipe.


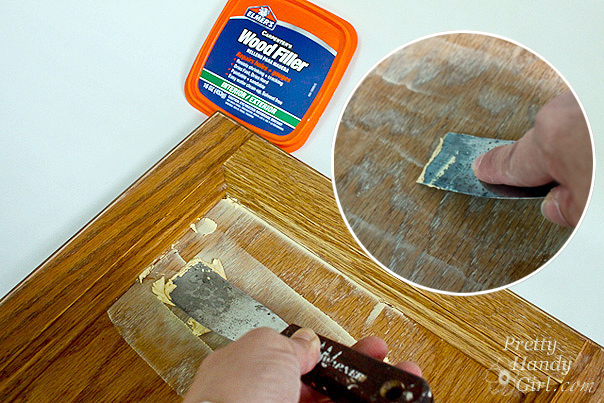
Use wood putty to fill in the wood grain on the middle panel of the cabinet. (You could also fill in the cracks on the frame of the cabinet too, but I have other plans for the frame.)


Let the putty dry for about 10 minutes. Sand the panel until it is smooth.


Wipe off the cabinet door again. Be sure to get all the sawdust off.

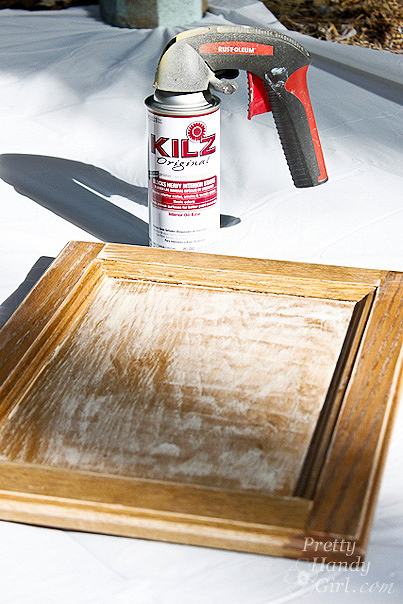
Spray your cabinet door with spray primer. One coat should be enough to cover the door. It helps to elevate the cabinet with a block or two underneath so it doesn’t stick to your drop cloth.


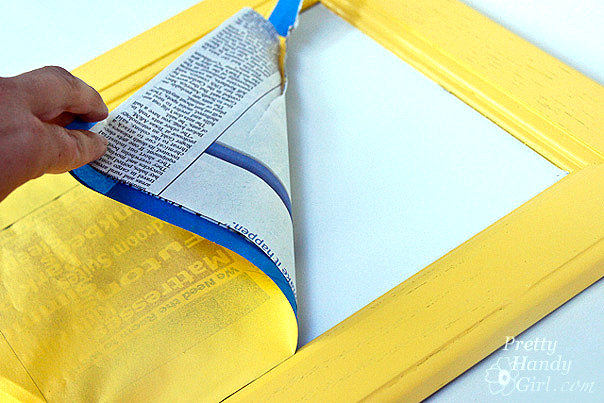
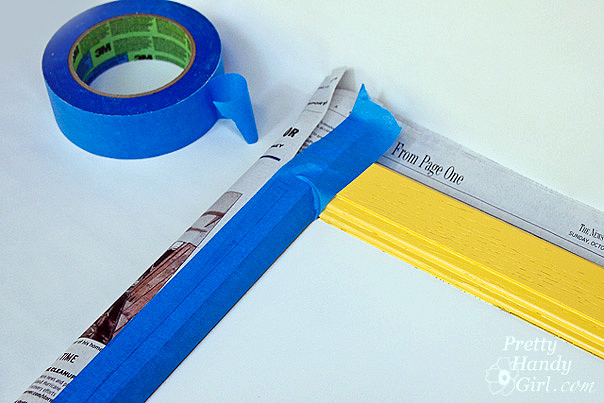
Mask off the middle of your door with newspaper and ScotchBlue Painter’s Tape. Press the edges down firmly by running a finger along the edge. (If your cabinet door is very textured, you can seal the edges by brushing matte medium where the tape meets the door.


Spray the frame with 2 even coats of the summer squash yellow color (allowing the paint to dry between coats.)


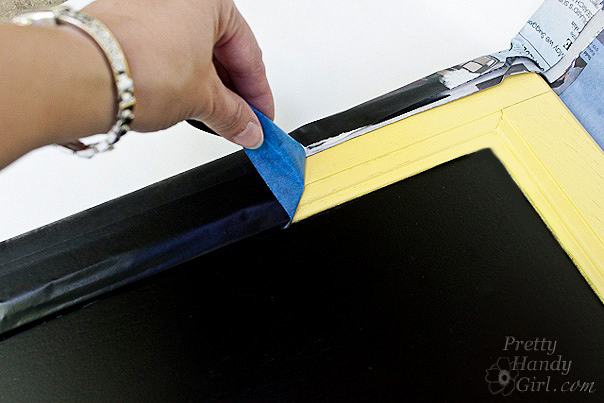
Remove the mask, now ooo and aaaa over that clean edge! Give the paint about an hour to cure before the next step.


Wrap newspaper around the back of the cabinet door and fold the edges up. Use ScotchBlue painter’s tape to tape the edges of the frame off (cover all the yellow with tape or newspaper.)


Spray the inside panel with 2-3 even coats of the chalkboard paint. Let it dry throughly before you remove the tape and newspaper mask.


It is starting to look rather purrrrdy, ya think?! Feel free to stop here and say that you are done…
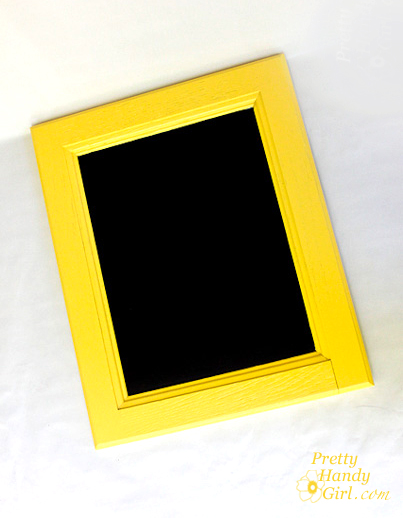
 

…or if you are a perfectionist (like me), you will want to cover the woodgrain on the frame with scrapbook paper.
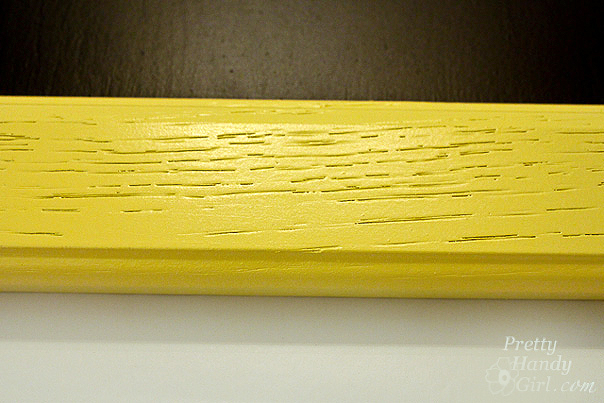
 

Simply measure your border and cut scrapbook sheets to that width. It is okay if your sheets aren’t long enough to fit on one length, you can tile them.
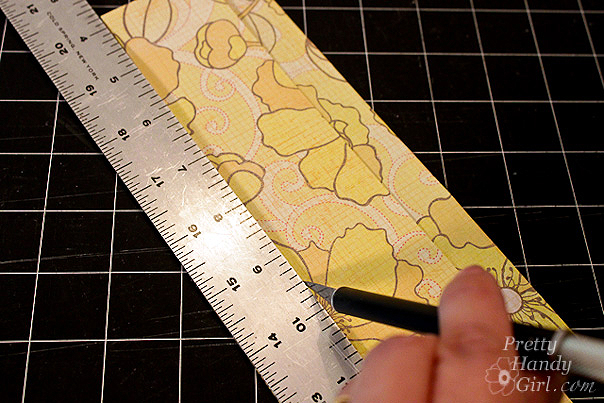
 

Brush one layer of mod podge onto the frame then lay the scrapbook paper on top of the mod podge. Press out all the air bubbles. Let the mod podge/paper dry for a few minutes.


Then brush 1-2 coats of the mod podge on top of the scrapbook paper borders to seal the paper.


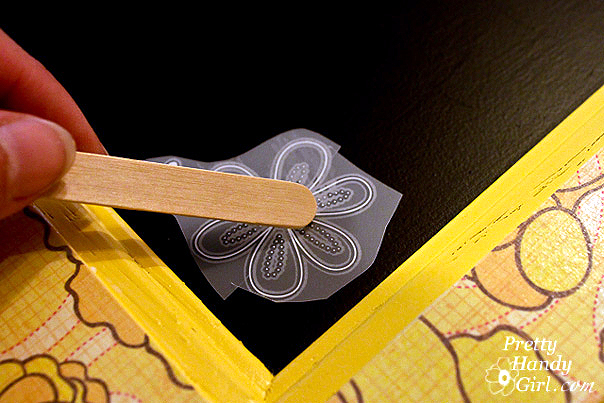
If you want to embellish your chalkboard frame, you can rub on transfer decals (or paint some decorations using white acrylic paint.)


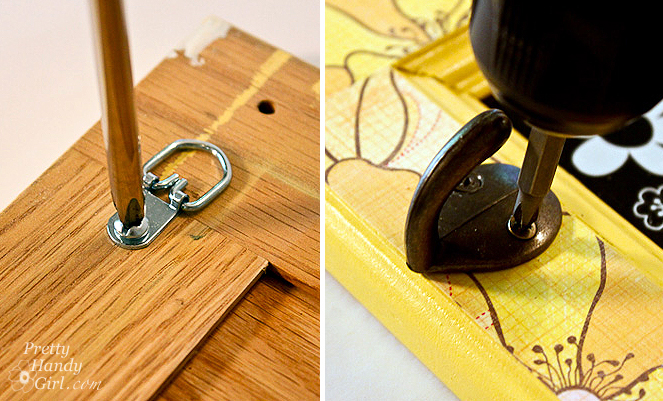
To make your chalkboard frame more functional, add 2 D-rings on either side of the back for hanging purposes. Then add some garment hooks to the front.


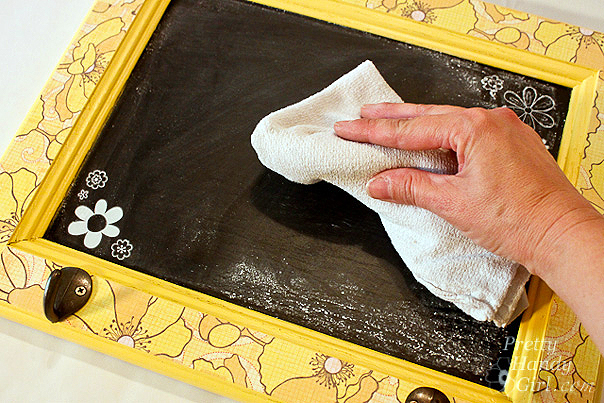
Don’t forget to season your chalkboard. (I prefer Old Bay seasoning…just kidding! I always wanted to say that.) Rub a piece of chalk on its side all over the surface and then wipe it off with a dry rag.


And that concludes the tutorial. Don’t you think the results are sweet! Especially because it is made from something that would have otherwise been discarded.


I envision a wall with several of these chalkboard frames lined up, one per family member. That way a message can be written to each person. I guess I better get busy and make 3 more.


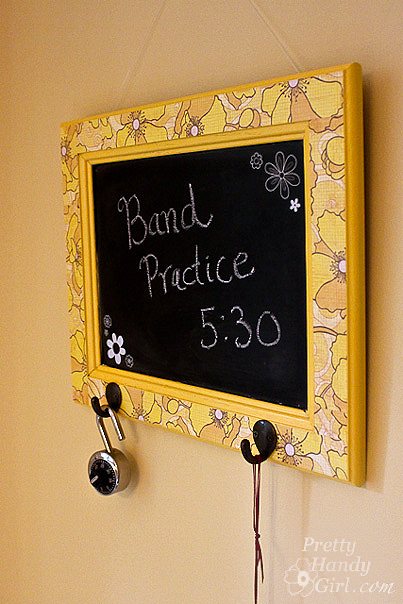
I love how the hooks add additional storage! Be sure to use two picture hangers (one for each D-ring hook.) If you have good eyesight you might have noticed my fishing line that is hanging the cabinet above. This was for photography purposes only. Unless you want your frame to rip the drywall and land on the floor the first time your child wants to hang something heavy on the hooks, do as I say, not as I do.
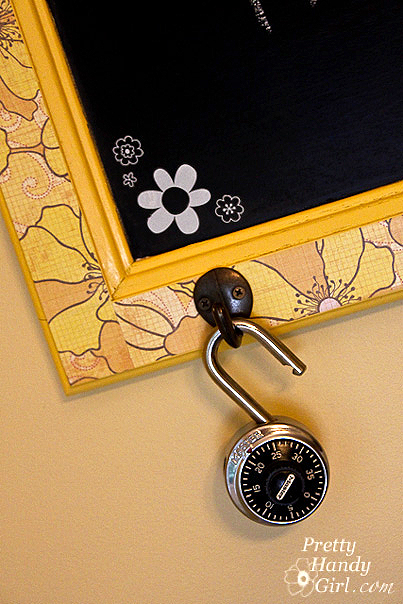
 

Awww, isn’t she just a perfect little slice of sunshine on a blank wall? She makes me happy.
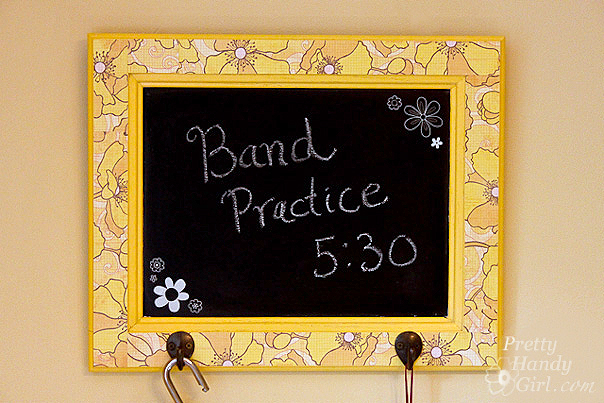


You made it through another one of my insanely long tutorials! Congrats!


Disclaimer: I was one of the bloggers chosen to host a ScotchBlue Painting Party. I was not paid or compensated for this post. I was sent a few rolls of ScotchBlue painter’s tape, but I honestly can’t remember if it was 2 or 3 or 5 because they promptly got added to the collection of ScotchBlue tapes I already own.

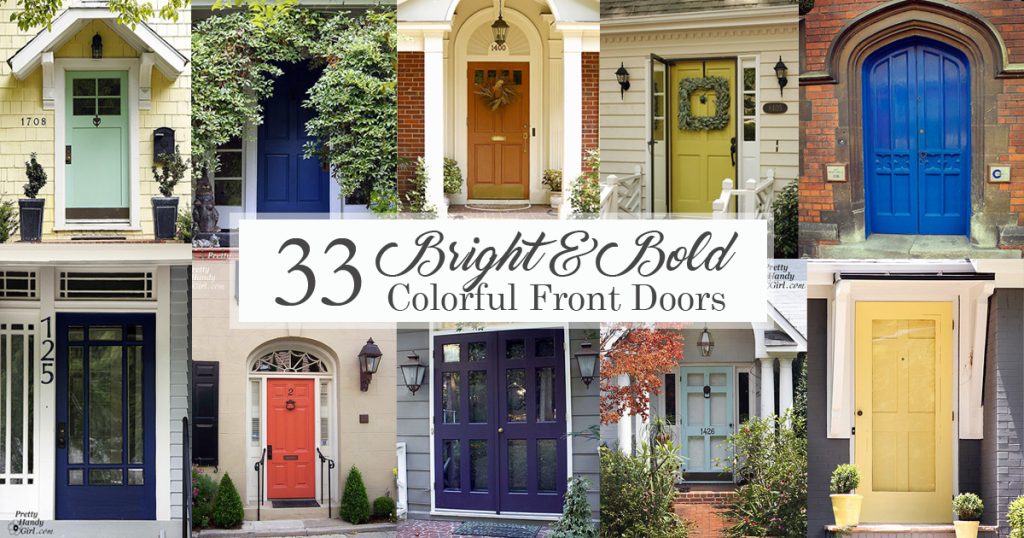
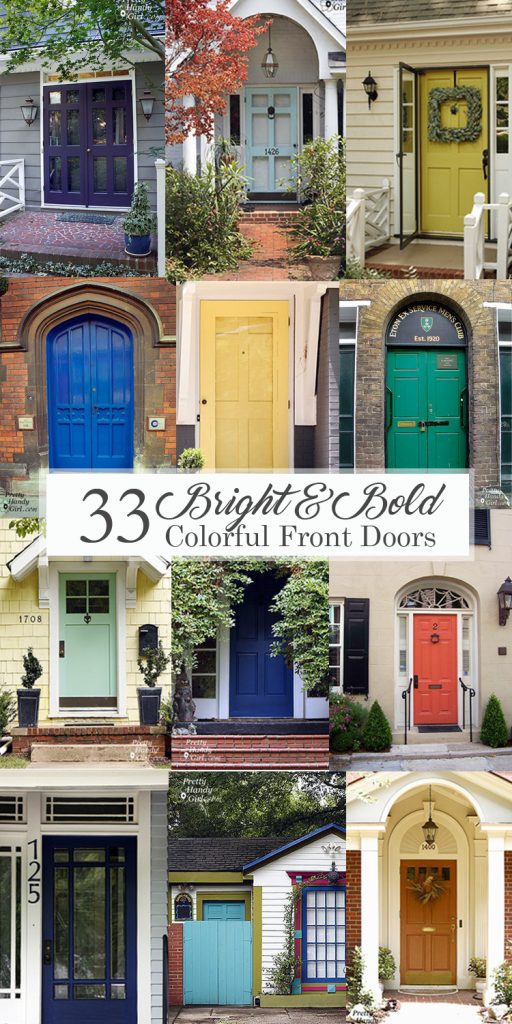
Bright and Bold Colorful Front Doors Social Media Image

Bright and Bold Colorful Front Doors Social Media Image33 Colorful Front Doors

I am drawn to homes that have unique front door colors. I crave something beyond the normal white, black or burgundy. Give me a unique color that tells me something about its occupants! I love being able to say, we’re the only house on the street with the purple doors. In my book, you need to Go Bold or Go Home! Get out that paintbrush and show your true colors. Here are 33 Bright & Bold Colorful Front Doors:

Colorful front doors

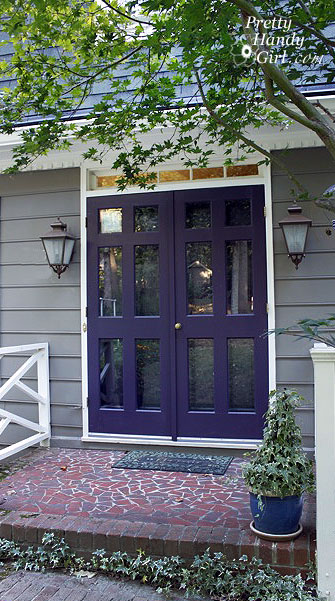
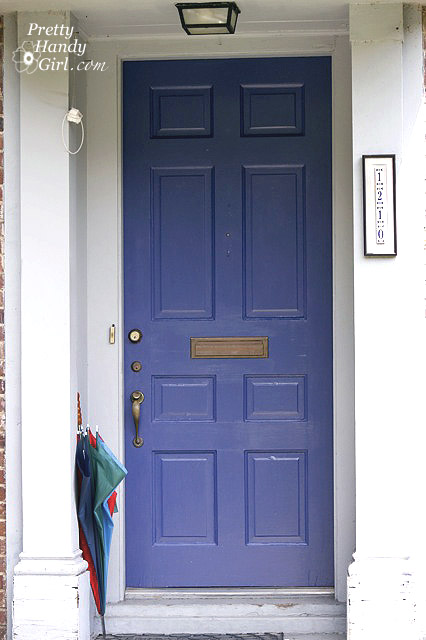
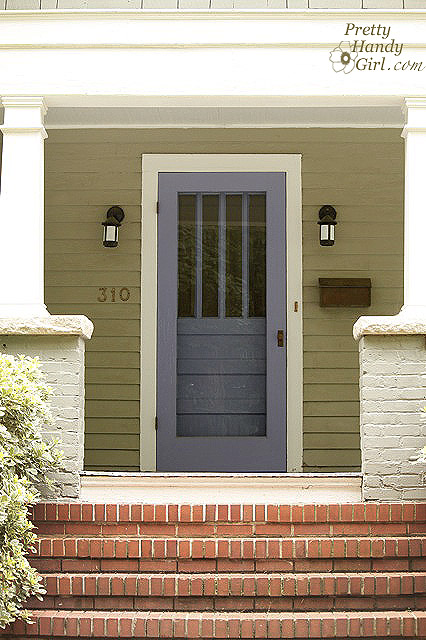
Our front door. Purple Honor 8906N by Duron

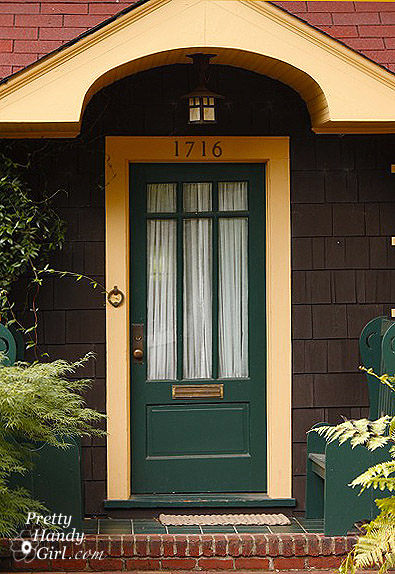
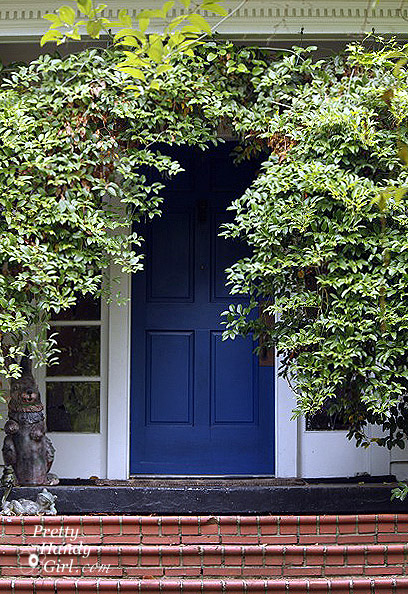
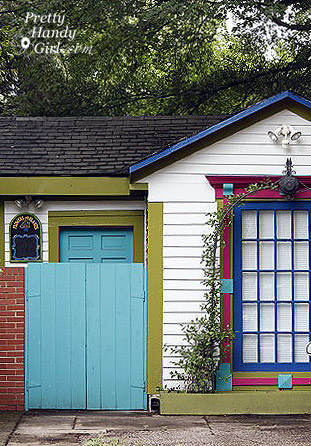
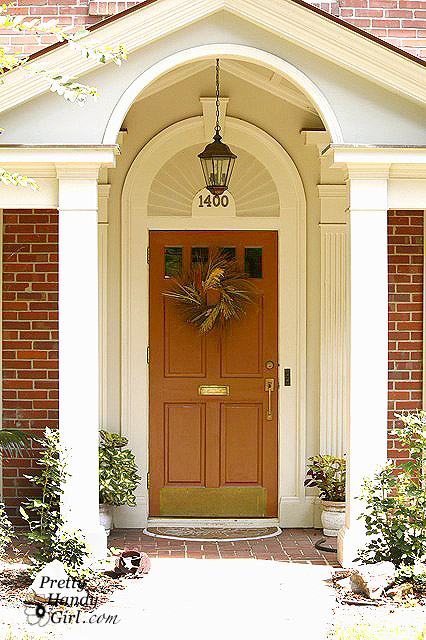
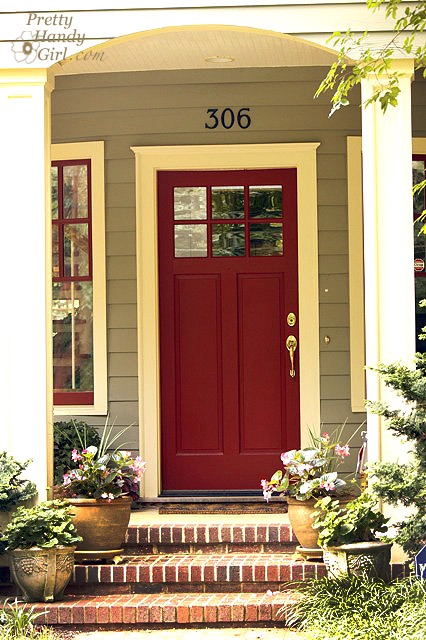
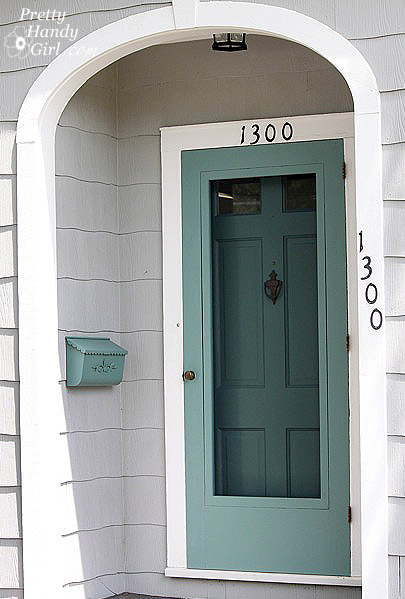
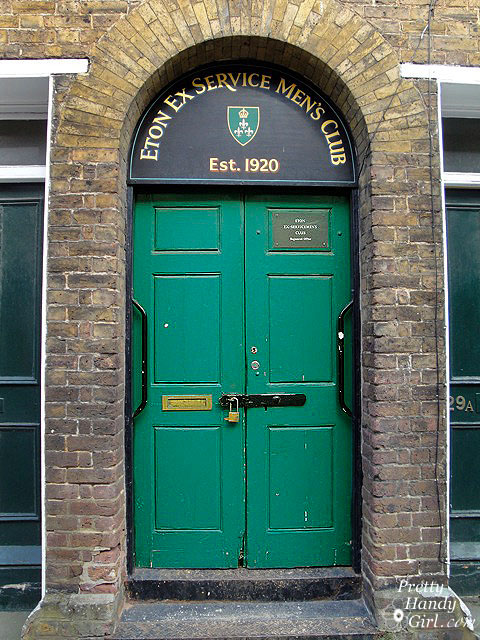
Cameron Park is one of my favorite neighborhoods in Raleigh. It is tucked between Oberlin & Hillsborough Street (two very busy roads). The houses are old and the trees are ancient. But, there seems to be an ongoing competition for the boldest and brightest front doors. I spent an hour just walking around the neighborhood snapping pictures of these louder than words portals.

I used a Sherwin Williams color deck to choose an approximate match for each door. If you are considering painting your door with any of these colors, be sure to paint a large sample on poster board and hold it up to your door first. Keep in mind, some of the colors may need two coats before you see the true color.

Colorful front doors

Colorful front doors

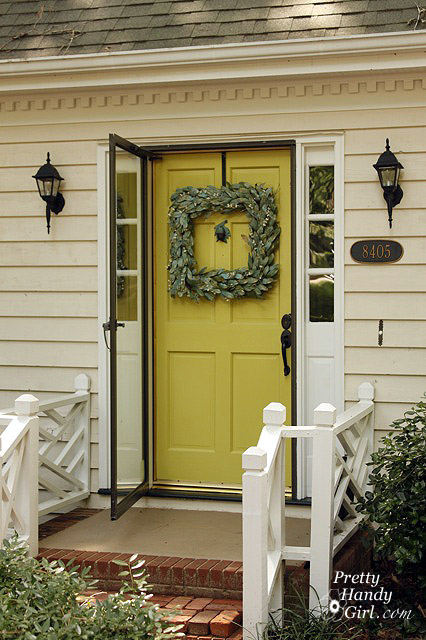
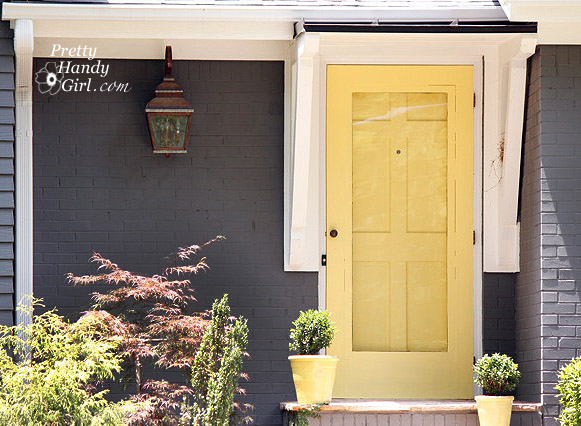
Chartreuse SW0073


Colorful front doors

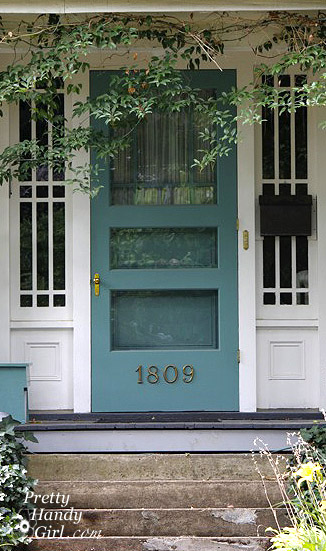
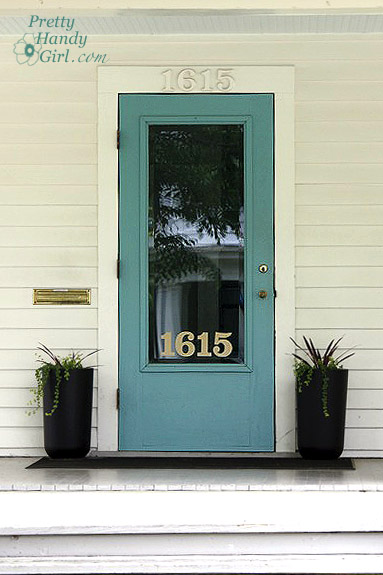
Blue Peacock SW0064


Colorful front doors

Halfway between Danube SW6803 and Dignity SW6804


Colorful front doors

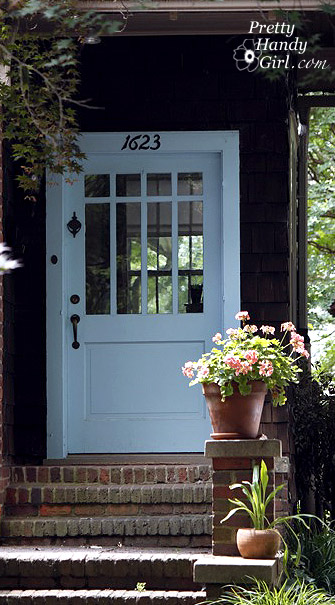
Slick Blue SW6949


Colorful front doors

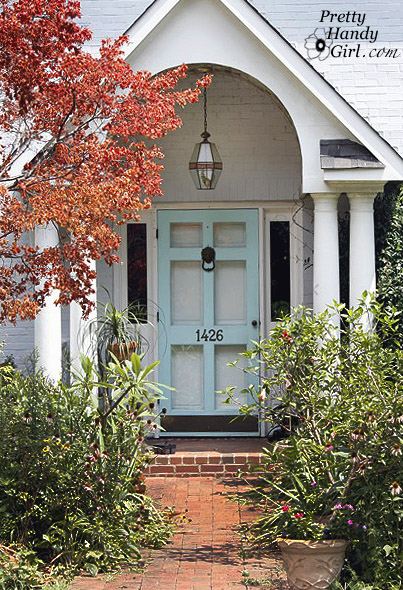
Open Seas SW6500


Colorful front doors

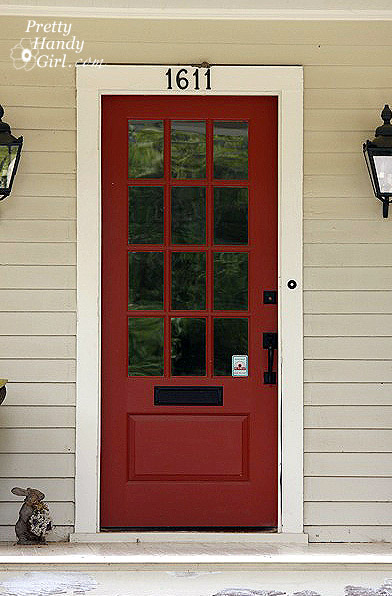
Crabby Apple SW7592


Colorful front doors

Atmospheric SW6505


Colorful front doors

Aqua Tint SW6939


Colorful front doors

Indulgent SW6969


Colorful front doors

Bee SW6683


Colorful front doors

Swimming SW6764


Colorful front doors

Fabulous Grape SW6293


Colorful front doors

Cloudless SW6786


Colorful front doors

Lobelia SW6809


Colorful front doors

Honorable Blue SW6811


Colorful front doors

Copper Pot SW7709


Colorful front doors

Sapphire SW6963


Colorful front doors

Wild Currant SW7583


Colorful front doors

Ebbtide SW6493


Colorful front doors

Lantern Yellow SW6687


Colorful front doors

Nautilus SW6780


Colorful front doors

Lei Flower SW6613

And just in case you have a lust for the international palette, these are a few doors I spotted in the UK:

Colorful front doors

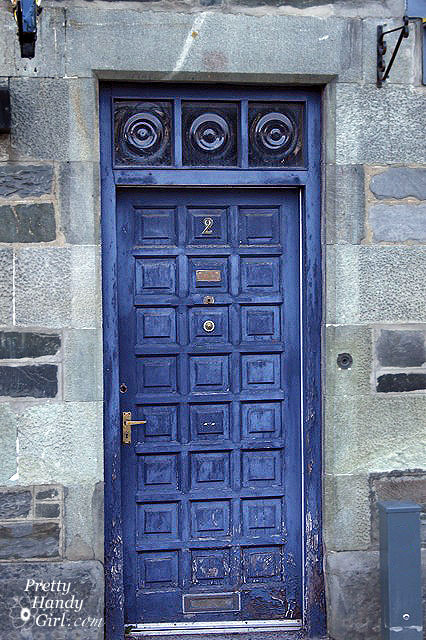
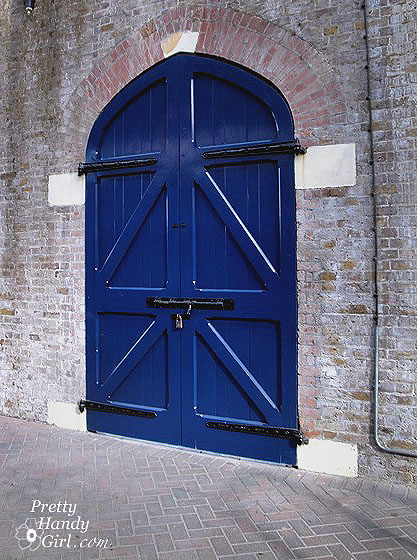
Frank Blue SW6987 – Obviously this door has a weathered look though.


Colorful front doors

Fine Wine SW6307


Colorful front doors

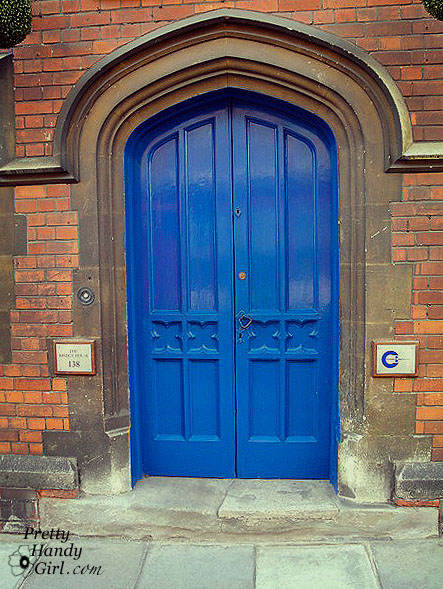
Blue Chip SW6959


Colorful front doors

Nifty Turquoise SW6941


Colorful front doors

Blue Blood SW6965


Colorful front doors

Heart Throb SW6866

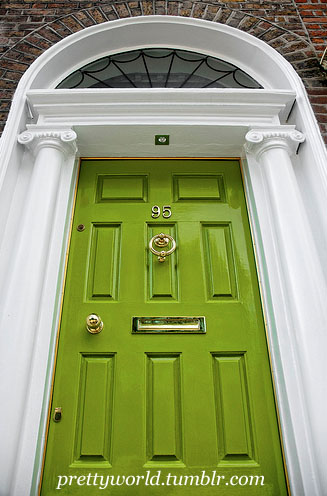
Talk about WOW factor! I found this green door online HERE.

Colorful front doors

Outrageous Green SW6922

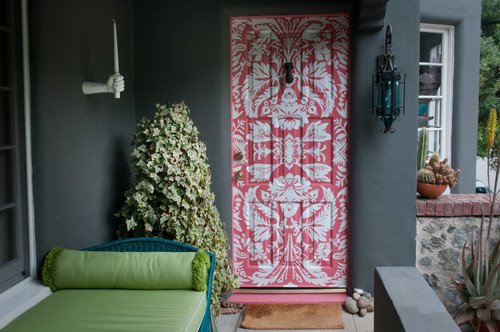
And if that isn’t enough to catch your attention, look what Allison Cosmos did to this door:

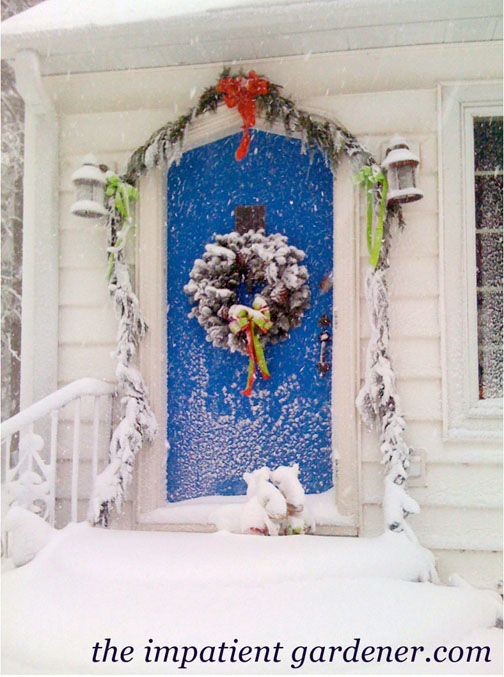
The Front Door eclectic entry

This is my all time favorite front door photo from The Impatient Gardener. Could you tell that I’m drawn to blues?

Colorful front doors

Blue Chip SW6959

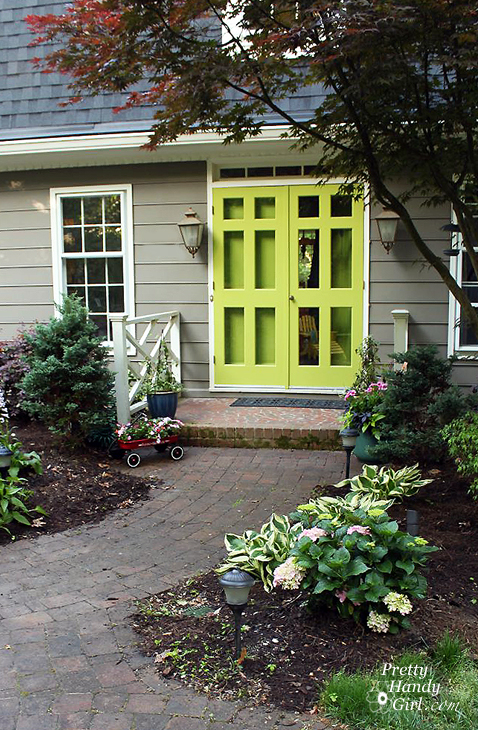
Back at the Pretty Handy Girl abode, my home’s doors were purple for over 7 years. I decided to add some vibrancy and paint the front doors an amazing green (Benjamin Moore Perennial Green). The front doors are beautiful now, but this project turned out to be the DIY project from HELL! If you ever need to strip paint off your front door, I have some tips and a tutorial for you.

Stunning Green Doors - Pretty Handy Girl green door

Friends don’t let friends have boring front doors. Be sure to pin this graphic to share these colorful inspiring doors with your friends!

Bright and Bold Colorful Front Doors

I hope you have been inspired! Now Go Bold or Go Home!

Speaking of painting, I have painted almost every room in our home now. Make that almost every room in two homes! You could say that over the years I’ve learned a few tricks of the trade. If you’re planning to paint, I recommend these favorite painting tools that I pull out for every painting job.

Colorful front doors

Removing a door’s hardware (knobs, latch assembly, hinges) is really a piece of cake if you know what you are doing.

There are several reasons you might need to remove a door from its hinges:

  1. The lock is broken and you can’t open the door.
  2. You want to replace your door.
  3. You want to replace the hinges.
  4. Your six year old was warned that if he slams his door one more time he will lose the door (true story).
  5. You want to repaint the door.

When I decided to give my downstairs half bathroom a makeover, I knew I needed to paint the door as well. The easiest way to repaint a door is to remove it from the hinges, remove all the hardware, and lay it flat on sawhorses and paint horizontally.

Before I show you how to paint the door, I will share with you how to remove the door, hinges, and the door knobs (or locksets if it has a key hole). How to remove the locksets is a helpful skill to learn should you wish to replace your door knobs, deadbolts or locksets.

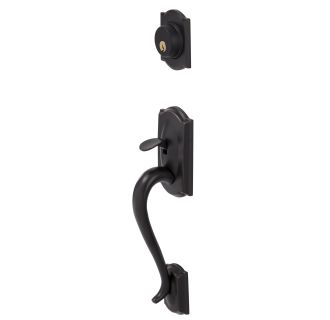
Letting you in on a little secret: Speaking of replacing locksets, did you know that if your house has several different locks you can have them rekeyed to just one key as long as they are all the same brand? When we moved into our home we had three different locks (2 Schlage and 1 Kwikset) and keys to only ONE lock! Arrggghhhh!  Unfortunately, I didn’t have the keys for either Schlage locks.) But, I really wanted to change the locks for the whole house. When I got a quote from a locksmith, I nearly passed out. $250 to get all our locks to match and to cut a few spare keys!

I thanked them and hung up. So, here is what I did. I bought one new Schlage lockset (handles and deadbolt set) for the Kwikset door. Then I took the locksets off the other two doors and brought them to a local locksmith (Busse’s Lock Service in Raleigh.) They were able to rekey both locks using my new Schlage key. The cost was under $50!

Photo courtesy of Handlesets.com

Later when the old lock on our front door broke, I ordered new ones from Handlesets.com (they sell all types of door hardware) and the customer service rep helped me enter the code from our master key when I placed the order. That way my new locks would match the rest of our house. Best of all they didn’t charge extra to for that service!

Sorry for the diversion, but I really wanted to let you in on that little secret.

Removing the Door Handles and Latch Assembly:

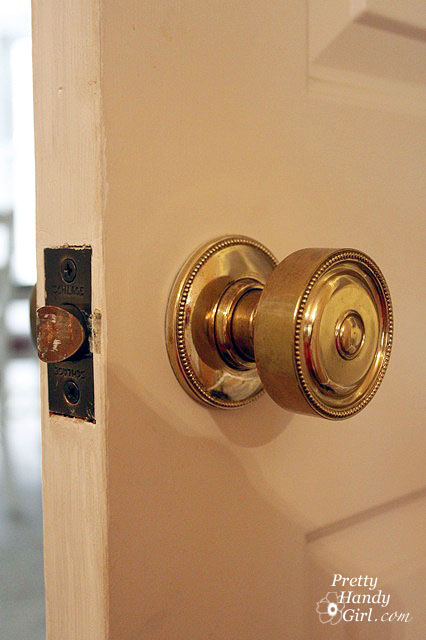
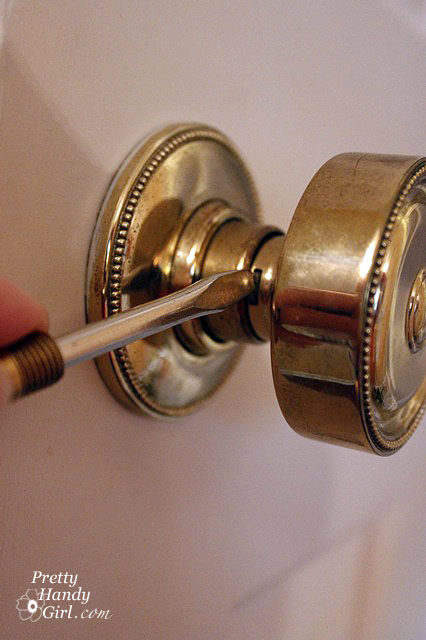
There are several types of door handles, you will need to inspect yours to determine how to remove it. Most door handles have screws on the interior side (for safety reasons, you definitely want them on the interior) that you unscrew to release the handles. Our door handles are a little different, but almost as easy to remove.

Insert a flat head screwdriver into the little slot on the side of the handle.

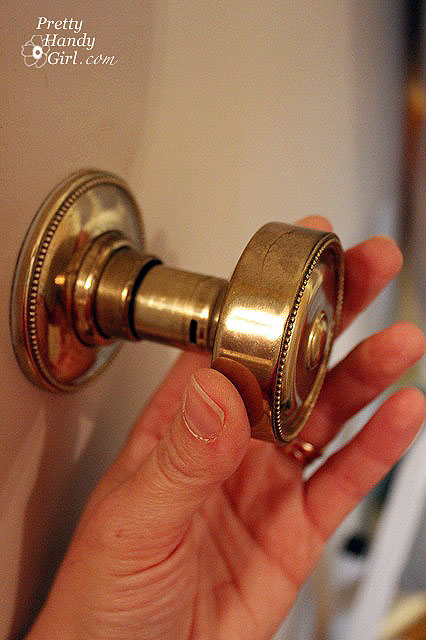
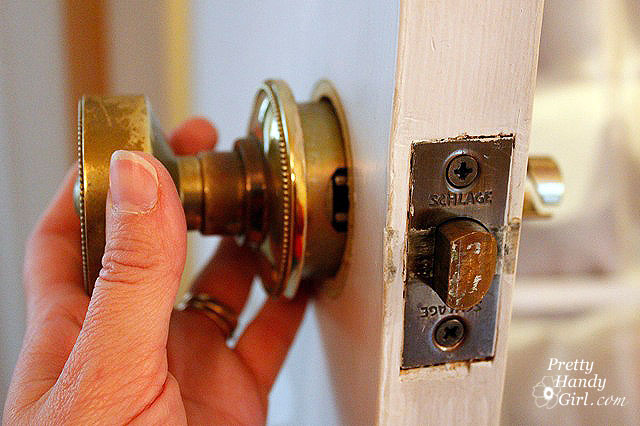
Pull the handle out and away from the door until it releases.

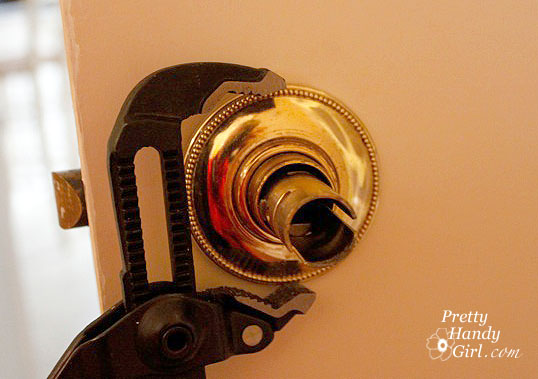
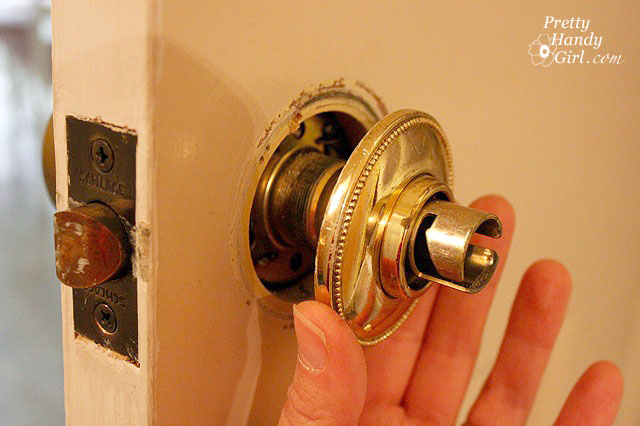
Unscrew the collar (also called a trim piece or escutcheon – yup, there is that word again!) that is up against the door until it comes off. You might need to use pliers to coax it free.

When it releases from the threads, remove the collar (ring, trim piece, escutcheon, WHATEVER.)

Gently pull the other handle off.

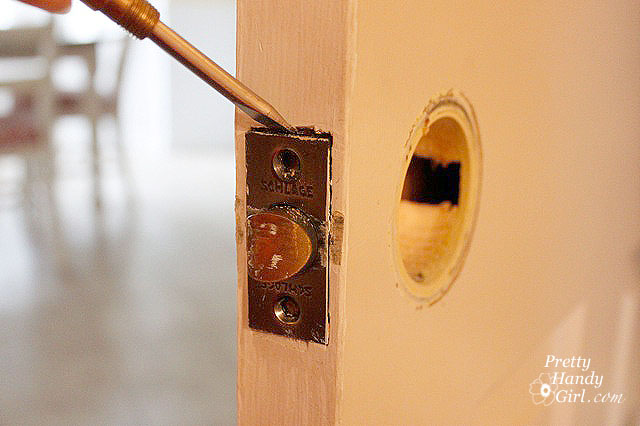
To remove the latch assembly, unscrew the two screws above and below the latch.

Gently pry the latch assembly out.

And remove it being sure to keep the screws with the latch.

Removing the hinges:

If you have the type of door hinges that the pin can be removed from, follow these instructions. If not, you will have to unscrew the hinges from your door (but don’t worry, I’ll show you how to do that in a minute.)

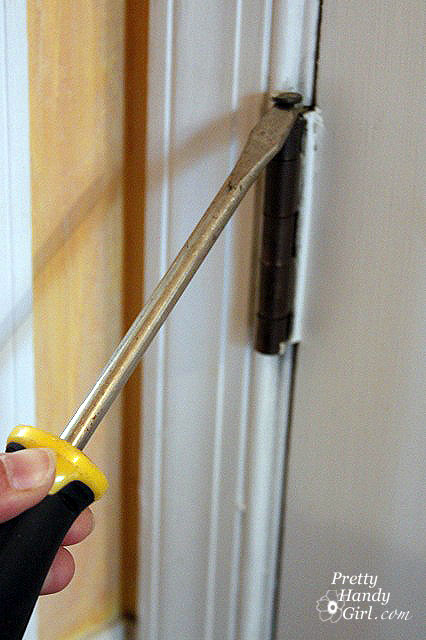
Removing the hinge pin is a snap. I use a flat head screwdriver and a hammer. Set the screwdriver just below the head of the pin and tap it lightly with the hammer until the screwdriver can fit below the head. If you can’t get the screwdriver under the head of the pin, insert the screwdriver into the bottom of the hinge and tap the bottom of the pin up slightly. Then angle the screwdriver end up and the handle down. Continue to tap on the screwdriver handle with the hammer until you can release the pin*.

*Oh, and before you remove all the pins, you may want to ask someone help hold the door while you remove the pins from the other hinges. Not that I’ve ever made that mistake (uh, okay, maybe I did.)

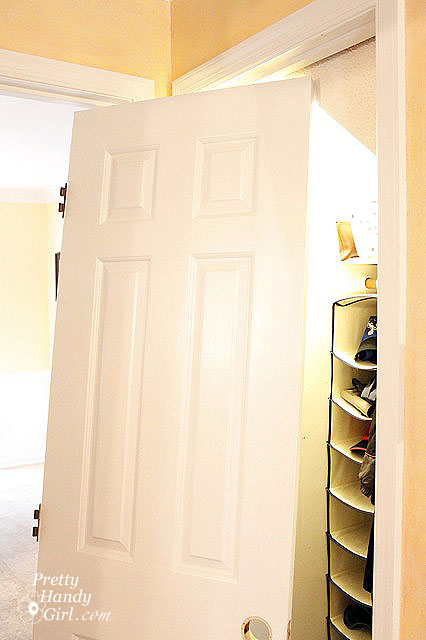
Remove the other two hinge pins and gently pull the door off the hinges.

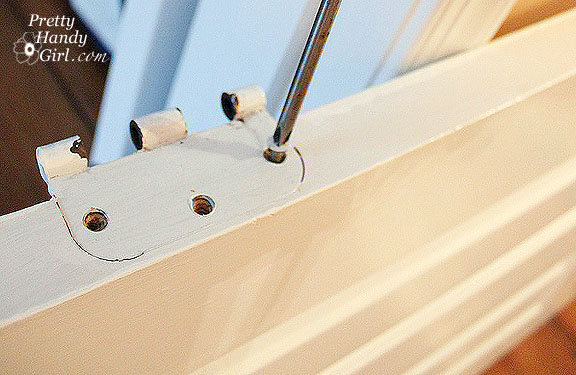
Use a screwdriver or cordless drill with a screwdriver bit to remove the hinges from the door and door frame if you are painting the trim as well.

I ran into a few painted over screws that I couldn’t turn. Here is how to deal with those little buggers.
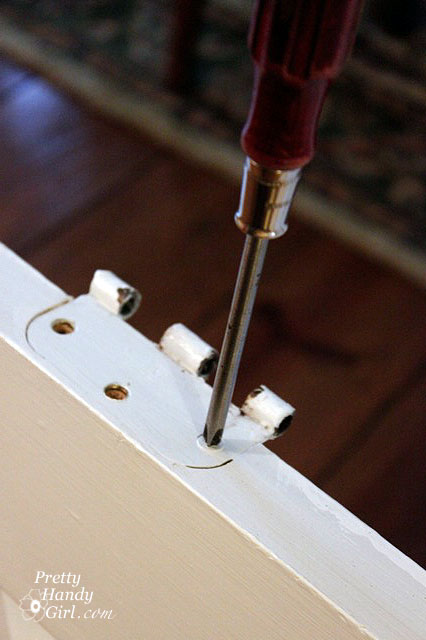
Lay your door on it’s side with the hinge facing up. Fit a screwdriver into the screw slots as best you can.

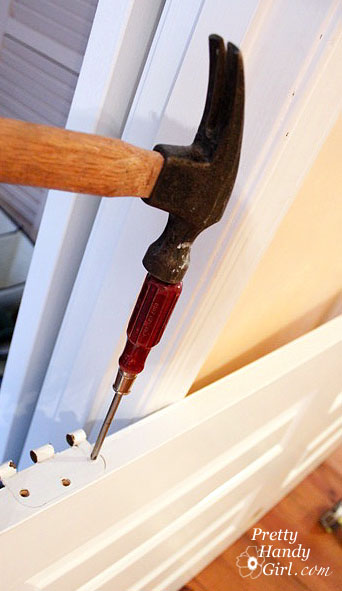
Then use a hammer to bang on the other end of the screwdriver.

This will either crack the paint or make enough of an indentation that you can turn the screw.

Be sure to keep all your hinges and screws in a separate bowl or bag.

Now you are ready to paint your door or paint your hardware (Like Beckie at Infarrantly Creative did HERE) or both! More tutorials to come.

When Miss Mustard Seed and I were junkin’ on Black Friday, she asked what I was looking for. I immediately answered rustic, rusty, and anything that looks aged and has a story to tell. I am so wacky like that, I could care less how well something is made or if it is an expensive antique. When I die, my kids are going to be sadly disappointed that all these antiques I’ve collected over the years aren’t worth a dime. C’est la vie, right?

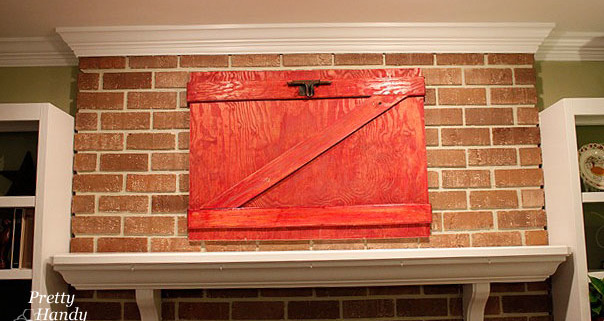
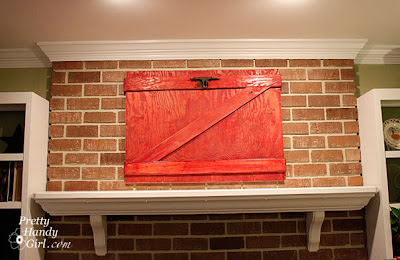
So, this year for our Christmas décor, I decided to create a natural rustic country inspired theme. What better way to invoke that spirit than with an old barn door. The only problem was that I didn’t own one. No problem, I’d just make one!

Materials:
Plywood board – painted or stained red
3 – 1″ x 4″ boards – painted or stained red
Nails or screws
Wood glue
D-ring picture hangers
Picture Wire
optional: Rusty door parts

In my “I can’t throw anything away scrap pile” I took some old plywood scraps that had been stained with red stain.

You will need to measured the space above your mantle, subtract a few inches from the top and bottom, then cut the plywood down to size (using a circular saw or table saw.)

Lay two 1″ x 4″ strips of plywood as cross pieces.

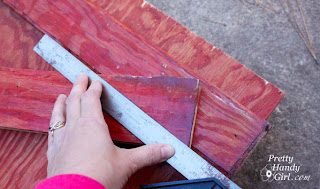
And one 1″ x 4″ piece at an angle. Draw a line where the horizontal pieces intersected with the diagonal piece.

Use a miter saw, circular saw or jig saw* to cut the angled cuts.

Liberally appy glue to the back of the 1″x4″ strips to secure them to the plywood base and then nail some finish nails into the strips to secure them. You can use a pneumatic nailer* if you have one, but screws or regular nails hammered in will work just as well! No need to buy any new tools for this project.

Hopefully you have a nail or hook already installed on your fireplace. Luckily I did, but in the past I have also just leaned artwork against the brick. So, if you choose to lean, ignore the next few steps.

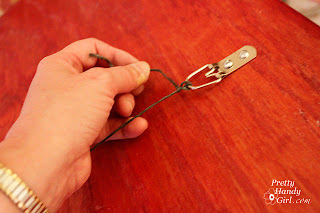
Measure the location of the hook on your mantle. For example, if the hook is 20 inches from the ceiling, and you want your barn door’s top to hang 12 inches from the ceiling, then you will need to install the hooks 9 inches down from the top of the barn door. This will allow an inch for the wire to slack. Get out your D shaped picture hooks and screw them to the back of your barn door using a cordless drill* or just a screw driver and some muscles. Repeat on the opposite side.

Feed some metal picture wire through one D ring. Twist once…

…then feed the wire back through the D ring and twist the rest of the wire tightly against itself.

Pull the wire taught and repeat on the opposite side.

This is the best way to attach picture wire so it doesn’t slip. If you are hanging something super heavy, you might need to loop the wire back through the D rings a few more times.

If you have some old gate handles, hinges, or latches, attach them to your door. I screwed this old RUSTY gate lock to the top of my barn door. It makes a convenient hanger for…

…my Christmas wreath!
That’s all I’m going to show you of our mantle today.

Did you like this post? Want to be notified when there are more fantastic tutorials by Pretty Handy Girl? Sign up to receive emails in your inbox:

Enter your email address:


Delivered by FeedBurner

Or follow me on Twitter or Facebook so you can be the first to know!

Why do we wait to remodel the rooms that we spend the most time in?

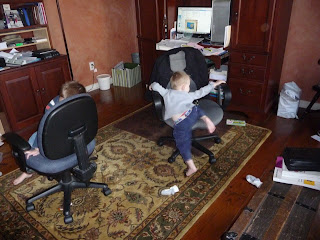
Our home office had very humble beginnings. No overhead lights meant we had to use a floor lamp and table top lights to see.

The walls were a deep burnt sienna color that didn’t bounce much of that light around.

I had a big computer armoire that was dark inside. But, worst of all, Pretty Handsome Guy and I worked together in the room with our backs to one another for 3 years!

I dreaded sitting and working in that room. As a graphic and web designer, I had no inspirations, no creative energy. And being the light obsessed person I am, I was depressed by all the darkness in the room. I took frequent breaks just to escape from the office.

I dreamed of a home office with one wall of built-in bookcases and storage and a work surface that jutted out in the middle. I tried to sell the idea to my better half, but Pretty Handsome Guy just couldn’t picture it.

As luck would have it, three months later, Sandra at Sawdust and Paper Scraps just completed my dream office in her home!

Sawdust and Paper Scraps Built-in Dream Office Come to Life

She posted the pictures on Remodelaholic. Hey Sandra, thanks for taking too long to finish it. Just kidding. But, If she had posted her pictures three months ago, our office may have looked very different.

Sometimes fate is a good thing, and in this case I am thrilled with the end result of our home office and it is all thanks to an inspiration I had when I found two of these:


$15 for a pair of solid wood doors with beautiful cherry stain on one side. 
I snatched them up at a church yard sale! You can imagine the look on Pretty Handsome Guy’s face when I came home with these hanging out the back of my car. “Um, don’t we already have doors on all our doorways?”  I answered with one word, “Potential.”
We didn’t do a thing to the doors except to remove the hardware and use the hinges in other rooms of our home. The stain color was a perfect match to our existing furniture.

If you look back at some of our earlier posts you have been privy to some of the changes we made in the office.


Well, we finally put the finishing touches on the room, and I’m ready to show you the results.


New window treatments, and freshly scraped and painted ceilings.


 FIVE! Yes, count them, five ceiling light fixtures.
4 can lights + 1 drum shade pendant = 5 glorious ceiling lights
where there were ZERO, ZIP, NONE before!


A corner bistro table where we can sit and have coffee.
I can meet with graphic design clients. 
But, mostly so the kids can color, work on homework or
someday start a blog called MyMomIsPrettyCrazyGirl.com
Enough about those crazy kids. This is where I blog!
So, do you see my inspiration door?
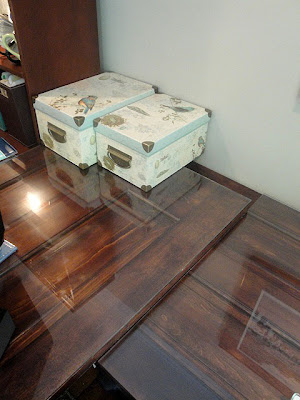
Here is a hint: There is a layer of custom cut glass on top,
and a keyboard tray mounted underneath.
 
Plus a hole to run the cords through.
 
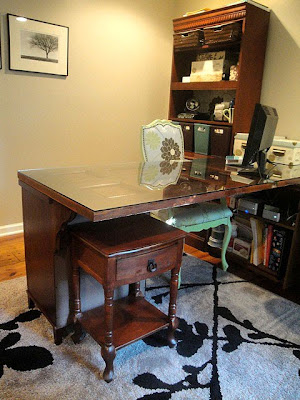
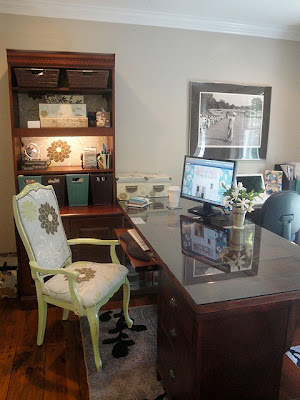
 How about now? Do you see it now? The doors are our desktops.
This is where I blog, design, and work! 
So open and airy.

We simply stacked the two doors on top of one another.
 
 And bought two pedestal file cabinets from Office Depot.
(I had to cut the legs shorter on this one to accommodate for the
difference in height with the two doors stacked.)
And voila! Two desks in an “L” shape.
No more back-to-back working.
Plus, lots of natural light bouncing around.
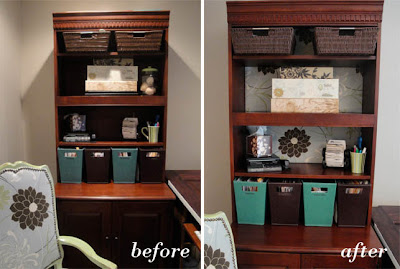
In the corner under the two doors, is an $8 yard sale bookcase that holds my computer, back up drive, CDs, books, and more supplies. It is hidden underneath, which is a good thing, because it desperately needs a little TLC.
 
The doors may have been my inspiration then,
but having a view out this window brings me loads of inspiration now!

This room is so special to us. We can sit and work, talk, catch up, and the boys have a great spot in the corner to color or practice reading on Starfall.com

The color paint we used is: Benjamin Moore Aura paint in Hot Spring Stones. It is the perfect warm gray beige color (in my opinion). The rug is from Home Goods. Curtains from Overstock.com. And fabric on chair, bistro table, and bookshelf back is called Fermini Sky. The drum shade pendant was from Amazon.com.