DIY-Painted-Pool-Sign

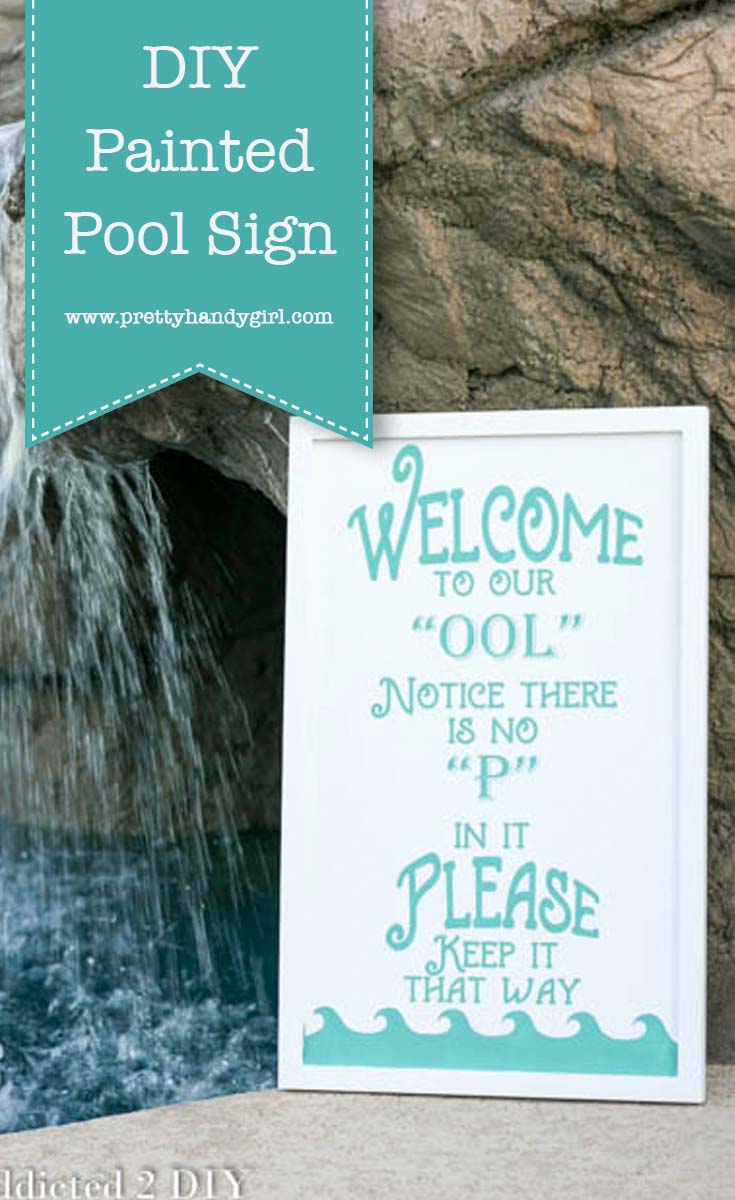
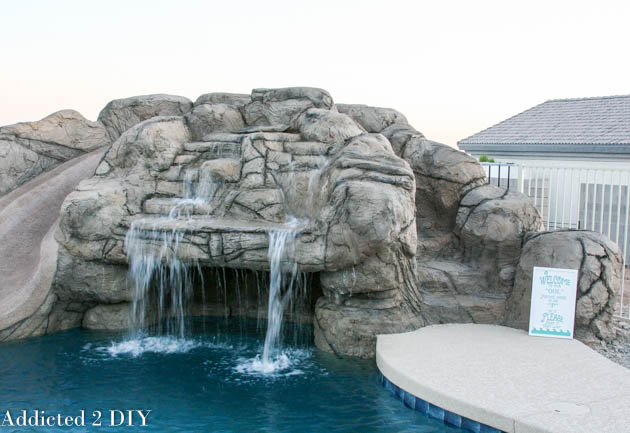
Hey everyone!  Katie again from Addicted 2 DIY.  It’s hard to believe, but it’s been two months now since we finished building our dream pool.  If you’ve ever wondered what you can learn (and save) by contracting your pool out yourself, I’ve got all of the handy details on my blog.  Now that we have our own pool to make fun family memories in, I thought a fun sign would be a great addition.  I designed this sign based off of one we had by our pool when I was a kid.  According to my mom, this one looks way nicer.  She wouldn’t lie to me, right?

To help you make your own sign, I’m also including the free SVG file I created for you to download.  Please use it for personal use only.

Here’s what you’ll need for your own sign:

  •  1×2 plywood project board (2’x4′)
  • 3 – 3/4″ x 3′ square poplar dowels
  • 1 1/2″ brad nails
  • brad nailer
  • wood glue
  • 220 grit sandpaper
  • orbital sander
  • 24″ clamps
  • wood filler
  • paint colors of your choice
  • paint roller and/or paintbrush
  • adhesive vinyl
  • transfer paper
  • electronic cutting machine (I have a Silhouette CAMEO)
  • Welcome to Our OOL SVG file

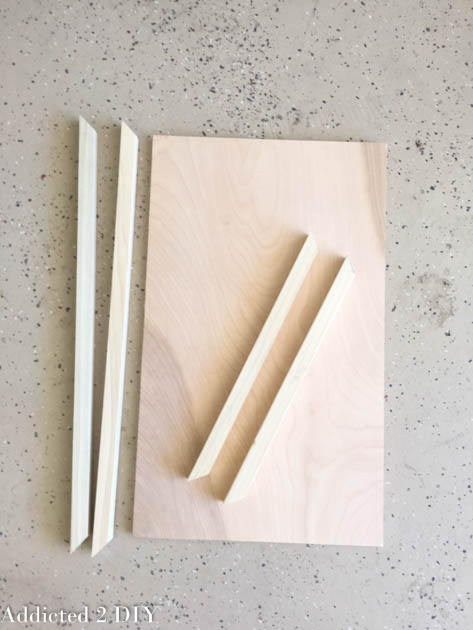
Start by cutting your plywood down to 12″ x 20″.  If you don’t have the ability to do this, you can always ask the helpful employees at the home improvement store.  Cut the square dowels on a 45 degree angle to frame the plywood.  The inside measurements should be 12″ and 20″.

supplies-for-wood-sign

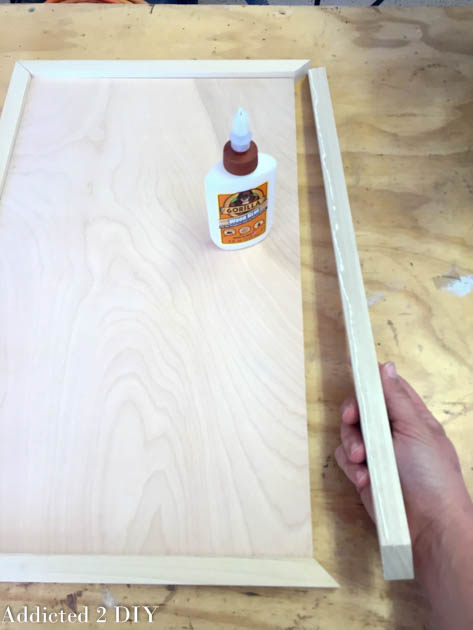
Frame the plywood with the dowels using wood glue.

add-trim-to-sign

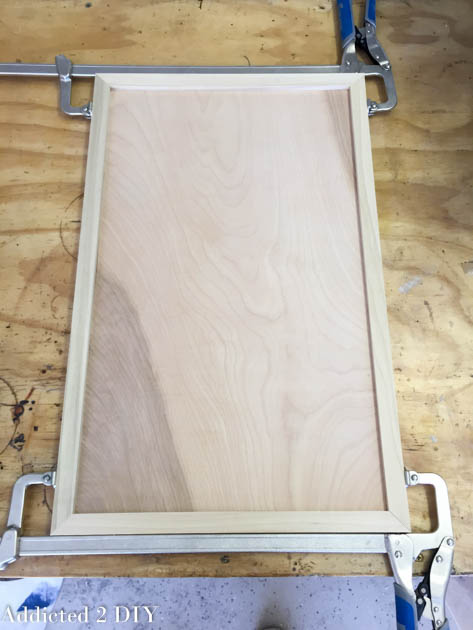
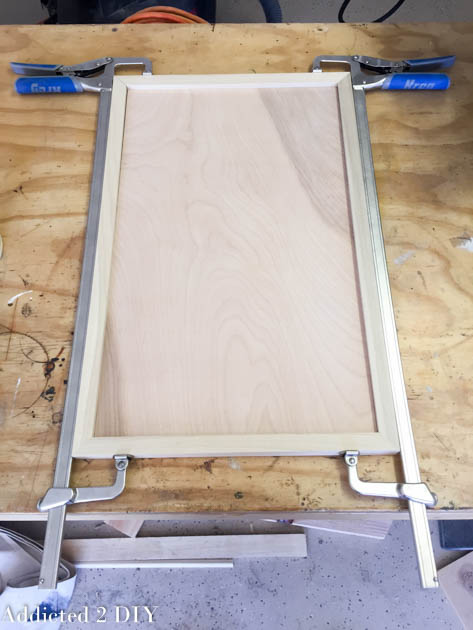
Clamp the edges…

build-wood-sign clamp-trim-to-plywood

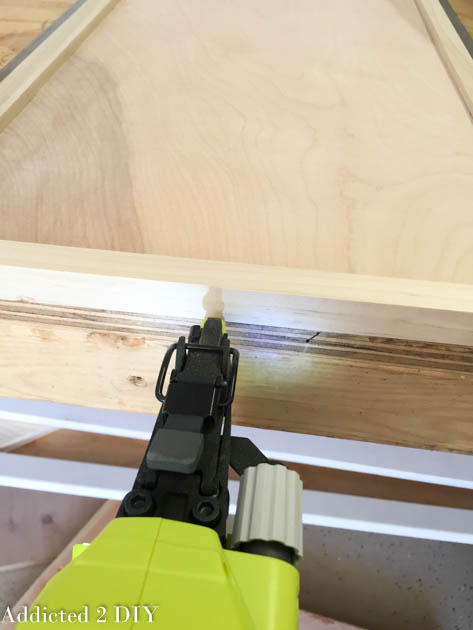
…and nail them to the plywood with your brad nailer.

nail-trim-to-plywood

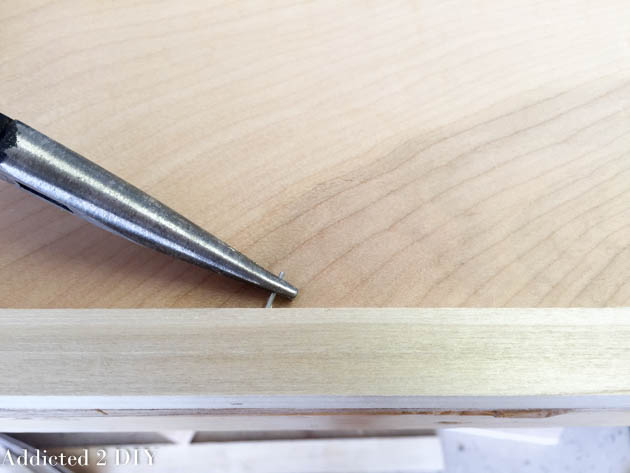
Since the plywood is only 1/2″ thick, you’ll have to be careful not to nail the trim too high.  I had one nail go astray, but I was able to get it out with needle-nose pliers.  It’s nothing a little wood filler can’t fix later on.

remove-nail-from-wood-trim

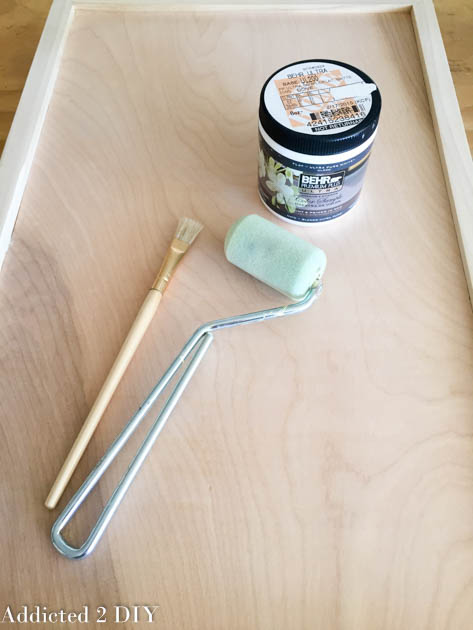
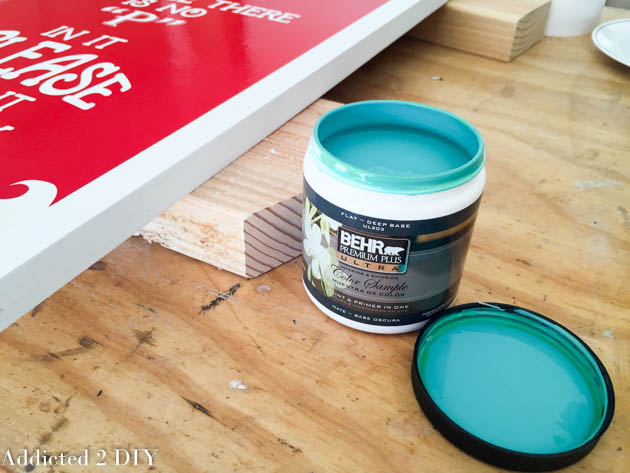
When your entire piece is assembled, sand it with 220 grit sandpaper to get rid of any rough spots.  Paint the entire sign, front and back, with your base color.  I love using sample size jars of paint for projects like this.

painting-wood-sign

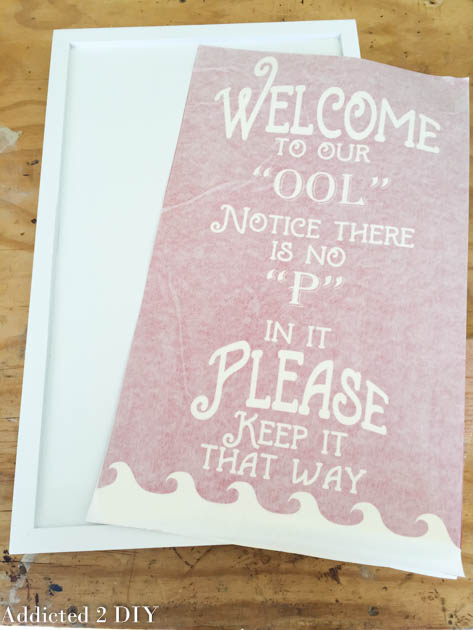
Cut your message out on an electronic cutting machine.  Weed out the vinyl design and cover it with transfer tape.

vinyl-for-wood-sign

Peel the backing off of the vinyl and carefully center it over the plywood face.  Smooth it with a scraping tool (or credit card.) Carefully peel off the transfer paper.
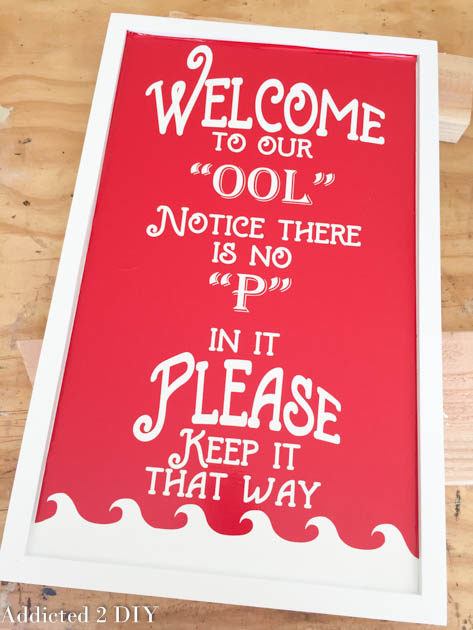
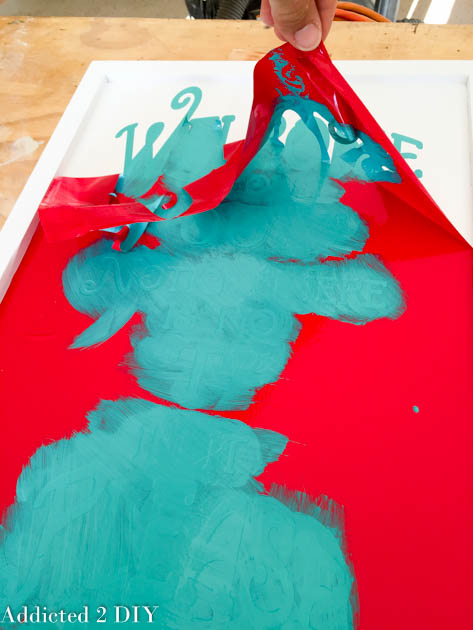
put-vinyl-on-wood-signGrab your second paint color and stencil the design with a paint brush or roller.  You can mask off the frame of the sign with painter’s tape or paper to protect it from any paint mishaps.  I opted to go slow and carefully paint inside the frame.

paint-for-wood-sign

Once your design is completely stenciled, carefully peel the vinyl off of the face of the sign.

stencil-swimming-pool-sign

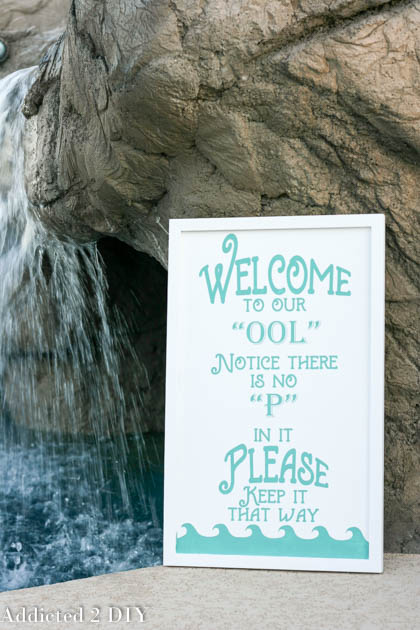
You can leave your sign as it, or distress it a bit.  Whatever you like!  I love distressing things, but I decided that I really liked a cleaner look for this sign.

sign-for-pool

swimming-pool-sign

I’m so happy with how it turned out!  I’m no graphic designer, so I spent several hours coming up with a design that was just right, but it was well worth it.  My kids think it’s hilarious!  Let’s just hope everyone that comes and visits us will follow the rules!  I’m thinking it will look great somewhere near our grotto/water slide.  Once we get that area landscaped, I’ll give it a more permanent location.  Now that this sign is done, I kind of want to make another one for the waterfall that says “Mt. Wannahockaloogie” from Finding Nemo.  We have a “Nemo” mosaic inside the grotto, so it would tie in perfectly.  I may be the only one that gets it, but that’s okay.

Katies-sign

~learn more about Katie~


Pin for later!
DIY Pool Sign | Pretty Handy Girl

how to build a wood ammo box

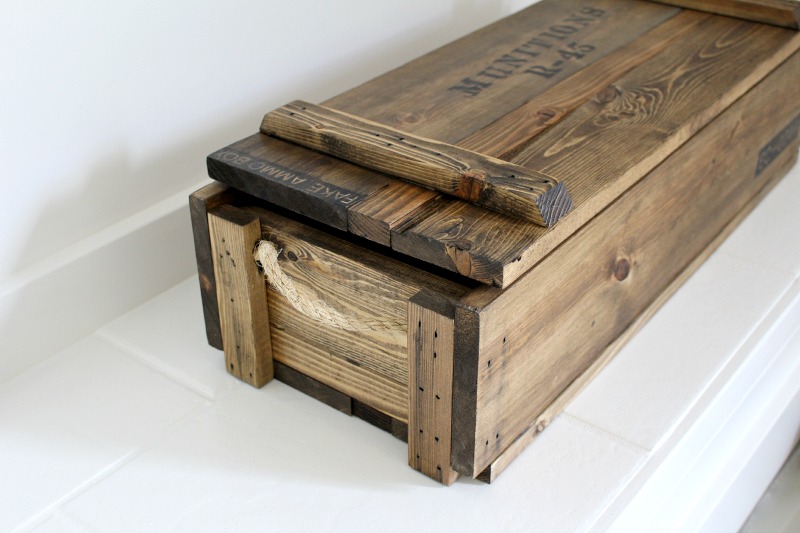
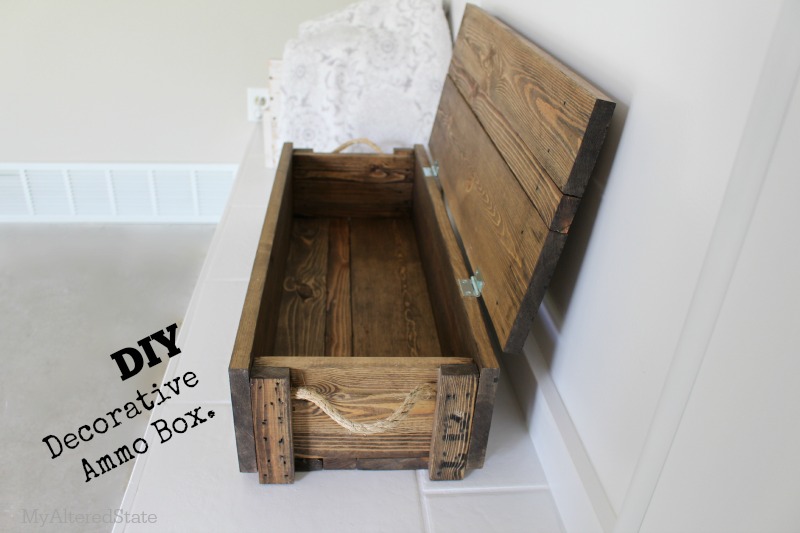
I’m super excited to have Pauline from My Altered State joining us today! It’s been a while since we’ve had a guest on Pretty Handy Girl, and this guest was certainly worth the wait! She’s joining us today to show you How to Build a DIY Decorative Ammo Box! This gorgeous crate may be for decorative purposes, but Pauline studied the construction of real ammo boxes to build it the same way the real ones are built. She’s amazing, and I know you’ll understand why in a minute.

I met Pauline at Haven last year, but I’ve been a fan of her blog way before we met. She is an avid upcycler and loves to use salvage materials in her projects.

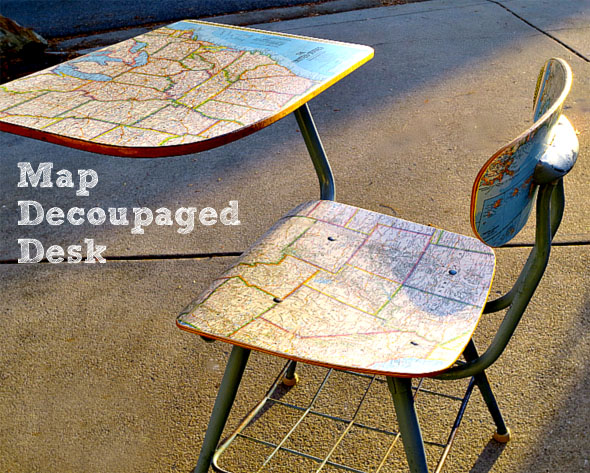
She has so many fabulous projects, I had a hard time picking a few to show you. Like this fabulous Map Decoupaged Desk/Chair!

DIY Decorative Ammo Box

Map Decoupaged Desk Chair

Or these beautiful Reclaimed Wood Snowflakes!

Reclaimed Wood Snowflakes

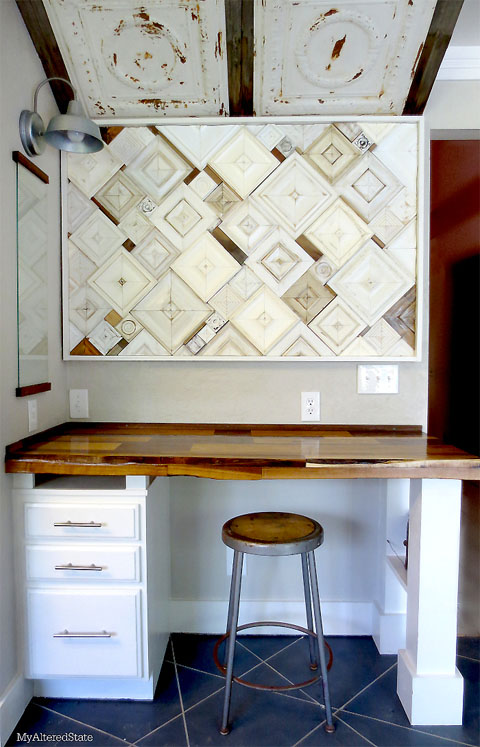
But, by far my favorite DIY project Pauline has completed so far is this desk and art installation in her kitchen!

Kitchen Nook Art Installation

And now, Pauline has an easy and unique tutorial for us today! Please clap, cheer and get on your feet for the amazing Pauline from My Altered State!

page_break_2
When I started blogging, I never dreamed that I would one day meet THE Pretty Handy Girl in person, let alone find myself writing a guest post for her.  So having said that, imagine how excited I am right now as I write my first guest post on Pretty Handy Girl!  Now it’s time to get started.  I hope you enjoy my DIY Decorative Ammo Box project.

ammo box diy

Wooden military ammunition boxes have been a staple in the vintage repurposing and upcycling world for a while. They are a versatile storage item with an industrial flavor, but sometimes they are hard to find. That’s when I get the urge to build.

In an effort to keep this tutorial from being too lengthy, you can find info on finishing and aging wood in this post. Now let’s get building.

DIY Decorative Ammo Box Materials:

To create a box with the dimensions of 27″ wide x 7″ tall x 10″ deep, purchase the following:

  • (2) 1″ x 6″ x 6′
  • (2) 1″ x 2″ x 6′
  • (1) 1″ x 4″ x 6′
  • Rope
  • Gorilla tape
  • Wood glue
  • 2 Hinges
  • Drill
  • Drill bit same thickness of rope
  • Clamp
  • Pencil
  • 2″ nails
  • Nailgun (or hammer)
  • Miter saw

DIY Decorative Ammo Box Cut List:

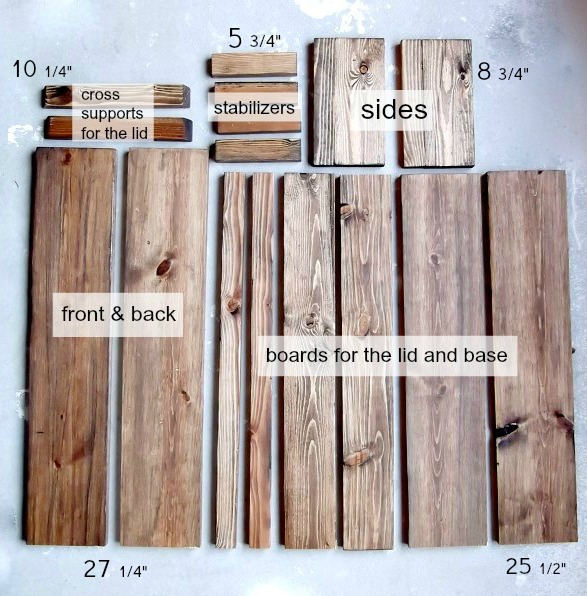
cut list wood ammo box

  • 2 – 1″ x 2″ cut to 10 1/4″ (cut ends at 30 degree bevel as shown above)
  • 4 – 1″ x 2″ cut to 5 3/4″
  • 2 – 1″ x 2″ cut to 25 1/2″
  • 2 – 1″ x 4″ cut to 25 1/2″
  • 2 – 1″ x 6″ cut to 8 3/4″
  • 2 – 1″ x 6″ cut to 25 1/2″
  • 2 – 1″ x 6″ cut to 27 1/4″

DIY Decorative Ammo Box Instructions:

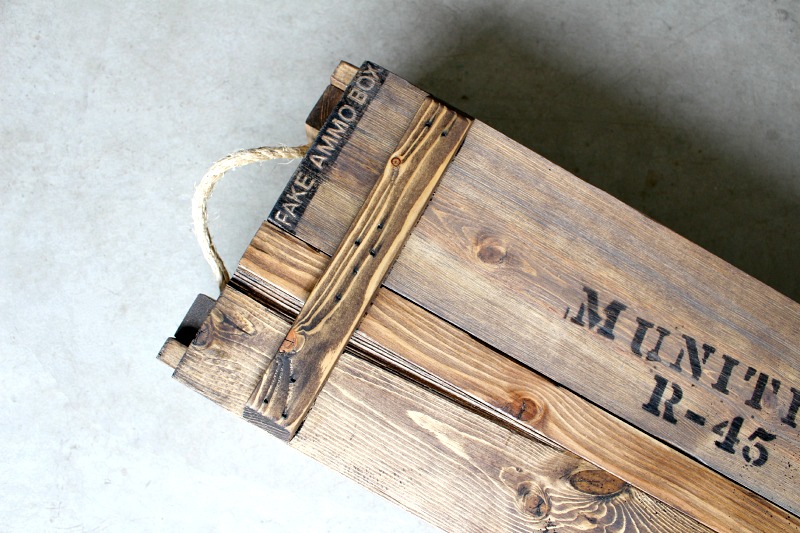
By copying the design of an authentic ammo box, I will show you how to build this DIY Decorative Ammo Box clear down to the way the handles are attached.

Lay out all your pieces for a “dry run” of the design:

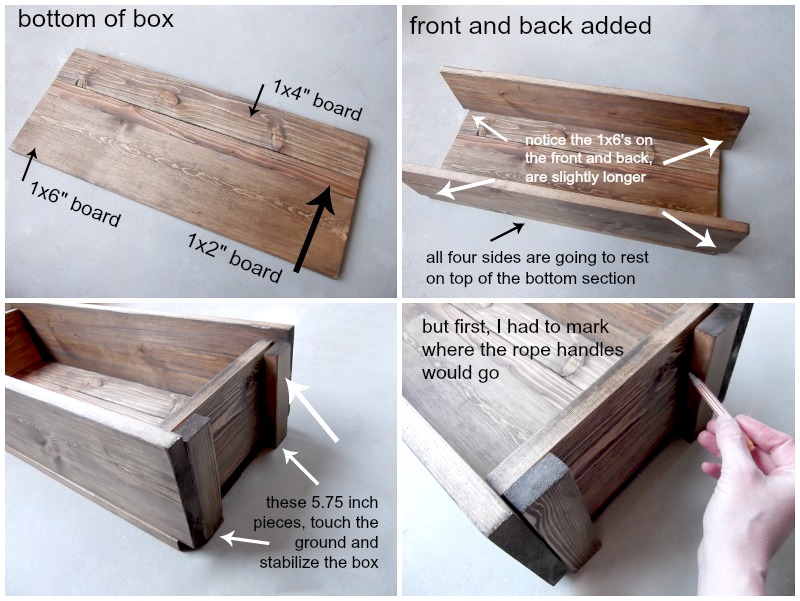
  • Bottom of box: (1″ x 6″ x 25 1/2″) + (1″ x 2″ x 25 1/2″) + (1″ x 4″ x 25 1/2″) boards.
  • Front and Back of box: 1″ x 6″ x 27 1/4″ boards
  • Sides of box (with rope handle): 1″ x 6″ x 8 3/4″ boards

Mark the location for your rope handles (approximately 2″ down from the top of the box.)

assemble wood ammo box

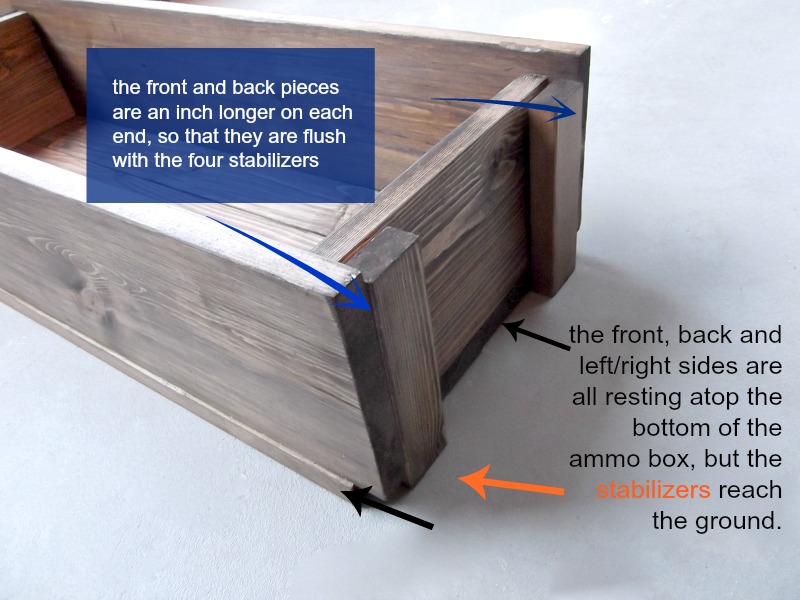
During the dry run, notice that the front and back pieces are an inch longer on each side. The stabilizing 1″ x 2″ pieces will rest on the ground, while the four sides of the box rest on the base.

diy ammo box design

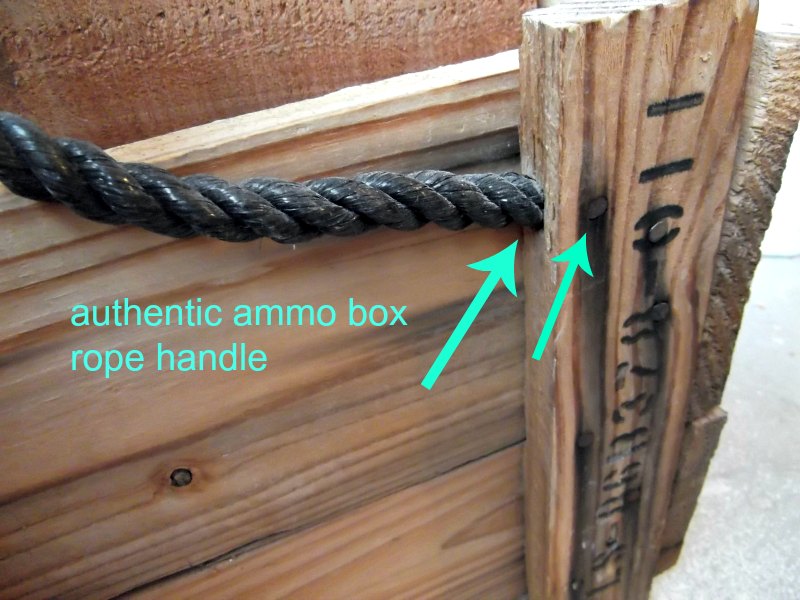
After all the ammo box collecting I’ve done over the years, you’d think I would have noticed how the handles were installed on the real thing. Nope. Never paid attention until now. Here’s a close up of the real thing:

military wood ammo box

A notch is hollowed out where the end of the rope goes, and then secured in place with nails. This design actually keeps any rope ends or knots from being visible on the inside of the box. Clever.

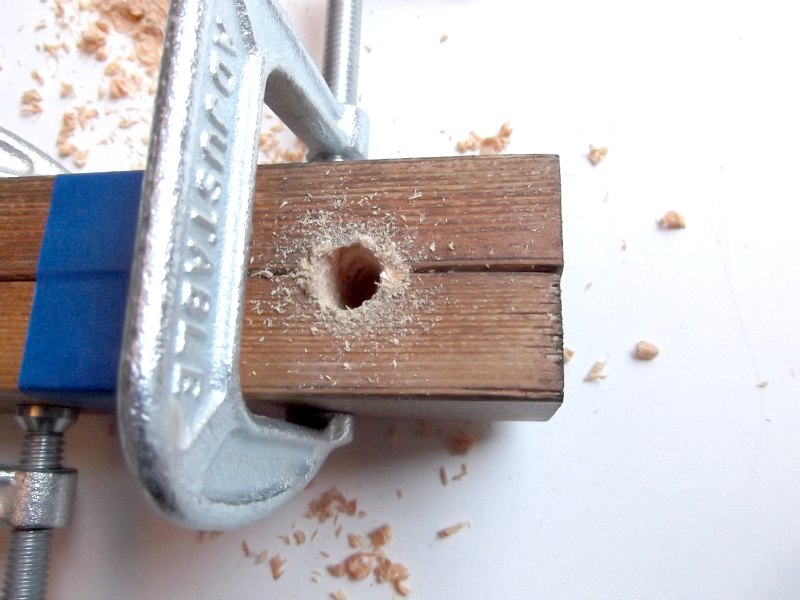
To create the notch, clamp two 1″ x 2″ x 5 3/4″ stabilizer pieces together. Use the drill bit to drill a hole directly in between the two pieces of wood. Repeat using two more 1″ x 2″ x 5 3/4″ pieces.

drill holes for rope handles

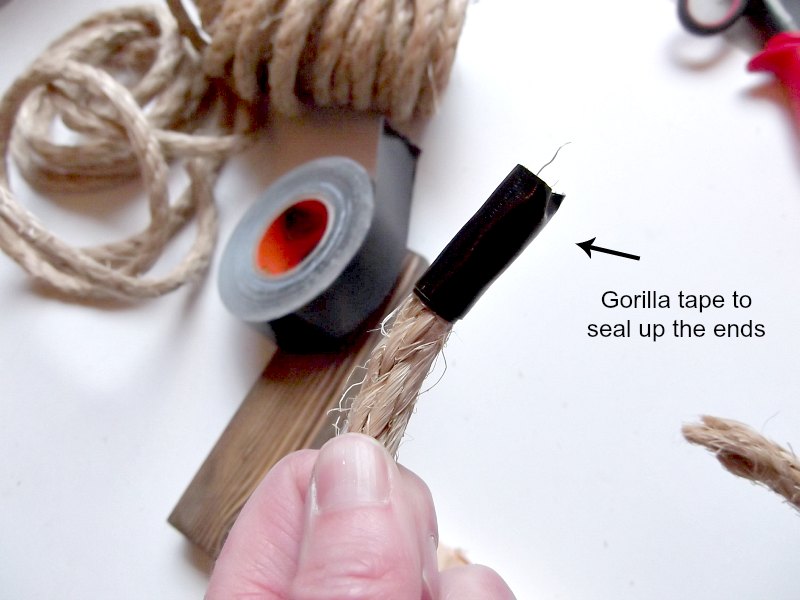
Use Gorilla Tape (or duct tape) to seal the end of the rope and keep it from unraveling.

rope handle wooden box

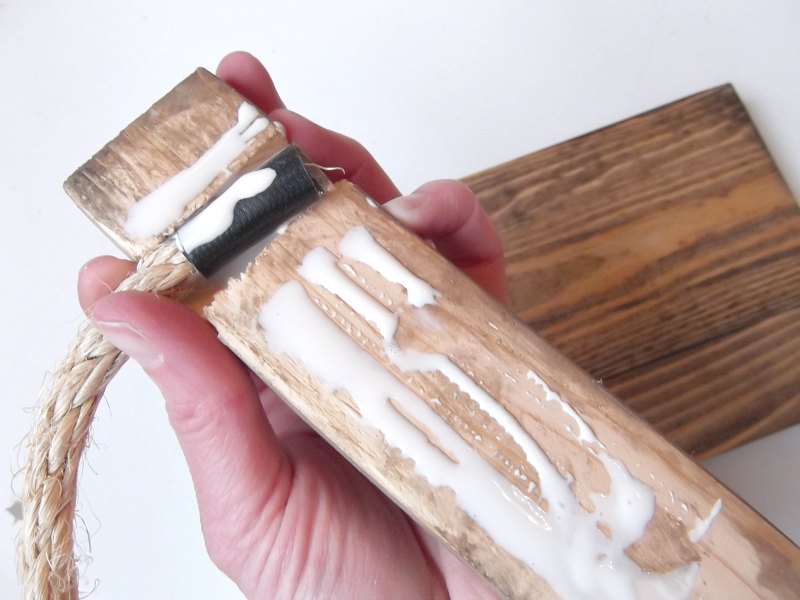
Rest the end of the rope into the notch of the stabilizer 1″ x 2″ and add wood glue to the stabilizer and the taped rope end.

wood glue diy ammo box

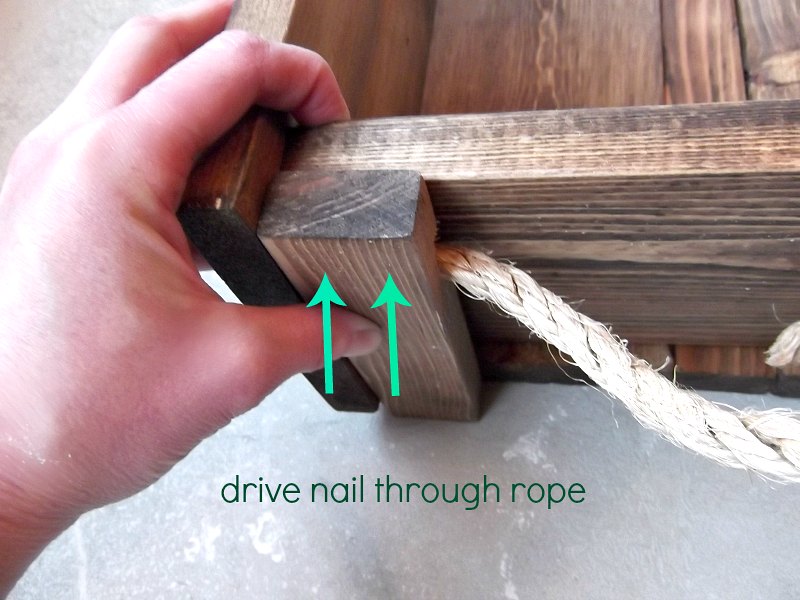
While holding the handle (stabilizer) pieces in place, drive the first nails through the wood, into the rope end and into the side of the box.

ammo box handles

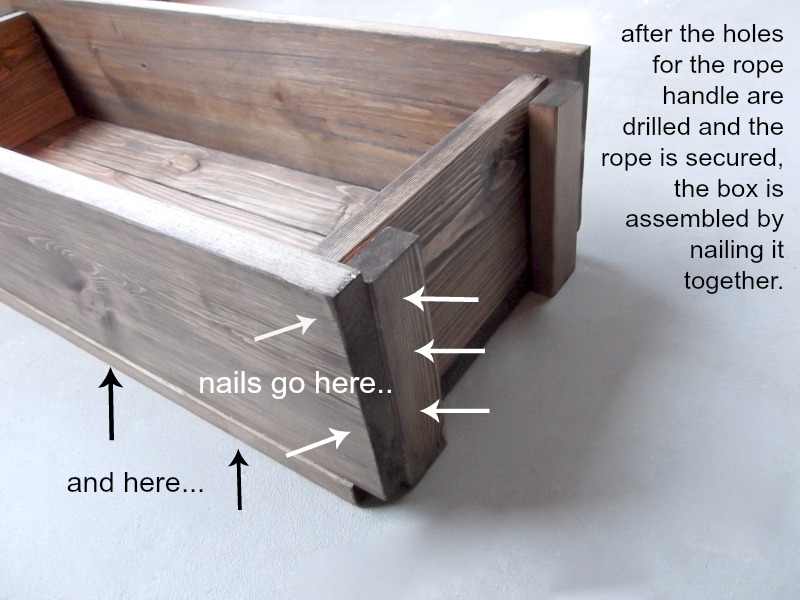
After driving two nails into the stabilizer pieces to secure the rope, drive two more nails through the front and back of the box, into the sides of the stabilizer pieces (as shown below.) Then go ahead and glue/nail all the sides together, while keeping it rested on top of the bottom boards.  (This will help you keep everything aligned and square.) Once all the sides are nailed together, flip the whole box upside down, and glue and nail the bottom boards into the frame of the ammo box.

diy ammo box secure sides

Assembling the lid:

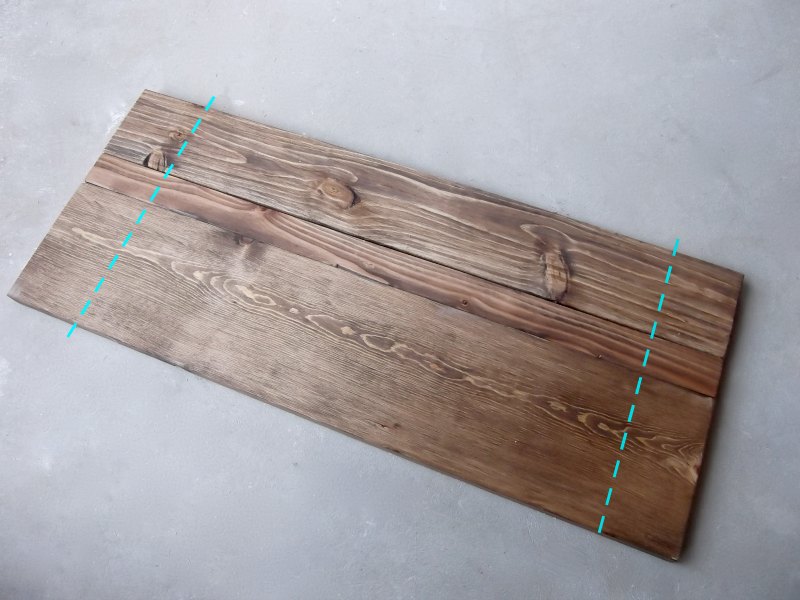
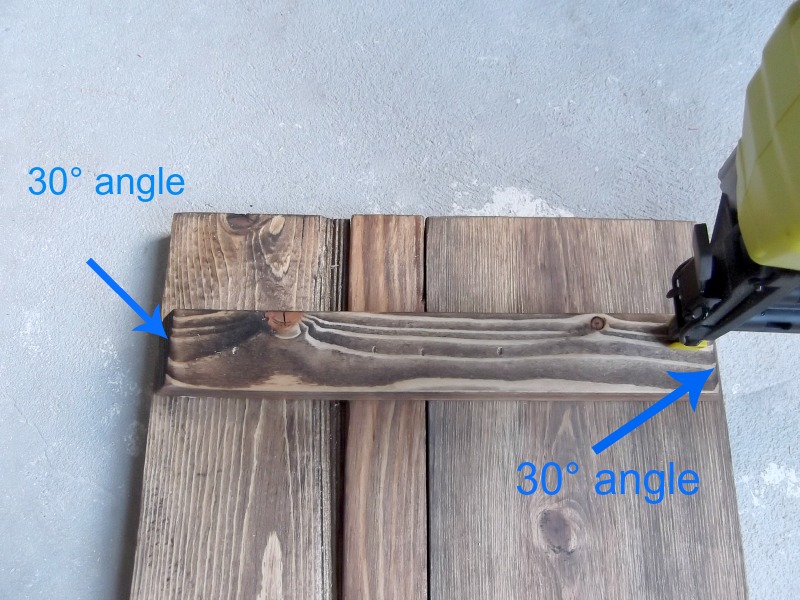
The three lid boards are identical to the boards on the bottom of the box: (1″ x 6″ x 25 1/2″) + (1″ x 2″ x 25 1/2″) + (1″ x 4″ x 25 1/2″) The lid boards are secured together by the two 1″ x 2″ x 10 1/4″ cross supports (the two pieces with both ends beveled at 30°.)

wooden ammo box lid

Nail on the cross supports about 2″  from outside ends of the lid.

ammo box lid

Attach the lid:

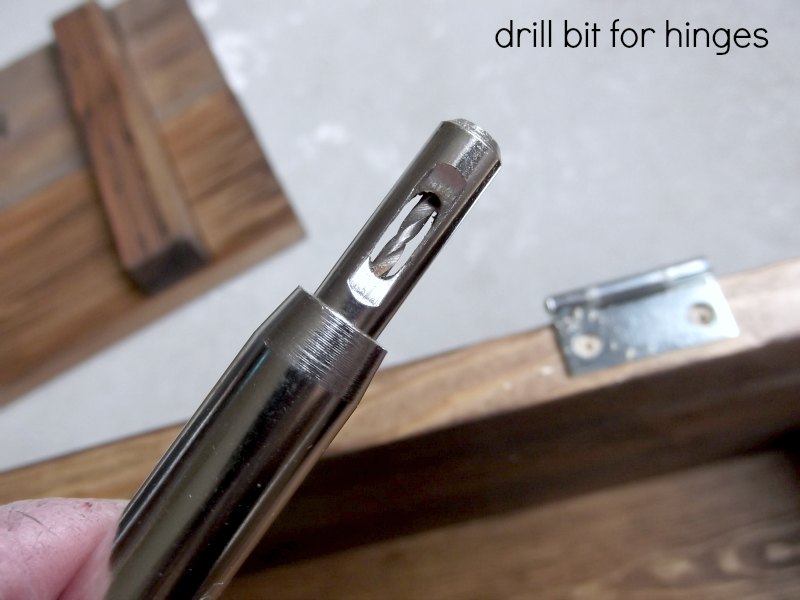
For a long time, if there were hinges involved in a project, I walked away in tears.  That is, until I discovered this little invention: a drill bit for hinges (affiliate link). I can’t say it enough as this little guy has saved my sanity a thousand times over.

Drill holes for the hinges, about 5 1/2″ from the outside edges of the box, and attach the hinges to the box and the lid.

drill bit for installing hinges

And that’s it!

how to build a wood ammo box

You’ve got yourself an ammo box, that has never actually held ammo.  What will you do with yours?

faux ammo box

I can think of a lot of other things that I might hide inside this box, like Wii remotes.  (After I add a lock, of course.)  😉

Visit this tutorial for the “how to” on the stain/distressing techniquefor this ammo box, where you’ll find great tips on aging wood with stain.

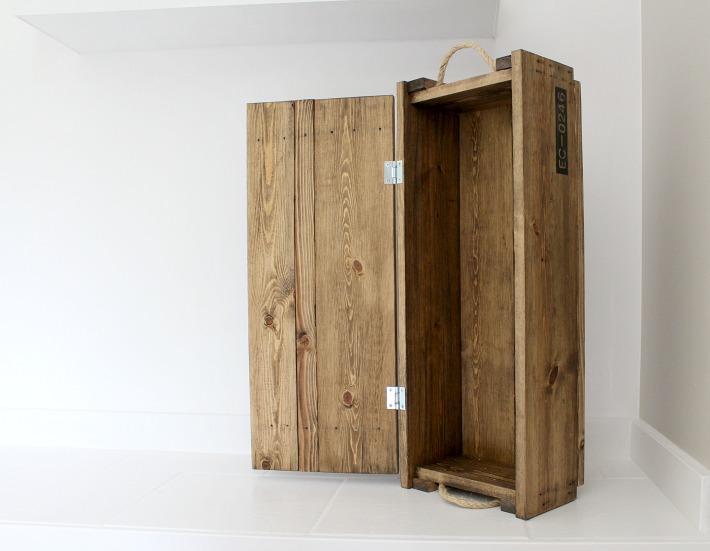
open ammo box

Hope you enjoyed!

Did I tell you Pauline is amazing or what?!

PHGFancySign

DIY Firepit and Seating | Pretty Handy Girl

DIY Firepit and Seating | Pretty Handy Girl

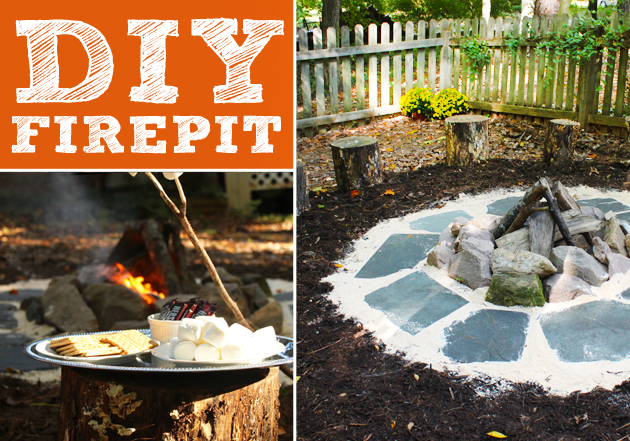
Firepits are very popular right now. You can purchase a simple firepit at your local home improvement store, or put in a little sweat equity and create a DIY Firepit with Seating.

When we had several hardwood trees taken down in our yard, I asked the tree guy to cut some of the base pieces of the tree trunk into 18″ segments to use as stumps to sit on.

Then I set about creating a DIY firepit and seating in our back yard.

Materials:

  • Shovel
  • String
  • Stake
  • Stick
  • Rocks or fire ring
  • Sand
  • Bag of drainage gravel
  • Slate, stepping stones or pea gravel
  • Mulch or crushed stone
  • Stumps or seating
  • Wood to burn

Instructions:

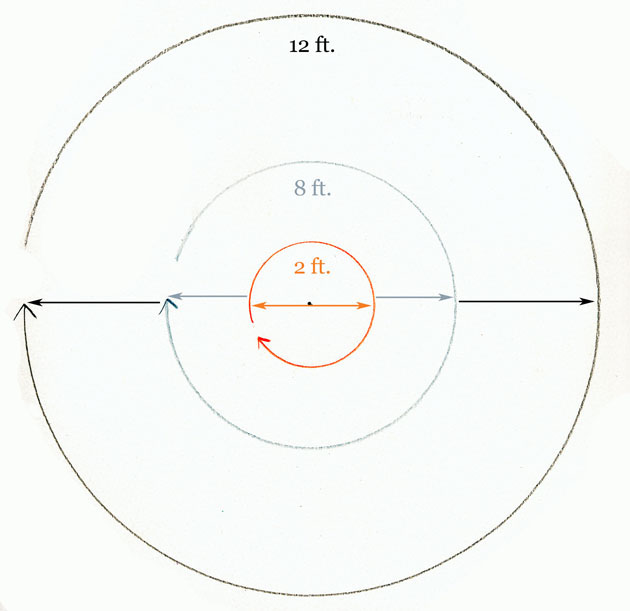
Begin by locating a level location to build your fire pit. Take note of any overhanging branches and trim them away from the firepit area. Hammer the stake into the center of your firepit area. Attach string and make a loop in the string at 6 feet. Insert a stick into the loop and walk around pulling the string taut while dragging the stick in the earth to mark a 12 foot diameter circle. Create another loop at 4 feet and repeat marking an inner circle. Finally, create a loop at 1 foot and drag the stick to mark the firepit ring area.

DIY Firepit and Seating | Pretty Handy Girl

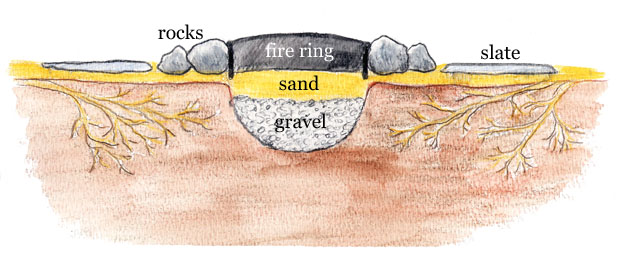
Dig a hole in the 2 foot firepit ring area. Remove any roots from the dirt. Dig about 12″ down. Fill the bottom of the hole with gravel. Add a layer of sand on top of the gravel. Line the 2′ firepit area with a fire ring or rocks (or both).

DIY Firepit and Seating | Pretty Handy Girl

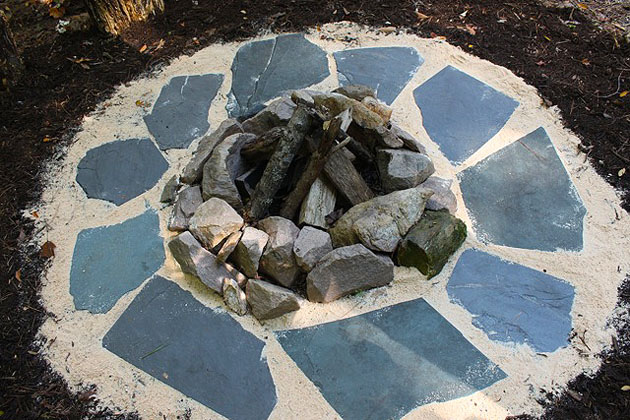
Pour sand around the 8 foot diameter circle and set your stepping stones or pea gravel in this area. Read more

2 Minute Wiper Blade Change | Pretty Handy Girl

2 Minute Wiper Blade Change | Pretty Handy Girl

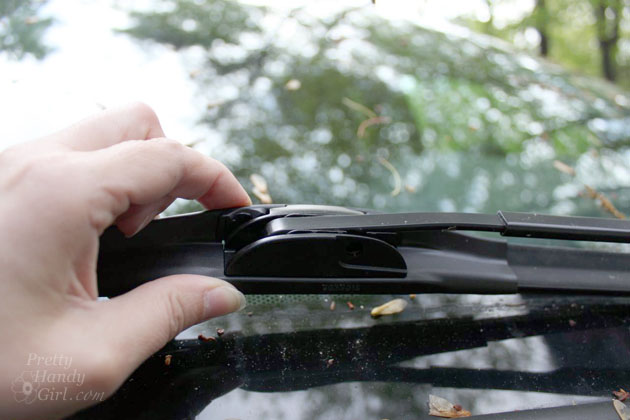
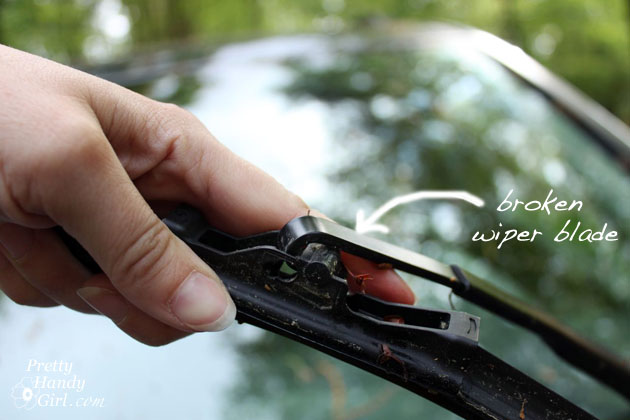
Have you ever had something get stuck in your wiper and you don’t realize it until it is pouring rain. Instead of pulling over to remove the object from the wiper, I tried the old “reach out the window and flick the wiper up.” Big mistake! I ended up breaking the wiper blade off the wiper arm. Ugh. Luckily we weren’t far from home, and I was able to drive home and swap cars before driving off the road.

2 Minute Wiper Blade Change | Pretty Handy Girl

Lesson learned, next time I won’t be so lazy.

New automobiles have improved the ease with which you can change the wiper blades. In fact, it will probably take you less time to change your automobile wipers than it takes to read this tutorial. Do you have 2 minutes? Great, let’s get to it.

2 Minute Wiper Blade Change | Pretty Handy Girl

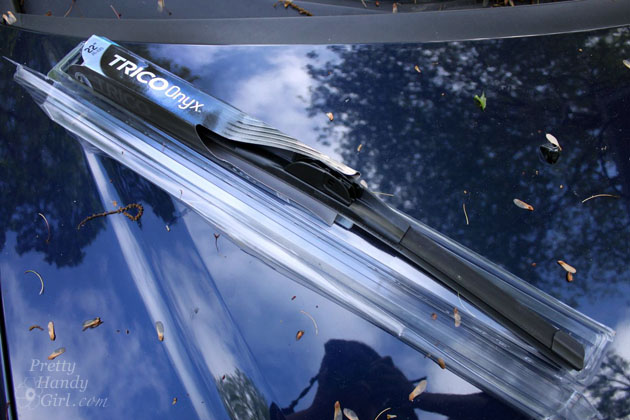
Buy a new set of wiper blades. Go ahead and splurge for good quality wipers so they won’t start squeaking in a few months. Grab a flathead screw driver.

2 Minute Wiper Blade Change | Pretty Handy Girl

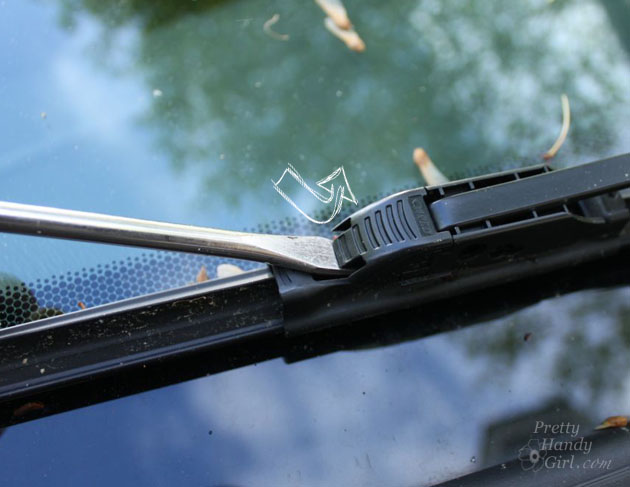
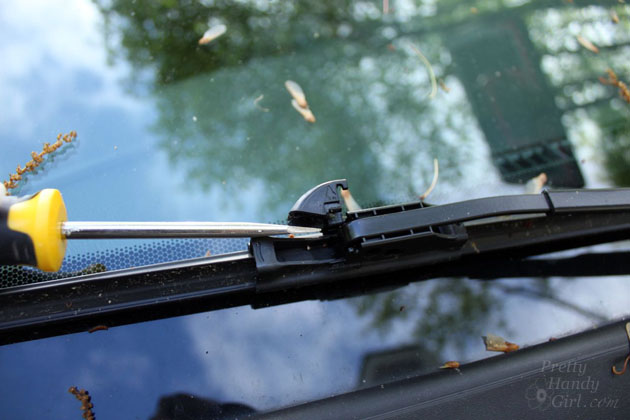
Insert a flathead screwdriver under the tab on the wiper.

2 Minute Wiper Blade Change | Pretty Handy Girl

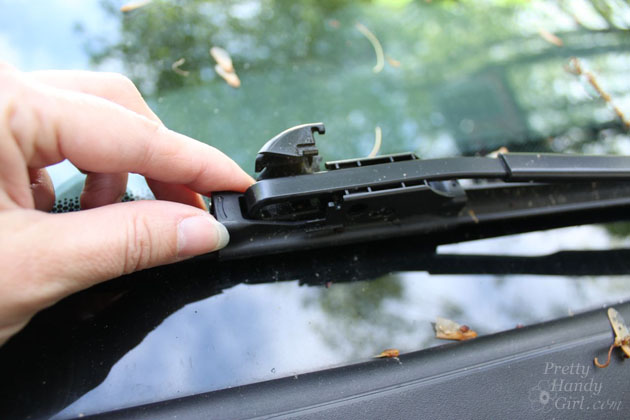
Lift up and expose the wiper arm hook.

2 Minute Wiper Blade Change | Pretty Handy Girl

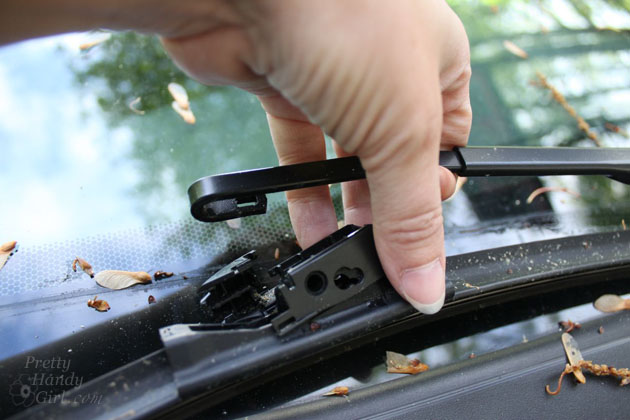
Press the lever down and push the wiper in toward the arm to slip the blade off the hook.

2 Minute Wiper Blade Change | Pretty Handy Girl

Remove the broken wiper.

2 Minute Wiper Blade Change | Pretty Handy Girl

All wipers aren’t the same, so take a look at your’s. Sometimes you need to squeeze the sides or remove a small clip. Here’s a video to help you remove two different types of wipers: Read more

File Cabinet Makeover Using Chalk Paint

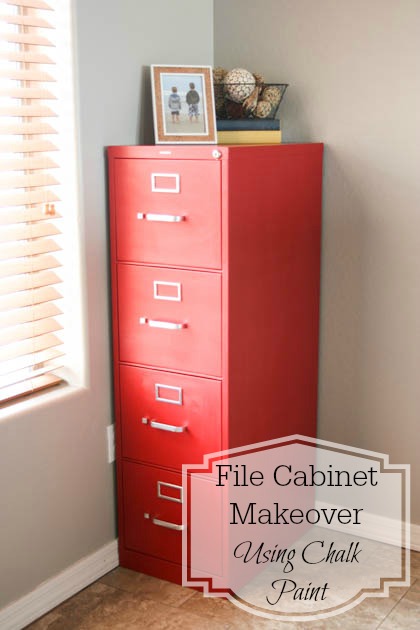
Hey there everyone!  I’m working in my craft room to give it a major overhaul and make it a much more functional and creative space.  It also doubles as an office that I share with my husband.  It’s not always the easiest thing to do, partly because of a lack of organization. One of the biggest projects we’re taking on is completely making over the closet.  I’ve already replaced the closet doors with curtains and I love how much easier it has made it to get to things in the closet.

File Cabinet Makeover Using Chalk Paint

edited-8164

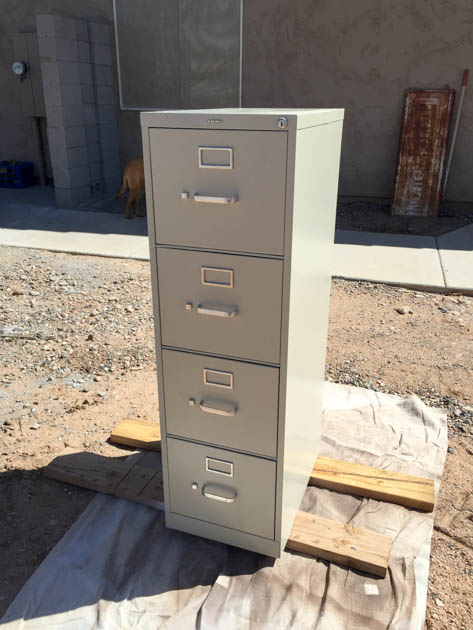
This file cabinet is one of the things that goes in that closet.  When we finish making over the closet, it will be moved to a more prominent location that will be more visible, especially if the curtains are left open.  Because of that, I decided that the boring beige color had to go and I gave it a quick and SUPER cheap makeover!
Here’s what you’ll need to do this project yourself!
File Cabinet Makeover Using Chalk Paint Materials:

File Cabinet Makeover Using Chalk Paint Instructions:

Unless you plan on painting it, you want to remove all of the hardware off of your file cabinet.  I wasn’t quite sure how this would go, but it was extremely easy to remove everything.  Just a couple of bolts and I was pretty much done!

edited-8166

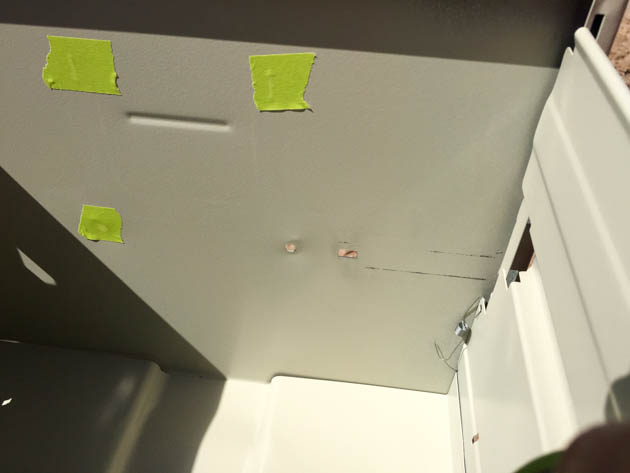
To protect the inside of the cabinet from overspray or paint dripping through, cover all of the holes from the inside using masking or painter’s tape.

edited-8168

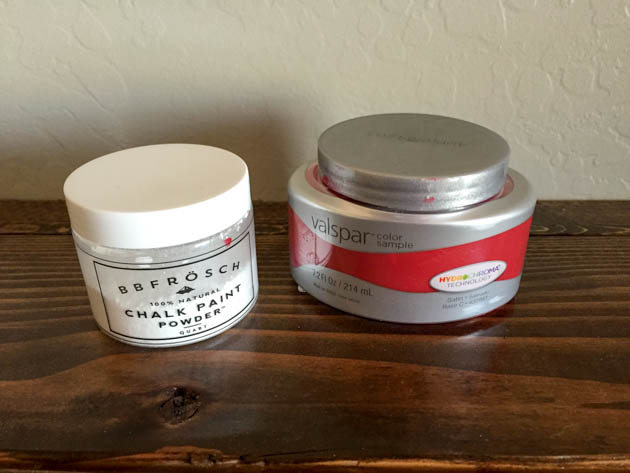
Time to mix your chalk paint.  What I love so much about BB Frösch Chalk Paint Powder is that there’s virtually no waste.  You mix as you go.  I like using the sample-sized paint containers because they’re cheap and if it’s a project where I’m not sure how much paint I’ll need, at least I know I won’t go way over by buying a quart.  The other amazing thing is that there’s virtually no prep work.

Wipe down the file cabinet with a wet cloth and that is it!

edited-8170

If you choose to paint your cabinet using a roller or paint brush, you can get started from this point.  If you plan to use a paint sprayer, you’ll need to prep the paint.  First and foremost, strain your paint!  Lowe’s sells little cone paint strainers (they look like coffee filters) for $.98 a four pack.  Once your paint is strained, you need to thin it with water.  The HomeRight paint sprayer that I use comes with everything you need to do this, plus great instructions. Read more