Rustic Ironing Board Holder | Pretty Handy Girl

DIY Industrial Ironing Board Rack

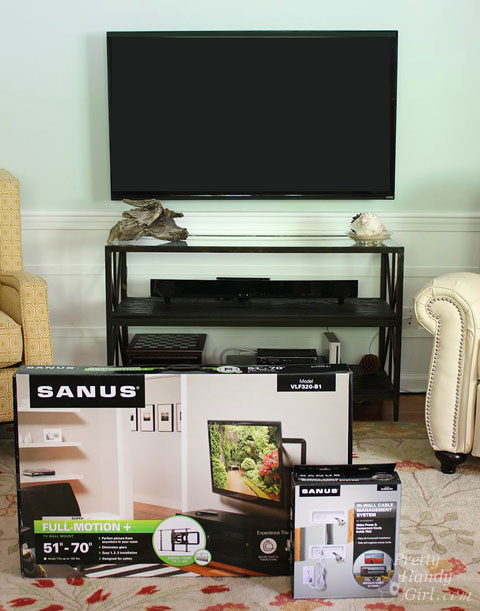
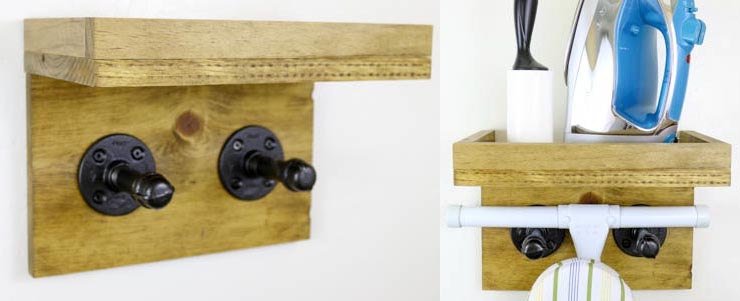
Hey there, everyone!  It’s Katie from Addicted 2 DIY again.  Today, I have a project that is not only quick and easy to put together, but it’s also made of scrap wood!  My lumber rack is getting a bit full, so I’ve been on a scrap wood purge kick lately.  If you remember, last month I shared a tutorial for how to build a rustic wine holder out of scrap wood.  This time I wanted to make a project that would solve two problems.  The first being my growing scrap pile, and my second being that I hate not really having a good space to store my ironing board.  I came up with a solution that took care of both of those problems and it was so fast to put together!

Materials:

  • 1×8 scrap wood (or purchase a 6′ x 1″ x 8″ pine board)
  • 3/4″ square dowels (I used leftover scraps from some wood I ripped down)
  • Kreg Jig
  • 1 1/4″ pocket screws
  • Brad nailer
  • 1 1/4″ brad nails
  • wood glue
  • two 1/2″ steel pipe flanges
  • two 3 1/2″ steel threaded pipe sections
  • two 1/2″ steel pipe caps
  • oil rubbed bronze spray paint
  • 3/4″ wood screws
  • D ring photo hooks

Instructions:

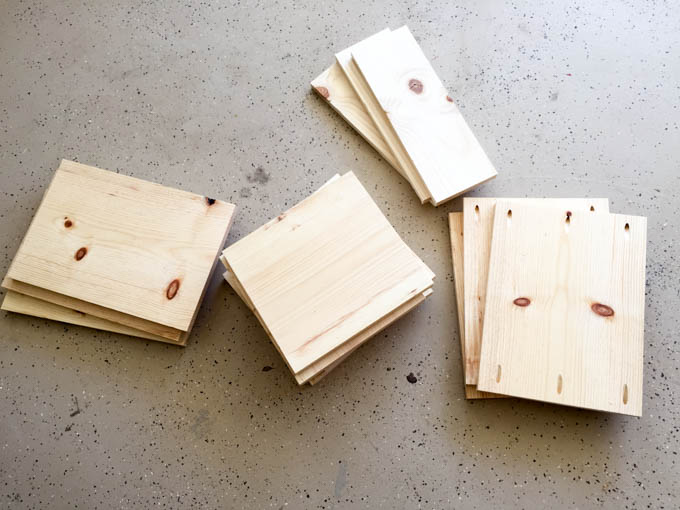
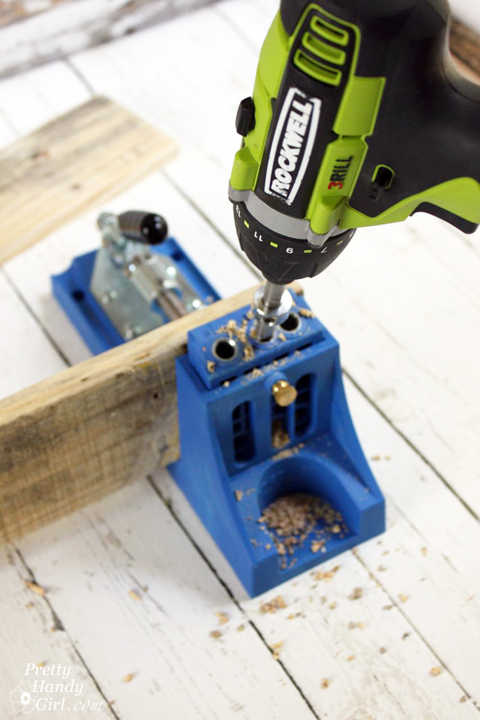
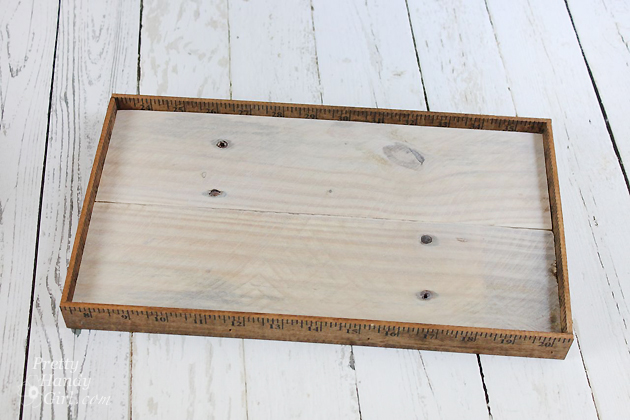
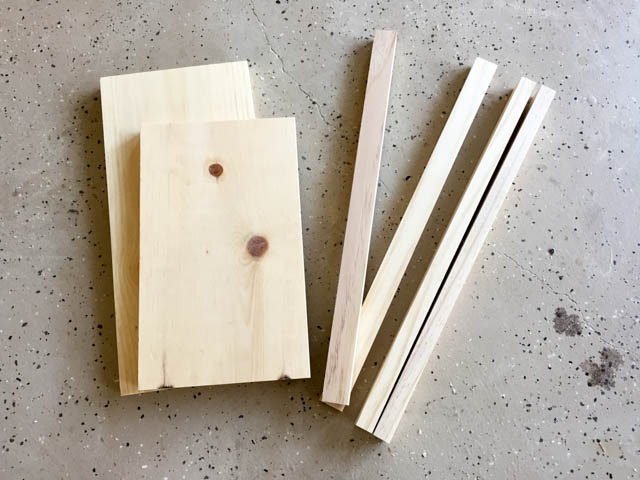
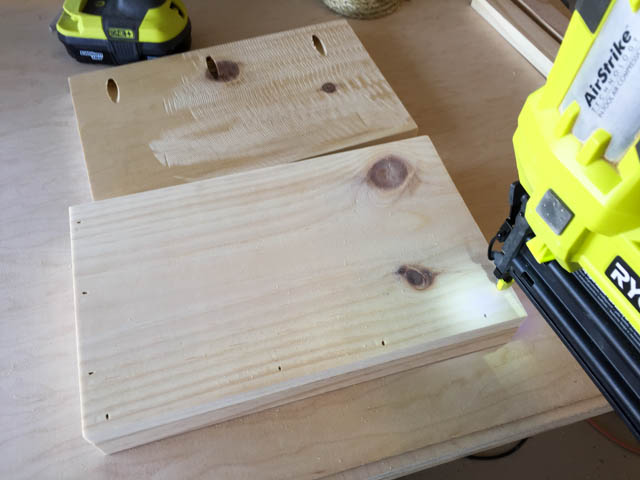
STEP 1:  Dig through your scrap pile or head to your local home improvement store to gather your wood pieces together.  I used 1×8 pieces of pine and rather than purchase 3/4″ dowels, I used 1″ scrap pieces that were leftover from some boards I had ripped down from another project.  Cut the 1×8 pieces to 12″ long.  Cut one 3/4″ dowel to 12″.  Cut two 3/4″ dowels to approximately 6 1/2″.  You’ll want to measure the exact length as not all woods are created equal and sometimes the thickness varies slightly.

Scrap_wood_ironing_board_rack

STEP 2:  Choose the board for the backing of the ironing board rack and drill 3/4″ pocket holes into the long edge of the piece.  Apply glue to the square dowels to attach to the piece that will become the shelf.

assemble_shelf

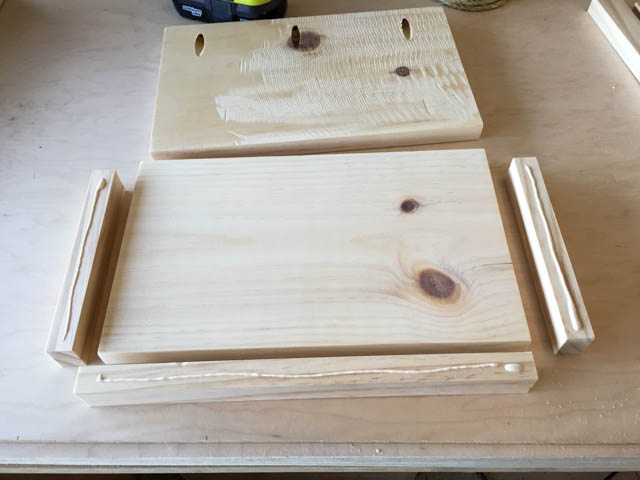
STEP 3:  Line the dowels up flush with the edges of the shelf and nail into place using 1 1/4″ brad nails.

nail_edges_to_shelf

STEP 4:  Attach the back to the shelf with wood glue and 1 1/4″ pocket screws. Read more

It's inevitable your little ones will get bump or bruise. Make them a Boo-Boo Bear to sweeten those tough times by Prodigal Pieces www.prodigalpieces.com #prodigalpieces

It's inevitable your little ones will get bump or bruise. Make them a Boo-Boo Bear to sweeten those tough times by Prodigal Pieces www.prodigalpieces.com #prodigalpieces

Hello PHG readers! I’m coming over from my blog, Prodigal Pieces, to share with you a sweet DIY that is easy to whip up and will make everyone smile (not to mention it makes a perfect last-minute gift!).

Do you remember the days as a child when you would stumble and hurt your knee or have some bump that required a little TLC? As a mom to 6 wonderful kids, I know how precious those times can be, and that’s where Boo-Boo Bear (a rice ice and heat pack) can sweeten those troubled times.

Boo-Boo Bear is sweet little friend who serves as a comforting ice pack that is the perfect temperature for those bumps and bruises that come along, AND he can also be lightly warmed in the microwave to soothe aches and pains. Want to make one for a special little person in your life? Read more

These DIY Stacking Cubbies are a great storage solution for stuffed animals, shoes, and more! The plans and tutorial make it easy to build as many as you like!

Hey everyone!  It’s Katie again from Addicted 2 DIY.  Today I’ve got a project to help keep things organized around the house.  These stacking storage cubbies are perfect for stashing away those growing stuffed animal collections, shoes, toys, books, etc.  They were so simple to build and they are easy to customize to fit your needs.  I’ve got the step-by-step tutorial for you below, and you can also stop by my site to download the printable plans.

Materials:
(contains affiliate links)

  • 2 – 1″ x 12″ x 8′ pine boards
  • 1 – 1″ x 6″ x 8′ pine board
  • 2′ x 4′ sheet of 1/4″ plywood (I used some that I already had on hand)
  • Kreg Jig
  • Brad Nailer
  • 1 1/4″ pocket screws
  • 1 1/4″ brad nails
  • 5/8″ brad nails
  • Kreg Rip-Cut
  • wood glue
  • orbital sander
  • 220 grit sandpaper

Cut list (for each storage cubby):

  • 2 – 1″ x 12″ @ 12″ (sides)
  • 1 – 1″ x 12″ @ 15″ (bottom)
  • 1 – 1″ x 12″ @ 16 1/2″ (top)
  • 1 – 1″ x 6″ @ 16 1/2″ (front)
  • 1 – 1/4″ plywood @ 12 3/4″ x 16 1/2″ (back)

Instructions:

Start by cutting all of your pieces for the cubbies.  Drill 3/4″ pocket holes into the bottom 1×12 pieces.

These DIY Stacking Cubbies are a great storage solution for stuffed animals, shoes, and more! The plans and tutorial make it easy to build as many as you like!

Attach the sides to the bottom using wood glue and 1 1/4″ pocket screws. Read more

DIY-feather-art

DIY Feather Art | Pretty Handy Girl

When I needed an extra piece of art for our living room gallery wall I created DIY Feather Art. You can create your own, but please purchase craft feathers, use fake feathers or paper feathers. (Per the Migratory Bird Treaty Act, it is illegal to collect feathers, nests and other anatomical parts of certain migratory birds.)

Materials:

DIY Feather Art | Pretty Handy Girl

  • Rustic 1×4″ boards (I used pallet wood)
  • Wood yardstick or lattice boards
  • Watered down white paint
  • Paint brush
  • Clamp
  • Scissors
  • Kreg Jig
  • Pocket hole screws (1.25″)
  • Nylon line
  • Small drill bit
  • Drill
  • Staple gun
  • 1″ finish nails
  • Hammer or nailgun
  • Wood glue
  • Feathers
  • Pencil
  • D-ring picture hangers

Instructions:

Cut your 1×4″ boards to size (or select one board the size you want for your art background.) To connect the two boards, mark the location to drill pocket holes.

DIY Feather Art | Pretty Handy Girl

Use the Kreg Jig to drill pocket holes into the back of both boards.

DIY Feather Art | Pretty Handy Girl

Clamp the boards together and join them with 1 1/4″ pocket hole screws.

DIY Feather Art | Pretty Handy Girl

Flip the board over and paint it with watered down white paint for a white-washed look.

DIY Feather Art | Pretty Handy Girl

Mark the width of the white-washed board onto the yardstick. Cut two pieces the same length. Read more

Installing a Wall Mount Flat Screen TV + Hiding Cords | PrettyHandyGirl

Installing a Wall Mount Flat Screen TV + Hiding Cords | PrettyHandyGirl

Do you have a flat screen TV? Do you have children? Wish you could mount your TV on the wall for space and safety? Or have you already mounted your TV, but the wires are visible and hang below your screen? GASP—not the dreaded visible wires syndrome!

Installing a Wall Mount Flat Screen TV + Hiding Cords | PrettyHandyGirl

Today I have a tutorial to show you How to Install a Wall Mount for your TV AND How to Hide those Unsightly Wires in a cable management system. SANUS sent me their Full-Motion TV Wall Mount and In-Wall Cable Management to use for this tutorial. Before you start thinking that you can’t do this, or that you have to hire an electrician to run power behind the TV, you don’t! And this is a very easy DIY project! The SANUS In-Wall Cable Management System is the coolest product. It allows you to hook up to an existing outlet elsewhere (within 60″ horizontally from your TV)! (Per FTC regulations, you should know that this is a sponsored post for SANUS, but I approached them after researching TV mounts and cable management systems. )

Genevieve Gorder has some good information about why you want to use a SANUS mount in this short video:

Why did I want to use the SANUS mount? Here’s just a few reasons:

Installing a Wall Mount Flat Screen TV + Hiding Cords | PrettyHandyGirl

You can pull your screen out from the wall or press it back to just a few inches away. (The arms extend a full 20″. Further than shown, because our cables are too short to fully extend.)

The power cord plugs into an ultra low profile in wall cable system. All wires are hidden behind the TV.

Installing a Wall Mount Flat Screen TV + Hiding Cords | PrettyHandyGirl

The TV can also extend and swivel from left to right. This allows us to be able to watch TV from the adjacent room! Which means the kids can eat pizza AND watch a movie because they can safely sit at the kitchen table and view the movie in the living room. Score one for Mom!  No more pizza stains on the rug or sofa.

Installing a Wall Mount Flat Screen TV + Hiding Cords | PrettyHandyGirl

Ready to learn how you can easily mount your flat-screen TV on the wall AND hide the wires? Let’s get to it! Read more