
I love a challenge. If you hold an object up to me and ask me how it can be transformed, I can usually name a few different things. So, when the Elmer’s #Look4Less Challenge was introduced, I jumped at the opportunity!
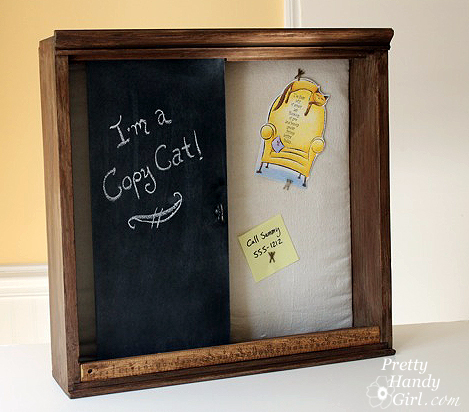
For this challenge I chose to recreate Pottery Barn’s Sliding Chalkboard Wall Organizer. I loved the idea of a sliding board and a bulletin board in the back. But, I especially loved the rustic wood look.

However, I wasn’t crazy about the price. (Obviously that didn’t stop the item from selling out!) So, if you want one for yourself, I’ll save you $100 and show you how to make your own!
My version cost approximately $30 (cost estimate based on materials used. If I used a 1/2 can of spray paint I calculated half the cost.) Personally, I spent about $10 out of pocket on this project because I had a lot of the supplies already. Plus, Elmer’s was kind enough to sent me some of the materials to make the project (shown as links below.)
Be sure to read the end of this post to learn how you can win your own Elmer’s materials!
In addition to the new art supplies, I bought an old drawer to use for the structure of my organization unit. I paid — are you ready for this — two dollars at our local Habitat ReStore! Seriously, only $2 for the main component of my wall organizer unit.

Here is a list of the rest of the supplies I used:

- Elmer’s White Foam Board
- Elmer’s Black Foam Board
- Elmer’s CraftBond Glue Spots Pop-up Medium
- X-acto knife
- Elmer’s Painters gold paint marker
- Krylon chalkboard spray paint
- Drawer
- Damp rag
- Painter’s drop cloth
- Batting
- Wooden ruler
- 1 Knob
- Washers
- Rustoleum brown spray primer
- Behr glazing liquid
- Valspar mocha glaze
- Acrylic or latex paint (dark brown tester sample)
- Acrylic or latex paint (light tan tester sample)
- Wood putty
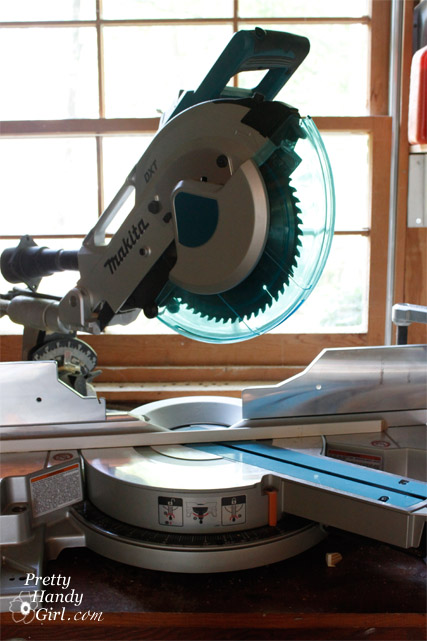
- Saw
- Hammer
- Drill and drill bits
- Handsaw
- Brad nails
- Finish Nail
- Construction glue
- Clamps
- Pencil
- Trim molding
- 1″ x 1″ wood strips (or square dowels)
- Duct tape
Prepping the drawer:
Remove any hardware from the drawer. Use a handsaw to trim off the sides of the face of the drawer. You want the sides to be flush with the sides of the drawer. The top and bottom of the face can extend beyond the drawer.

Orient the drawer so the face is now the bottom of the wall organizational unit. The rear panel of the drawer is now the top of the unit.
Add decorative trim molding to the top as shown:

- Cut decorative trim molding to the width of the top of the unit/drawer. (Check with your local Habitat Restore for inexpensive trim.)
- Choose a finish nail that is long enough to go through the molding and into the drawer. Drill a few pilot holes into the molding (to avoid splitting the wood when you hammer a nail into it.)
- Run a bead of construction glue on the top of the drawer. Lay the molding on top of the glue.
- Use finish nails to hammer through the pilot holes and attach the molding to the drawer.
Wipe off the drawer/unit with a wet rag.
Faux painting the unit:
If you are dealing with a mixture of wood finishes (some paint, some stain), you will want to prime and paint your unit. I decided to give mine a faux rustic wood treatment (because I love that rustic wood look!) Here are the basic steps:

- Use wood putty to fill any holes or cracks. After the putty has dried, sand it smooth. Wipe off any dust from the wood using a damp rag.
- Prime the entire box (minus the back) with Rustoleum brown primer.
- Mix 1 part glaze to 2 parts light tan paint.
- Brush the mixture onto the unit using a tattered paint brush. Keep the strokes in long lines to mimic wood grain.
- Let that layer dry. Mix 1 part glaze to 2 parts dark brown paint.
- Brush it on the unit using the same technique as step 4.
- Finish up by brushing a coat of Vaspar Mocha glaze over the entire unit.
Creating the bulletin board:
After the glaze has dried, cut a piece of Elmer’s White Foam Board the dimensions of the inside of the drawer/unit.

Cut a piece of batting the same size as the foam board.

Cut a piece of painters’ drop cloth 2-3″ wider (on all sides) than the foam board.
Layer the drop cloth, then the batting and top it with the foam board.
Wrap the edges of the drop cloth around the foam board and secure it with duct tape.

Add a few Elmer’s CraftBond Glue Spots Pop-up Medium to the back side of the foam board and press the board into the back of the unit. Instant bulletin board!

Adding a graphic letter to the bulletin board:
Print out a large letter, number or symbol. Cut out around the shape using an x-acto knife.

Position the cut out onto the bulletin board and trace around the edges lightly with pencil.Use an Elmer’s Painters gold paint marker to color inside the pencil tracing.

Creating the sliding chalkboard:
Cut the Elmer’s Black Foam Board the height of the interior of the drawer/unit and about 1/3 the width.

Spray the black foam board with the chalk paint. Add 1-2 more light coats per the directions on the can.

Measure the interior width at the top and bottom of the organizational unit. Cut two 1″ x 1″ strips of wood (or square dowels) for the top and 2 strips for the bottom. Drill a hole in each end of the strips.

Measure out 1″ from the bulletin board, on the bottom of the unit. Mark this location. Repeat for the top . Run a bead of construction glue onto the bottom of the wood strip and then adhere it to the bottom of the unit at the 1″ measurement mark.
Hammer brad nails into the predrilled holes. Repeat for the top of the cubby. (Two 1″ square strips are shown, but only install the back ones at this time.)

If the chalkboard paint has dried, rub a piece of chalk all over the board to season it. Wipe it clean with a dry cloth.
Drill a hole into the chalkboard where you want the handle. Feed the handle through. Add washers to the backside of the chalkboard if you need to take up some of the slack on the screw.

Insert the chalkboard into the wall unit and rest it against the first strip. Add the second strip in front of the chalkboard and attach it the same way you did above.
Be sure that the wood strips are not too snug against the chalkboard. The board should have enough freedom to slide back and forth freely.
Finishing touches:
If you want to give your ruler some age, rub a walnut stain onto the wood. Let it dry. Glue the wooden ruler to the front of the wood strip on the bottom using construction glue.
Clamp the ruler in place and let it dry overnight.

Add your pushpins and a message to the chalkboard and enjoy your efforts! You just saved yourself $100!!! Woot!

If you want instructions for hanging the unit, check out this post on hanging objects on the wall (the right way) the first time.
I’m pretty pleased with my Pottery Barn copy cat. Not to be mean or anything, but I like mine better because of the ruler,

the decorative crown molding,

and most of all for the price!!!
Do you like my Pottery Barn knock off? Or does it still look like an old discarded drawer to you?

Disclaimer: This project has been compensated as part of a social shopper insights study for Elmer’s #gluenglitter #collectivebias #CBias. I was paid a small fee and sent some Elmer’s products. However, the ideas and opinions expressed in this post are solely mine.
Sharing with Sawdust and Paper Scraps – Build{hers} Link Party
Did you like this post? Want to be notified when there are more fantastic tutorials by Pretty Handy Girl? Sign up to receive emails in your inbox:
Enter your email address:
Or follow me on Twitter or Facebook so you can be the first to know!