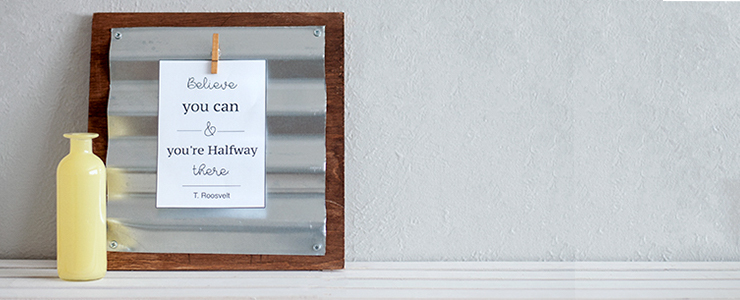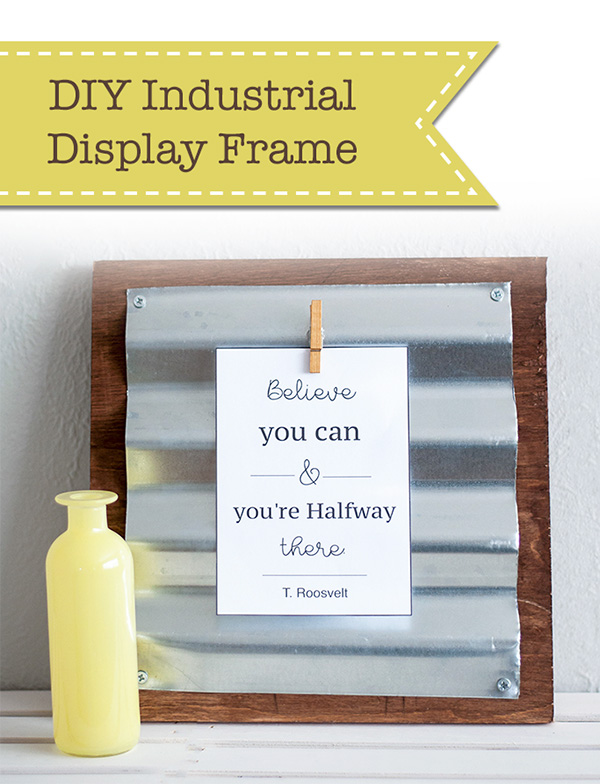
Make a custom industrial display frame using corrugated metal and wood. It is an easy and quick project and makes a perfect gift too.

Make a custom industrial display frame using corrugated metal and wood. It is an easy and quick project and makes a perfect gift too.Easy DIY Industrial Display Frame

Hello Pretty Handy Girl readers, Anika here from Anika’s DIY Life with an industrial metal and wood display frame for you to make!

Lately, I find myself drawn to the industrial style with the metal and wood combinations. A couple of weeks ago, I made this sign for my workshop using corrugated metal and I think it turned out amazing.
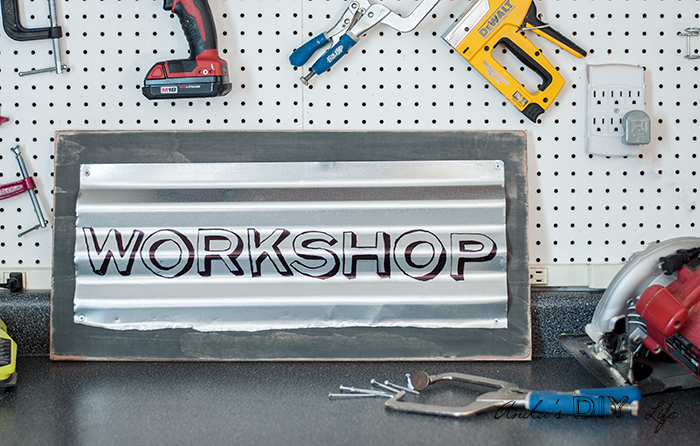
How to make a custom industrial sign

I loved it so much that I wanted to make something similar for my office. I came up with a simple display frame. This is a super easy and quick project. And DIY Industrial Display Frames would make a great handmade gift for anyone!
How to make a custom industrial display frame

Materials:

(I’ve included affiliate links for your convenience. I earn a small percentage from a purchase using these links. There is no additional cost to you. You can read more about affiliate links here.)

  • Corrugated metal sheet – cut to 11.5″ x 11.5″
  • ¾” plywood – cut to 12″ x 12″
  • [amazon_textlink asin=’B000KWKQTS’ text=’¾” Spax screws’ template=’ProductLink’ store=’prett-wp-001-20′ marketplace=’US’ link_id=’0e9701a6-acfd-11e7-96d4-3f296134737b’]
  • Stain in color of your choice (I used Early American)
  • [amazon_textlink asin=’B003BXE6ZI’ text=’Mini clothespin’ template=’ProductLink’ store=’prett-wp-001-20′ marketplace=’US’ link_id=’f894d98c-acfc-11e7-83c3-1d6e95b98e44′]
  • Hot glue
  • Drill
  • Tin snips or Jigsaw with metal cutting blade
  • Gloves
  • [amazon_textlink asin=’B01AWK1XAS’ text=’Eye protection’ template=’ProductLink’ store=’prett-wp-001-20′ marketplace=’US’ link_id=’e1f16864-acfc-11e7-8b07-2d86581d9e35′]

Instructions:

Step 1 – Cut your plywood to size. Cut your corrugated metal sheet slightly smaller than the plywood board. Use tin snips or a jigsaw with a metal cutting blade. Be sure to take appropriate precautions (wear work gloves and safety glasses because the metal is really sharp.)
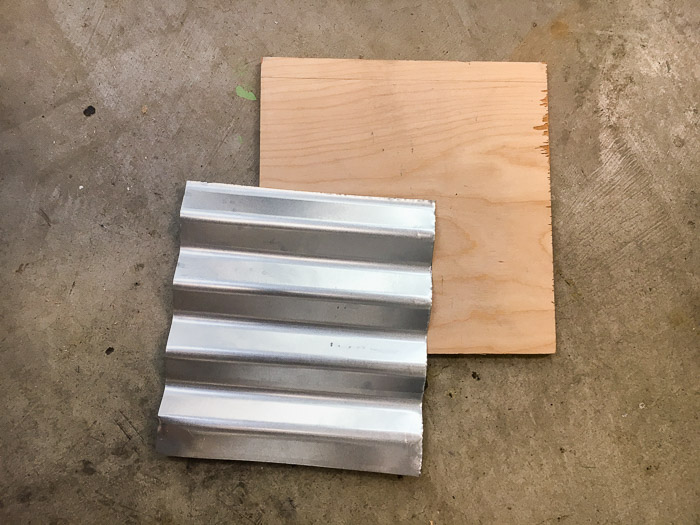
How to make an industrial picture frame

Step 2 – Stain the plywood in the color of your choice.
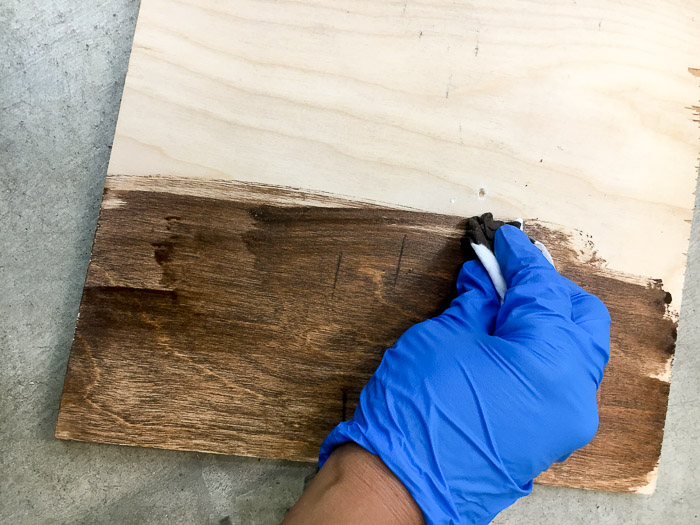
Stained plywood for a metal and wood industrial frame

Step 3 – Attach the corrugated metal sheet to the plywood using the Spax screws. Leave ½” on each side to prevent the screws from splitting the metal.  (Why Spax screws? They go through metal and wood easily without the need to pre-drill.)
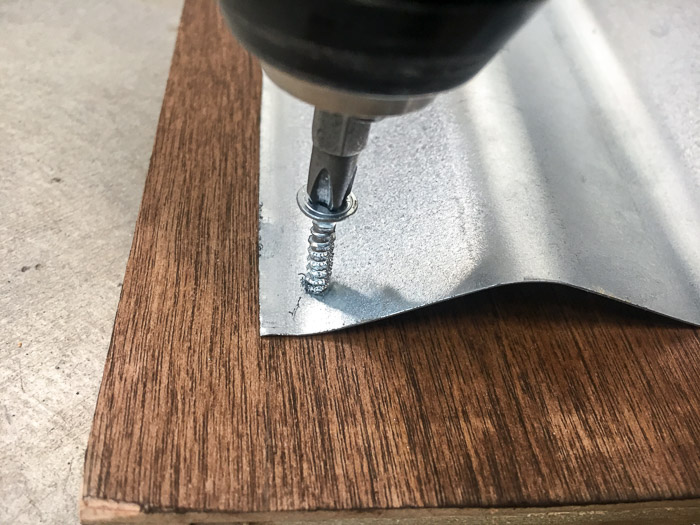
How to attach metal to wood

Step 4 – Decide if you want the display frame in landscape or portrait orientation and attach the mini clothespin using hot glue.
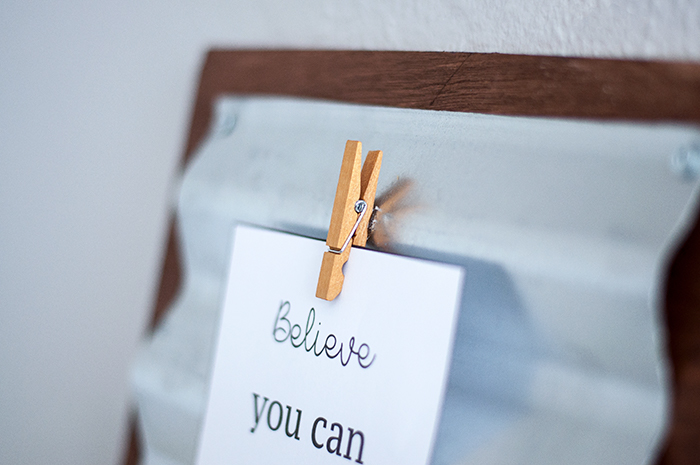
Making a simple industrial metal and wood picture frame

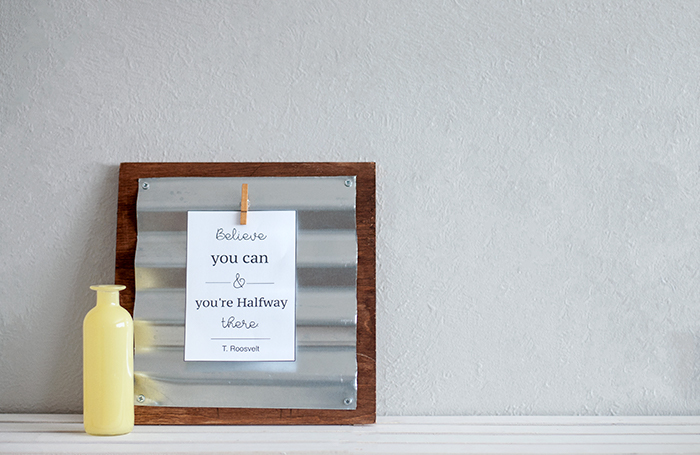
I chose the portrait orientation and popped in one of my favorite quotes. The size is perfect for a 5×7 picture and I can easily switch out the quote for a picture when I want.

How to make a custom industrial display frame

I hope you liked this fun DIY Industrial Display Frame. Until next time!

~ View more of Anika’s DIY Tutorials ~

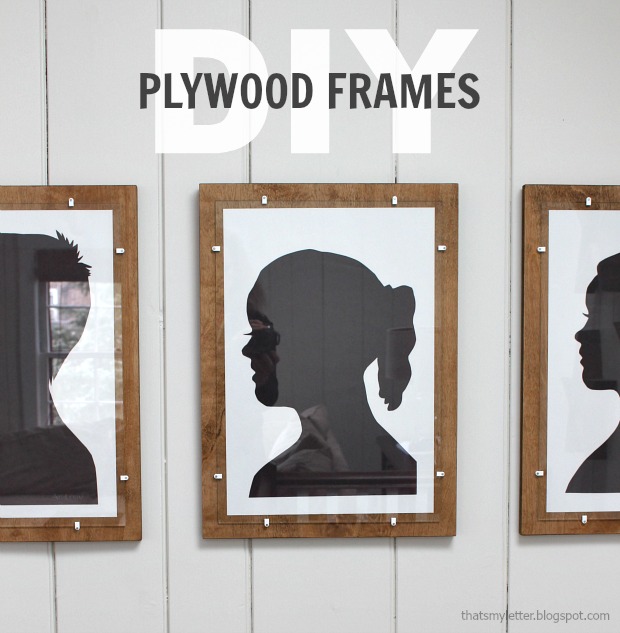
Did you like this project? If so, I think you’ll love these simple DIY Plywood Frames:

Simple Plywood Frames


Floating TV ShelfHow to Build a Floating TV Shelf
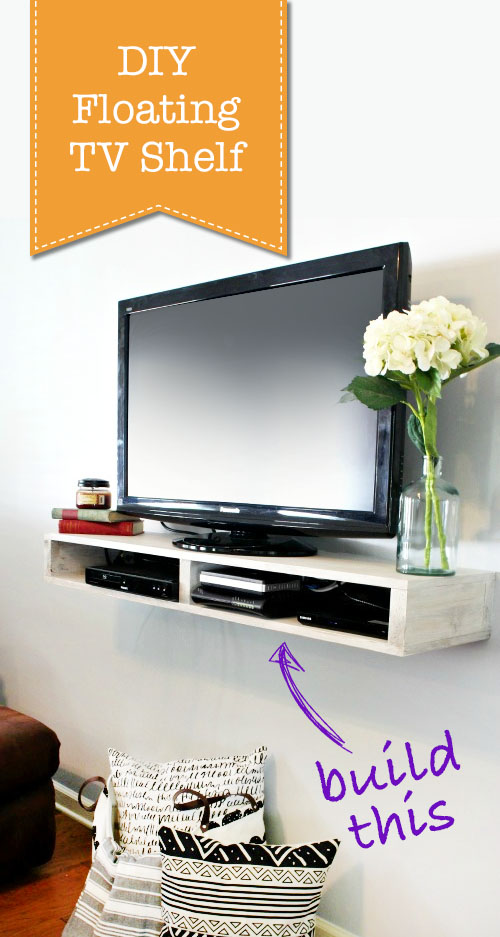
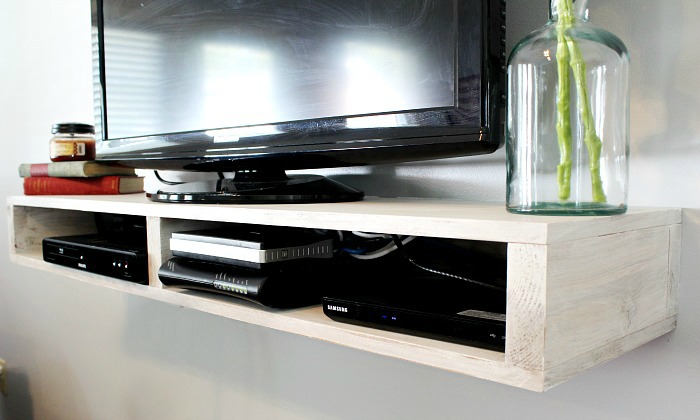
Hey guys!  It’s Shara here again from Woodshop Diaries and I’m so excited to show you this cute new floating TV shelf I made to hold your TV and components!  It’s modern, sleek, and does its job without taking up a lot of space.  It also has two open cubbies to house DVD players, wireless routers, modems, etc.

Floating TV Shelf

This shelf is very easy to build and doesn’t require any special tools.  You can have it done in a couple hours and hung on the wall in about five minutes.

So are you ready to learn How to Build Your Own Floating TV Shelf?

Floating TV Shelf Materials:

Floating TV Shelf Cut List:

  • (1) 1 ½” x 3 ½” x 48″ (back of TV shelf frame)
  • (3) 1 ½” x 3 ½” x 10½” (TV shelf supports)
  • (2) ¾” x 12″ x 48″ (top and bottom of shelf)

Floating TV Shelf Instructions:

Step 1: Assemble Floating TV Shelf Frame

Depending on how tall you want your shelf, you can either use a 2″x 4″ (which would make the opening in your shelf 3 ½” tall).  Or you can use a 2″x 6″ (which would make the opening 5 ½” tall).  If you have a table saw, you can rip whatever size board to the custom height you want.  (For this build, I ripped a 2″x 6″ down to 4″ wide for my frame.)

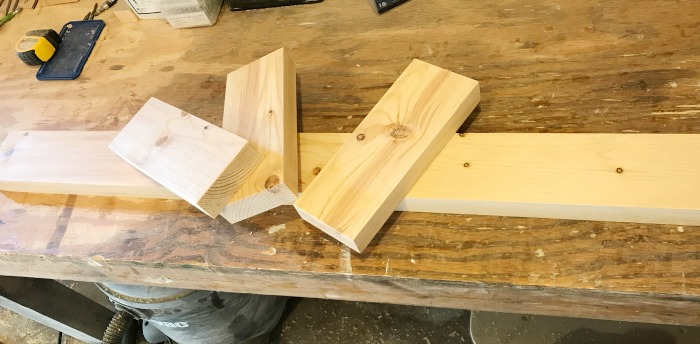
Once you determine the width you want, cut a piece at 48″ long.  Then, cut your three pieces at 10 ½” long.

Floating TV Shelf

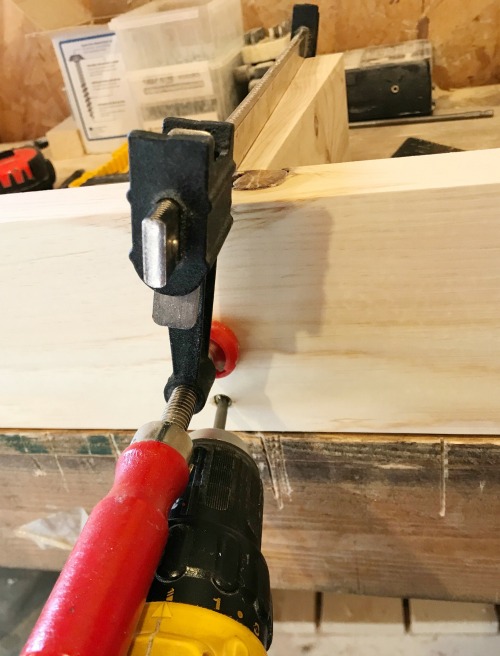
Glue, clamp and screw two of the short boards onto the ends of the long board.

Floating TV Shelf

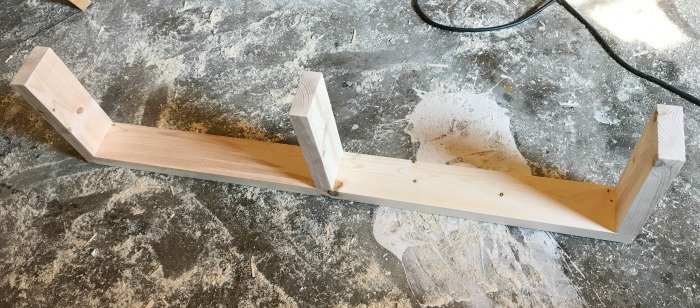
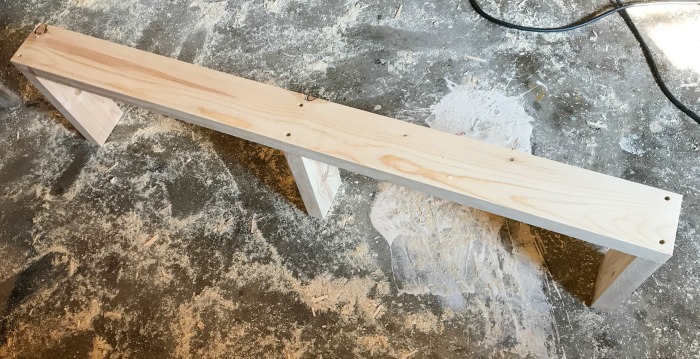
Then glue and screw the third short board in the center using 2 ½” screws.  (Remember to pre-drill before screwing.) Your assembled shelf should look like this:

Floating TV Shelf

Floating TV Shelf

Step 2: Holes for Cables and Cords

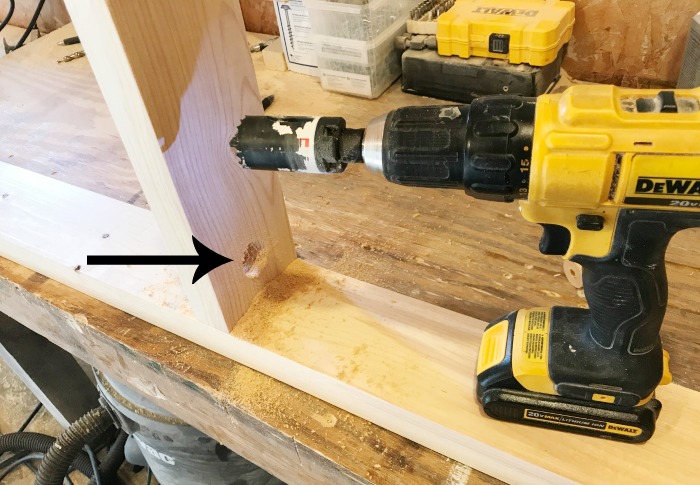
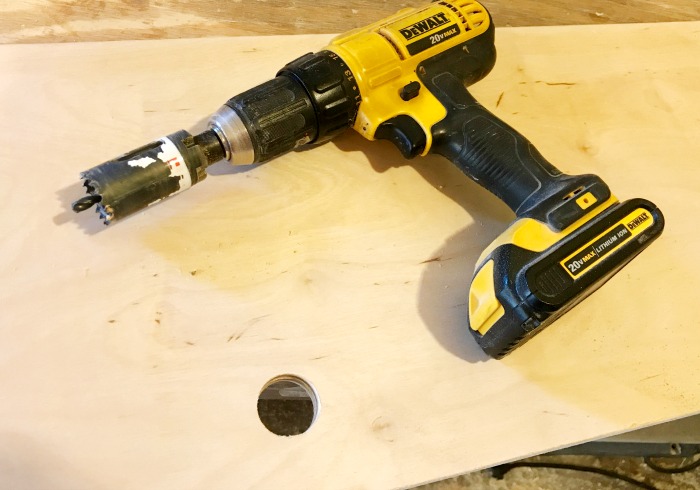
Use a 1 ¼” or larger hole saw to drill a hole through the middle of the center shelf support.  This will allow cords to run between sections depending on where the power cords need to go.  (Make sure to avoid the screws holding the board in place when drilling your hole.)

Floating TV Shelf

Step 3: Add Plywood Top and Bottom to Frame

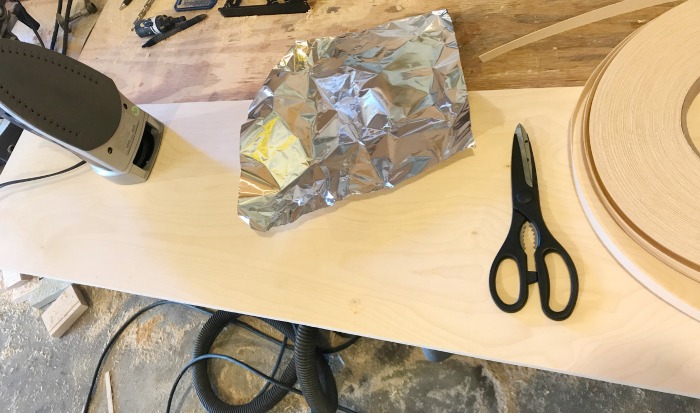
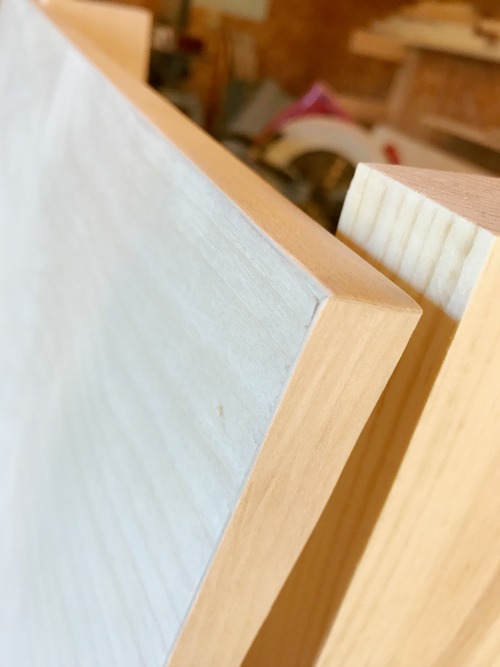
Use table saw or circular saw to cut the ¼ sheet of plywood in half to give you two 12″ x 48″ pieces. Sand the edges smooth. Apply edge banding to the plywood edges.  You can follow Brittany’s tutorial for finishing off plywood with edge-banding if you need more instructions.

Floating TV Shelf

Remove any excess banding with a sander to make your edges clean and smooth.

Floating TV Shelf

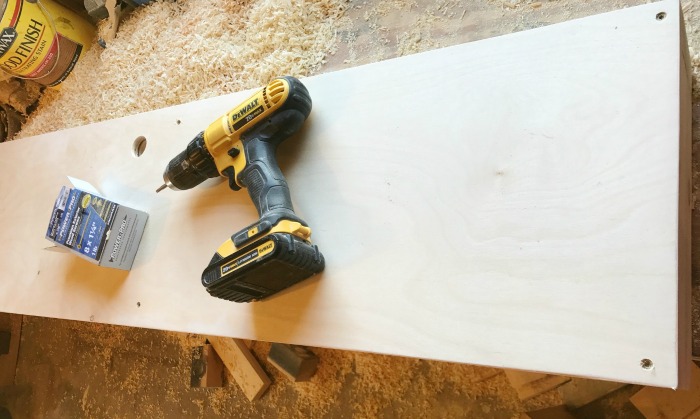
Determine where you will need holes for cords in the top and/or bottom of your floating shelf. Drill your holes in the plywood where needed.

Floating TV Shelf

Center the plywood on the shelf. Use 1 ¼” wood screws to attach the plywood to the shelf supports.  Flip the shelf over and repeat the process for the bottom.

Floating TV Shelf

Step 4:  Finish the TV Shelf

Putty all screw holes and sand the shelf well.  Paint or stain as desired.  (I stained my shelf using Minwax Early American and then dry-brushed white paint on top. Finally I used the sander to distress the shelf in random spots.

Floating TV Shelf

Step 5: Install

Grab a helper to hold the shelf during installation. Find the location you want your shelf to hang. Use a level to make sure the shelf is level. Locate at least 2 studs (3 is better) behind the shelf and use at least four (two per stud) 2 ½” screws to attach through the back of the shelf into the studs. And that’s it.  You’re done!

Floating TV Shelf

Such a simple, yet stylish and functional project!  What do you guys think?  Is this something you would try in your living room or bedroom for somewhere to set your TV without taking up a large footprint?  I love this idea!  I hope you enjoyed this project!

Pin this tutorial to share the DIY inspiration:

Floating TV Shelf

Shara's Signature~Read more of Shara’s Tutorials~


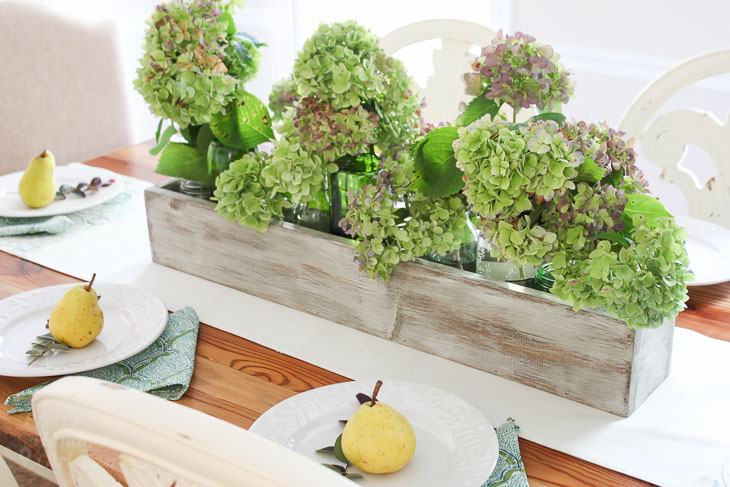
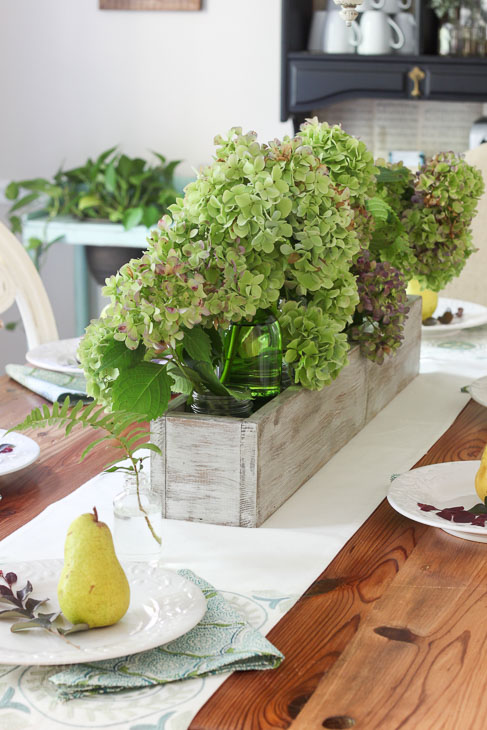
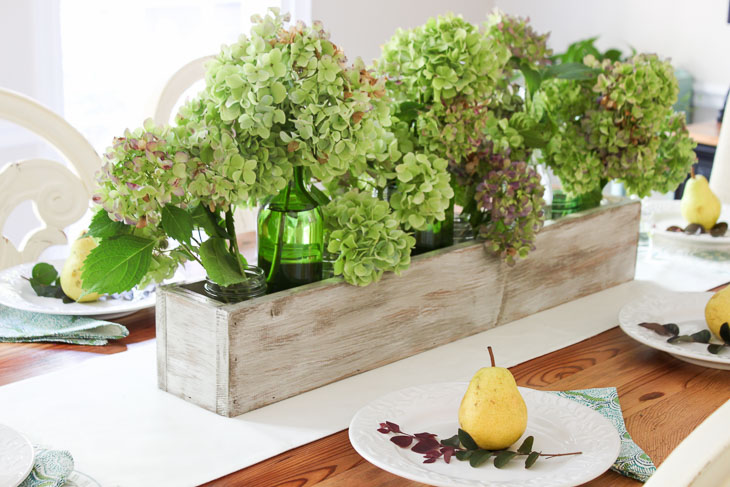
Green and purple hydrangeas in rustic wood trough. Build Your own Rustic Trough Centerpiece tutorial.

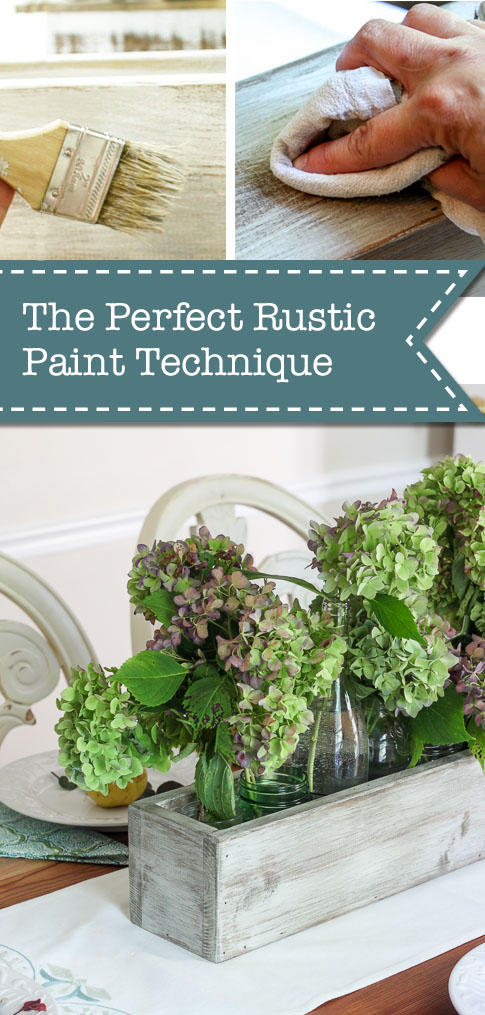
The Perfect Rustic Paint Technique {with Video Tutorial}The Perfect Rustic Paint Technique {with Video Tutorial}
I have been painting and distressing furniture and home décor for almost ten years now. Over the years I’ve tried a lot of different techniques, but the one I’m going to show you today is the one I consider “The Perfect Rustic Paint Technique!” The reason I like this technique is because I get consistent results and it’s not as messy and time consuming as painting several layers and sanding back down to the raw wood. This isn’t to say that I don’t still experiment or sometimes go back to previous techniques. I just wanted to show you my tried and true technique.

Green and purple hydrangeas in rustic wood trough. Build Your own Rustic Trough Centerpiece tutorial.

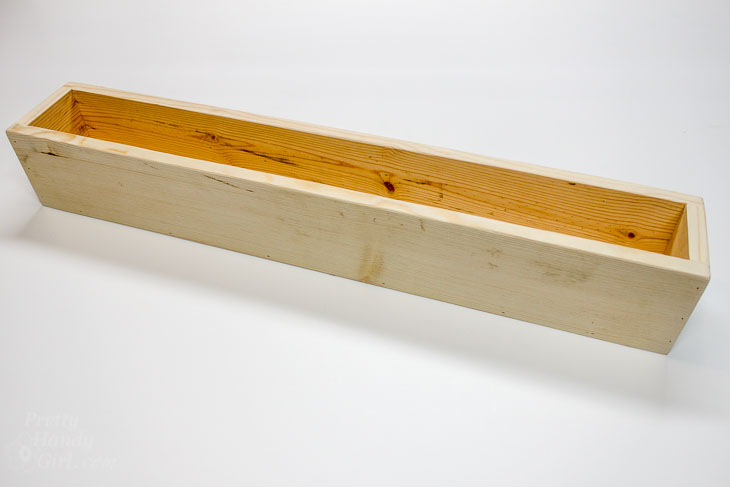
You may have seen the DIY Trough Centerpiece I built last week. If you don’t have a piece of furniture you want to try this technique on, go ahead and build this quick little (or should I say long) DIY Trough Centerpiece to experiment on.

Finished trough build.

Then you’ll want to gather some materials and coffee (this is optional, but I find I enjoy DIYing with a cup of java.)

Materials:

(I’ve included affiliate links for your convenience. I earn a small percentage from a purchase using these links. There is no additional cost to you. You can read more about affiliate links here.)

Instructions:

Want to cut to the chase and watch the video tutorial? Well, be my guest:

If you like to see the step-by-step tutorial, here’s the break down:

Step 1: Sand & Stain

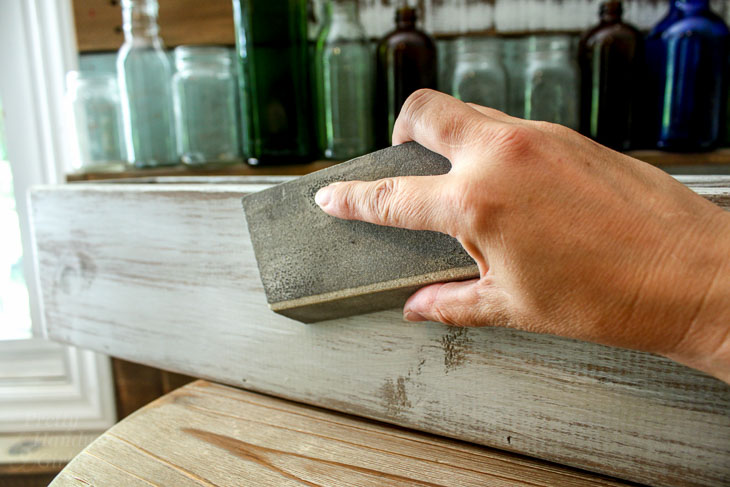
Lightly sand your piece to remove any rough spots.

If you’re working with a pre-finished piece of furniture, clean well to remove any dirt or oils that would resist the stain. Then sand everything lightly to give the surface a little “tooth” for the paint to grip to. Skip the next step unless you have sanded down to bare wood.

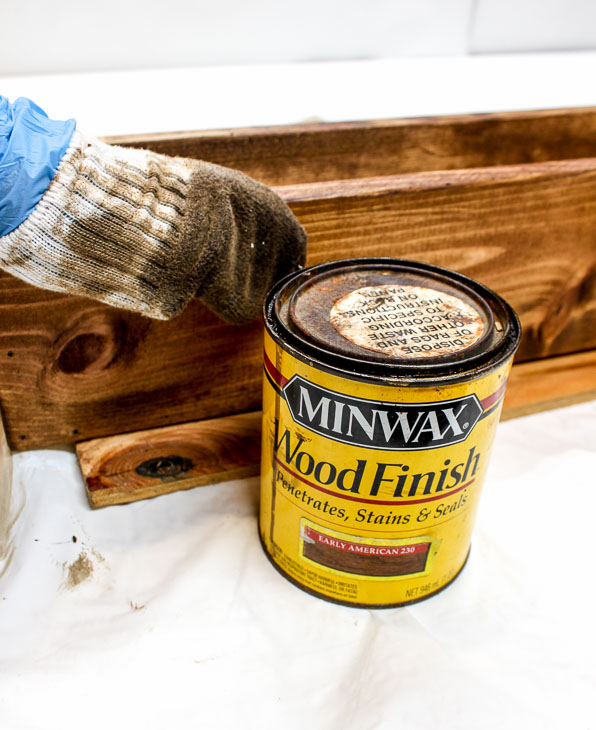
Put on your rubber glove and grab a rag or slip an old sock over your hand. Dip the rag into the stain and wipe it on the wood. Wipe off any excess stain. If you want a darker look, apply a second or third coat of stain. Allow the stain to dry (overnight is best.)

Wipe on Minwax Early American Stain.

Step 2: Painting

A quick note about chalk-like paints: I have tried a lot of different chalk paints and still don’t have an absolute favorite. Personally I like to buy them based on a pre-mixed color I like. That being said, I do have some that I don’t like as much. Although the Annie Sloan Chalk Paints were first on the scene, I struggled with them having unmixed chunks in them and they tended to dry out too quickly for my taste. That being said, most chalk paints will dry out quicker than latex paint. So make not to leave the lid off too long (it’s better to pour a small amount onto a tray or paper plate.) And store chalk paint in a temperature controlled environment. 

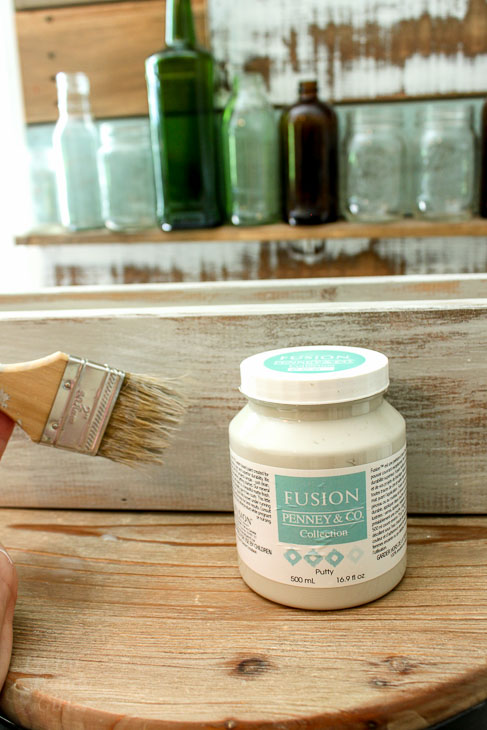
Dip your chip brush into the chalk paint and dab off most of the paint onto rag. Your paint brush should have very little paint on it.

Lightly drag the chip brush over your piece following the direction of the wood grain. This technique is called dry brushing (in case you wondered.) Allow some of the wood stain to show through. This will cut down on the need to sand down to the wood later.

Dry brush Fusion paint.

Step 3: Adding Dimension

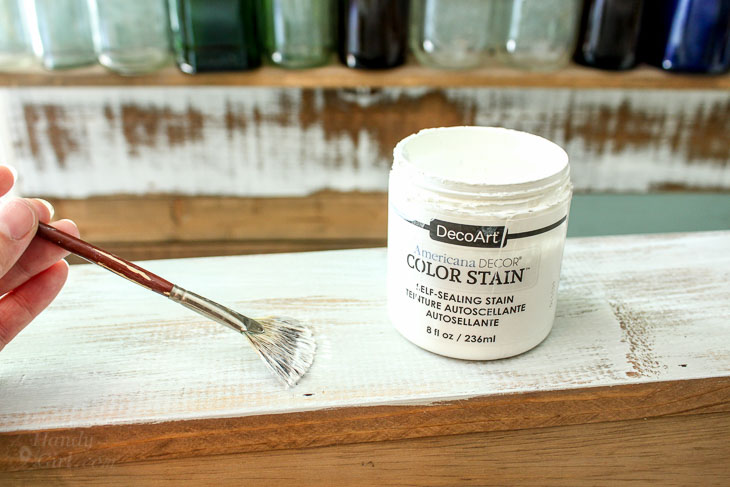
Allow the paint to dry (which shouldn’t take very long.) Dip another chip brush into the white color stain. Wipe off most of the paint and dry brush some “hi-lights” onto your piece. You don’t need as much coverage as the painting step. This is just adding some extra dimension to the piece.

Use DecoArt white stain for highlights.

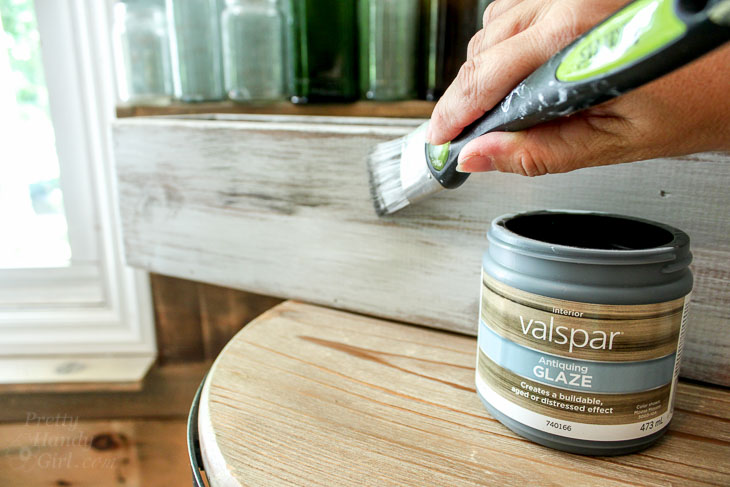
After the white stain has dried, dip another brush into the antiquing glaze and wipe most of the glaze off the brush. Once again, dry brush some areas on your piece to give some more dimension.

Dry brush Valspar Antiquing Glaze.

If you make a mistake or put too much glaze on, you can wipe it off within the first few seconds. Alternatively, you can always sand off any paint, stain or glaze you apply.

Sand smooth.

Once you’ve achieved your desired amount of paint, stain and glaze, get ready to seal in the beauty!

Step 4: Wax Finish Coat

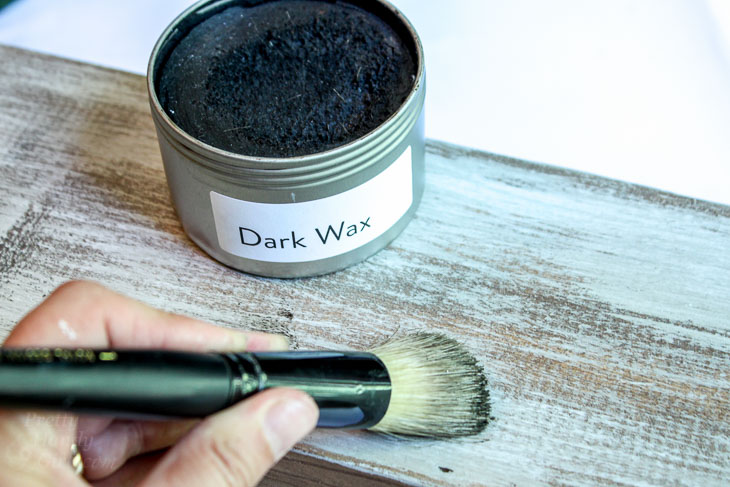
Apply some dark wax onto a wax brush (or stencil brush.) Rub the wax on in a circular pattern.

Apply Dark Wax.

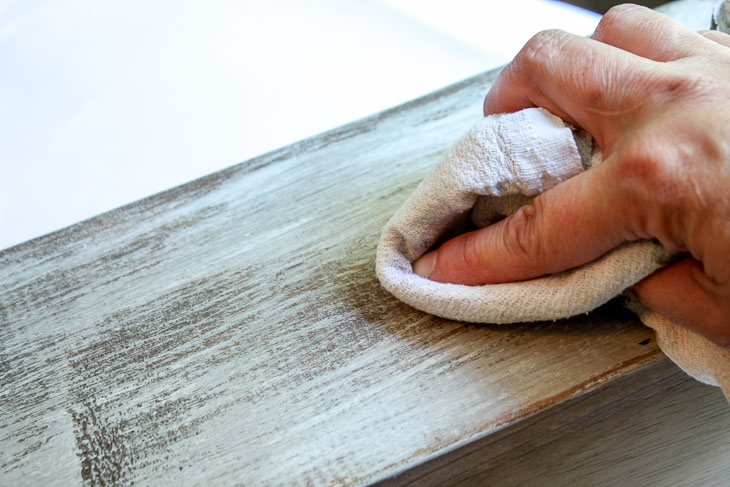
Then buff it off with a clean dry rag. The wax gives your piece a soft luster and protects it from water. If you are working with a piece of furniture, you may want to apply another coat of wax. And you will need to re-apply in a few years.

Buff off wax.

Now stand back and admire that Perfect Rustic Paint Technique!

She’s purdy, don’t you think?

Pin this picture to share the rustic love!

The Perfect Rustic Paint Technique {with Video Tutorial}
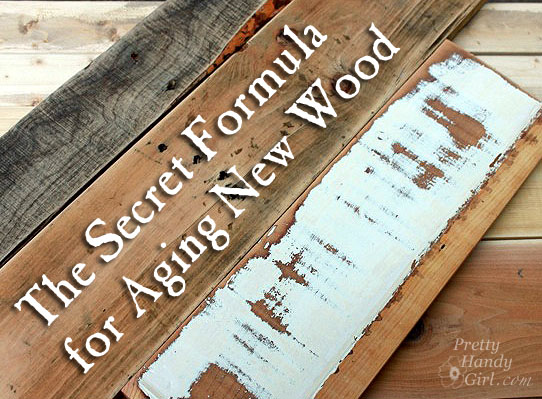
Liked this tutorial? I think you’re going to love my Secret Formula for Aging New Wood:

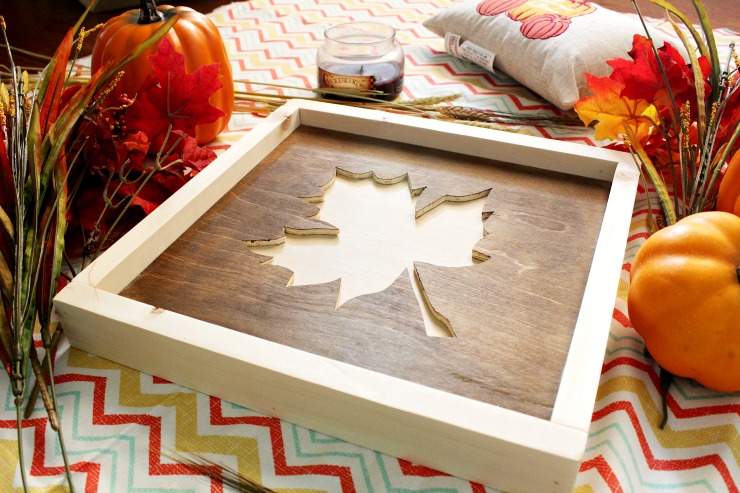
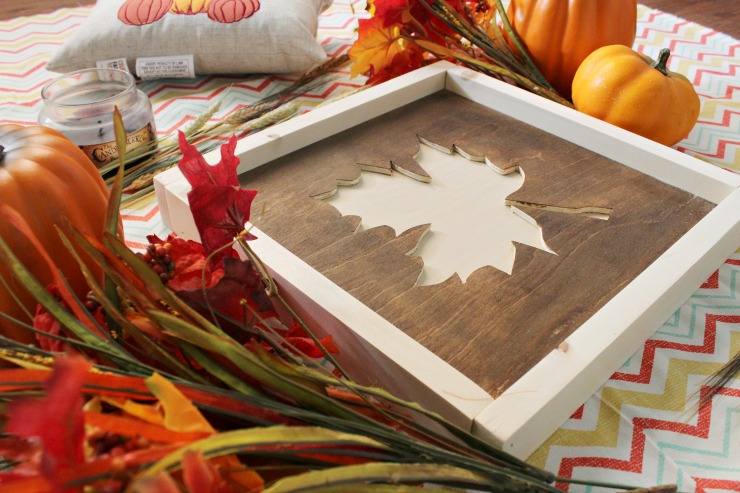
DIY Framed fall art from scrap wood

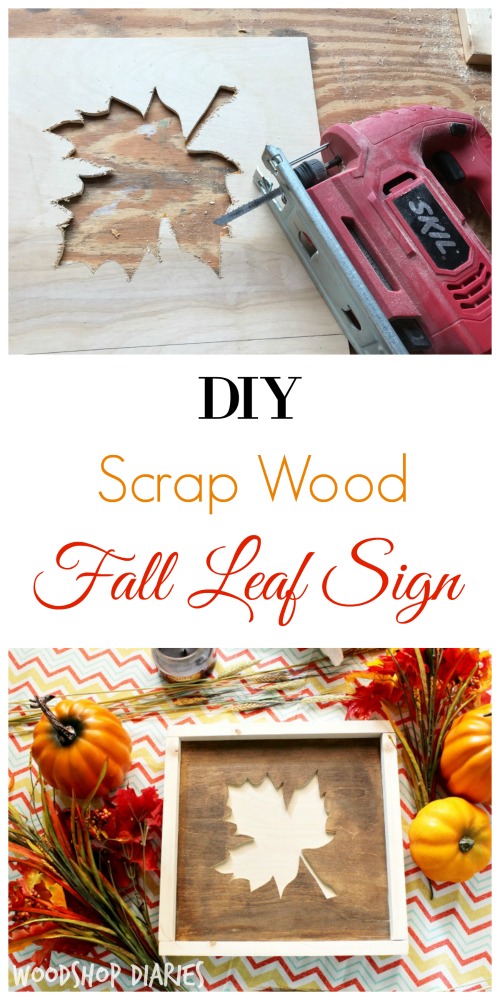
How to make an adorable fall sign from scrap woodDIY Scrap Wood Fall Leaf Sign

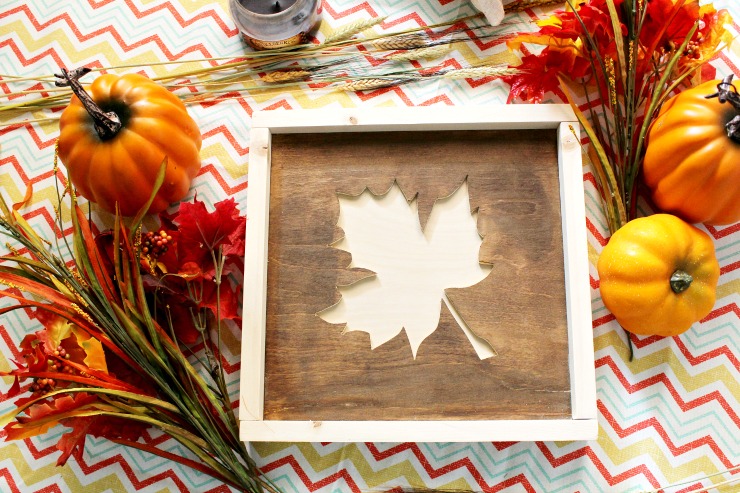
It’s Shara from Woodshop Diaries and I’ve been on a roll lately with scrap wood projects (remember the scrap wood caddy?) Today I have another fun project to help you get ready for fall! It’s a super easy DIY Scrap Wood Fall Leaf Sign.

I’m ALWAYS in the mood for fall because it’s my favorite season! I know it’s August, but in just a few short days the calendar will flip to September! Time to get a head start. This simple project is great for decorating your house. Instead of a leaf, you could make a turkey, pumpkin, or whatever you want!

DIY Framed fall art from scrap wood

Materials:

(I’ve included affiliate links for your convenience. I earn a small percentage from a purchase using these links. There is no additional cost to you. You can read more about affiliate links here.)

Cut List:

  • 1/4” x 11 ½” x 11 ½”
  • 3/4” x 11 ½” x 11 ½”
  • (2) 3/4” x 1 ½” x 11 ½”
  • (2) 3/4” x 1 ½” x 13”

Instructions:

Step 1: Cut your plywood to size

Cut your 1/4” and 3/4” piece of plywood to the same size. (Mine are 11 ½” square, but if you have larger or smaller pieces of scrap, feel free to alter the sizes. The only rule is to make sure your 1/4″ & 3/4″ plywood scraps are the same size.)

Step 2: Cut out your leaf shape

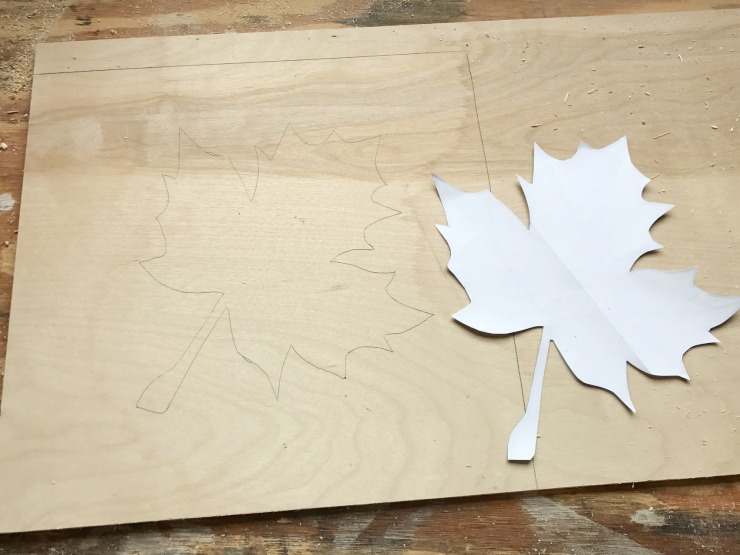
Perform a Google search for “leaf clip art” and make your own stencil from a leaf print out.

Trace your leaf shape stencil onto the 1/4” piece of plywood, making sure it is centered. (Ignore the fact that I didn’t cut out my plywood square shape first.)

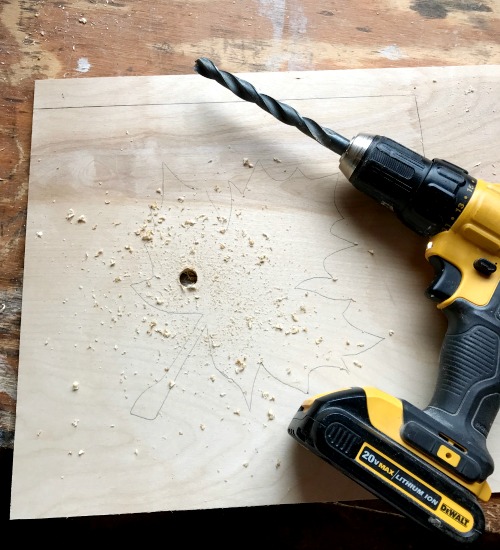
Using a large drill bit, drill a hole into the middle of the leaf shape.

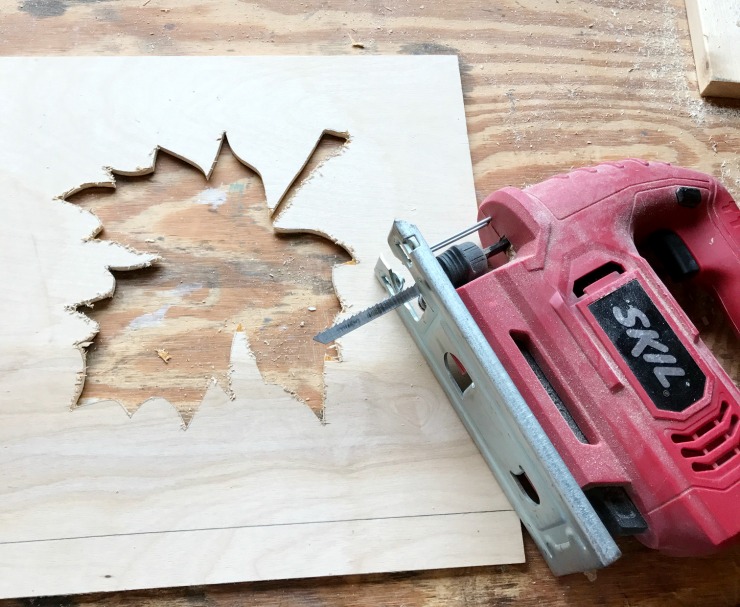
Insert your jig saw blade into the pre-drilled hole.

Cut out the leaf shape.

Sand the rough edges with sandpaper.

Step 3: Stain or paint pieces

Paint or stain the pieces at this point. For the same look as mine, stain the 1/4″ plywood and leave the 3/4” piece unfinished. This will allow the leaf shape to stand out against the dark stain.  In addition, you can paint the ¾” piece, or stain it a different color.  Use your own creativity to finish your DIY Scrap Wood Fall Sign.

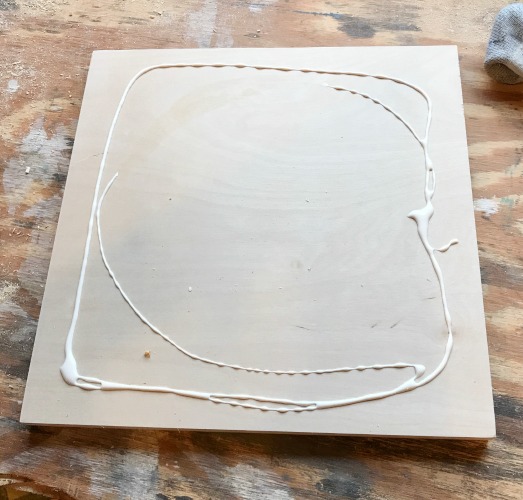
Step 4: Glue the pieces together

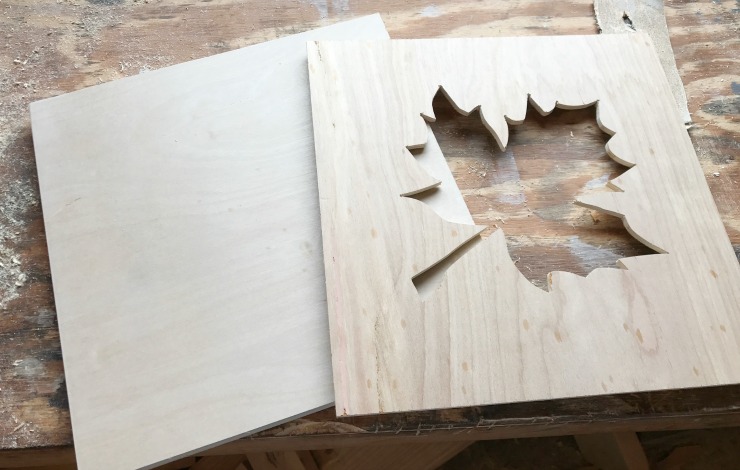
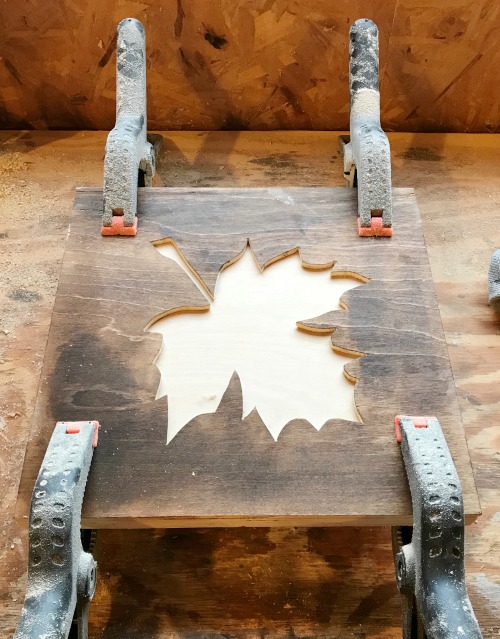
Glue the 1/4” plywood cut out to the 3/4” piece of plywood.

Clamp the two pieces together as the glue dries.

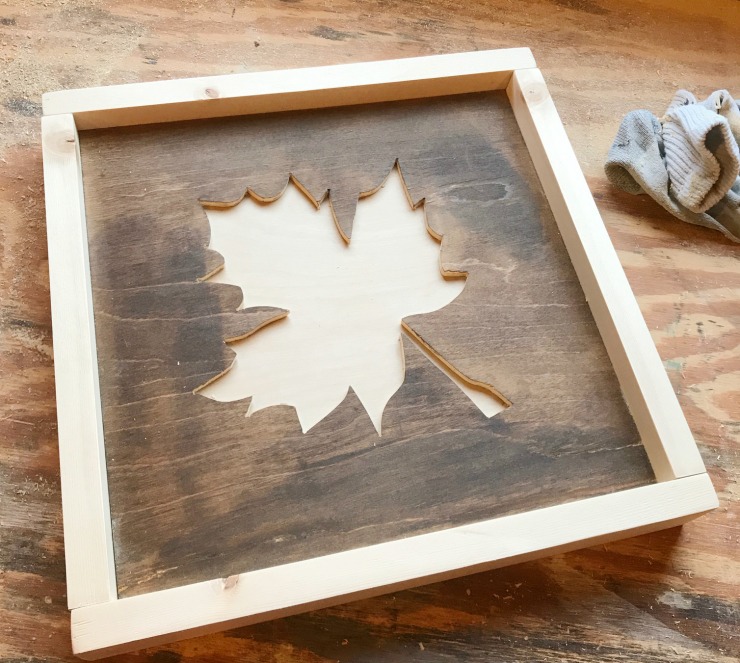
Step 5: Add the frame

Once the glue is dry, cut pieces of 1″ x 2″ to fit around the edges of the plywood art. (Measure yourself or use the cut list above).  Attach using a nail gun or hammer and nails.

Add a coat of polycrylic to protect the wood.

Then hang that baby up or set it somewhere where you will see it.

DIY Fall Sign from scrap wood

Now grab your hot chocolate and hoodies because you are officially ready for sweater weather and the fall season!

Fall leaf sign from scrap wood

For more scrap wood inspiration, be sure to check out these other awesome scrap projects:

DIY Cake Carrier from wood scraps   or  DIY Keepsake Box from wood scraps

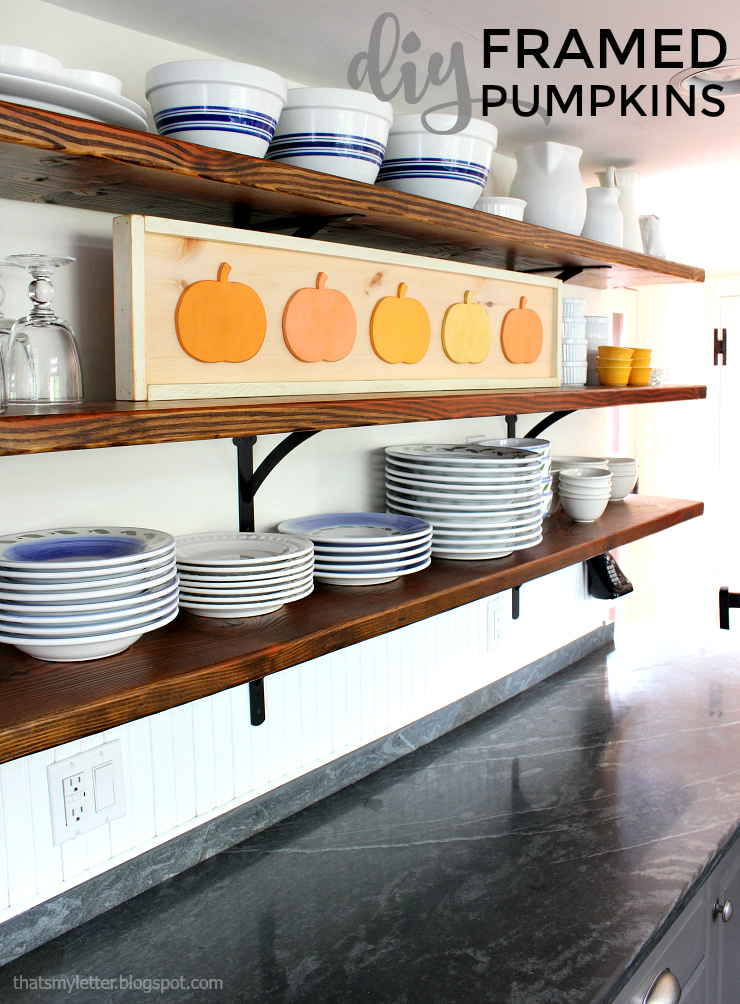
or  DIY Framed Pumpkins:DIY Framed Pumpkins | Pretty Handy Girl

Until next time, happy building! And happy fall, ya’ll! 🙂Shara's Signature~Read more of Shara’s Projects~

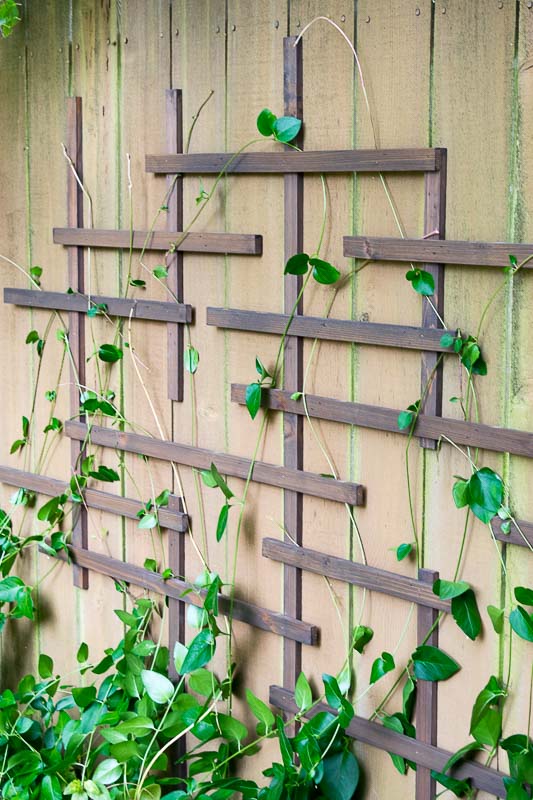
Weave your vines through the fence trellis to create a living wall!

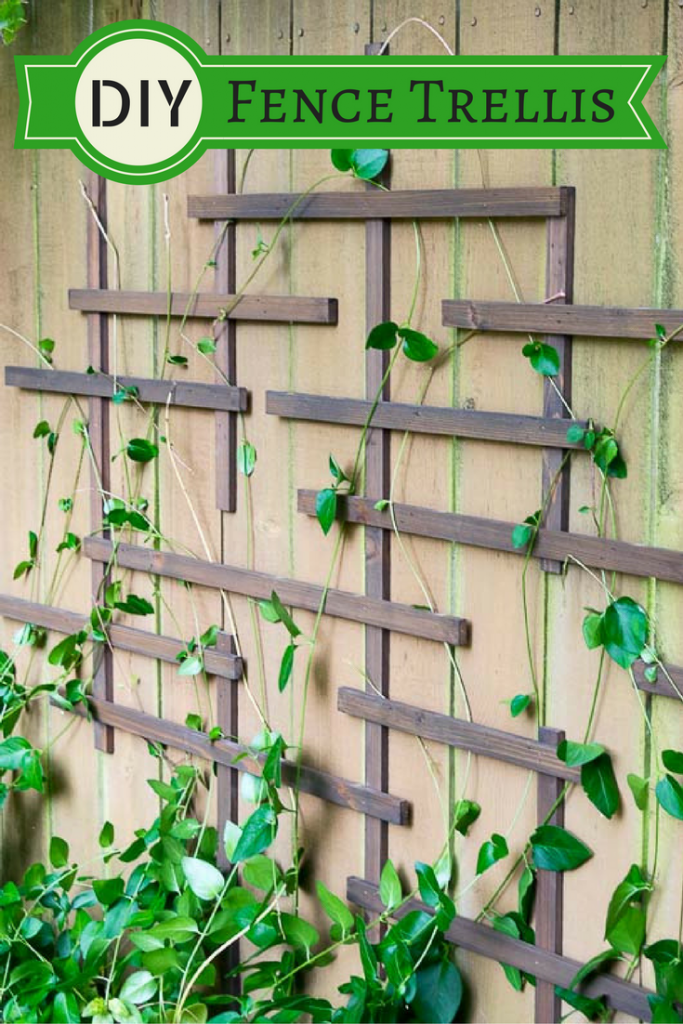
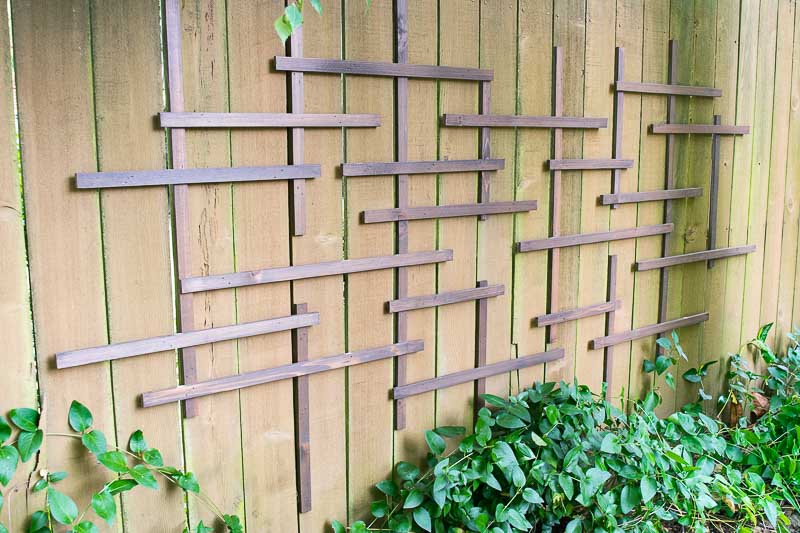
This fence trellis is easy to build, and will turn a dull fence into a living wall!DIY Fence Trellis

Hi, Pretty Handy Girl readers! I’m Vineta from The Handyman’s Daughter, and today I’m going to show you how to create this easy DIY fence trellis. Easily give a boring, flat fence visual interest in winter, and a place for vines to grow in the summer!

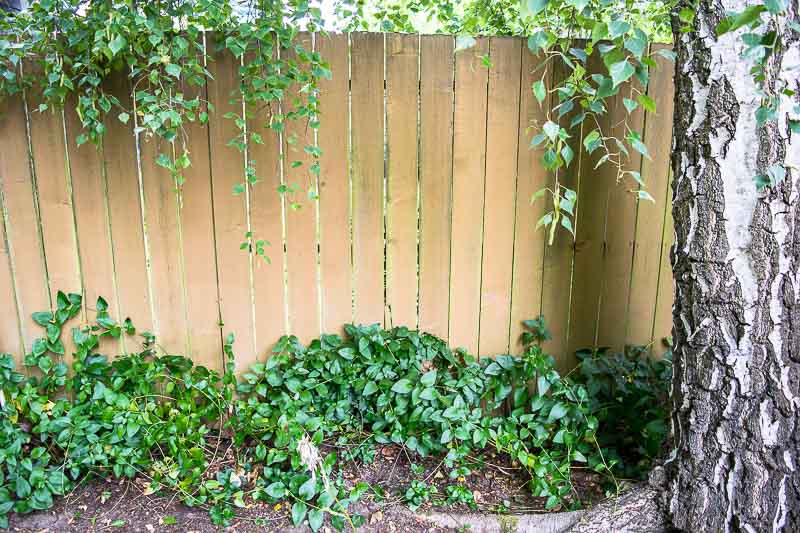
Our entire backyard is surrounded by a six-foot-high cedar fence, which gives us plenty of privacy but isn’t exactly pretty. The previous owner planted clematis vines along one side, but didn’t give it anything to grab onto. So it sits in a pile on the ground instead! This fence trellis will give the vines something to climb and fill in the plain background.

That mound of green at the bottom of the fence is a vine! With a new fence trellis, it can climb and thrive.

Materials for Fence Trellis

  • Cedar fence pickets (I ripped 6″ wide pickets into 1 ½” strips, but you can also use 1 x 2 boards.)
  • Sander and sandpaper
  • Exterior wood stain (I used Behr’s waterproofing exterior stain in Coffee)
  • Nail gun or hammer
  • 1 ¼” brad nails
  • Level
  • Scrap of 1 x 4 board to use for spacer

How to Build a DIY Fence Trellis

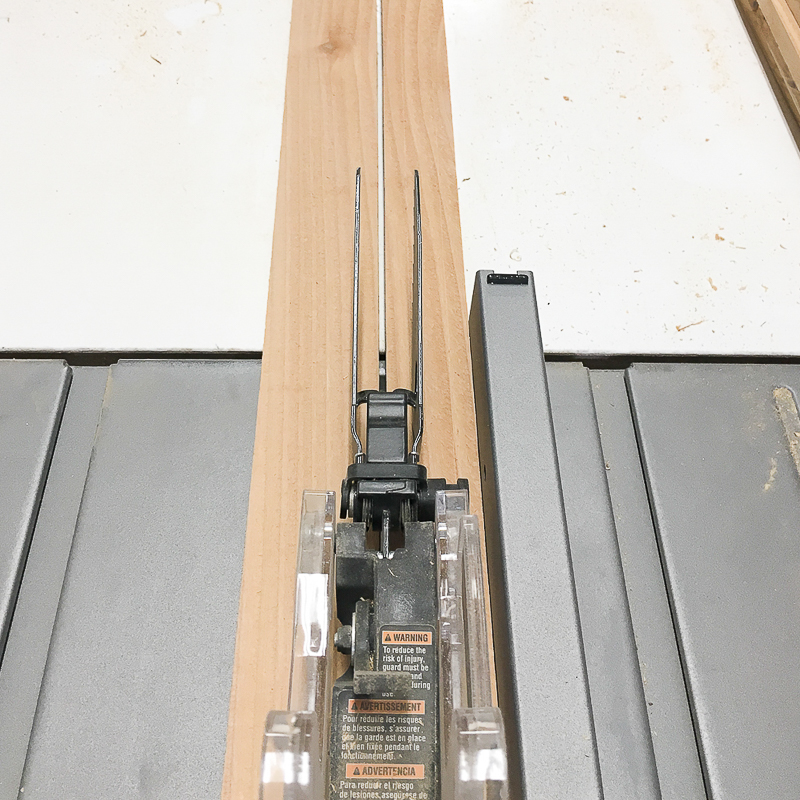
Start by cutting four 6″ wide cedar pickets into 1 ½” wide strips lengthwise. If you don’t have a table saw, you can simply use 1 x 2 boards.

Cut cedar fence pickets into 1 1/2" strips to create this fence trellis.

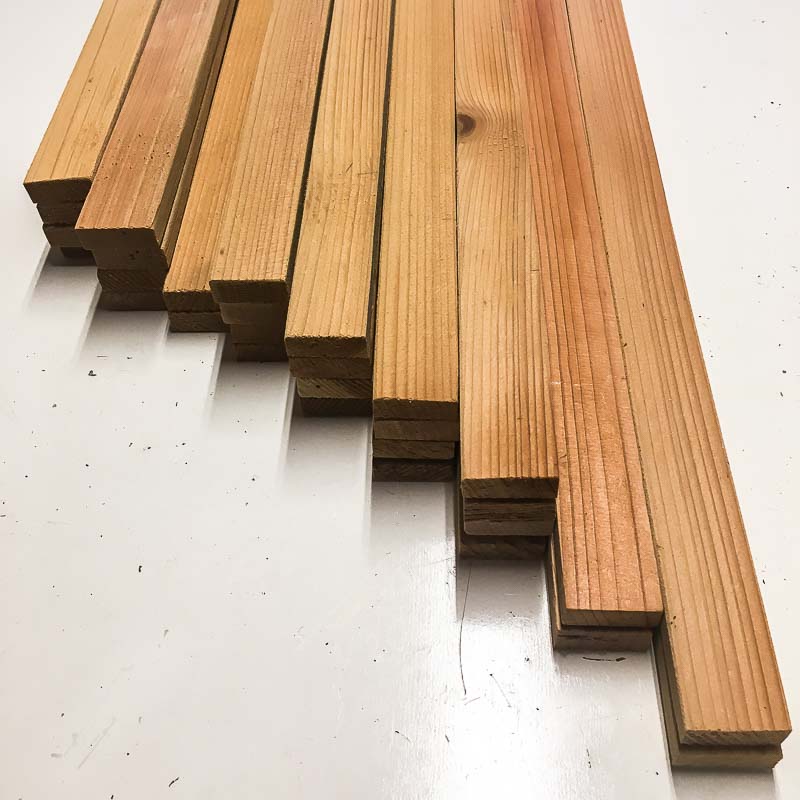
Next, cut the strips down into shorter lengths. I made a few of each of these dimensions: 16″, 20″, 22″, 24″, 26″ and 30″.

Cut the pieces for your fence trellis out of inexpensive fence pickets.

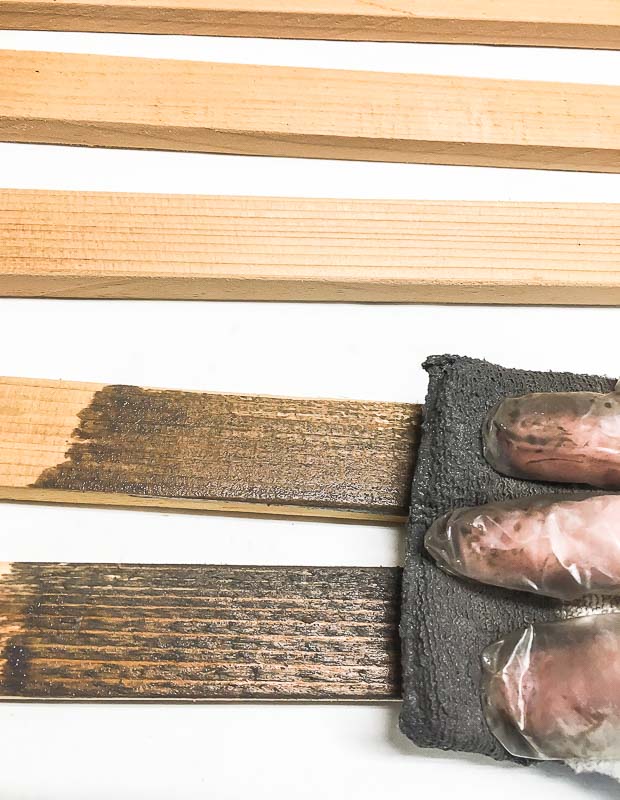
Sand each piece, then give them all two coats of your preferred exterior wood stain.

Stain the cut pieces of your fence trellis before assembly.

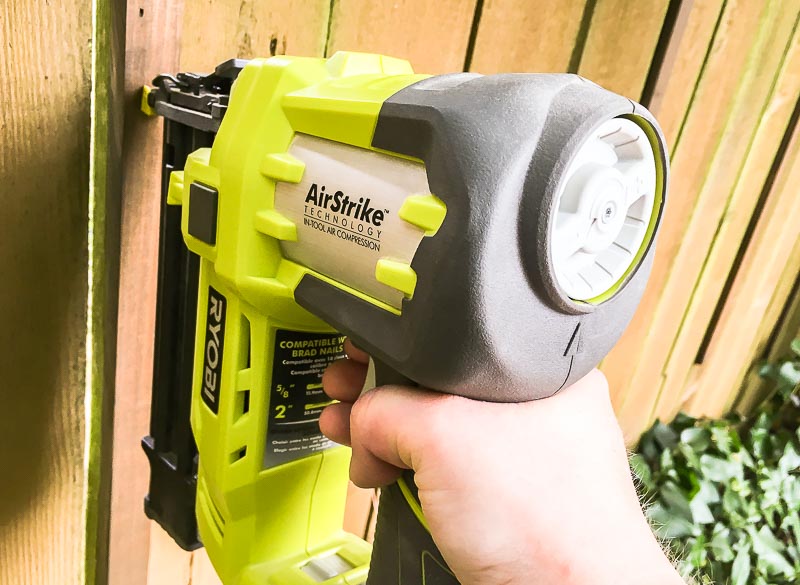
Once the stain is dry, you can start assembly! Begin with the longest pieces. Hold them vertically against your fence, spacing them out along the fence evenly and nailing them directly to the fence.

Use a nail gun to attach the vertical pieces directly to the fence.

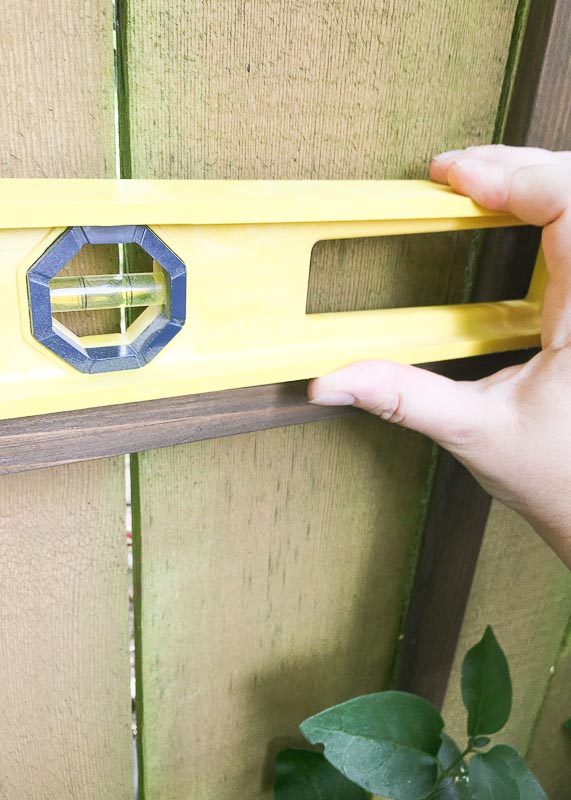
Next, select a few pieces to attach horizontally at the bottom. Nail one end to the vertical support, then use the level to make sure it’s even before nailing down the other end.

Use a level to make sure the bottom rows are straight.

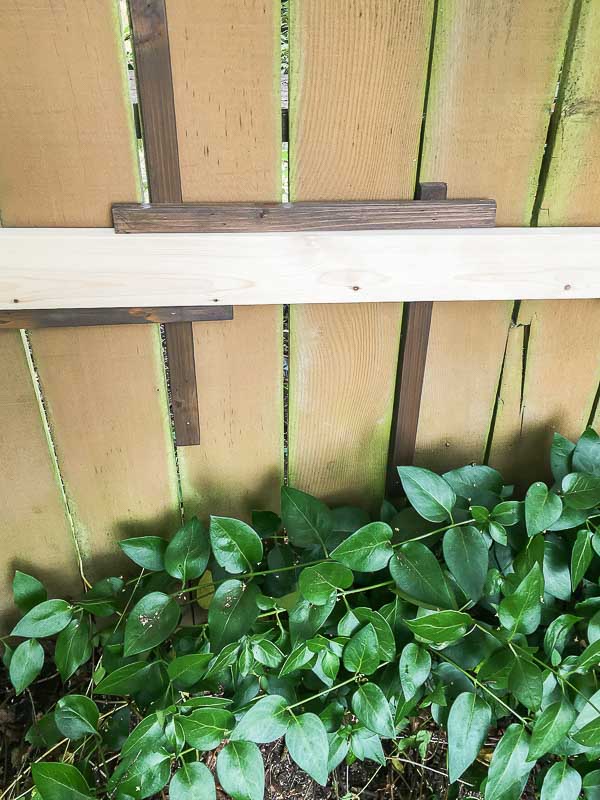
Use the 1 x 4 spacer to keep the distance between horizontal pieces the same. Rest the spacer on top of the attached piece, then prop another piece on top and nail into place. This is much easier than using a tape measure!

Use a spacer between the slats of your fence trellis so the horizontal rows will be evenly spaced.

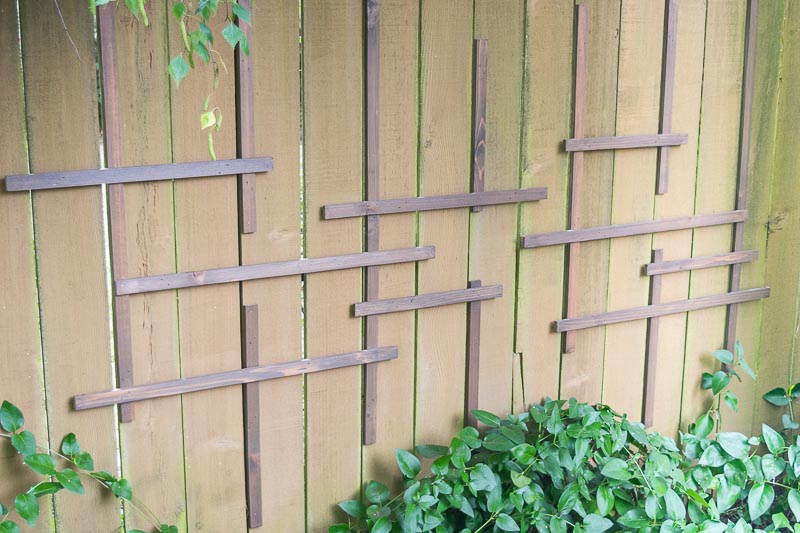
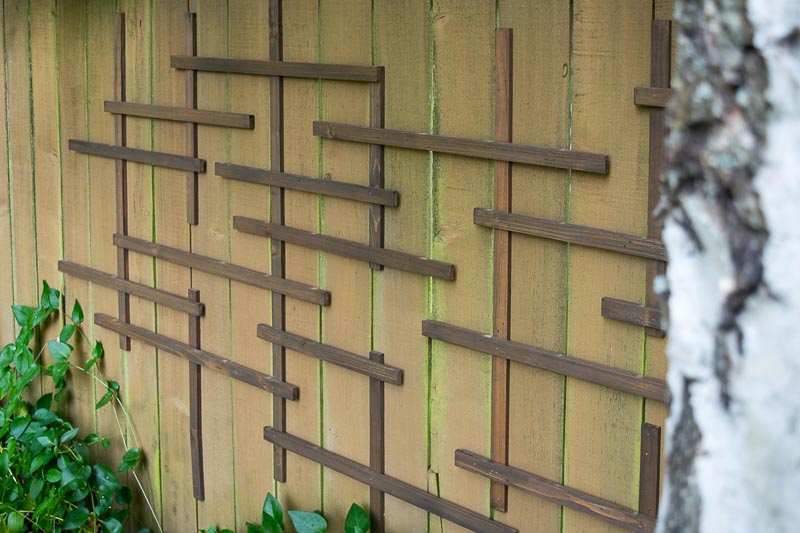
Work your way up the fence, randomly placing horizontal pieces. Make sure each one is attached to at least two vertical supports. Add more vertical supports as needed to bridge the gaps.

Fill in gaps with additional vertical supports, and mix up the various lengths.

Remember to step back and to view your overall design every once in a while. It should look random, but not TOO random! It’s easy to pull off pieces and move them around if you don’t like how it’s turning out. I went for an asymmetrical look, but you could make a simple grid if you prefer.

This fence trellis provides visual interest in winter, and a spot for climbing vines in the summer!

This fence trellis now draws attention to the shady part of the garden.

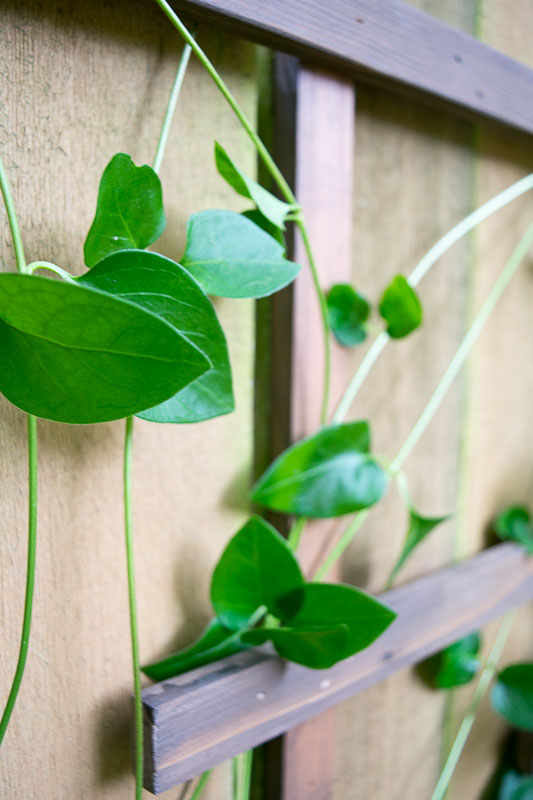
Weave the vines under the elevated pieces to help the plants find a spot to grip. Over time, the vines will find their own way up the DIY fence trellis. I can’t wait to see them blooming next spring!

Weave your vines through the fence trellis to create a living wall!

Give the vines a helping hand by weaving them through the slats of your fence trellis.

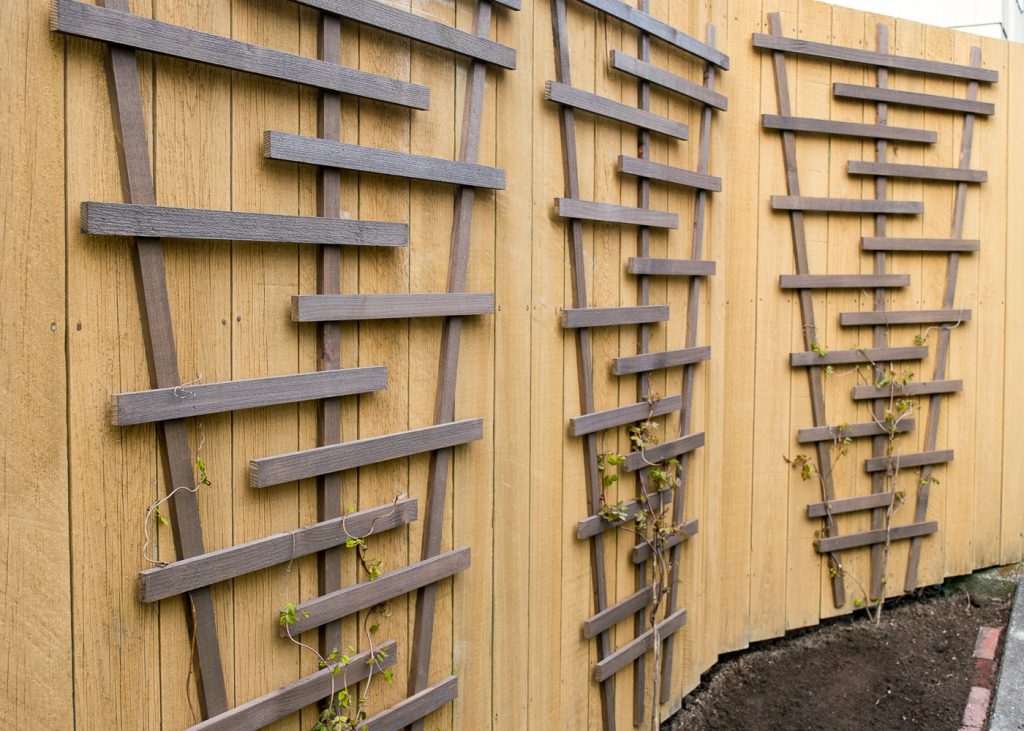
Want some more trellis ideas? You can get the free building plans for this angled garden trellis I created for another part of the fence at The Handyman’s Daughter!

There are so many ways to create your own fence trellis! You can find the plans for this one at The Handyman's Daughter.

Or create a lattice privacy wall trellis instead!

I’d love to hear what you would recommend planting under this DIY Fence Trellis. Until next time!

 ~ view more of Vineta’s projects ~