I’ve been fighting a losing battle this week. I seem to have come home from California with some airplane cooties. Last night I got knocked down by a raging ear infection. This evening I came down with pink eye. My sympathies go out to all our little ones that have suffered from an ear infection. OUCH! Hopefully I’ll be punching back soon once the antibiotics take effect.

Lucky for you I wrote a tutorial earlier in the week for a friend who is also suffering from lack of sleep. My friend Jess who writes Frugal Flourish and her husband just welcomed a beautiful baby boy into their lives.


Needless to say I should be getting more sleep sooner than they will. But, I wish them easy parenting over the next year (and then some.)

So to get your DIY dose, head over to Frugal Flourish to see how I made these glass citrus plates. And help yourself to a lemon cookie.

Hopefully I’ll see you back here on Monday. I’m going to TRY to take it easy this weekend.

Fork Photo Holder

I want to share with you how to make an alternate base for that Fork Photo Holder you see above. If you will give me a few minutes, I’ll show you how to do that.

Materials:
Fork (.25 each from Goodwill)
Wooden base from craft store (cost me .69 each)
Beads, corks, or other items to thread onto the base of your wire (corks were free, beads I had on hand)
Scrapbook paper
Mod Podge
Multi-Purpose Utility Wire 16 Gauge ($7.99 for a huge roll of it, I only used a few inches per project)
Wire cutters
Needle-nosed pliers
E-6000 glue
Felt
Drill with 1/16″ drill bit


Instructions:

Start by sanding any rough edges off your wooden base. Then prime and paint them.

Measure and mark the center of your wooden base.

Using your 1/16″ drill bit, drill through your base (be sure to put a piece of scrap wood underneath to avoid drilling into your table, etc.)

Lay a piece of scrapbook paper on top of the base and use your finger to score around the edges of the base.

Cut out the shape scored on the scrapbook paper.

Using mod podge, brush one coat onto the top of the wooden base. Lay your scrapbook paper cutout onto the base and follow up with another coat of the mod podge to seal the paper to the base.

Assemble your fork onto the wire as shown HERE.

Thread on your beads for the base. (Alternatively, you can use a wine cork or a solid end bead and drill a hole through them.)

Then dip the end of your wire into the E-6000.

And insert it into the base. Some of the glue should squeeze out of the base. You can use the excess glue to adhere the beads to the base. (Yes, you should wear gloves when working with E-6000 glue. Do as I say, not as I do!)

Protect your table with newspaper, craft paper, or wax paper while the glue dries.

Using a sliver of soap, draw around the base of your photo holder onto the felt.

Cut the felt slightly smaller than the traced shape.

Use a little E-6000 to glue the felt to the bottom of the base. Let it dry on wax paper (I use old cereal bags because they were free and I like to recycle.)

And you are done!

I raided my neighbor’s recycling bin for that beautiful cobalt blue wine bottle. It works well as a base too! Don’t you think it would be a cute place to hold “Today’s Specials” at a restaurant? Or a reminder note. Or just a beloved photo.

What would you use one of my fork photo holders for?

PHGFancySign

I am in love with those adorable french provincial dressers. The flourishy handles are what really get my heart pounding.When I saw this dresser on Craig’s List for $35 dollars, I pounced!

 Disclaimer: I stole this picture from the previous owner’s Craig’s List Ad.

Oooo baby, don’t you just love that faux gold outlined accents and off white laminate top. Yes, I said laminate. But I wasn’t afraid of it. For $35 who cares if it gets messed up. If you never take the risk, you’ll never learn anything new, right?!

The drawers were still in good shape, but a little loose around the joints, so I squirted my new favorite Gorilla Glue into the joints and clamped lassoed them up!

Then I used newspaper to protect any of the areas I didn’t want sprayed.

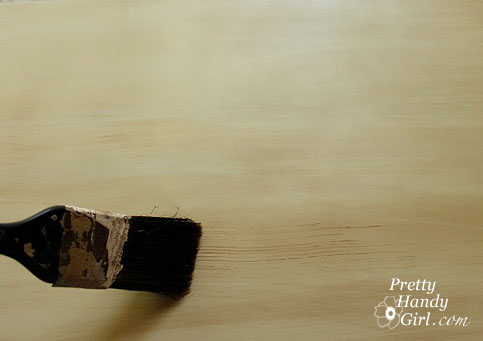
After sanding all the surfaces to rough them up, I put a coat of primer on everything. Loving that crisp clean white, but the dresser told me to “Keep Calm and Carry On.”  So, I cooperated and continued on to another color.

Next, I sprayed Rustoleum Heirloom White and distressed the surface with a wood stain.

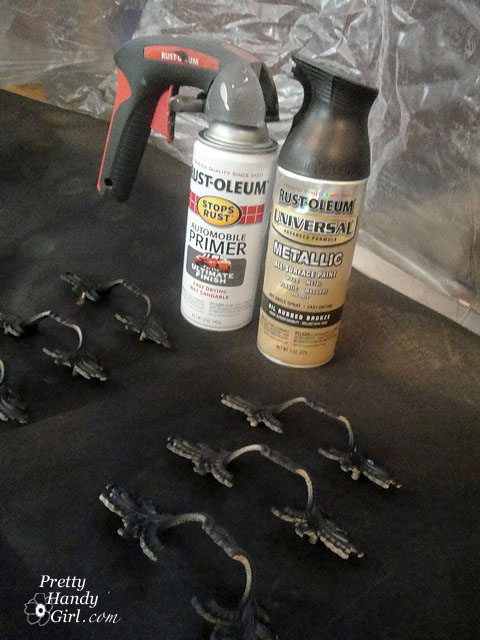
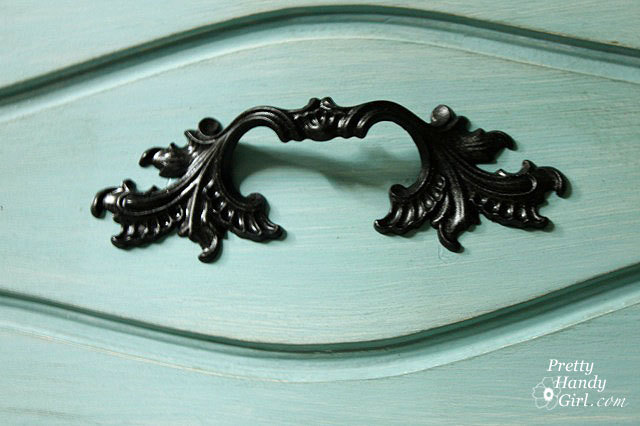
The drawer pulls got their own treatment of automotive primer followed by Oil Rubbed Bronze paint. Thank goodness they were happy with their new color because – I’m telling you – that dresser was certainly acting like a diva! She was still demanding a new color.

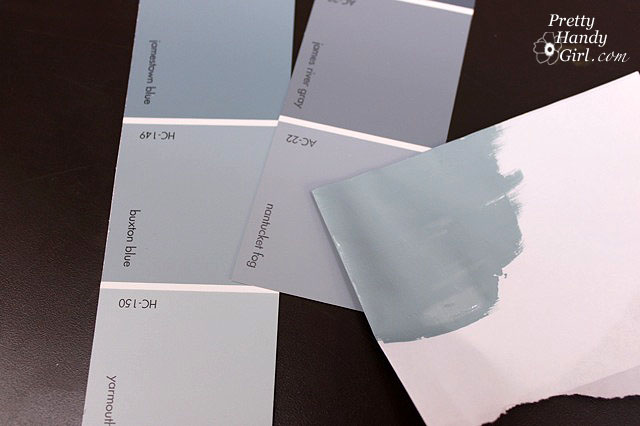
I have seen many Nantucket Fog makeovers and decided to make a run to Ace Hardware to pick up a small sample of that blue gray color. And I grabbed a can of artistic glaze.

After two coats of the Nantucket Fog glaze, that little dresser still wanted something else. Sheesh! So I pulled out some leftover blue paint from my dormer window shutters.

Finally, she shut up! It’s a good thing too, because I LOVE this color. I love it so much that I hauled my tired hiney back over to Ace to match the color just for you.

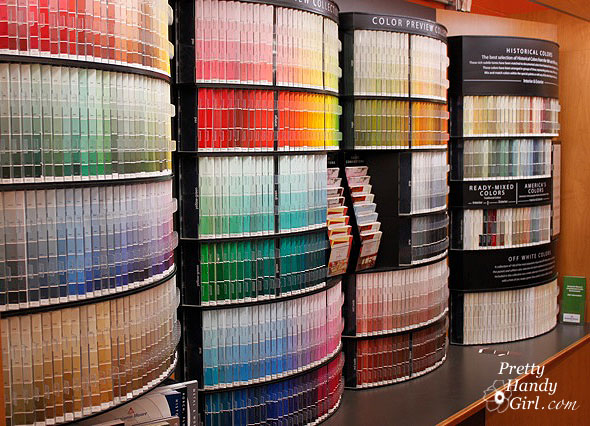
Does anyone else get starry eyed and entranced by all these fabulous colors?

The closest match is Buxom Blue from Benjamin Moore. Not too far off from Nantucket Fog, but you know those divas they want what they want!

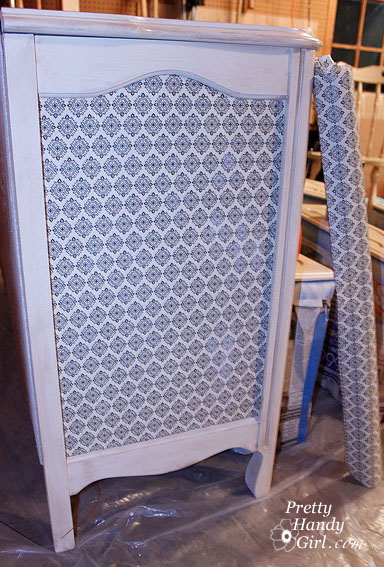
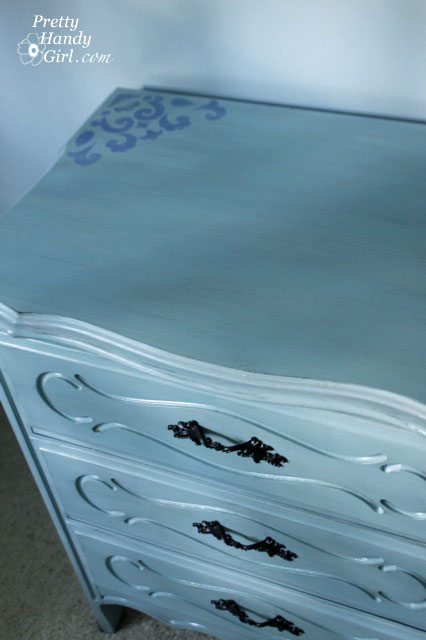
Now, all important divas need something to wear that gets them noticed. Thus, I decoupaged some wrapping paper on the side (tutorial is here.)

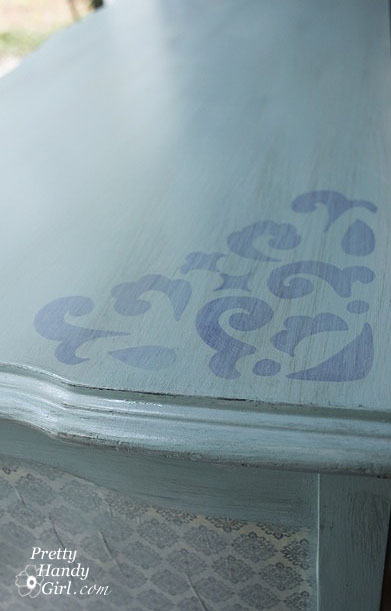
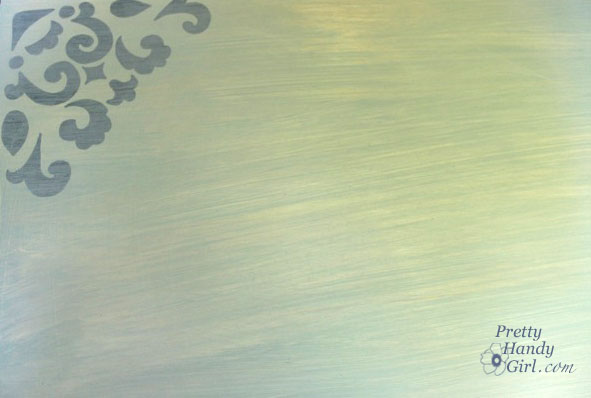
And then because I liked the pattern so much, I blew it up and added it to two corners of the dresser top (tutorial for adding a sharpie stencil.)

I added some beachy blue glaze over the wrapping paper and the top graphic.

And I have to tell you that – halleluiah – I finally figured out the proper technique when using the valspar glazes (the tutorial is here.)

I finished up with three coats of a semi-gloss polyurethane.

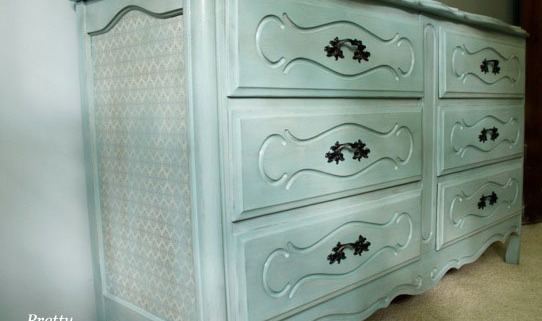
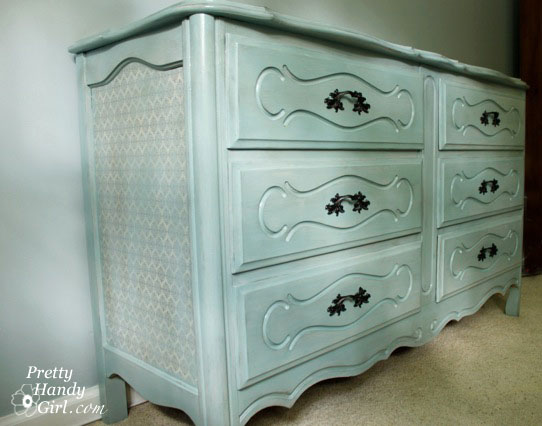
And here is that stunningly beautiful diva of a dresser. Transformed from Cinderella to the Belle of the ball!

Isn’t it amazing what a little oil rubbed bronze can do!
 
 Hard to believe this was wrapping paper in a previous life!
 Peek-a-boo I see a cute stencil.

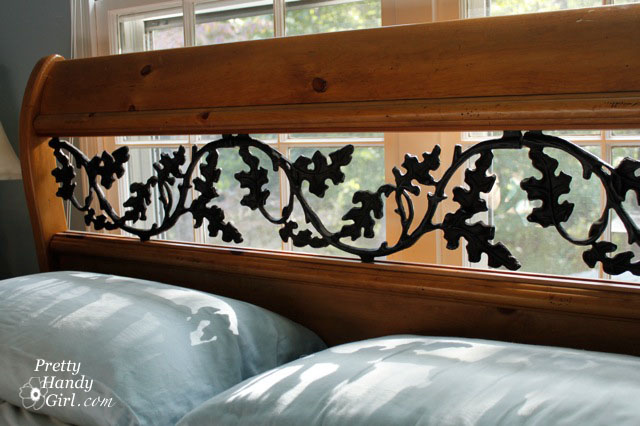
Now, I have to convince Pretty Handsome Guy that our master bedroom furniture doesn’t have to be all matchy matchy!

 Because I LOVE our Pottery Barn Sleigh Bed. 
But not the matching dresser.
 I love the new-old dresser! What do you think?

Any helpful hints on using Jedi mind tricks on unsuspecting Pretty Handsome Guy?

Update: Thank you to my readers that pointed out that I installed the handles upside down. They have been fixed now ;-).