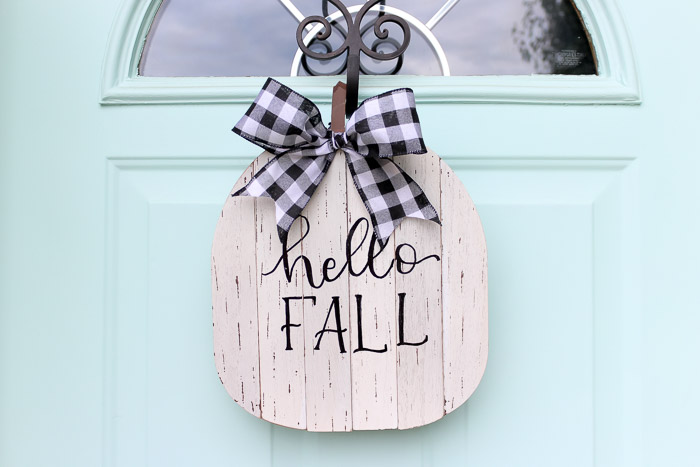
Let’s add a little hand-lettered touch to your front door with this adorable wooden fall pumpkin sign that you can make in no time!

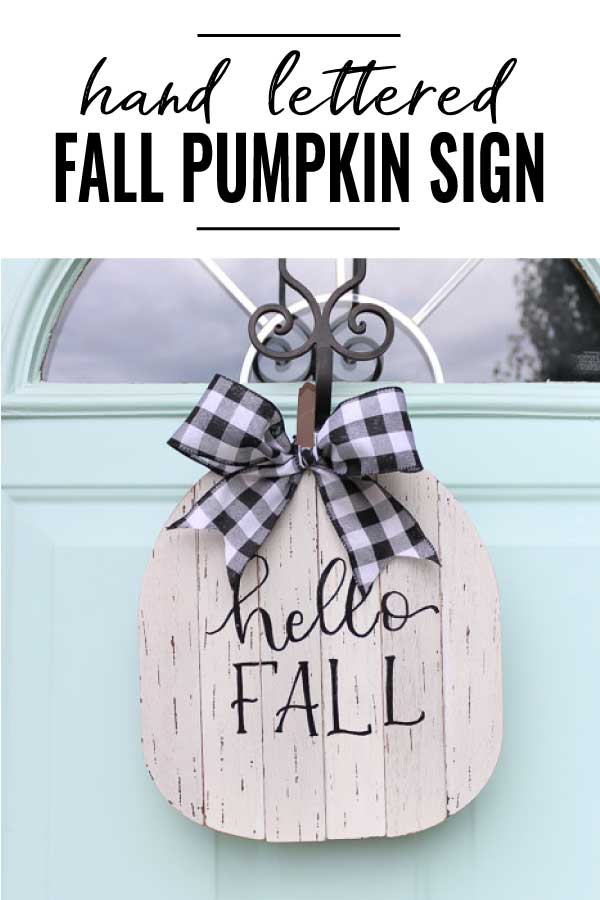
How to Make a Hand-Lettered Fall Pumpkin Sign

Hi, it’s Amanda from Domestically Creative again with another easy DIY project. Today I’m sharing how I made this adorable hand-lettered pumpkin sign that hangs on our front door for fall. Don’t let all of the steps and photos scare you away from making your own fall pumpkin sign! This project is very simple and only took me about 15 minutes to make. Heat up your glue gun and let’s get started!
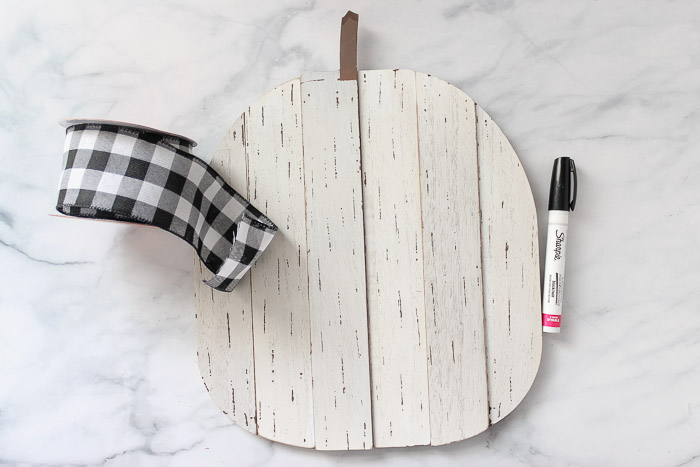
Overhead view of supplies

Materials:

Instructions:

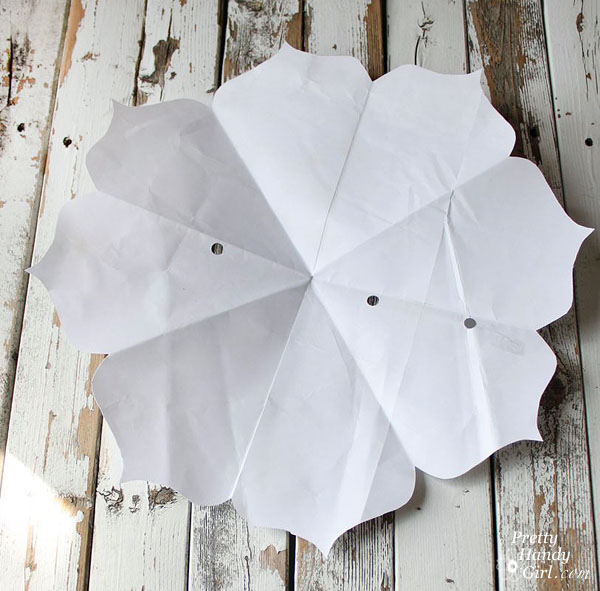
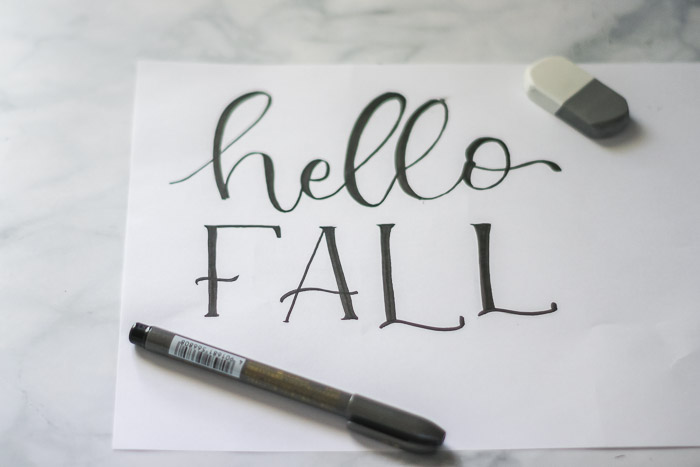
Step 1 – Create the design

The first step is to create a hand-lettered design for this fall pumpkin sign. You can create it in one of two ways. If you feel confident enough to hand-letter your own design, draw it out on a sheet of paper to the same size it will be on the pumpkin. If you are doubting your artistic lettering skills, create a digital design using fonts on your computer and print it out to the right size. Either way will work for this simple fall door decor.

"hello fall" hand-lettered design

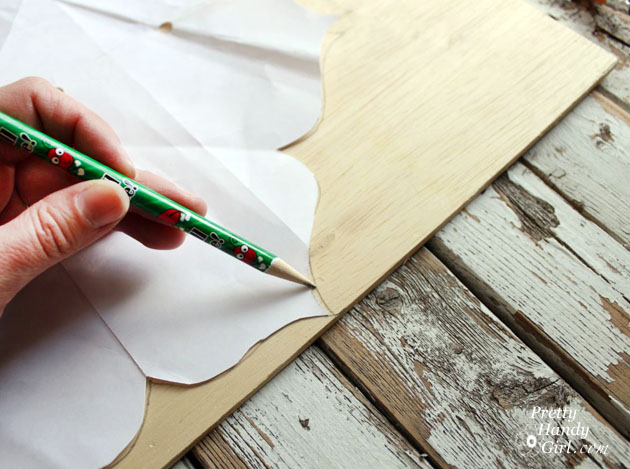
Step 2 – Transfer the design

Turn the paper over and shade over the back with a pencil. Aim for dark and full coverage so that the graphite can transfer in the next step.

shading over back of design with pencil

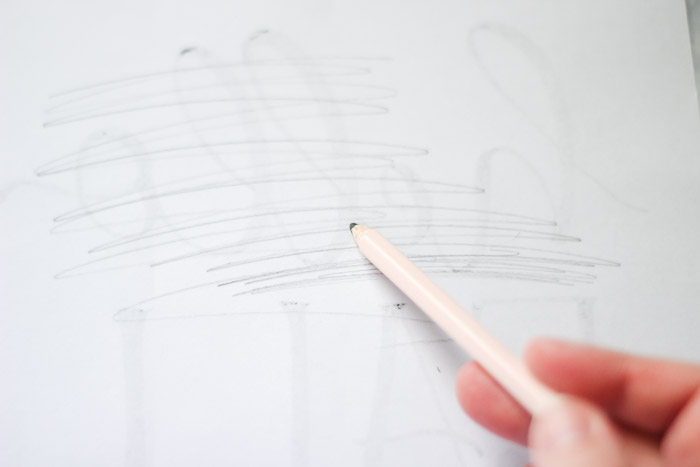
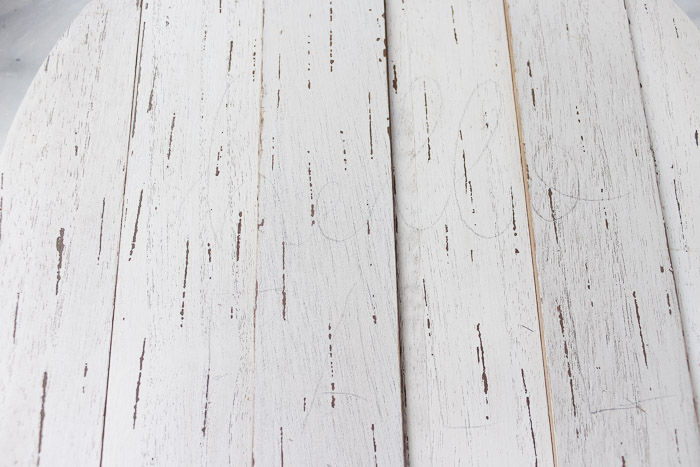
Flip the paper back over and place it on top of the wooden pumpkin. Using a pencil, trace over the design using firm pressure. This will transfer the design onto your pumpkin!

tracing over design with pencil to transfer onto pumpkin

When you pull up the paper, you should be left with a light pencil outline of your design.

close up of transferred "hello fall" design on pumpkin

This is the same method used in this reversible pedestal sign!

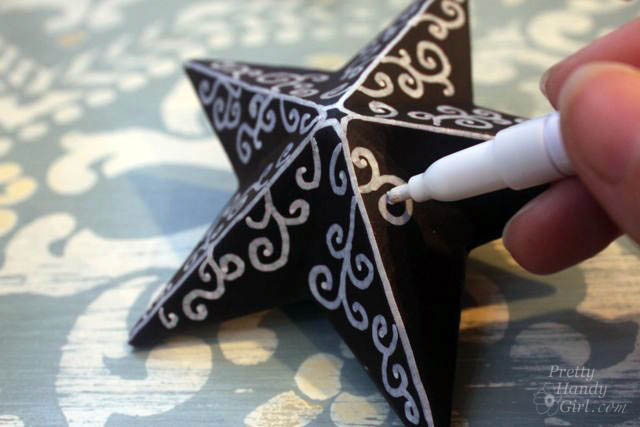
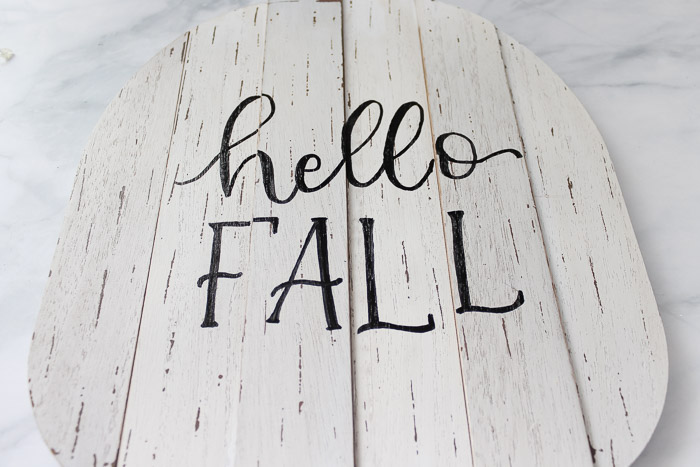
Step 3 – Paint on the design

Using an oil-based paint marker, go over the design, and fill in any necessary areas. Since this fall pumpkin sign will be hanging on the front door, using oil-based paint will protect it from fading or running.

white wooden pumpkin with hello fall written on it

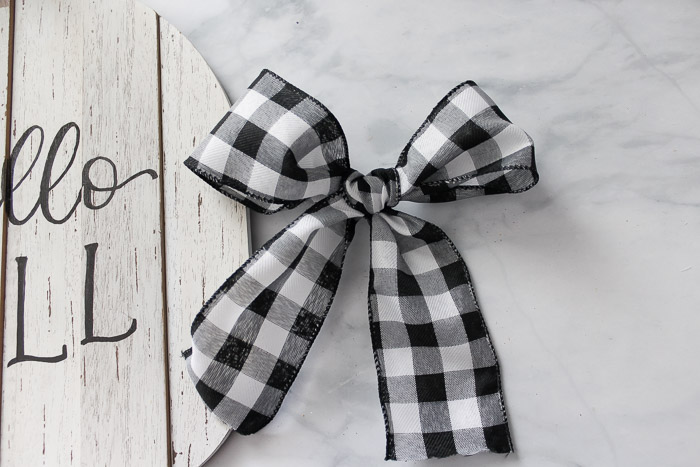
Step 4 – Make the bow

Tie a simple two-loop bow with a wired edge ribbon, just like tying your shoes! Fluff up the loops and center knot of the bow until it looks nice and full.

buffalo check bow next to pumpkin sign

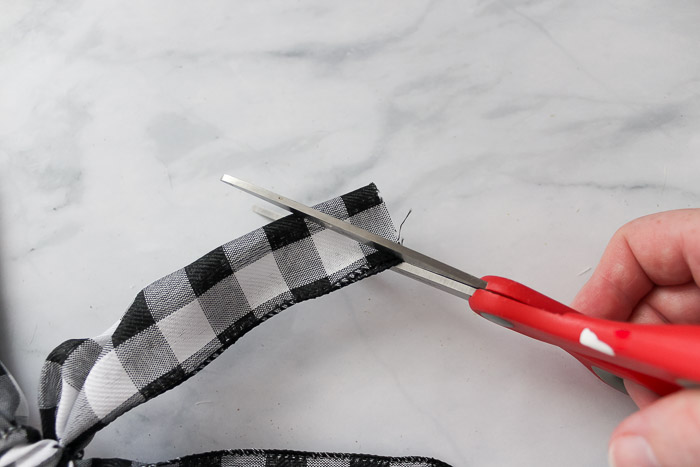
Optional Step: Fold the tails of the bow in half length-wise. Use scissors to cut out a triangle from the wired edge at the bottom of the tail.

Step 5 – Attach the bow

Attach your bow to the pumpkin with some hot glue. Another option is to use a thin gauge wire and wrap that around the stem of the pumpkin. Either way will work!

Step 6 – Attach a ribbon for hanging

Since this fall pumpkin sign will be hanging on the front door, I added a small ribbon to the back of it using a staple gun. First, cut a piece of ribbon slightly longer than the width of your pumpkin.

staple gun attaching ribbon to hang pumpkin sign

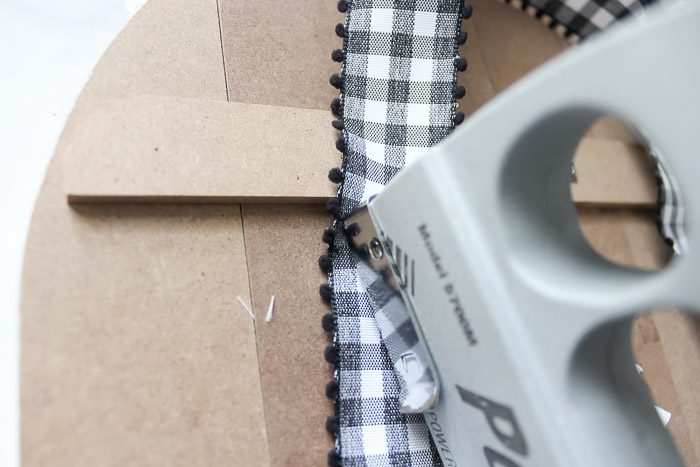
Then staple one end of the ribbon to just inside the left edge of the pumpkin. Repeat this for the other side and end of the ribbon. You will be left with a loop in the middle to hang your new pumpkin sign from.

Overview of stapled on ribbon to the back of wooden pumpkin

Step 7 – Hang on the front door

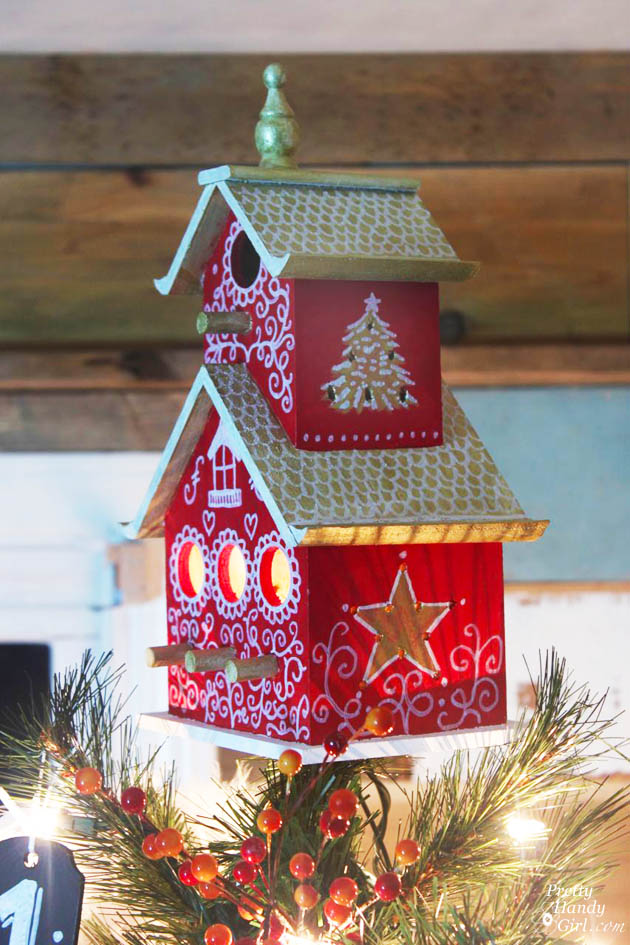
You’re finished! Hang up your new fall pumpkin sign on the front door (or any place in your home) and enjoy!

Finished hello fall pumpkin sign with buffalo check ribbon hanging on blue front door

What design will you put on your own hand-lettered fall pumpkin sign?

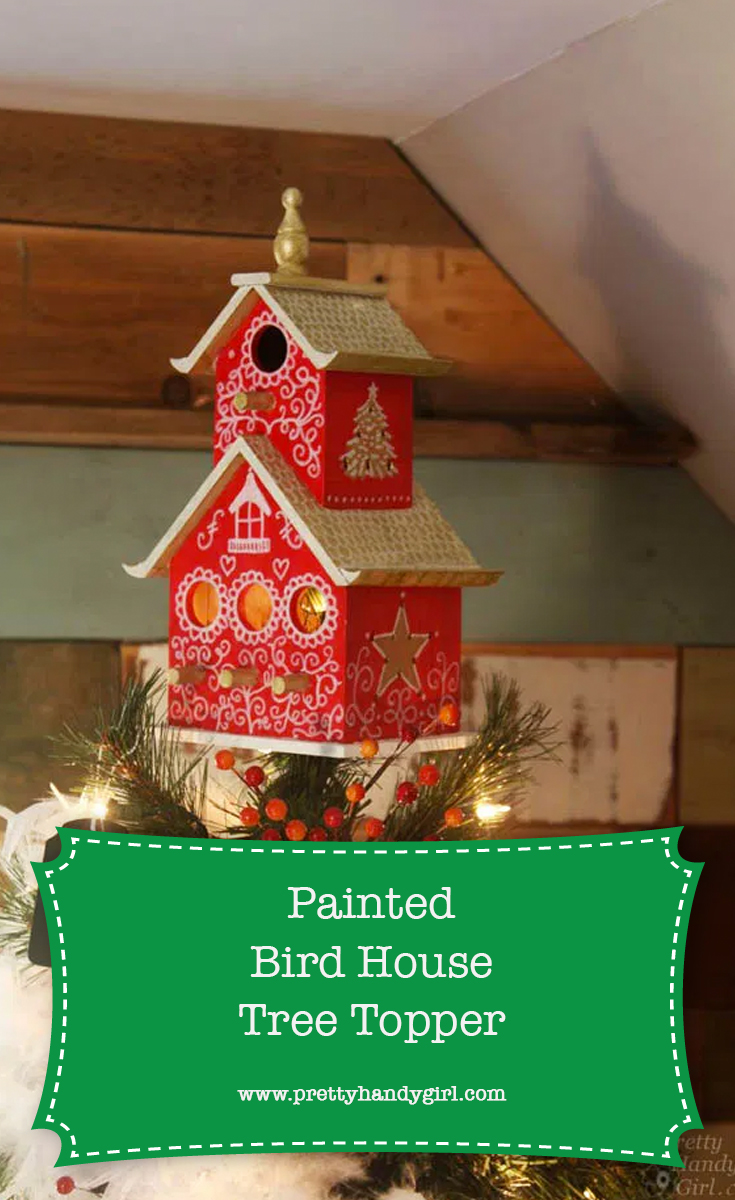
Love it? Don’t forget to pin this project for later!

I’m Amanda, and I am the creator and voice behind the food and DIY blog, Domestically Creative. What started as a place to share updates with friends and family after we moved from Illinois to Tennessee and then to Texas, turned into a passion for finding creative and frugal ways to feed us and decorate our homes.

I have always had the “make it myself” attitude and I’m not afraid to bust out the power tools or get creative when it comes to decorating our home on a budget. You can usually find me scouring the local thrift stores, garage sales and estate sales looking for my next makeover (like this litter box cabinet), or dreaming up ways to make our new house feel more like home. My most recent project was giving my home office a much needed facelift. Some of the plans included creating a fun inspirational accent wall and adding pegboard to store my craft hoards.

I currently call Missouri home, where I live with my husband, dog, and 2 cats in a pretty dull, late 90’s split level. My husband and I both love to travel the U.S and recently purchased a small travel trailer to tag along in our journeys. In our free time together we can usually be found working together on a home project, exploring a new place, or just lounging with our pup, Delilah.

I’d love for you to connect with me on social media via Facebook, Instagram, Pinterest and Twitter!

See all of Amanda’s tutorials HERE.

Rustic Pallet Serving Tray | Pretty Handy Girl

It’s amazing how serving food on a rustic tray can elevate your standard meal or dessert into an elegant occasion. This simple decorative rustic pallet serving tray is a simple project anyone can do!

Rustic Pallet Serving Tray | Pretty Handy Girl

Rustic Pallet Serving Tray

When I worked on a deck makeover with my sister, Caitlin (of Symmetry Designs), we shopped for a lot of the accessories ahead of time. She wanted me to find the perfect Bali-esque tray. Unfortunately I was coming up empty-handed. But, sometimes, you just have to DIY it! This Rustic Pallet Serving Tray was the brainchild of my sister, but I took her idea and ran with it.

Here’s how to make one for yourself.

Materials:

(I’ve included affiliate links for your convenience. I earn a small percentage from a purchase using these links. There is no additional cost to you. You can read more about affiliate links here.)

Instructions:

Fold a piece of paper into eights. Cut a design along the edge. (I used a simple scallop shape like this “}”.)

Rustic Pallet Serving Tray | Pretty Handy Girl

When you unfold the paper, you should have a paper template to use for tracing.

Rustic Pallet Serving Tray | Pretty Handy Girl

Trace the template onto a piece of thin plywood.

Rustic Pallet Serving Tray | Pretty Handy Girl

Use a jigsaw or band saw to cut out the shape. You might find this tutorial helpful for cutting out intricate shapes.

Rustic Pallet Serving Tray | Pretty Handy Girl

Lay your plywood shape on top of the rustic boards. Move the boards around until you like the sections that will make up the tray. Mark a square around the shape with a ruler.

Rustic Pallet Serving Tray | Pretty Handy Girl

Cut the boards down to size using the pencil mark as a guide.

Rustic Pallet Serving Tray | Pretty Handy Girl

Dry fit the boards together on the plywood shape.

Rustic Pallet Serving Tray | Pretty Handy Girl

Wet both the plywood shape and the boards with a damp rag.

Rustic Pallet Serving Tray | Pretty Handy Girl

Apply Gorilla Glue to the plywood shape.

Rustic Pallet Serving Tray | Pretty Handy Girl

Set the rustic boards into the glue on the plywood shape.

Rustic Pallet Serving Tray | Pretty Handy Girl

Weigh the boards down with weights or heavy books.

Rustic Pallet Serving Tray | Pretty Handy Girl

Allow to dry for at least an hour. Remove the weights and clamp the boards onto a work surface (with the area needing to be cut hanging over the edge. Make sure there is clearance for the jig saw blade. You’ll need to cut half the boards and then turn and re-clamp to cut the entire circumference. The Rockwell JawStand works beautifully for this task.

Rustic Pallet Serving Tray | Pretty Handy Girl

Draw a pencil line 1 inch out from the plywood shape. Cut around the pencil line with a jig saw.

Rustic Pallet Serving Tray | Pretty Handy Girl

Sand edges and grooves with sandpaper or Dremel Multi-Max.

Rustic Pallet Serving Tray | Pretty Handy Girl

Measure and mark the location of the handles on the tray.

Rustic Pallet Serving Tray | Pretty Handy Girl

Pre-drill holes using a bit that is the same size as the handle screws.

Rustic Pallet Serving Tray | Pretty Handy Girl

Flip the tray over and drill countersink holes with a larger drill bit.

Rustic Pallet Serving Tray | Pretty Handy Girl

Attach the handles with the screws. The screw heads should sink into the plywood.

Rustic Pallet Serving Tray | Pretty Handy Girl

If you want a truly rustic look, lightly sand your handles.

Rustic Pallet Serving Tray | Pretty Handy Girl

If you are going to use your tray for food, use a plate or doily under the food.

Rustic Pallet Serving Tray | Pretty Handy Girl

What do you think? Do you like this beautiful rustic tray? Think you could make one? I bet you could!

Rustic Pallet Serving Tray | Pretty Handy Girl

You can see this tray and our Bali-inspired deck makeover here.

PHGFancySign

Pin for later!

This DIY Rustic Pallet Serving Tray is easy to create with a cutout pattern | Plank serving tray | Pretty Handy Girl #DIY #woodworking #DIYtray #servingtray #rustichomedecor

If the birds are out in your area, chances are they are looking for a place to nest. Try your hand at doodle-painting a cute little birdhouse to help them start a family. Who knows, they may be lurking in your yard like a depressed House Hunter’s couple who can’t get past the color on your neighbor’s birdhouse. Check out this cute Doodle-Painted Birdhouse.

Doodle Painted Birdhouse

Doodle-Painted Birdhouse

Have you lost your mind Brittany? This looks like a Christmas tutorial in May? No, I haven’t lost my mind and yes, this is May (for those of us who have lost track of the days. But, this is the perfect project for anyone who has a simple birdhouse that needs sprucing up for those discerning House Hunter birds.

Although I created this little painted birdhouse to function as a tree topper, you can forgo drilling a hole in the bottom and add a hook to have a fully functional birdhouse for those bird watchers in your home.

This is a project you can do for fun or meditation. And kids can also get in the fun. All you need is some acrylic paint and a paint pen and you can have a blast making this Doodle-Painted Birdhouse for yourself or as a gift.

Painted Birdhouse Tree Topper Tutorial | Pretty Handy Girl

Materials:

(I’ve included affiliate links for your convenience. I earn a small percentage from a purchase using these links. There is no additional cost to you. You can read more about affiliate links here.)

Optional:


Instructions:

Spray prime the unfinished birdhouse and allow it to dry thoroughly.

Painted Birdhouse Tree Topper Tutorial | Pretty Handy Girl

Sketch a star shape on the sides of the birdhouse. Mark the location where you wish to drill holes. (If you are using this for an outdoor birdhouse, it’s nice to have a little ventilation for the house. But, feel free to skip this step if you wish.)

Painted Birdhouse Tree Topper Tutorial | Pretty Handy Girl

If your birdhouse is a double-decker, you will probably want to drill holes through the sides at angle and down into the first floor roof. This will allow some of the light to come through the top story holes as well.

Painted Birdhouse Tree Topper Tutorial | Pretty Handy Girl

For Tree Topper Only:

Mark the center location on the bottom and drill a 5/8″ hole through the bottom of the birdhouse. (Skip this step if you want a functional birdhouse.)

Painted Birdhouse Tree Topper Tutorial | Pretty Handy Girl

Dump any wood shavings out of the birdhouse. Set up the birdhouse on the drop cloth for painting.

Painted Birdhouse Tree Topper Tutorial | Pretty Handy Girl

Paint the sides of the birdhouse red (or any color you like.)

Painted Birdhouse Tree Topper Tutorial | Pretty Handy Girl

Paint the roof, steeple, and perches gold. Add a star and tree shape on the sides to accentuate the drilled hole patterns.

Painted Birdhouse Tree Topper Tutorial | Pretty Handy Girl

After the gold and red paint has dried completely, use the white paint pen to doodle-paint all over the birdhouse.

Painted Birdhouse Tree Topper Tutorial | Pretty Handy Girl

Afraid to Doodle-Paint?

Nonsense, there is no rhyme or reason to the doodling, just make lots of little curly q’s, c’s, and loops. You can start by outlining the window structures. Then embellish them. Regardless of your doodle-painting style, it’s important to have fun!

You can see how I used the same technique on the chalkboard ornaments on my Feathered Nest Christmas Tree and they came out really cute.

Doodle Chalkboard Ornament | Pretty Handy Girl

When the paint pen lines have dried, add a few coats of an outdoor sealant.

Birdhouse Tree Topper:

You can use it as a tree topper by feeding the top branch(es) into the hole on the bottom of the birdhouse.

Painted Birdhouse Tree Topper Tutorial | Pretty Handy Girl

Outdoor Birdhouse:

Add the screw eye hook and hang the birdhouse from a tree in your yard.

Painted Birdhouse Tree Topper Tutorial | Pretty Handy Girl

Décor Birdhouse:

If you simply want to display your birdhouse as décor, set a little battery-powered light inside the hole in the bottom and enjoy a homey birdhouse on a shelf.

Painted Birdhouse Tree Topper Tutorial | Pretty Handy Girl

Want to decorate your birdhouse more? You can see how I created this little Christmas painted birdhouse and embellished the roof.

Christmas Wreath handpainted birdhouse | Pretty Handy Girl

Doodle-painted birdhouses are adorable gifts and very frugal. Make it May is almost over, but stay tuned for one more project!

PHGFancySign

Pin for later!

How to Make a Painted Bird House Tree Topper | Pretty Handy Girl

How to Make Pinch Pots from Air Dry Clay

Looking for a simple craft to make and help you decompress? Make these cute clay pinch pots and use them around your house.

How to Make Clay Pinch Pots

How to Make Pinch Pots from Clay

I hope you are ready to get your hands a little messy!  Today’s tutorial is all about making some easy pinch pots out of inexpensive clay.  Right now, it feels like the days are long, and life is still so uncertain. I find that immersing myself in an enjoyable activity really helps to pass the time.  Working with the hands can be good for the soul!

The good news is, you don’t really need anything special other than air dry clay and your hands.  Plus, you don’t have to leave your house to create this project.  The terracotta clay I purchased is from Amazon and was shipped right to my door.

Crayola Air Dry Clay

This is a great craft for the kiddos too, so be sure to involve them with learning how to make pinch pots if they are looking for something to do.

Let’s dive right in!

Materials:

(I’ve included affiliate links for your convenience. I earn a small percentage from a purchase using these links. There is no additional cost to you. You can read more about affiliate links here.)

Instructions:

This project is easy, inexpensive, and very therapeutic! Let your mind focus on shaping the clay and put your worries aside for a little bit.

Step 1: Shape your clay into round balls

Shape Clay into a Round Ball

Layout a piece of parchment paper.  Grab a hunk of clay and shape/roll it into a nice ball. My clay balls are about the size of the palm of my hand. You can go bigger or smaller, it’s up to you!

Step 2: Form your Pots

Push thumb into center of clay

Now that you have your clay ball formed, take your thumb or finger and stick it into the center of the ball. Use your fingers to “pinch” the clay outward, slowly creating a bigger hole in the center. Keep going around and around until you are satisfied with the shape and size of your pinch pot.

Use fingers to pinch out sides of pot

Clay is forgiving, you add more if you pinched it too thin. Add a little water to your clay to avoid cracking. The thicker the sides (or bottom), the longer it will take to dry. Keep that in mind when shaping your pinch pot.

Step 3: Dry your Pinch Pots for Several Days

Let pots dry for several days

We left our clay pinch pots to dry on the parchment paper for several days. When they are fully dry, the pots will turn a lighter color and be hard to the touch.  Once dry, you can paint them with acrylic paint or just leave them plain.  Being the simplistic girl that I am, I just left mine plain.  But kids might enjoy a painting project.

That’s it!  As I said, this is a simple, inexpensive project.  Luckily, you should have plenty of clay leftover for next time.

Crayola Pinch Pots How to Tutorial

You might be wondering what in the heck to do with pinch pots?

Aside from the fact that it’s just a fun craft, there are tons of ways to use your new pots! A quick google search will bring up some ideas for you. But I’ll give you a few here to get you started.

  • Plant faux succulents
  • Use as a ring tray on your nightstand
  • A decor dish to decorate with

Since you can’t get the clay wet, planting a real plant in them is not going to work. But that’s ok because those faux succulents have to go somewhere and they look great in these little pinch pots.

You could also use them as a small catch-all dish on your nightstand or console table. In fact, that’s how I’m using my pinch pots! I have one sitting on my nightstand because I somehow always forget to take off my earrings at night – so this has become the perfect little spot to put them before I go to sleep.

Pinch pots from clay - use as a jewelry dish!

Finally, you can just use them as decor pieces to decorate shelves and bookcases or tables. They look very earthy, so depending on your decor style, they add a nice collected feel to your rooms. Plus – you made them! Take a little pride in your handiwork.

If you like this clay project, be sure to check out my tutorial for a heart-shaped jewelry dish.

Stay safe, stay healthy!

karen signature

~ See More of Karen’s Tutorials ~


karen from decor hintHello!  I’m Karen, the creator of the Home Decor and DIY Blog: Decor Hint. I’m a Native of the East Coast, but I currently live in beautiful Seattle with my hubby, our two wonderful children, and our spunky wheaten terrier.

You can usually find me with some sort of craft in one hand and a coffee in the other. And I’m always rearranging furniture or moving lamps from room to room. I have a passion (read: obsession) for decorating, DIY, and gardening. In short, I love making my house into a home.

Like many, I’m inspired by what I see in home decor magazines, but I’m not so inspired by the price tags.  Consequently, I love finding and creating beautiful budget-friendly home decor items. In a head to head competition, I bet you’d never know the difference between the designer items and my DIY creations!  Many of my DIY projects focus on sewing, crafting, upcycling and organizing. Some of my favorite projects have been making pretty wreaths, sewing my own tassel hand towels, and crafting these trendy wood bead garlands. I can’t wait to inspire you and spark your creativity through my DIY projects.

You can always connect with me on Pinterest, Twitter or Instagram.

Upcycled Magnetic Chalkboard Frame | Pretty Handy Girl

I’m a serial upcycler. When I can find relatively free materials and turn them into something worth displaying, I’m thrilled! This Magnetic Chalkboard frame is one of those upcycled projects I am proud of.

Upcycled Magnetic Chalkboard Frame | Pretty Handy Girl

Upcycled Magnetic Chalkboard Frame

Earlier in the week, I showed you the changes I made in my oldest son’s bedroom. One of the switches I made was to replace his bedroom door because the old one had cracked after one too many slammings. Ugh, cheap hollow door.

In an effort to keep my son from taping all types of signs to his new door, I found an ugly old frame and married it with some scrap metal from a junky set of shelving a neighbor was throwing away.

bookcase in love with ugly frame

That’s not real wood, it’s metal…fake wood metal. Yuck. Wait until you see how they were transformed. You won’t believe your eyes, so watch closely how I made this Upcycled Magnetic Chalkboard Frame.

Before you leave this tutorial thinking you can’t possibly make this project because you’ll never be able to find cheap faux wood shelves, let me share with you some alternate materials you can use!

(I’ve included affiliate links for your convenience. I earn a small percentage from a purchase using these links. There is no additional cost to you. You can read more about affiliate links here.)

Magnetic Material:

Non-Magnetic Material for Chalkboard:

Now that you have some additional material options, let’s get busy making a Magnetic Framed Chalkboard (or just a framed chalkboard).

Materials:

Upcycled Magnetic Chalkboard Frame | Pretty Handy Girl

Optional: You may need some Goo Gone, a scraper, and rag to eliminate any glue on the back of the frame.

Instructions:

Begin by cutting your metal (or backing) to fit into the back of the frame.

Upcycled Magnetic Chalkboard Frame | Pretty Handy Girl

Paint one side of the metal with chalkboard paint. Let it dry. Apply a second coat of chalkboard paint. Let it dry.

Upcycled Magnetic Chalkboard Frame | Pretty Handy Girl

While the chalkboard paint is drying, time to work on the frame.

If your frame has paper on the back, peel it off and use Goo Gone, a scraper, and sander to remove any of the glue residue.

Upcycled Magnetic Chalkboard Frame | Pretty Handy Girl


When the chalkboard paint has dried, insert it into the frame, chalkboard side up from the backside of the frame (are you seeing where I’m going with this?)

Upcycled Magnetic Chalkboard Frame | Pretty Handy Girl

The back of the frame is much prettier than the front, but in order to hold the chalkboard in place, we need to cut some picture molding. Cut the end of your molding at a 45 degree angle. Fit it into the frame and mark where to make your second cut.

Upcycled Magnetic Chalkboard Frame | Pretty Handy Girl

Continue fitting and cutting molding around your frame.

Upcycled Magnetic Chalkboard Frame | Pretty Handy Girl

Once all four pieces of molding fit, you are ready to secure them.

Upcycled Magnetic Chalkboard Frame | Pretty Handy Girl

Apply a bead of wood glue along the inside edge of the back of the frame.

Upcycled Magnetic Chalkboard Frame | Pretty Handy Girl

Set the molding pieces in place and wipe up any glue that squeezes out.

Upcycled Magnetic Chalkboard Frame | Pretty Handy Girl

Clamp the molding pieces and the frame. Allow the glue to dry for at least an hour.

Upcycled Magnetic Chalkboard Frame | Pretty Handy Girl

When the glue has dried. Attach two D-rings to the back of the frame.

Upcycled Magnetic Chalkboard Frame | Pretty Handy Girl

Season the chalkboard with the side of a piece of chalk. Then use a dry rag to buff it off.

Time to hang it up! (In my case, I hung it on my son’s door.

Upcycled Magnetic Chalkboard Frame | Pretty Handy Girl

To keep the frame from bouncing any time the door is opened or closed, I put a 3M Command velcro strip between the bottom of the frame and the door.

Now my son can put up pictures, messages, and more without damaging the door.

Upcycled Magnetic Chalkboard Frame | Pretty Handy Girl

Pretty cool huh?! Would you ever guess the back of an ugly frame and metal shelves could look this beautiful?

Upcycled Magnetic Chalkboard Frame | Pretty Handy Girl

I especially like the little metal fasteners showing in the corners of the frame.

Tell me, do you have an ugly frame hanging around your house? Have you ever looked at the back and found it more beautiful than the front?

PHGFancySign


Pin for later!