Painted Chandelier Sleeves | Pretty Handy Girl

Painted Chandelier Sleeves | Pretty Handy Girl

When you were perusing my holiday tablescape post did you see my fancy copper chandelier sleeves? My chandelier was looking a bit dingy with the aged yellowing sleeves. I decided to spray paint them copper for a new look.

To update chandelier sleeves, you can paint them any color you like.

Simply remove the light bulbs.

Painted Chandelier Sleeves | Pretty Handy Girl

Lift the sleeves off.

Painted Chandelier Sleeves | Pretty Handy Girl

Wash the sleeves off and dry them.

Painted Chandelier Sleeves | Pretty Handy Girl

Then pick your favorite spray paint color and spray paint them. I used Rust-Oleum High Heat Ultra Enamel Spray – Aged Copper to paint mine.

Painted Chandelier Sleeves | Pretty Handy Girl

That update was so easy, I might spray paint them again in a year. I’m thinking light blue or silver next time. What do you think?

PHGFancySign


Pin for later!

See how Pretty Handy Girl updated her dingy, aged yellow chandelier sleeves with copper spray paint! | Lighting DIY | Pretty Handy Girl #prettyhandygirl #DIY #lightingDIY #chandelierDIY

Metallic Color Block Canisters | Pretty Handy Girl

Metallic Color Block Canisters | Pretty Handy Girl

I’m back with another easy Lowe’s Creative Idea this month. When you get tired of your cobalt blue canisters you can easily spray paint them with a metallic color block pattern. That’s exactly what I decided to do with my thrift store canisters.

I’ve been on a major mission to purge things I no longer use or love from my house. I have almost completely filled our dining room with things to donate. I had contemplated donating my cobalt kitchen canisters because the color wasn’t making me happy anymore. But, then I realized that I could give them an entirely new look with some spray paint.

Materials:

Instructions:

Remove the lids, the metal ring, and spoons from your canisters.

Metallic Color Block Canisters | Pretty Handy Girl
(Wood plank photo backdrop courtesy of Leen the Graphics Queen.)

Use a sanding block to lightly rough up the surface of the canisters. Wipe all the sanding dust off with a damp rag.

Metallic Color Block Canisters | Pretty Handy Girl

Spray the outside and base of the canisters with Valspar Premium Primer. Read more

DIY Button Pendant Light | Pretty Handy Girl

DIY Button Pendant Light |Pretty Handy Girl

While I was house touring on Tybee Island and having  fun antique and salvage shopping in Savannah, I spied some bare lamp shade frame hanging lights. They immediately inspired me to design a DIY Button Pendant Light for over my bedside table in our master bedroom. Part of the desire was born out of the necessity to have more space on my bedside because the table actually doubles as my makeup vanity.

DIY Button Pendant Light | Pretty Handy Girl

Making a Button Pendant Light is an easy DIY project, but you’ll need some patience while threading the buttons. I’ll also show you how to wire a lamp socket and lamp plug! Ready to get started?

(I’ve included affiliate links for your convenience. I earn a small percentage from a purchase using these links. There is no additional cost to you. You can read more about affiliate links here.)

Materials:

DIY Button Pendant Light |Pretty Handy Girl

Optional:

Instructions: Read more

Upcycled Metal Rolling Cart Plant Stand | Pretty Handy Girl

Upcycled Metal Rolling Cart Plant Stand | Pretty Handy Girl

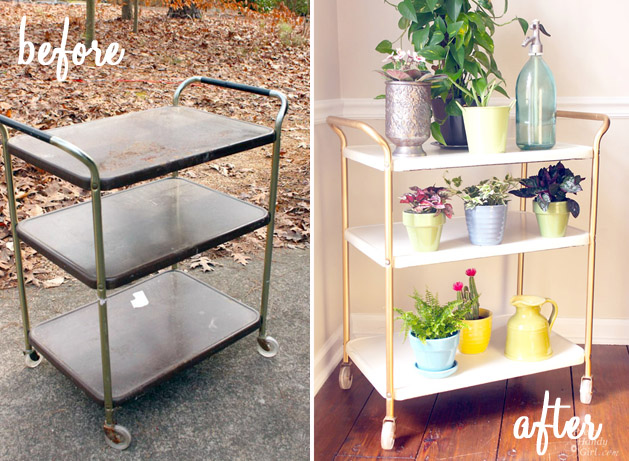
This past summer I spied a metal cart in a dumpster. To be frank, I have never truly actually participated in dumpster diving. The thought of actually climbing inside a dumpster has never been on my acceptable things to do list. But, this metal bar cart was floating on top of the trash pile. It was (to quote a Seinfeld episode) above the rim! And it was begging to be upcycled into a beautiful plant cart.

So, I convinced myself it was okay and wasn’t officially dumpster diving. Feel free to debate this fact in the comment section.

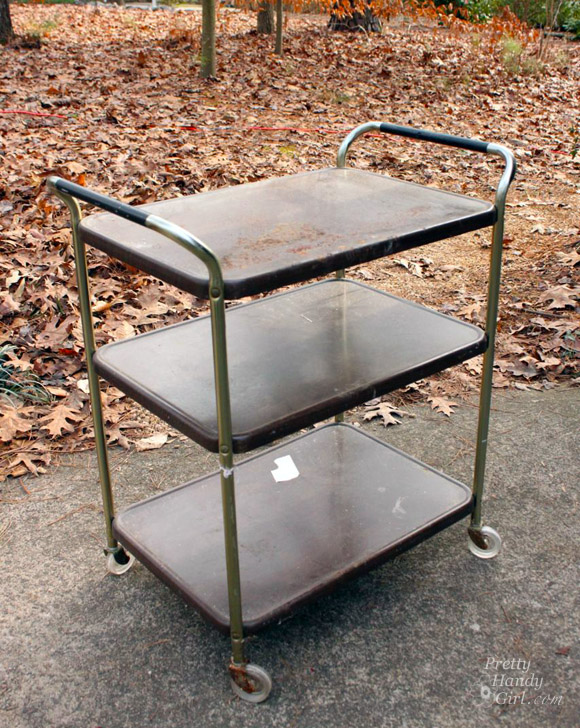
I brought it home and knew I could do a quick makeover with some spray paint. But, first it needed a good cleaning and some prep work. The tops of the shelves were very rusty:

Upcycled Metal Rolling Cart Plant Stand | Pretty Handy Girl

Upcycled Plant Cart Saved from “Above the Rim”

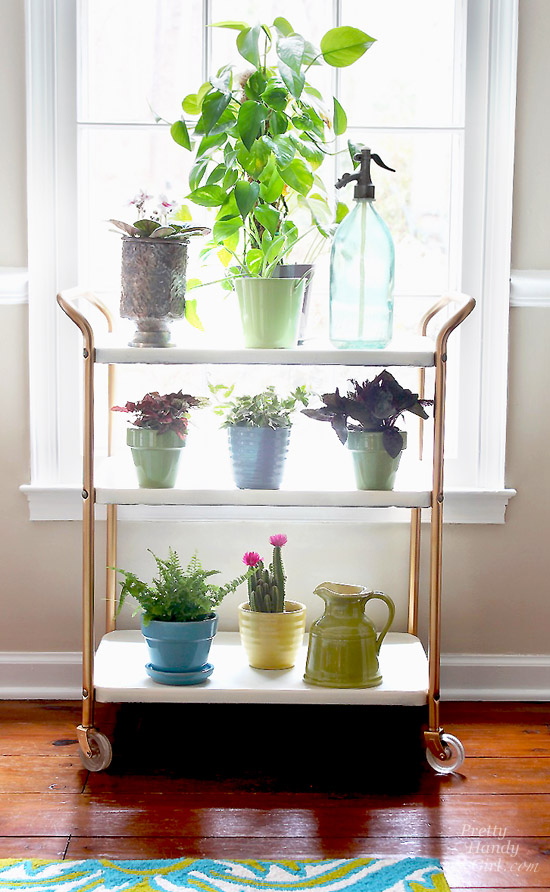
And the undersides were filthy. But, the end product was worth it! Here is how to upcycle your own little metal rusty bar cart into a beautiful plant stand!

Materials:

Upcycled Metal Rolling Cart Plant Stand | Pretty Handy Girl

  • 1 Discarded rusty bar cart (rescued from above the rim)
  • Socket set
  • Hammer for coaxing rusty bolts loose
  • Can of Rustoleum Heirloom White spray paint
  • Can of Krylon Copper Spray paint
  • Sander/sanding block
  • Fine grit sand paper
  • Wire brush
  • Rag and/or damp wipes
  • Painter’s tape
  • Drop cloth
  • Scraps of wood to elevate while painting
  • Optional: Drill

Upcycled Plant Cart Instructions:

Loosen corner bolts with a socket wrench or drill and socket bit. Hammer out any that are too rusty to budge. Read more


I admit it, I believe in UFOs. I’ve seen them, honestly! I even captured a picture of two of them, see:

Yup, we have two UFOs that are frequently seen in our kitchen. Why did I purchase and install them when we first moved in? I’ll never know. Don’t get me wrong, they aren’t horrible, but they just don’t go with the casual country vibe I want in my kitchen. Read more