How to build an easy scrap wood multiuse caddy

How to build an easy scrap wood multiuse caddy

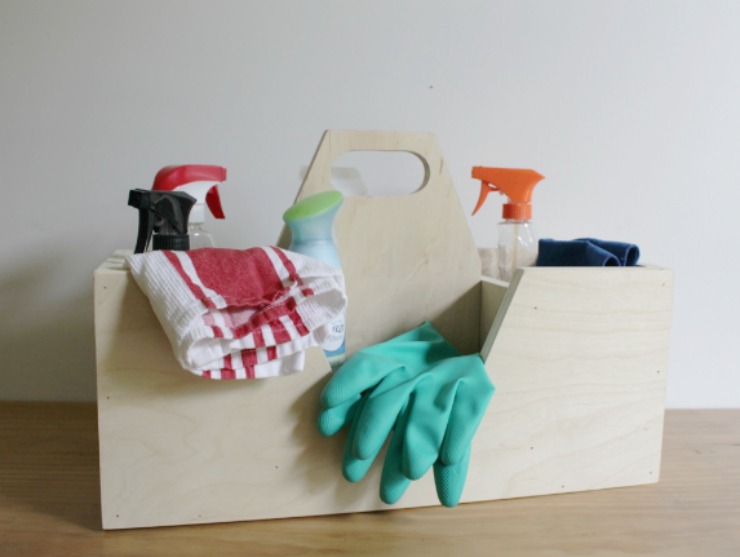
Hey everyone!! It’s Shara here again from Woodshop Diaries to bring you a simple, versatile, and really fun project. It’s a scrap wood caddy!

I hesitate to put a label on what type of caddy it could be because you can carry whatever you want inside. Cleaning supplies, tools, craft knick knacks, gardening accessories — the possibilities are endless!

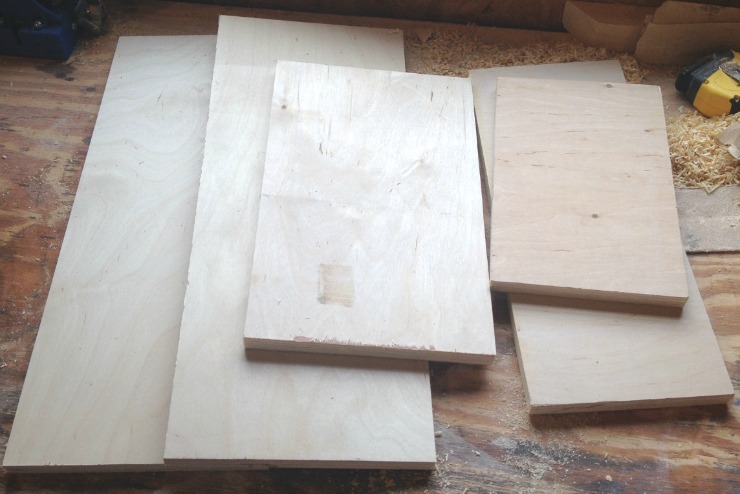
The size is easy to customize and you only need a few tools and some scrap plywood. If you don’t have any scraps, pick up a quarter sheet of 3/4” or 1/2” plywood at the lumber yard or big box store to make this.

If you’re ready to get building, here’s the plan:

Materials:

(I’ve included affiliate links for your convenience. I earn a small percentage from a purchase using these links. There is no additional cost to you. You can read more about affiliate links here.)

Cut List:

(Keep in mind: you can customize for different size scraps or for a larger or smaller caddy)

  • (2) pieces 3/4” x 8” x 19” (front and back)
  • (1) piece 3/4” x 8” x 17 ½” (bottom)
  • (2) pieces 3/4” x 8” x 8” (sides)
  • (1) piece 3/4” x 8” x 12” (middle divider w/ handle cutout)
  • (2) pieces 3/4” x 8” x 6 ½” (middle dividers)

Instructions:

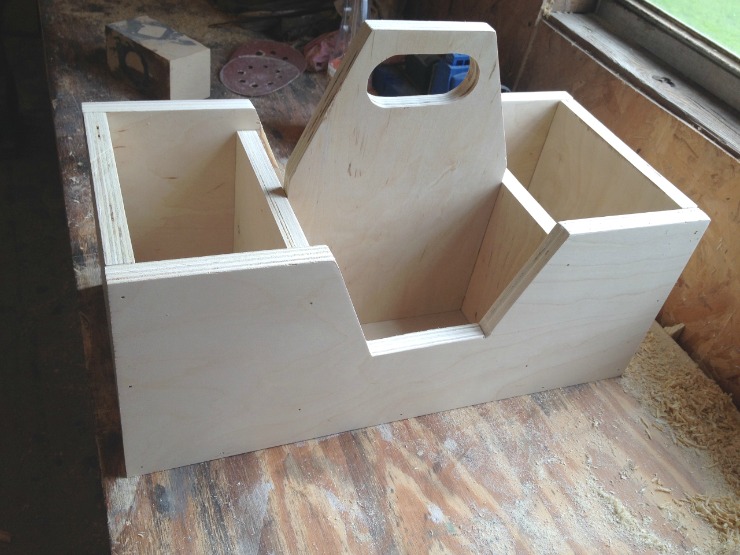
Step 1: Cut out middle divider with handle

Cut your scraps to 8” wide to make the build easier. (If you don’t like 8”, you could make it another size, but the cut list will change slightly.)

Scrap wood DIY Cleaning Caddy

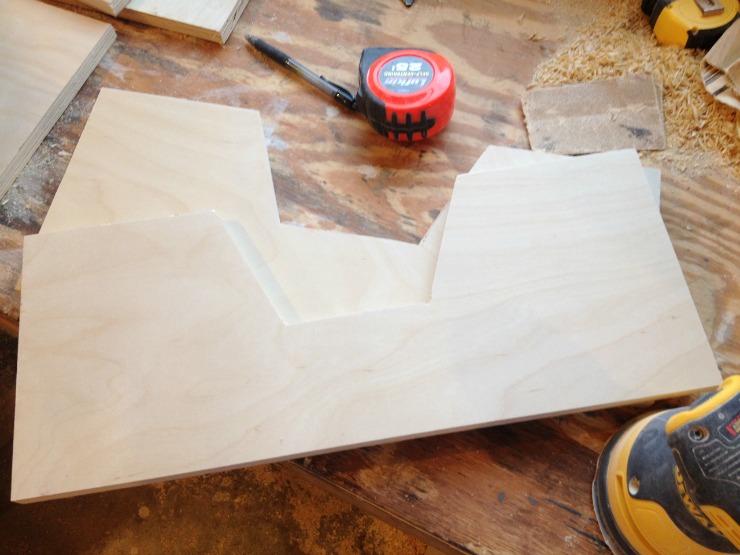
Take a piece of 8” wide x 12” tall and mark the center. Measure and mark 2” to each side of the center and 5” down. Draw diagonal lines to connect the marks as shown:

How to make a multiuse caddy

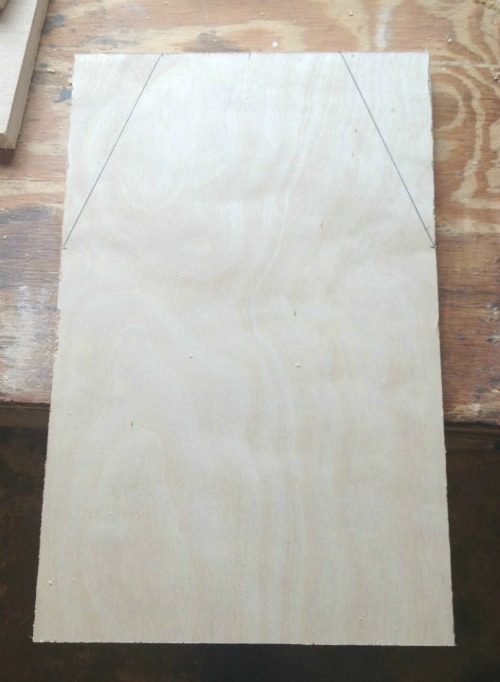
Use a miter saw to cut the diagonal corners off.

How to make a multiuse caddy

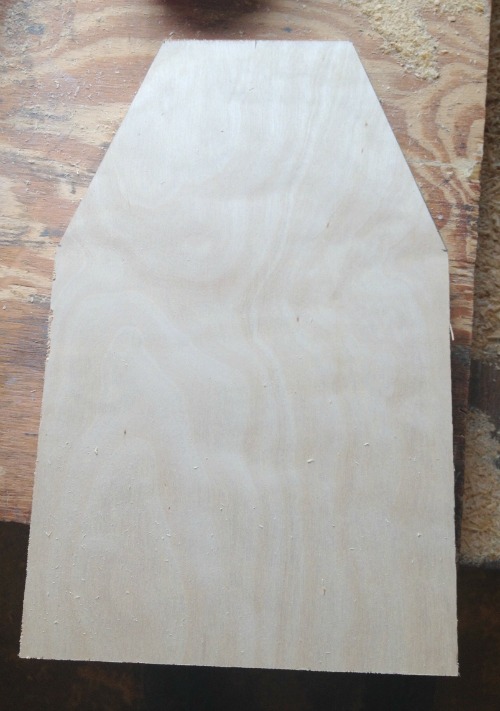
Draw a handle hole. To make this an easy task, drill two holes first (using a drill bit or hole saw) to get the blade in.

How to make a multiuse caddy

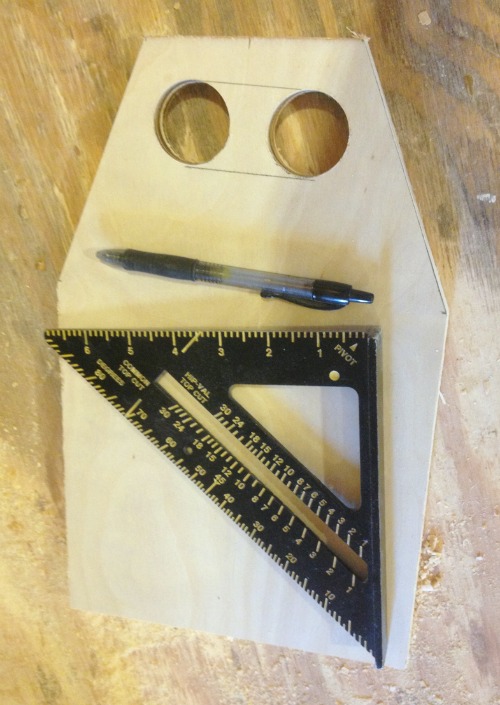
Then cut along your line.

How to make a multiuse caddy

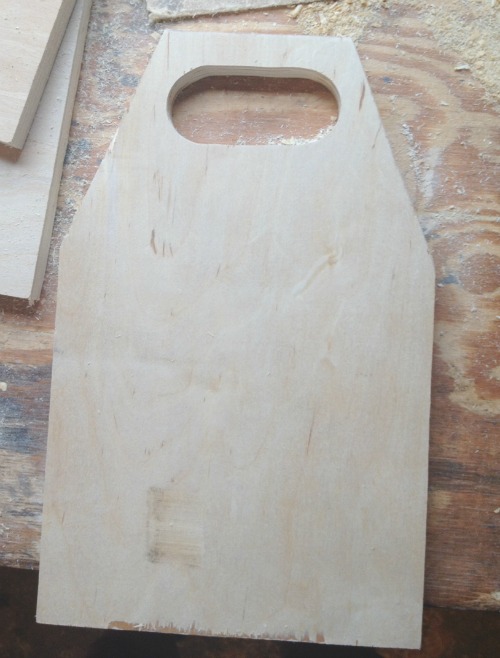
Sand your edges smooth.

Step 2: Cut out the front and back sides

Cut two pieces of your plywood to 8” x 19”. Find the center of one of the pieces lengthwise. Flip the middle divider from step 1 upside down and center it on the 8″ x 19″ plywood. The top of the divider should line up 3” from the bottom of the plywood. Trace the diagonal cut out onto the plywood and cut out using a jig saw. Trace the same shape onto the second 8″ x 19″ plywood piece and cut out to match.

How to make a multiuse caddy

Step 3: Assemble the bottom

Cut the bottom piece* (8” x 17 ½”) and 2 side pieces (8” x 8”).

*If you are using 1/2” scrap plywood instead, be sure to add an extra 1/2” to the length of your bottom piece.

Glue and nail the pieces together as shown below. You can use hammer and nails, but a nail gun would be ideal to save time and prevent pieces from moving while you assemble.

How to make a multiuse caddy

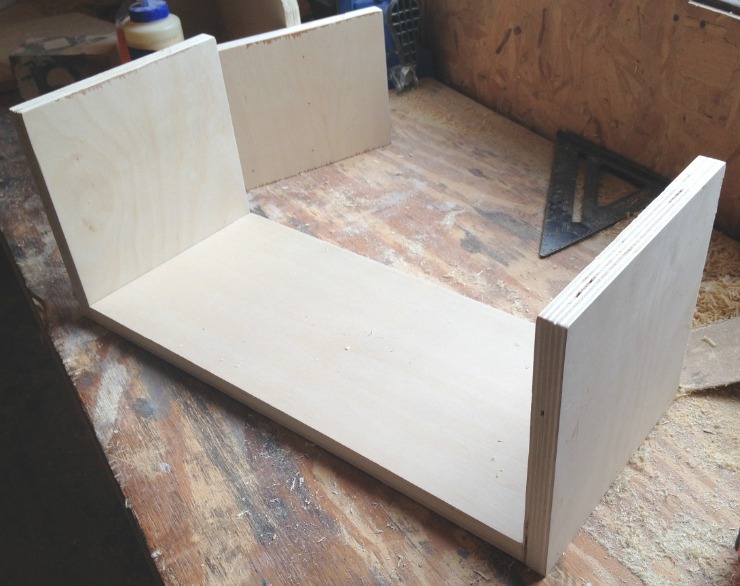
Step 4: Attach sides

Glue and nail the front and back pieces from step 2 to the sides and bottom from step 3.

How to make a multiuse caddy

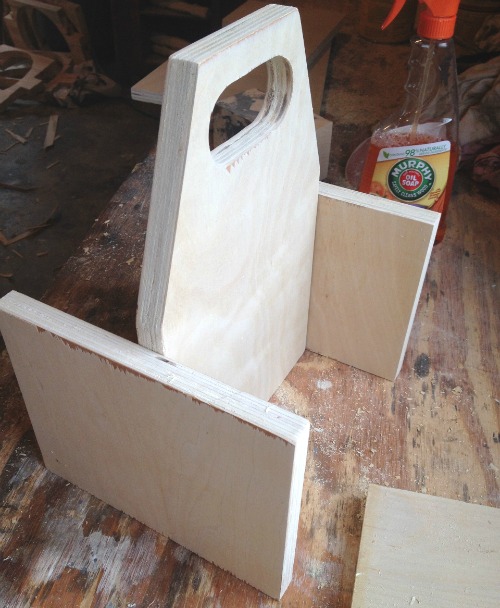
Step 5: Assemble the middle dividers

Cut the 2 middle dividers from the cut list (8” x 12”). Measure and mark the vertical centers of the divider pieces. Make sure that the piece with the handle is centered on the middle dividers. This will make your inside “compartments” the same size.

How to make a multiuse caddy

Glue and nail these pieces to the handle cut out piece from step 1.

How to make a multiuse caddy

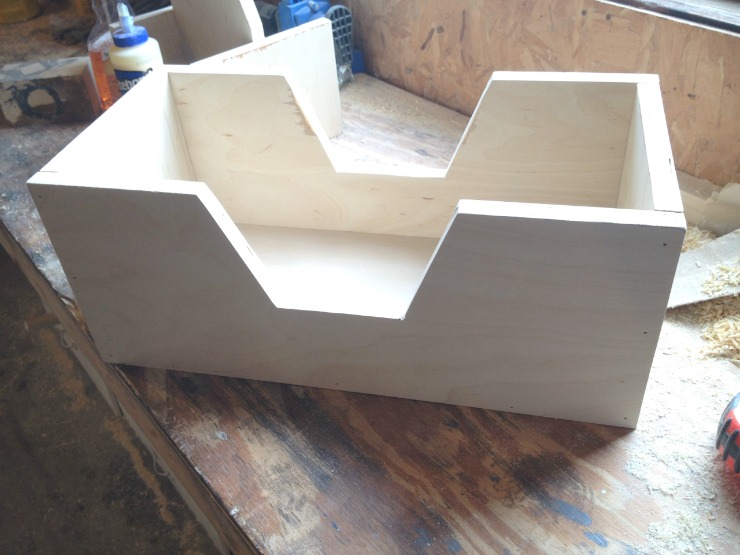
Step 6: Add dividers

Slide the dividers into the box you made in step 4 and make sure to center it. Nail the dividers in place through the front and back of the caddy. You can add a couple nails in the bottom as well, just be careful that you don’t miss and have stray nails coming up through the bottom of your caddy.

How to make a multiuse caddy

Give your caddy a good sanding and it’s good to go. You can add paint or stain, but I left mine natural.

How to build an easy scrap wood multiuse caddy

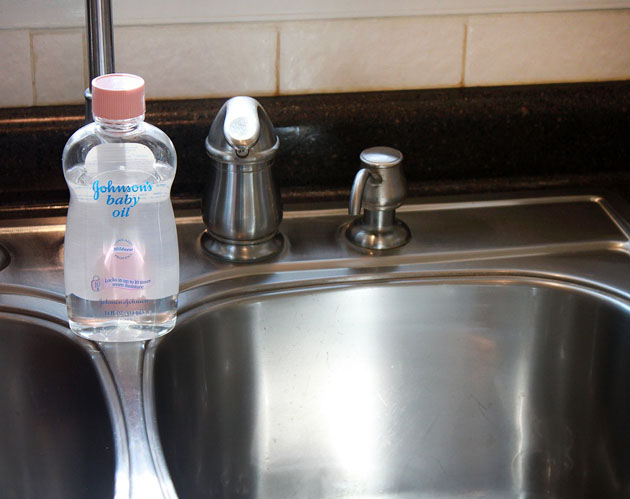
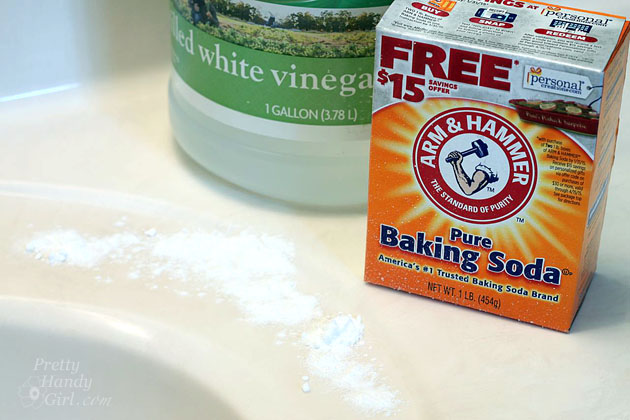
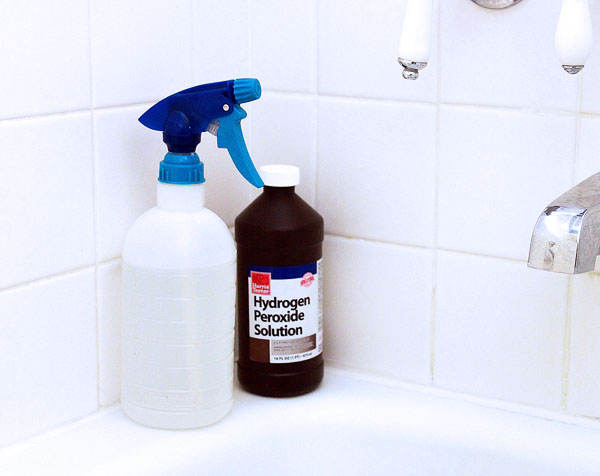
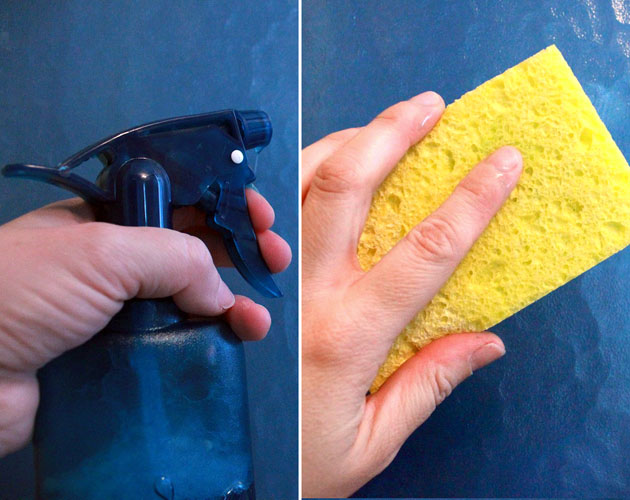
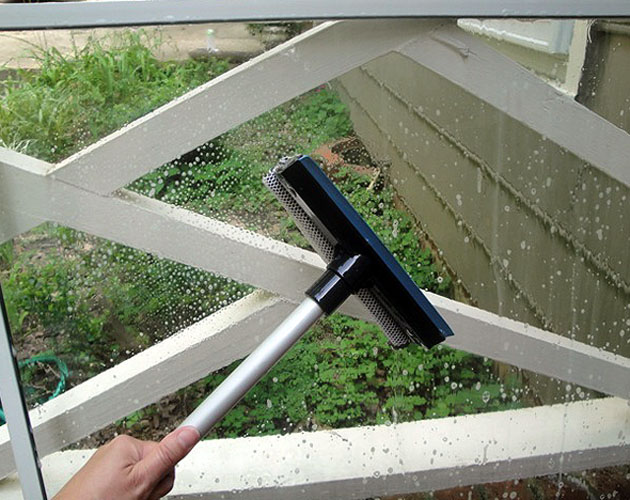
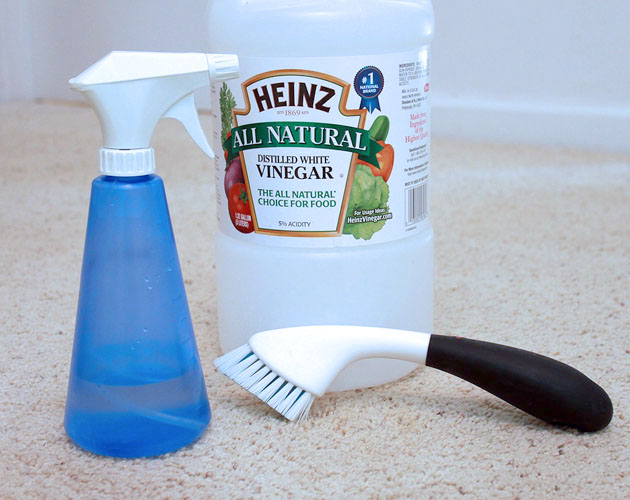
This caddy could be used for cleaning supplies. . .

How to build an easy scrap wood multiuse caddy

. . . craft supplies. . .

How to build an easy scrap wood multiuse caddy

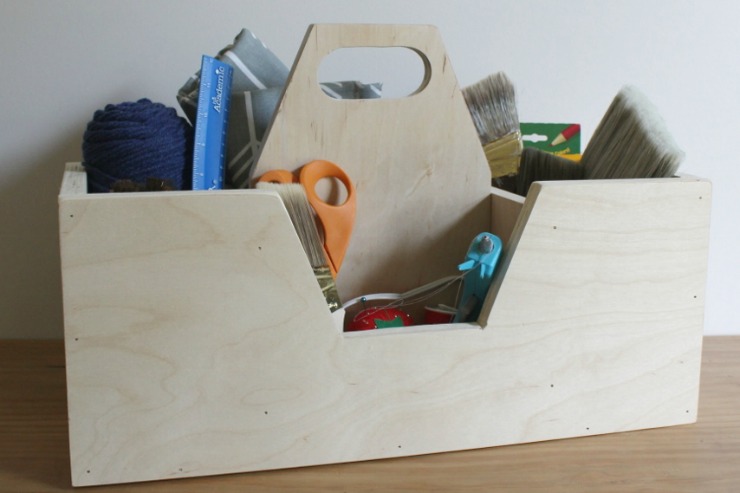
. . . tools or any small things you want to organize.

How to build an easy scrap wood multiuse caddy

Don’t you love a good scrap wood project? Me too! For more fun scrap wood projects, check out this DIY personalized lazy Susan made from 2x scrap boards, or this floating mirror shelf made from a scrap 2×4.

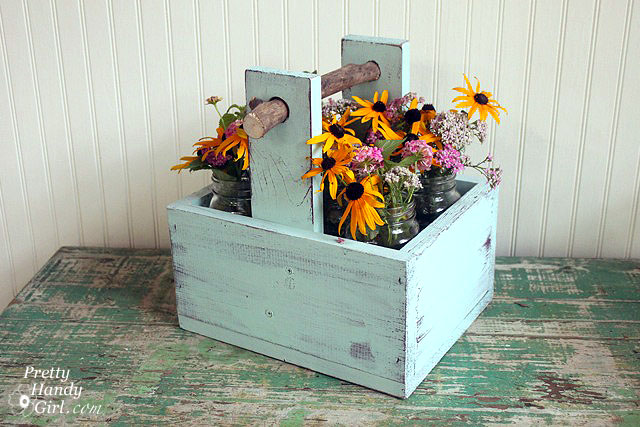
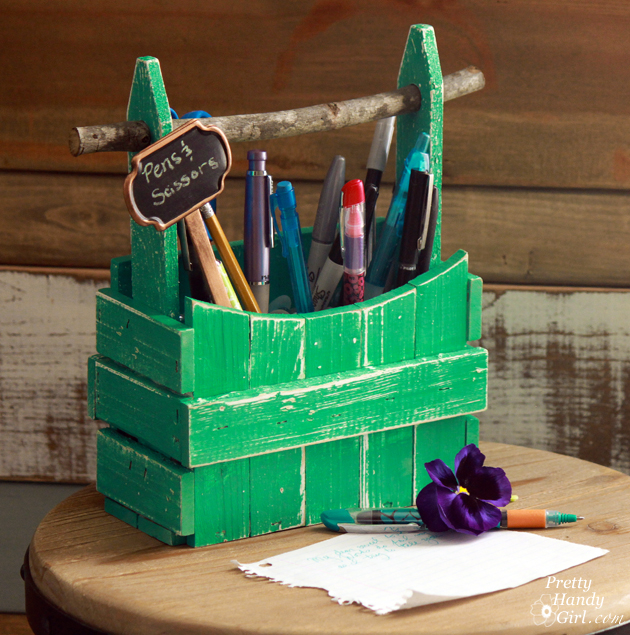
You may also like these simple scrap wood caddies:

Rustic Branch Handled Caddy

Mini Picket Fence Caddy

Until next time, happy building!

Shara's Signature

~ Read more of Shara’s tutorials ~

What No One Tells You About Farmhouse Sinks | Pretty Handy Girl

When we bought our farmhouse sink, I naively thought I wanted one because they looked so beautiful in photos of farmhouse style kitchens. Now that we’ve had our farmhouse sink for three years, I want to tell you What No One Will Tell You About Farmhouse Sinks, especially cast iron sinks.

Fact #1:

You will chip dishes and break glasses if you aren’t careful. It happens. We’ve lost two dishes and two glasses in our sink. Cast iron sinks are made tough to prevent chipping. Honestly, it’s cheaper to replace a glass or dish than the entire sink.

Fact #2: 

You may get wet. We’ve found that when our faucet is on the spray setting it spatters us. I’m not sure if this is a factor of the sink design or the sprayer. We didn’t have this issue with our old two basin sink. To solve the problem we use stream most of the time and put the water on low when spraying.

splashed-shirt

Fact #3: 

It will get dirty. A white sink will definitely show dirt and grime.

dirty-farmhouse-cast-iron-sink

This was a bit of a bummer, as someone who had to constantly shine the surface of our old stainless steel sink with baby oil to hide the hard water spots. But, I’ve come to terms with it and only have to clean it once a week to keep it looking like new.

baby oil shine stainless steel

Fact #4:

It will get scratched. Cast iron sinks will scratch, but I expected as much since we cook almost daily using heavy cast iron pans. Honestly I’m surprised we haven’t chipped the sink yet. It’s held up to a lot of abuse. In three years we have yet to chip our sink, but the marks and scratches have happened.

How to Clean a Cast Iron Sink or Tub | Pretty Handy Girl

Luckily, I have the perfect solution to clean a cast iron sink (or tub) to help it look new again.

How to Clean a Cast Iron Sink or Tub | Pretty Handy Girl

Before:

dark scratched cast iron sink

After:

How to Clean a Cast Iron Sink or Tub | Pretty Handy Girl

Fact #5:

You can’t wash dishes on one side and set the clean ones in a dish drainer in the second basin. With one large sink, all the dishes in it will get wet. This was the one change that was less of an issue for us. We simply put our dish drainer on the counter. When we have company, I put the drainer out of sight under the sink.

casement window over sink

Conclusion:

If we were to go back in time and do it again, would I buy a farmhouse sink again?

Absolutely! I still love the look. Cleaning the scratches every few weeks is no big deal. I absolutely hated our stainless steel sink because of hard water deposits and spots. Scratches are much less noticeable than the hard water deposits.

I LOVE having a big sink to clean dishes in. I feel a bit like Elaine enjoying the extra wide driving lanes Kramer created. Who doesn’t like a little more elbow room?

Best of all, I can hide dishes in it. Little known fact, my coffee mug and a knife were in the sink when I took this photo:

What No One Will Tell You About Farmhouse Sinks

The apron front farmhouse sink we have is this one. (affiliate link) If you decide to buy one, I think you will love it, as long as you are okay with those 5 Things No One Will Tell You About Farmhouse Sinks!

farmhouse sinks

Does your HE Washer stink? Here’s what you can do about it:clean front load washer


Want to save hundreds of dollars a year? Make my tested and approved DIY Laundry Detergent!DIY Laundry Detergent | Pretty Handy Girl


How to Clean a Humidifier

How to Clean a Humidifier

Winter is such a dry season, and the appropriate time to keep the air quality inside of your home healthy with moisture. This can be easily done with a humidifier. During the coldest days of winter it seems like our humidifier is constantly running. All that use can put a lot wear on it, but it’s easy to take care of your humidifier in just a few steps.

Here is How to Clean a Humidifier:

Materials:
(contains affiliate links)

  • Humidifier
  • New filter (find your’s on Amazon)
  • Sponge
  • Water
  • Vinegar
  • Rag

Before you clean your humidifier, consult with the instruction manual that came with it. If you can’t find the manual, do a search online. Usually companies have links to instructions on how to clean their appliances.

Instructions

1. First, unplug your humidifier. Take it apart and empty the water container. Separate the pieces and discard the old filter.

2. You’ll see the parts that need attention. They build up with residue that needs washing.  Make a spray with water and vinegar (or just pour vinegar into the base of the humidifier). Use a wet sponge to wipe down the base.

How to Clean a Humidifier

Read more

12 Tips to Maintain the Value of Your Car | Pretty Handy Girl

12 Tips to Maintain the Value of Your Car | Pretty Handy Girl

We’ve sold a few cars in our lives. Each time we were able to get top dollar for our used vehicles. Today I have 12 Tips to Maintain the Value of Your Car. 

(This is a sponsored post for Spiffy Mobile Car Wash, my newest favorite way to get my car washed!)

You’ve all heard the saying that a new car depreciates the moment you drive it off the lot. Although, this is somewhat true, you can prevent your car’s value from depreciating too much and too quickly by following these tips:

1. Keep it Clean – Leaving dirt and debris on your vehicle can cause small scratches. Worse yet, bird poop and splatters can actually damage the paint. A regular cleaning is going to keep your car in tip top shape.

As you know, those inexpensive drive thru car washes don’t get your car completely clean, especially on the inside. But, do you really have time to drop off your car to a mobile detailer? That’s where Spiffy Mobile Car Wash can help. They come to your home or place of business and clean your car while you work or chase the kids.

12 Tips to Maintain the Value of Your Car | Pretty Handy Girl

All you have to do is download the app and select your service and appointment time. Then watch as your car gets cleaned from the inside out. I’ll give you more details about the service at the end of these tips.

2. No Salt – If you live at the beach or in a harsh winter area, salt can break down your car’s paint and cause metal to rust much faster. It’s important to keep your car protected with frequent car washes and wax your vehicle’s exterior. (Spiffy Mobile Detail can do this for you if you chose the 3,4, or 5 service!)

3. Change Your Oil Regularly – Help your car’s engine run smoothly for a long time by keeping up with your oil changes. Depending on the age of your vehicle, oil changes are recommended every 3,000 – 5,000 miles. Be sure to keep your receipts to show potential buyers that your car was well cared for.

4. Check Fluids – Make sure to check your car’s fluid levels at least once a month. You can check the fluids yourself or ask a mechanic to check for you. Top off engine oil, windshield wiper fluid, transmission fluid, power steering fluid, coolant, and brake fluid if they are low. As an easy reminder, ask your mechanic to check and top off fluids at every oil change. Read more

10 DIY Frugal Cleaners | Pretty Handy Girl

On a quest to save money while cleaning your home? Do you want to use less chemicals when you clean? This is a compilation of 10 DIY Frugal Cleaners that I use in my home.  You can easily make them with common household ingredients. Soon your home will be clean and your wallet fat!

Super Frugal Laundry Detergent

DIY Laundry Detergent | Pretty Handy Girl

Frugal House Cleaners Detergent Ingredients:

  • 1/4 bar of Fels Naptha soap
  • 2 Tablespoons Borax powder
  • 1/4 cup (4 Tablespoons) Arm and Hammer Washing Soda (not baking soda)
  • 2 empty laundry detergent bottles or 1 – 2.5 gallon water jug

Frugal House Cleaners Detergent  Instructions:

  • Grate the 1/4 Fels Naptha Bar using a cheese grater.
  • Put the Fels Naptha shreds and 1 cup of water into a pot and melt over medium-low heat, stirring constantly. Continue stirring until all the soap has dissolved. Pour 2 1/2 quarts (10 cups) of water into a large container or bucket and add the cooked soap mixture.
  • Add 2 tbsp. of Borax and 1/4 c. of the washing soda and stir.
  • Add 2 1/2 quarts more water and stir.
  • Cover the mixture and let it set overnight.
  • The next morning, your soap will have thickened and gelled considerably. Stir it up. Add the mixture to your empty container(s) filling only half way full. Fill the rest of the container with water.
  • Shake the bottles to mix before use. Use 1/4 cup per load.


Inexpensive Fabric Softener Sheets

diy_fabric_softener_sheet_sponges

  • 1  bottle of Liquid Fabric Softener
  • 1 bucket
  • 4   sponges (cut in half to make 8)

Pour liquid fabric softener into bucket. Fill empty softener container with water and add it to the bucket. Repeat to give you a 2:1 mixture of water to fabric softener. Drop sponges into the mixture. Grab a sponge and wring out the excess liquid. Add it to the dryer with your wet clothes.

(Straight cheap fabric softener also makes a great wallpaper remover!)


Miracle Stain Remover

frugal house cleaners

  • 1 scoop of Oxi-Clean
  • 1 scoop of Liquid Clorox 2
  • 1 scoop of Cascade powder dishwashing detergent (or another powered brand.)

Fill your basin with warm water then add the oxi-clean, clorox 2 and dish detergent. Give it a swirl and mix until the powders dissolve and bubbles form. Place the stained garment into the mixture, being sure the stain is submerged. Let soak for about 2 hours.

For tougher stains, let it soak overnight. Remove the clothing to behold the miracle! Normally I will throw the garment into the wash, but you could simply rinse and dry it. This formula is also safe for colors as well!


Drain Cleaner

boiling_water_drain_cleaner

  • Hot Water
  • Salt
  • Vinegar
  • Baking Soda

For light drain cleaning, mix 1/2 cup salt in 1 gallon water, heat (but not to a boil) and pour down the drain.

For stronger cleaning, pour about 1/2 cup baking soda down the drain, then 1/2 cup vinegar. The resulting chemical reaction can break fatty acids down into soap and glycerine, allowing the clog to wash down the drain. After 15 minutes, pour in very hot water to clear residue.

Caution: only use this method with metal plumbing. Plastic pipes can melt if excess boiling water is used. Also, do not use this method after trying a commercial drain opener as the vinegar can react with the drain opener to create dangerous fumes.


Sink Cleanser and Hard Water Stain Remover

Scrub Away Hard Water Stains | Pretty Handy Girl

  • Baking soda
  • Vinegar

Make a paste with baking soda and water. Dip an old tooth brush into the paste and scrub your sink with the paste. Pour straight vinegar into a separate container. Dip toothbrush into the vinegar and go back over the backing soda paste. The fizzing chemical reaction of the backing soda and vinegar will aid in removing hard water stains. Repeat if necessary. For tougher stains, grab this power tool!


Stainless Steel Sink Shine

baby_oil_shine_stainless_steel

  • Baby oil
  • Paper towels

Squirt a small amount of baby oil in a clean stainless steel sink. Spread it around and wipe with a paper towel until shiny.


Mold remover

10 DIY Frugal Cleaners | Pretty Handy Girl

  • 1/2 cup hydrogen peroxide (3%)
  • 1 cup water

Mix in a spray bottle. Spray on mold and wait at 1 hour. Rinse clean.


Magic Soap Scum Dissolver

miracle_soap_scum_remover

  • 1 cup vinegar
  • 1 cup blue dawn dish detergent

Microwave vinegar until hot! Mix with blue dawn dish detergent in a spray bottle. Spray it on your toughest soap scum. Then wipe it off with ease!


Window Washing (Exterior and Interior)

window_washing_mixture

  • 2 gallons of warm water
  • 1/2 cup vinegar
  • 2 tsp liquid dish detergent

Tools: Sponge/Squeegee, Sponge, Dry lint free rag

Mix ingredients in a bucket. Dip the sponge/squeegee into the mixture and scrub the windows. Use the squeegee to remove all liquid from the windows. Wipe clean with a dry rag.


Carpet Stain Remover

10 DIY Frugal Cleaners | Pretty Handy Girl

  • vinegar
  • water
  • corn starch
  • salt
  • borax

Mix equal parts white vinegar and water in a spray bottle. Spray directly on stain, let sit for several minutes, and clean with a brush or sponge using warm soapy water.

For fresh grease spots, sprinkle corn starch onto spot and wait 15 – 30 minutes before vacuuming.

For a heavy duty carpet cleaner, mix 1/4 cup each of salt, borax and vinegar. Rub paste into carpet and leave for a few hours. Vacuum up the mixture.

I hope you found some of these home cleaners helpful. Please share if you have any great recipes for cleaners in the comments below.

PHGFancySign

Pin for later!

DIY House Cleaners