Easy Clean Up Paint Tray Liner | Pretty Handy Girl

31 Days of Handy Home Fixes | Pretty Handy Girl

I love to paint rooms! It’s one of those meditative tasks that leaves you with instant gratification when  you are done. But, I don’t like the clean up afterwards. Several years ago I came up with an Easy Clean Up Paint Tray Liner that costs next to nothing!

All you need are two plastic grocery bags and two strips of painter’s tape.

Day 11: Easy Clean Up Paint Tray Liner

Make sure your grocery bags are clean and don’t have any holes in them. Turn the bags inside out if there is printing on them. (Sometimes the ink is water soluble and can mix with the paint.) Observe as my sister gives her best Vanna White impression and shows you how to invert that bag:

Easy Clean Up Paint Tray Liner | Pretty Handy Girl

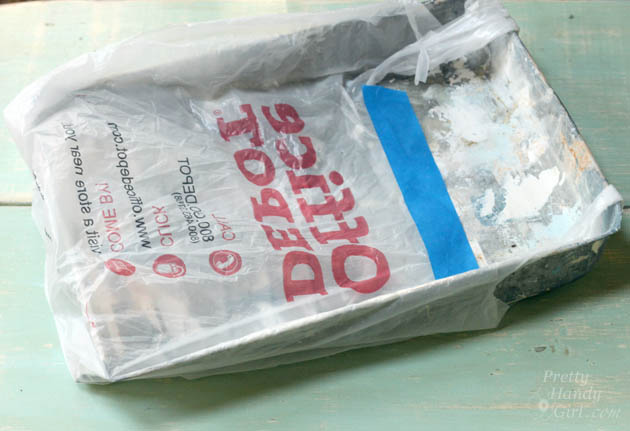
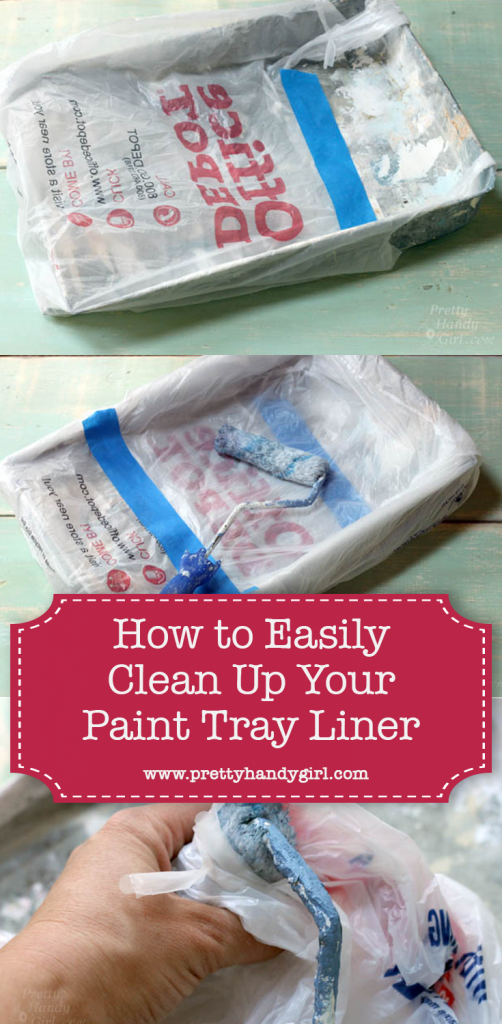
Slip the first bag on from the top of the tray and tape it at the bottom.

Easy Clean Up Paint Tray Liner | Pretty Handy Girl

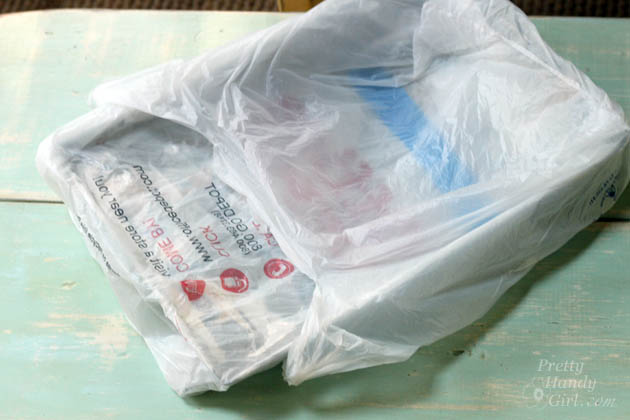
Slip the second bag over the bottom this time:

Easy Clean Up Paint Tray Liner | Pretty Handy Girl

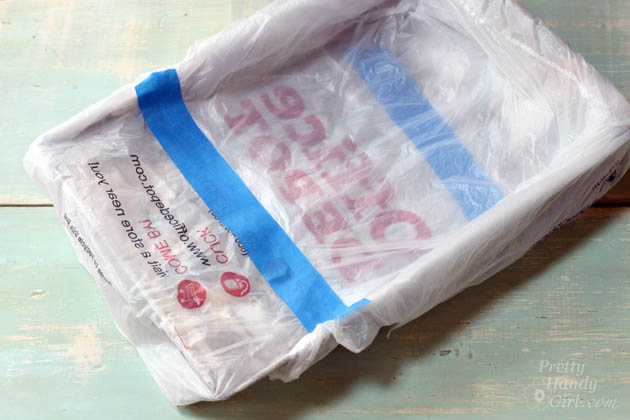
Tape the opening of the bag across the entire paint tray width.

Easy Clean Up Paint Tray Liner | Pretty Handy Girl

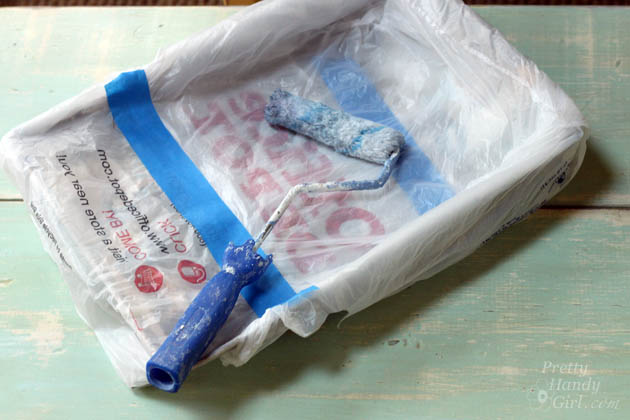
You’re ready to rock and roll, errr roll and paint!

Easy Clean Up Paint Tray Liner | Pretty Handy Girl

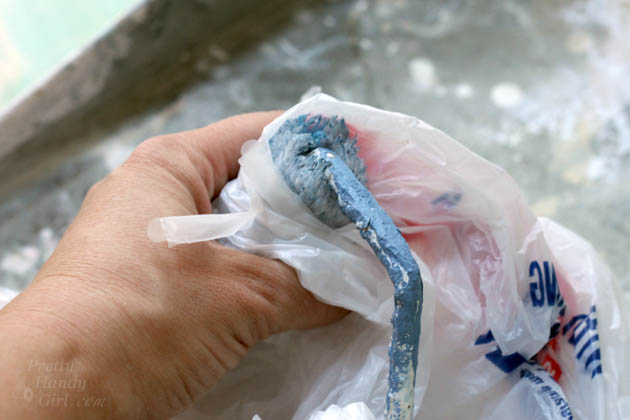
When you are done, carefully remove the plastic bags and throw them away. If you are pitching your roller, you can grab the roller through the bags and pitch it too.

Easy Clean Up Paint Tray Liner | Pretty Handy Girl

No need to clean the tray (unless some paint seeped inside.) Unfortunately, you’ll probably still need to wash your paint brushes. But, if you clean your paint brushes correctly, they should last you a decade or more!

PHGFancySign

Pin for later!

paint tray liner plastic bag


refill_rollers_for_touch_up_painter
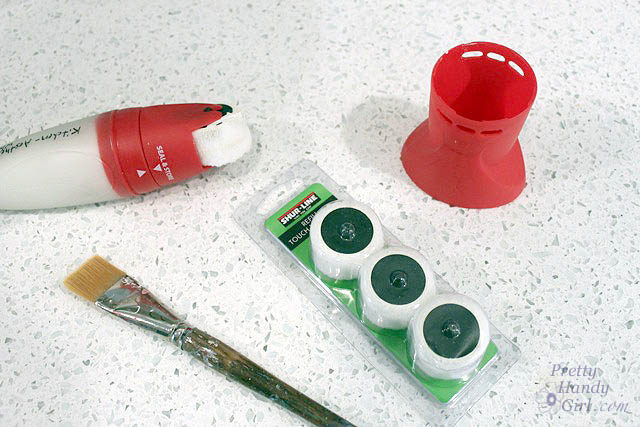
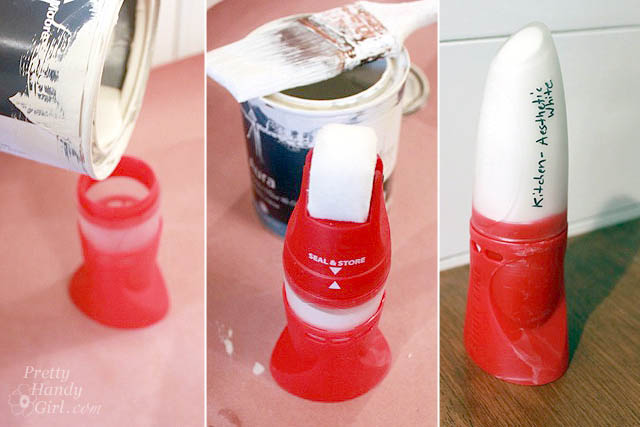
I’m picky about my painting products. In fact I rarely stray from the same brushes, edgers and paints that I’ve used for over 10 years. As a DIY blogger, I will receive “new” painting gadgets to try from time-to-time. It is rare that I end up liking or using them after initially trying it (consequently I won’t blog about them.) The Shur-Line Touch Up painter, although “new”, actually proved to be a product that I do like! I was skeptical when I first received it two months ago. The concept is that you can store a small amount of your leftover room paint and have it available for touch ups. (Anyone who has kids and pets knows that keeping your walls fresh is a challenge. I’ve used the Mr. Clean Magic Eraser with good results, but sometimes it scrubs away too much paint.)

After filling the Touch Up Painter over a month ago, I set it aside in our garage until this week.

filling_touch_up_painter

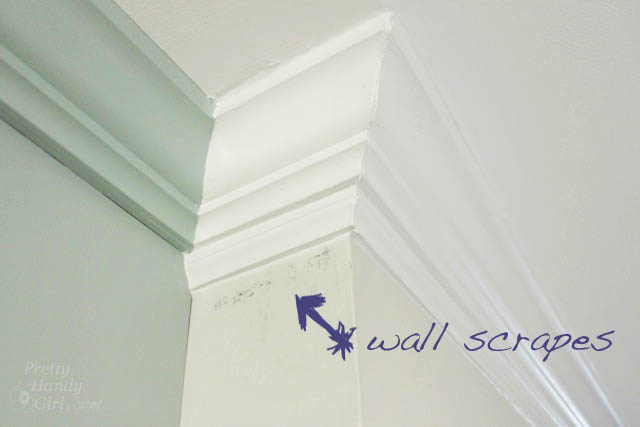
I had 10 minutes before my girlfriends were coming over for coffee. In one of those last minute scrutinies of my home, I noticed the scrapes on the wall! Eeek.

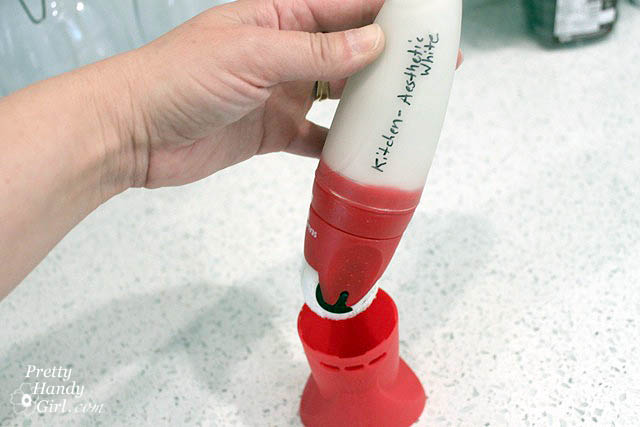
remove_touch_up_painter_from_base

It was the perfect time to try out this new gadget and quickly touch up the scuffs from the crown molding installation.

wall-scrapes_in_paint

When I first opened the Touch Up Painter, I was dismayed to find a big blob of dried paint on the roller. Read more

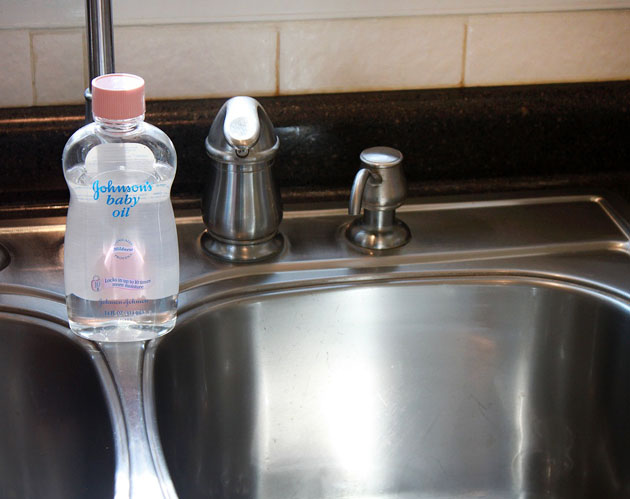
Anyone else detest cleaning their homes? {Major hand raised over here!} I don’t like to clean, but what I really dislike is paying those exorbitant prices to purchase store bought cleaners. Did you know that you can make your own cleaning products using ingredients that cost pennies compared to a bottle of cleanser!

For example, baby oil makes an excellent stainless steel sink shiner (who knew!)

Read more

Painting Like a Pro

Let’s talk about Paint, Baby…

Before we start, let’s talk paint. One factor for a perfect paint job is the quality of the paint you choose. Do yourself a favor, don’t settle for the cheap store brand paint. You may save yourself a few bucks, but you will be looking at streaks and imperfections from the cheap paint for years to come. Or worse, the paint won’t hold up to wiping or moisture (not good!)
Painting Like a Pro

Painting Like a Pro

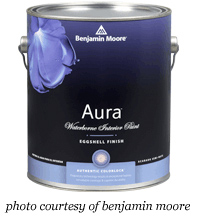
Benjamin Moore Aura Paint – Love this stuff! Serious love affair here. Not only is it low VOCs and low odor, but the coverage is amazing and you don’t see any of the roller marks. It is thick like a chocolate milk shake and spreads slightly after it is rolled on. This is the only paint I’ve been able to get away with only using one coat. But, it was because I was painting a lighter shade of sage over a pine green color. Other rooms where I was going from a much darker color to a light color, I had to use two coats, but I definitely didn’t use as much paint as I would have if I used another brand. Be prepared for the sticker shock, this paint isn’t cheap at $56 a gallon, but you will use less and you will be saving the environment!

Painting Like a Pro

Valspar – Hi Def Paint – Before we were spoiled by the Benjamin Moore Aura paint, Pretty Handsome Guy and I used to paint with Valspar paints for all our walls. In fact, we still use the Flat Ultra White for our ceilings. We were always happy with the results, but the idea of using a Low VOC paint really appealed to me.  Last week, as I eyed the “oops” paint at my local Lowe’s (a normal habit of mine), I was lucky enough to spot a color that was very close to a color I was craving for our bathroom. I grabbed it up for $5 ($10 at register with a $5 rebate. Normally $32). The paint was a gallon of the new Valspar Hi-DEF paint. I have to say, I was impressed by the coverage. It almost covered all of the old color in one coat (I was covering dark purple with a light aqua.) This paint would be a good option if you didn’t want to shell out the $56 for the Aura paint.
Painting Like a Pro

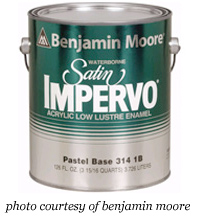
Benjamin Moore Impervo paintThis is my new favorite trim paint! This stuff goes on smooth and spreads like an oil paint. It also has a durable finish that resists chipping and really stands up to our kids’ shenanigans. Before I found the Impervo, I thought I was doomed to use an Alkyd (oil paint with a dryer added) paint for our trim. If you’ve ever had the misfortune of using oil based paint, you know that it has a strong odor and the brushes have to be cleaned with turpentine. Not at all good for you or the environment.  You can imagine my excitement (and skepticism) at finding a water based trim paint that is supposed to hold up like oil. Our living room trim paint has lasted 1.5 years and it still looks great! Again, this amazingly durable paint isn’t cheap, it costs $48  a gallon, but at least you don’t have to paint your trim every year if you have little devils boys in your home.

Please note: There are other good paints available (Sherwin Williams is also a favorite of many other DIY bloggers.) This is just a list of the paints that I love to use.


Let it Shine, Let it Shine (or maybe a little less shine) – Flat, Eggshell, Satin, Semi-Gloss, or  Gloss. How do you know which one to choose?

Gloss – The only time I use gloss or high gloss is for trim and cabinetry. (Or the things that get grubby fingers ALL over them.) The gloss surface cleans up much better than non-gloss, and it doesn’t hold onto oils or grease like the other finishes.

Semi-Gloss – This sheen is great for painting a bathroom, kitchen or walls that will see a lot of moisture, water and basic abuse.  Similar to the gloss, it will be easier to wipe clean and water splashes won’t show as much on this surface.

Satin – I know I just said you should paint kitchens and bathrooms with semi-gloss, but I rarely do. Why? Well, because my walls are far from perfect. We have two rooms that had wallpaper painted over (not my decision.) After spackling and sanding the seams (doing my best to smooth them), I used a satin paint.  Satin has most of the durability of a semi-gloss, but less sheen. If you use paint with a sheen you will see highlights wherever there is a seam, bump or edge.Therefore highlighting your imperfect walls.

Eggshell – Low sheen, but not flat. Eggshell is best for rooms with imperfect surfaces or bedrooms. Eggshell has an almost matte or flat appearance and is very smooth and hides bumps and dips fairly well. It’s not as easy to clean, but will stand up to an occasional wiping better than flat paint.

Flat – I never use flat, except….when painting ceilings. Then we grab our favorite ceiling paint: Valspar Flat Ultra White for maximum light reflection. (Read more about bright white ceilings HERE.) So, unless you are painting ceilings, don’t use flat, it is too chalky and hard to clean.

Just call me Ms. Mix-a-lot. How to Save $ by Mixing Your Own Paint:

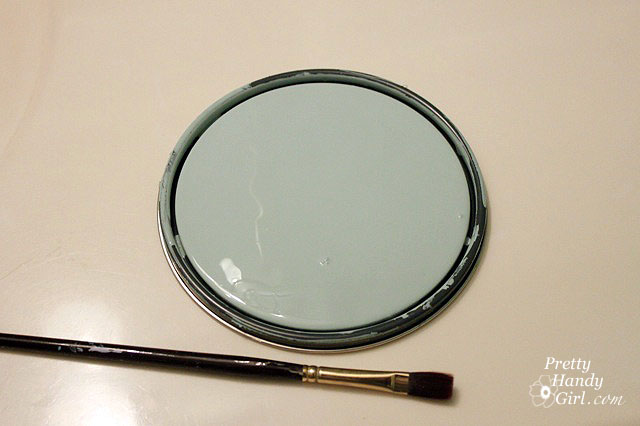
Some of  the paints I mentioned can cost quite a pretty penny. So, I thought you might like to know the way I save money on paint. I frequently scour the “Oops” or “Mistint” paints. If I see a color that is close to what I want, I grab it. For my downstairs bathroom I spotted this sea green color and knew it was close to the color I wanted, but just a shade darker. All I needed to do was purchase an empty paint can and use some leftover white paint to mix a prefect color.

You can mix any two sheens as long as they are next to each other in the list above. In other words mixing gloss and semi-gloss is fine; semi-gloss and satin; satin and eggshell; or in my case eggshell and flat paint.  You definitely don’t want to mix a semi-gloss with a flat or eggshell. You might get some streaks and it is hard to mix.

Painting Like a Pro

To mix paint, I like to use this paint mixer attachment that fits on my drill. It is a dream come true for a custom paint mixer like myself.

Painting Like a Pro

Without going into too much color theory, here are two mixing formulas I like to use.

Keep in mind your paint color has to be fairly close to the final color you want before attempting these mixes.

Too vibrant, intense or bright – Let’s say you find a color that you like, but it is too intense and you want to dull or tone it down. You can add either black or brown paint (I use acrylic craft paint) to tone down the color. Pour some of your paint into an empty bucket or paint can, then add a big squeeze of black (or brown.) Mix it, put a dab on a piece of paper and dry it with a hair dryer (because I’m too impatient to wait.) Still too vibrant? Add more black (or brown) until it is the color you want. I used this method for my dormer hallway shutters. You’ll have to play with the mixing until you get the desired results.

Too dark, need a shade lighter – Add white paint to a bucket, then slowly add small amounts of your paint color and mix it. Put a dab on a piece of paper and dry it to check the color. Still too light? Add more color or if it is too dark, add more white.

I hope this post helps you find the perfect paint for your next paint job.

Other Steps in this Series:

Step 1. Prep work

Step 3. painting your room and finishing touches


Painting Like a Pro

Today I have the skinny on paintbrushes, they all look alike, but they don’t behave alike! Pretty Handsome Guy and I have painted our fair share of rooms, especially dated brown trim moulding. One thing we learned early on is that buying a good brush was key to making a difficult job more manageable. When we first moved in and were cheap didn’t know any better, we bought the least expensive store brand brush we could find. What a mistake! Those brushes barely held up to one room of trim. The bristles frayed and the paint brushes lost their chisel shape.
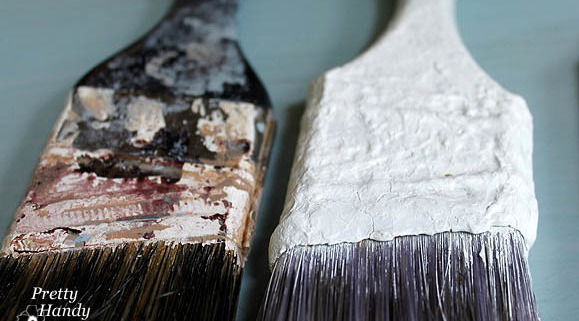
Case in point:

(That being said, the same thing can happen to a good quality paint brush if you don’t clean and care for it properly. More on that later.)

But, if you spend a little more to buy a good quality brush and take good care of it, you can use that brush for years!!!

Above you can see the cheap store brand used maybe 2-3 times.
A brush we have owned and used for 8 years!
And a brand new never used Purdy brush.
(I encourage you to click on the picture to see it enlarged!)


 Close up of the layers of paint on that 8 yr. old Purdy!

Recently Purdy contacted me and asked if I wanted to try one of their brushes  and maybe blog about it. I said sure, but I felt a little guilty. Why? (Whispering: Well, because we already have an arsenal of Purdy brushes in our painting supplies. When it comes to brushes, that is all we buy.)  Okay, this is where I need to tell you that –  yes, Purdy sent my a free brush and 5-in-1 painting tool to try out. But, did they pay me? No. And, did they ask me to write a positive review? No. So, I am being totally honest with you when I say that I do like their brushes. That being said, I have not tried some other high quality brushes. The only thing I do wish was different about Purdy brushes, is that they would develop an ergonomic handle for their brushes. After an hour of painting trim my hand always cramps up.

I haven’t bought any ergo handle type brushes, but I have seen this brush from Proform Technologies:

I might just have to try one of these next time.

Okay, so I sold you on buying a good brush, and you were shocked by the price tag. Now I want to show how to care for that brush so it will behave for you (and you won’t have to replace it anytime soon.)

Be sure to clean your brush before the paint can dry on your brush. If you can’t wash it immediately, go ahead and leave your brush in a jar of water (or mineral spirits or turpentine for oil based stains or paint).

When you are ready, here is how to properly wash your paint brush:

1. Rinse out as much paint as you possibly can.
 
2. Bend the bristles against your palm or the bottom of your sink.
Repeat on the opposite side.
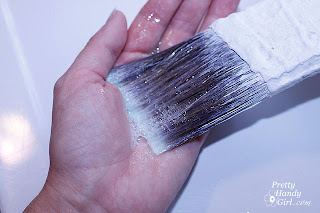
3. Gently separate the brush to expose the core
and rinse any paint out of the inside of the brush.
4. Squirt some dish or hand soap in your palm.
Working in a circular motion, mix the soap in your hand with your brush
until a big lather forms.


5. Then rinse all the soap out bending the bristles if needed.
6.Repeat steps 2-5 until the water runs clear. 
7.Squeeze all the paint out of your brush using your fingers like a squeegee.
Then hang your brush upside down to dry.
I used large paper clips to make these hooks that hang over the sink.

If you are using an oil based paint you will want to substitute mineral spirits or turpentine for the soap and water. I also try to keep the brushes I use for oil paint or stains separate from my latex brushes.

Happy painting for years to come!