Jaime from That’s My Letter here to share a handmade ornament as part of the Très Frugal gift ideas series running all through November.

circle ornaments

Today I’m sharing how to make a simple circular handpainted monogrammed ornament with a metal frame.

circle ornaments 5

You can choose nearly any font for the monogram, the thicker the letters the easier it is to paint.  You’ll get the best results if you use a small, fine brush, go slow, and have a steady hand.  Then you’ll be making monogrammed ornaments for all your friends and family this holiday season:

circle ornaments 7

The circular wood discs are readily available at most craft stores and the stainless steel metal hose clamp adds the perfect frame and weight to the ornament.  It’s the perfect combination of wood, metal and fabric with the added ribbon:

circle ornaments 6

Supplies: Read more

feathered_nest_christmas_tree

I know what you’re about to say…”What?! It’s not time for Christmas decorations!” Well, I received an email from Michaels asking if I’d like to participate in the Michaels Dream Tree Challenge. If you saw last year’s contestants and the resulting dream trees, you’ll completely understand why I was excited to be asked to join in this year. Plus, I’ve been working feverishly on the Très Frugal month of DIY Gift Ideas and having some Christmas décor set up has put me in the mood (and provides for a festive backdrop for photography!)

Once I received my pre-lit tree and the gift card to pay for my tree decorations, I hit up my local Michaels retail store. I really had no idea what theme I wanted to create, but I did know I wanted to be frugal and make my gift card stretch as far as possible.

As luck would have it, there were lots of Fall berries on clearance. Can you tell the difference between fall red berries and Christmas red berries?  Read more

Sleigh Gift Wrap

This is it, the last day of the Creative Gift Wrapping tutorials. I hope you have had fun with some of these creative gift wrap ideas. In case you missed any, here are the previous days of gift wrapping:

Day #1 – Monogram & Name Plaque

Day #2 – Frosty & Rudolph gifts

Day #3 – Butterflies & 3-D Tree 

Day #4 – Chalkboard Tags

Today I have my favorite gift wrap! I have to admit that the polar bear is my favorite animal, so I might be biased. But, it is a really easy look to re-create.

Materials:

  • Wrapping paper
  • White card stock paper
  • Snowflake hole puncher
  • Key tag
  • Satin ribbon
  • Jingle bell
  • Black & white pom poms (nose & tail)
  • Small black button
  • Elmer’s glue
  • Hot glue gun

Wrap a present with gift wrap.

Using the template below (click on the photo for a larger version and then print it out), cut out the polar bear shape on white card stock. Better yet, if your printer can handle it, print it out on card stock and then flip the bear over to the white side.

Glue the bear onto the gift package.

Punch out some snowflakes. (I used some white and some light blue that would show up better on top of the white bear.)

Cut one piece of red ribbon for the bears collar. Glue the collar and snowflakes onto the package using Elmer’s glue. Use hot glue to attach a button and pom pom for the eye and nose.

Thread a jingle bell onto some satin ribbon, then tie a bow onto a key tag.


Hot glue the bow/jingle bell onto the bear’s collar.


Factoid: Did you know that a polar bear’s skin is actually black? And the bear’s hair is actually transparent hollow tubes. This serves three purposes:

  1. The tubes are hollow so they store air in them. This acts as an insulator.
  2. Plus, it helps the polar bears buoyancy while swimming.
  3. Remember how I said their skins is black? Well, because the fur is actually transparent, it allows the sun to reach the bear’s skin and help warm them. Cool, huh?!

Materials:

  • Wrapping paper
  • White card stock paper
  • Satin ribbon
  • Sprig of rosemary or other evergreen twig
  • Hot glue gun

Wrap a present with gift wrap.

Add a ribbon on the diagonal corners.

Click on the dove silhouette below to see the full size image. Print it out on the cardstock paper and cut out the shape to use as a template, or use the reverse white side of the shape.

Use a hole punch to cut out the eye. Hot glue the dove to the package and hot glue the rosemary underneath the dove’s beak.

Have fun with this creative package. Add the words PEACE, or bend the wings up to make them three dimensional.

This dove will work on a variety of sized gifts. Try one on a vertical present.


“Peace on Earth, Goodwill Toward Men”

Bonus: Here are two more creative gift wrappings to try. The holly leaves are simply pieces of scrapbook paper folded and glued onto the package.

The sleigh was so much fun to create! I wrapped pieces of foam board and cut out a scrapbook paper sleigh.

Glued cotton balls for snow and some buttons and buckles make this a gift the recipient will want to stare at instead of open.

I hope you have a wonderful Christmas day, a Happy Holiday and a terrific New Year!

Every year I try to come up with new and creative ways to wrap Christmas gifts for my friends and family. For me, making beautiful packages is almost as fun as opening the gifts Christmas morning. In fact, I usually invite a few friends over to wrap presents with me. We spend a few hours chatting, cutting paper and creating little present masterpieces.

After last year’s get together, I needed to stock up on more gift wrap supplies. A quick trip to Walmart provided plenty of embellishments, paper, and exciting new crafting supplies.

I was especially excited about trying the X-ACTO template, decorative edge scissors and the swivel knife. I’ve never seen these products before. Fun, fun, fun!

Want to join me for a little gift wrappity wrap party? Go ahead and grab these supplies and I’ll show you how I created my scrapbook inspired presents.

Materials:

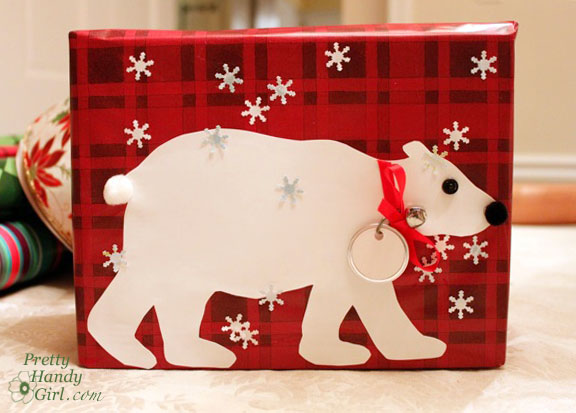
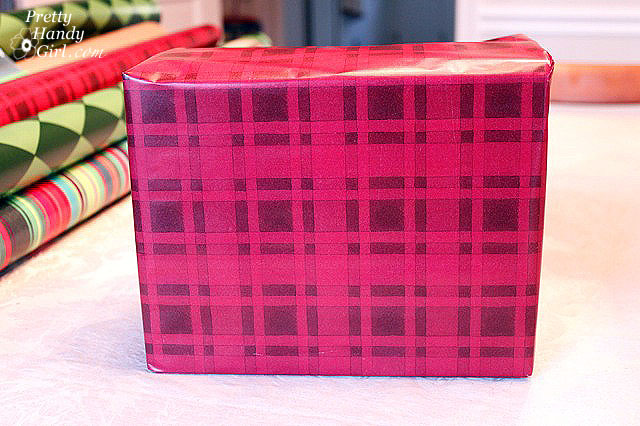
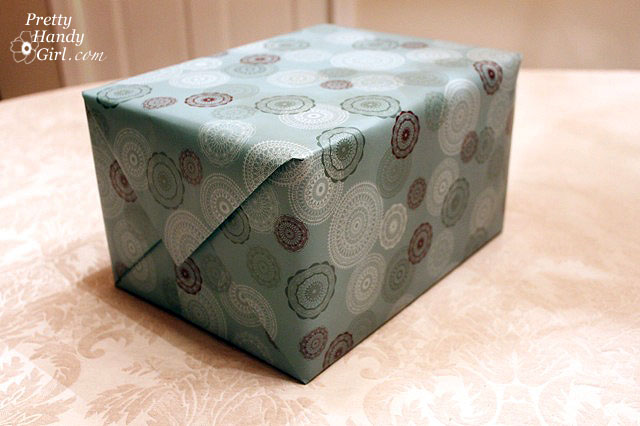
Let’s start with this red and white graphic shape gift.

Begin by wrapping the present with a solid color gift wrap.

Use the Elmer’s double stick tape underneath the edges of the paper for a hidden (no tape lines) closure.

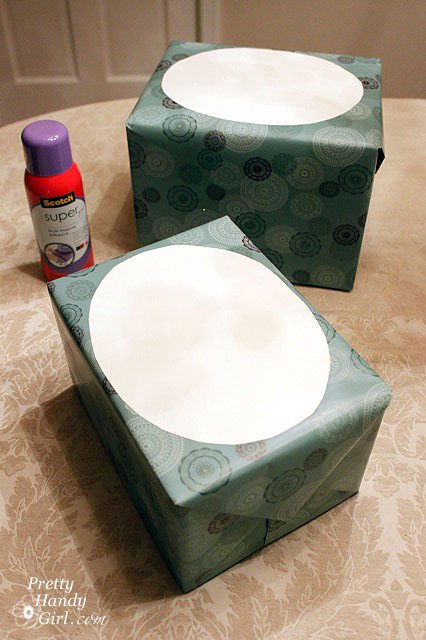
Cut a piece of the Colorbok decorative scrapbook pages (die cut lattice page) to the same height of the package and about 2/3 the width of the gift. Trim along the edges of the design using the X-ACTO swivel knife.

Rub the Elmer’s glue stick onto the back of the lattice pattern. Then flip it over and press it onto the gift.

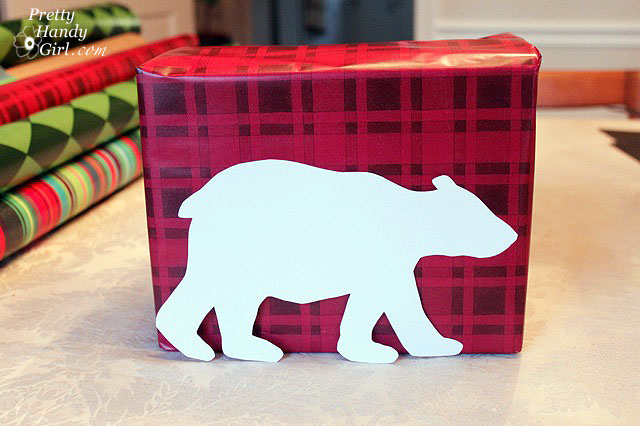
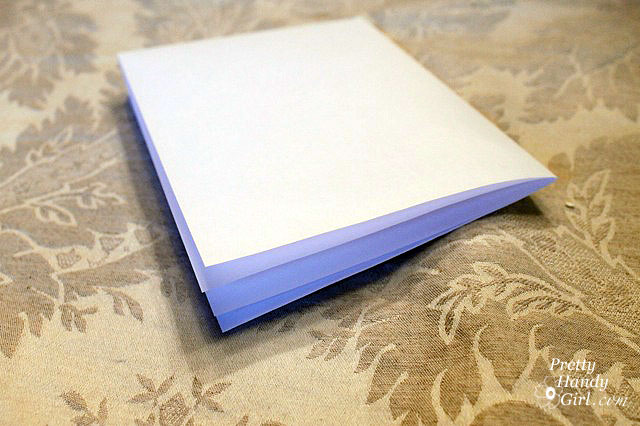
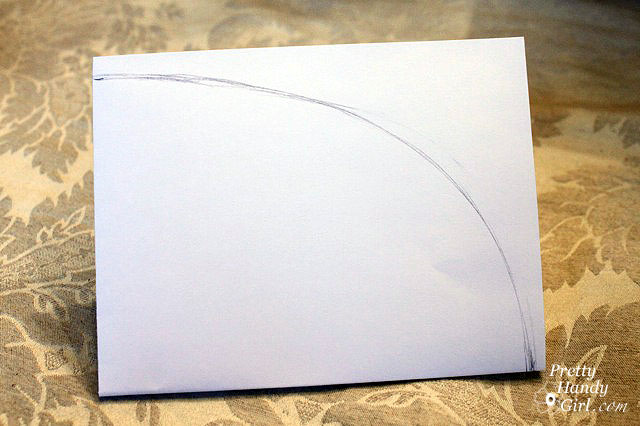
Fold a letter size sheet of paper into quarters. Draw one quarter of a decorative shape onto the paper (I tried to emulate the lattice hole design.) Make sure that your paper folds are in the center of the shape.

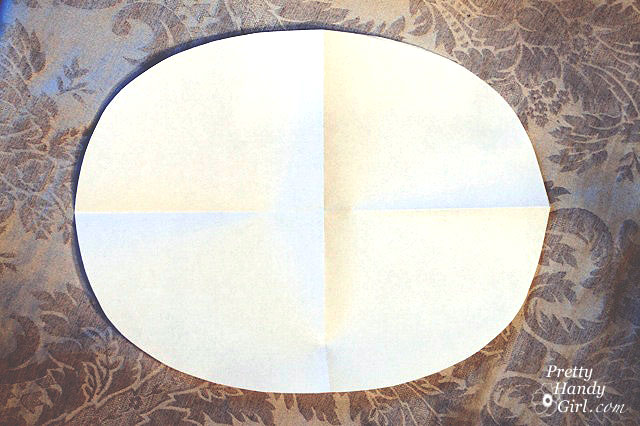
Cut out the shape you drew on the paper. Open the paper up and use it as a template to trace and cut the design out of black foam board.

Use the regular X-ACTO knife (and a brand new blade) to cut around the template. (Take your time with this task. You can make multiple cuts from different angles if you need to.)

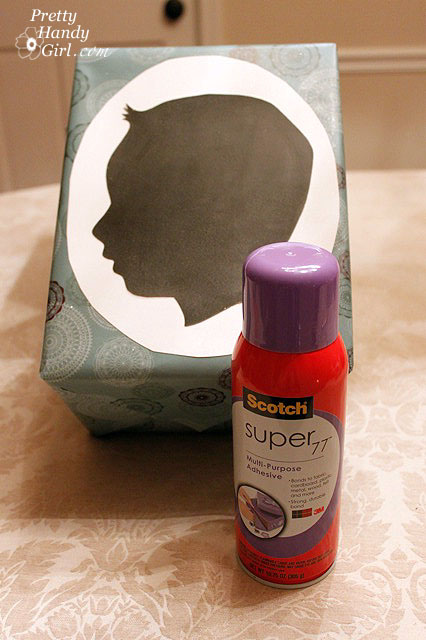
Play with the layout of the graphic shape on your package. Mentally note where the graphic shape will go, then lift the black foam board shape off of the present.

Wrap ribbon around the present forming a cross shape. The center of the cross should line up with the center of your graphic shape. Tape the ribbon to the back of the package.

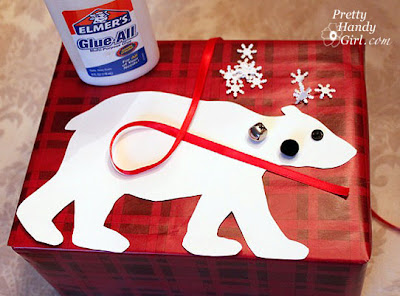
Adhere the black foam board shape to the center of the ribbons. (I find the CraftBond medium glue dots are super strong and perfect for the task of gluing the foam board shape.)

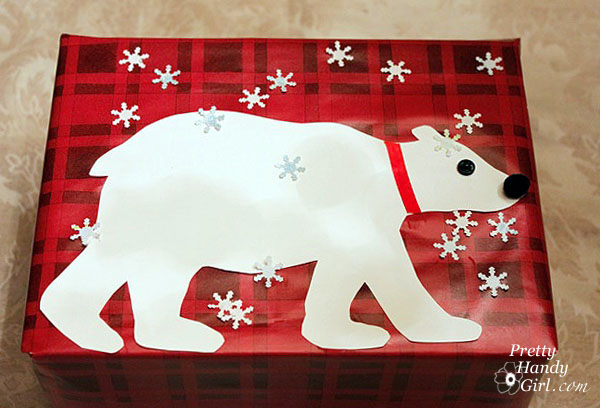
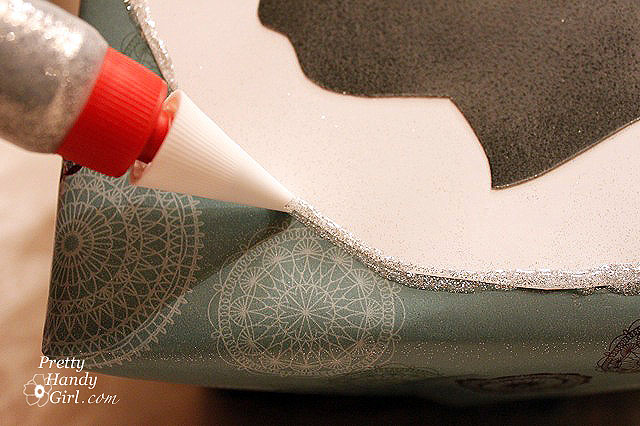
Dress up the black foam board graphic by outlining the shape with Elmer’s sparkle glue.

After the glitter glue has dried, write the recipient’s name using the silver Painters opaque paint marker.

Add  a ribbon to the top using another glue dot to hold it in place. You can learn how to make professional bows from Mural Maker & More.

And you are finished! Isn’t that beautiful? I really like the graphic shapes and the layers of textures.

Let’s try another gift wrap design! This green and red gift with a monogram letter is just as easy to create.

Begin by cutting out a piece of scrapbook paper. Lay the X-ACTO decorative shapes template on top of the paper and carefully run the X-ACTO swivel knife around the edges. Be careful not to cut or chip the template edges. Because they are plastic, they can break. I “tiled” the template to create an elongated shape.

Lay the cut out scrapbook paper on top of another piece of coordinating scrapbook paper. For this 2nd sheet, I decided to use the decorative scalloped edge scissors to compliment the X-ACTO decorative shapes curved template. Cut out the second sheet about 1/2″ wider than the first one.

Remove the scrapbook papers and tape a ribbon around the present. By using the Elmer’s removable double stick tape you can hide how the ribbons are secured. Be sure to have the ribbons cross high up on the gift to allow room for the monogram.

Add some more double stick tape to the backs of the scrapbook paper. Center the smaller piece on the larger one. Then, adhere the papers on top of the ribbon using the double stick tape.

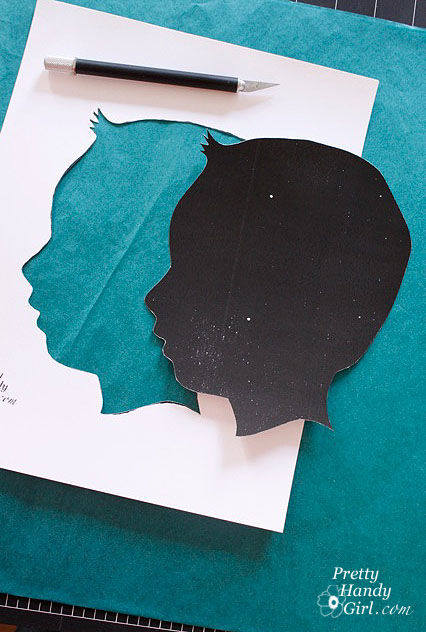
Print out a large letter from your printer. Trim some of the excess paper from around the letter. Lightly tape the letter printout on top of a piece of black foam board.

Using a fresh X-ACTO blade and knife, carefully cut out around the outline of the letter.


Use some Elmer’s Craft Bond Medium Glue Spots on the back of the foam board “A” and adhere it to the present.

Write the gift recipient’s name onto the letter using the silver Painters opaque paint marker. Tie a separate bow and then adhere it with more glue spots.

You now have an adorable monogrammed present for someone special.


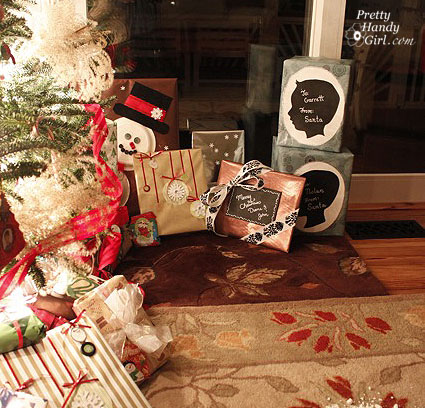
These two Christmas presents are too beautiful to open. But, if you put them in front of five and seven year old brothers, they won’t hesitate for a second to rip into the frilly bows and lines of these presents. So, save these for someone special! 😉

How did you like this tutorial? Want to learn more ways to spruce up the presents under the tree? Check back everyday this week to see some more creative gift wrappings.


Disclosure: This project has been compensated as part of a social shopper insights study for #Elmersholiday #GlueNGlitter #collectivebias and #CBias. I was paid a small fee to shop at Walmart and use a selection of X-acto and Elmer’s brand products. The ideas, tutorial and opinions expressed in this post are solely my own.


Now that the Christmas hype has died down and my cold has lost its grip on my sinuses, I’m back with a quick little tutorial on creating a special silhouetted gift for your child.

Thank you to my dear Pretty Handsome Guy for his guest post. I’m glad you all enjoyed a good laugh at his expense.

Christmas morning my boys were greeted by magical North Pole snow footprints (baking soda) leading up to the tree.

In an effort to keep the Santa myth alive, the two presents from Santa were constructed in a different style from the other presents under the tree.

My six year old exclaimed Christmas morning, “MOM! Santa knows what we look like!” So, I think I fooled them again this year.

Materials:
Scissors
X-acto knife (optional) and cutting surface
Profile picture of your child
Spraymount
White sheet of letter size paper
White cardstock paper
Black cardstock paper or construction paper
Chalk, Bistro marker, or White paint pen
Pencil
Glitter spray
Glitter glue

Start by creating your child’s silhouette. (My silhouettes took many steps in Adobe Photoshop, but I’ll give you instructions for the easy way.) Simply take a photo of your child turned sidewards (preferably in front of a blank wall.) Then enlarge the photo on a copier to the size you want to use. Lay the paper on top of the black cardstock and cut them both at the same time. I prefer to use an X-acto knife for the cutting, but you can use scissors if you like.

Unless you have a graphic program or a template to draw perfect ovals, you will need to draw one freehand. Wait, wait, don’t freak out. You can do this!

First, fold a letter sized paper into fourths.

Draw a curve on the paper with the fold sides inside the curve.

Cut along the line.

Open up your paper to reveal your oval. If you don’t like it, try it again.

Once you are happy with your oval, trace the folded oval onto white cardstock paper and cut it out.

Wrap your present (be sure to use wrapping paper that your child has never seen in your home!)

Spray the back of your cardstock oval with spray mount and adhere it to the present.

I added some glitter spray to the wrapped package to give it a little extra sparkle! (I know, it doesn’t really show up in the photo.)

So, here is a close up of the glittery goodness:

Spray the back of your silhouette head with the spray mount and lay it inside the oval.

Next, add a bead of glitter glue around the edge of the oval. Note of caution: Allow the glue to dry before setting your package upright or it WILL run. Of course I learned the hard way and had to unglue my package from the shelf it was sitting on. Drat!
Here are the presents before I added the “To & From” on them.
You can write your child’s name on the silhouette using chalk, bistro marker or white paint pen. Or leave it blank if you wish, your choice.
That’s it, not too hard, but the results are stunning. You could use this gift wrapping technique for any special present.
I have to share with you a little something that warmed my heart Christmas morning. My oldest carefully cut off the fronts of all the presents that I gave him to preserve the creative gift wrap designs.
He saved them all including his silhouette from Santa.
In stark contrast, my youngest tore into the packages as any other eager four year old boy would.