Wall-Mounted Desk Tutorial | Pretty Handy Girl

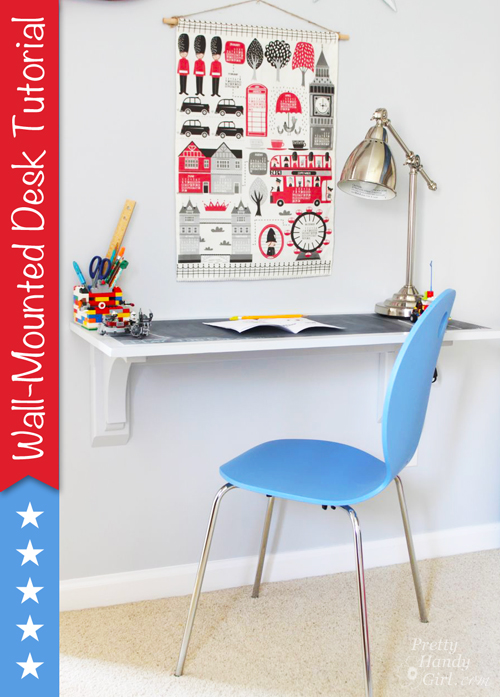
Need a desk but lack floor space or the funds to buy a desk? This Wall-Mounted Desk tutorial will meet your needs! Plus, you can customize the length to meet your needs.

Wall-Mounted Desk Tutorial | Pretty Handy Girl

Wall Mounted Desk Tutorial

Hey, I hope you had a fabulous weekend! Was it productive? Full of DIY activities? Well, I’m back with a tutorial for building a wall-mounted desk. The great thing about a desk that is wall-mounted is it can be small or large and it won’t take up any floor space! This gives a nice clean look and makes the room feel larger. Plus, the materials will almost certainly cost less than buying a desk.

My son is starting to have more homework in school. (I didn’t realize that first grade was the new 3rd grade!) I figured soon enough he’s going to need a spot to sit and work on homework. Plus, he’s an avid Lego builder and this makes a great surface for him to build on.

Materials:

  • Finish grade plywood (my desktop is 16″ x 40″)
  • Painter’s Tape
  • 1 – 2″ x 4″ x 93″
  • 2 – 9.5″ x 9.5″ bird’s mouth brackets
  • 4 – 3″ cabinet mounting screws
  • Paint
  • Paint brush
  • Drill
  • Drill bits
  • Level
  • Pencil

Instructions: 

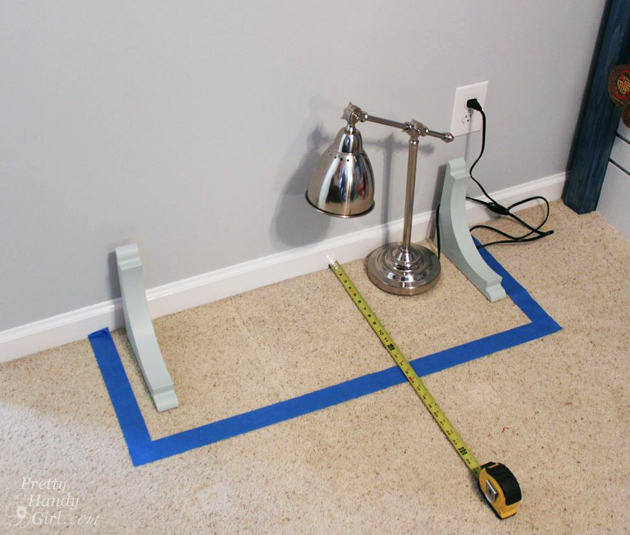
Begin by assessing where you want to mount your desk. For better perspective, you can outline the desk area with painter’s tape on the floor.

Wall-Mounted Desk Tutorial | Pretty Handy Girl

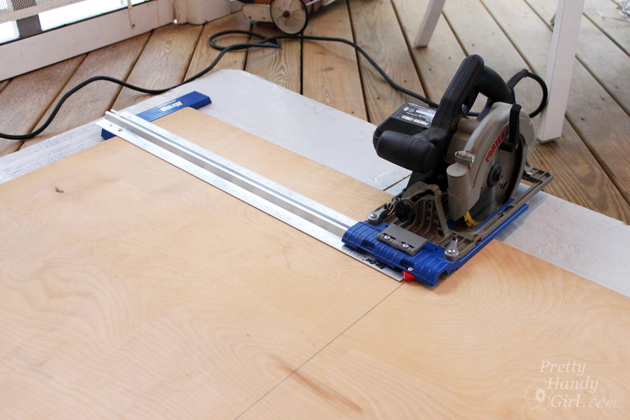
Cut your finish grade plywood to size. Using the Kreg Rip Saw with my miter saw is much easier than hauling out the table saw and getting as assistant to help lift the plywood. If you put a piece of rigid foam insulation underneath, you can cut almost anywhere! Just set your saw blade depth slightly below the plywood.

Wall-Mounted Desk Tutorial | Pretty Handy Girl

Cut your 2″x4″ stud 4″ narrower than the length of your desk top surface. (My desktop is 40″ long, therefore my mounting stud is 36″ long.)  Locate the studs in your wall. Mark their location.

Wall-Mounted Desk Tutorial | Pretty Handy Girl

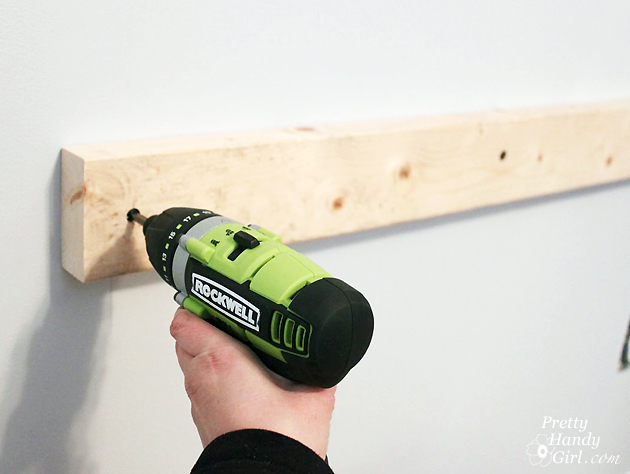
Pre-drill holes in the mounting board at the stud locations. Use a small bit slightly narrower than your screws. Then use a larger bit the width of your screw head to create a countersink hole. Drive the cabinet mounting screws into one end of the mounting board and into the stud. Use a level to make sure your mounting board is level, then drive the additional mounting screws into the other studs.

Wall-Mounted Desk Tutorial | Pretty Handy Girl

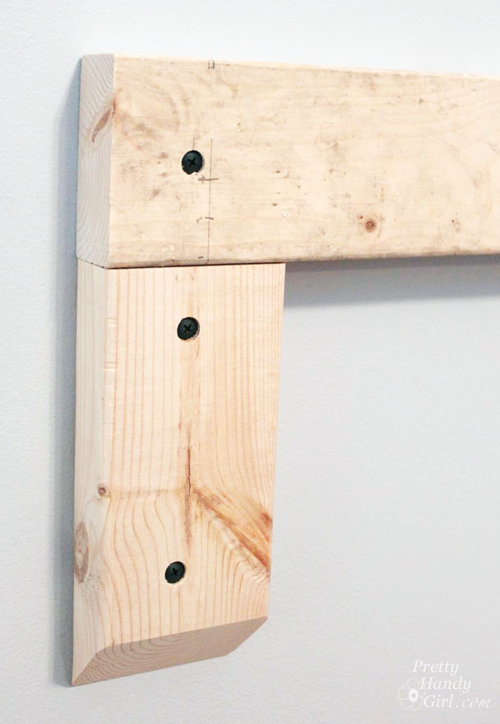
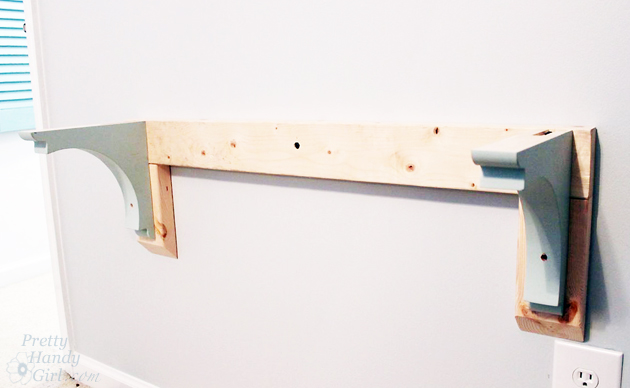
Cut two pieces of 2″x4″ at 8″ long. These will create the supports for the shelf brackets. For a clean look, bevel the end at a 45 degree angle when you cut them. Attach the 2″ x 4″ pieces below each end of the mounting board as shown below.

Wall-Mounted Desk Tutorial | Pretty Handy Girl

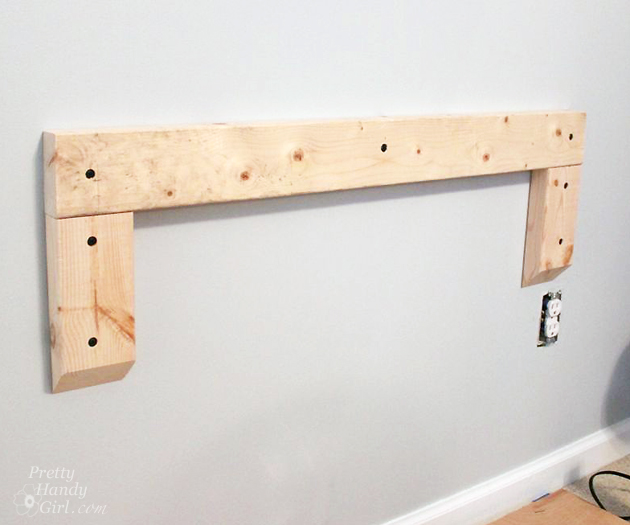
Your mounting boards should look like this:

Wall-Mounted Desk Tutorial | Pretty Handy Girl

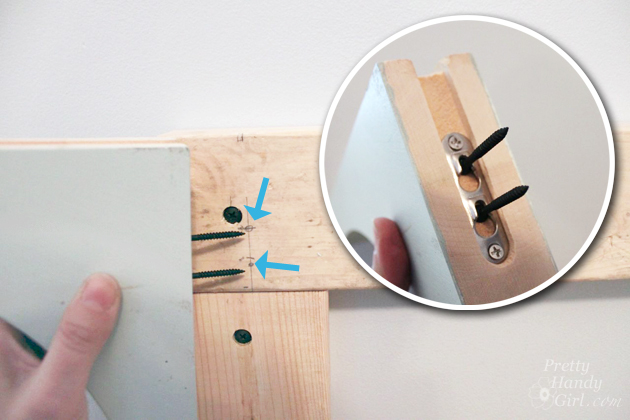
Set two small screws into the shelf bracket keyholes. Line the bracket up with the top of the mounting board and center it on the vertical supports already attached to the wall. Make a pencil mark where the screws need to be set.

Wall-Mounted Desk Tutorial | Pretty Handy Girl

Use the pencil to mark the depth of the keyholes on the screws so you know how deep to drive the screws into the bracket support.
Wall-Mounted Desk Tutorial | Pretty Handy Girl

Attach the small screws to the vertical support where the pencil marks were and drive them to the point where you marked on each screw.

Slip the bracket onto the screws.

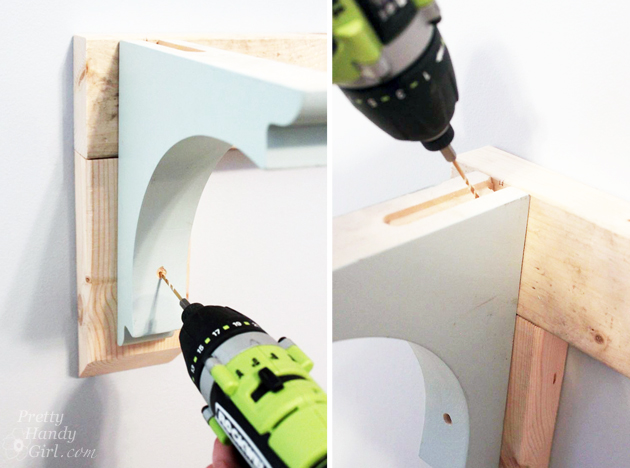
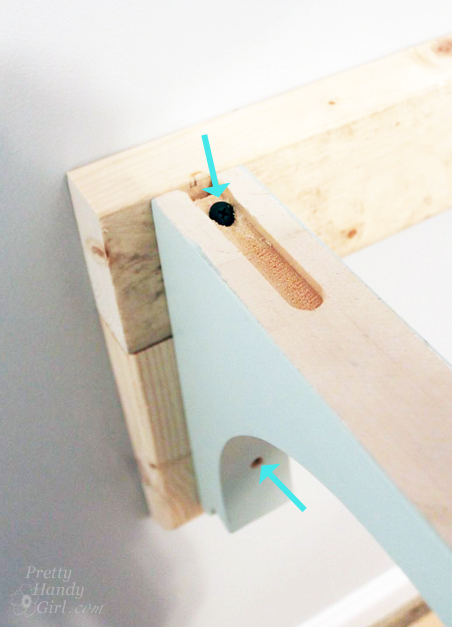
For added support, pre-drill one hole through the top of the bracket and into the mounting board. Pre-drill a second hole through the bird’s eye bracket at the narrowest point.

Wall-Mounted Desk Tutorial | Pretty Handy Girl

Drive screws into the two pre-drilled holes to further secure the shelf brackets to the mounting boards.

Wall-Mounted Desk Tutorial | Pretty Handy Girl

Repeat for the second bracket.

Wall-Mounted Desk Tutorial | Pretty Handy Girl

Lay your desktop surface on top of the brackets. You can either drive small screws through the top of the desk and into the mounting board. Or drive a small screw up through the underside of the bracket and into the desktop. I prefer the latter because you won’t have to wood putty the desk surface.

Wall-Mounted Desk Tutorial | Pretty Handy Girl

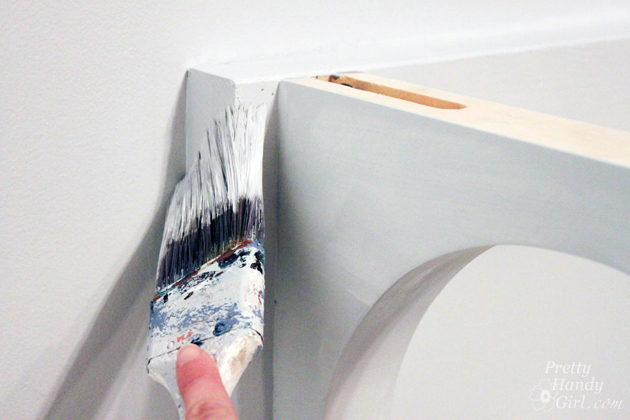
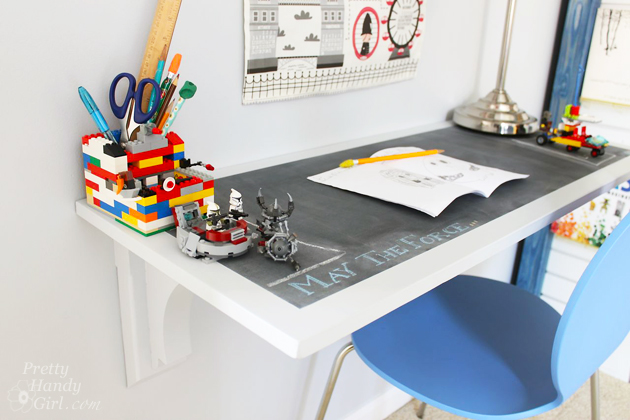
Wood putty all your holes. Allow the putty to dry and sand the putty smooth. Paint your brackets, mounting boards, and desktop. I chose to paint my desktop beforehand with a chalkboard surface.

Wall-Mounted Desk Tutorial | Pretty Handy Girl

Let the paint dry. If you want to protect the desk surface, you may choose to paint a few coats of polycrylic on top.

Wall-Mounted Desk Tutorial | Pretty Handy Girl

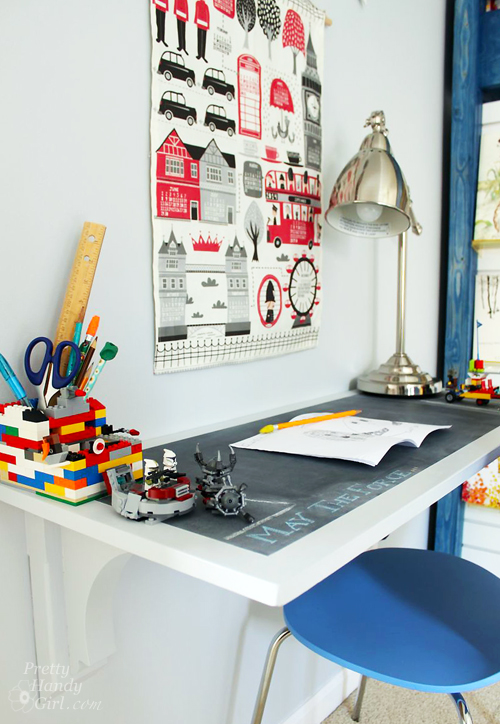
And my son has a spot to do homework, legos, or create a little book.

Wall-Mounted Desk Tutorial | Pretty Handy Girl

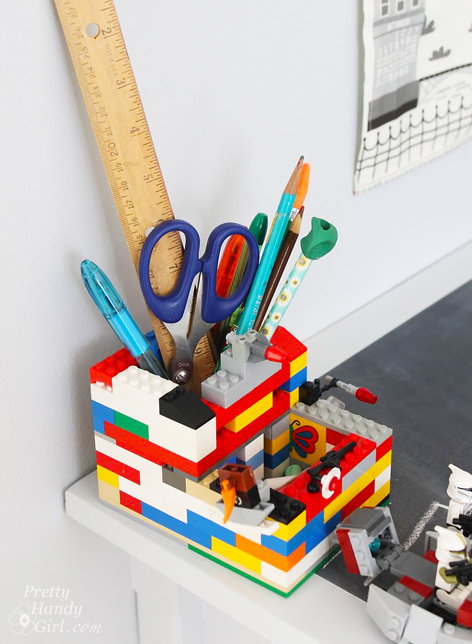
Don’t you just love his lego pencil holder he created?! I think he needs to start an Etsy store ;-).

Lego Pencil Holder | Pretty Handy Girl

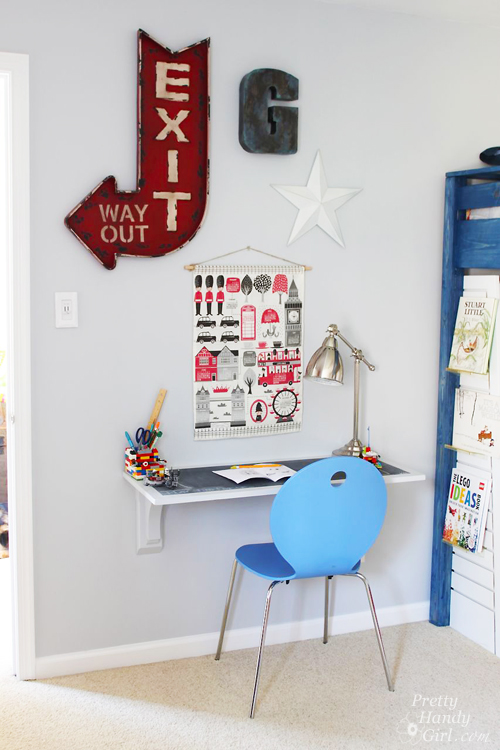
I had fun decorating the wall with some vintage signs and an adorable London themed tea towel calendar from Spoonflower. Making tea towel calendars every year in November/December has been a tradition I started over a year ago. We anxiously await the release of the newest calendar designs on Spoonflower.

Wall-Mounted Desk Tutorial | Pretty Handy Girl

Source List:

I hope you found this tutorial helpful. It was an easy solution for my son’s room. Best of all, you can expand the width, but if you do add more brackets.

PHGFancySignPin for later!

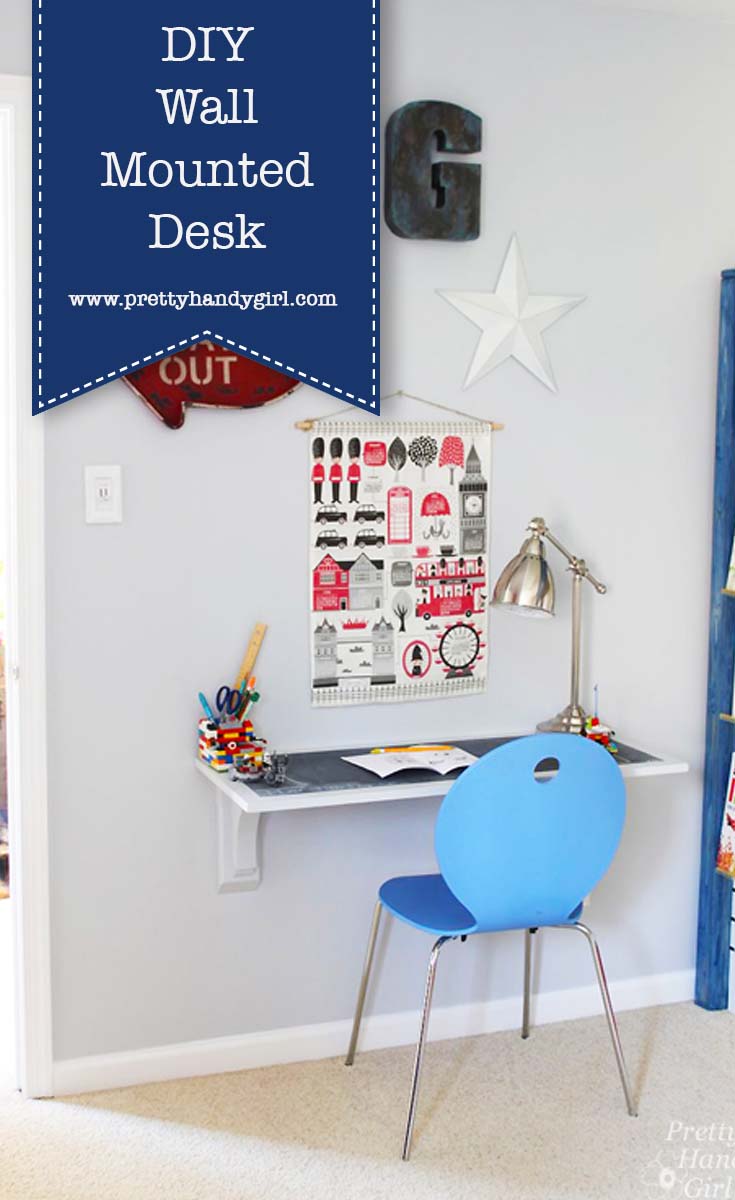
DIY Wall Mounted Desk

If you liked this tutorial, you might also like this inexpensive desktop for $40!

How to Make a Chalkboard Surface Desk | Pretty Handy Girl

How to Make a Chalkboard Surface Desk | Pretty Handy Girl

As part of the makeover of my son’s bedroom, I wanted to create a fun chalkboard desk surface for him to write and build legos on. The idea of a chalkboard coated surface came to me when I remembered how much he liked the mini-chalkboard decals that used to be on his room wall.

Creating a chalkboard surface on any desk or flat surface couldn’t be easier with the right tools. Here’s how you can create your own chalkboard desk!
Materials:

  • 3M fine grit sanding block
  • Valspar High-Hiding Primer tinted gray
  • Rustoleum chalkboard paint
  • 2″ paint brush
  • Foam brush
  • Small craft paintbrush
  • Desk surface (I used pre-cut finish grade plywood)
  • ScotchBlue painter’s Tape
  • General Finishes Water-based sealer (or satin Minwax Polycrylic)

Instructions:

Begin by lightly sanding your desktop with the sanding block. Wipe any dust off with a damp rag.

Paint one coat of primer on your desktop surface. (A little note about my primer: I asked the Lowe’s paint department to tint it as dark as they could with black colorant. This helps when you are painting over the primer with a dark color.)

How to Make a Chalkboard Surface Desk | Pretty Handy Girl

After the primer has dried, create a border on your desktop with painter’s tape. Press the edges down firmly with your fingers. Paint one coat of chalkboard paint with the paint brush. Brush the paint in one direction. Let that layer dry. Repeat with a second coat brushing across the original strokes (i.e. vertical then horizontal.) Read more

wall chalkboard

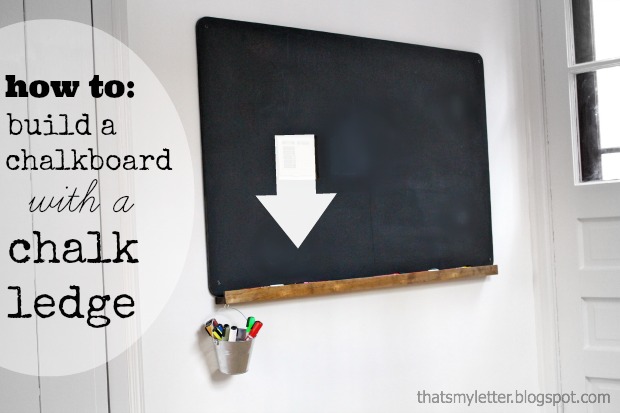
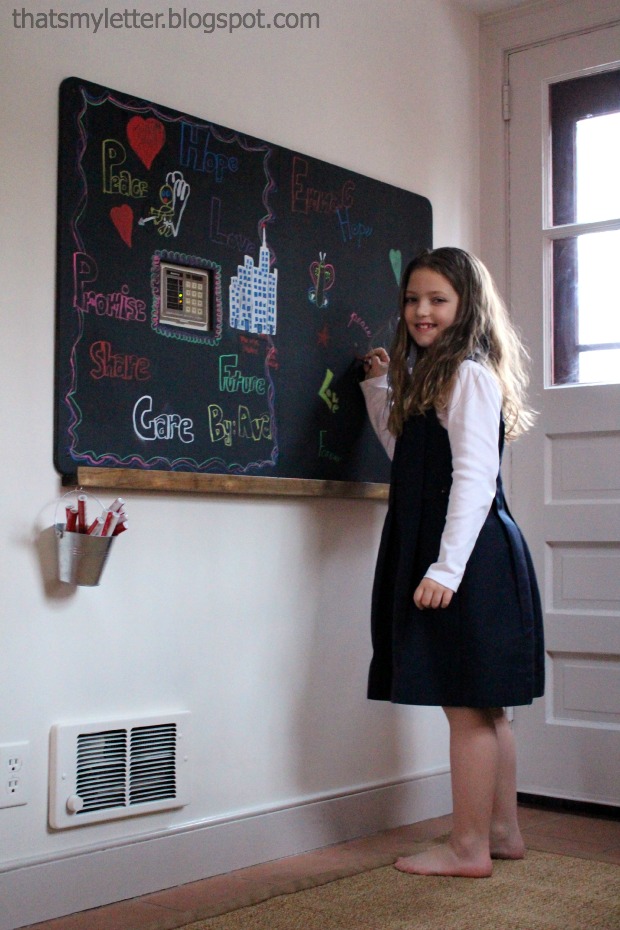
Chalkboards are popping up everywhere (like Brittany’s DIY chalkboard calendar from last week) and you can easily make one, but how about upping the usefulness by making a chalkboard WITH a chalk ledge?  Jaime here from That’s My Letter to show you how easy it is to add a chalk ledge to your chalkboard.

chalkboard with ledge

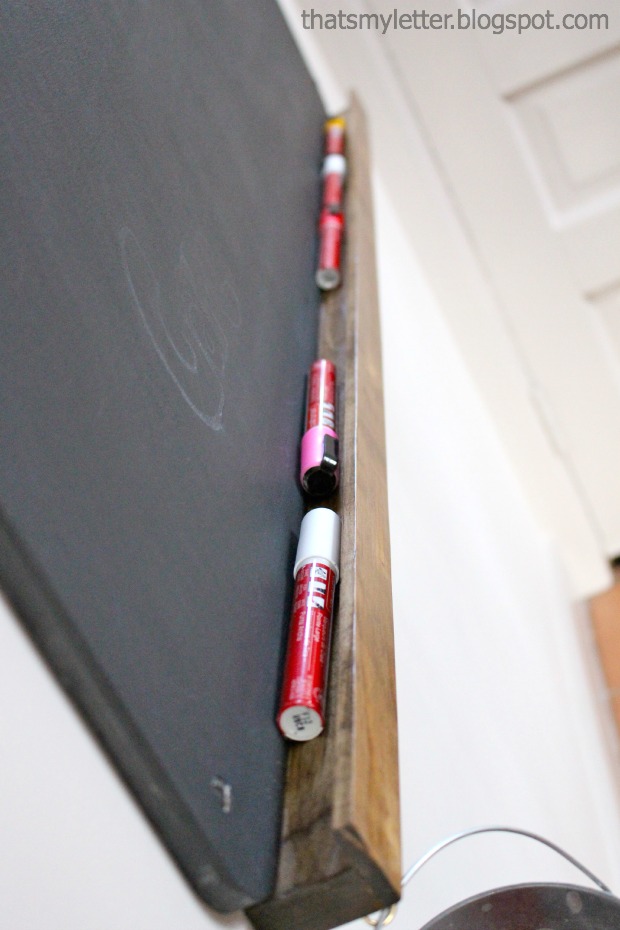
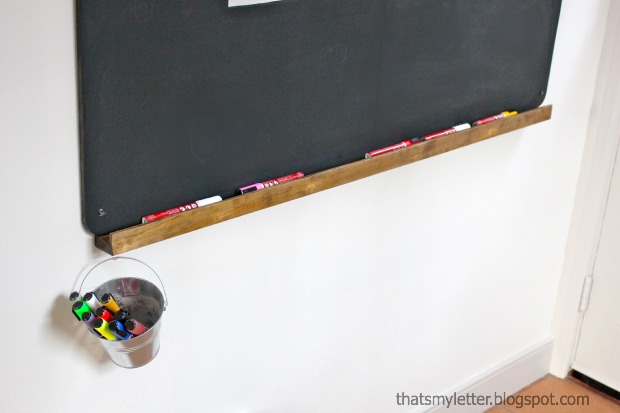
You definitely need a place to put all that chalk (or chalk markers like we prefer).  This chalk ledge protudes a minimal  1 3/4″ from the wall but still has space enough to hold lots of chalk.

chalkboard with ledge 5

I also attached a galvanized pail for more chalk markers.

chalkboard with ledge 1

wall chalkboard 1

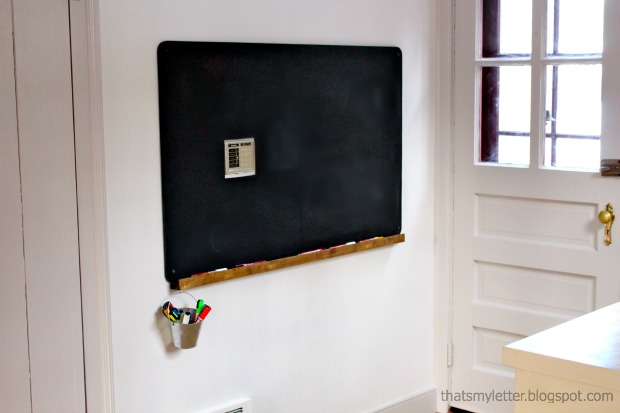
I installed this chalkboard near our back door mudroom area.  Unfortunately the key pad for our alarm system is nearly smack in the middle of that wall.  I simply cut out a square in my plywood using a jig saw to accommodate the key pad.  My kids love their new chalkboard and somehow the key pad isn’t quite so obvious once they start drawing around it.

chalkboard with ledge 2

Supplies:

  • 1/2″ plywood (cut to desired size)
  • 1×2 pine board (cut to length of plywood)
  • 1 3/8″ x 1/4″ thick flat trim moulding (cut to length of plywood)
  • black chalkboard paint
  • blue painters tape
  • stain
  • polyurethane
  • foam brushes
  • drill
  • Kreg pocket hole jig (not necessary but definitely easier if you have one)
  • 1″ pocket hole screws
  • wood glue
  • 3/4″ trim nails
  • countersink bit
  • 2 1/2″ toggle bolts
  • 5/8″ spade bit (check toggle bolt requirements)
  • pencil
  • level

Instructions:

Step 1: Cut your plywood to size, using your Kreg pocket hole jig make pocket holes every 8″ along bottom edge of plywood (on back side). (I used the portable base with automaxx clamp here, much easier that slipping a large piece of plywood into the jig.) Read more

Pretty Handy Girl's Christmas Home Tour

PHG_Christmas_Home_Tour

Welcome, welcome! I see you made it here from Songbird’s beautiful home. If you are coming here first, be sure to check out Marianne’s home:

songbird-house-tour

I can not tell you how excited I am to have you in for the tour. Last Christmas we were living in a demolition zone. So, it feels wonderful to have our kitchen complete and be able to focus on decorating for the holidays.

Pretty Handy Girl's Christmas Home Tour

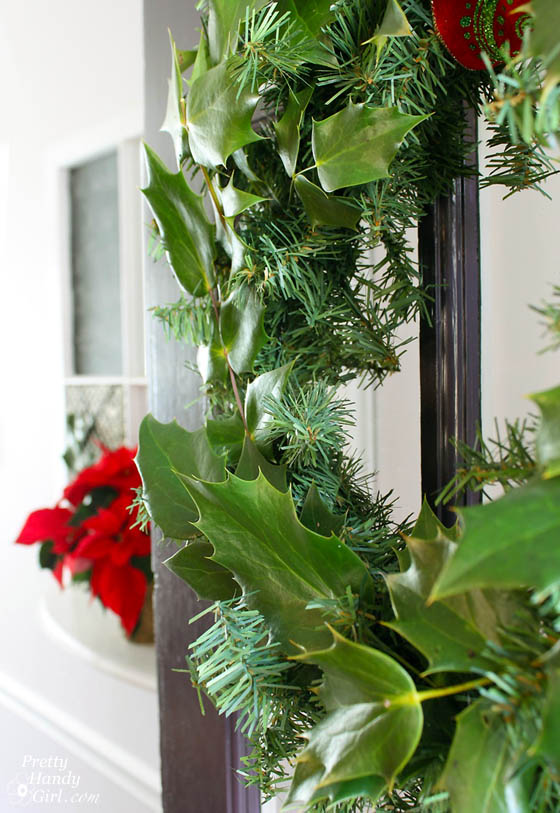
I’m also enjoying low fuss decorating. Like this fake wreath that looks fabulous when you tuck some live greenery inside (thanks for the idea Colleen.)

Pretty Handy Girl's Christmas Home Tour

Pretty Handy Girl's Christmas Home Tour

Another lazy decorating trick is to wrap garlands around the chandelier. Read more

Chalkboard Painted Mugs | Pretty Handy Girl

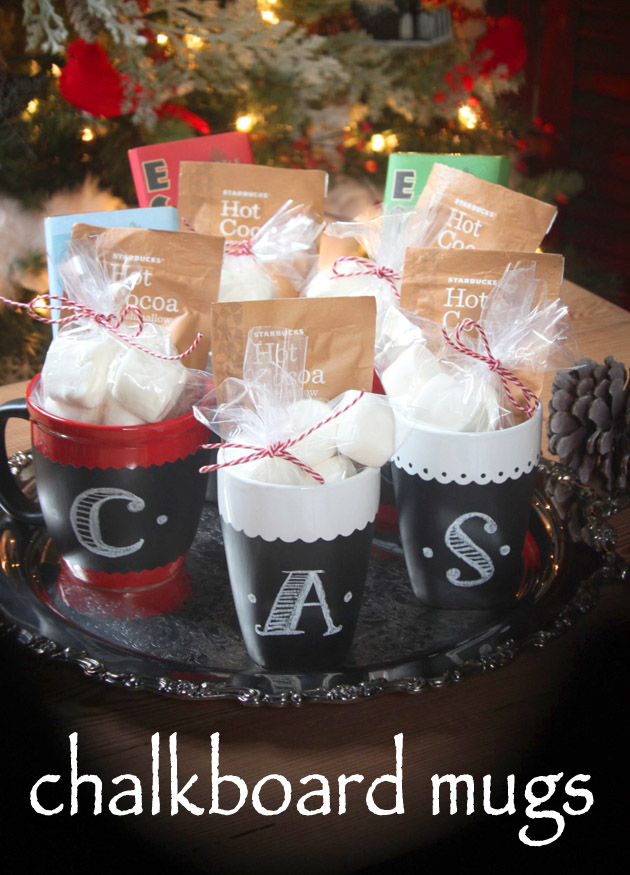
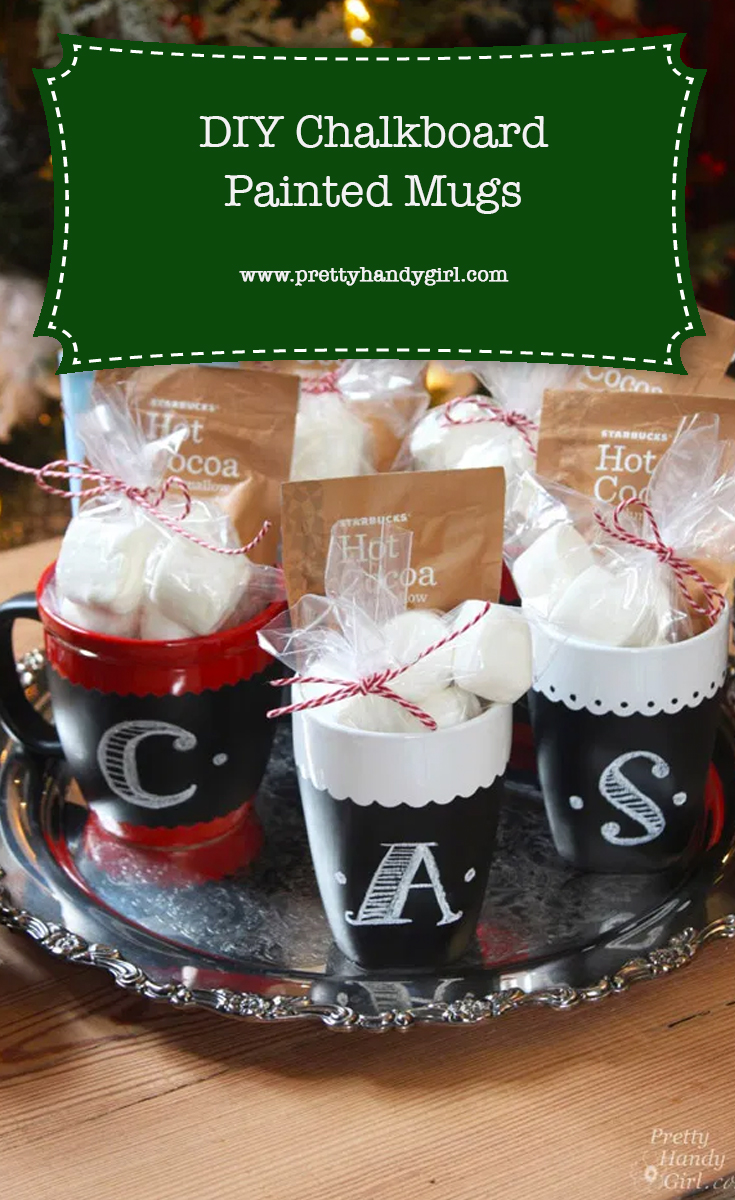
The holidays are fast approaching and the last thing I want to do is wander through the stores aimlessly looking for gifts for my friends or for the service providers in my life. Instead, I came up with the perfect gift idea: DIY Chalkboard Painted Mugs!

Chalkboard Painted Mugs | Pretty Handy Girl

DIY Chalkboard Painted Mugs

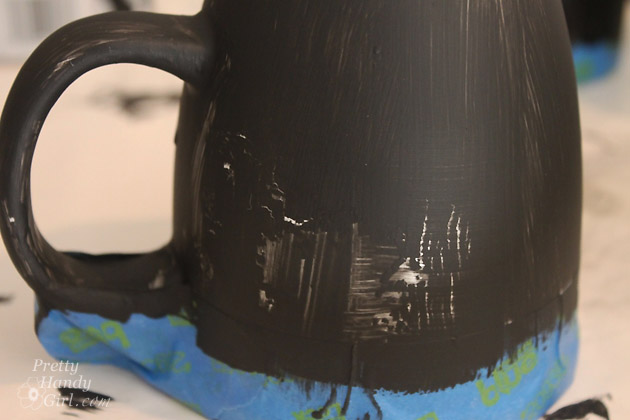
Have you seen those cute chalkboard mugs at Starbucks? They are so fun and I think it would be funny to write crazy messages on them daily. I decided to try my hand at a DIY painted version. Let me say upfront that I did a little test using Rustoleum Chalkboard paint on one mug and Porcelaine Chalkboard paint (made for glass and ceramics) on a second one. I expected the regular chalkboard paint to flake off, especially after seeing this happen after just one coat:

Chalkboard Painted Mugs | Pretty Handy Girl

However, after a second coat and baking it in the oven, it appeared to hold up after an initial dishwasher run. I can chip off some of the regular paint with my fingernail on the edges. But, overall the paint seems to be hanging onto the mug. That being said, based on the way the Porcelaine paint immediately took to the mug and appears to be harder to chip, I expect the Porcelaine painted mug to hold up much longer. So, if you want a chalkboard mug that will last longer, use Porcelaine paint.

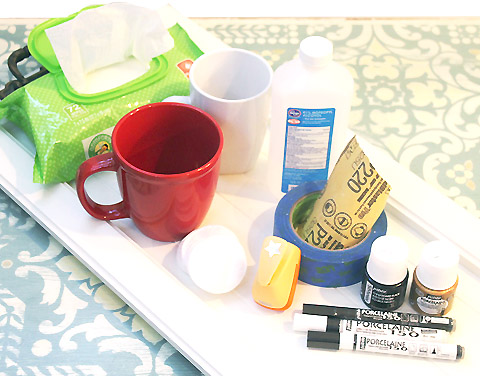
Chalkboard Painted Mugs Materials:

(I’ve included affiliate links for your convenience. I earn a small percentage from a purchase using these links. There is no additional cost to you. You can read more about affiliate links here.)

Chalkboard Painted Mugs | Pretty Handy Girl

Chalkboard Painted Mugs Instructions:

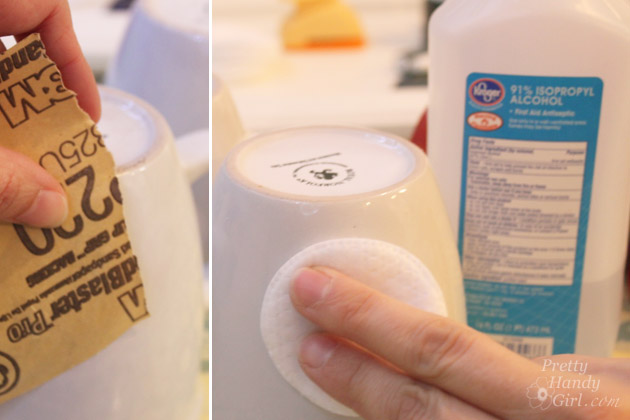
Lightly sand the sides of the mug where you intend to paint. Wipe off any dirt and oils with a cotton pad soaked in rubbing alcohol.

Chalkboard Painted Mugs | Pretty Handy Girl

Creating Decorative Borders:

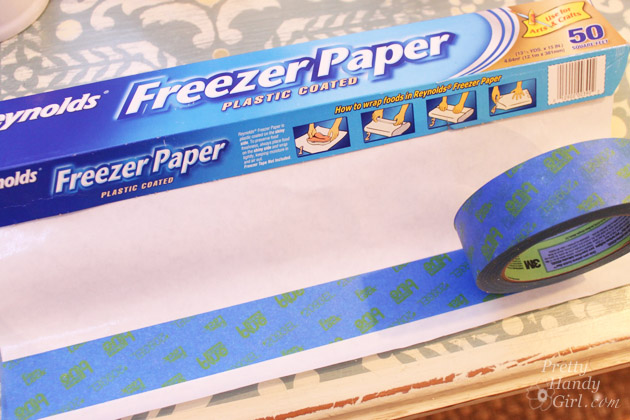
Lay a strip of painter’s tape onto freezer paper.

Chalkboard Painted Mugs | Pretty Handy Girl

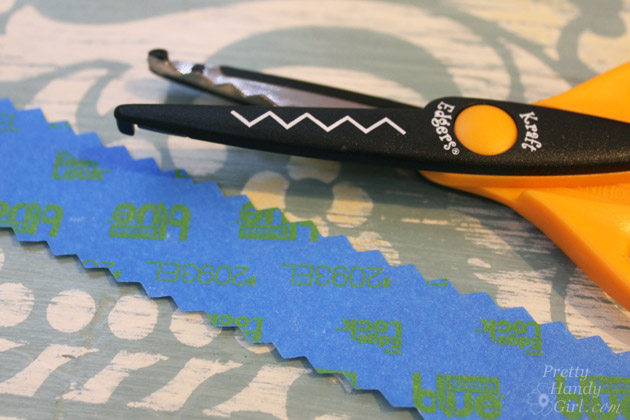
Cut along one edge (or both) with craft scissors. Cut in the middle with regular scissors to give you two pieces of decorative edged tape.

Chalkboard Painted Mugs | Pretty Handy Girl

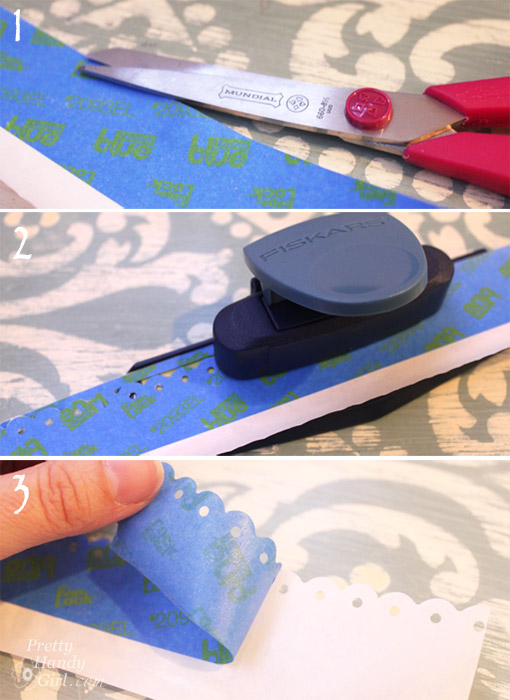
Using a Decorative Border Hole Punch:

  1. Cut along the top edge of the tape to create a straight edge.
  2. Align the cut edge in the border punch and punch along the top of the tape.
  3. Peel tape off of the freezer paper.

Chalkboard Painted Mugs | Pretty Handy Girl

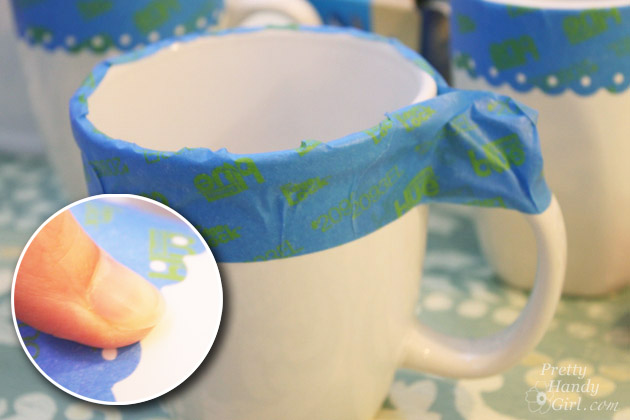
Tape off the top of your mug to protect it from paint. (This should be safer because you really don’t want people drinking liquid against the paint.) Be sure to press the edges down firmly. You can also tape along the bottom if you want a centered band of chalkboard on the mugs.

Chalkboard Painted Mugs | Pretty Handy Girl

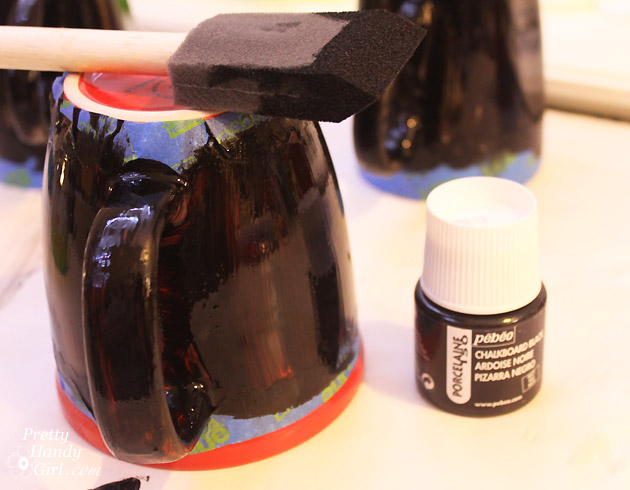
Pour a small amount of the Porcelaine paint into the disposable cup. Use the foam brush to evenly coat paint onto the mug. Check for drips before the paint dries. After the first coat dries, paint a second coat for complete coverage. (Occasionally three coats may be necessary.)

Chalkboard Painted Mugs | Pretty Handy Girl

After the paint has thoroughly dried (allow 24 hours to dry), remove the painter’s tape. Clean up any seepage or drips by scratching off the paint with the x-acto knife.

Chalkboard Painted Mugs | Pretty Handy Girl

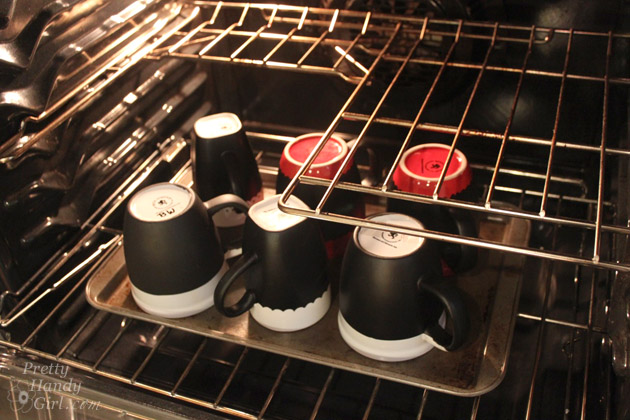
Place mugs in a cool oven. Heat oven to 300F and bake for 30 minutes. Let oven cool with mugs inside.

Chalkboard Painted Mugs | Pretty Handy Girl

The mugs are ready for decorating now! Add some hot cocoa and marshmallows for an instant chocolatey gift.Better yet, you could make these yummy hot cocoa on a stick gifts!

Chalkboard Painted Mugs | Pretty Handy Girl

These are so incredibly fun! I can’t wait to use one and write something witty on it. At $1 each for the mugs and $10 for the Porcelaine chalkboard paint (enough to paint about 8-10 mugs) this is truly a thrifty gift idea!

Chalkboard Painted Mugs | Pretty Handy Girl

So, please tell me, what should I write on DIY Chalkboard Painted Mugs?

  • Fill ‘er up
  • Don’t Let Me Run on Empty
  • High Octane Please
  • Do Not Disturb until I’ve Finished this Cup
  • ___________________

PHGFancySign

Pin for later!

DIY Chalkboard Painted Mugs | Pretty Handy Girl