DIY Button Pendant Light | Pretty Handy Girl

DIY Button Pendant Light |Pretty Handy Girl

While I was house touring on Tybee Island and having  fun antique and salvage shopping in Savannah, I spied some bare lamp shade frame hanging lights. They immediately inspired me to design a DIY Button Pendant Light for over my bedside table in our master bedroom. Part of the desire was born out of the necessity to have more space on my bedside because the table actually doubles as my makeup vanity.

DIY Button Pendant Light | Pretty Handy Girl

Making a Button Pendant Light is an easy DIY project, but you’ll need some patience while threading the buttons. I’ll also show you how to wire a lamp socket and lamp plug! Ready to get started?

(I’ve included affiliate links for your convenience. I earn a small percentage from a purchase using these links. There is no additional cost to you. You can read more about affiliate links here.)

Materials:

DIY Button Pendant Light |Pretty Handy Girl

Optional:

Instructions: Read more


Happy Independence Day America!

A few weeks ago I attended a birthday party for my niece at The Scrap Exchange in Durham. My kids had to drag me kicking and screaming out of there because I was in creative nirvana. There were all kinds of little gems of creativity. Bottlecaps, rolls of paper, extra tiles, scraps of fabric, stencils, etc. It was like being a kid in a candy store! One of the many things that caught my eye were these little glass vases. I brought a few of them to the register and the lady asked if I really only wanted three of them. Then she explained that they cost $1 each or $10 for the whole case!

So, I bought the whole case (it was a no brainer.)

But, what the heck would I do with 48 teeny glass bottles? I ended up using some to make these beauties. Read more

creative gift wrapping

This is it, the last day of my Creative Gift Wrapping Tutorials. I saved these adorable silhouetted animals for last.

Snowy Polar Bear
Materials:
 
Wrapping paper
White card stock paper
Snowflake hole puncher
Key tag
Satin ribbon
Jingle bell
Black & white pom poms (nose & tail)
Small black button
Elmer’s glue
Hot glue gun
Wrap your present as you normally would.
Using this template (click on the photo for a larger version and then print it out), cut out the polar bear shape on white card stock. Better yet, if your printer will handle it, print it out on card stock and then flip your bear over to the white side.
Glue your bear onto the gift package.
Punch out some snowflakes. (I used some white and some light blue that would show up better on top of the white bear.)
Cut one piece of red ribbon for the bears collar. Then glue the collar and snowflakes onto the package using Elmer’s glue. Then glue the button and pom poms using hot glue.
 Thread a jingle bell onto some satin ribbon, then tie a bow onto a key tag.

Hot glue the bow/jingle bell onto the bear’s collar.

 Factoid: Polar bears are my favorite animal! Did you know that a polar bear’s skin is actually black? And the bear’s hair is actually transparent hollow tubes. This serves three purposes: 

  1. The tubes are hollow so they store air in them. This acts as an insulator. 
  2. Plus, it helps the polar bears buoyancy while swimming. 
  3. Remember how I said their skins is black? Well, because the fur is actually transparent, it allows the sun to reach the bear’s skin and help warm them. Cool, huh?! 
Dove of Peace
Materials:
 
Wrapping paper
White card stock paper
Satin ribbon
Sprig of rosemary or other evergreen twig

Hot glue gun

Wrap your present as you normally would.

Add your ribbon on the diagonal corners.
Click on the dove silhouette below to see the full size image. Print it out on the cardstock paper and cut out the shape to use as a template, or use the reverse white side of the shape.
 
Use a hole punch to cut out the eye. Hot glue your dove to the package and hot glue the rosemary underneath the dove’s mouth.

Have fun with this creative package. Add the words PEACE, or bend the wings up to make them three dimensional.

This dove will work on a variety of sized gifts. Here she is on a vertical present.

“Peace on Earth, Goodwill Toward Men”


handmade projects

Welcome back. If you are up for some more creative gift wrappings, let’s get going.

Hanging Ornaments
Materials: 
Wrapping paper
Curling ribbon
Buttons
Snowflake Embellishments
Hot glue gun
Elmer’s glue
Circle template: jar, glass, compass

Scissors

Wrap your present in wrapping paper.
Using your circle template, trace different sized circles on colored paper and/or wrapping paper. Cut out the circles. Lay them onto your package with a few buttons to determine the desired layout.
Cut curling ribbon to the lengths needed to meet the ornaments and glue them with Elmer’s glue onto the package. Glue the ornament circles and buttons next using hot glue. Add stickers or snowflake embellishments on top of the circles. Finish by tying some bows with the curling ribbon and attach them just above the ornaments with hot glue.
“Deck the Halls”
Here is my girlfriend, Renee’s ornament package.
I love the little “x’s and o’s” she added for her daughter.
Musical Snowman 
 
Materials:
Wrapping paper
Printed sheet music (do a google image search for: sheet music)
Snowflake hole puncher
white or scrapbook paper
Snowman sticker or embellishment
Elmer’s glue
 
Limber up those thumbs and get to work punching out mini snowflakes. Or better yet, let the kids do it (my boys had a ball making all these snowflakes.)
Wrap your package as you normally would. Using a solid color or wrapping paper with less detail seems to work best.
Tear the printout of sheet music to make the snowy hill. Lay it on top of the package and crease the edges so it wraps around the box.
Glue on the music sheet first. Then layout your snowflakes and snowman and glue them on.
 
 Feel free to add snowflake embellishments or circle hole punches if you want.
Tomorrow is the last day of my SIX days of Creative Gift Wrapping.

Click HERE to see an adorable polar bear and dove!

Our office renovation is nearing completion. We’ve been working on the room for two plus months now. The majority of the work is complete, but we are waiting for two desk cabinets to come in to the Office Depot warehouse so we can actually order them. At this point I’m wondering if I should just build my own! <<Sigh>>

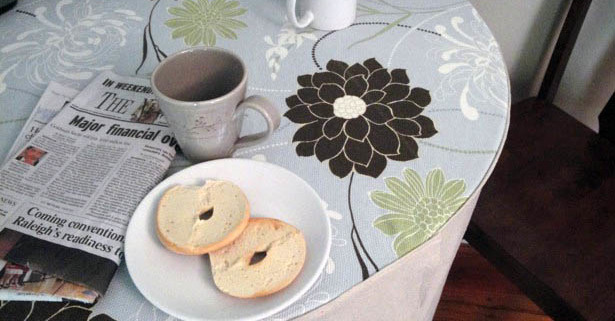
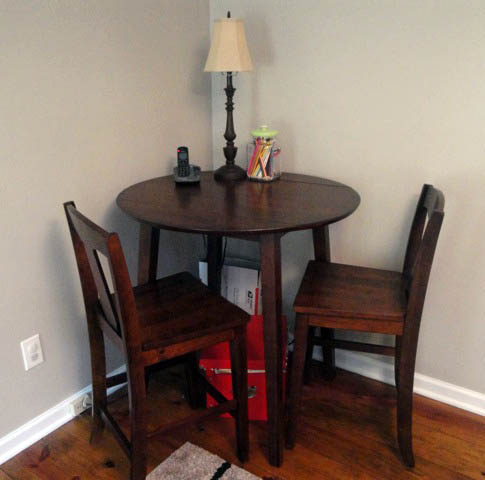
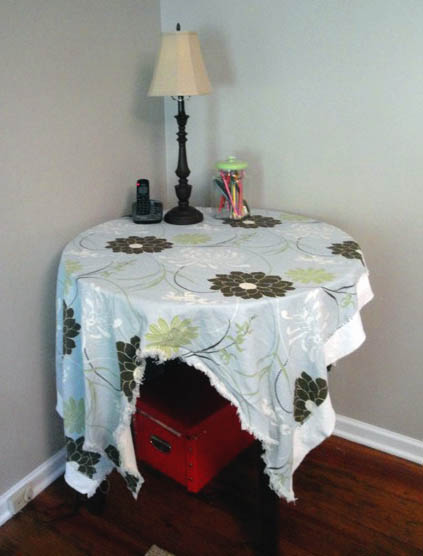
After searching for over a month on Craig’s List, I finally broke down and bought a small counter height bistro set from Big Lots for the corner of our office. We thought it would be a great place for the kids to sit and do homework. Or better yet, for Pretty Handsome Guy and I to talk and have our morning coffee!

The height and footprint is perfect, however, the dark wood (in addition to the other furniture in the room) made the room too dark for my taste. Okay – and I’m a sucker for hidden storage (need to hide that stop sign red box!) So, I came up with the idea to slipcover the table.

Unfortunately I didn’t have enough fabric left over from my yard sale re-upholstered chair and the back of the bookcase project. But, I did have enough to cover just the top of the table.

Then I bought two small 4′ x 5′ painter’s drop cloths for $5 each. I am seriously addicted to these must have fabrics! I already used a pair for our laundry room curtains and I bleached another one to make grain sack valances for our dining room at a later date.

So, anyone remember their geometry class? I barely remembered enough to figure out that the circumference of my 3′ diameter table is 9.42 (Ï€ x diameter or 3.14 x 3= 9.42). Therefore, two 5′ wide cloths would just cover my table!

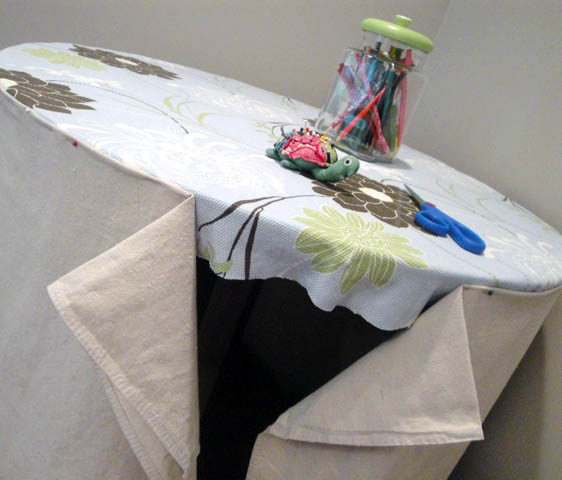
The first thing I did was trim the fabric around the tabletop allowing a 1″ overage for seam allowance.

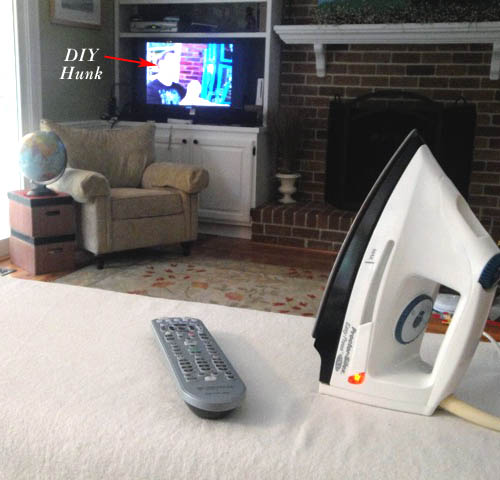
Then I ironed the drop cloths, and decorative table top fabric. I hate ironing  – I hardly ever iron. Usually I’ll just spritz water on my shirts or pants in the morning and they dry wrinkle free. Or if it is really wrinkled, I will dampen my clothing and toss them in the dryer for a few minutes.

Sometimes, I just have to break out the iron. But, I found a way to make ironing enjoyable. I set up my ironing board and watched a little HGTV or DIY Network while I de-wrinkle. Nothing like a hot DIY hunk to make me all steamy. Hee, hee.


I folded the top of the drop cloths so they just meet the table top and the bottom brushes the floor (this way I won’t have to hem the bottom.) Next I pinned the 2 drop cloth pieces around the table. Being sure to use lots of pins, since sewing around a curve can have a tendency to make the fabric pucker.

Then I stitched on top of the drop cloth, as close to the edge as I could. Being careful to avoid letting the fabric pucker.

After a few trial and errors, I got a smooth line and the drop cloth edges overlapped slightly.

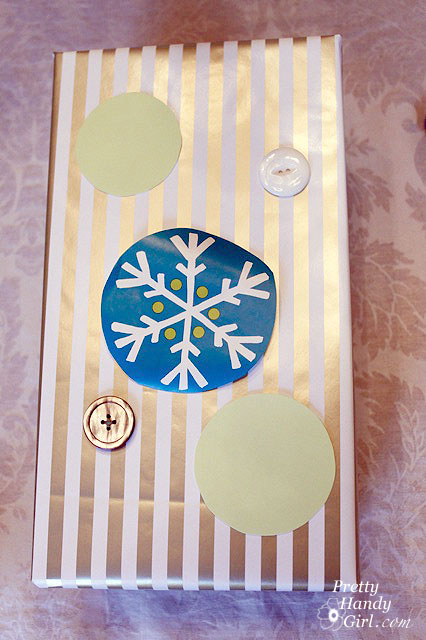
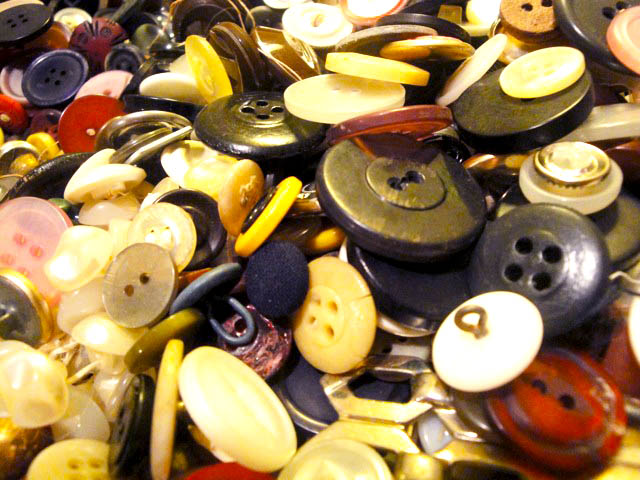
Next the fun part! Digging in my grandmother’s button tin! She passed this down to my mother and somehow it ended up in my possession. (Shhhh, don’t tell my sisters!) I love this tin. The smell I encounter when I open the tin is part metal, part perfume, and 100% nostalgia.

I remember the feeling of running my fingers through the buttons. Isn’t this the prettiest eye candy? All those colors and textures.

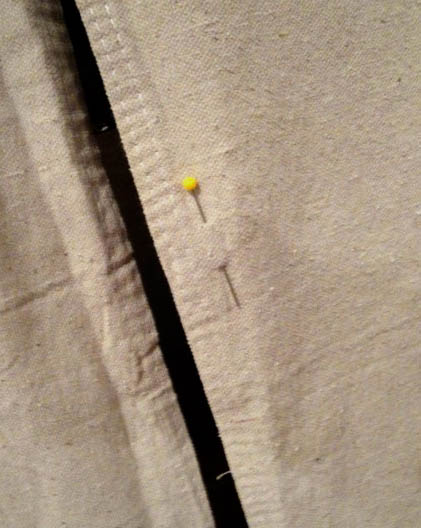
<<snap of the fingers>> Okay, back to the project at hand. I chose four large brown buttons. Then eye-balled them on my slipcover and put a pin where each one would be attached.

I used a disappearing pen to mark the size of the button on the side that overlaps the other.

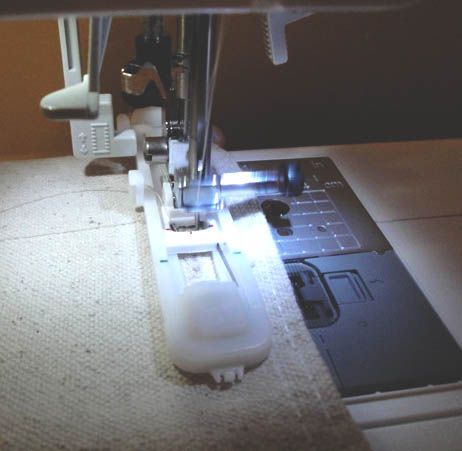
This is the first time I’ve used the buttonhole foot on my Brother CS-6000i sewing machine. (No, I’m not paid to endorse this sewing machine. I just can’t believe all the features it has for the $125 price!) I was impressed by the button holder that automatically tells the machine how big to make the hole.

The machine also has a feature where it can stitch your buttons on, but I knew it would take me longer to read and measure how to tell my machine where the holes in the buttons were. So, I sewed them on by hand.


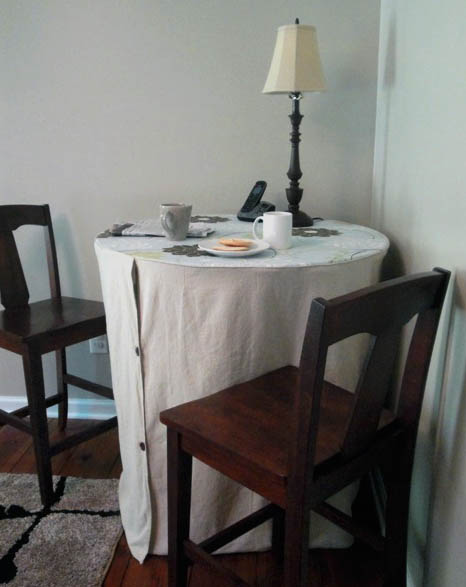
And presto, I have a pretty bistro table with storage underneath!


And, a place to have morning coffee with Pretty Handsome Guy.
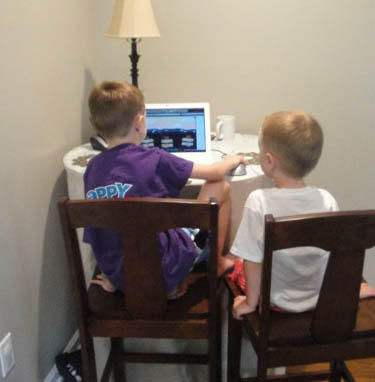
And, somewhere for the kids to do homework (or brush up on reading at Starfall.com.)


Visit thecsiproject.com