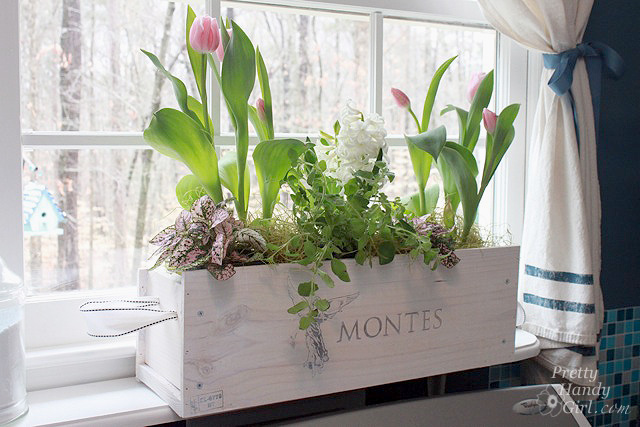
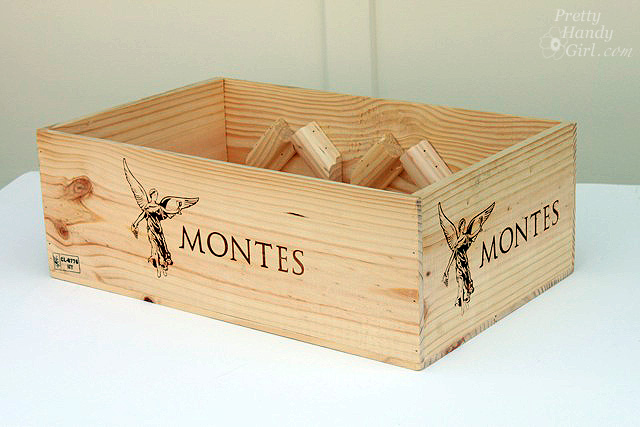
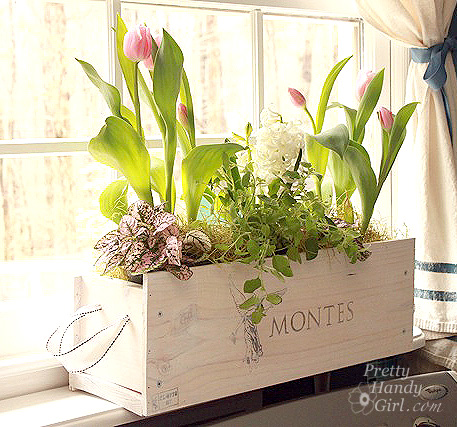
The other day I was wandering aimlessly shopping at Costco and spied an empty wooden wine crate. The angel stamped on the side was beckoning me to take her home. Actually, I read Funky Junk Interiors’s post about making tool boxes last year and have been looking for just the right wood to make one. The angel may not have calling me, but I wasn’t about to leave the store without her.

I thought about tucking it under my coat and making a break for the front door, as I was sure there were other crafty ladies eyeing up the lonely wine crate. But, I resisted the urge and asked the manager if I could have it, and he graciously let me take it home. I was exuberant because I’ve been missing my rustic wine crate that Cherie won. Read more

I am very excited to welcome Kristen from Pink Toes and Power Tools today! She’s gonna kill me for this, but this is Kristen:

I am not trying to embarrass her, I just want you to see what a fun gal she is! And not only is she fun, she’s got some serious DIY talent! You should see her daughter’s bed that she made!

Please give Kristen a warm welcome today!

Hello Pretty Handy Girl readers! I am Kristen from Pink Toes and Power Tools and I am honored to be guest posting today here at PHG!

At Pink Toes and Power Tools, you will get DIY instruction and inspiration in home remodeling and decorating, with an emphasis on woodworking. The projects on my blog are all done by me. I’m 5’2″ tall and 115 pounds. In short (pun intended), if I can do it then you can too!”

I was a seasoned DIYer in sewing and interior painting prior to beginning my blog, but I was a complete newbie in woodworking. Learn along with me as I tackle my first project, a Storage Closet Organizer, which gave me the confidence to build some Leaning Wall Shelves, which eventually led to an entirely new entrance to my home (which is also the laundry room):

With the new year rolling over just recently, I made a resolution to get some organization back into some hidden areas of our home. So today I am going to show you how you can build some under the sink storage, because I was tired of opening the door and looking at this:

I wish I could tell you that I “staged” it to look this bad, but unfortunately that isn’t the case. Some of you may still think that I did and for that I thank you — that means somebody out there believes I’m just not this messy. My husband sure wishes that were so! You can now understand that when I saw this on Pinterest I got pretty excited.

image

source: Pregnant…with power tools

Actually I got a LOT excited…dollar store bins! Scrap wood! Cheap and easy DIY—what’s not to love??

So I went off and I built some stuff and now it looks like this:

I love it so much now!

First thing you need to do is go get yourself some bins. This project cost me $4 because all I had to buy were the bins and I got 2 for $1 at Dollar Tree. You also need to know that bins vary in quality and usability for this project. Look for rigid bins with side edges that are uniform with no obstructions like these:

Mine looked decent in the 2 pack

…but revealed their true colors when I separated them.

Oh well, no worries. I decided to make these work because they were the only options at Dollar Tree that were the right size (these are about 6.25×10) . I modified my runners from the inspiration photo by using two for each side. You would want to do that if your bins are wonky like mine, or you want the bin to not tilt forward as you pull it toward you to open it.

I’ll give you the instructions using my dimensions — modify yours to work with your bins and cabinet space or to use up the scraps that you have available.

For the plastic bin tower you need:

3/4″ plywood–2 @ 9.5 x 19.75 (sides)

1/2″ plywood–2 @ 8 9/16 x 9.5 (top and bottom–I pieces together mine with multiple scraps for each)

1/2″ mdf/ply–16 @ 2 x 9.5 (runners)

1/4″ ply–8 9/16 x 20 11/16

8 bins 6.25 x 10

First you attach the runners. I did this one by one using a bin to space them and make sure it didn’t bind at any point. Turns out as I measure them now, they are all almost exactly 1/4″ wide. Glue and nail with 1″ 18 gauge nails or countersink some screws.

IMG_5642

Here I am figuring out how wide to cut the top and bottom. I think these would slide better if I had put them a little closer together, but I didn’t want to risk them binding. Glue and nail/screw on your top and bottom piece. I just put one nail on each corner of the top and bottom at this point (makes it easier to square it up). Put it on its face, square it up, nail on the back, and add some more nails or screws to the top and bottom.

IMG_5643

Done!

The drawers do not slide perfectly–if you want drawers that do, you have got to get rigid bins with a decent lip on the side like I said before. For $4, I am more than thrilled with these.

The other components for this project are super easy but you’ve got to be careful. This whole unit won’t fit in the cabinet wall to wall if it is all attached together. If you are strategic you can get them in there and remove them later.

Add a scrap wood bin with felt on the bottom for easy gliding so you can reach into the back recesses and you are good to go!

It looks like I threw out a lot of stuff, but honestly what I got rid of would have fit in half of one of the plastic drawers. Ok, maybe three-quarters of one if you count half empty boxes and miscellaneous plastic bags.

What do you think of it? Have you got a place for one of these in your home?

Thanks again for having me here Brittany!

{clapping hands}

Thanks for that wonderful tutorial Kristen! If you would like more DIY tutorials and fun, head over to Pink Toes and Power Tools! And tell her I sent you!

Would you like to be a guest on Pretty Handy Girl? Read my open invitation here.

Matchbox Car Racing Ramp

Do you have a little free time over the Christmas break? How about taking some time to make a wooden racing track with your kiddos!

If you have boys, I’m sure you have Hot Wheels cars in your home. They go hand-in-hand. My boys play with their race cars for hours!

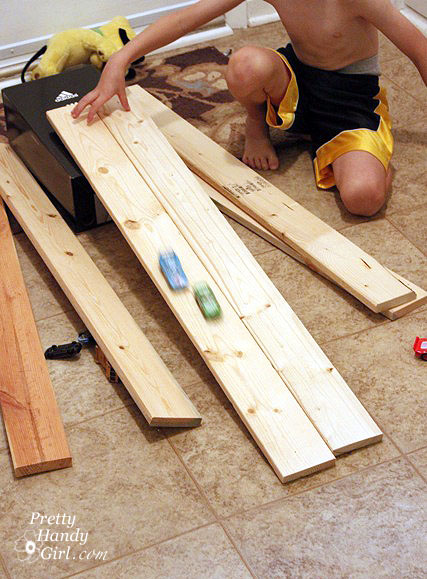
They have several of the plastic tracks. And even a curly-Q racing ramp. But, honestly they seem to play with my scrap pieces of wood more than the plastic tracks. Chances are, if you or your spouse build things, you will have all the scraps of wood on hand to make this racing ramp.

My 7 year old and I worked together on this project. (He was my design consultant and he also helped with some of the assembly.) But, imagine the surprise on a child’s face if you made this ramp as a holiday or birthday gift!

Materials:


  • 2 – 1 x 4 x 13″ boards (tower sides)
  • 1- 1 x 4 x 9″ board (tower roof)
  • 2 – 1 x 8 x 33″ boards (ramp sides)
  • 1 – 1 x 6 x 33″ board (ramp)
  • 1 – 3/4″ dowel rod (cut to 12″)
  • 1 – 1/8″ dowel rods
  • 1 – thin rectangular strip for a divider 33″ long
  • 1 5/8″ screws
  • 1″ finish nails
  • 2″  finish nails
  • Gorilla Glue
  • Sandpaper
  • Primer
  • Spray paint
  • ScotchBlue Painter’s Tape
  • X-acto knife
  • Clamps
  • Cordless drill
  • Handsaw or miter saw
  • 3/4″ spade bit
  • 1/8″ drill bit

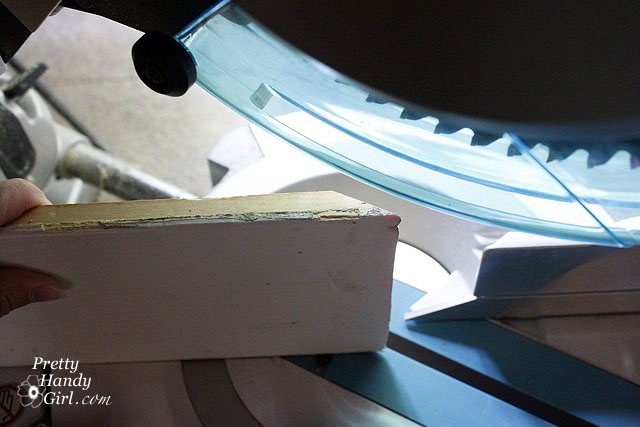
Start by cutting all your boards to length. Grab the ramp board (1 x 6 x 33″) and cut one end of the ramp at a 30Ëš angle.

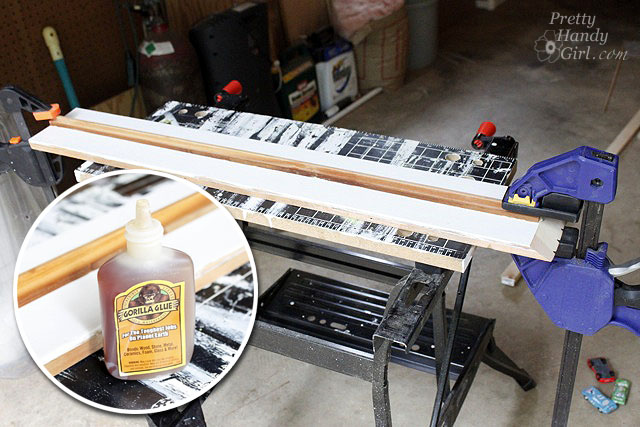
Glue the narrow strip onto the center of your ramp using a small amount of Gorilla Glue.

Clamp the strip and add a few 1″ finish nails to secure the strip.

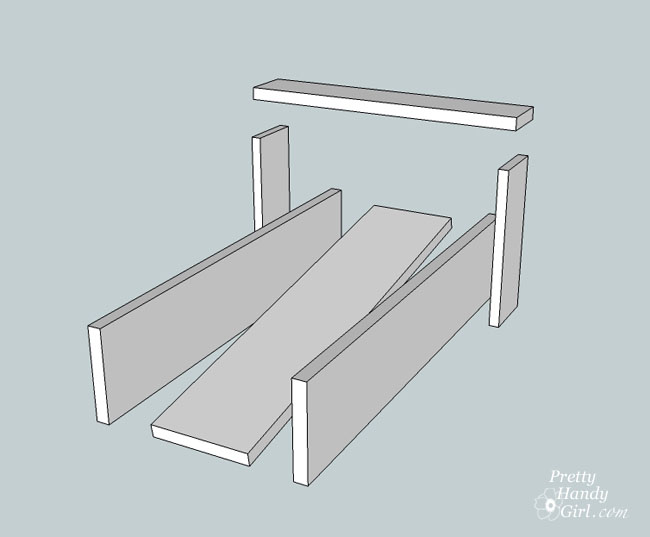
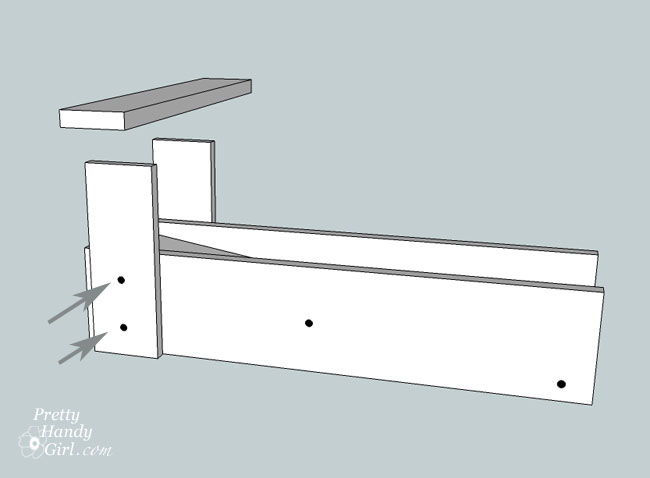
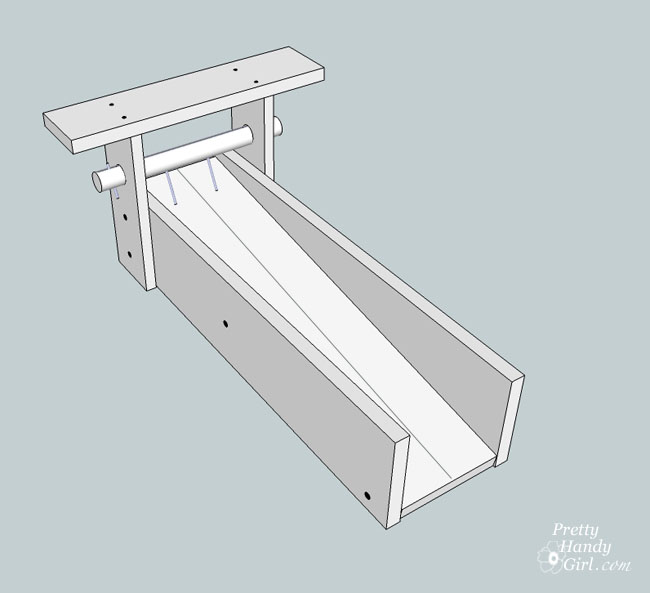
Set up your boards as shown. Tilt the ramp up at the back, the angled cut will rest on the floor (not shown.)

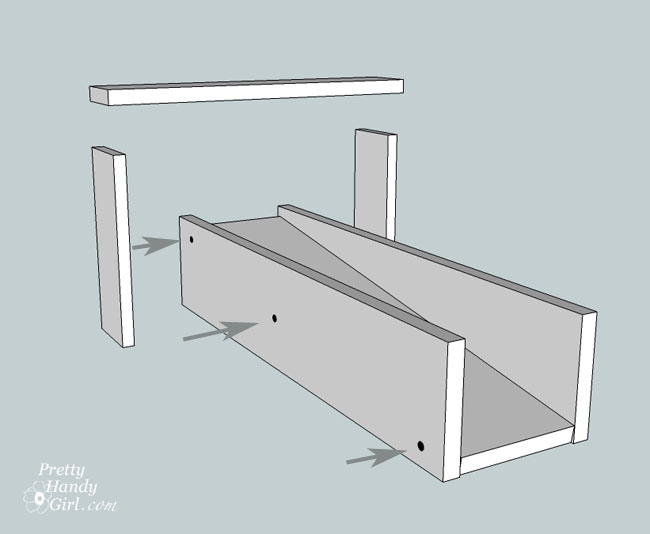
Drive a few screws through the side walls and into the ramp with your drill.

Line up the tower sides approximately 2″ from the back edge of the ramp walls. Then secure them in place with a few more screws.

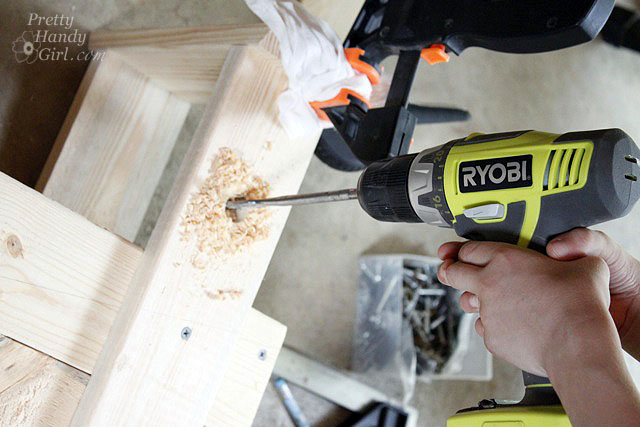
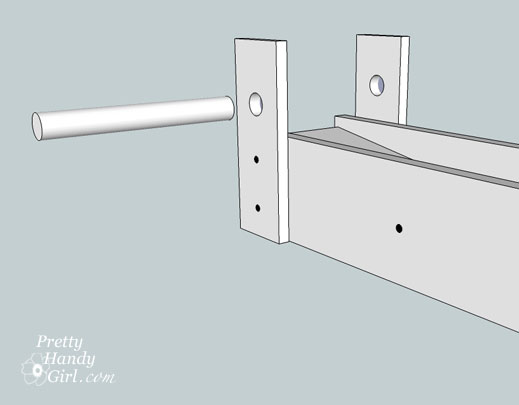
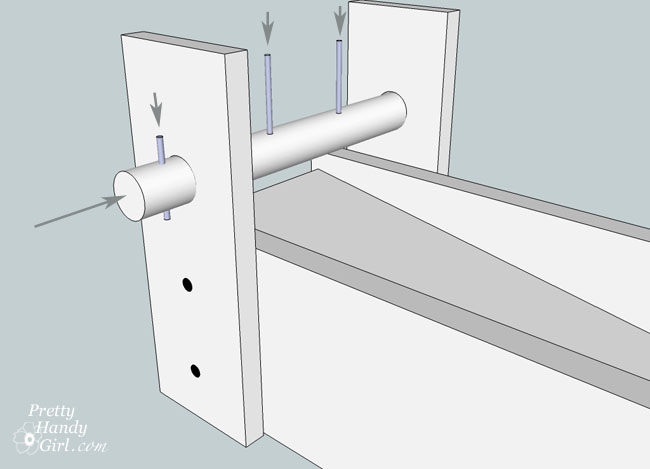
Drill a hole into each tower side large enough for the 3/4″ dowel rod to fit through.

Slide the dowel rod through and center it on the ramp.

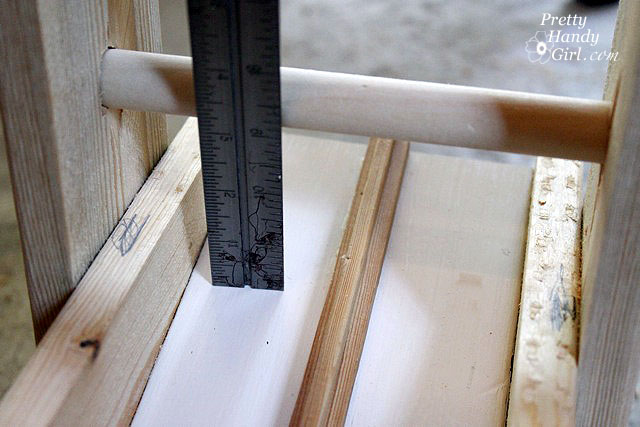
Mark the location of the center of the left and right tracks onto the dowel rod. Measure the distance between the dowel rod and the ramp. Use this measurement to cut 2 pieces of 1/8″ dowel rod 1/2″ longer than that measurement.

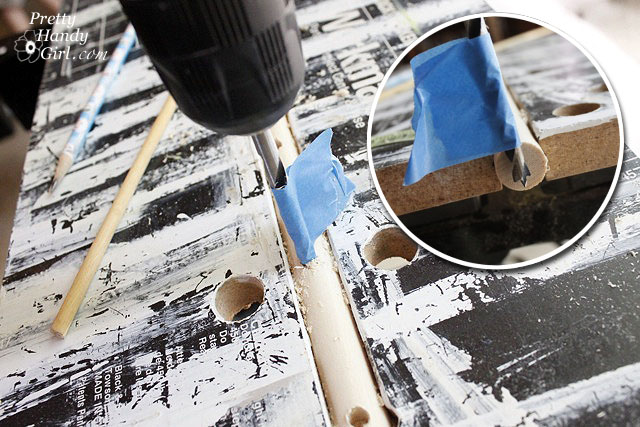
Remove the 3/4″ dowel rod. Drill holes 1/8″ wide halfway through the big dowel rod at the locations you marked for the centers of the tracks.) Wrap a piece of painter’s tape around the drill to indicate a depth 2/3 of the way through the 3/4″ dowel rod. Then don’t let the bit go further than the tape into the rod.

Mark the location where the dowel meets the outside of the tower wall.

Drill a hole all the way through the large dowel rod. Insert the 3/4″ dowel rod through the holes in the tower walls. Glue the 1/8″ cut dowels into the halfway holes. Then cut and glue two more 1/8″ dowels to go through the 3/4″ dowel on the ouside of the tower walls. These will anchor the large dowel rod and keep it from slipping out of alignment.

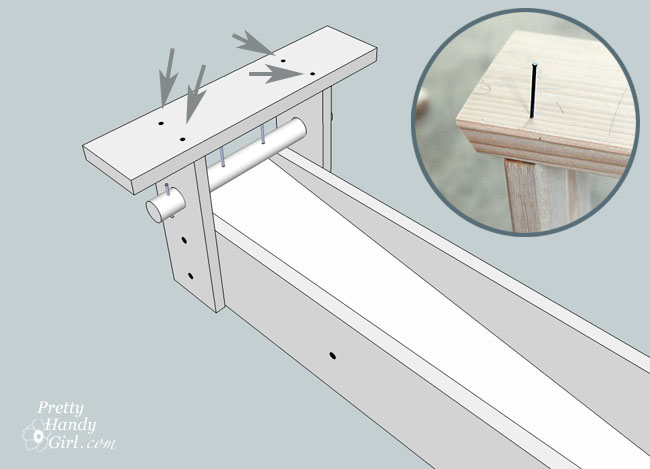
Nail finish nails through the tower roof and into the walls of the tower.


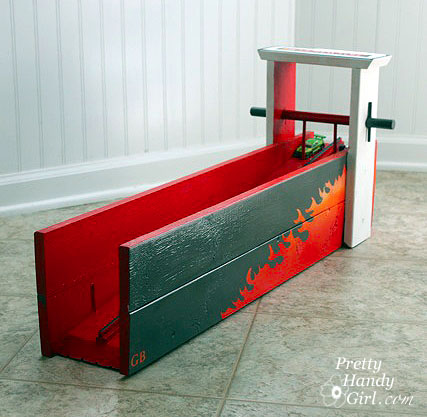
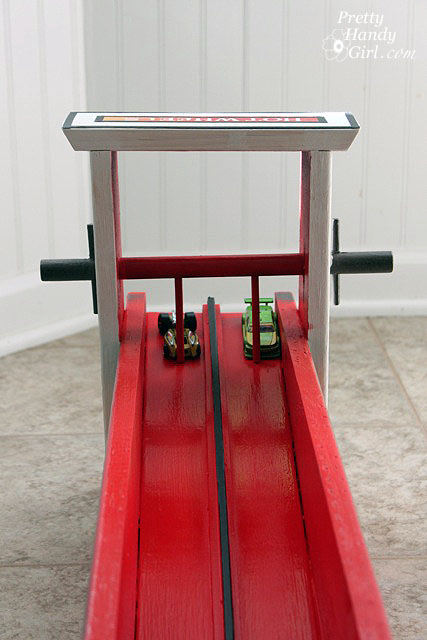
That completes the building portion of this tutorial. Hopefully your ramp resembles this one:


Now it is time to add some pizzazz! Ka-chow!

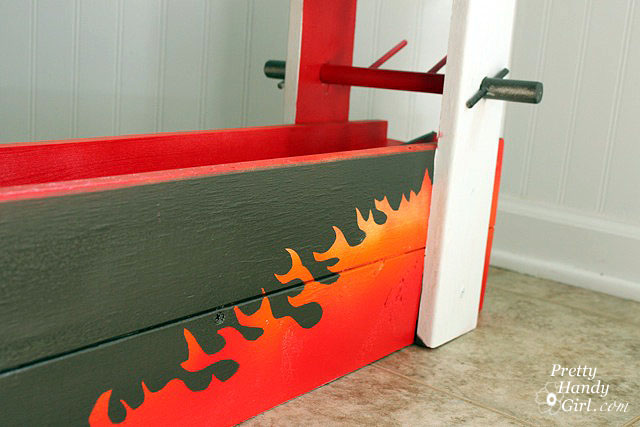
My design consultant demanded fiery red flames and black on his ramp. (And what he wants, he gets!)

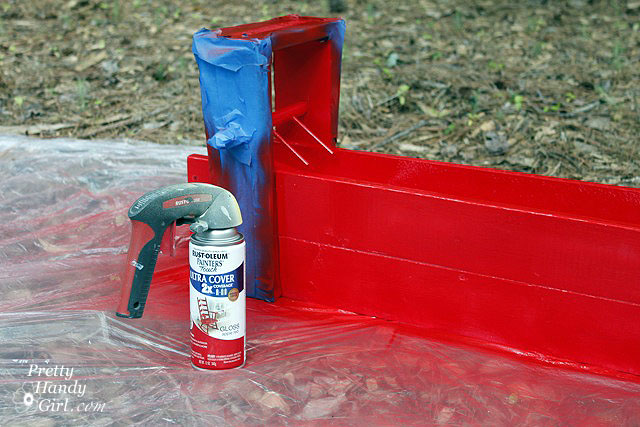
I lightly sanded the wood race track. Added a coat of primer and some red and yellow spray paint.

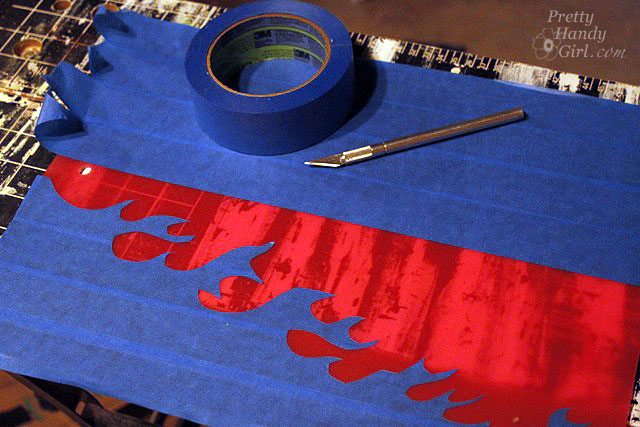
Then I cut out a flame design using ScotchBlue painter’s tape (4 pieces overlapping) and an x-acto knife on a cutting board.

I gently lifted the tape and adhered it to the side walls.

After a coat of metallic hammered metal spray paint, I removed the tape to reveal:

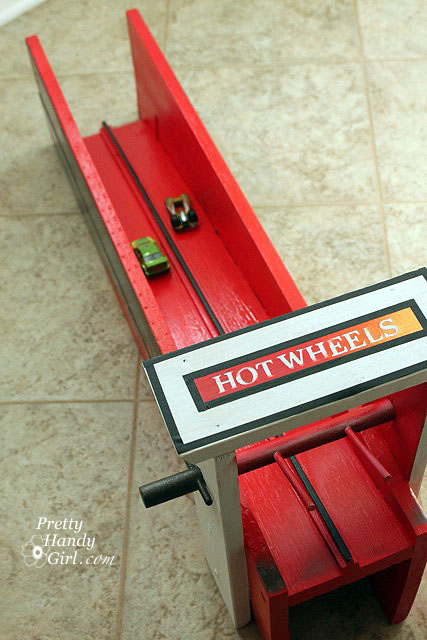
What do you think? Do I have a shot at a job on Orange County Choppers??!! The “logo” on the top was made by pressing letter stickers over the primer, then I taped off around the words and sprayed some red and yellow spray paint. The lines are made with black graphic adhesive lines.

On your marks…get set…

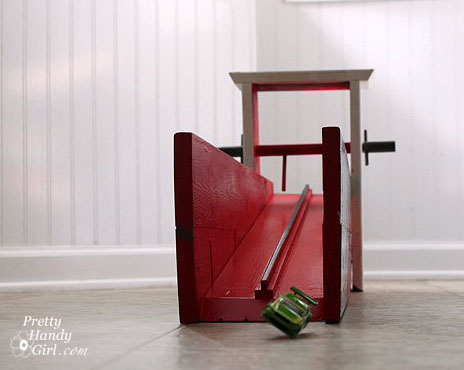
and GO!


Nice two wheel stunt!

I hope you will make one of these for your little stunt driver.

When last we left our gal, Pretty Messy Girl was embarking on a journey into the bowels of her garage. There were crevices and corners that hadn’t seen a shop-vac in years. Dead spiders and centipedes lurked in their dark and dusty hideaways. Fearlessly, she dove head first into the task at hand and with her hero, the Bagster at her side, she overcame the clutter despite the odds!

How did she do it you ask? Well, come with me (if you dare) to see how she took a cluttered disaster of a garage and made it into a serene DIY work haven (okay, that might be stretching it a bit.)

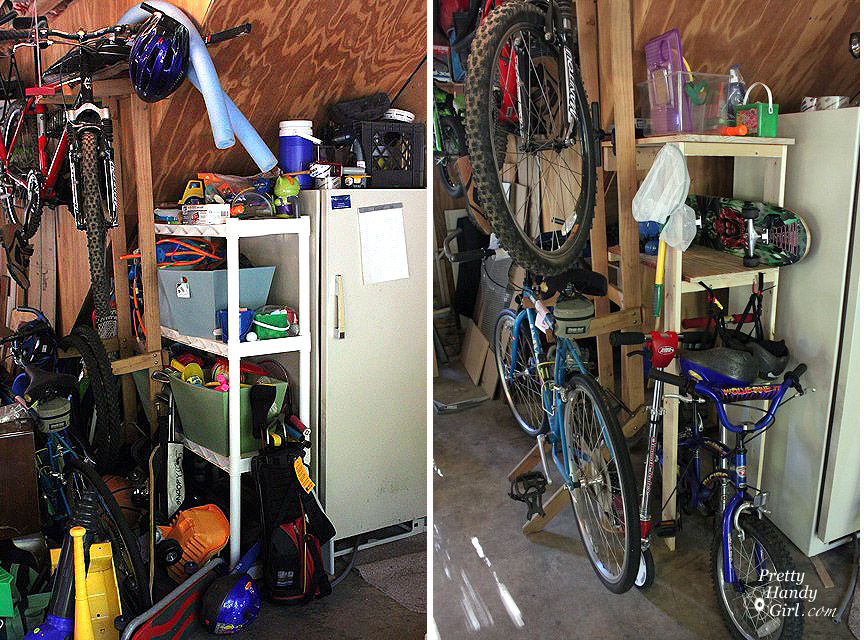
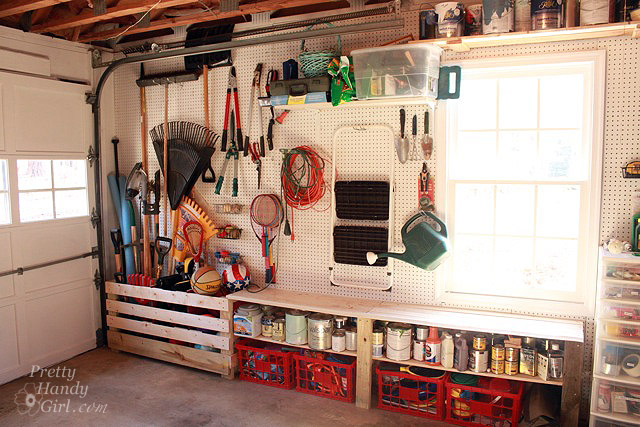
Here is how she shoe-horned lawn equipment, garden tools, four bikes, two scooters, safety gear, sports equipment, balls galore, games, swim and outdoor activities, beach things, shoes, food storage, paint, paint and more paint …(deep breath)…AND an entire power tool laden workshop into this small space.

First she cleared out the entire garage. What was left was a dusty, dirty, and dark cave. All the “crapola” was placed into the Bagster. A little comment from Pretty Messy Girl:

I must say that I really didn’t mind having Mr. Bagster hanging out next to our driveway for a few months. It weathered the rain and wind. And gladly accepted anything I put into it (with the exception of certain items that you can’t dispose of: paint, appliances, and a few other hazardous waste materials.) Now, if I had a big dumpster blocking the view and creating an eyesore for the neighbors, that would be a different story!

The bag was super easy to set up and it held the items inside. Occasionally a side would flop over, but if I put big and ridgid items inside the edges, the sides would stand up better.

A few trips were made to Goodwill and a few more trips into the attic (don’t ask what lurks up there. Gulp!) Once the garage was cleared, she gave it a good cleaning with the shop-vac.

Then she decided that she MUST paint the walls of the garage. Pretty Handsome Guy thought she’d fallen off her workbench. I mean, why paint the inside of a garage? Well, let’s just say that you can thank her later. The results speak for themselves. The amount of light in the garage now makes it a lot easier to photograph tutorials.
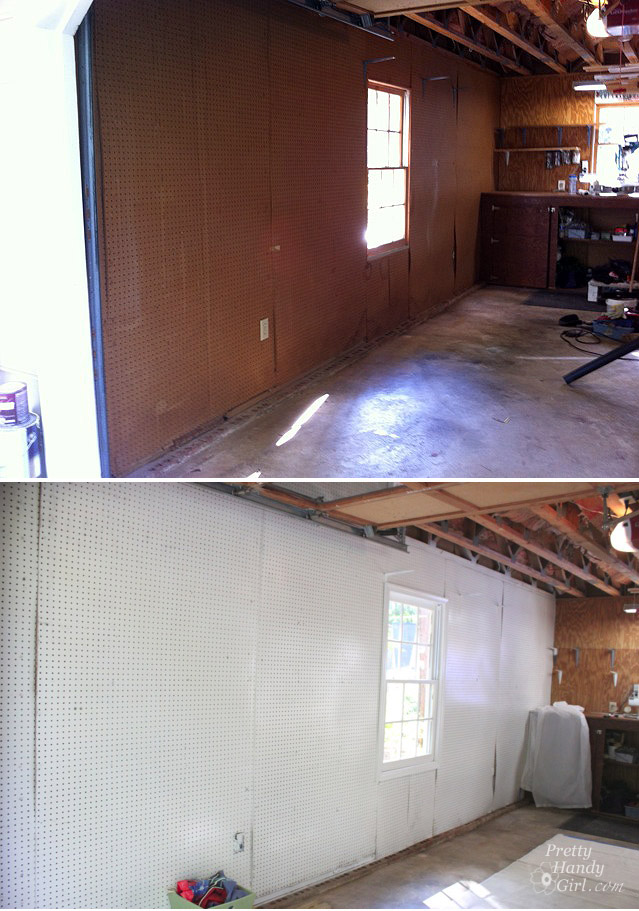
Next came the quest to squeeze a gallon worth of stuff into a quart sized container. Pretty Messy Girl uncovered several nooks and crannies that were not being utilized in the garage. And she built several custom shelving units to take advantage of the wasted space. One for the bikes and safety equipment:

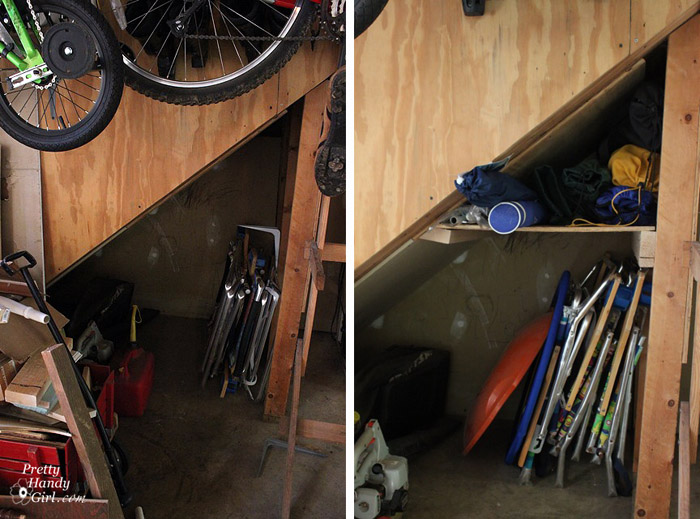
A shelf for the beach umbrellas and folding chairs (did you see that empty space above the beach chairs! That was a crime! Wasted space has no business in this garage.
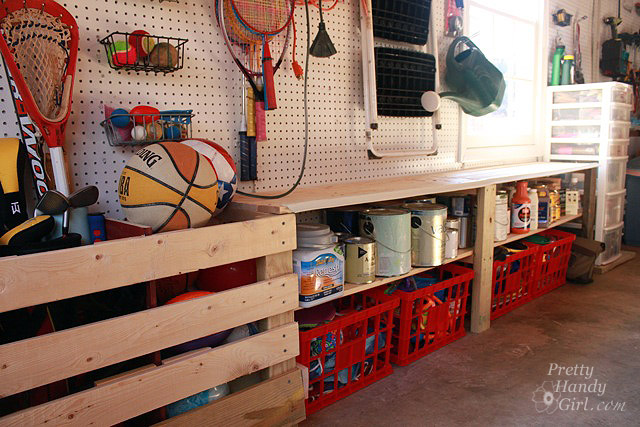
She also designed a yard-a-sport-o-ball collector. But, it is easier to just say the corral.
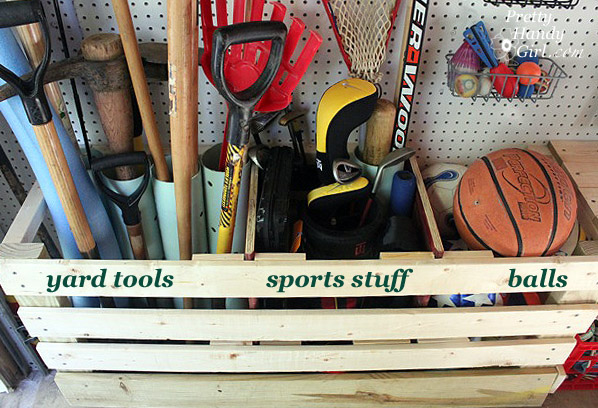
The corral was created to maximize storage for those items that are always grabbed for on a regular basis. The rakes and yard tools used to each have separate hooks on the peg board, but that took up a whole wall worth of space! Now, they take up a small 4′ x 2′ space.

To hold the tools upright, she bought the cheapest and widest piece of PVC pipe she could find. Then cut the drainage pipe into 4 equal lengths. After bolting them together at the top and bottom, screwed them to a 2″x4″ that was attached to the wall. Voila! Perfectly upright storage for yard tools!

Two more compartments were created in the corral by nailing small scraps of 1×4″ boards and then cutting a piece of plywood to slide between the scraps and create a separate compartment for sports “sticks”. And another compartment for all the balls that come standard with two small boys! What is it with boys and their balls? (Wait, don’t answer that!) I don’t think I owned more than two balls as a child. (Now I’m getting myself into innuendo-trouble.)
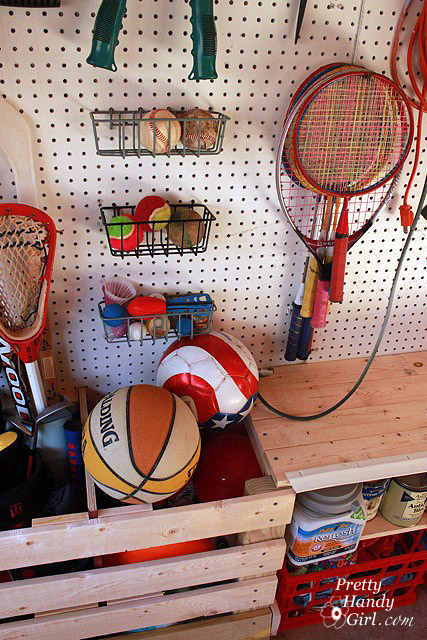
Attached to the corral are two built in shelves specifically sized for all the paint. Yes, she has an ever growing paint collection! (An artist has to have options, ya know!) And plastic milk crates below store water toys and games.
Do you remember the paint storage before? She’s extremely lucky no one called the Shelf Protective Services Division. That is just cruel and unusual punishment!
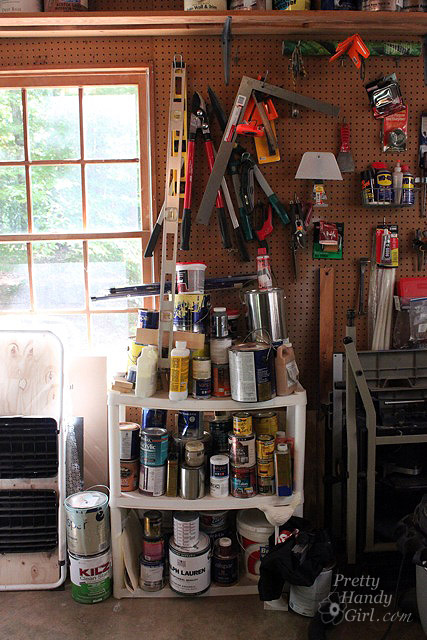
The plastic storage shelves have been sent out to pasture to retire in a life of ease (holding empty plant pots under the deck.)
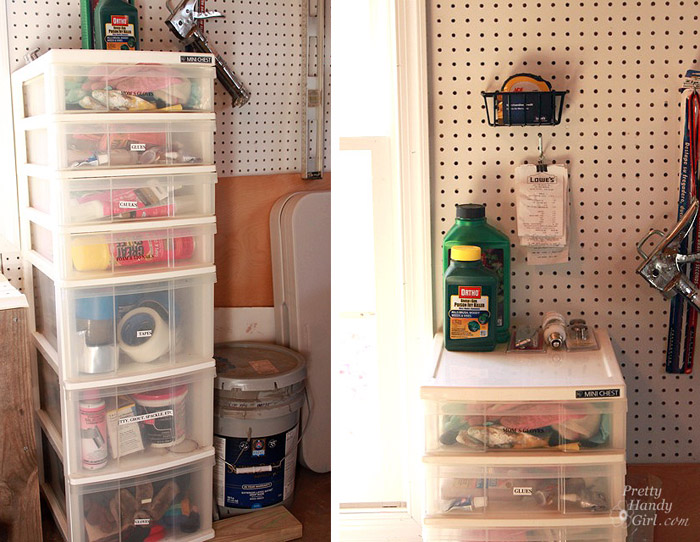
Where the paint used to be, she pulled  a plastic storage chest from the attic (Yes, there is an entire store to shop from up there.)

The plastic drawers are perfect for housing tape, caulk, glue, gloves, etc. And in a stroke of genius — not really, but why she didn’t think of this before, we’ll never know — she added a binder on a hook to hold all the home improvement receipts. AND this is also where all the items to be returned wait (for the one day that they will be reunited with their family on the store shelves.) When that day arrives, and months have past, she can store all the merchandise credit cards in the little wire shelf. (She does a little jump kick every time she raids that stash of pre-paid cards.)
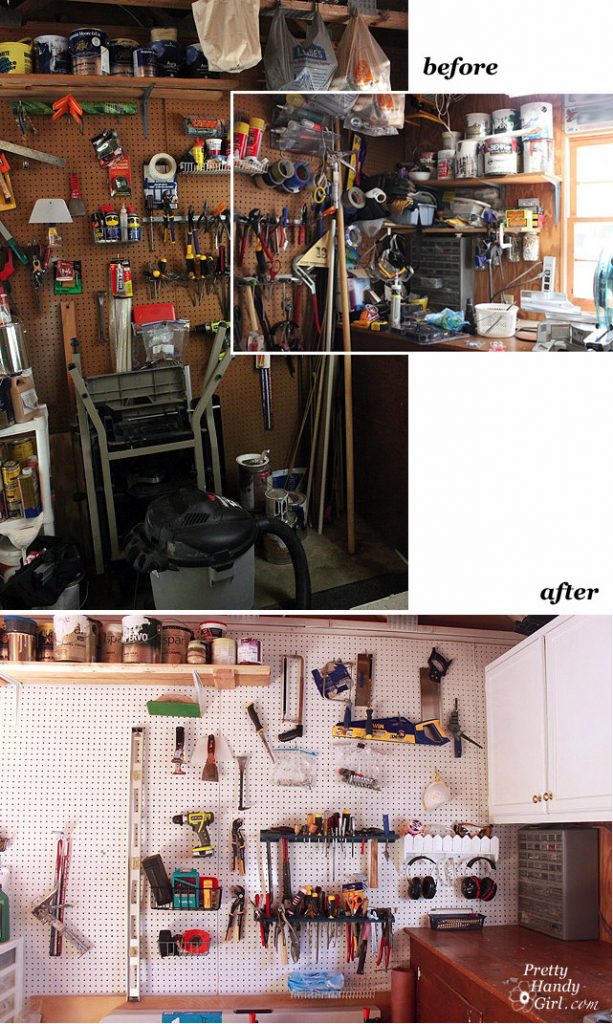
Moving right along, this was definitely the most disorganized section of the garage. The tool storage near the work bench. What a crying shame. What DIY woman could live with that? (Obviously Pretty Messy Girl, that’s who.) Well, it is a mess no more. With some new tool storage and some thought put into tool useage, she tamed the tool clutter.
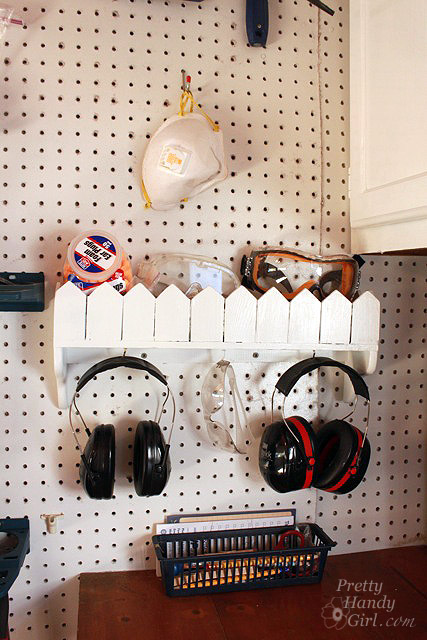
And a special spot was chosen for all the safety gear (to be a constant reminder of how important it is to wear them)! Right Meri-K?
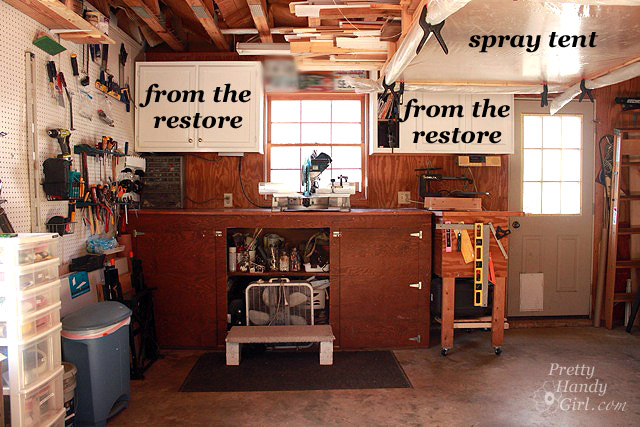
We come now to the dust protection area. With the miter saw being Pretty Messy Girl’s right hand man, this area had seen mountains of sawdust. Cans of paint, and anything that was on the open shelving always had a 1/4 – 1/2 inch of accumulation. But, not anymore! Two cabinets were purchased from the Habitat ReStore and hung on the wall. (The price was a real steal! $50 for both.) A fresh coat of paint gave them new life. Someday she hopes to paint the wall and workbench to match. Some day (a girl can dream can’t she?) In addition to sawdust, paint dust can become a real problem in her lair. One time she and a friend spray-painted some chairs and the entire garage and everything in it looked like a coal mine. A spray tent was added to the underside of some rafters. Plastic sheeting simply tacked up with 1×2″ boards and the sides are rolled up and secured in place with extra large clamps. (PVC pipes inside the plastic help make rolling up neat.)
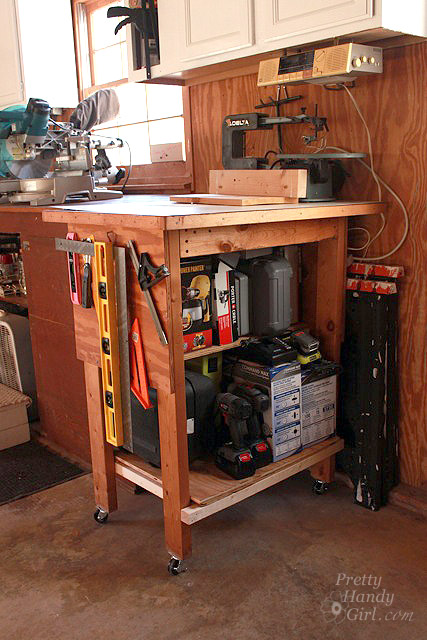
The rolling tool caddy is tucked away on the right side of the workbench. Moveable storage for all the power tools.
An annex was built onto some IKEA shelving for shoes and boots. (And excess food storage.)
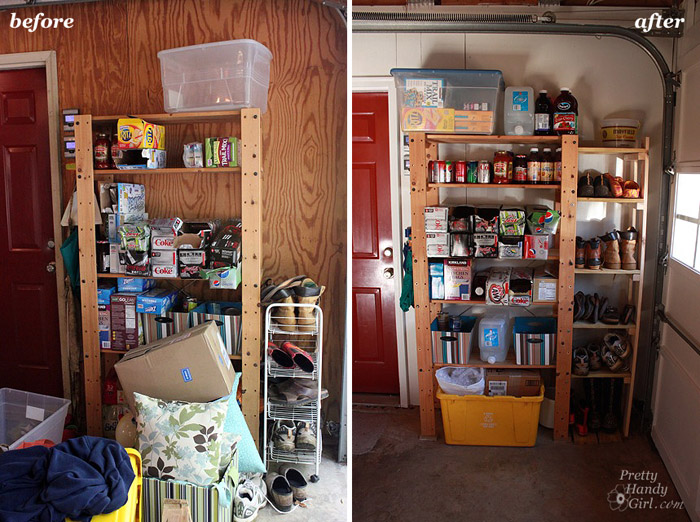
And that brings us back to the beginning.
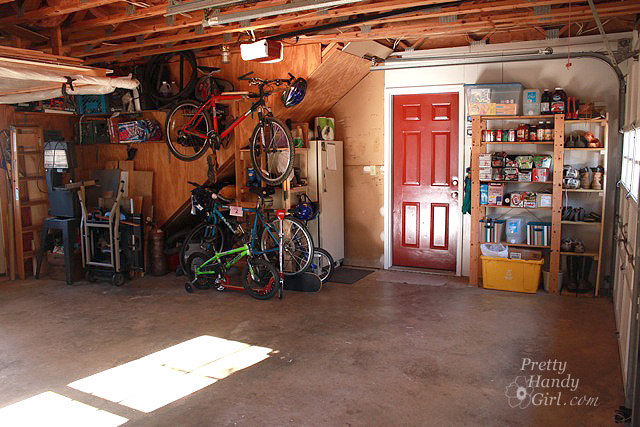
This is one useful garage once again.
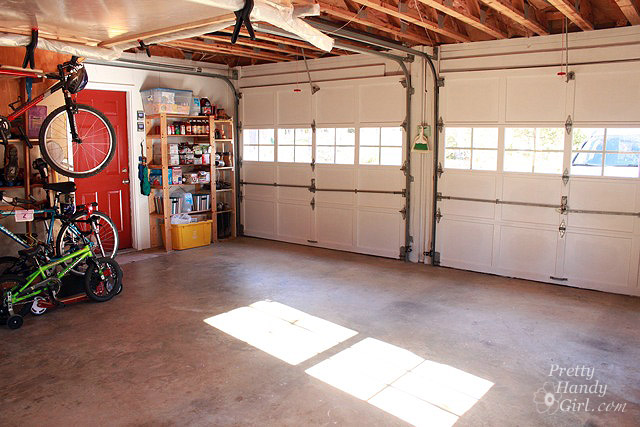
And Pretty Messy Girl has now reclaimed her title of Pretty Handy Girl! Woot!
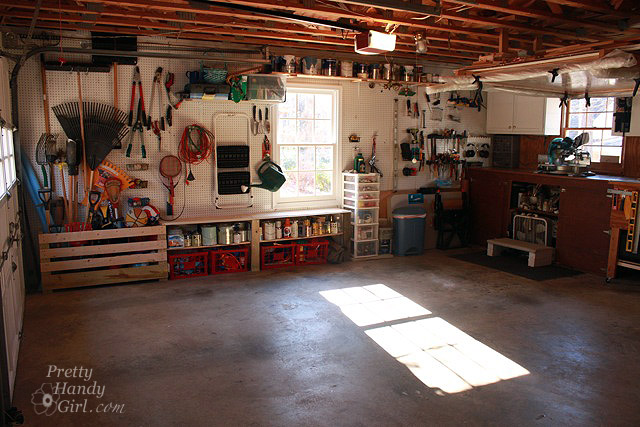
What do you think? Did you get any ideas for storage solutions? Is there anything that could work for your garage or workshop? If you need to clean out some serious “junk”, think about buying the Bagster. It is like a dumpster in a bag! For $29.95 you can purchase it at your local hardware or home improvement store. Pick up charges vary from about $79 – $159 depending on your location. It was really nice to be able to just toss the stuff inside and call a handsome young man to come haul it away!

And the bonus comes when the truck arrives to provide entertainment for mom your children. Watching the crane arm pick up the Bagster is really really cool!
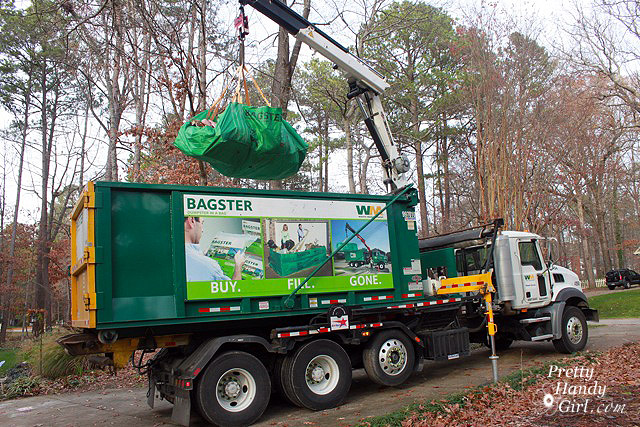
And now the moment y’all (well at least me) have been waiting for: a video of the Bagster Bag being lifted up and taken away by crane. Pretty Handy Girl says,

I am seriously such a geek, I was über excited to watch this. I even told Waste Management to have the driver call my cell phone so I could be there to watch. My 5 year old son had to hold my hand and keep me from jumping up and down. Eeeeeekkkk!

I almost forgot the best part: There is now room for Pretty Messy Mobile! I don’t think there is any hope for the car. Any mom knows that there is no such thing as a clean car when you have kids. Old cheerios and raisins have a final resting place in between the seats of this carpool vehicle.
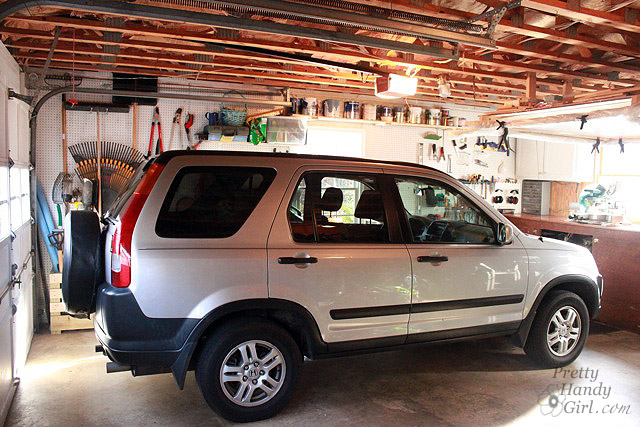

The End!
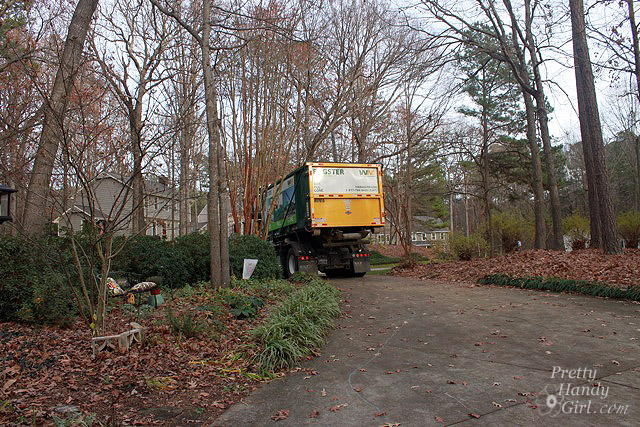
Here is a little more information about our superhero, The Bagster:

While households look for ways to save money, more homeowners are tackling projects themselves from bathroom remodels to flooring projects to spring cleaning. The Bagster® bag is an innovative, convenient and affordable solution for smaller home improvement projects.

The Bagster® bag is a highly durable, woven bag designed for disposing as much as 3,300 pounds of debris and is big enough to hold full sheets of plywood, doors and even a bathtub.

The Bagster® bag is a convenient choice for any home improvement project.

  • – Often times construction debris can’t be picked up from the curbside, so consumer now have a great solution when a dumpster is too large for the project.
  • – The Bagster® bag is ready when you are – great for last-minute projects or ones that need an extended period of time to complete.
  • – Consumers can use the bag for as long as they like, then schedule a collection when the bag is full or their project is finished. The bag and collection service are always ready, putting consumers in control of their projects.
  • – Collection can be scheduled online at www.thebagster.com or by calling 1-877-789-2247, and Waste Management will collect the bag within three business days.

The Bagster® bag is an affordable solution for homeowners and a great way to save money on do-it-yourself projects.

  • – Bagster® bags cost just $29.95 and the flat rate collection fee ranges from $79 to $159 per bag, depending on your area – 50 to 70 percent less than a dumpster rental.

Waste Management has made the Bagster® bag a simple solution for waste and debris removal.

  • – Consumers can purchase the lightweight bag at more than 2,000 locations across the country, use it for as long as they like, then schedule a collection online or over the phone whenever they are ready.
  • – The Bagster® bag is sold at local home improvement and hardware stores, including participating The Home Depot, Lowe’s, Ace Hardware and True Value. To find a local retailer near you, visit www.thebagster.com.

* For more information, visit www.thebagster.com.


Disclosure: Waste Management partnered with bloggers such as myself to participate in its The Bagster® Bag Blogger Challenge. As part of the program, I received compensation. They did not tell me what to purchase or what to say about the products used for the The Bagster® Bag Blogger Challenge. Waste Management believes that consumers and bloggers are free to form their own opinions and share them in their own words. Waste Management’s policies align with WOMMA Ethics Code, FTC guidelines and social media engagement recommendations. You should know by now, that I will never write about a product that I didn’t like.

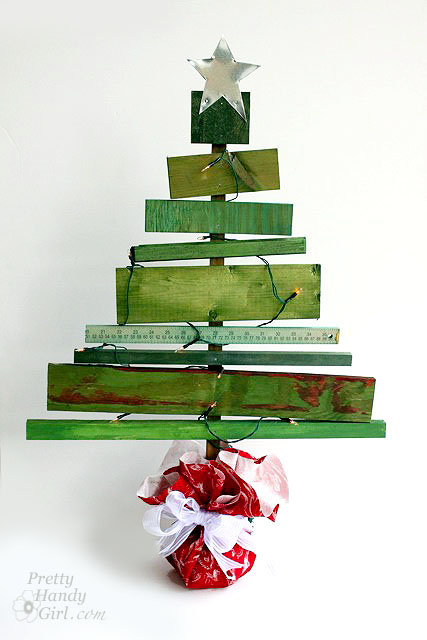
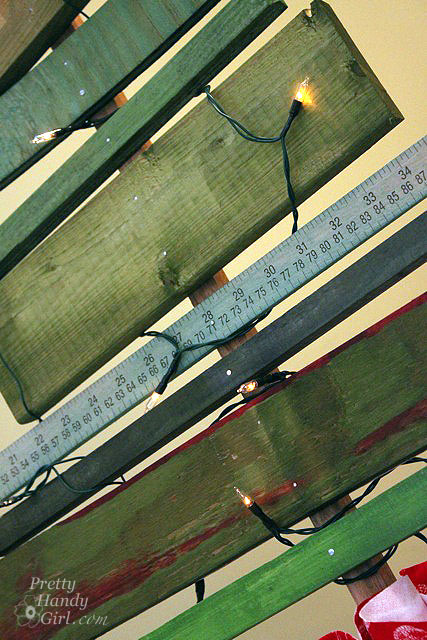
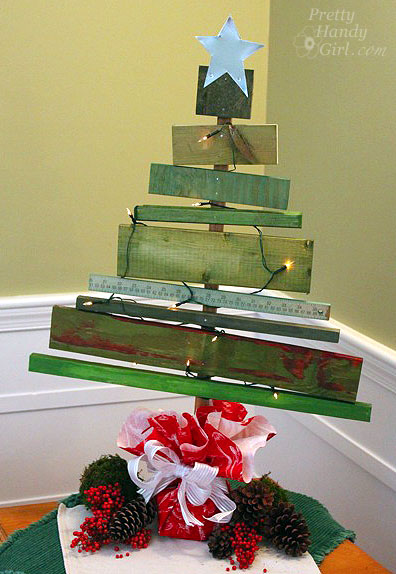
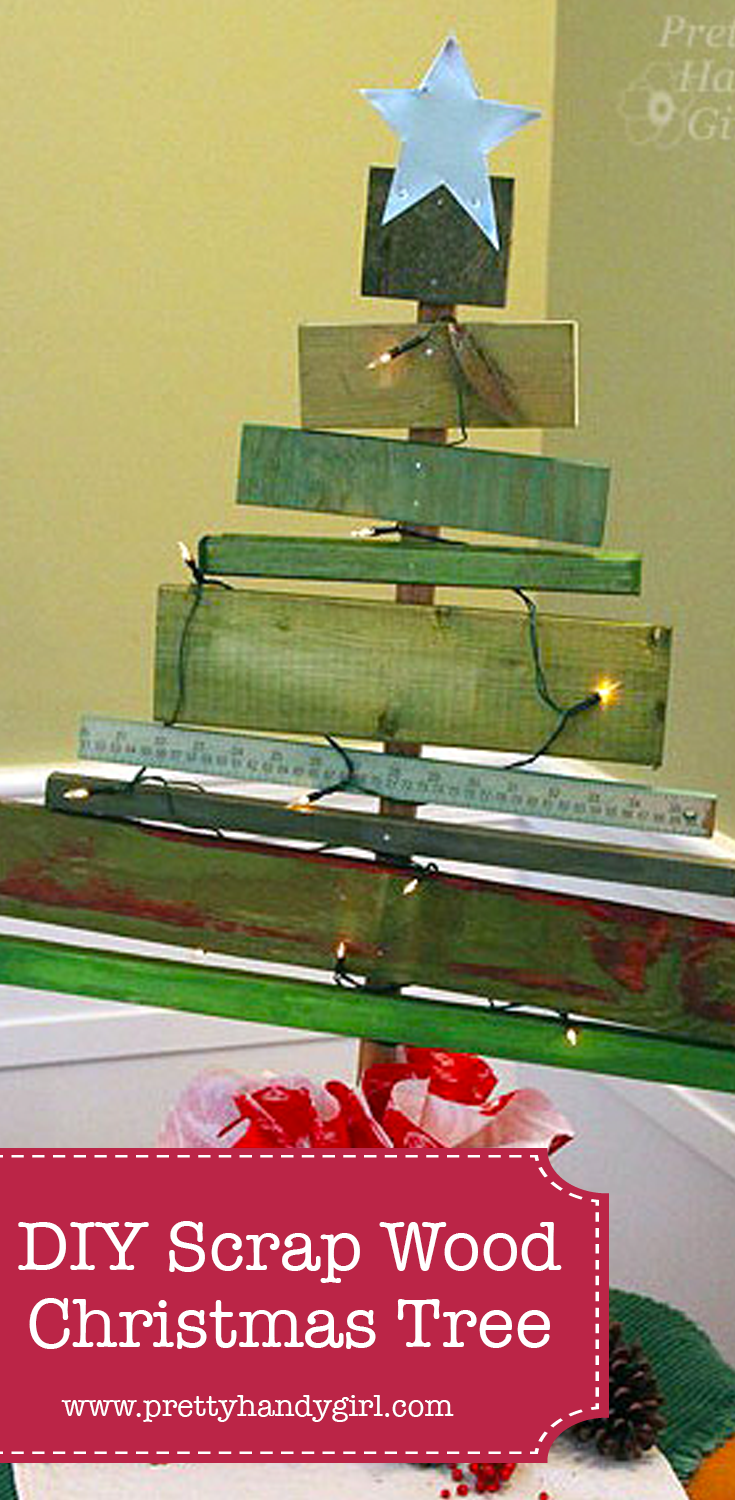
scrap_wood_christmas_tree

Holiday decorating is in full swing in my house. We bought our tree today and Pretty Handsome Guy and the boys decorated it today while I worked on the cute little scrap wood Christmas tree above.
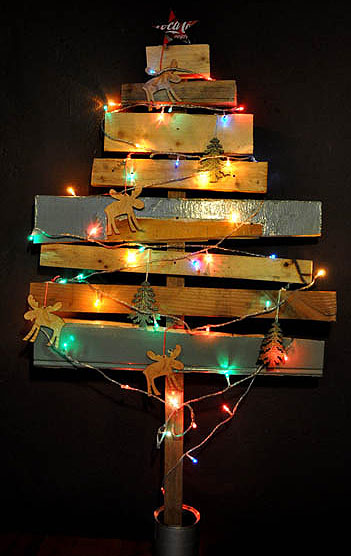
When I saw the scrap wood DIY Christmas Tree made by Creative Chaos, I fell in love and knew I had to make one too.

Having an ever growing scrap wood pile also helped convince me to make it.

I decided to try dyeing the wood scraps! You read that correctly, dye the wood. Did you know that you can use RIT dye to color more than just fabric?! Check out the RIT Dye website to learn more about all the techniques and materials you can dye. You will be amazed! Plus, RIT created a RIT Formula Guide that will give you 500 formulas to mix your own custom colors!
Seriously, that is an amazing array of colors!

Building the scrap wood tree is a super easy project that doesn’t take much skill. There is a fair amount of waiting time (waiting for the wood to soak up the dye and waiting for concrete to harden) but I’m sure you can find something more productive to do than watching cement dry.
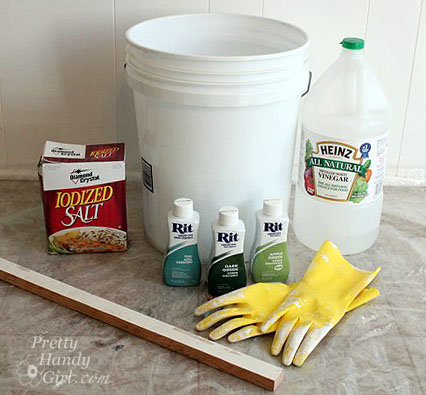
Materials:

(I’ve included affiliate links for your convenience. I earn a small percentage from a purchase using these links. There is no additional cost to you. You can read more about affiliate links here.)


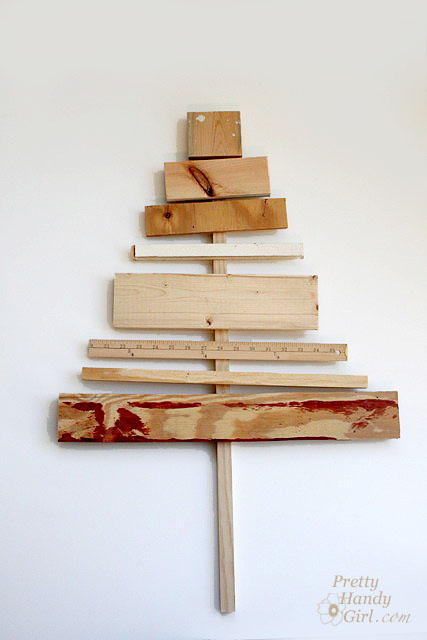
Cut your wood scraps to create a triangular form when stacked on top of one another. Cut one long strip to use as the tree trunk.

Dyeing the Wood:

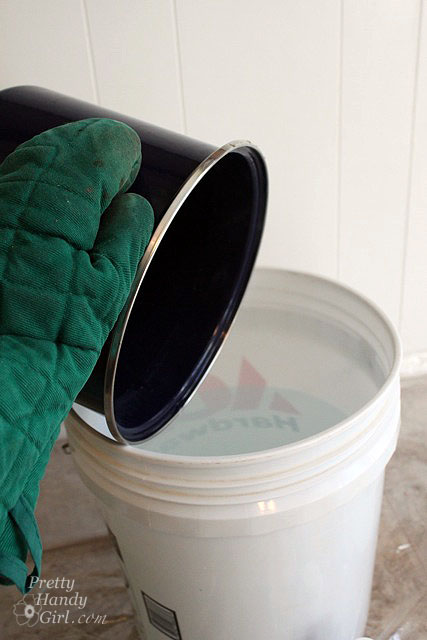
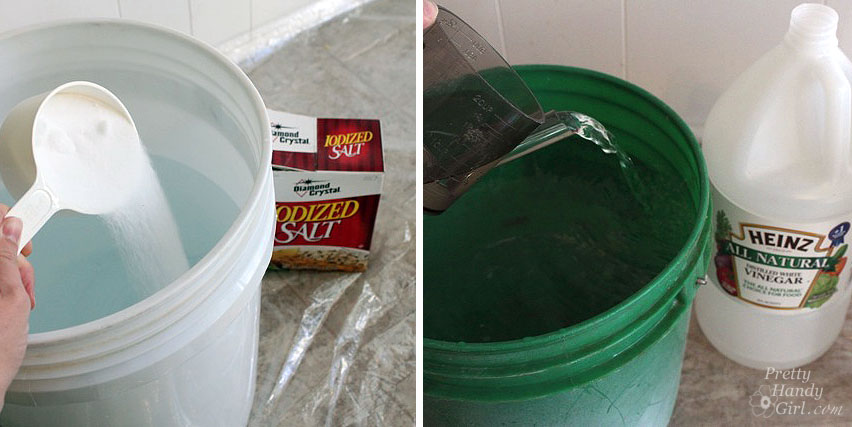
Lay out three 5 gallon buckets (or mix the colors one at a time and use the same bucket.) Set out the dye colors (dark green, apple green & teal) and salt or vinegar onto a plastic sheet. RIT Dye works best when mixed with hot water. Our water heater is set on a safe hot temperature so as not to burn our boys’ hands. Therefore, I decided to add a little bit of boiling water to my mixture to increase the temperature.

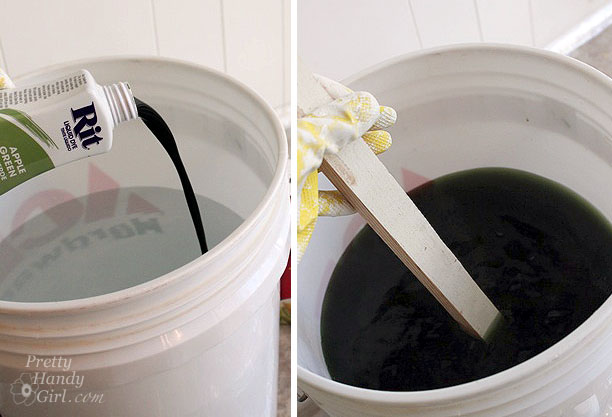
Follow the directions on the RIT container. I added 1/2  bottle of RIT Dye to 3 gallons of water (1/2 gallon of which was the boiling water.) Then mix in 1 cup of vinegar (or salt) in each bucket. (I tried both and didn’t notice any major differences between using salt or vinegar, so you can use either for dyeing wood.)

Put on rubber gloves. Stir until the dye is well mixed.

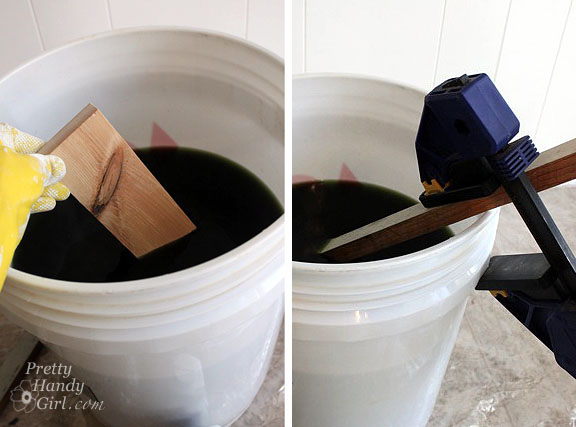
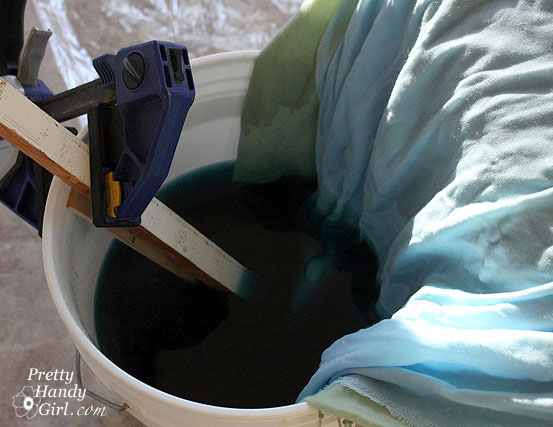
Split up your wood and dip each into the desired color. Because the wood will float, you may need to clamp a piece of wood to hold your larger scraps below the liquid. Then flip the wood to dye both ends of the scrap. The smaller pieces can be floated right side down for color absorption on the side you’ll see.

After 30 minutes remove the wood and let it dry. (Look at that scrumptious color! And the cool thing is that the grain still shows through.)

While you are waiting for the dye to dry. Stain the tree trunk strip by dipping a paper towel into Minwax Early American stain and rubbing it on the wood. Alternatively, you could stain the trunk with RIT Dye in a brown color.

*A note about pre-painted or sealed scraps. The wood needs to be unpainted, unsealed, or unstained in order to accept the RIT dye color. I tried dyeing these two strips and obviously it didn’t work too well.

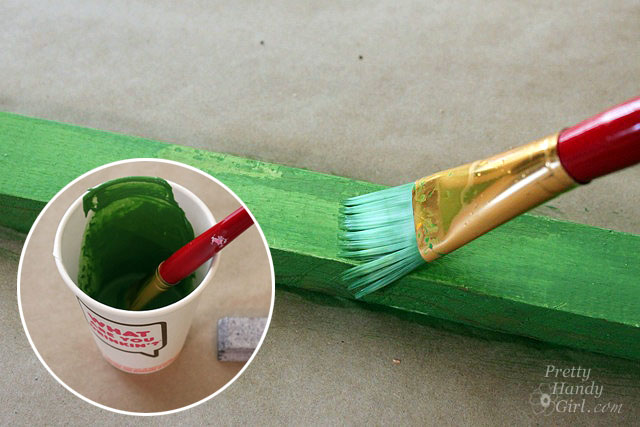
No worries though, I mixed up some green acrylic paint and some water and then painted them separately.


Building the Tree:

Position the scraps in the desired location on the trunk.

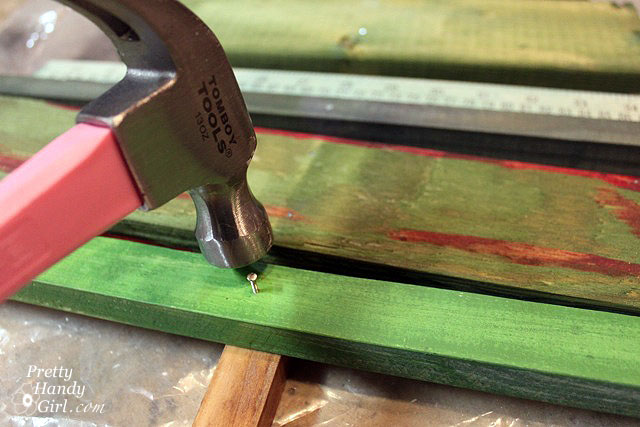
Gently hammer the scraps to the trunk strip with brad nails. Make sure the nails will go through the scrap and about halfway through the trunk.


Making the Cement Base:

*If you want to stake your tree in the ground, feel free to skip this step.

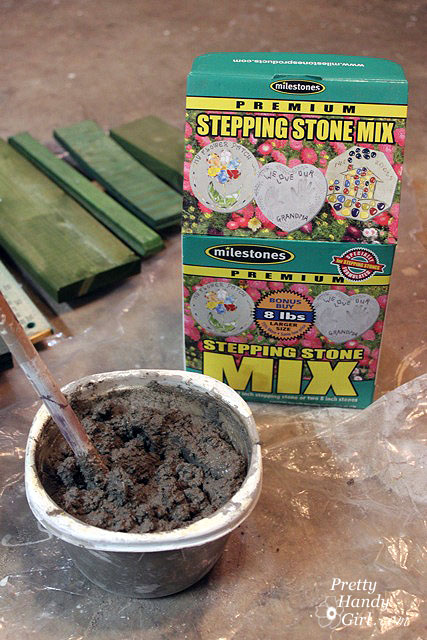
Wash out the plastic container. Fill the container with cement mixture from the stepping stones kit. Follow the directions on the package. (I ended up using only half the kit, so I halved the directions.) Slowly add water and stir the cement mixture until it is thick and heavy, but not crumbly.

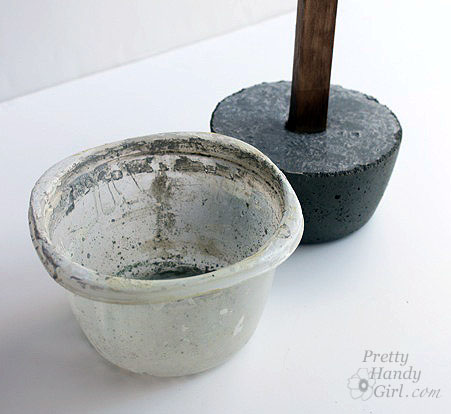
When you have the right consistency, gently bang the container on the ground to get some of the air bubbles out and to level the top. Slide the tree trunk stake into the cement.

Level the tree from side to side and front to back. Then secure the tree with clamps (or other props) while it dries overnight.

In the morning, squeeze the sides of the container to release the cement base. Remove the container and brush off any cement crumbs from the base.

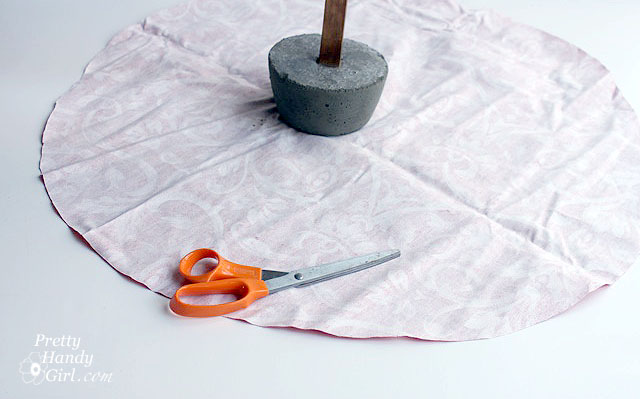
Cut a piece of fabric in a circle large enough to cover the base.

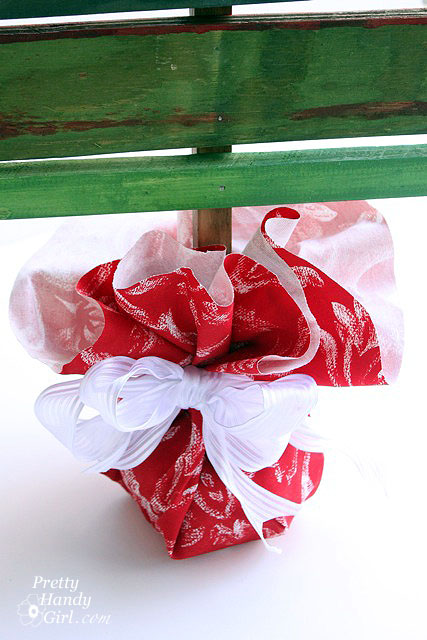
Gather the fabric up and tie it with a ribbon to secure it in place.


Adding the Star:

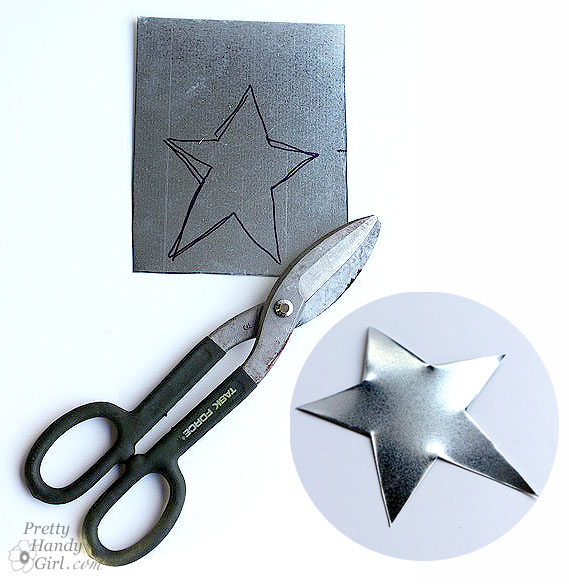
Trace a star shape onto a scrap of sheet metal (duct material) or a metal can. Cut out the shape using tin snips. Wear gloves to protect your hands from the sharp edges.

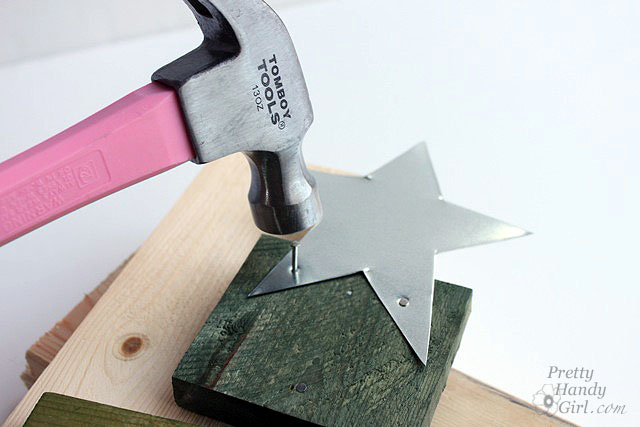
Position the star so it overlaps the top piece of scrap wood on the tree. Hammer two brad nails through the star and into the wood.

Decorate your tree with some holiday lights. (I found a set of battery powered LED lights at Target. They aren’t as bright, but it eliminates having to plug in a light cord and having a tripping hazard.)

I like the variety in color I got from using the three different colors of RIT dye. I am really loving my little table top tree. He kind of reminds me of a Charlie Brown Christmas tree, but I’m not sure why.


I have to tell you that I was so excited when I saw the color of the Teal RIT Dye, that I couldn’t resist throwing some old scarves into the bucket with the wood.

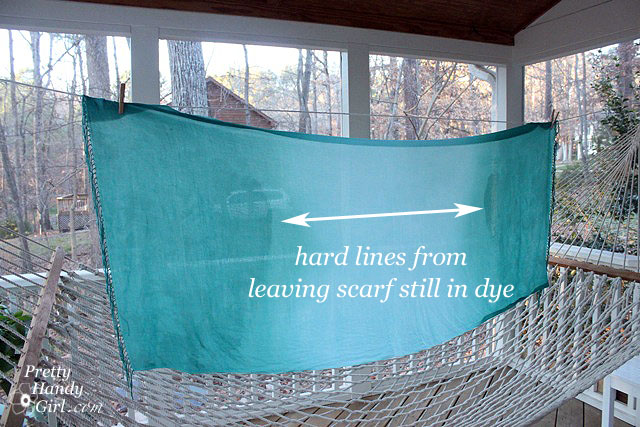
I had two scarves, one was light green and the other light blue. The green one never accepted the dye even after an hour of soaking. Obviously, the scarf was made of polyester, which will not accept dye. The light blue one came out beautifully. I attempted to recreate an ombré technique as described on the RIT Dye website, but didn’t read the directions until after the scarf had been sitting still in the dye for about 10 minutes. This gave me a sharp dye line, but it isn’t really noticeable when wearing it.  Next time I’ll know to keep dipping and moving the fabric.

This forgotten scarf has now been relegated to my wear almost everyday scarves!


Disclosure: This post has been sponsored by RIT Dye. I was sent several bottles of RIT Dye and paid a small fee in return for writing a post about my experience using their product. The ideas and opinions are strictly my own. I will never let any compensation (monetary or free product) keep me from giving you (the reader) a straight up and honest review.

Pin for later!