It’s official, we don’t have any babies or toddlers or young ones in our house anymore. Pardon me while I wipe the tears from my eyes. Nope we have boys. Long lean and fat free boys who like to run and do all sorts of death defying take years off of Mom’s life feats.

Talk of farts and laughing at poop jokes is common conversation in our home. Have you heard the one about the boy who went to the doctor? He told the doctor, “Doctor doctor, my bottom is broken. It has a crack in it.” Want to hear another one? I didn’t think so.

I’ve also noticed that my sweet little boys’ feet are slightly pungent 99% of the time (except for up to 30 minutes after bath time.)

These are the ages when they remember and know exactly what they want for their parties. When Pretty Handy Boy #2 asked to have a lizard themed birthday, you know I had to oblige. (Did you notice that subtle name change? He used to be Handsome Boy. Well, he’s still handsome, but he and his brother are getting to be very handy with the tools. Therefore, I’m renaming both my boys, going forward they will be known as Pretty Handy Boy #1 and #2.)

As I’m sure you know, lizard themed birthday parties are not exactly a common party choice. Running to the party store to pick up everything was a lost cause. (I didn’t think he’d accept Miss Spider plates and decorations.) With not a lot of time (and on a tight budget), this is what I came up with: Read more

Make Your Own Terrariums


Terrariums are making a comeback in home décor. Gone are the octagonal mirrored terrariums. They have been replaced by sleak apothecary jars, tall cylinders and lidded glass vessels (to name just a few shapes.)

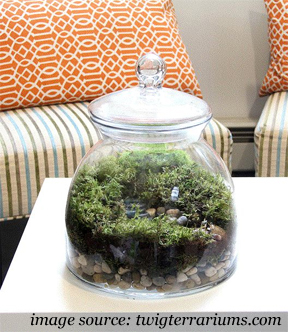
Twig Terrariums has an amazing array of beautiful ready made terrariums or DIY kits for sale! Some of them have stunning details, right down to a little miniature person inside the lush world. The terrarium below sells for $200.

If you want to create your own version that is a little more budget friendly, it isn’t hard to do. In fact you can get some plants from a local nursery or as close as your own backyard!

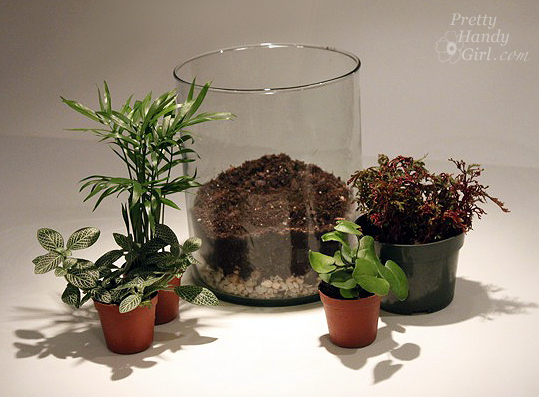
Materials:

  • Glass container (with or without a lid)
  • Small decorative pebbles or pea gravel
  • Potting soil
  • Live Moss
  • Terrarium plants (small shade loving plants)
  • Potting shovel
  • Water

1. Clean your glass container with soap and water and dry it.

2. Add a layer of gravel or decorative pebbles to the bottom of your glass container.


3. Add a layer of potting soil. No need to level it.


4. Collect your plants and think through the plant placement in your head.


5. Gently remove a plant from the pot.

If it is root bound (all the roots are wound tightly around the bottom) gently tease some of the roots free and break apart the roots at the bottom of the plant.


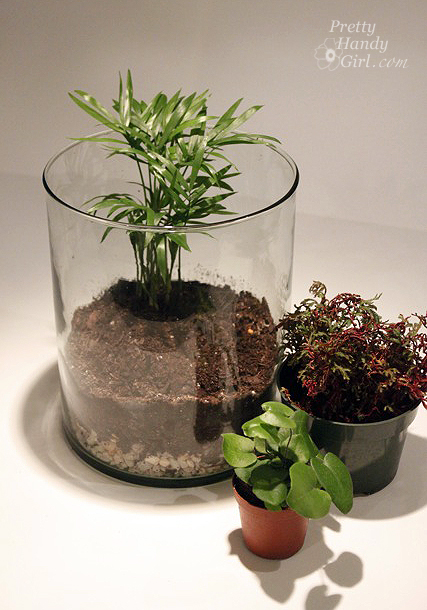
6. Insert your plants into the soil.

Put taller plants at the back and the shorter ones in the front so you can see all the plants.


7. Cover the soil with moss. You can cut or tear pieces to fit flush with the edge of the terrarium.

8. Fill your terrarium and let the water soak in. The water should reach the top of the rocks. Check the water level a few times a week and be sure to refill when the water gets low. If your terrarium has a lid you won’t have to water as often as a lidless variety.


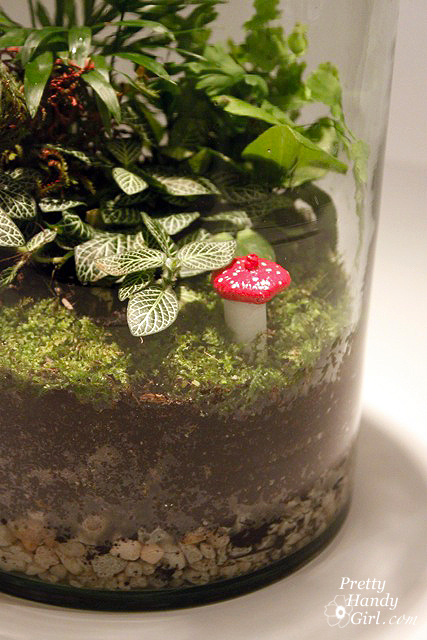
9. Add any decorative embellishments like these faux mushrooms (tutorial HERE)…

…or my sons’ favorite, a little plastic dinosaur!

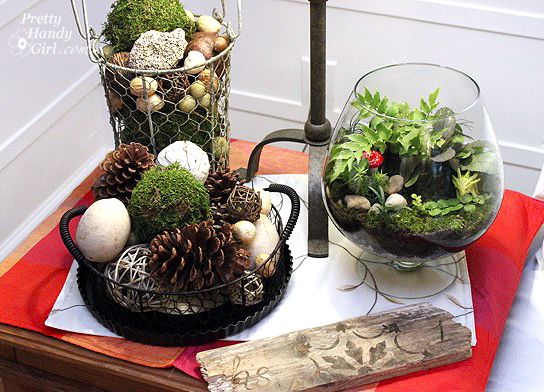
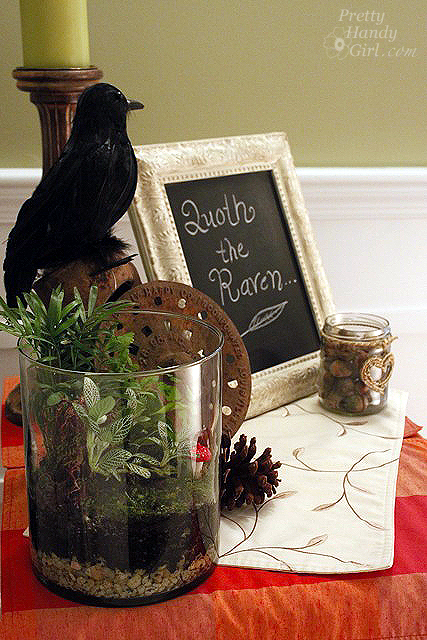
Terrariums make the perfect year round accessory. I have them prominently featured in my living room along with some other natural elements.

This version was made entirely with plants that I have growing in my shade bed. Small ferns, arugula and creeping ground covers. Plus, I added a few round pebbles for visual interest.

I might pick up a tiny person or two at a hobby shop next time I’m near one. Anyone seen any that look like the characters in “Land of the Lost” heh, heh, heh!


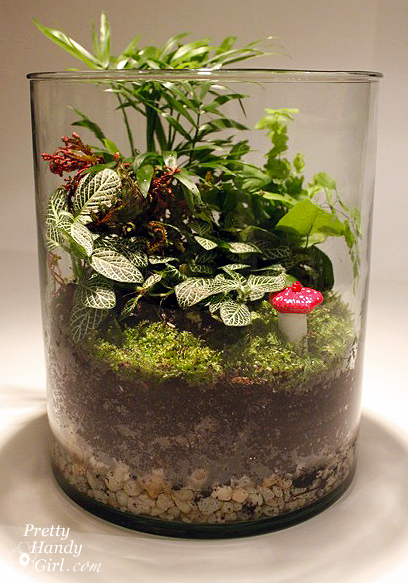
In the meantime, I’m loving my cost effective terrarium. Yes, terrarium singular, because the cylinder terrarium was a gift for our friends who dog sat for us.


I almost wouldn’t be surprised to see a fairy take up residence in one.

I’ve been busy working on some more projects to show you, so hang tight and check back soon! 😉 In the meantime, I hope you have a fabulous weekend and are enjoying Fall!


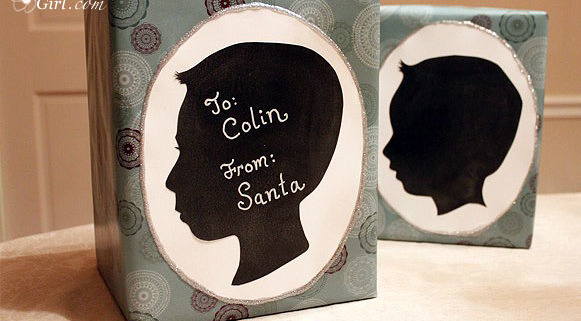
Now that the Christmas hype has died down and my cold has lost its grip on my sinuses, I’m back with a quick little tutorial on creating a special silhouetted gift for your child.

Thank you to my dear Pretty Handsome Guy for his guest post. I’m glad you all enjoyed a good laugh at his expense.

Christmas morning my boys were greeted by magical North Pole snow footprints (baking soda) leading up to the tree.

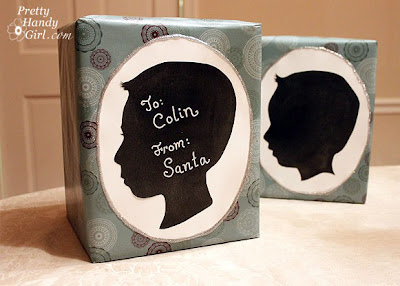
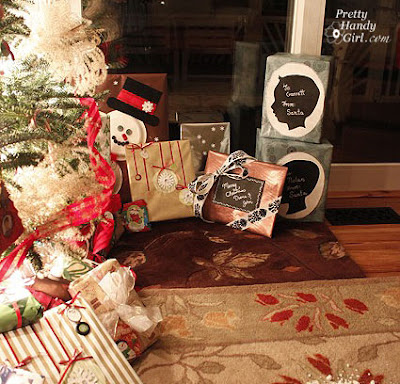
In an effort to keep the Santa myth alive, the two presents from Santa were constructed in a different style from the other presents under the tree.

My six year old exclaimed Christmas morning, “MOM! Santa knows what we look like!” So, I think I fooled them again this year.

Materials:
Scissors
X-acto knife (optional) and cutting surface
Profile picture of your child
Spraymount
White sheet of letter size paper
White cardstock paper
Black cardstock paper or construction paper
Chalk, Bistro marker, or White paint pen
Pencil
Glitter spray
Glitter glue

Start by creating your child’s silhouette. (My silhouettes took many steps in Adobe Photoshop, but I’ll give you instructions for the easy way.) Simply take a photo of your child turned sidewards (preferably in front of a blank wall.) Then enlarge the photo on a copier to the size you want to use. Lay the paper on top of the black cardstock and cut them both at the same time. I prefer to use an X-acto knife for the cutting, but you can use scissors if you like.

Unless you have a graphic program or a template to draw perfect ovals, you will need to draw one freehand. Wait, wait, don’t freak out. You can do this!

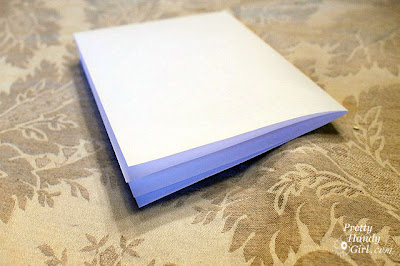
First, fold a letter sized paper into fourths.

Draw a curve on the paper with the fold sides inside the curve.

Cut along the line.

Open up your paper to reveal your oval. If you don’t like it, try it again.

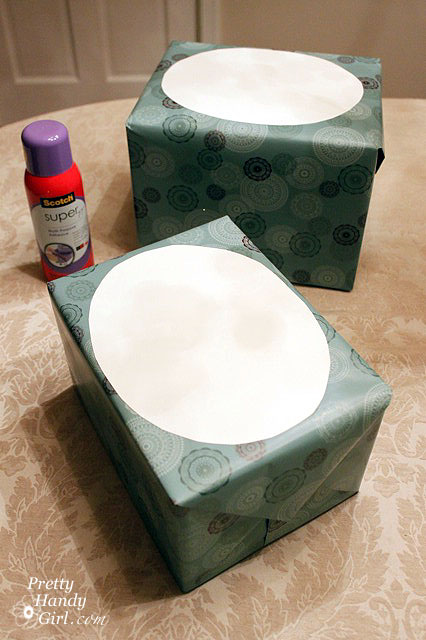
Once you are happy with your oval, trace the folded oval onto white cardstock paper and cut it out.

Wrap your present (be sure to use wrapping paper that your child has never seen in your home!)

Spray the back of your cardstock oval with spray mount and adhere it to the present.

I added some glitter spray to the wrapped package to give it a little extra sparkle! (I know, it doesn’t really show up in the photo.)

So, here is a close up of the glittery goodness:

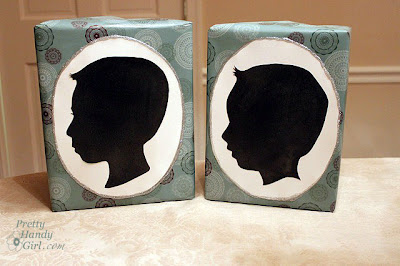
Spray the back of your silhouette head with the spray mount and lay it inside the oval.

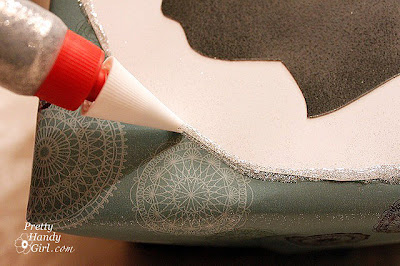
Next, add a bead of glitter glue around the edge of the oval. Note of caution: Allow the glue to dry before setting your package upright or it WILL run. Of course I learned the hard way and had to unglue my package from the shelf it was sitting on. Drat!
Here are the presents before I added the “To & From” on them.
You can write your child’s name on the silhouette using chalk, bistro marker or white paint pen. Or leave it blank if you wish, your choice.
That’s it, not too hard, but the results are stunning. You could use this gift wrapping technique for any special present.
I have to share with you a little something that warmed my heart Christmas morning. My oldest carefully cut off the fronts of all the presents that I gave him to preserve the creative gift wrap designs.
He saved them all including his silhouette from Santa.
In stark contrast, my youngest tore into the packages as any other eager four year old boy would.
creative-gift-wrapping

I have so much to tell and show you, I can hardly contain myself! If you follow me on Twitter (PrettyHandyGirl), you may have seen this photo of the light fixtures I scored from our Habitat ReStore last week! (Yes, I also have a Facebook Fan page.)

I was ecstatic to find another light that I turned into a Pottery Barn inspired lantern. And it is identical to the one I showed you here!

In addition, I finally found a foyer light fixture that I love (after a little spray paint magic). And I also grabbed a three arm chandelier that looked like it could have been in Ballard Design’s catalog! This treasure was promptly installed in my girlfriend’s mudroom (which I can’t wait to show you!) She and I worked for several days on a storage and shoe solution for her narrow hallway. My goal is to get the final pictures of the project to share with you shortly.

In other news, I’m very excited to have been mentioned in November’s Family Handyman magazine.

Definitely not me on the front cover.

My son’s closet turned reading nook is pictured on page 94. If you don’t subscribe to this magazine, it is a great DIY and repair resource. But, if you don’t want to subscribe, you can still access most of the tutorials on their website.

Running out of breath here…

Finally, By Your Hands has a Q&A feature post on me today.

Check it out here if you are curious to learn how I got my start at being handy.

Anyway, let’s just say I’ve been a busy Pretty Handy Girl the past two weeks.

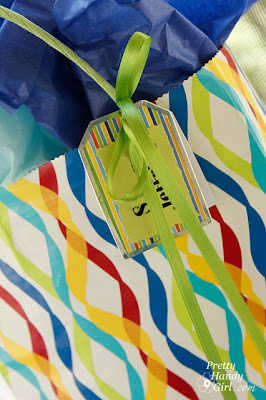
One of the reasons I’ve been busy is because both my sons had birthday parties to attend this week. I decided to make a few special gift tags that would double as luggage tags for the lucky birthday munchkins. They were very easy to make and really looked fab on the gifts.

Without anymore blah, blah, blah, here is the tutorial:

Supplies:
Metal Tag Maker Rims (bought at Michael’s)
Scrapbook paper (cardstock weight)
Mod Podge
Wax Paper (did you know you can use your recycled cereal bags for this?)
Paint brush
Paper cutter or Scissors
Decorative scissors (optional)
Ribbon
Regular pliers – I used glass nibbling or grozing pliers but any kind should work (DO NOT BUY the special tag crimper tool that the store wants to sell you for $25!)

1. Measure your metal tags (the set I bought came with a template).

2. Print out your gift recipient’s name on cardstock paper. Skip a few lines and print out their address and phone number on the same sheet. (In fact, I ganged up several names including my son’s so I could make many tags at once.) Be sure the names and addresses will fit inside your tag dimensions.

3. Using the tag template, cut two coordinating papers for the background of your tags.

4. Trim the name and addresses smaller than your tag dimensions. (I used deckled edge scissors.)

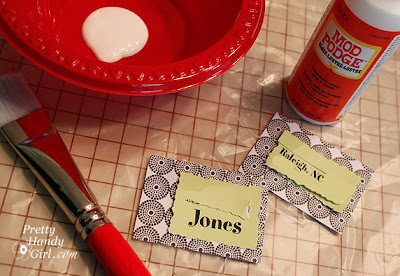
5. Line up all your cut paper and supplies on top of wax paper (cereal bag). Poor a small amount of Mod Podge into a bowl and dip your brush in it.

6. Coat the back side of one of your coordinating background papers. Place the other sheet of decorative background paper on top of the first one (backs together.)

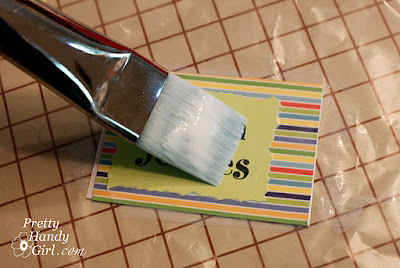
7. Next coat the back of the name sheet with Modge Podge and adhere it to one side of the background label. Be careful to leave space for your hole punch on one end. Brush Mod Podge over the top of the name and the background paper to seal it.

8. After the front side has dried, flip it over and repeat step 7 for your address label. It is very important that you position your address on the same edge of the tag as the name on the opposite side. Otherwise you will end up punching a hole through one or the other.

9. Once the tag has dried, use your template to trim the corners off your tag and punch a hole through the middle.

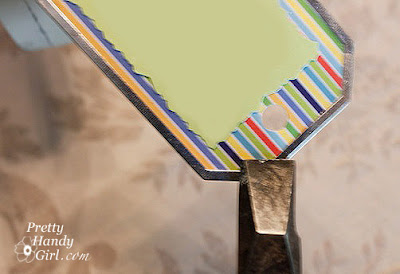
10. Gently insert your tag into a metal tag frame (some trimming may be necessary). When you tag fits snuggly inside the frame, pull out your pliers and start squeezing around the edge of the metal frame. Work your way all the way around.

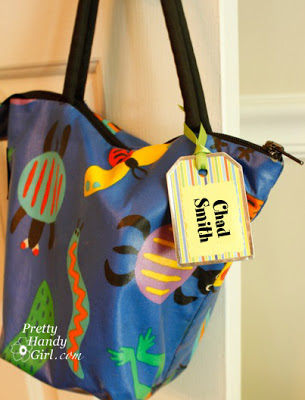
11. Thread your ribbon through the hole and tie it to your gift! Your tag can be re-used on a lunch bag, backpack or luggage!

I also cut an extra piece of scrapbook paper the same size as the metal tag;
put my son’s name on it;
and threaded it on with the gift tag
so the birthday child would know who gave the gift.
Who wouldn’t want one of these cute tags on their lunch bag?