my-repurposed-life-navy-blue-small-headboard-bench

Today’s Rockstar is one of the bloggers that I aspired to be when I started blogging. This gal truly paved the way for DIY Bloggers. Gail is here to show us how to make a headboard bench. Watch closely as she deftly converts an old headboard into a cozy entryway bench.

Gail is the rockstar behind the wildly famous My Repurposed Life! She has the ability to see beyond the ugly junk and trashed items on the curb. She has a way of seeing the beauty in all of it!

Rockstar DIY Series

I hear the sounds of hammering, Gail is ready to take the stage! Give it up for this rockstar!

page_break_2

Hi there Pretty Handy Girl readers. I am so happy to be here, because I’m a huge fan of Brittany. I’ve followed her blog for a long, long, time.

I’m Gail from My Repurposed Life. If you don’t know me, the blog name sort of gives it away. I mostly blog about repurposing items; saving them from the landfill; and giving them a new purpose in life. Many people who find me through Google, do so by looking for headboard benches. It’s pretty much what I’m known for. Today, I’m going to share one of my all-time favorite headboard benches with you.

my-repurposed-life-small-entryway-bench

A supply and tool list is at the bottom for your reference.

bunk bed

I got two sets of these bunk beds for a steal at a thrift store. They’re not typical of the headboards I normally pick up—I prefer larger headboards.

You can see the piece in the back is slightly larger than the one in the front. That identifies it as the headboard.

twin-bench

You can see the headboard is in tact, but the foot board was cut on the miter saw right above the brace, leaving the top half of the foot board for another project.  At this point you decide how deep you want the seat of your bench to be.

kreg-pocket-holes

I used scrap 1×4’s for the side that connects the headboard to the foot board. All of my boards are secured using a Kreg Jig and pocket hole screws.

side-skirting

See how easy? the bench is already formed with a few simple steps, you could stop right here and add a seat. However, I knew I wanted to do a little something extra for this petite bench. Read more

A refinished wooden sideboard left with a natural stain – not painted! Learn how to refinish this sideboard.

Have you ever turned down a piece of furniture that looks ruined? Aha, today’s rocker is Emily and she has the superpower to make furniture look brand new again!  On the Rockstar DIY stage today is a performance you won’t forget. Emily will single-handedly take you through the steps of Refinishing a Mid-Century Sideboard.

Rockstar DIY Series

If you haven’t met Emily yet, she is truly a Rockstar! Emily lives in Rochester, NY and is ALWAYS working on an amazing home improvement project.

Emily-MerryPad

Emily can be found with a hammer, saw or drill in her hands at MerryPad. She has painstakingly renovated two homes. And, as if she wasn’t busy enough with home projects (and taking care of a baby and her step-daughter), she can also be found blogging at DIYNetwork’s Made + Remade. That girl is a machine!

Oh, I hear the sound of a sander, so put your hands together and give it up for Emily!

page_break_2

Hey guys! Super nice to meet you. If we haven’t already met, I figured there’s one thing you should know about me: I really like getting my hands dirty. Building furniture can be fun, and learning how to maintain my home has brought me a lot of pleasure, but if you see me and you notice my hands and arms are coated by stain? Well, you’ll know that I’ve been having a really good time (and I’ve probably run out of mineral spirits, again). Refinishing and restoring furniture–and cabinets, and floors, among other things–is one of my favorite DIY endeavors, always a fun learning experience, and always an opportunity to bring new life into an item that was once beautiful. I’ve had some lucky secondhand finds over the years, from bedside tables to chairs, but one of my favorite transformations was this Bassett Sideboard that I scored from a garage sale for $15.

How to refinish a vintage midcentury sideboard with scratches and water damage.

T’was one of my first refinishing projects, swoon.

If you’re tackling your first refinishing project (or just looking for tips), here are the products and tools I used for this makeover:

  • Detail palm sander and normal sandpaper to get into small crevices
  • Rags (general clean up cloths, and old rags or socks for applying the stain)
  • Tack cloths (the tack cloths are wonderful for cleaning all evidence of sanding dust before staining)
  • A paint brush and high-density foam roller (for application of the conditioner and polyurethane topcoat)
  • Pre-stain wood conditioner
  • Oil-based stain (for this piece I chose English Chestnut by Minwax)
  • Gloss polyurethane

An extraordinary amount of sanding went into eliminating the damage that had existed in the top surface. Scratches are relatively easy to cure, but you never know how bad the water damage is until you start sanding deep, as evidenced by this progress photo:

How to refinish furniture with scratches and water damage.

Elbow grease and a few more courses of low-grit sandpaper (80-120) helped to transform the surface of the sideboard into a raw wood state and eliminate the visible water rings. You might find that your water damage runs deeper – every case is different. Read more

Pretty Handy Girl Living Room Reveal | Pretty Handy Girl

Cory Rolling Storage Ottoman from La-Z-Boy | Pretty Handy Girl

I’m so excited to finally reveal our living room makeover to you. I partnered with La-Z-Boy to furnish our living room almost exclusively with La-Z-Boy furniture and accessories. The furniture from La-Z-Boy arrived a while ago, but the rug was backordered for several months. My La-Z-Boy in store designer asked me twice if I wanted to chose another rug, but I’m so glad I decided to wait. I love the rug and can honestly say that it was well worth the wait!

Before we get to the tour, I think it’s only fair to show you a few pictures of the progression of the living room over the years. About a year after we bought the house in 2007, I painted the walls a lighter sage green and added sconces. We also paid a contractor to double the width of the opening to the kitchen. That made a huge difference. You can see the missing flooring where the small opening used to be below:

doorwayopenedup

The sofa was a hand-me-down from my Godfather’s parents.

Xmasmorning

Underneath the red slipcover was this fabulously reupholstered sofa. Can you tell what year I re-covered it?

plaid_sofa

Ummm, hello 1990’s hunter green plaid. I don’t have a photo, but under this plaid monster is the original fabric from the 60’s. It was a floral woven tapestry fabric. I still can’t believe we sat on this sofa that was over 50 years old. It was hard as a rock.

In 2009, I pulled up the wall-to-wall carpeting and installed antique heart pine wood flooring. I also painted the previously painted white fireplace to look like brick again.  You read that right, the brick is painted!

livingroomdone2

In 2011, I covered the sofa with a new slipcover, but it was still the same uncomfortable hard sofa. We also tried positioning the sofa at an angle in the room.

living_room_vertical

This past winter we moved the furniture around again and for the first time we felt that we had found an arrangement that worked for us.

Pretty Handy Girl's Holiday Home Tour 2014

If you recall, I took a little field trip to our local La-Z-Boy furniture gallery back in December. I met with Lexie, the designer, who was invaluable with her expertise and design advice. Then you all helped me by voting for your favorite fabric selection (big virtual kisses and hugs from me to you for that!)

The voting was a tie, so I combined fabrics from the two winners and ultimately chose this combination:

La-Z-Boy Living Room Mood Board | Pretty Handy Girl

Ready to see how they look in the living room? Are you telling me to shut up already and get to the reveal? Your wish is my command, here is our living room reveal:

(I’ve included affiliate links for your convenience. I earn a small percentage from a purchase using these links. There is no additional cost to you. You can read more about affiliate links here.)

Read more

Tips for Creating a Gallery Wall | Pretty Handy Girl

12 Tips to Create the Perfect Gallery Wall | Pretty Handy Girl

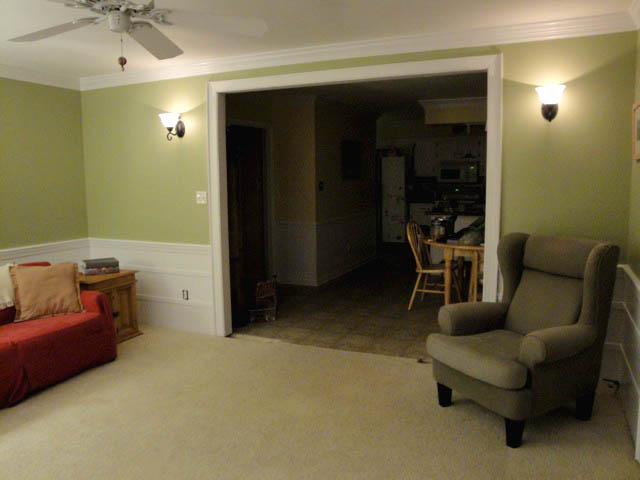
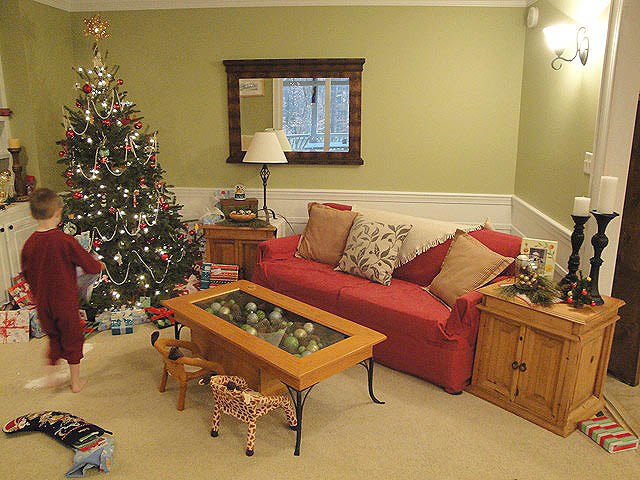
When you Don’t Love It, a room in your home can become a place to avoid. Last week I hung our TV on the wall in our living room, but was cringing because that big fat TV was screaming “Look at me! Look at me!” It was killing the cozy vibe I wanted to create in our room. This is the place that my family likes to chillax. It’s the room where wrestling matches happen and the room where we curl up by the fire. We watch movies and sports in this spot.  But, frankly, I didn’t love it. When I looked in the living room all I could see was a giant black elephant in the room.

Tips for Creating a Gallery Wall | Pretty Handy Girl

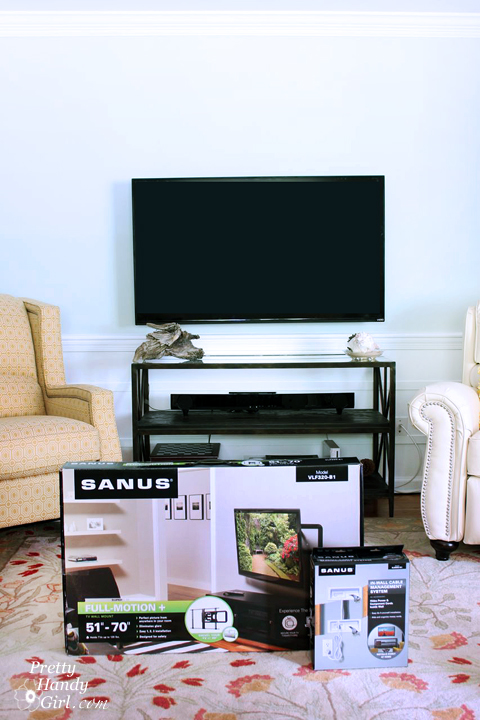
I agreed to let Pretty Handsome Guy pick out a big flat screen TV. But, I secretly devised a plan to keep me happy and let Handsome Guy have his big honkin’ TV.

Tips for Creating a Gallery Wall | Pretty Handy Girl

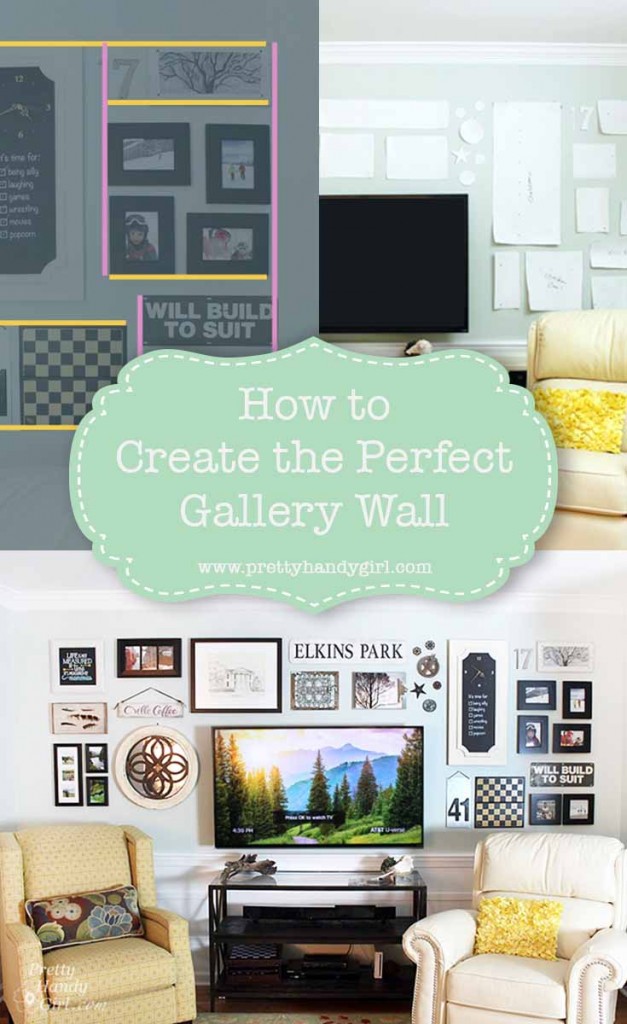
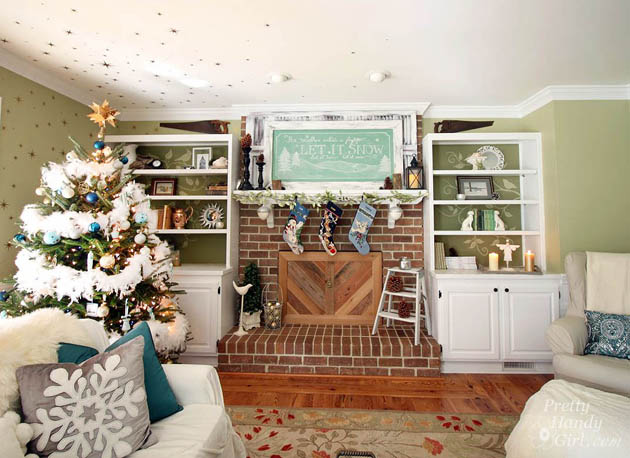
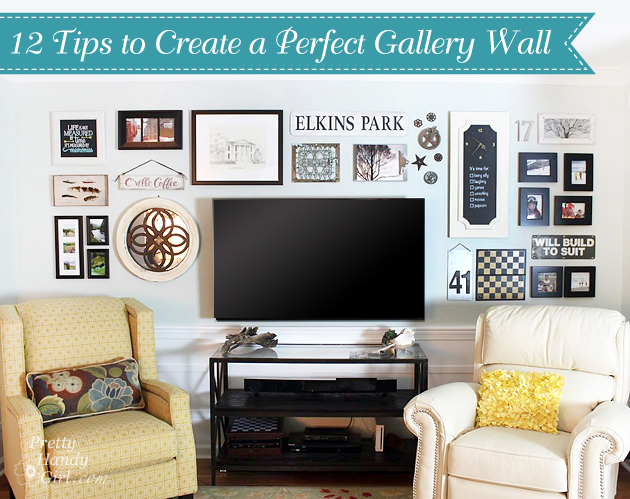
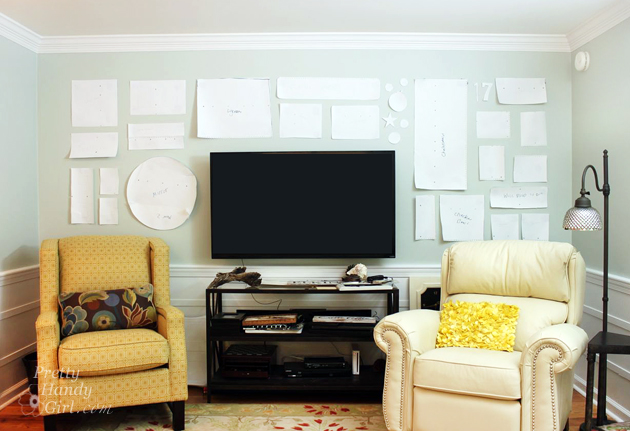
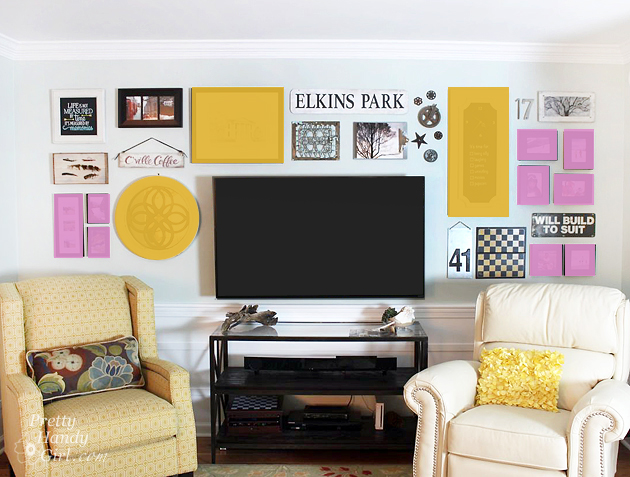
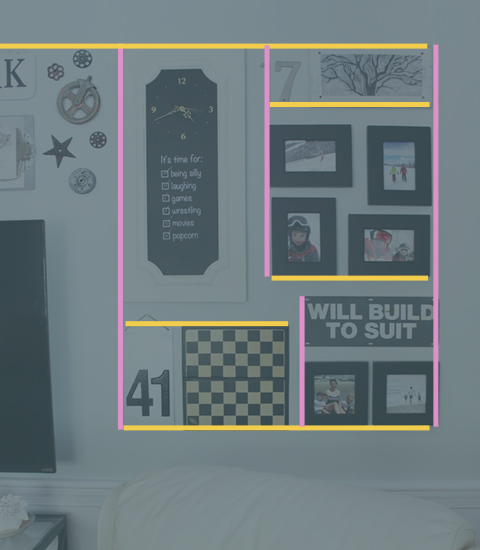
And I Created a Perfect Gallery Wall around the TV to de-emphasize its size and dominance in the room.

15 Tips for Creating the Perfect Gallery Wall:

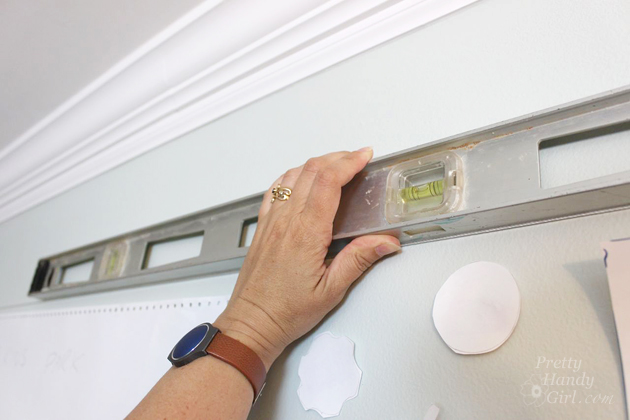
#1 Start with a Level Line

Determine the area you want to install your gallery wall. Measure down from your crown molding or ceiling to the top of the gallery area.

Tips for Creating a Gallery Wall | Pretty Handy Girl

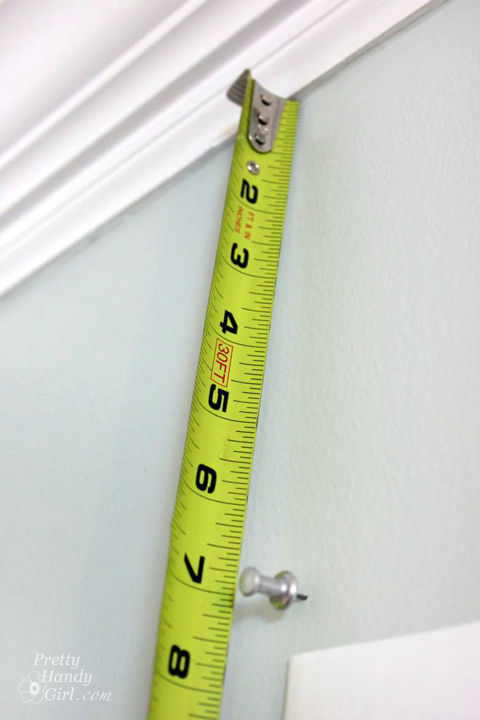
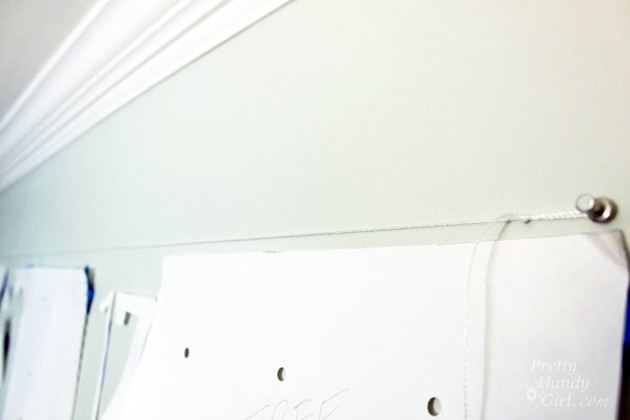
Insert a thumbtack or pin at that height. Run a piece of string from the thumbtack along the width of your gallery wall space. (It helps to have a friend hold the free end of the string, but you can use a piece of painter’s tape to hold it temporarily.)

Level the string and secure the opposite end with a thumbtack.

Tips for Creating a Gallery Wall | Pretty Handy Girl

Tips for Creating a Gallery Wall | Pretty Handy Girl

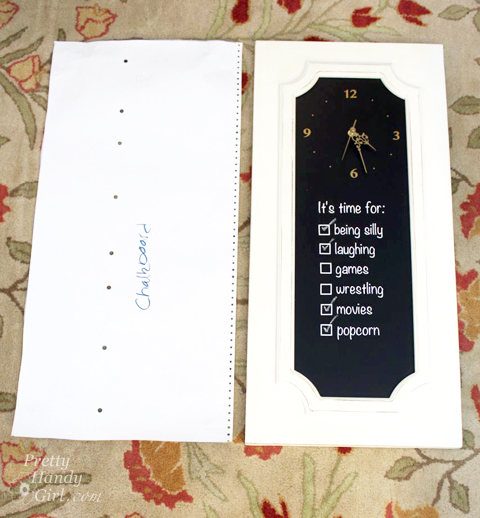
#2 Create Paper Templates

Pull together all your frames and art. Create a paper template for each object. (Craft paper, butcher block paper or old dot matrix printer paper works perfect for this task.)

Tips for Creating a Gallery Wall | Pretty Handy Girl

Use painter’s tape to secure the templates to the wall. Step back and look at the wall from across the room. Take a picture of the wall with your mobile device and look at the picture to see if you see any issues. Or face away from the wall and look at it in the mirror to look at the arrangement from another angle. Play with the templates until you Love It! I will be honest with you, this process takes a while. In the long run, you’ll love your gallery wall if you live with the arrangement for a few days before the final installation.

Tips for Creating a Gallery Wall | Pretty Handy Girl

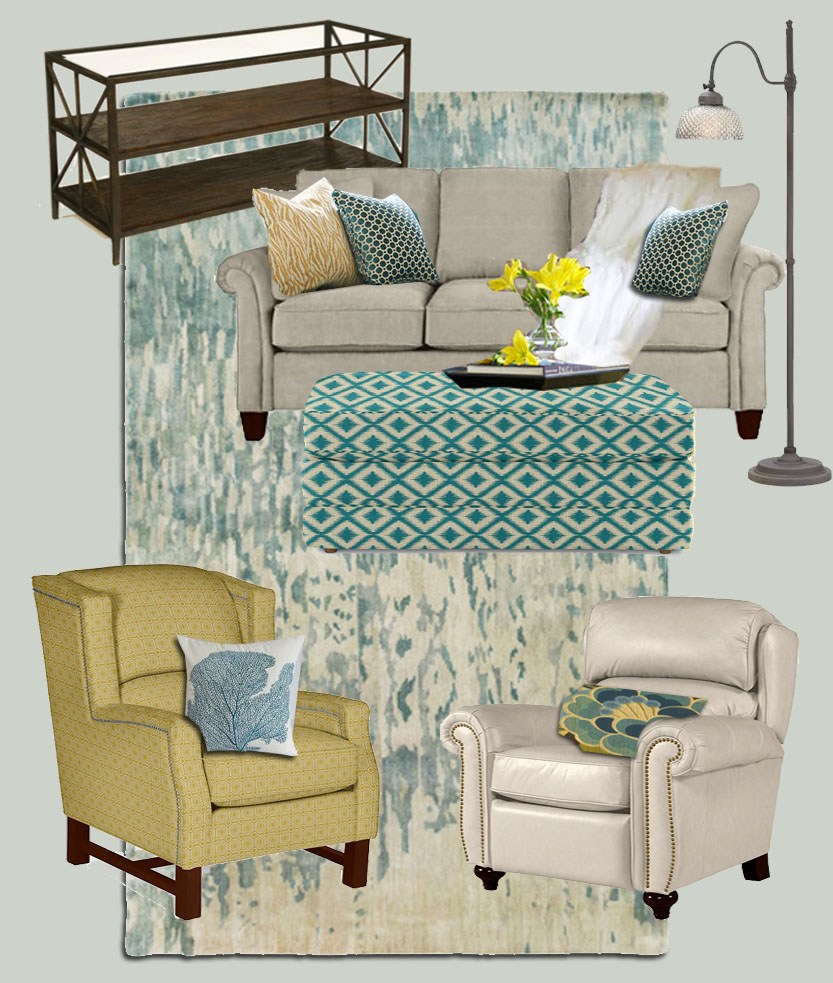
#3 Pick a Color Palette

Choosing a color palette of 2-3 colors will help you create a cohesive look and make it easy to create a visually pleasing gallery wall. The easiest palette to work with is black and white, because you can use black, white and a variety of grays.

Tips for Creating a Gallery Wall | Pretty Handy Girl

You can also add a bold color to the mix and know that everything works with black and white!

Tips for Creating a Gallery Wall | Pretty Handy Girl

#4 Use a Variety of Shapes and Sizes

For more visual interest, use a variety of shapes and sizes. Gallery walls that use the same frame for the entire collection can look stunning and orderly. But, for a more organic and eclectic gallery wall, feel free to play with many shapes and sizes. Your color palette of 2-3 colors will keep it looking unified.

Tips for Creating a Gallery Wall | Pretty Handy Girl

#5 Balance Larger and Smaller Objects

When working with several shapes and sizes, it’s important to balance your arrangement. Space larger items away from each other and preferably on opposite sides. Pay attention to collections of smaller objects as well. Your wall would look unbalanced if all the large objects were on one side and all the small art on the other.

Tips for Creating a Gallery Wall | Pretty Handy Girl

While spacing the object templates, use the trick in #2 by taking a photo or using a mirror while playing with placement.

#6 Use Consistent Spacing and Align Edges

Use consistent spacing between your art. Smaller collections can visually work as one large object if you space them closer together. But, use a larger space outside the collection that equal to the rest. Try to align horizontal or vertical edges with adjacent art. They don’t have to be hung in a uniform grid, but creating a shared horizontal or vertical line can help create a pleasing installation.

Tips for Creating a Gallery Wall | Pretty Handy Girl

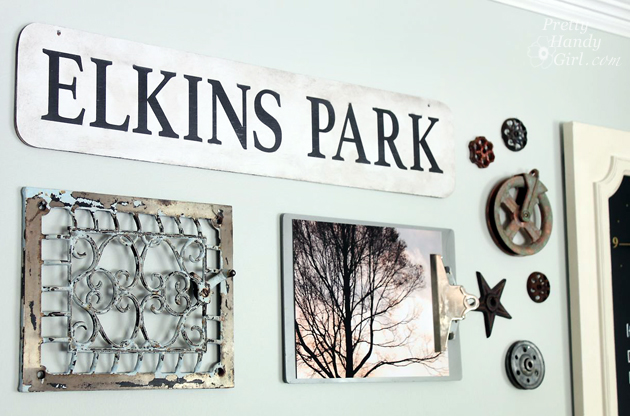
#7 Group Like Objects

As mentioned in #6, you can group smaller objects together to fill a larger space. Use objects of the same color, material or shape together as a collection.
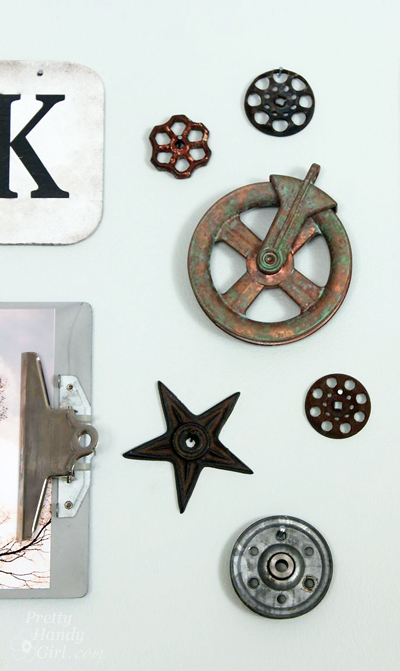
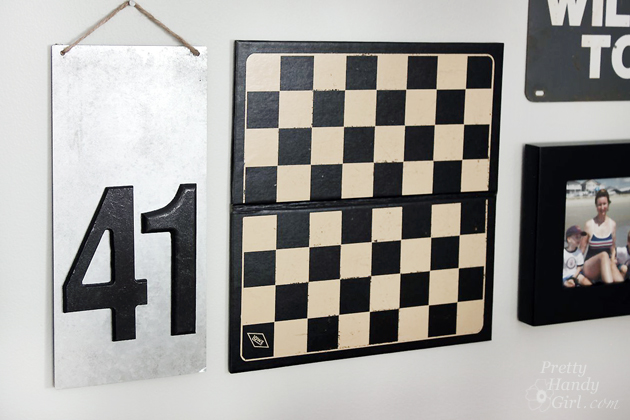
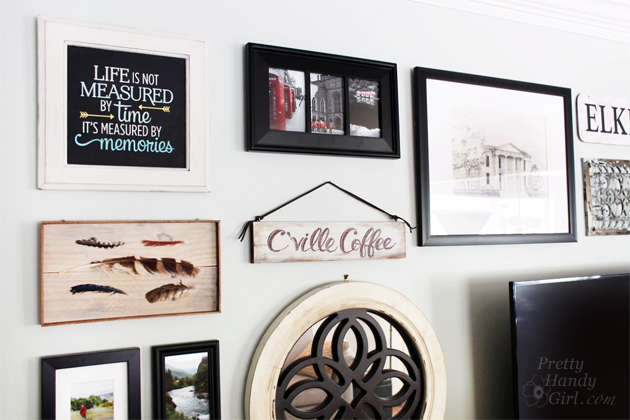
Tips for Creating a Gallery Wall | Pretty Handy Girl

#8 Mix Textures

For lots of visual interest, introduce several different materials and textures into your gallery wall. Break up black frames with wooden art, metal signs and even natural elements like feathers, branches, found objects, etc. The sky wall is the limit (ha, ha). Have fun using your imagination.

Tips for Creating a Gallery Wall | Pretty Handy Girl

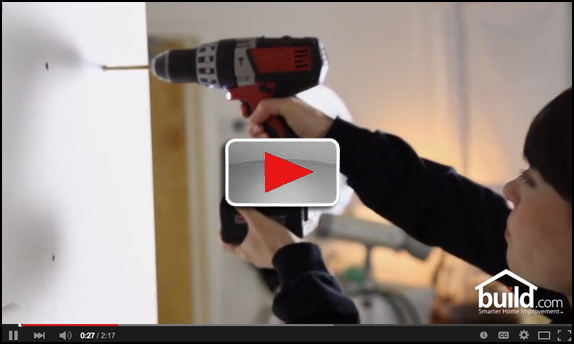
#9 Use Good Wall Anchors, Hangers, and Bumpers

While hanging artwork, be sure to use picture hangers or anchors strong enough to hold your artwork. It’s so important to use a hanging hook or anchor that is designed to hold more than your art weighs. Watch the video on “Testing Drywall Anchors” to see why this is so important:

video-screen-shot-buildcom

Way to go Build.com for performing this test!

#10 Mark Hanging Hardware on Templates

This trick will save you time and save your walls from turning into swiss cheese! Set your template on the back of your art (the back side should be up) and poke a hole with a pencil where the hanging hooks, holes or wires are. Hang your template back on the wall.

Tips for Creating a Gallery Wall | Pretty Handy Girl

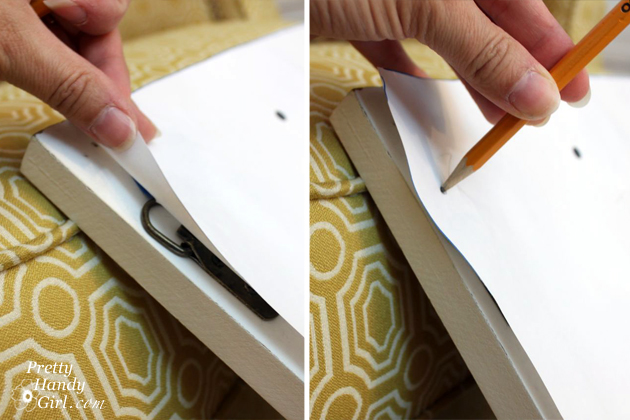
#11 Hanging Your Art Perfectly

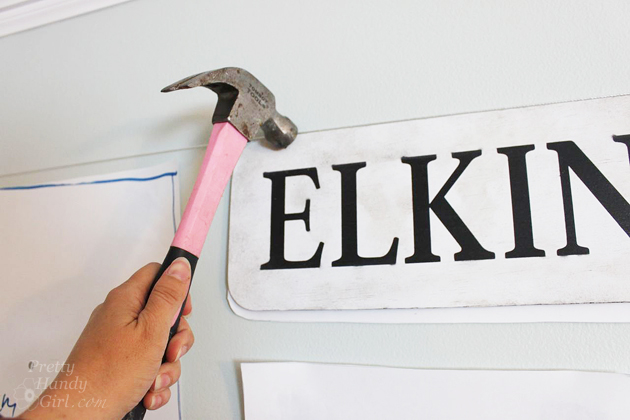
Ready to hang your art perfectly the first time? Grab your picture hanging hardware, nails and a hammer.

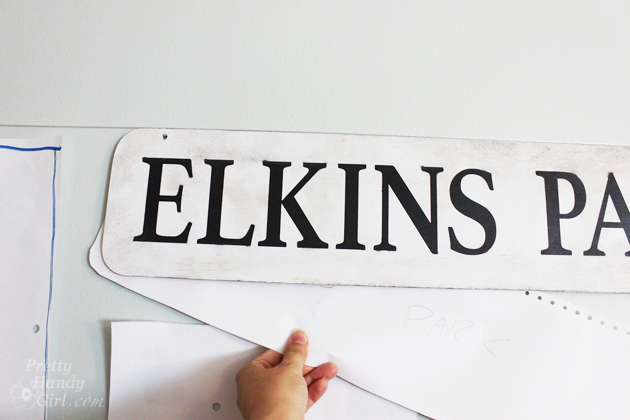
Make sure that each template is level. For art that has visible holes, line up the art on top of the template. Hammer the nail or hook through the hole.

Tips for Creating a Gallery Wall | Pretty Handy Girl

Then simply pull and rip the template off the wall from beneath the art.

Tips for Creating a Gallery Wall | Pretty Handy Girl

For hanging hardware that is hidden. Hammer your picture hardware through the template lining up the hook or nail with the hole you poked through in tip #10.

Tips for Creating a Gallery Wall | Pretty Handy Girl

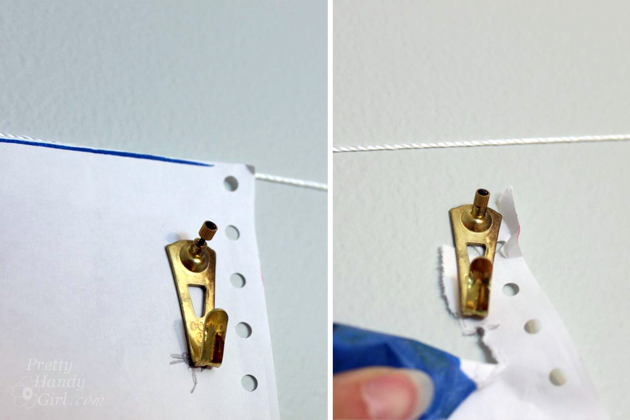
Tear the template off after you have your hangers installed. Hang your art on the hooks perfectly the first time!
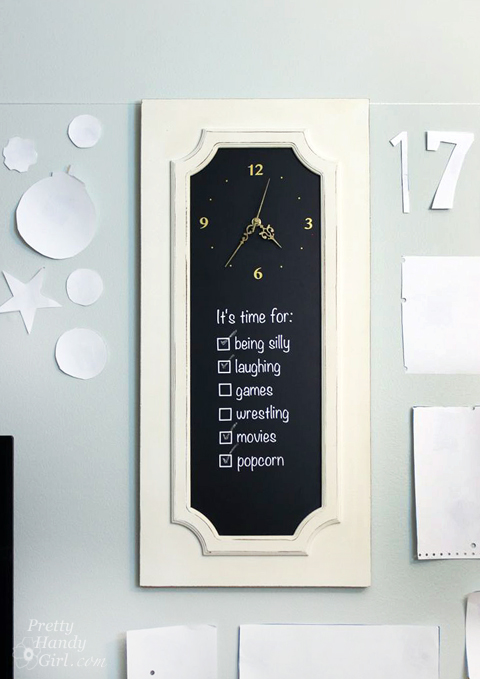
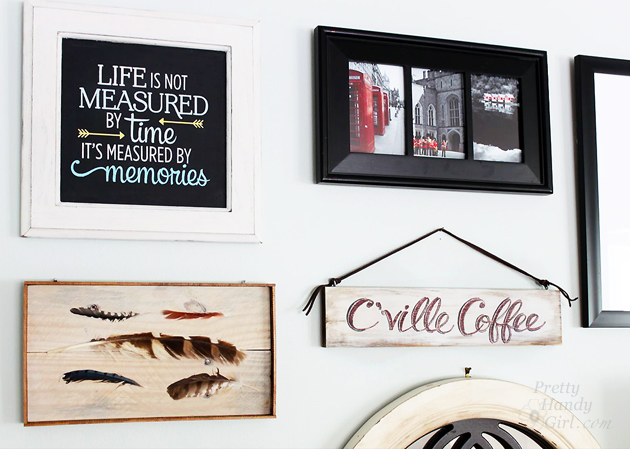
Tips for Creating a Gallery Wall | Pretty Handy Girl

#12 Make it Personal

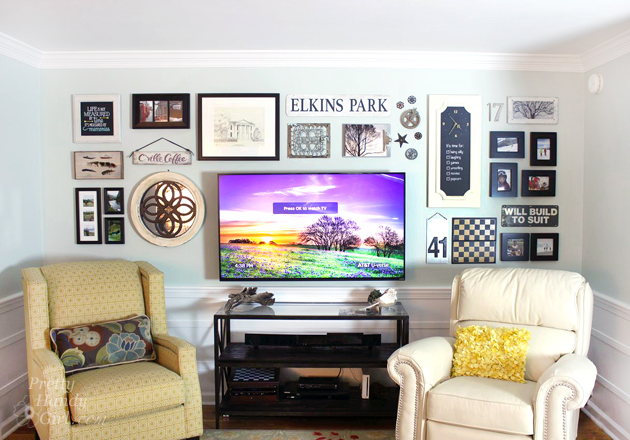
Make your gallery wall a reflection of you! Use vacation photos, messages and art that has meaning to you and your family.

Tips for Creating a Gallery Wall | Pretty Handy Girl

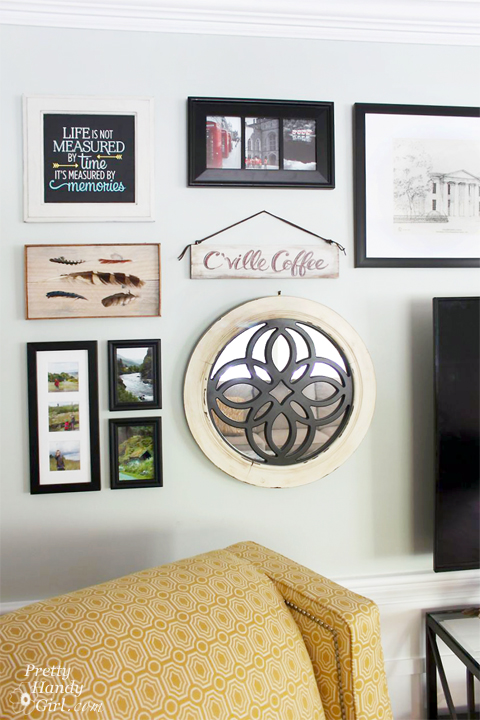
I smile every time I walk into our living room. It is filled with memories and art that makes me happy.

Tips for Creating a Gallery Wall | Pretty Handy Girl

PHGFancySign

Disclosure: Thank you to Build.com for sponsoring today’s post and inspiring me to discover my #LoveItMoment 

Pin for later!

Lowe's Spring Makeover Reveal Tour | Pretty Handy Girl

Have you been following all the Lowe’s Spring Makeovers? There were 10 in all, and each one is truly a miraculous transformation. If you remember, there were 10 bloggers who were sent to 10 different areas that were hardest hit by this past winter. We all combed through hundreds of applications to select 10 homeowners who deserved a fantastic makeover. There were challenges; there were lots of Lowe’s heroes who stepped up to help with those challenges; and there were lots of happy tears in the end. You’ll definitely enjoy reading each story and seeing the reveal!

If you’re ready to start the tour, grab a cold drink and head this way—>>> Read more