While writing this post, I thought about some alternate titles.
Here are some of the contenders:
1. How to entertain your kids while installing hard wood floors
2. How to cover your screened porch with debris from demolition
3. When you really should rent a dumpster
4. How to signify that Christmas is over
5. When getting a good deal on antique flooring from Craig’s List really isn’t a “good deal”
6. How to convince Pretty Handsome Guy that I really need a table saw
7. How to use up all of your husband’s Christmas vacation time
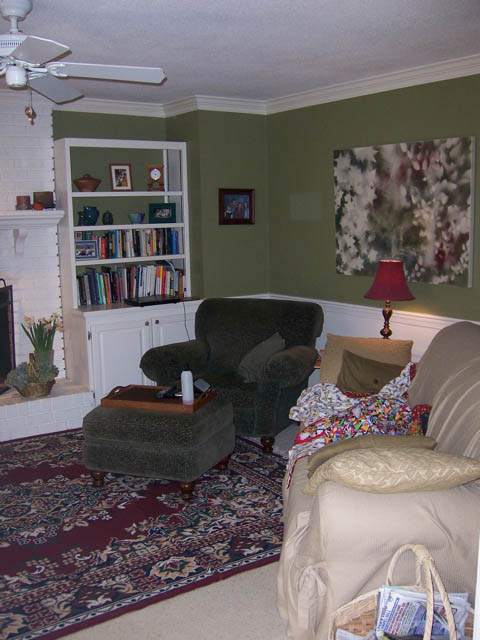
I hope you’ve enjoyed our adventures while renovating our living room. This is the fourth step in the ever growing series renovating our living room. Previous parts can be read here:
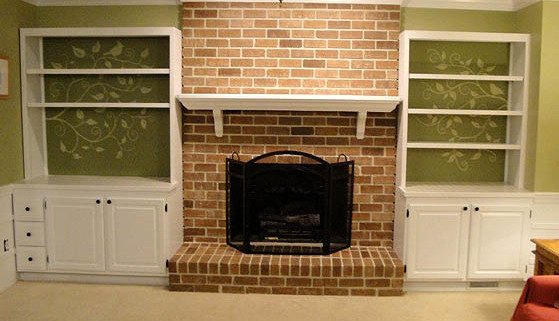
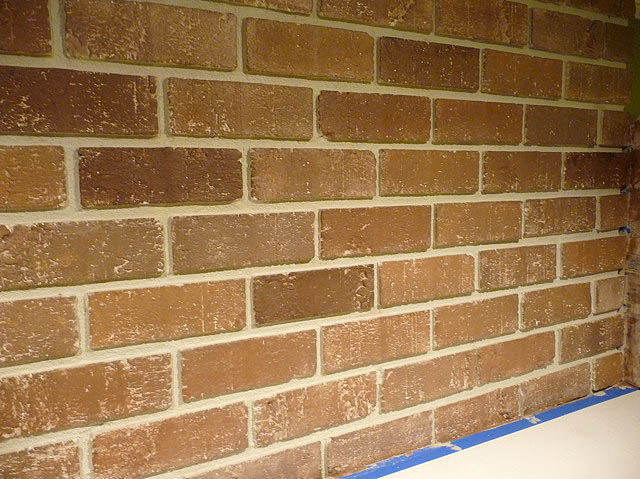
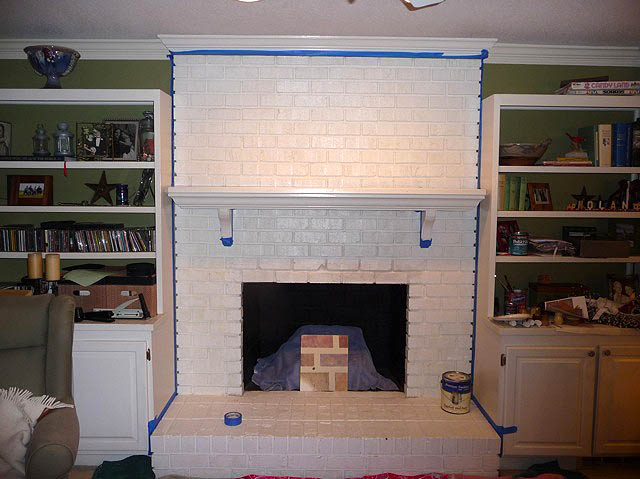
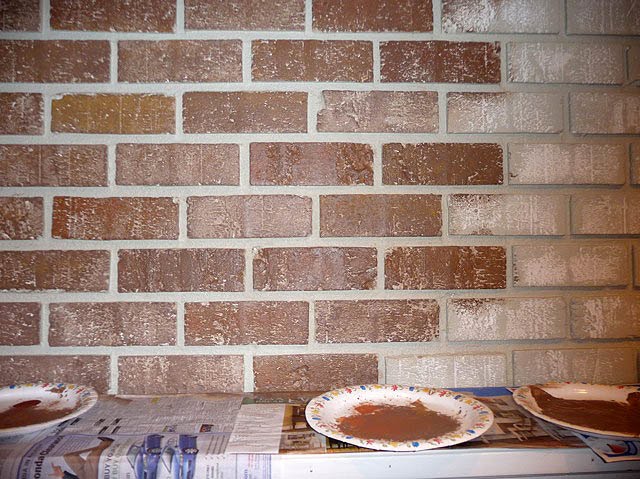
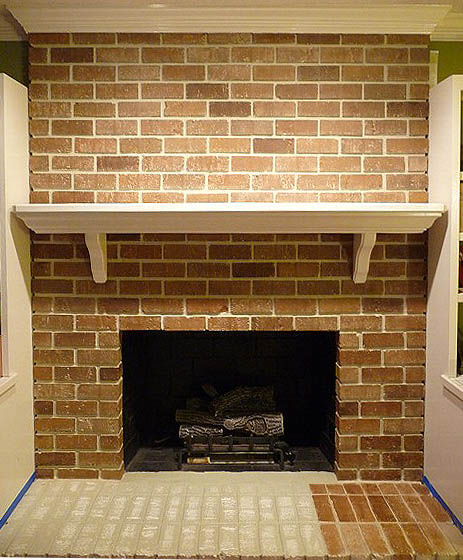
1. Faux painting brick over a previously painted white brick fireplace
2. Lightening up a room in 5 steps
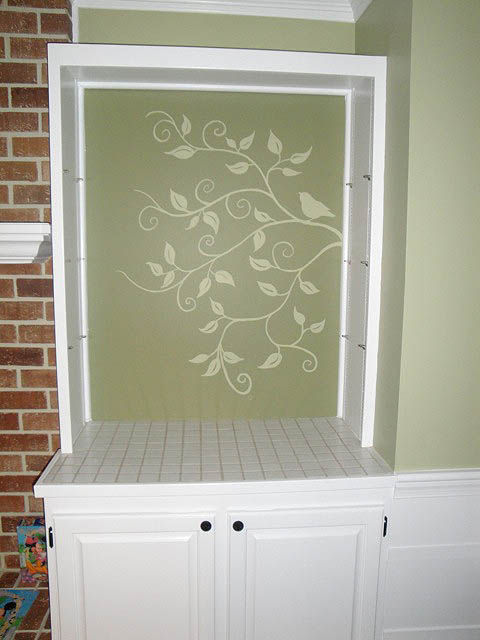
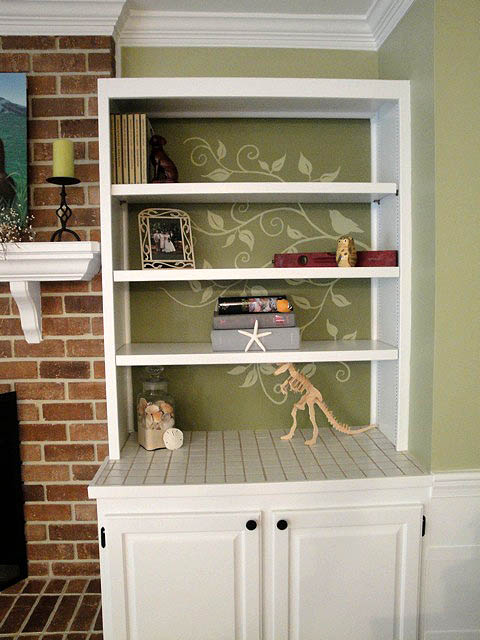
3. Painting decorative graphics on a wall
4. Preparing to Install Antique Heart Pine Floors (and the Craig’s List source)
5. Installing Heart Pine Floors and the Final Reveal
And now, without further delay,
4. Preparing to Install Antique Heart Pine Floors (and our amazing Craig’s List source!)
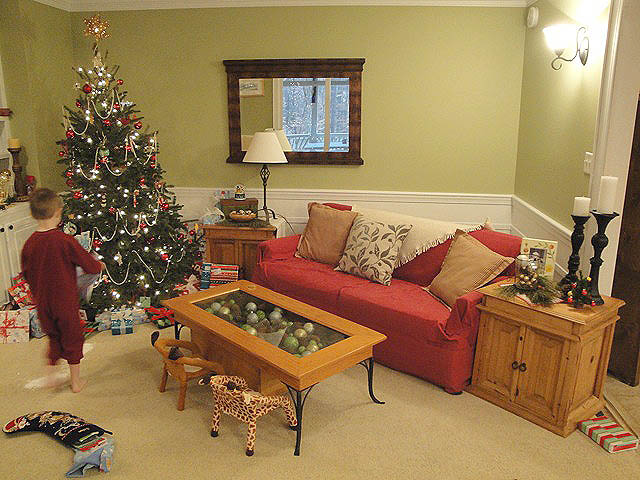
When we last left the Pretty Handy Girl Family the stockings were hung with care and Santa had left his tell tale magic snow boot prints.
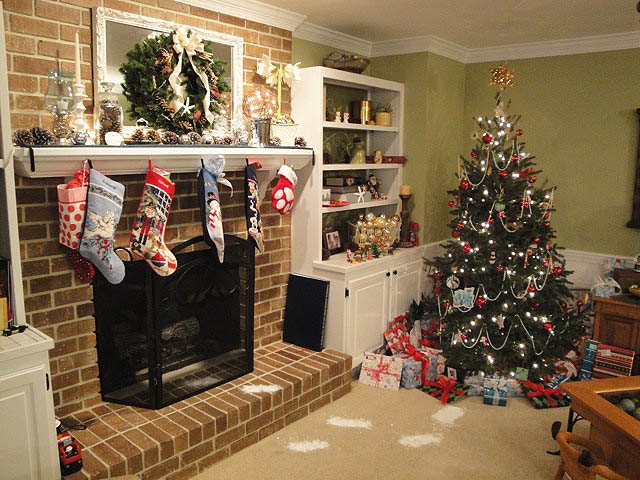
One day later, December 26th, and we threw out the tree, put away all the decorations, emptied the room and let the demolition begin!
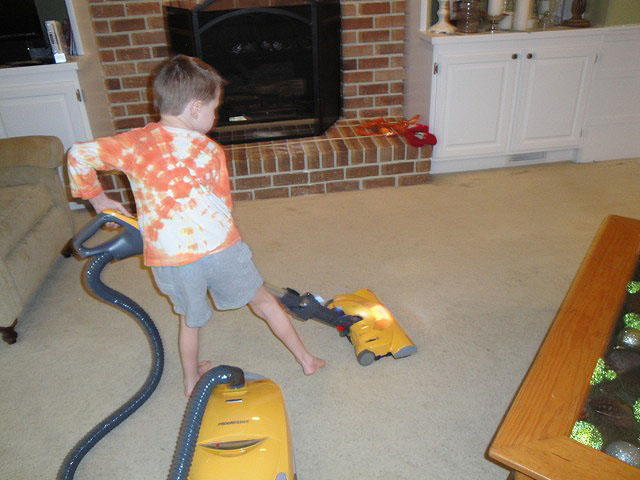
Our living room rug had seen 3 families, 3 dogs, and 6 children. Do I need to say more? It was time to say goodbye to that stained carpet. It seemed like a good idea to vacuum the rug before we removed it. A complete waste of time when we saw the dirt underneath, but whatever, if my son wants to vacuum, who am I to stop him!
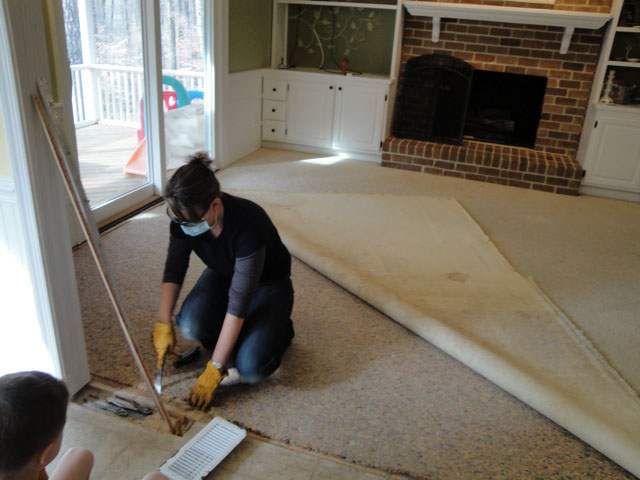
To remove carpet, grab some plyers and start pulling up the carpeting from the edges. Then, take a utility knife and cut the carpet in three foot strips, roll them up, try not to gag as you see the stains underneath, and toss them out (we tossed them on the porch adjacent to the living room.) You will notice that I was wearing a mask. I highly recommend wearing gloves, mask and while you’re at it, maybe a hazmat suit!

For some reason, this activity was irresistible to our two boys (notice the cheering section with their chairs pulled up for a front row seat.)
We were thoroughly disgusted to find that one of the dogs (at least I think it was a dog) had been using the fireplace as a fire hydrant. The stench immediately released as we tore up the carpeting.
Next we removed tack strips with a hammer and pry bar and gloves (be careful not to get poked by those tacks! Ouch!) Removed the carpet padding by cutting it into strips too. Threw it on the porch.
We had standard under-layment (particle board) under our carpeting. This is that type of wood that is made of tiny chips of wood and it flakes very easily. You CANNOT nail a floor into this stuff (unless you want your floor to bow and squeak, don’t do it!) We used a long digging bar (see below) to get some leverage under the under-layment.
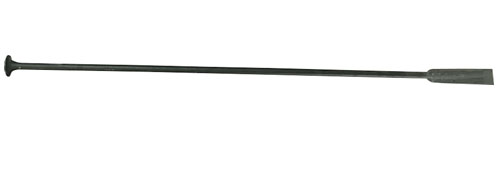 |
| Heavy 6′ long digging bar |
The boards broke into small 2′ chunks which we also threw onto the porch.

It was at this moment, (while gazing at the 3′ high pile of debris) that we realized that maybe we should have rented a dumpster. I wondered if we would ever see our porch floor again!
Luckily, we were able to fit all the trash in the back of a neighbor’s truck. Pretty Handsome Guy and our oldest son made a trip to the dump. I was told it was quite an experience driving up Mt. Trashmore and pushing the debris out the back as seagulls swooped and swarmed. Yuck!
Back at home, I removed all the nails leftover from the particle board and swept and vacuumed the floor.
After we cleared the porch, we started setting up shop and taking inventory of what we needed for the installation.
- Several sheets of 3/4″ plywood to build up our subfloor to the same height as the kitchen
- Screws
- Tar paper to act as a vapor barrier
- Chalk line and chalk (already had)
- Staple gun and staples (already had)
- Rent a pneumatic floor nailer and hammer
- Flooring nails
- Miter Saw (check)
- Table Saw (hmmmm, I didn’t have one, and I would probably need one to rip a board or two when I got to the end of the room. Let’s just say that I got my Christmas present a few days after Christmas!)
 |
| Courtesy of HomeDepot.com: order your own here! |
We began by measuring the floor and cutting our 4’x8′ sheets of plywood to fit in the room. This is a small room, so we only needed 6.5 sheets of plywood. Then we screwed about a gazillion 500 screws into the plywood until it was squeak-free and wouldn’t move in an earthquake.
How did we ensure that we had removed all the squeaks? Well, we had our oldest son test it out with his new roller skates he got for Christmas.

After the sub floor was built up, we stapled down tar paper over the whole floor. Did you know that tar paper can also become an instant blackboard for two boys? Scribbles and race tracks instantly appeared.

So, speaking of scribbles, you may notice some writing on the left hand side of the picture below. I always like to leave a little note or a story about the renovation for some future homeowner to find. (Although, curse the person that even thinks of removing my beautiful floors!)

This is the message I left:
“These heart pine floors were laid December 2009. The boards were reclaimed from the second floor of an old farmhouse just north of Oxford, NC in Virginia. The nails are antique square cut nails leftover from the construction of my grandfather’s house in Troy, NY.”
This is only part of the whole story about these boards. We have wide plank heart pine floors in most of our downstairs. They are original to the house, and add so much character! We wanted to try to keep the integrity of the house when we added wood floors in the living room, so I had spent hours scouring the web to find a source for wide plank heart pine flooring. The cost for reclaimed lumber with the same width was crazy expensive! $10 – $12 per linear foot. Worth every penny I’m sure, but unless we won the lottery, those floors were going to have to wait.
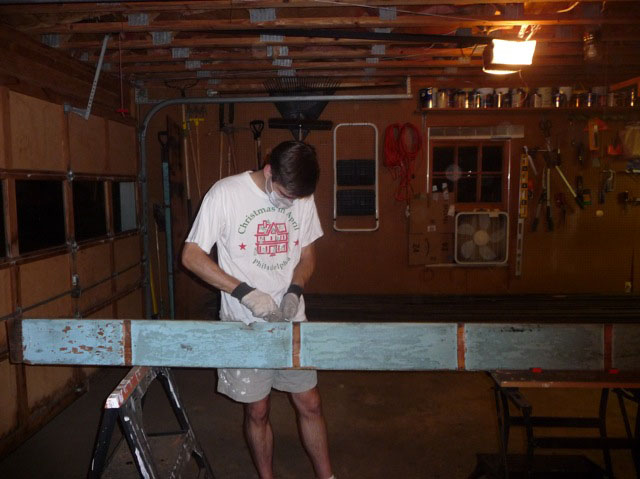
One day I stumbled across some wide plank heart pine lumber on Craig’s List. Yes, Craig’s List! I agreed to buy the lumber, basically sight unseen because the seller hauled the lumber to our house from Virginia (about an hour and a half away.) My heart sank when he pulled in our driveway. This lumber was filthy! Covered in dirt and grime. I really thought I might be getting ripped off. But, then he pulled one board from the trailer that he had sanded down and showed it to me. That one board was beautiful. It was a gorgeous amber color and had pretty knots in it. He told me that he demolishes old buildings and the owners let him sell anything he can salvage. He promised that this lumber was probably gorgeous underneath the dirt and grime. I took a leap of faith and paid for it.
The wood sat in our garage for months until we finally decided to get the ball rolling. We started by scraping the tongue and grooves of the wood. 100 years of dirt and grime poured from the cavities in the boards. Then we removed as many nails as we could find. These were not round nails, they were hand cut and forged square nails.

3 Days of scraping, prying and pulling left a dirty floor and a dirty Pretty Handy Girl and Pretty Handsome Guy.
Next we sent the lumber off with our handyman, who safely removed all the lead paint from the one side of the wood. These were floor boards from the second floor of a farm house, the owners had painted their exposed ceilings (the undersides of the floor boards!) Unfortunately, he wasn’t able to plane the wood (even the tops and bottoms of boards by shaving), since the wax used to finish the floors 100 years ago kept gumming up his planer. (Thank you Steve Bartholomew for your hours of labor on our wood and the numerous blades you ruined for us.)
Enter one fabulous woodworker, Mark Kegler from Kegler’s Woodwerks. He and his father were so wonderful and gave me many tips and words of encouragement since this was my first time installing wood floors. They planed the wood and put new tongue and groove on the boards, which I know helped my installation process tremendously!
When Mark and his father returned the wood to us, I was weak in the knees. I have never seen wood like this before. The patterns, wood grain and coloring was BEAUTIFUL!!! I knew then that the time, effort, and extra money spent planing and removing the paint was well worth it. We had saved a piece of history and preserved wood that few will see in today’s lumber industry.
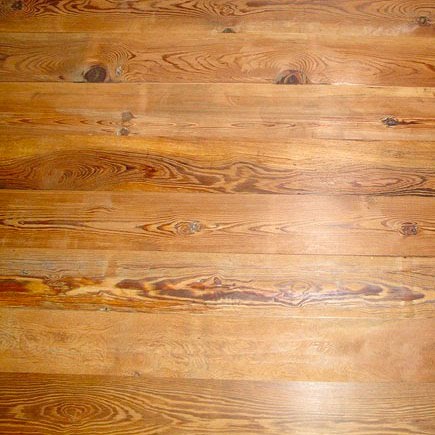 |
| I love the grain variations! |
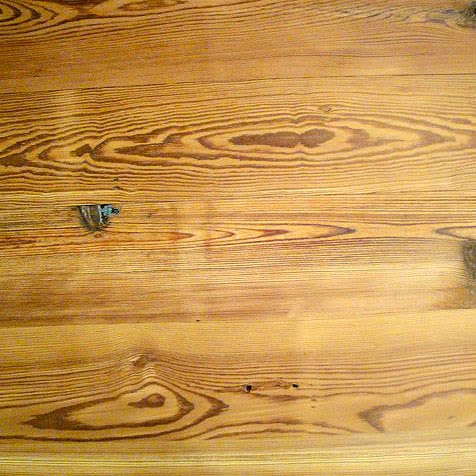 |
| See just a hint of the paint still in the knot. |
 |
| Some of the grain has a bluish cast to it! |
Next up on the blog: How to keep 2 kids out of the room you are working on. And the process for installing wood floors, sanding and final reveal!