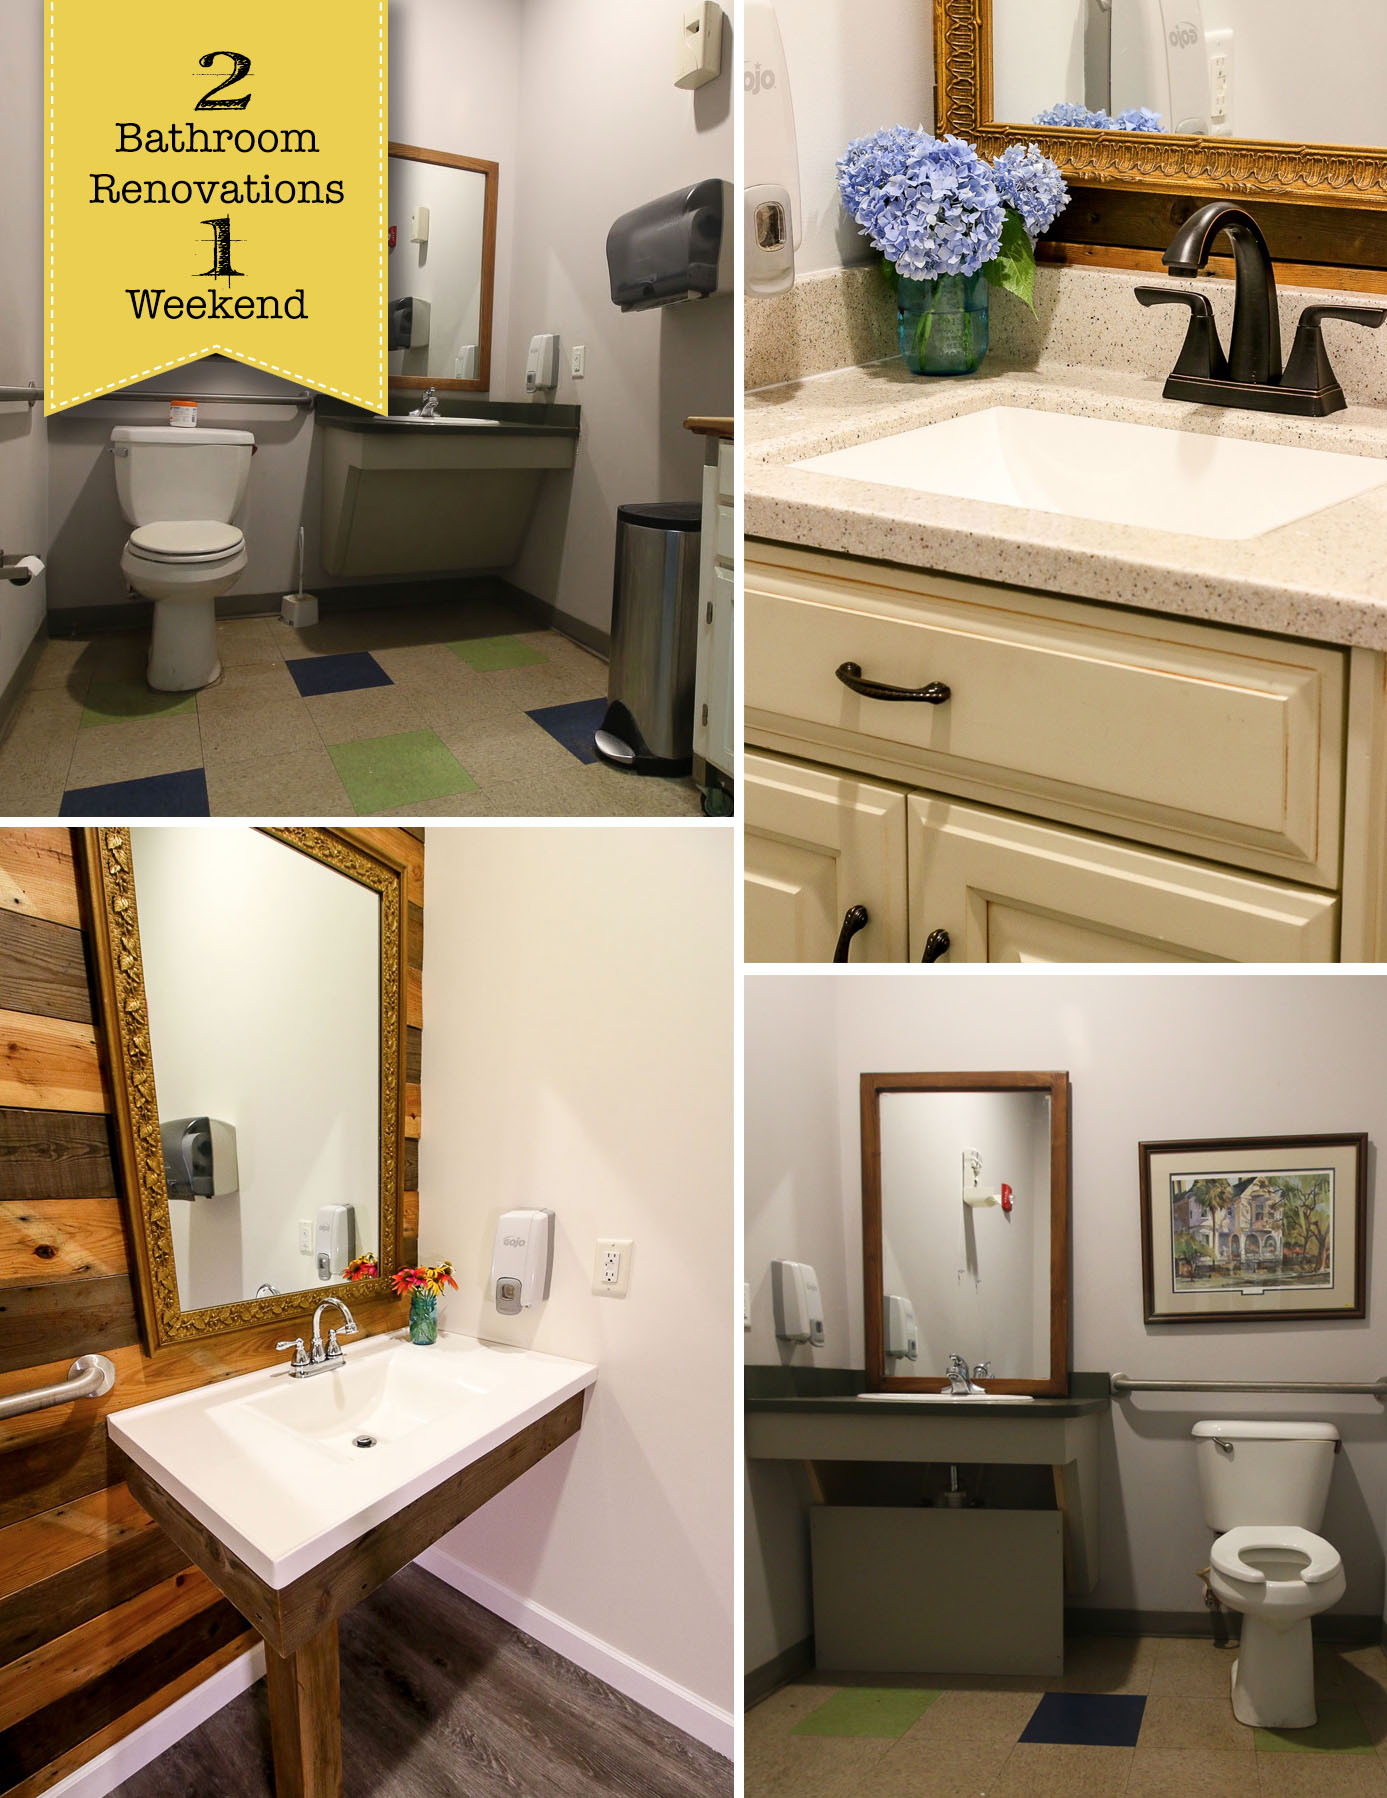
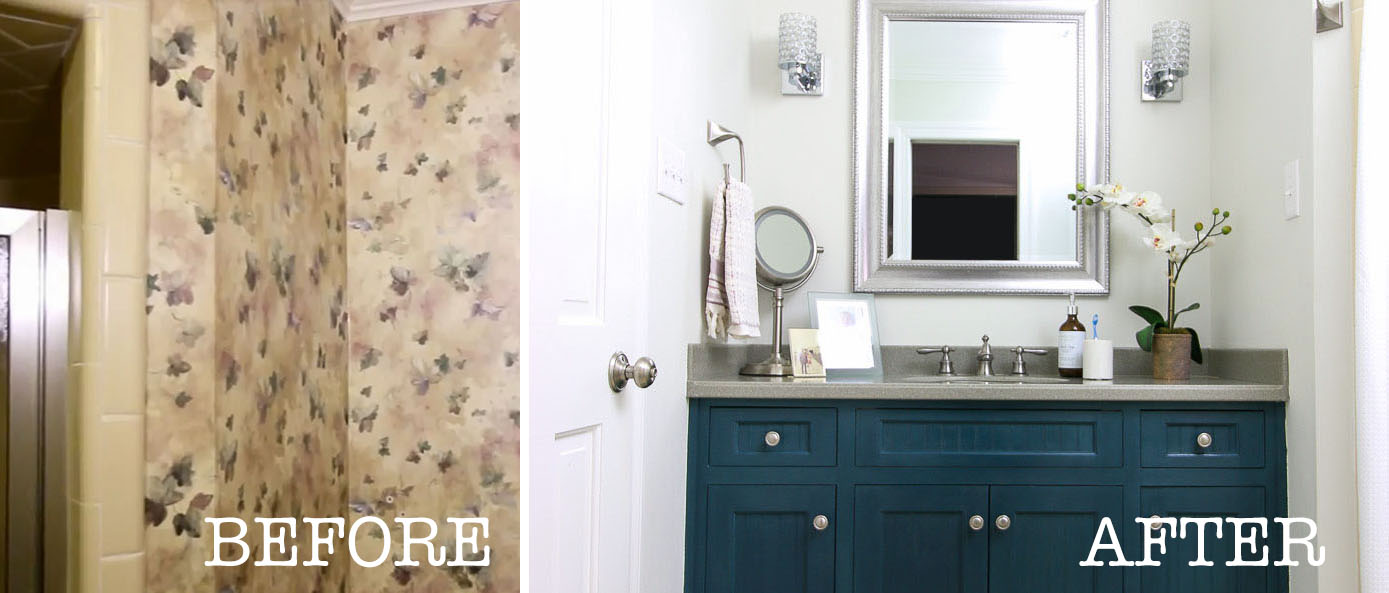
Ever want to surprise your spouse with a budget-friendly master bathroom makeover for under $500? You won’t believe this before and after transformation my friend Beth and I pulled off over a weekend.

Surprise Bathroom Makeover Under $500
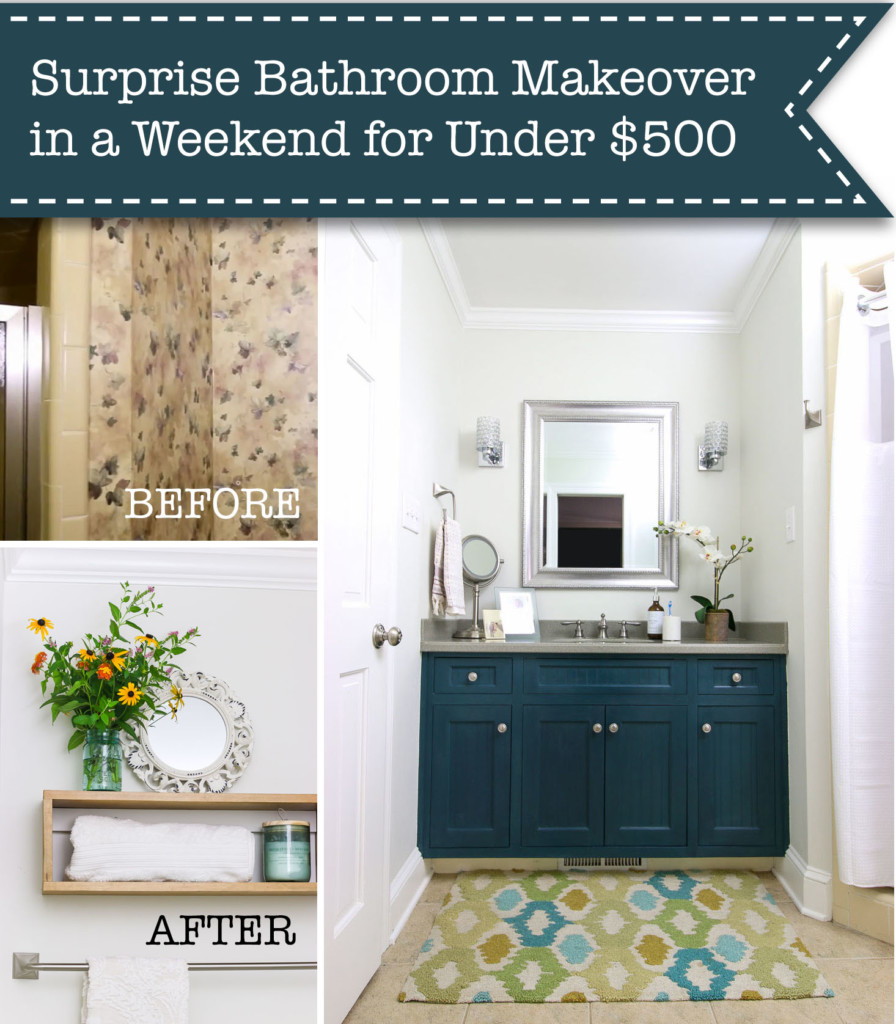
A Surprise Bathroom Makeover Under $500

My friends at GREAT STUFFâ„¢ sponsored this project, and I can’t wait to share a new product they recently released. Be sure to read to the end to find out what it is!

My good friend Beth, who I’ve known for over a decade, is my frequent walking buddy. Which means we pretty much discuss anything and everything on our walks. During one of our neighborhood strolls, we were discussing projects we wanted to work on next. Beth told me her husband, John, was so fed up with their bathroom, he’d been shaving in the kids’ bathroom. Upon further questioning, I learned the light over the mirror in their bathroom had stopped working a while ago. The light remained broken as Beth was plunged into some challenging family issues. Now that things had resolved with her family, she was ready to fix the bathroom light and maybe give the room a little makeover.

The next words out of Beth’s mouth were like a match igniting my desire to plunge headfirst into a new DIY project.

“John and the kids are going away this weekend and I’m staying here,” she said.

Instantly I volunteered to help her surprise her husband with a bathroom makeover. Little did I know, we’d have a lot of work to cram into one weekend.  But, hey, what’s more exciting than a surprise makeover? Am I right?

Challenges in the Small Bathroom:

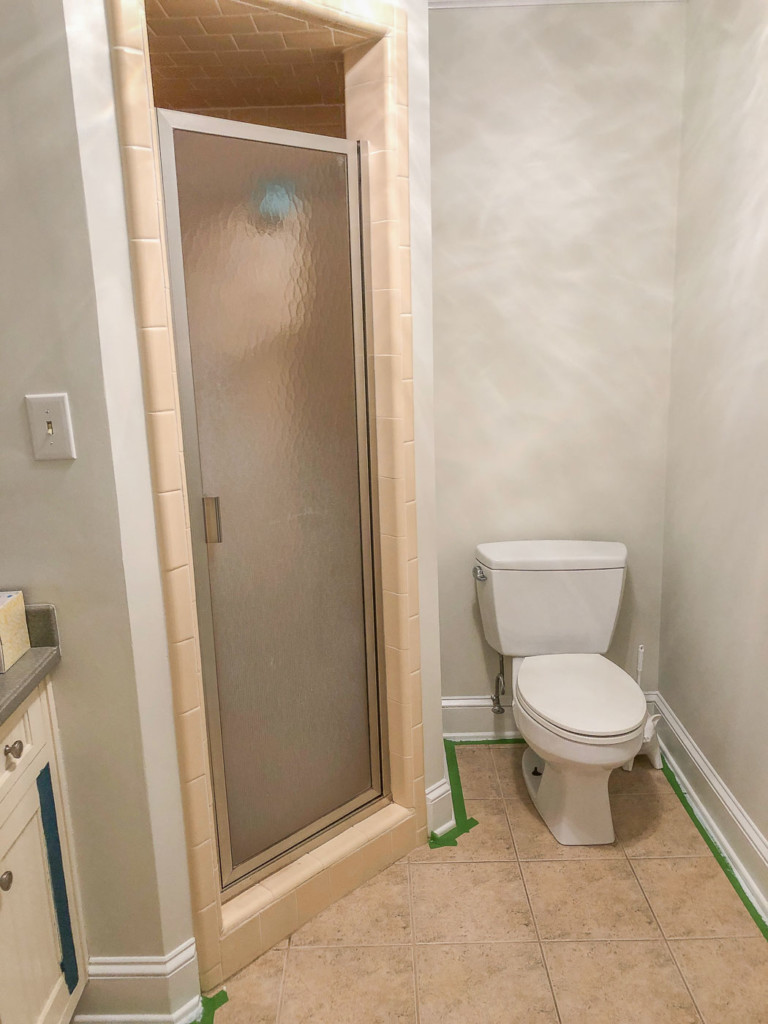
Before the big work weekend, I stopped by Beth’s house to assess the situation. Their bathroom had some issues, the first being the lack of lighting over the sink. The second was a dimly lit ceiling fixture that could only take one lightbulb. The exhaust fan worked, but it was loud and had a discolored cover.

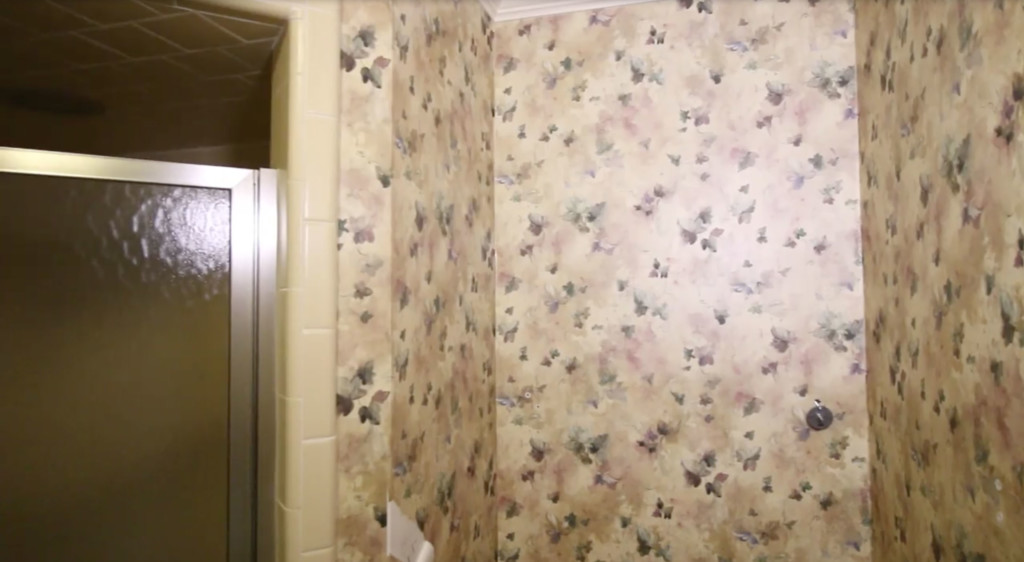
By far, the worst feature in the bathroom was the English ivy wallpaper. It was too busy, too dreary, and I don’t even think an English noblewoman would want it in her home! Luckily, Beth was on board with stripping it. With the wallpaper gone, we could give the bathroom an impactful makeover with paint, new lighting, and some new hardware. Beth was on a tight budget (she didn’t want to alert her husband to our surprise makeover), so she kept her purchases to just under $500.

A Surprise Bathroom Makeover for under $500

It’s time to get busy on Beth’s bathroom. Just remember it’s a surprise, so don’t tell her hubby. You can come join us by watching the video (but be prepared to help us strip wallpaper.)

The Makeover Weekend Arrives:

On Friday morning I arrived at Beth’s ready to work and we got straight to stripping! Wallpaper, that is!

Did you know there are really only two types of wallpaper when it comes to removal?

  1. The Easy to Remove Kind
  2. The Pain in the A$$ (what idiot didn’t prime the drywall—oh screw it let’s just replace the drywall) Kind

I was incredibly relieved that someone primed under Beth’s bathroom wallpaper. Lucky for us, it came off fairly easily in big strips. I wish I could say the same about my house, we had wallpaper glued to the drywall (no primer between the two.) But, this means I’ve had lots of experience and a proven way to prepare the wallpaper to paint over (so you don’t see the seams and you never have to worry about it peeling).

Learn how to get rid of both kinds of wallpaper here!

A Solution for the Electrical Problem:

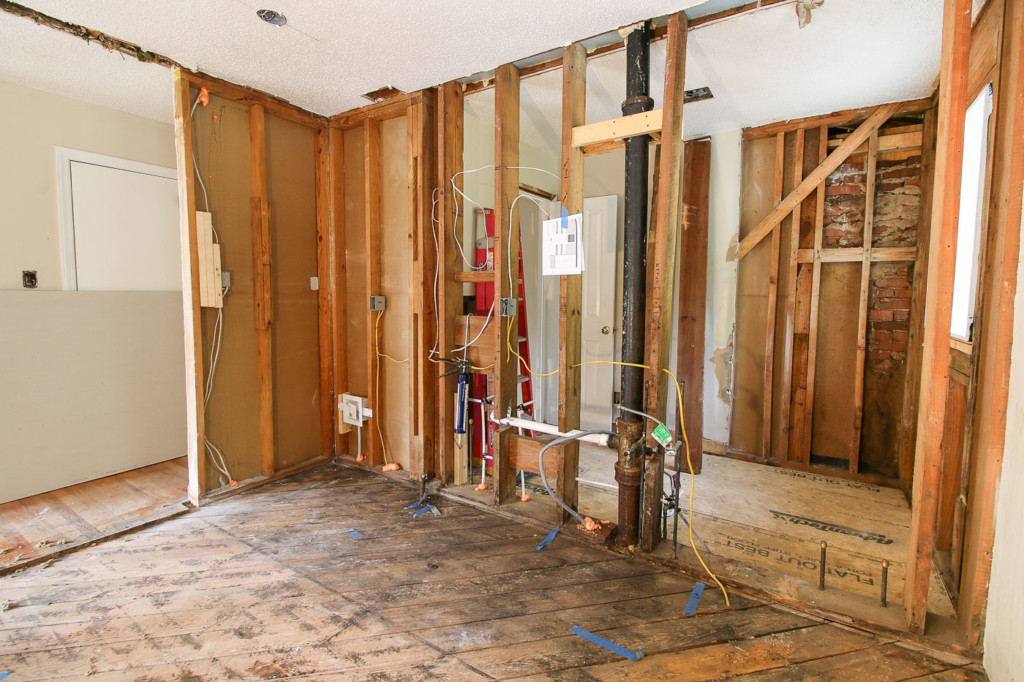
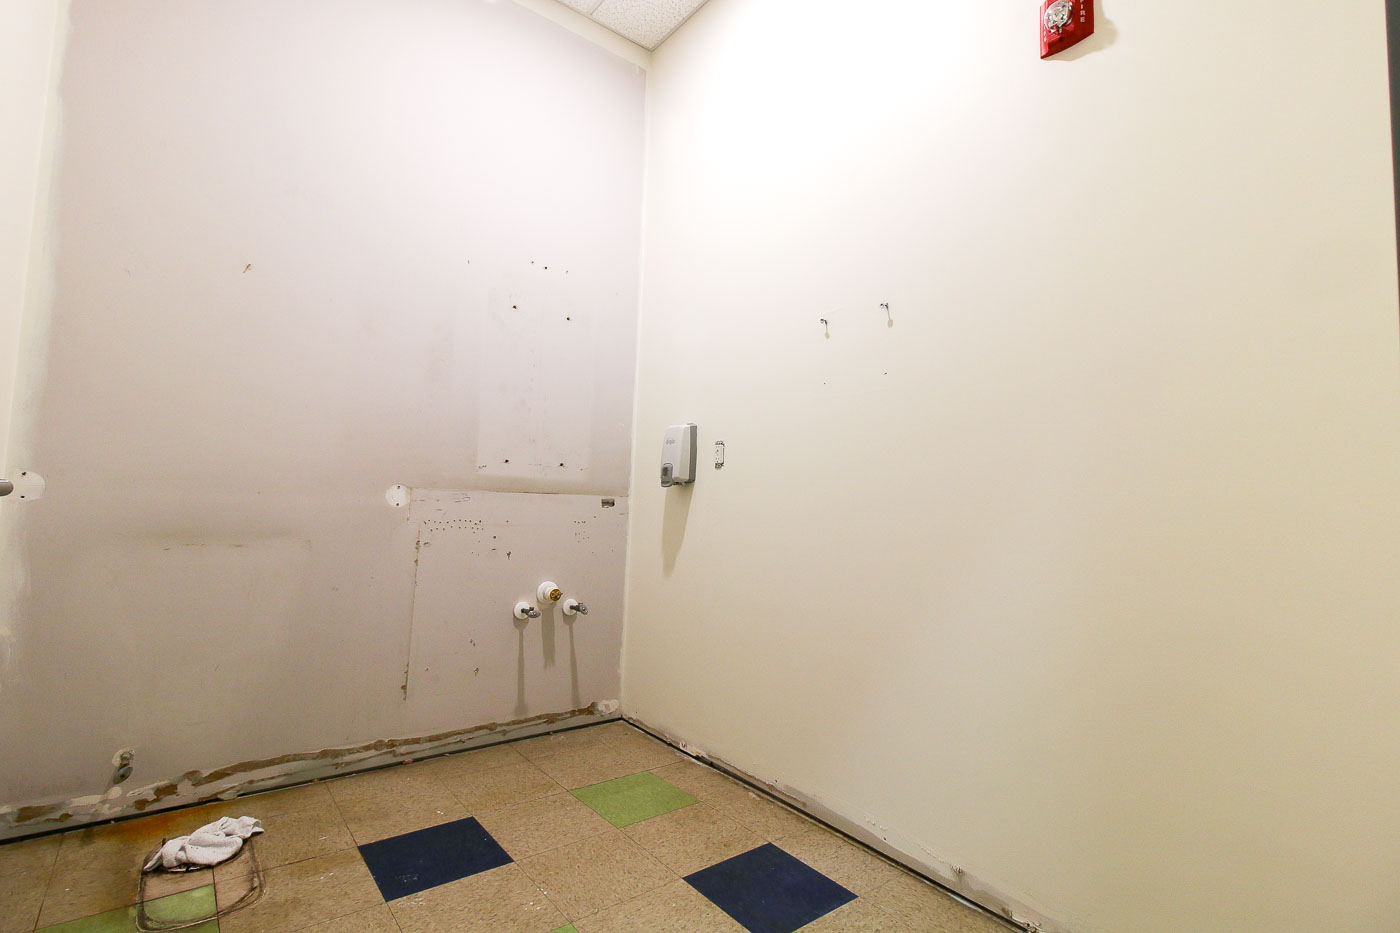
Now that the wallpaper is gone, it’s time to address that light (or lack thereof) over the sink. Although Beth had dutifully called my favorite electrician to fix it, they hit a wall (or more accurately, a pipe.) Upon removing the broken light fixture he discovered an unsafe wiring situation.

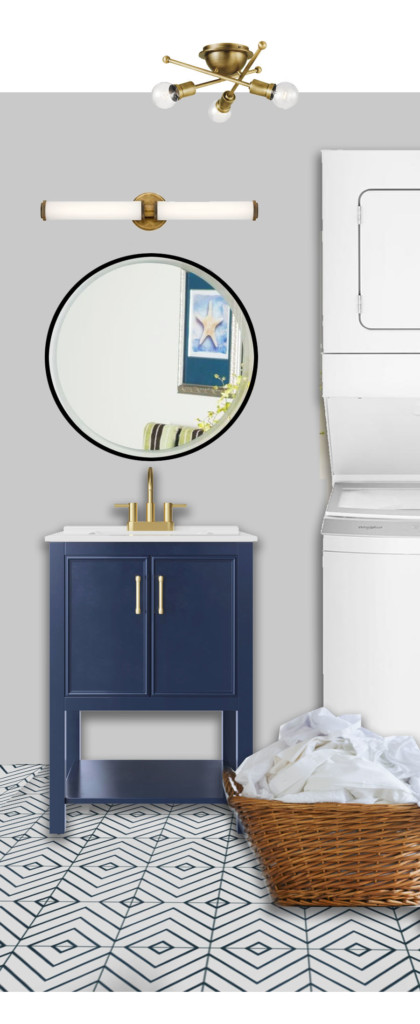
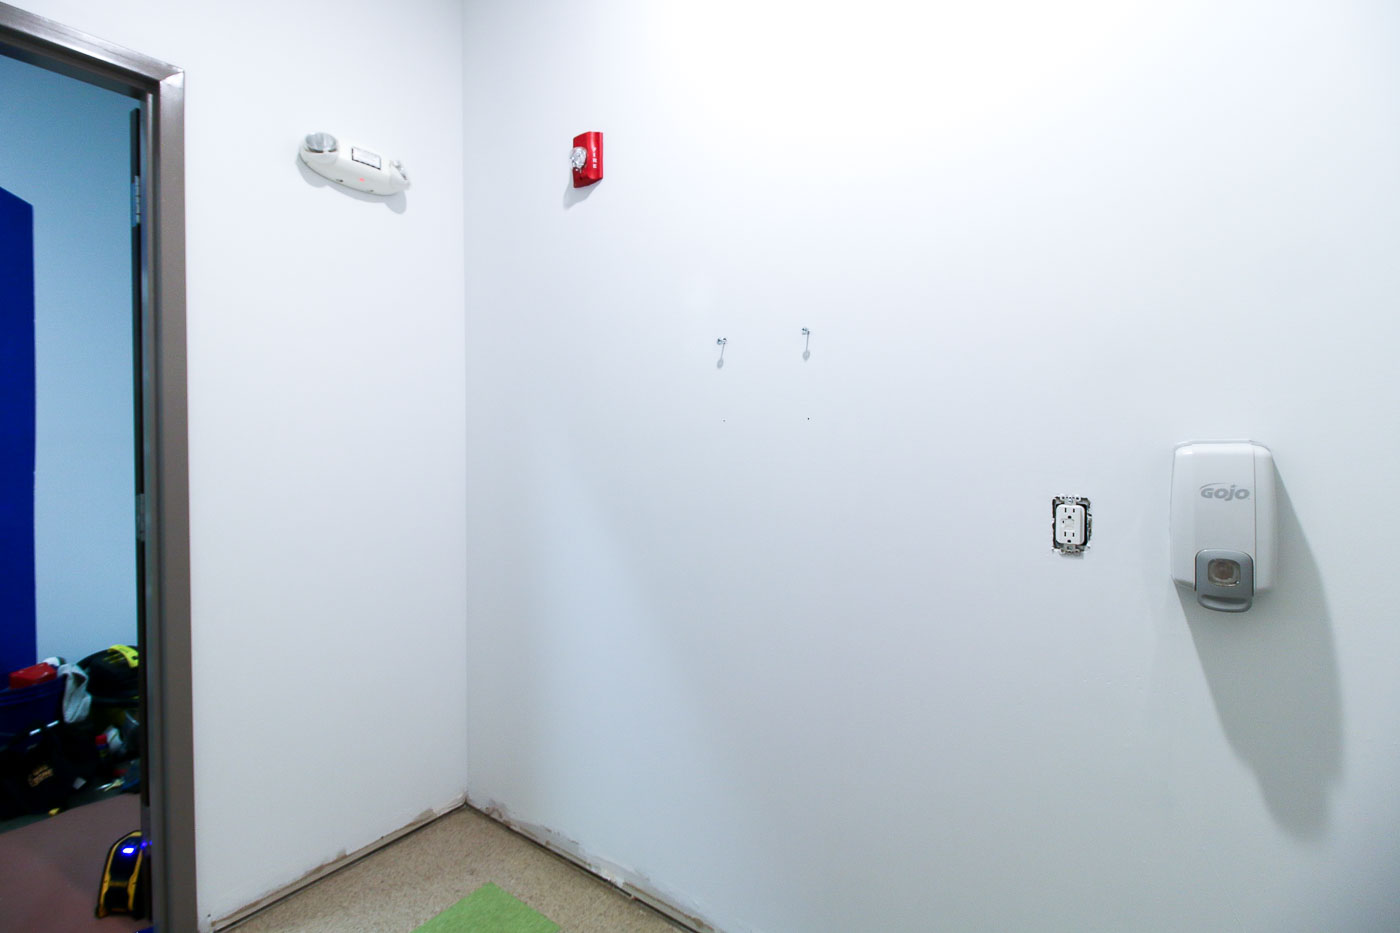
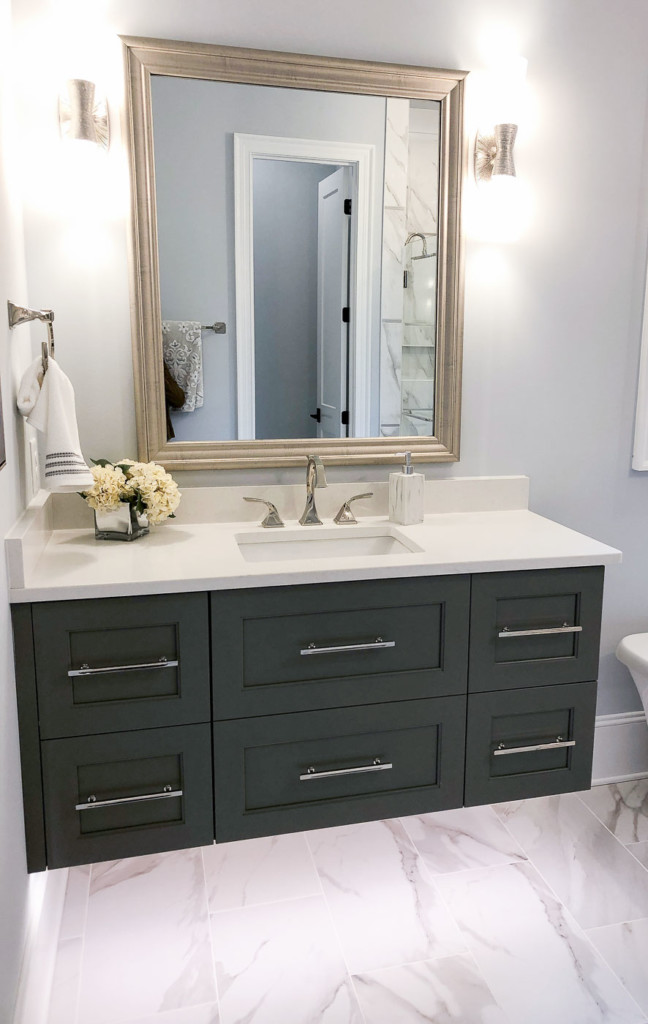
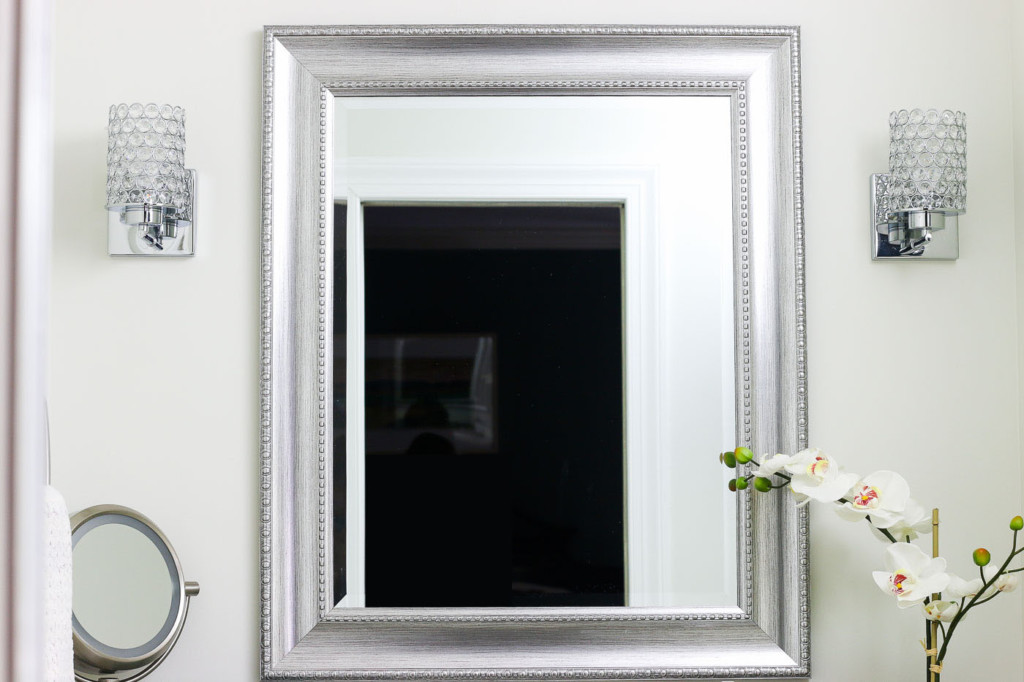
Some idiot had moved the wire out of the junction box and punched it through the wall in an attempt to center the light. (This a code violation because it’s a fire hazard when wiring connections are outside a junction box.) It was obvious they weren’t able to relocate the electrical box because the plumbing vent pipe was centered on the wall. Not wanting to hang the light off-center, Beth told the electrician she had to think about what she wanted to do with the light. Luckily, I had an idea that would be twice as nice. Why try to deal with one light that can’t be centered, when you can double the lighting with wall sconces? I showed Beth this photo and she instantly loved the idea.

We were grateful when my electrician was able to swing back by and install the junction boxes on either side of the mirror area before we started painting the walls. Then I patched the holes he made and we were back in business (painting business that is.)

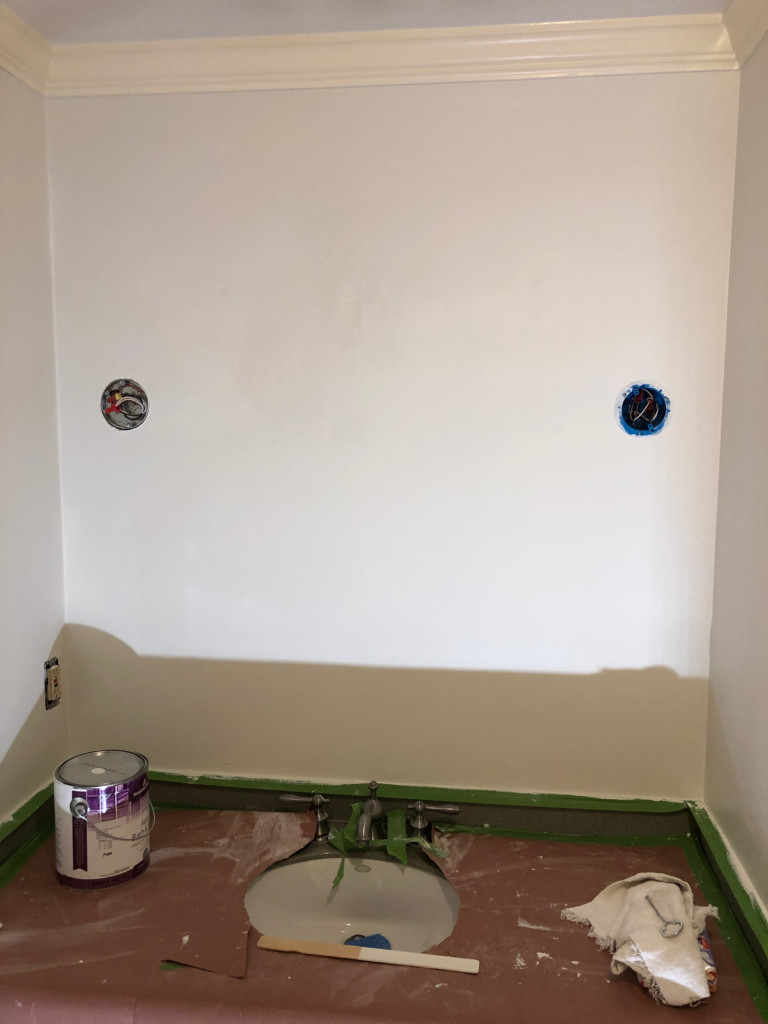
It’s hard to see the paint color in the photos, but we chose One Horn White by Magnolia Home. It’s white with a hint of green and it looks great in this bathroom.

The off-white molding looked dingy with the new wall color, so we gave the baseboards and the crown molding a fresh coat of white paint.

New Lighting and a New Skill:

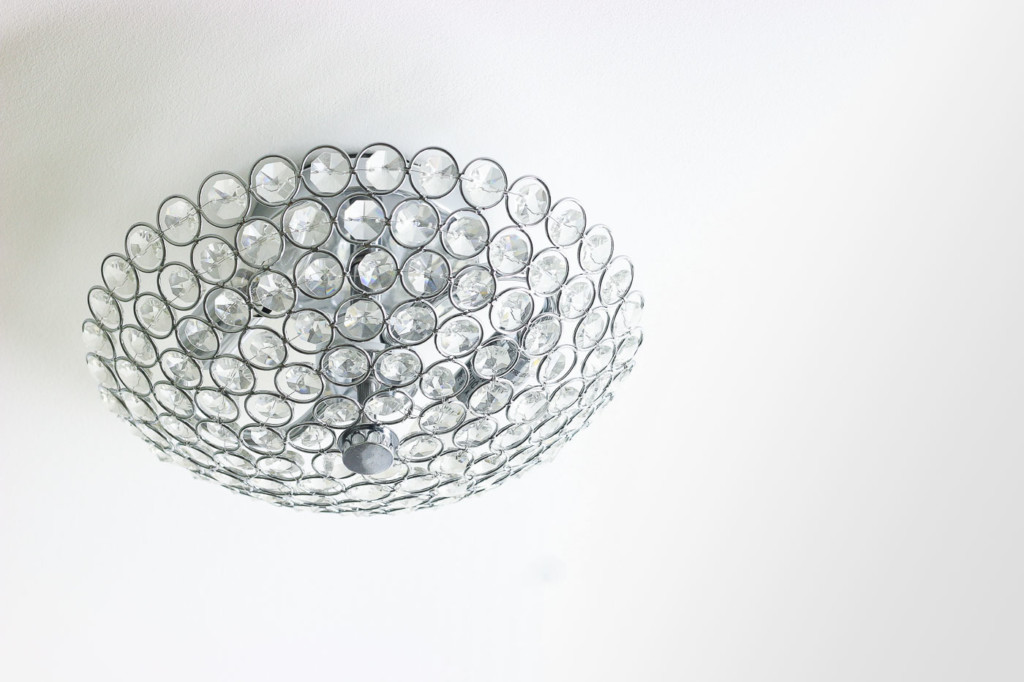
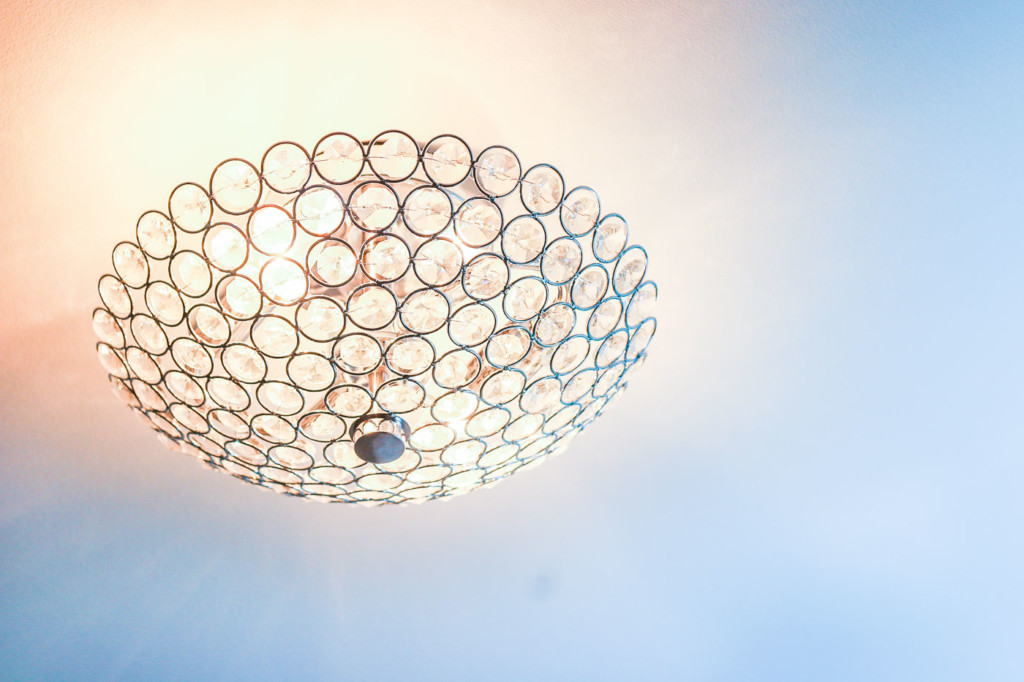
Part of the makeover involved teaching Beth how to install the new stunning crystal ceiling light she picked out! Although she was nervous at first, I taught her how easy it is to replace a light fixture. With her new electrical skills, I encouraged her to install the sconce lights as well.

Unfortunately, the sconces didn’t arrive in time for the surprise. But, we taped up a picture of the new sconces for the big reveal.

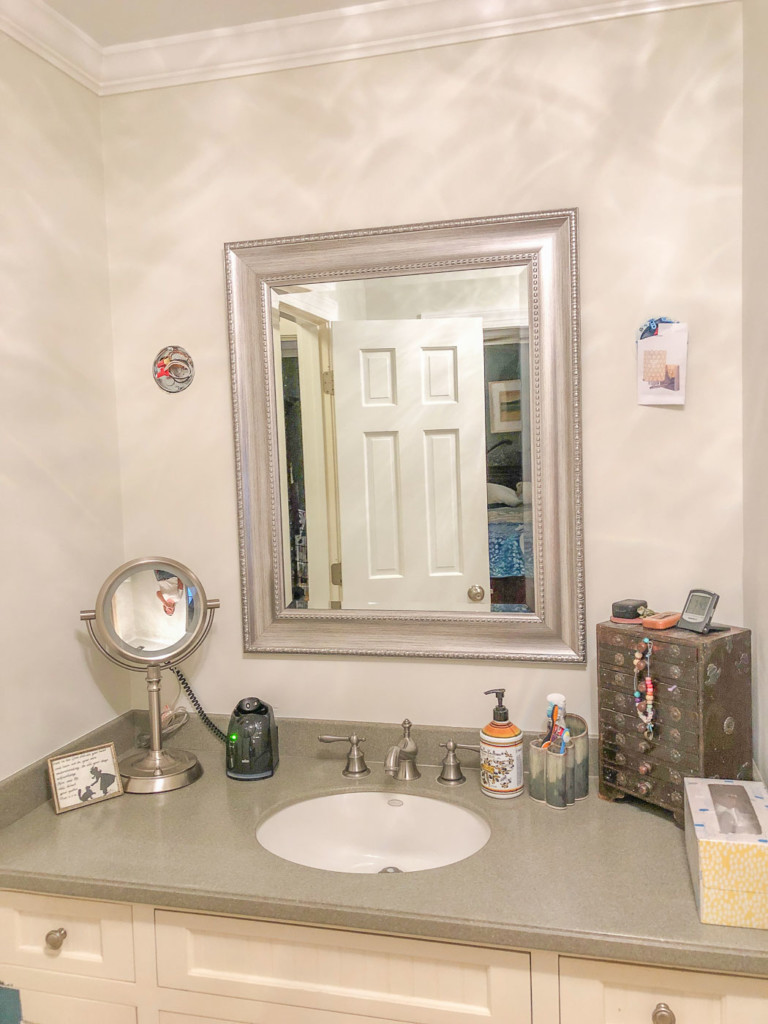
Later, Beth used her new skills to install the wall sconces when they arrived!

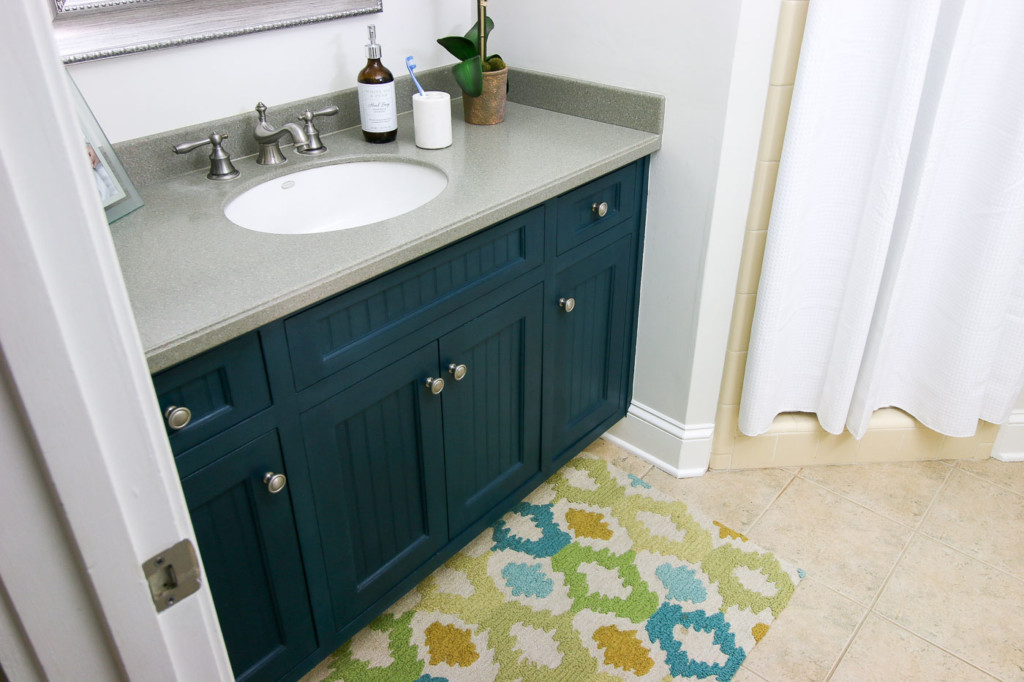
Budget Vanity Update:

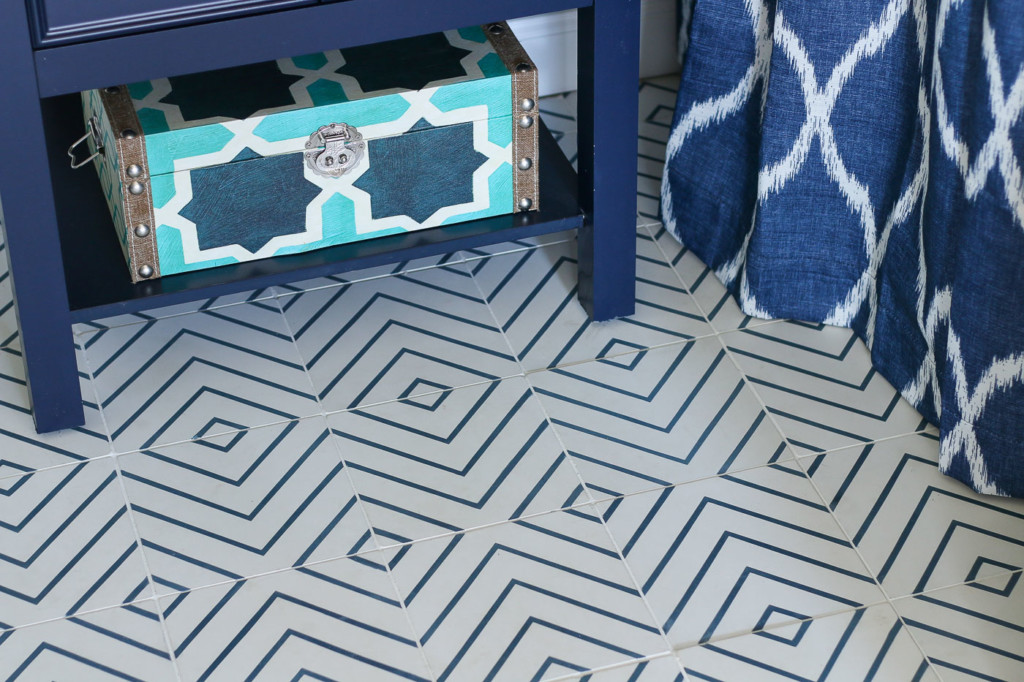
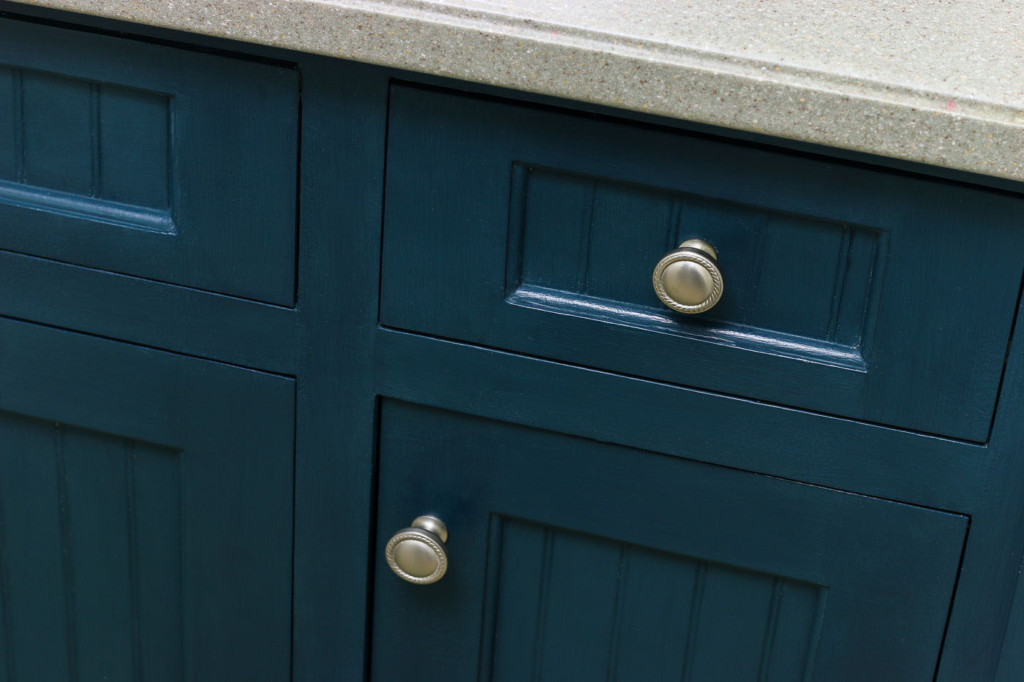
Instead of replacing the vanity, Beth painted it a beautiful dark teal color. The color is Weekend by Magnolia Home and I love the dark elegance and also a punch of color needed in this otherwise neutral bathroom.

Before we knew it, Sunday afternoon had arrived and although we weren’t able to completely finish the makeover in one weekend, it was still a big surprise for Beth’s husband. Even the kids were surprised. You have to watch the video to see their reactions. It’s priceless!

Finishing Up the Bathroom Makeover:

After our weekend of work, life got in the way of finishing their bathroom. Then a pandemic hit and we all dutifully stayed at home for several months.

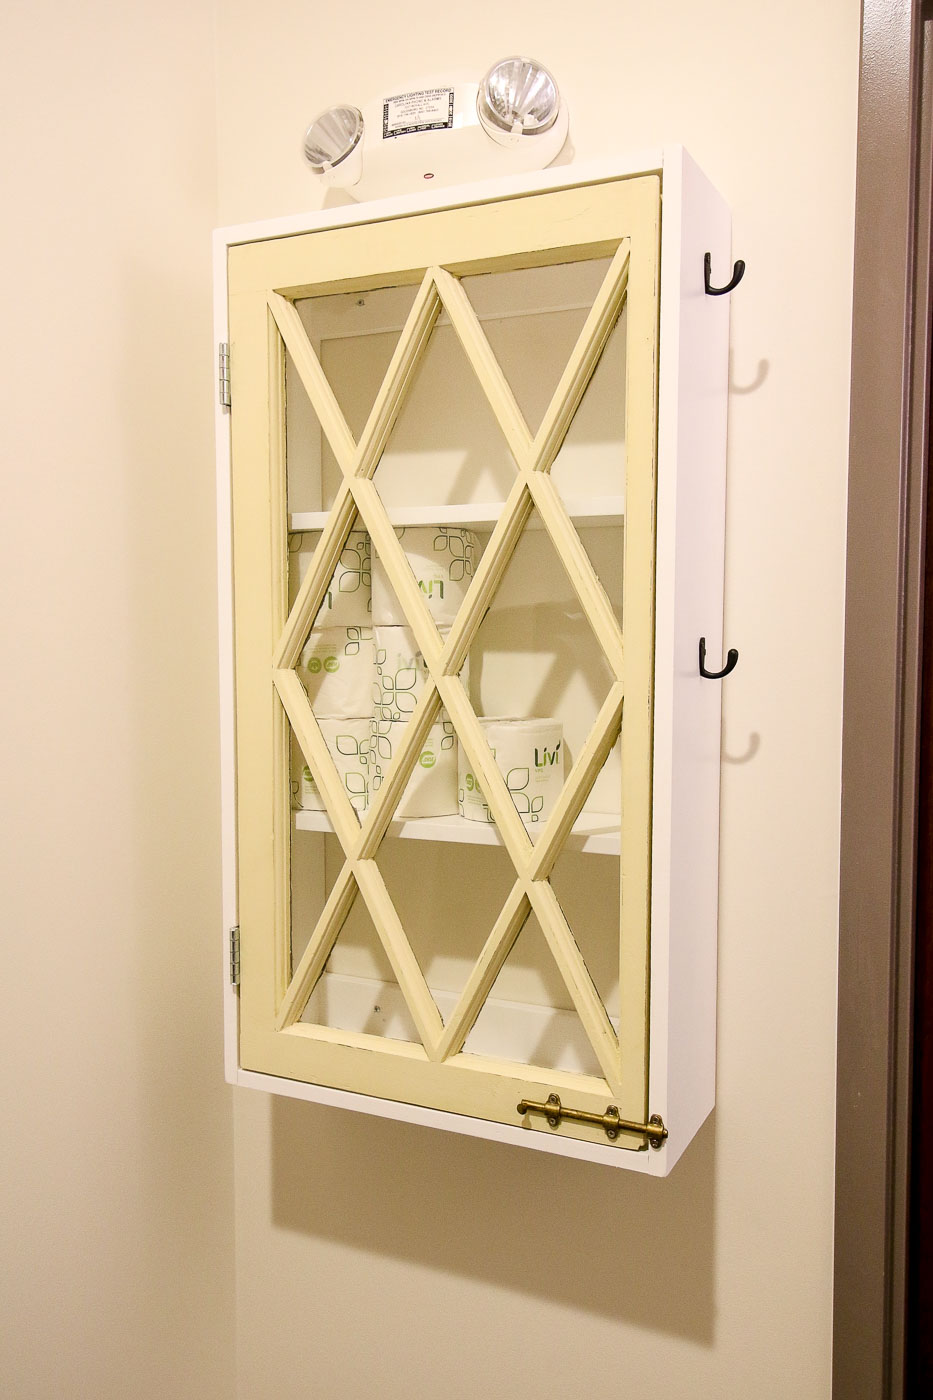
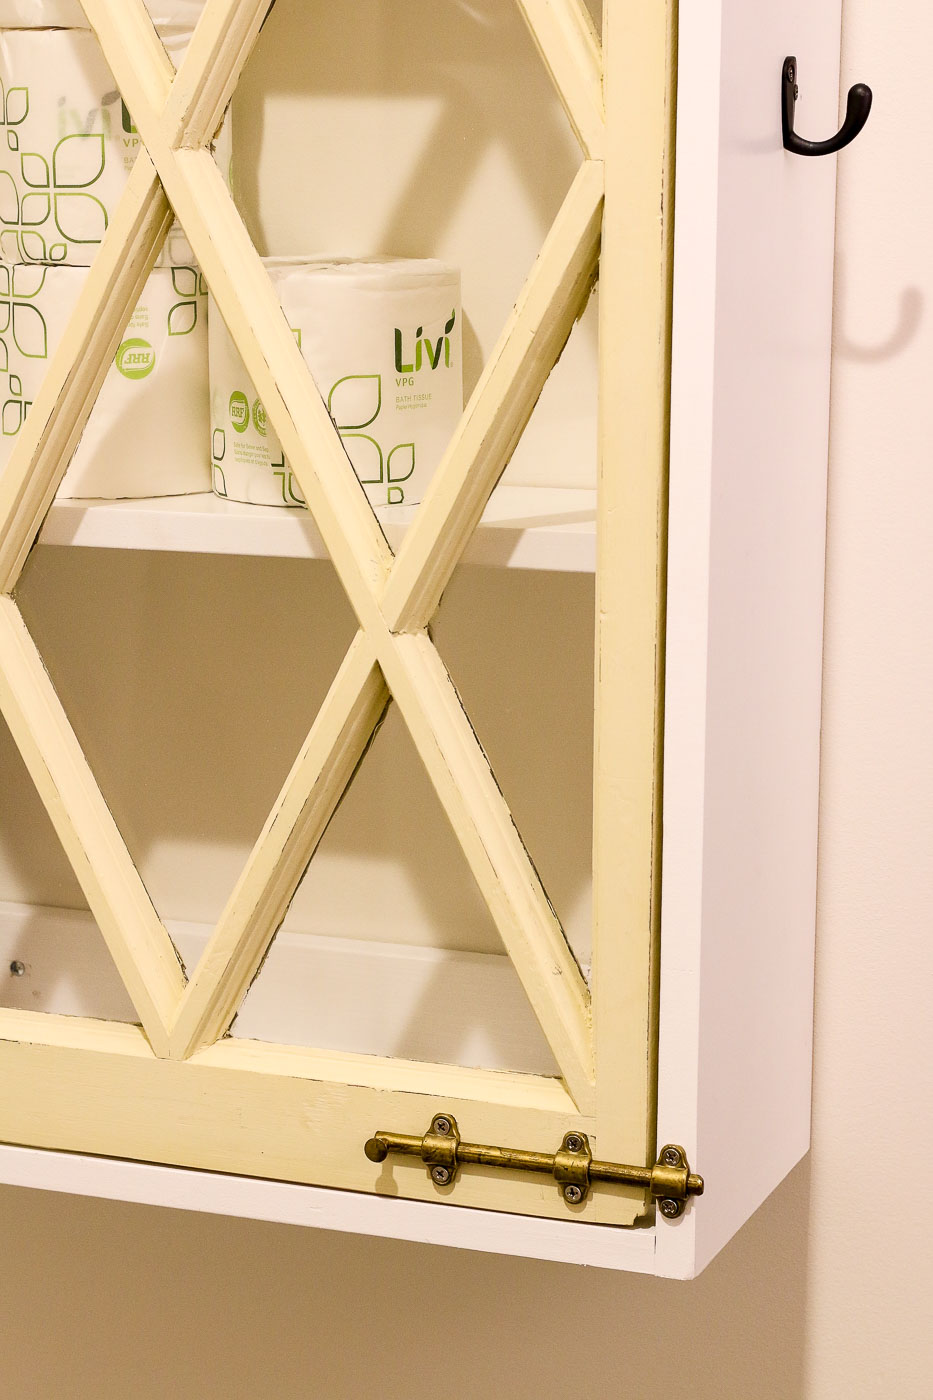
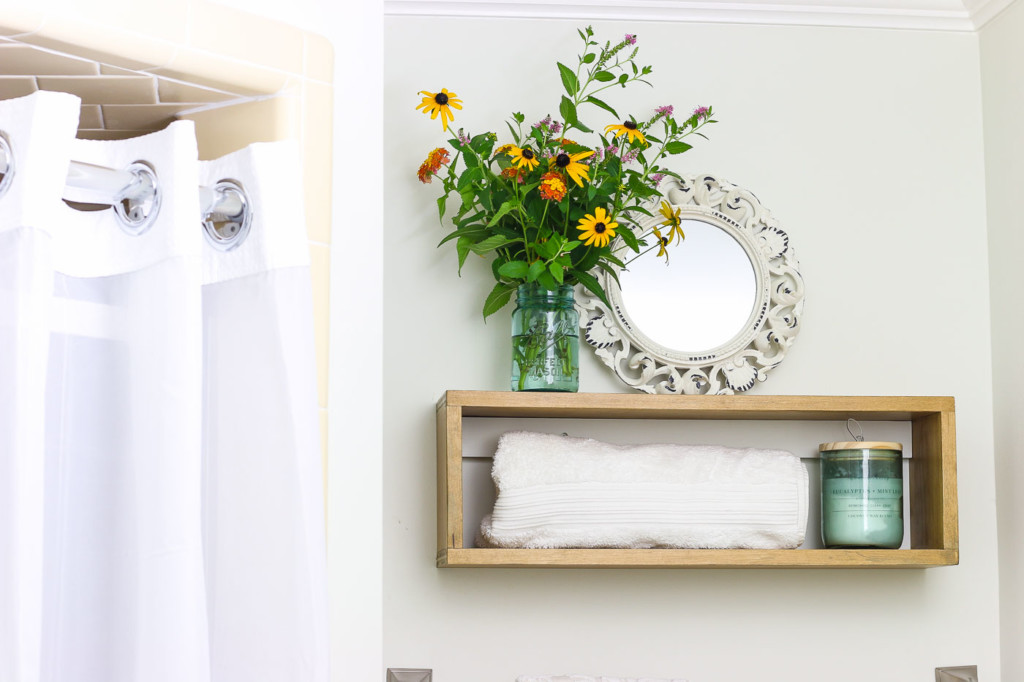
A few weeks ago, I helped Beth finish up the final touches like painting the exhaust fan, adding a finish coating to the vanity, and adding a floating shelf over the toilet.

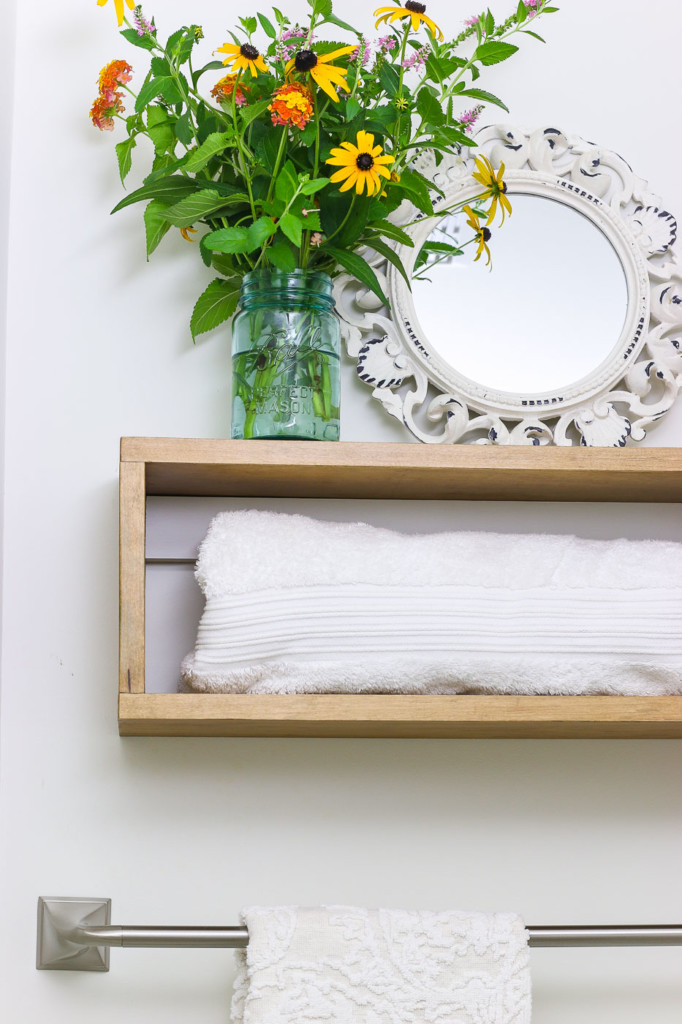
The shelf is a simple touch but adds some extra storage and style to this small bathroom.

Protecting the Bathroom from Drafts and Bugs:

While the bathroom vanity was empty, I took the opportunity to fill in the gaps around the water lines and drain pipe under the vanity using GREAT STUFFâ„¢. It’s a simple fix that takes no time at all, but makes a huge difference in controlling bugs and pests.

Those of us that live in the south know we have some Jurassic-size bugs that like to pop out of nowhere, making us scream like a little girl being spooked. (Pretty Handsome Guy is definitely guilty of being able to hit those higher octaves when he finds a roach in the house.) Some people call them water bugs or palmetto bugs, but they are big fat wood cockroaches! For this reason alone, it’s a great idea to seal those gaps around your pipes.

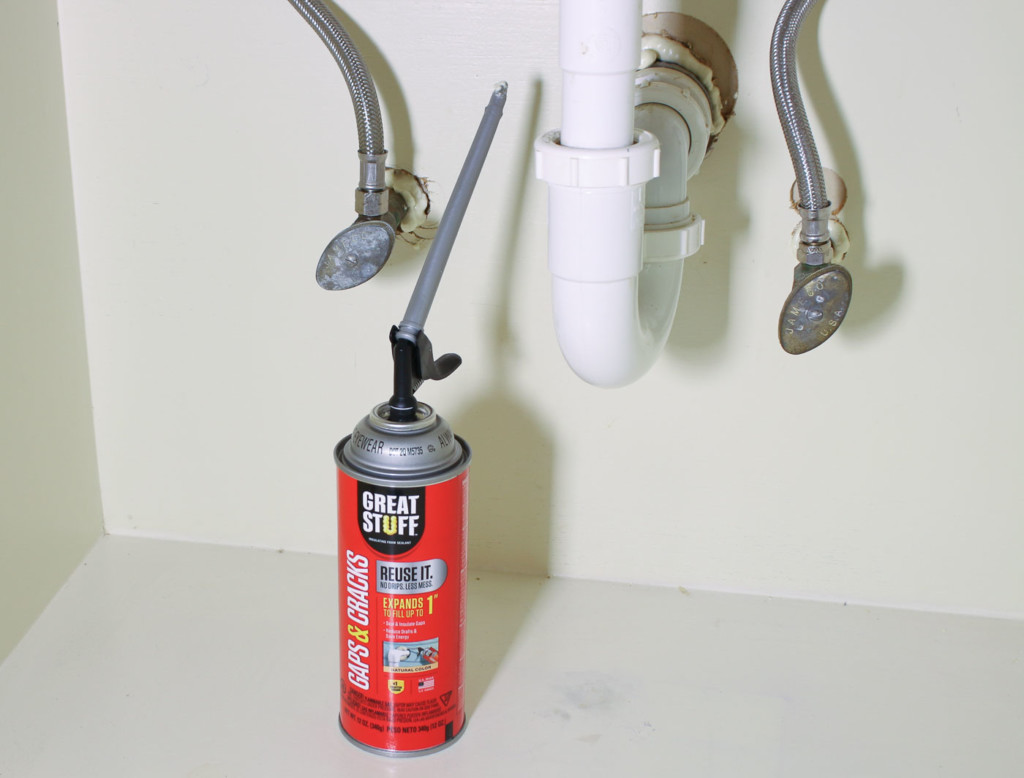
Sealing around the pipes with GREAT STUFFâ„¢ is super easy and it just got easier with the new Smart Dispenser which has fewer drips and can be re-used for up to 30 days! This was definitely one of my pet peeves about the original can. Previously, the GREAT STUFFâ„¢ material would harden in the dispensing straw making it unusable for future projects. (Click here to learn more about the GREAT STUFFâ„¢ with the Smart Dispenser and where you can purchase it.)

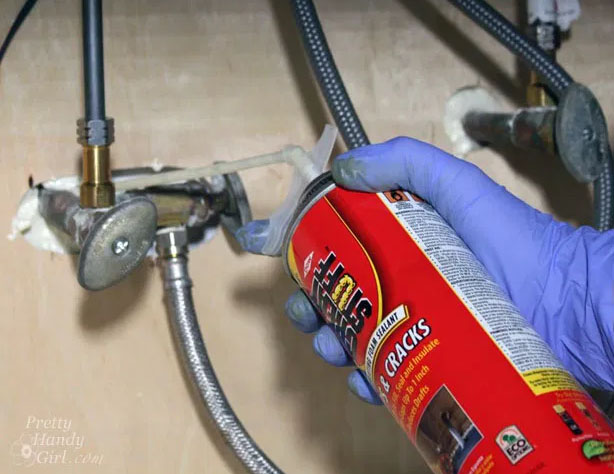
Lucky for us, GREAT STUFF™ cared enough to come up with an innovative solution to this issue—the smart dispenser!

The Reveal:

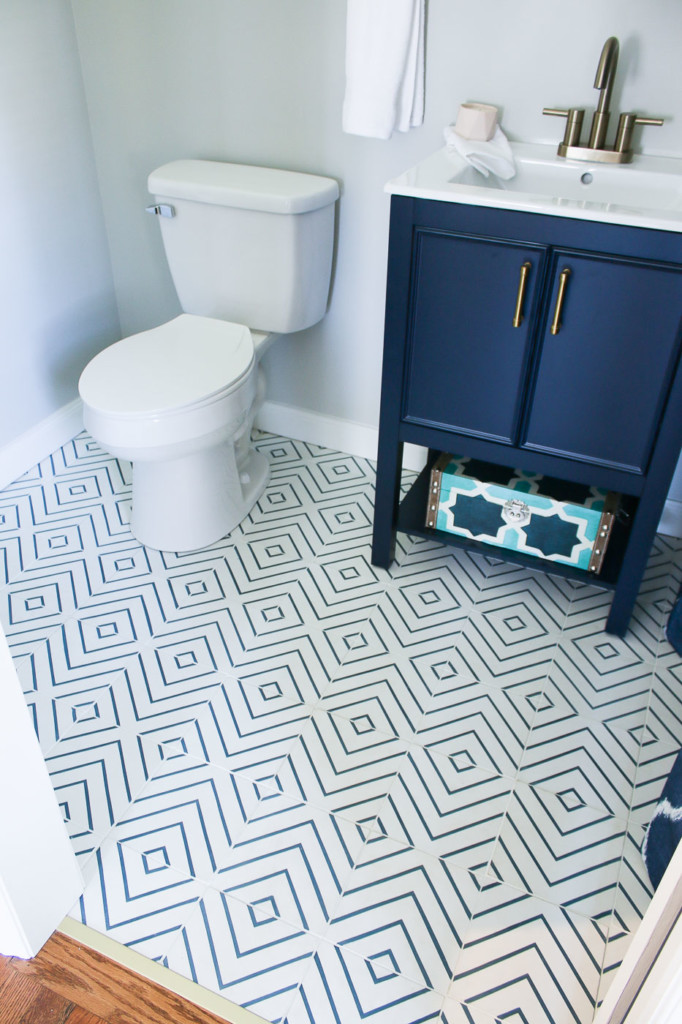
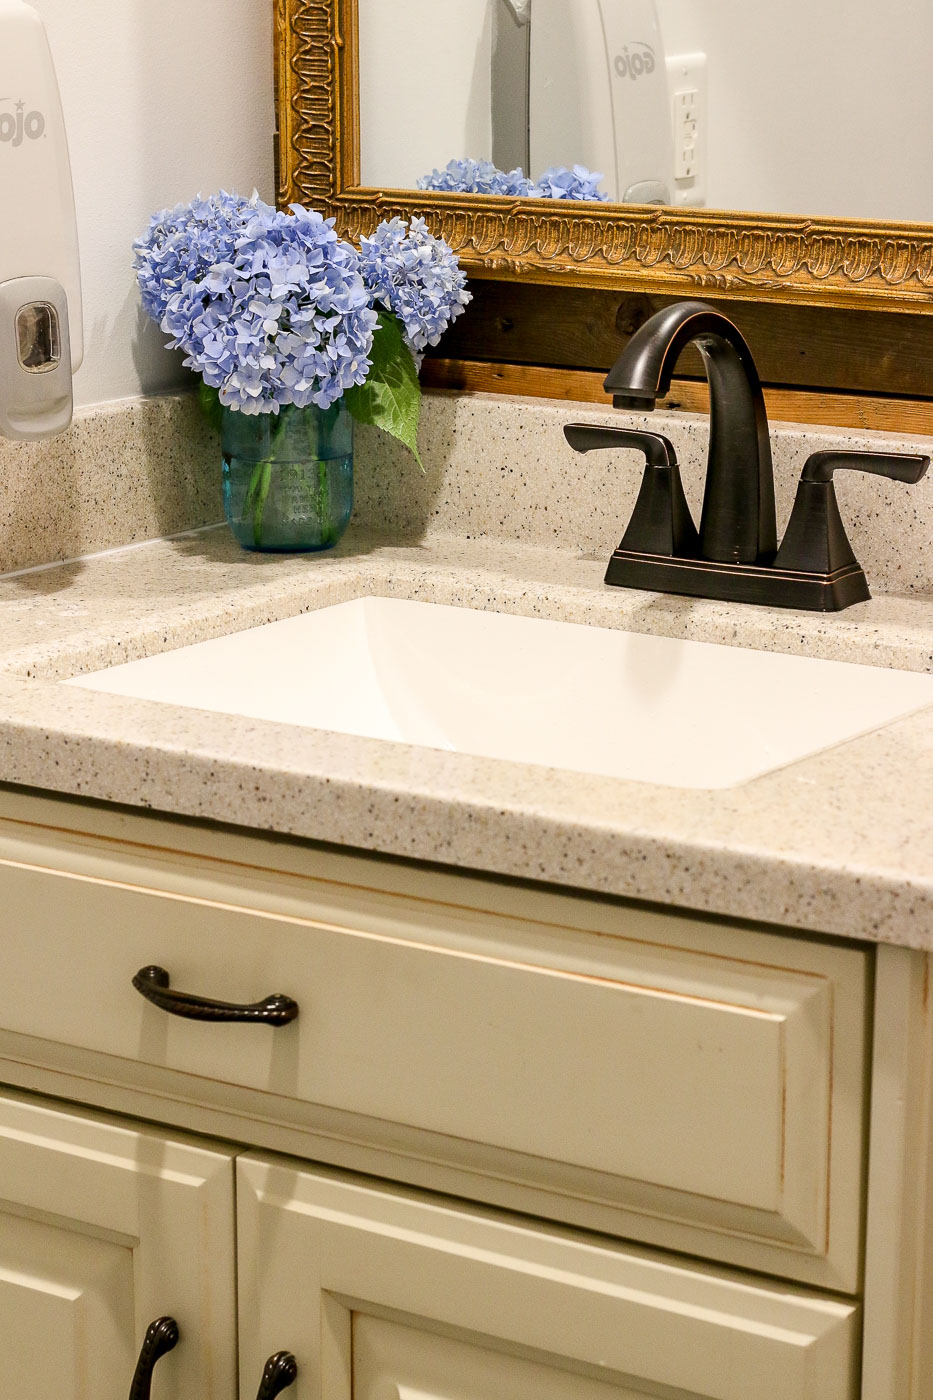
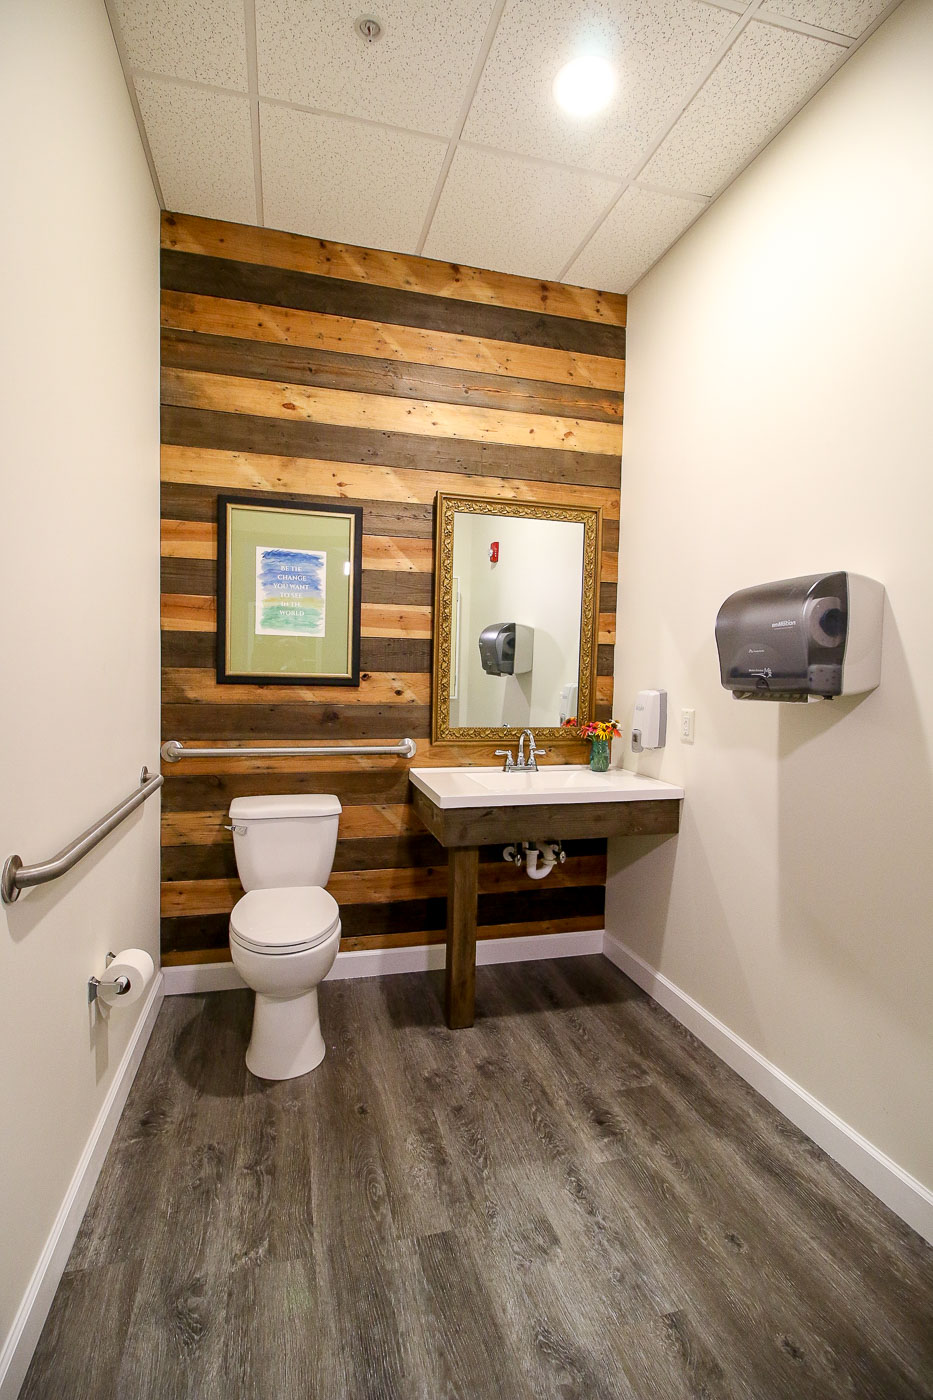
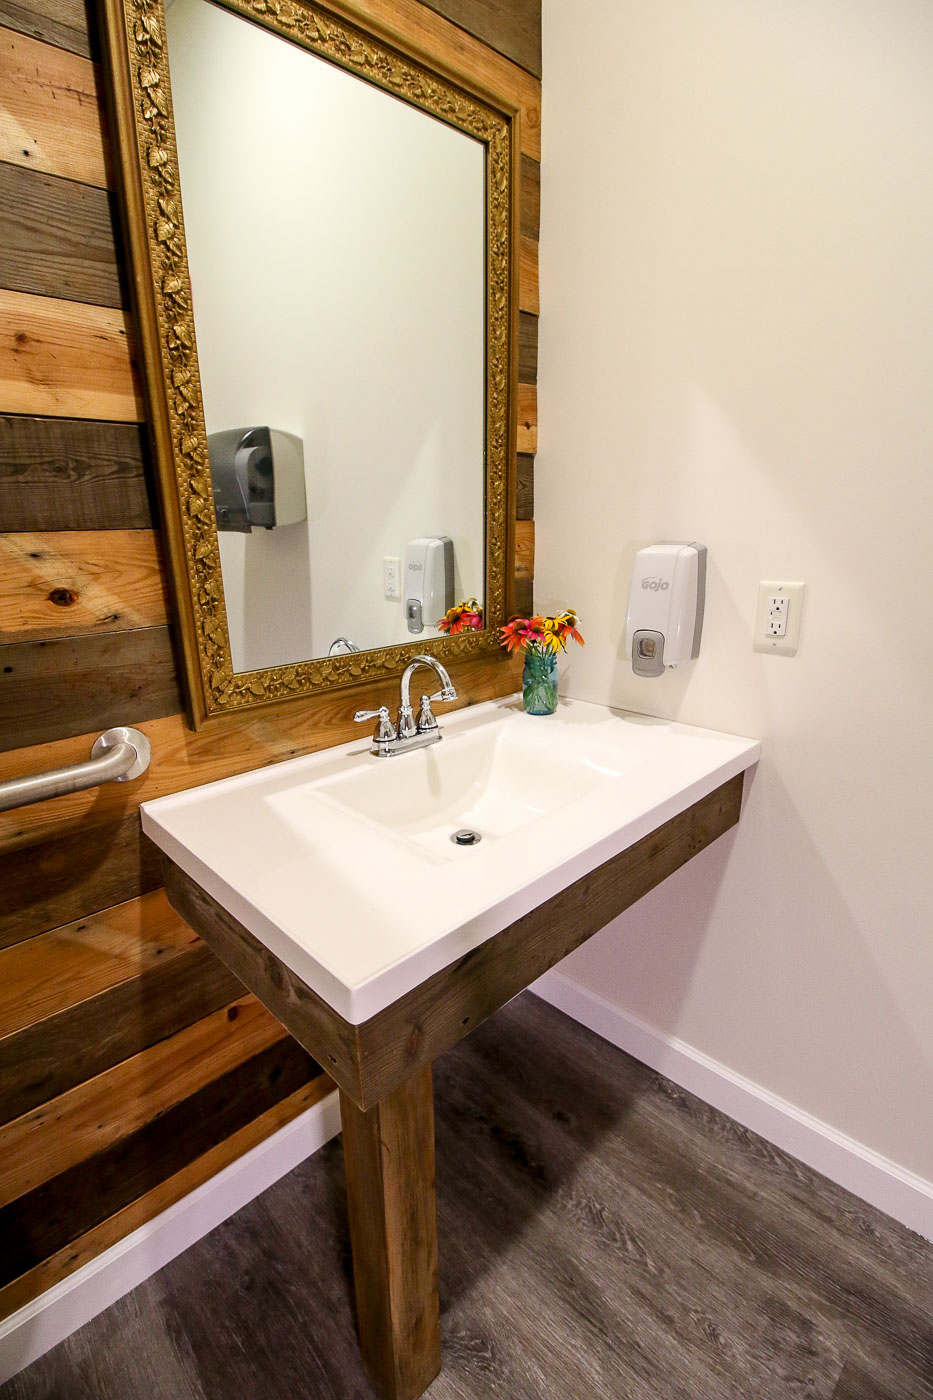
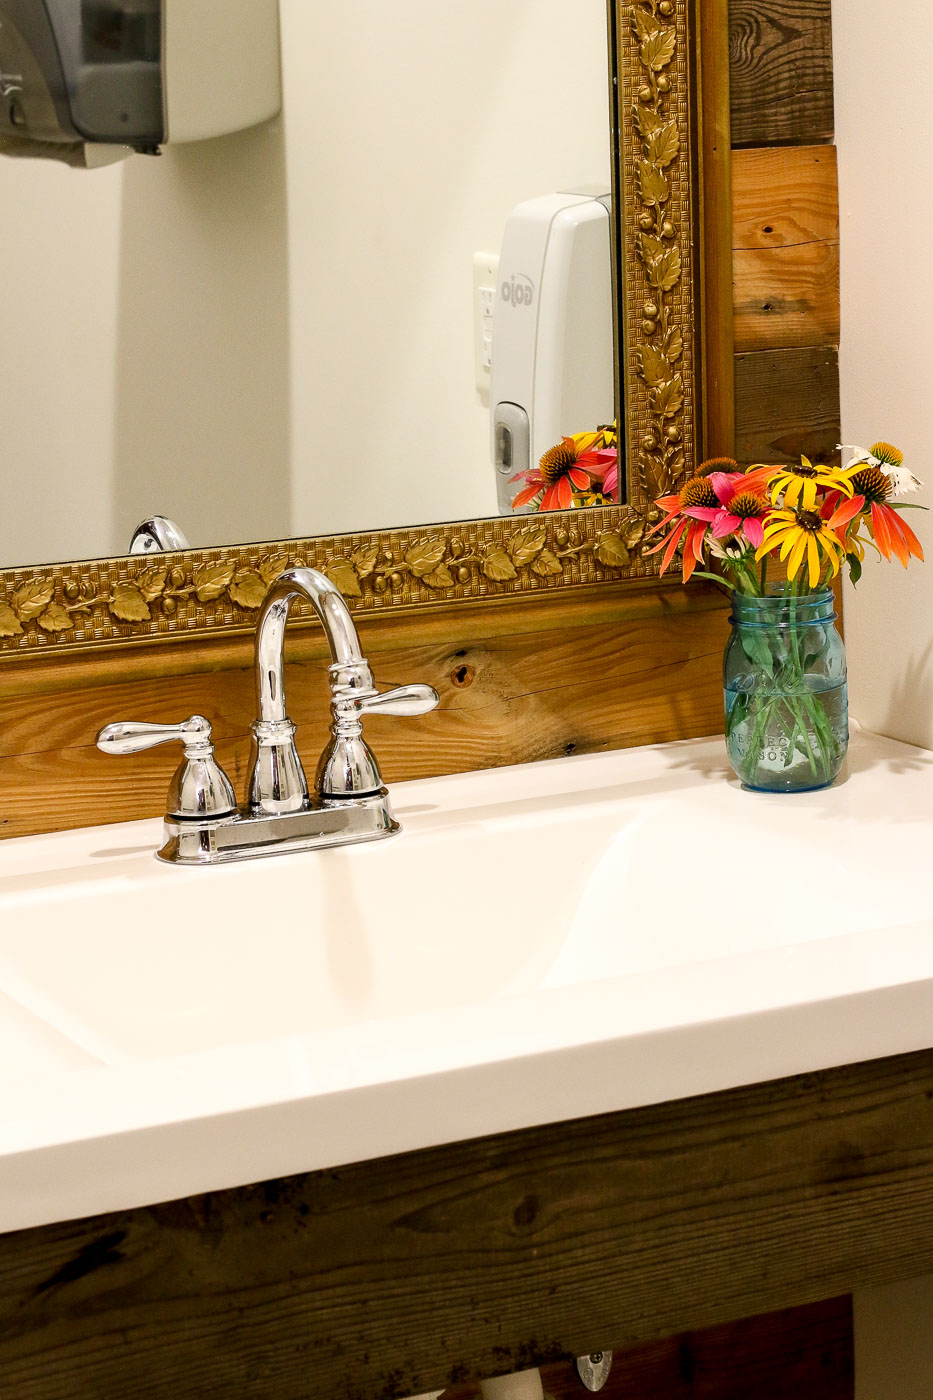
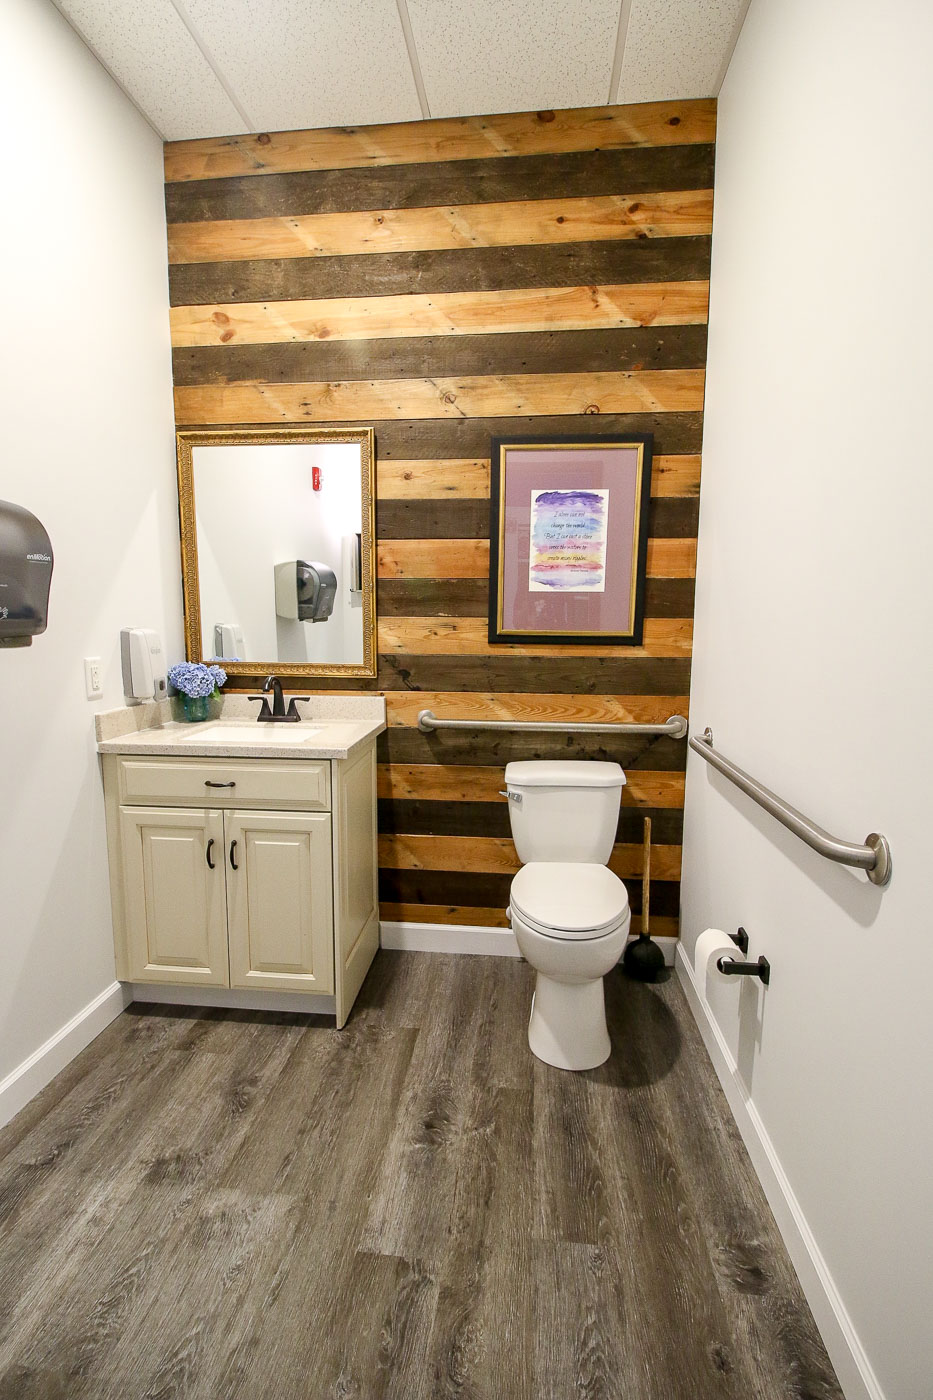
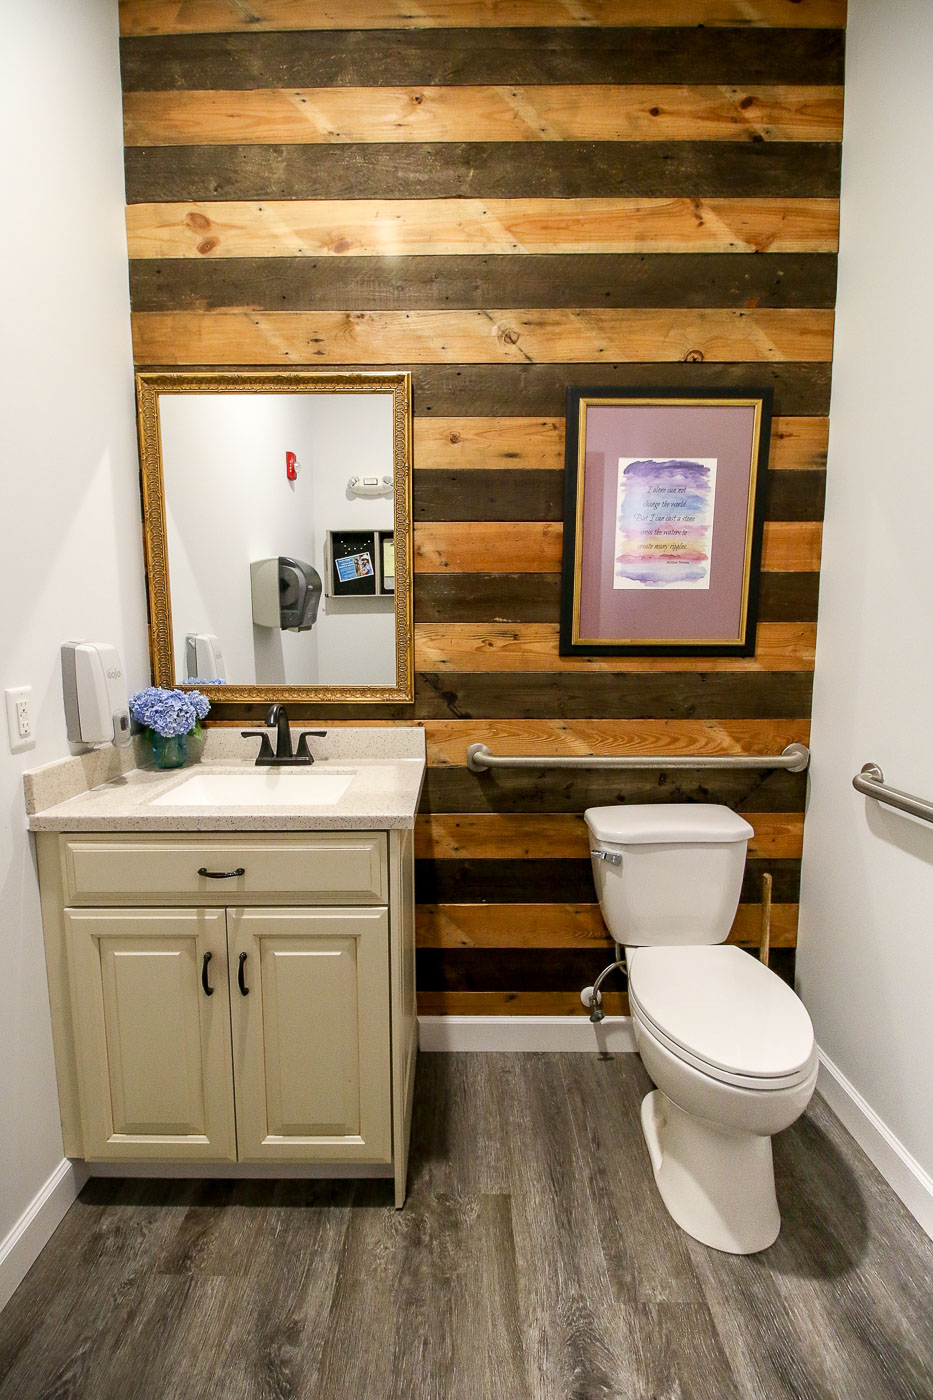
I’m thrilled to be able to show you the final reveal.

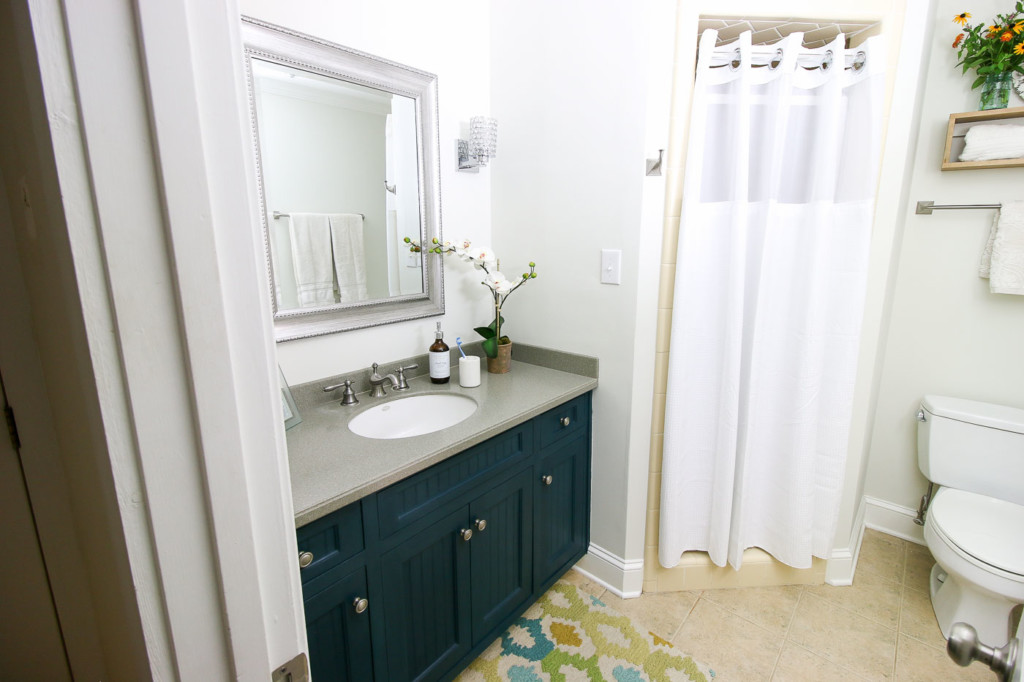
Beth and John are loving their new lighter and brighter bathroom.

It’s amazing how choosing a cooler paint color downplays the creamy tiles. This is a great trick I use when giving dated bathrooms an inexpensive facelift.

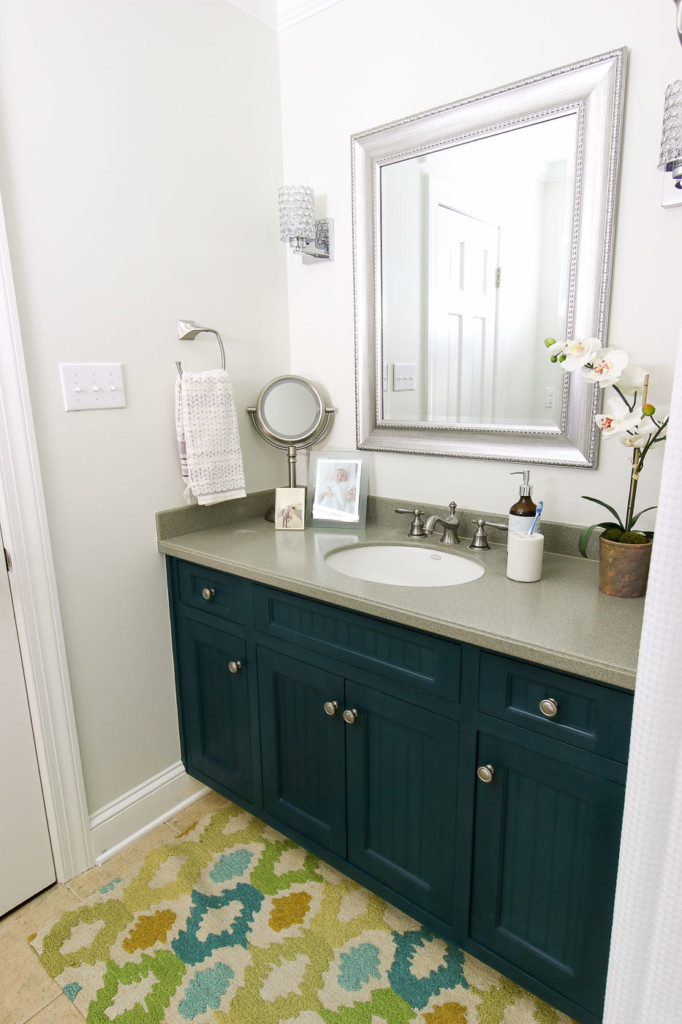
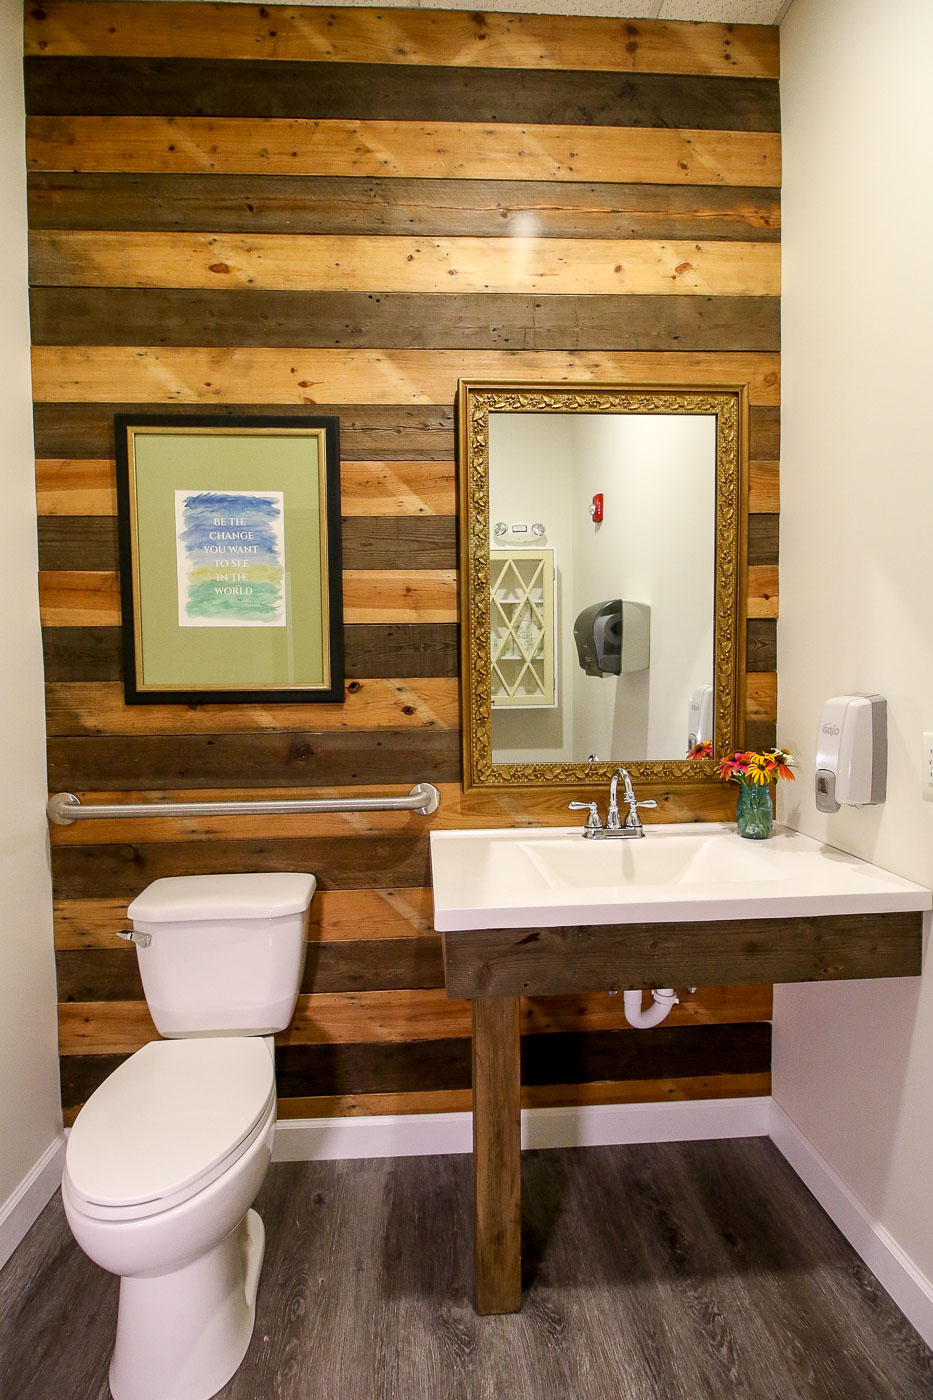
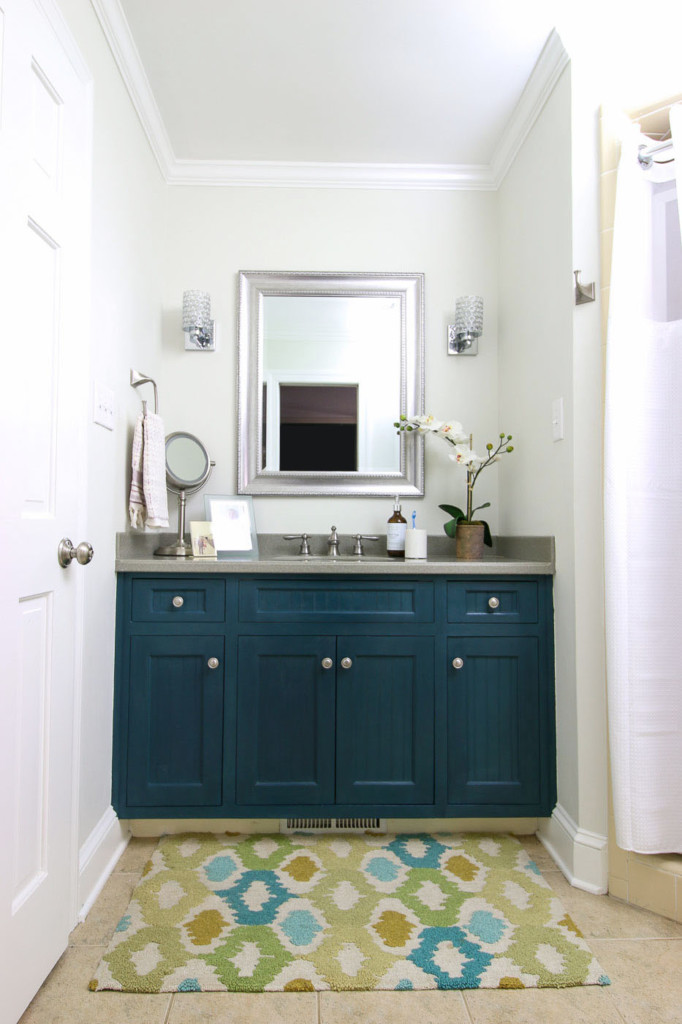
Speaking of facelift, what do you think about the painted vanity? We loved the dark teal color and how it plays nicely with the old countertop.

Beth reused the same knobs to stay under budget.

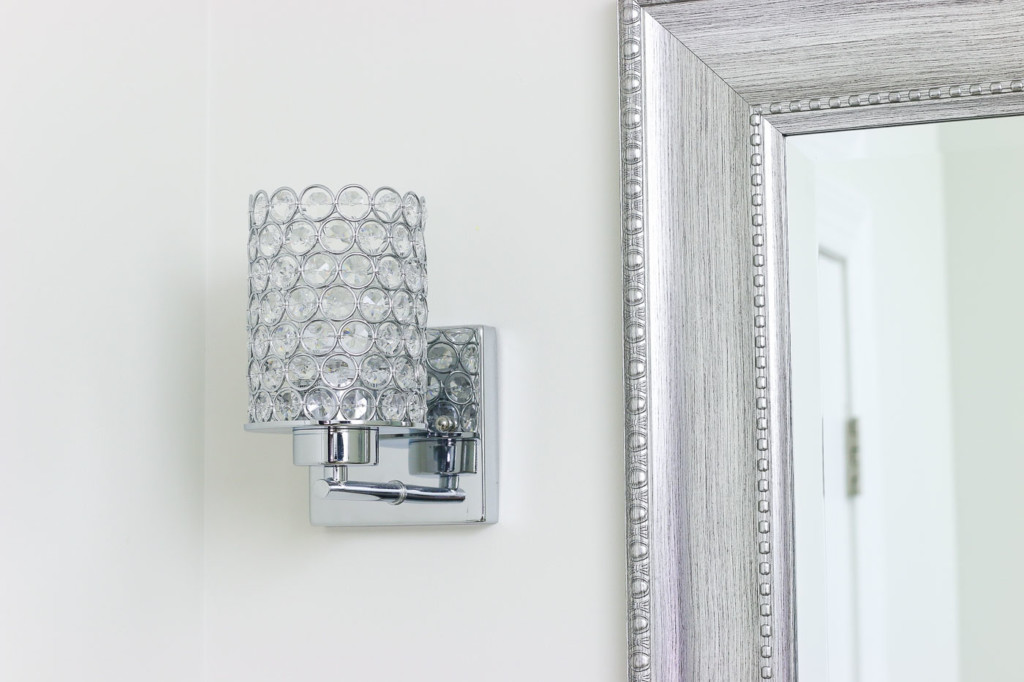
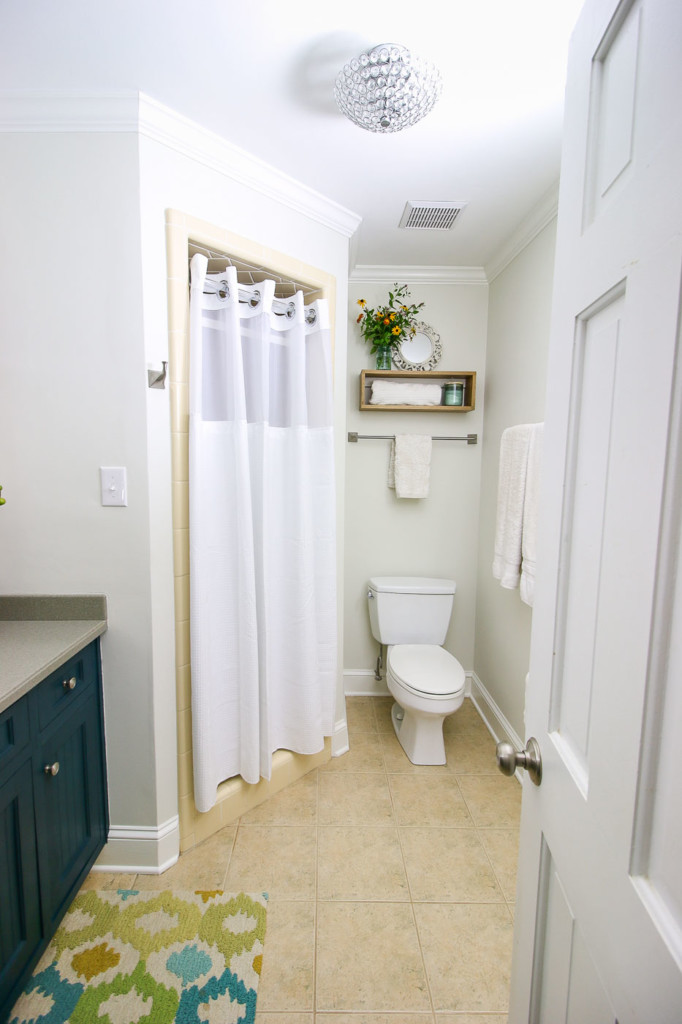
I love the elegant lighting Beth picked out for the room. The ceiling fixture is much brighter with two bulbs and reflective crystals!

And, adding two sconces, dramatically improved the lighting in this bathroom!

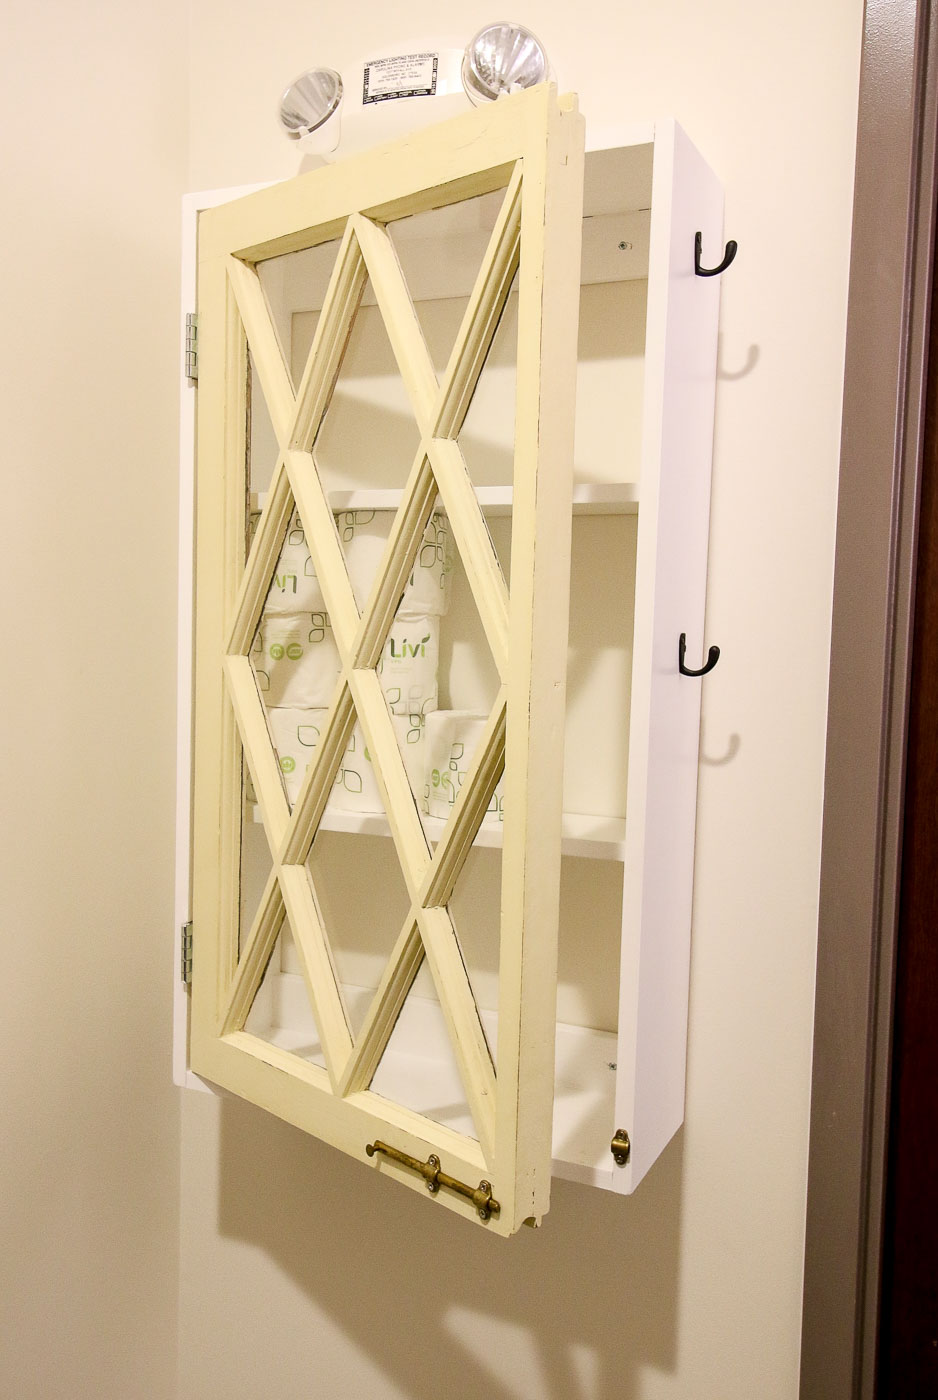
But, I have to say my favorite element is the simple modern floating shelf.

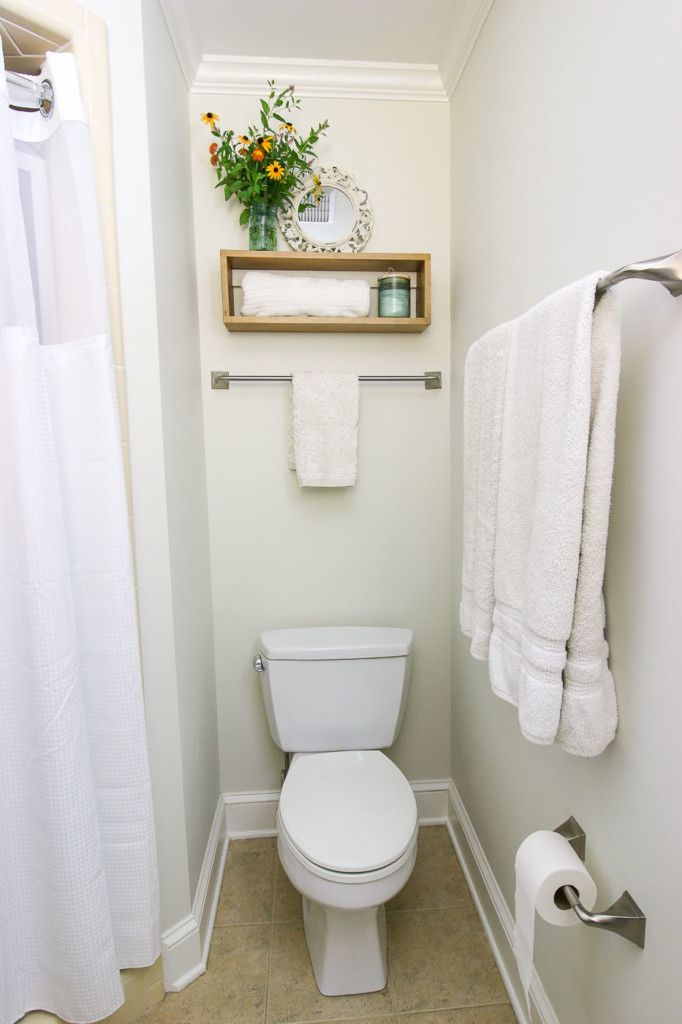
It adds a little storage and some style to an otherwise empty wall over the toilet.

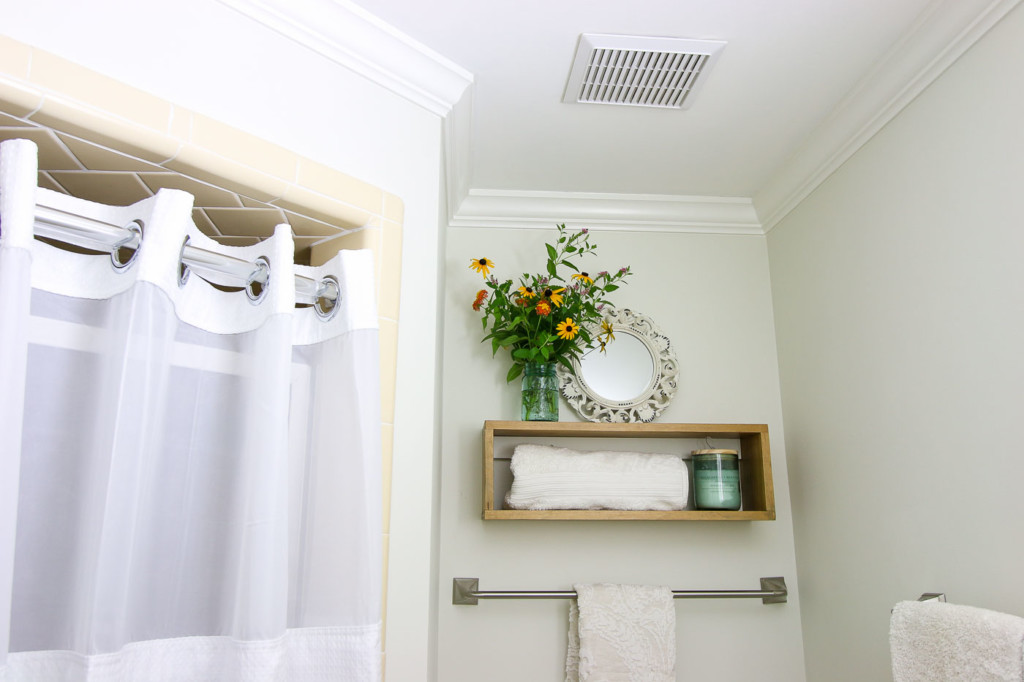
Of course, we can’t forget the old exhaust fan. With a little spray paint, it looks brand new.

Cost Breakdown & Sources:

Grand Total: $462

What do you think? Isn’t this an amazing makeover for under $500? Do you have a room that could use a makeover for less than $500? Do tell!

Disclosure: This is a sponsored post for GREAT STUFFâ„¢. I was honored to work with them on this project and was compensated for my efforts. All words and opinions are my own. I have not been told what to say. As always I am very particular about the sponsors I work with and you will be told if you are reading a post that has been sponsored or in which materials were provided.

lili cement tiles in two bathrooms

I’m definitely tired of using a port-a-potty at the Millie’s Remodel house. It’s high time we get the bathroom floors tiled so my plumber can install a toilet! Come along with me today as I install the cement tile floors in the bathrooms.

Millie's Remodel: Cement Tiles in the Bathrooms

Millie’s Remodel: Cement Tiles in the Bathrooms

If you remember my last Millie’s Remodel update, I shared the only working bathroom was the port-a-potty in the front yard. I was definitely done with sharing it with my subcontractors and the MAILMAN! Ugh, I lost track of how many people were using it.

After installing the waterproofing and uncoupling membrane, both bathrooms were ready for tiling. Hooray!

You might remember I shared the mood boards for both the main bathroom and the powder/laundry room.

Main Bathroom Moodboard

Powder/Laundry Room Moodboard

Being able to finally install the tiles is one of my favorite stages in a home renovation. Especially because when the Lili Cement tiles I ordered arrived, and I couldn’t wait to see them installed on the floors. I should mention, Lili Tiles is one of the Millie’s Remodel sponsors. When the company contacted me, I was thrilled with their bright-colored tiles and the variety of shapes and patterns. Frankly, it was tough to choose just two tile patterns.

Variety of tiles on the floor

Here are some other things I love about the Lili Cement Tiles: Each tile is handmade! You can watch the process here. And if you want to see more inspiring photos of Lili Cement tiles installed in a variety of spaces, follow Lili Cement Tiles on Instagram! Plus, I love supporting small companies, especially one founded by a woman.

Lili Cement Tiles on Instagram

Okay, now it’s time to show you these beautiful cement tiles installed. Go ahead and watch this video to see them in the Millie’s Remodel bathrooms and watch how much fun I had installing them! Seriously, it was more fun than you can imagine.

What do you think? Do you love the patterns? Think they work for a mid-century modern beauty? I can’t pick my favorite because I love the subtle star pattern in the Vegas 3 tile installation.

Lili Cement Tile Vegas3 houndstooth pattern gold and black tiles

But, I’m equally excited by the classic navy diamond pattern in the Mia 4 tile installation.

Lili Cement Tile Mia 4, Navy and White diagonal box tiles

However, what is making me jump for joy, is the toilet and sink hooked up in the powder room. I could have kissed my plumber when he showed up to install the toilet and sink in the house.

Lili Cement Tile Mia 4, Navy and White diagonal box tiles

Time to say goodbye to the port-a-potty. See you soon with another Millie’s Remodel update!

Disclosure: Thank you to Lili Cement Tiles for sponsoring the Millie’s Remodel project. I was sent complimentary products in exchange for mentioning Lili Tiles in my project. All opinions and ideas are my own. As you know, I’m very particular about the brands I work with, and Lili Cement Tiles is a brand I’m happy to recommend!

When I first walked through the Millie’s Remodel house, I knew I had to do two things to the home. First, I needed to add a doorway for the laundry room inside the house. Second, I really needed to add a second bathroom. Believe it or not, I was able to accomplish both goals in one room. Come see my design plans for the shared powder room and laundry room.

Millie’s Remodel: Powder Room & Laundry Room Design

If you remember, Millie’s laundry room was only accessible from the back deck. You had to walk out the back door, make a U-turn and go into the laundry room. I’m certain it was a major inconvenience doing laundry if it was raining, snowing, or just plain cold outside.

To remedy this situation, I had my masonry contractor brick up the door and we put a transom window at the top of the opening to add some natural light into the room.

But, I got ahead of myself. Did you remember what I found under the laundry room floor and door?

ROT! Lots of wood rot and a fungus growing on the floor joists. My framers came in and replaced all the damaged joists and put down AdvanTec material for the subfloor. This is my new favorite material for subfloors. It’s moisture (and therefore mold) resistant. AdvanTec has tongue and groove edges so there’s virtually no movement or squeaking in the floor.

open framed wall looking into new powder room and laundry room

A new door opening has been framed into the house. The doorway may seem extra wide, but that’s because I still have to install the pocket door frame there.

Now that the subfloor and framing is done, it’s time to focus on making this room beautiful again. Here’s my design board for the shared laundry and powder room.

(I’ve included affiliate links for your convenience. I earn a small percentage from a purchase using these links. There is no additional cost to you. You can read more about affiliate links here.)

Ceiling Mounted Light | LED Wall Light | Round Modern Mirror | 24″ Vanity with Top  | Gold Sink Faucet | Stacked Washer & Dryer | Cement Tiles

This bathroom has to do double-duty as a laundry room and powder room. For this reason, I opted for a vanity with storage inside. I can’t wait to see all these elements installed in this room. Personally I like the classic navy and white color palette.

What about you? Do you like the design choices I made for this room?

A special thank you to the Millie’s Remodel Sponsors:

The Millie’s Remodel project sponsors have donated materials for the Millie’s Remodel project. As you know I am very particular about the brands I work with and recommend. As a general contractor, I choose the products used on my projects wisely to make sure they last a lifetime. Therefore, I have no reservations putting my name behind each and every one of these sponsors.

millies remodel sponsors logos

Millies’ Remodel has come to the point where it’s time to start building back! Hooray. But, this means I need to pick out the final finishes. Want to see Millie’s main bathroom design board?

Millie’s Remodel: Main Bathroom Design

I find the process of creating a design board very helpful. It’s the easiest way to see how everything will work together and pinpoint anything that might not fit with the desired design style.

Before I show you the design board, I know I left you hanging for a month after we’d stripped everything down to the studs and installed new electrical, plumbing, and a new Trane HVAC unit. Now we have a clean slate for the bathroom.

framing opening and plumbing run between kitchen bathroom

You have to admit, it’s an improvement from the original bathroom. Especially because the toilet was ready to fall through the floor!  In case you forgot what it looked like when I bought the house, here’s a reminder. How could you forget that beautiful faux blue marble vanity top? Yuck.

If you’re wondering where I was for a month, I had three trips from mid-December to mid-January. Although normally I get homesick if I travel more than once in a month, it was nice spending time with my boys, my husband, my sister, and a few friends. First, we flew across the country and beyond for a vacation trip to Hawaii over Christmas. We had a fabulous time swimming with sea turtles, whale watching, and witnessing all the beauty along the Road to Hana, and a sunset view from Haleakala in Maui. Then we flew to the big island and had our minds blown touring Volcano National Park. We capped off the trip with a stop in San Jose to see my sister, my nieces, my brother-in-law, and my mom! There’s nothing like family to make you laugh until you are crying.

After being home for a week, I took a quick trip to Hilton Head, SC to tour the HGTV Dream Home. You can see parts one and two of the tour.

Finally, I flew back west for a week to attend the International Builder Show in Las Vegas. I’ve never been to this show but it was amazing, overwhelming, and exhausting all at the same time. But enough about my travels, today I want to show you the finishes I’m contemplating for Millie’s main bathroom.

Mid-Century Style

I knew Millie deserved a mid-century modern vibe given her age (and the popularity of this design trend.) To tell you the truth, I’d never designed anything with MCM in mind. To familiarize myself with this more minimal design style, I searched “Mid-Century Modern” images in Pinterest and started creating a design file for Millie’s Remodel.

After delving deep into the Mid Century pin world, I began to put together elements for the bathroom.

(I’ve included affiliate links for your convenience. I earn a small percentage from a purchase using these links. There is no additional cost to you. You can read more about affiliate links here.)

Sources: 

Over Mirror Light | Black Modern Door Lever | Gold Tub Shower Fixtures | Lighted Mirror | Graphic Cement Floor Tile | Beveled Subway Tiles | Dresser

What do you think about the finishes I picked for the bathroom? I’m loving the combination of warm colors. The light fixture and lighted mirror from Kichler will add some much needed soft light in the bathroom.

Can I tell you about those subway tiles? I couldn’t find an exact source link for those tiles because I purchased them at my local Habitat ReStore! And boy did I get a steal on them! I paid $8 per box meaning I paid 71 cents per square foot! The vanity I chose is a dresser I plan to transform into a vanity by adding a sink and modifying the drawers to fit around the plumbing. I can’t wait to show you how to transform a dresser into a vanity.

Finally, let’s talk about the star of the bathroom. Those tiles! The Vegas 3 Lili Cement Tiles can be installed in several patterns, but I liked this houndstooth style pattern. Of course, a regular doorknob wouldn’t be fitting for a mid-century modern house, so I’m excited to install those flat black Latitude door levers by Schlage.

I’m dying to know if you like the mood board for Millie’s main bathroom. Anything you’d change?

P.s. Lili Cement Tile, Schlage, and Kichler are sponsors of the Millie’s Remodel project. I am so grateful for their support of this project.

A special thank you to the Millie’s Remodel Sponsors:

The Millie’s Remodel project sponsors have donated materials for the Millie’s Remodel project. As you know I am very particular about the brands I work with and recommend. As a general contractor, I choose the products used on my projects wisely to make sure they last a lifetime. Therefore, I have no reservations putting my name behind each and every one of these sponsors.

millies remodel sponsors logos

We recently completed Habitat for Humanity Bathroom Renovations in a Weekend.

I don’t usually work for others, but when the executives at my local Habitat for Humanity office asked me to come in and take a look at their dated bathrooms, I said I could. But, I quickly stated I don’t traditionally offer my general contractor services to anyone. Most of you know that Habitat for Humanity is one of my top charities. And for good reason! Our local Habitat for Humanity has built over 600 homes to help address the affordable housing crisis in our area. I would do anything for this organization, but renovating two bathrooms wasn’t a job I’d usually tackle unless it was for one of my own properties.

However, when I saw their sad and dated twin bathrooms, I changed my mind about offering my services. I knew I could improve the bathrooms as a way of thanking the employees for the work they do for our community. I also knew it would be a great way to keep busy before closing on Millie’s Remodel. Between Habitat for Humanity’s calendar and mine, we finally settled on the last weekend before I signed the contract on Millie.

In my head, I thought it would be a quick two day renovation easily accomplished over a weekend. Instead, it turned into a four day marathon working into the evening on two of those days. In an effort to explain my faulty time estimation skills, I submit two facts:

  1. I’m an overly optimistic person. I will always see the glass half full.
  2. I’m not the sharpest math person and forgot to multiply my time by two for two bathrooms.

Oops! Luckily, I got some help from two local friends: Sophie from @TheHipperFam and Stephanie from @UncommonOutpost. Without their help, I might still be working on these bathrooms.

The Before:

Although the pictures look dark, what you can’t see in these photos is the horrible flickering fluorescent light fixtures. The lighting was so dismal, I knew I had to change out the fixtures. Because no matter what updates were made, the lighting would always act as a wet blanket on the new look.

The old vanities were both built for handicap accessibility which left no room for storage under the sinks. Therefore, each bathroom had a ReStore salvaged kitchen cart to make up for the lack of storage. But, the carts were dirty and looked out of place in the bathrooms. I knew I had to come up with a plan to get rid of them.

Speaking of dirty, the walls definitely needed a new coat of paint. The grime and scuffs were everywhere.

The Design:

For the design plans, I challenged myself to work within a small budget and use as many items as possible from the Habitat ReStore. With this in mind, I created a plan in Photoshop and submitted it to Habitat for Humanity for approval.

Luckily they loved the design idea and gave me the go ahead to renovate the bathrooms. But, I kept a few things secret from them. After all, what fun is a makeover project without a little surprise, right?!

The Renovation Plan:

  • Electrician to replace CFL tube lights with LED Recessed Can Lights
  • Pretty Handy Girl build storage cabinet and one handicap sink frame
  • Plumber to Remove Sinks and Toilets
  • Remove all Fixtures from Bathroom
  • Remove Flexible Vinyl Baseboards
  • Clean and Patch Walls
  • Clean floor with TSP Cleaner
  • Paint Walls
  • Lay Waterproof LVT Flooring
  • Sand and Prep Reclaimed Lumber
  • Install Reclaimed Wood Wall
  • Install Vanities
  • Add Wood Baseboards and Paint
  • Plumber Replaces Toilets and Installs Faucets
  • Add Mirrors, Art, and Replace Fixtures
  • Stand back and admire the renovation results (and snap a few pictures)

Let the Habitat for Humanity Bathroom Renovations Begin:

A few days before I started the renovation, my electrician stopped by the offices to swap out the old fluorescent lights with brighter (and less flickery) recessed LED lights. Immediately the room felt brighter, but it wasn’t as bright as I had hoped. To help lighten the space more, I chose light paint shades for the walls. The colors I selected are from Magnolia Home Paint Line because I loved working with the paint in the Saving Etta house.

The handicap accessible bathroom was painted Carter Creme. I knew this color would look beautiful with the reclaimed wood wall and add a little warmth to the room.

Carter Creme paint color by Magnolia Home Paint

I would have liked to use the same color in the other bathroom, but the vanity color  was already a cream color and I didn’t want to draw attention to the slightly dated vanity color (or accidentally match it). Using Cloudy Gray, a paint color with cool tones, helped tone down the warmth of the vanity and provided some contrast.

Cloudy Gray paint color walls by Magnolia Home Paint

Both paint colors were light enough to do wonders for improving the light in the windowless bathrooms.

After painting, Sophie and I worked the afternoon to lay LVT waterproof flooring (also from the ReStore) in one bathroom. The flooring went in very easily, but we did have to slow down to cut around the toilet flange and the doorway.

After Sophie left, I tackled the second bathroom floor, working late into the night. It’s amazing what a difference the new waterproof LVT flooring made in these bathrooms.

On Sunday, Stephanie helped sand and prep reclaimed lumber from the ReStore for installation. We ran out of weathered boards, so had to improvise with a vinegar and steel wool concoction I whipped up the night before. My friend, DIY Pete, has a great tutorial for making this solution here. After the boards were dry, she and I clad the back walls of the bathrooms with the reclaimed lumber.

To achieve the striped look, we alternated the weathered side with the protected side of the wood. These boards were originally subflooring in an old house, so they have lots of character, nail holes, and a beautiful warm color. To protect the boards from water and to keep them from flaking, we coated them with a clear varnish.

Finally on the afternoon of Day 4, I gave my plumber the go ahead to come back to install the new toilets (courtesy of Wilkinson Supply Co.) and the sink faucets. Stephanie and I worked feverishly ahead of him trying to hang the mirrors and art.

We replaced the dated oak mirrors with pretty gold framed ones. I found the first mirror super cheap at a thrift store.

The other one was a gold art frame from the ReStore. I replaced the picture with mirrored glass and it looks like it was always a mirror!

This is a little message area was created by screwing two drawers (salvaged from the ReStore) together and adding cork and a clip board.

The handicap bathroom needed additional storage since it didn’t have a sink cabinet. To solve the issue, I built this little wall cabinet using an old window from the ReStore.

Then I added a little reclaimed door latch to keep the door closed. Hooks on the side are for hanging up a purse or light jacket.

Two Bathrooms in One Weekend – The Reveal:

Are you ready to see the final results? First here’s a reminder of what the bathroom looked like four days earlier. (The new LED light was already installed by my electrician in this photo.)

Habitat for Humanity Bathroom Renovations

And here’s what the same bathroom looks like now!

Originally I thought we could secure the sink base to the studs. But, after discovering the studs were all metal, we decided to add one leg to the front corner of the sink apron for more support.

The art quotes were created by reusing ReStore art frames. I simply created some watercolor art and added the quote in Photoshop.

Habitat for Humanity Bathroom Renovations

The twin bathroom looked like this before:

And now!

The sink vanity was from the ReStore. We were lucky the Raleigh ReStore has a huge selection of donated cabinets.

Habitat for Humanity Bathroom Renovations

I documented the entire renovation on video, hopefully, you’ll enjoy watching the whole Habitat for Humanity Bathroom Renovations process.

Want to Help Habitat for Humanity and Work Along Side Me?

Have you ever wished you could work next to me? Learn some tricks and tips of the trade? Well, now you can! I’ve signed up to volunteer for this year’s Women Build, She Nailed It Campaign with our local Habitat. This is a one day opportunity to help build a house with ALL WOMEN! Don’t be intimidated, you won’t be asked to do anything you aren’t comfortable with. But, you may gain a little empowerment and learn a new skill or two!

Habitat for Humanity Women Build Charlotte, NC | Pretty Handy Girl

The date is Saturday, September 28th in Wake Forest and I’d love to meet you there and share a day of swinging hammers. What do you say? Want to join me? If you can’t, but still want to contribute, please make a donation to the Women Build Campaign. Even the smallest donation will help us accomplish our goal.

Again, I have to give a huge shout out to Sophie from @TheHipperFam and Stephanie from @UncommonOutpost who came to help me on this project and gave up their weekend. Also, a big thank you to ALM Plumbing and Wilkinson Supply Co. for donating the toilets.

I hope you liked the video. If you aren’t subscribed to my YouTube channel, definitely do so now to stay up to date on all my tutorials and renovation projects!

Subscribe to my YouTube Channel

See you all soon.

Be sure to pin this image to share how to accomplish a bathroom renovation in one weekend!