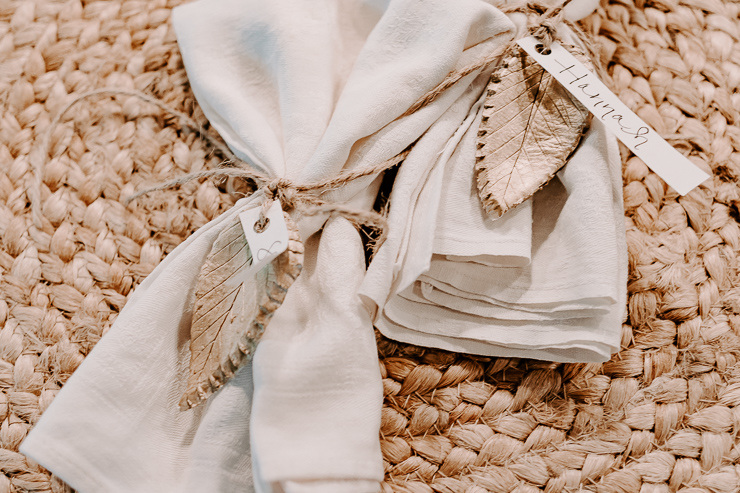
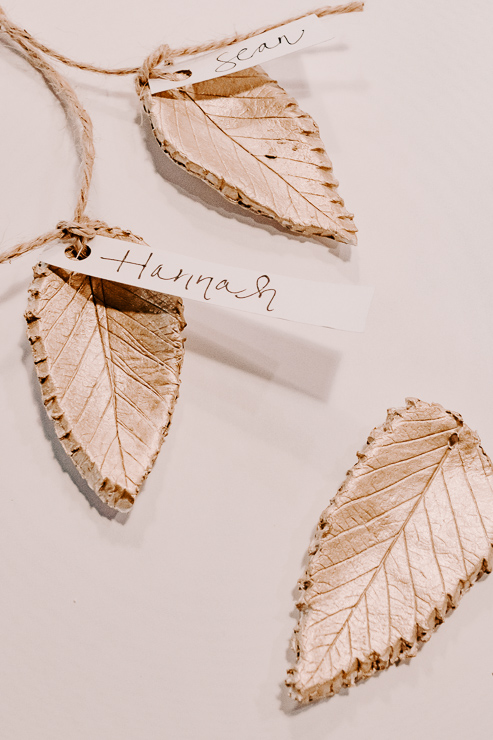
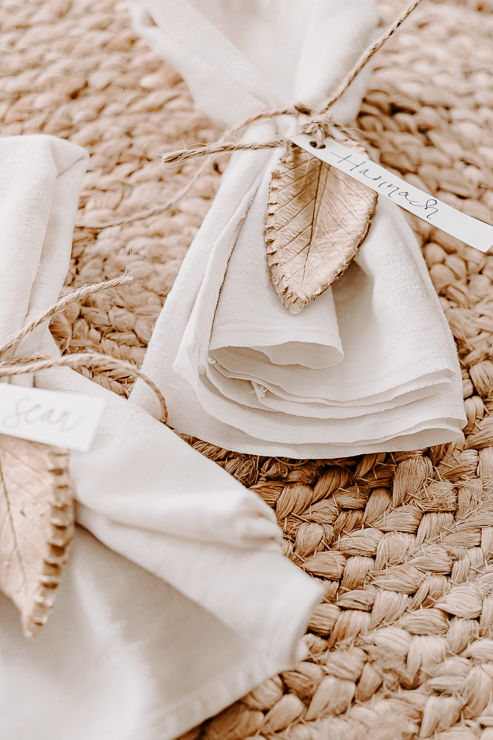
view of napkins tied with jute twine and a clay leaf place card

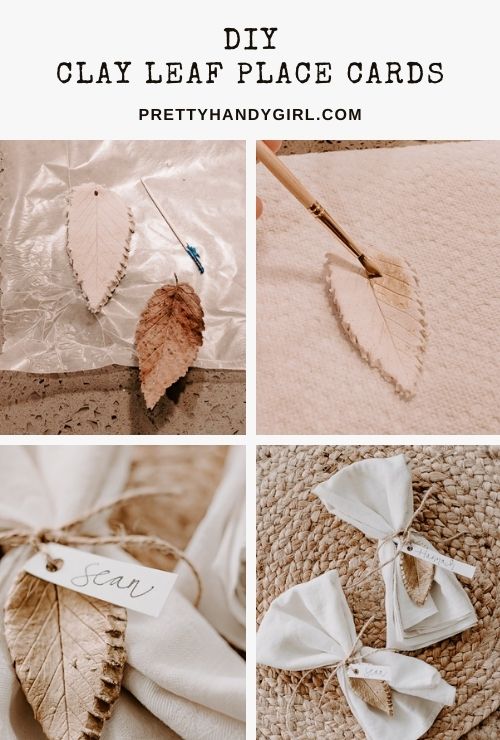
diy clay leaf place cards

DIY Leaf Place Cards for the Holidays

I hope your fall has been lovely so far.  The weather is just starting to turn here in NC.  I have to say, I love the weather here compared to Seattle.  We never experienced so much sun day after day!  Today, with Fall weather on my mind, I’m making you these DIY leaf place cards for the upcoming holidays.  These place cards are little clay leaves inspired by nature (hello, fall!) and painted in a beautiful gold color to elevate them for elegant dinners and parties.  

view of napkins tied with jute twine and a clay leaf place card

You’ll love my secret for getting those fancy leaf edges from your clay too – read on to find out how I do it.

These place cards can be used time and time again, just change out the name tag for each new guest.  

I hope you enjoy this craft!  

Materials:

  • Gold Paint
  • PaintBrush
  • Air Dry Clay
  • Flat Screwdriver
  • Rolling Pin
  • Toothpick
  • Leaves from Outside
  • Jute Twine
  • Wax Paper
  • Cardstock
  • Pen for Writing 

Instructions:

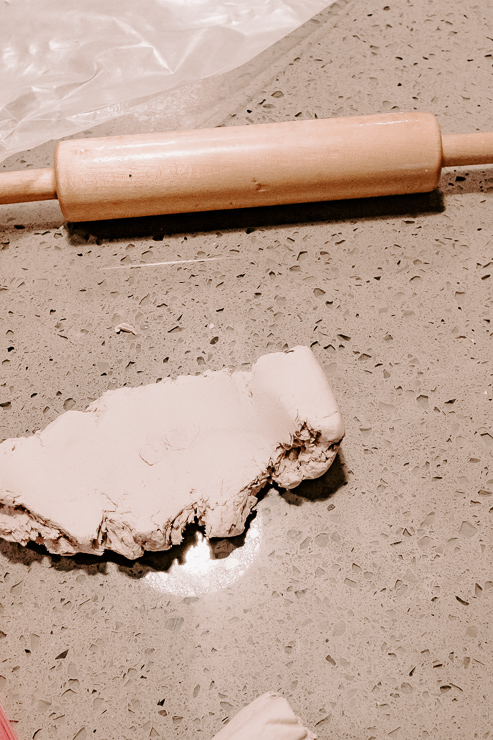
Step 1:  Roll our your Air Dry Clay

rolling out air dry clay

Grab a ball of air-dry clay and with slightly wet hands, roll it out using your rolling pin.  You want it to be about ¼ inch thick.  If you make it too thin, it will be too fragile and crack.  

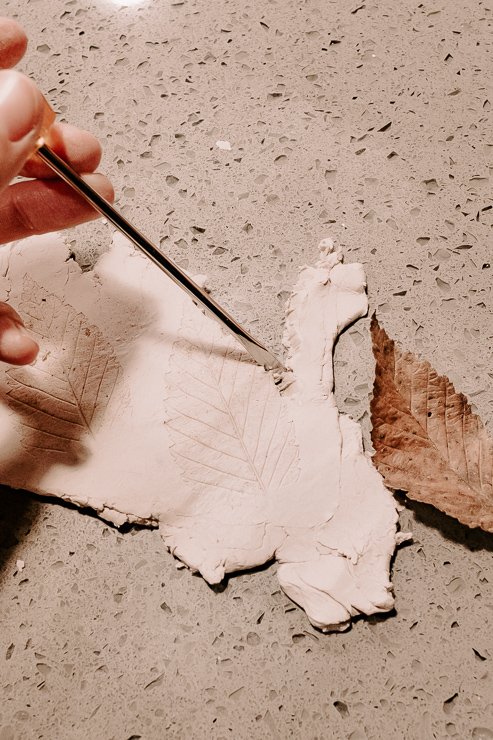
Step 2:  Make a Leaf Imprint

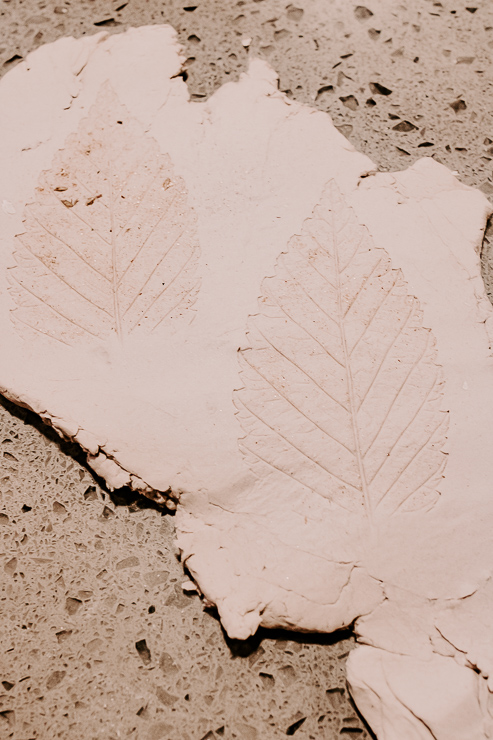
leaves imprinted in clay

Take your leaf, and lay it on top of your clay.  Using your rolling pin, roll carefully over the leaf several times, creating an imprint of the leaf onto the leaf.  

Step 3:  Cut your Leaf Out

cutting out leaves from clay

Here’s where the magic happens!  You should see a beautiful leaf imprint in your clay.  Take a flat screwdriver and make little divots on the side of your clay leaf, where the leaf would naturally have edges.  

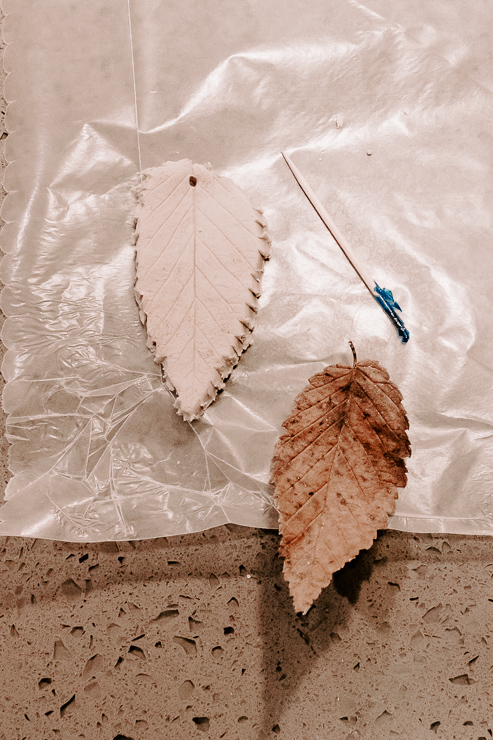
a leaf cut out of clay with a hole for hanging

Do this all the way around, and then carefully remove your leaf.  Using a toothpick, make a hole in the top of your leaf.  This will be for tying your jute twine later.  

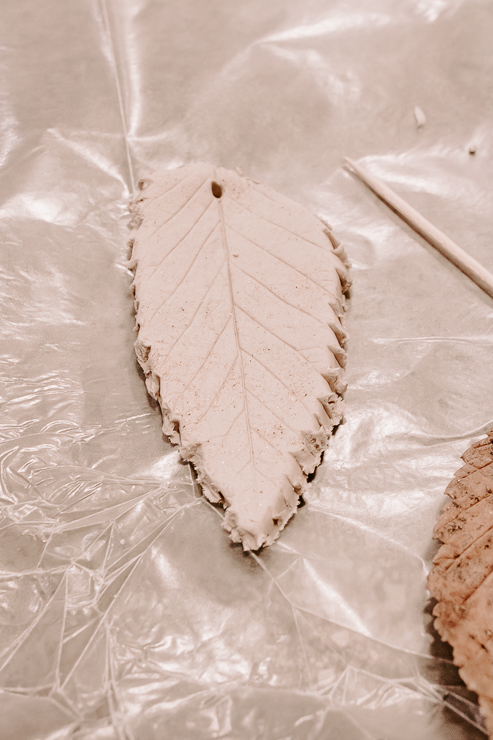
close up view of clay leaf

I take the leaf in my hands and slightly bend it to give it a more natural leaf shape, but you are welcome to keep it flat too.  Place your leaf on wax paper and allow it to air dry naturally for a couple of days.  

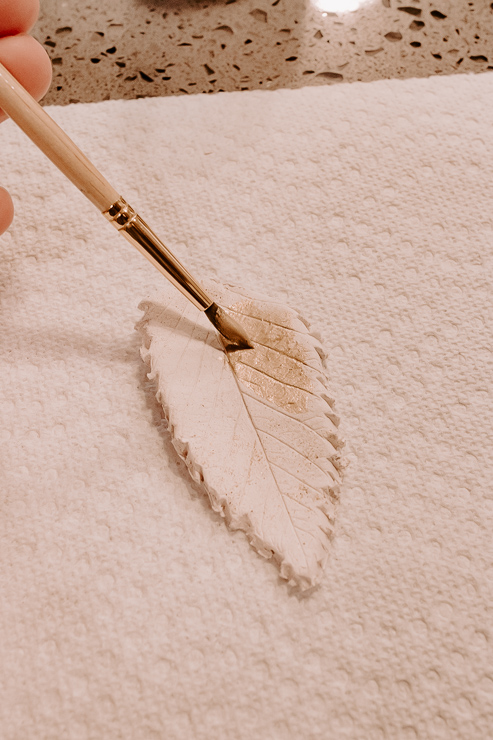
Step 4:  Paint your Clay Leaves

painting clay leaves gold

After your leaves dry, take a paintbrush and gold paint and lightly brush a few coats on the top and sides of your clay leaf.  Set them aside to dry.  

Step 5:  Tie on a Nametag

view of gold painted clay leaves

Our leaves are looking beautiful!  Now, all we need to do is cut a small tag of cardstock and write the guest’s name on it.  Use a hole punch to cut a hole in the cardstock.  Tie this to your leaf by threading your jute twine through the hole we created in the leaf in Step 3.  

napkins tied with jute twine and clay leaves with names

Simply beautiful!  

I like to tie my cloth napkins with jute twine, and then tie the clay leaf name tag to it.  

napkins tied with gold clay leaves and name tags

How pretty and unique are these!?  I’m sure you will get some comments from your guests.  And they will feel so special sitting at this elegant dinner with you.  

As I said earlier, you can reuse these DIY leaf place cards.  Once you get the hang of making one leaf, the rest don’t take long.  You can also try this project with different shaped leaves, such as maple leaves.  

napkins tied with jute twine and clay leaves with names

My daughter and I foraged for some leaves together.  She happened to find the pretty ones I ended up using.  Thanks, Hannah! 

Grab the kids and make this a family project.  It’s a great craft to do around the holidays.  

karen signature

~ See More of Karen’s Tutorials ~


karen from decor hintHello!  I’m Karen, the creator of the Home Decor and DIY Blog: Decor Hint. I’m a Native of the East Coast, but I currently live in beautiful Seattle with my hubby, our two wonderful children, and our spunky wheaten terrier.

You can usually find me with some sort of craft in one hand and a coffee in the other. And I’m always rearranging furniture or moving lamps from room to room. I have a passion (read: obsession) for decorating, DIY, and gardening. In short, I love making my house into a home.

Like many, I’m inspired by what I see in home decor magazines, but I’m not so inspired by the price tags.  Consequently, I love finding and creating beautiful budget-friendly home decor items. In a head to head competition, I bet you’d never know the difference between the designer items and my DIY creations!  Many of my DIY projects focus on sewing, crafting, upcycling and organizing. Some of my favorite projects have been making pretty wreaths, sewing my own tassel hand towels, and crafting these trendy wood bead garlands. I can’t wait to inspire you and spark your creativity through my DIY projects.

You can always connect with me on Pinterest, Twitter or Instagram.

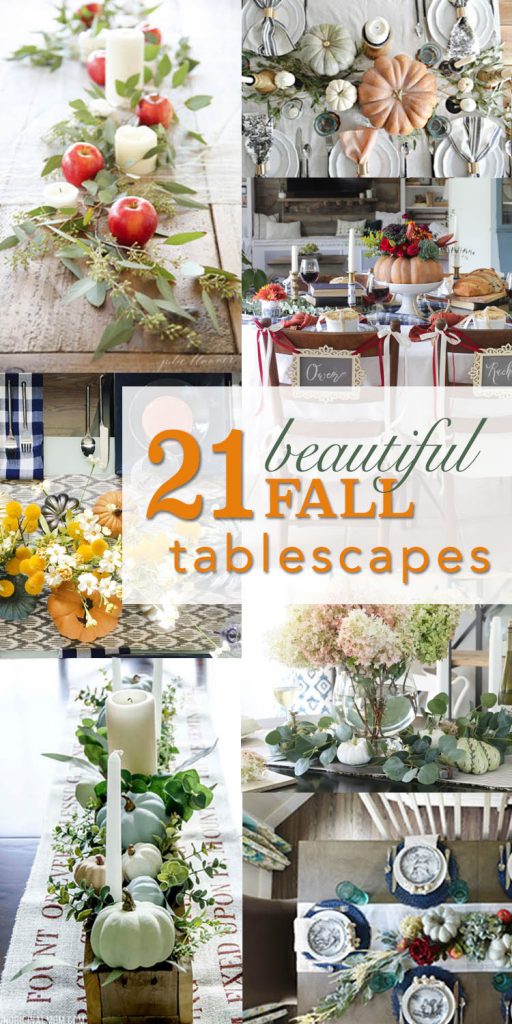
If you liked this tutorial, you’ll love these fall tablescape ideas:

21 Beautiful Fall Tablescapes - Decorating Your Table for Fall

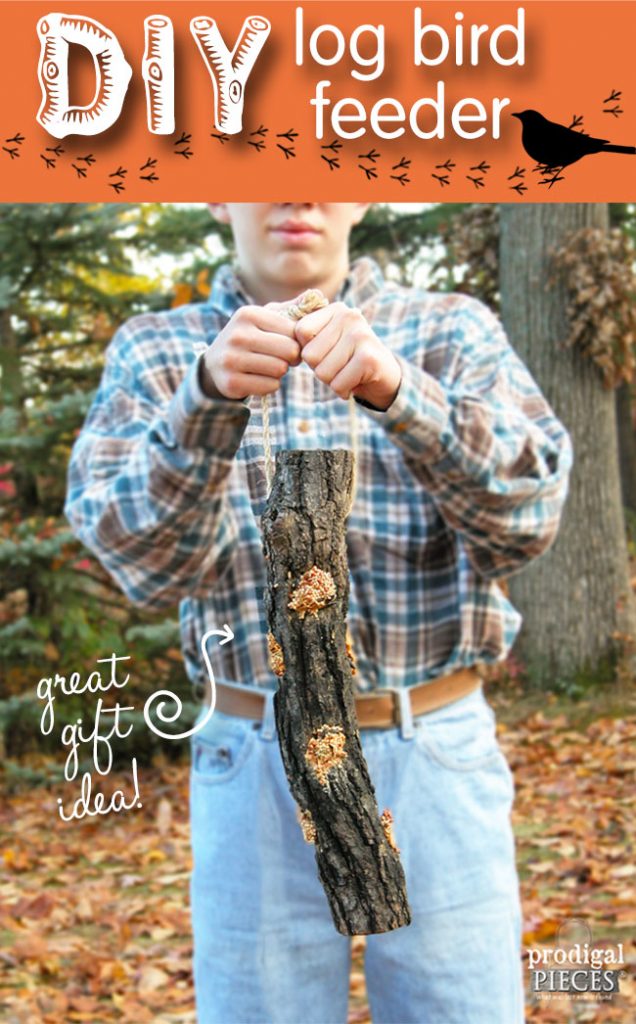
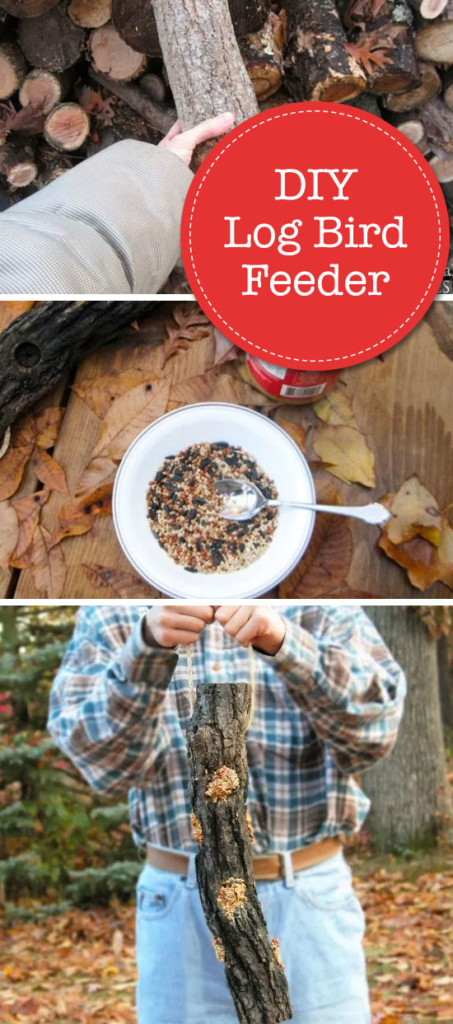
Give your feathered friends a treat from spingtime through winter. Make this easy-peasy DIY log bird feeder with one tool and a few basic materials by Prodigal Pieces for Pretty Handy Girl www.prodigalpieces.com #prodigalpieces

Hello readers, I’m Larissa coming to share with you a nature-inspired DIY project. Today, we’ll learn how to create a special DIY Log Bird Feeder treat for our feathered friends. The best part is that this can be a family fun activity to do AND to give as a gift for anyone who loves bird watching.

Give your feathered friends a treat from spingtime through winter. Make this easy-peasy DIY log bird feeder with one tool and a few basic materials by Prodigal Pieces for Pretty Handy Girl www.prodigalpieces.com #prodigalpieces

DIY Log Bird Feeder

We are avid bird lovers in our home and were delighted when a friend of mine gave us this bird feeder made from a piece of firewood and rope. How easy is that?

Give your feathered friends a treat from spingtime through winter. Make this easy-peasy DIY log bird feeder with one tool and a few basic materials by Prodigal Pieces for Pretty Handy Girl www.prodigalpieces.com #prodigalpieces

What a delight it is to see our tree clinging birds (nuthatches, tufted titmice, and woodpeckers) come for a visit and see their excitement at the treat they’ve found, especially the birds that overwinter. Did you know that migratory birds will remember your home the next time they’re passing through and will come back again year after year if you continue to provide nourishment for them? It’s like a reunion each spring and winter. Fun!

So, let’s grab some materials and get ready to create a DIY log bird feeder!

Give your feathered friends a treat from spingtime through winter. Make this easy-peasy DIY log bird feeder with one tool and a few basic materials by Prodigal Pieces for Pretty Handy Girl www.prodigalpieces.com #prodigalpieces

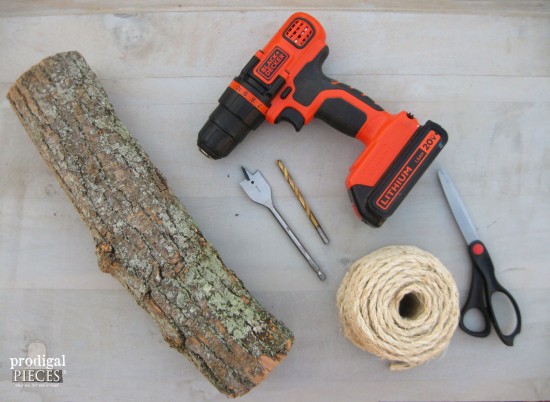
Materials:

(I’ve included affiliate links for your convenience. I earn a small percentage from a purchase using these links. There is no additional cost to you. You can read more about affiliate links here.)

Picking Your Log:
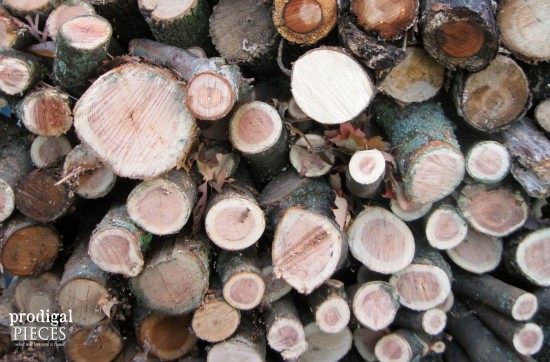
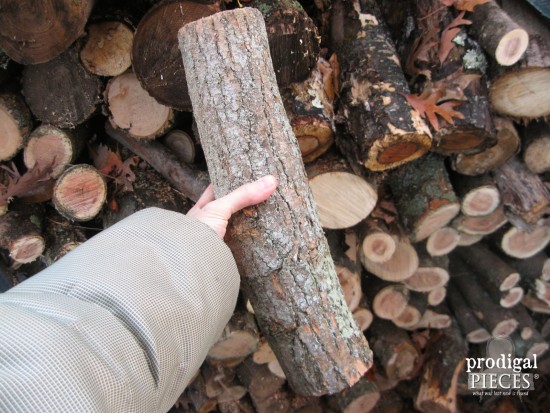
We are blessed to have a fireplace, so we always have a stash of firewood on hand. For your log, you can use a downed branch or head to your own stash to grab a piece of wood.

Give your feathered friends a treat from spingtime through winter. Make this easy-peasy DIY log bird feeder with one tool and a few basic materials by Prodigal Pieces for Pretty Handy Girl www.prodigalpieces.com #prodigalpieces

The tree-clingers prefer a chunky bark, but any tree variety will do.

Give your feathered friends a treat from spingtime through winter. Make this easy-peasy DIY log bird feeder with one tool and a few basic materials by Prodigal Pieces for Pretty Handy Girl www.prodigalpieces.com #prodigalpieces

Instructions:

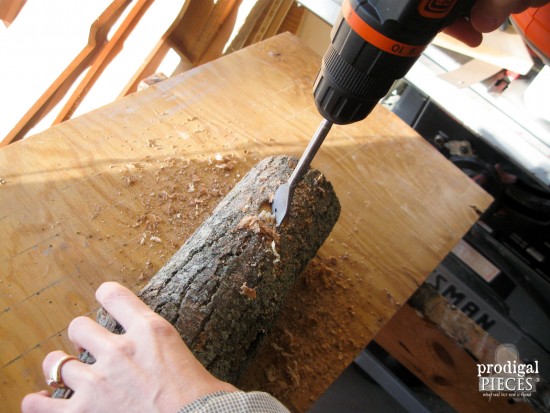
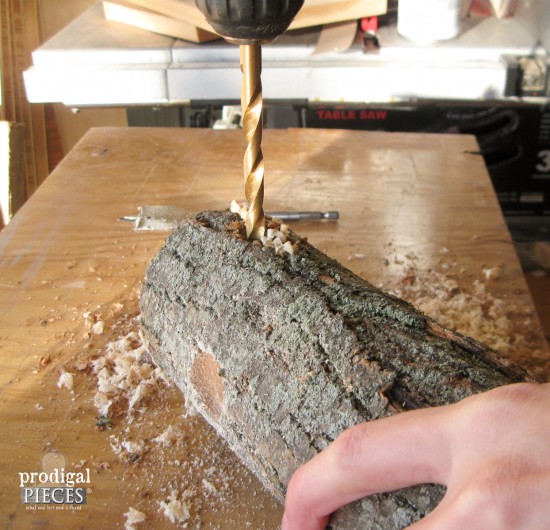
Clamp your log and keep your hand clear from the drill bit. Wear appropriate eye protection.

Give your feathered friends a treat from spingtime through winter. Make this easy-peasy DIY log bird feeder with one tool and a few basic materials by Prodigal Pieces for Pretty Handy Girl www.prodigalpieces.com #prodigalpieces

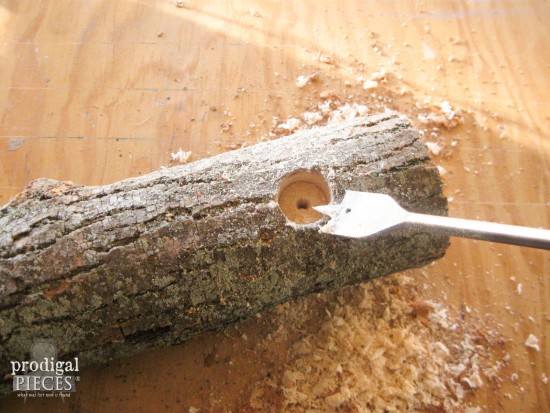
To start, use a 1″ spade bit to drill a hole approximately 1/2″ deep, 2 inches down from the top.

Give your feathered friends a treat from spingtime through winter. Make this easy-to-build DIY log bird feeder with one tool and a few basic materials.

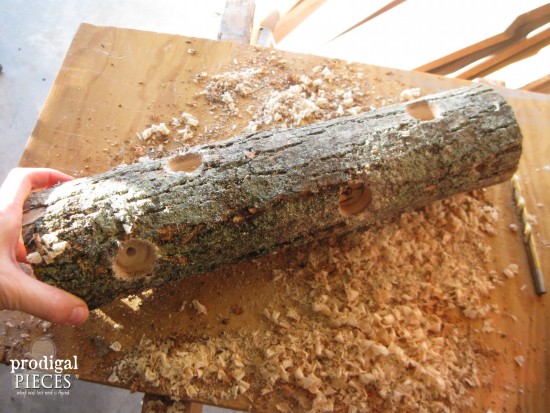
Drill a second hole on the same face about 6″ below the first.

Roll the log a quarter turn and drill in the next face starting with the first hole about 5″ from the top and then a second hole 6″ below that one. (This does not have to be exact and gives a more rustic feel when randomly chosen.)

Give your feathered friends a treat from spingtime through winter. Make this easy-peasy DIY log bird feeder with one tool and a few basic materials by Prodigal Pieces for Pretty Handy Girl www.prodigalpieces.com #prodigalpieces

Repeat those steps until you have two sets of matching faces on opposing sides.

Drill your rope hole using a 5/16″ bit. Starting on the face that has the first hole 5″ down, drill your rope hole 2″ from the top, making sure to go completely through the log.

Give your feathered friends a treat from spingtime through winter. Make this easy-peasy DIY log bird feeder with one tool and a few basic materials by Prodigal Pieces for Pretty Handy Girl www.prodigalpieces.com #prodigalpieces

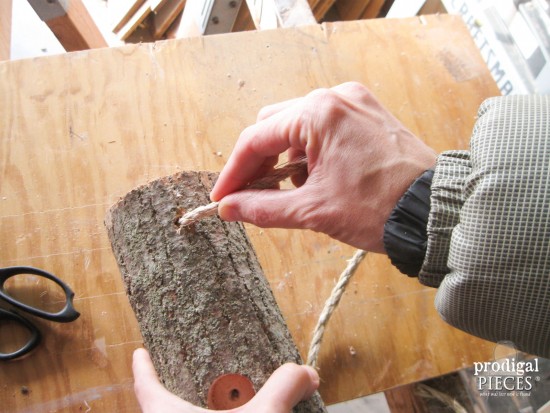
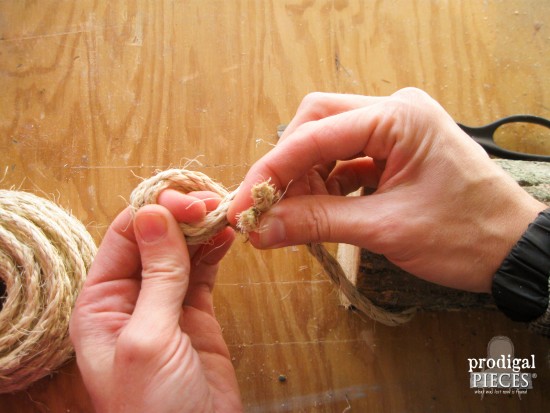
Cut a 2′ or longer piece of rope and thread it into the hole. If you turn the rope in the direction of the braid (counter-clockwise) while inserting it, that will help the rope go through smoothly.

Give your feathered friends a treat from spingtime through winter. Make this easy-peasy DIY log bird feeder with one tool and a few basic materials by Prodigal Pieces for Pretty Handy Girl www.prodigalpieces.com #prodigalpieces

Once through, tie the rope ends together using a basic knot.

Give your feathered friends a treat from spingtime through winter. Make this easy-peasy DIY log bird feeder with one tool and a few basic materials by Prodigal Pieces for Pretty Handy Girl www.prodigalpieces.com #prodigalpieces

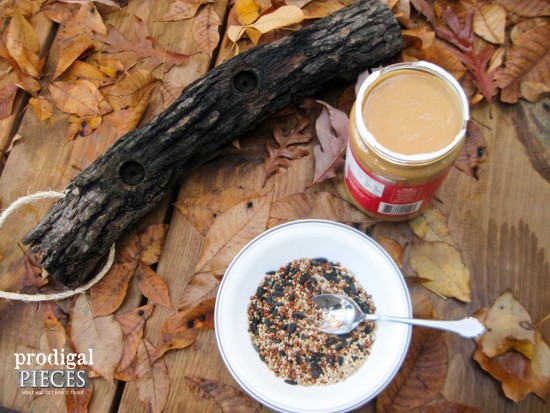
On to the fun part! Birds burn a ton of protein flitting about, so they need to store up as much as they can. We prefer to use chunky peanut butter and then roll it in seeds like this.

Give your feathered friends a treat from spingtime through winter. Make this easy-peasy DIY log bird feeder with one tool and a few basic materials by Prodigal Pieces for Pretty Handy Girl www.prodigalpieces.com #prodigalpieces

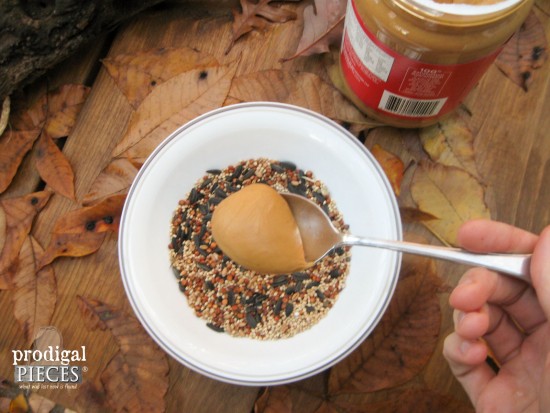
Grab a tablespoon of peanut butter and place it in a bowl of birdseed.

Give your feathered friends a treat from spingtime through winter. Make this easy-peasy DIY log bird feeder with one tool and a few basic materials by Prodigal Pieces for Pretty Handy Girl www.prodigalpieces.com #prodigalpieces

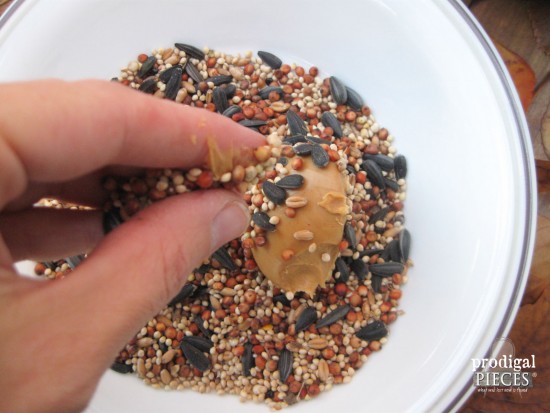
Then sprinkle the peanut butter with seed.

Give your feathered friends a treat from spingtime through winter. Make this easy-peasy DIY log bird feeder with one tool and a few basic materials by Prodigal Pieces for Pretty Handy Girl www.prodigalpieces.com #prodigalpieces

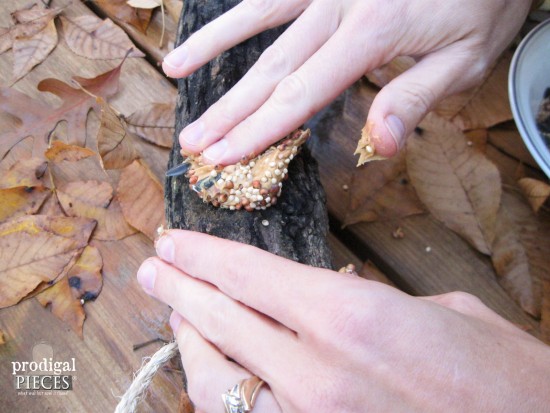
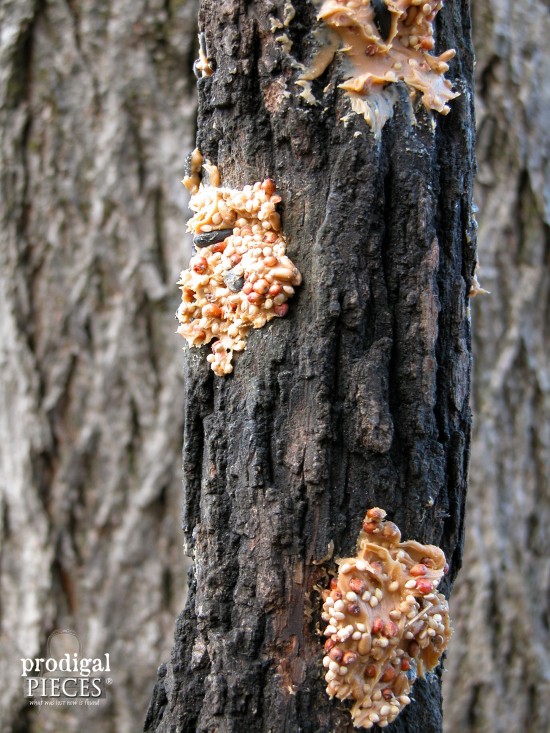
After coating with the seed, press the mixture into the holes using the back of a spoon, or if you’re nutty like me (catch the pun?) it’s more fun to use your fingers.

Give your feathered friends a treat from spingtime through winter. Make this easy-peasy DIY log bird feeder with one tool and a few basic materials by Prodigal Pieces for Pretty Handy Girl www.prodigalpieces.com #prodigalpieces

The kids love this part!

Give your feathered friends a treat from spingtime through winter. Make this easy-peasy DIY log bird feeder with one tool and a few basic materials by Prodigal Pieces for Pretty Handy Girl www.prodigalpieces.com #prodigalpieces

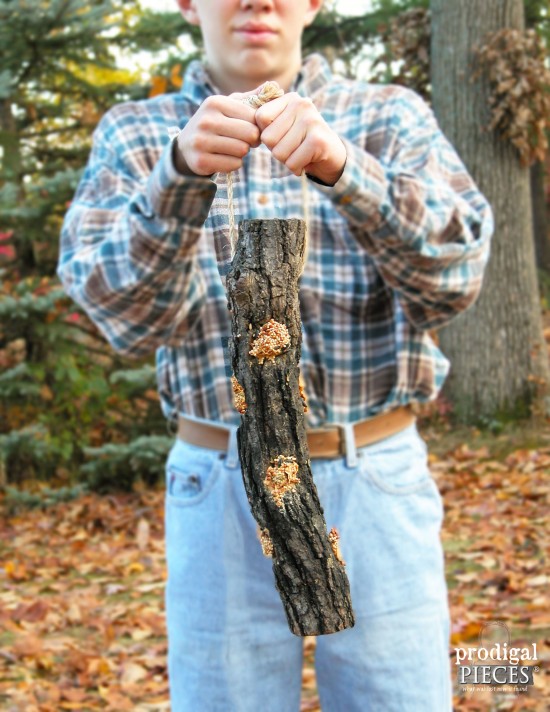
You’re done and it’s ready to hang. Yay!

Give your feathered friends a treat from spingtime through winter. Make this easy-peasy DIY log bird feeder with one tool and a few basic materials by Prodigal Pieces for Pretty Handy Girl www.prodigalpieces.com #prodigalpieces

For a fun twist, and if you’re feeling handy, you could also add dowels for other species to be able to roost at each hole, but for this project I kept it simple.

Got questions? Please feel free to ask.

If you enjoyed this project, do pin and share!

blog signature copy

Pin this project for later!

DIY Log Bird Feeder Pin Image


Liked this project? Then you’ll love these birdhouses:


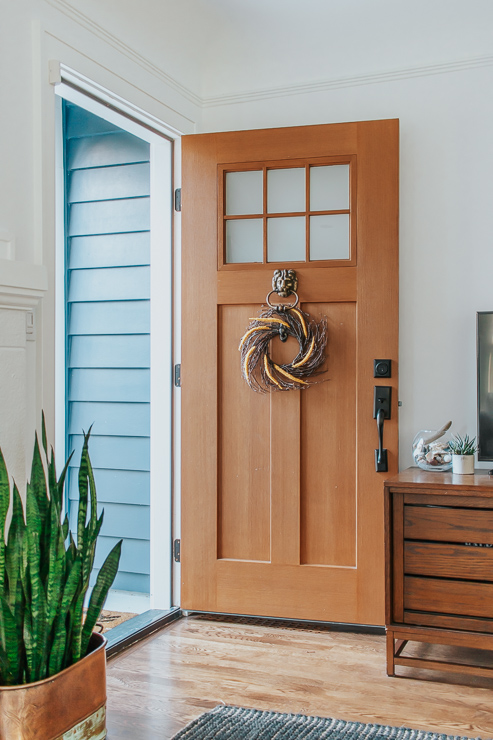
DIY Simple Fall Wreath for Less than $10

Hi everyone!  Happy Fall!

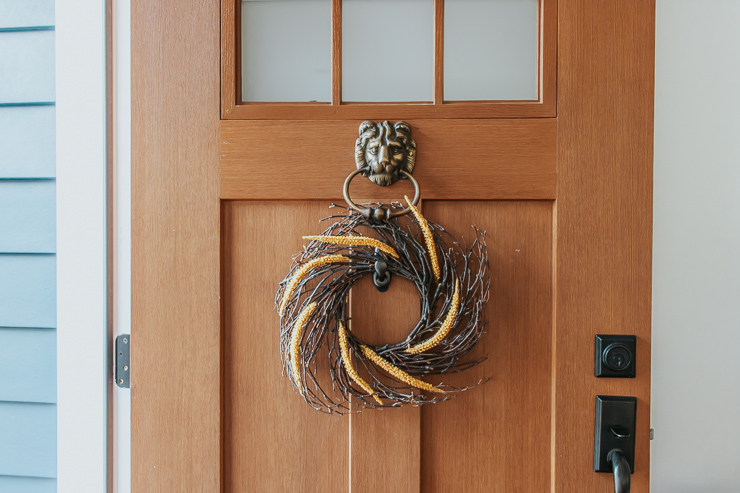
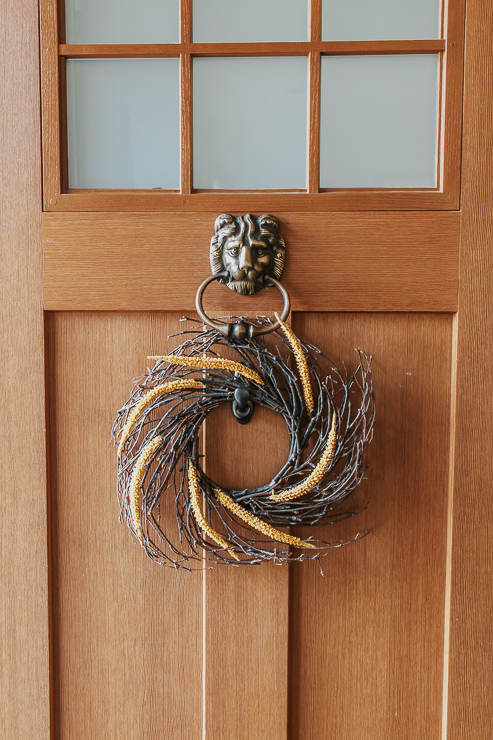
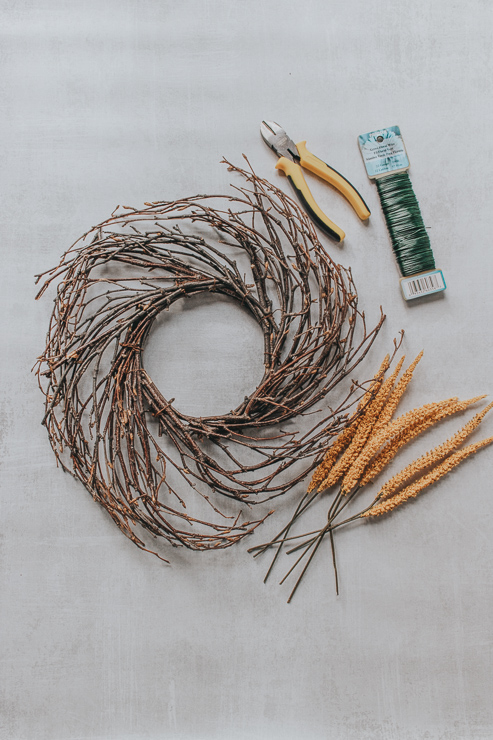
Today I’m back with this super simple wreath idea that will cost you less than $10 all in! It includes using an inexpensive starburst twig wreath from Amazon and some cattail bunches that I picked up at Dollar Tree for a buck each.

I happened to see this twig wreath from Amazon and it was only $7. I knew I wanted to make a Fall wreath with it. That’s what started this whole project! The nice thing about using twig wreaths is that they help to “fill out” your wreath. You don’t need as many floral/greenery accessories because the twigs add bulk.

I love making wreaths. It’s one of my favorite crafts. Lately, I’ve gravitated toward very simplistic, almost minimalistic looking, wreaths. And that’s how I wanted to design this one.

The cattails add a nice pop of color.

Let’s get started!

Materials:

(I’ve included affiliate links for your convenience. I earn a small percentage from a purchase using these links. There is no additional cost to you. You can read more about affiliate links here.)

Instructions:

Follow these three simple steps to creating your Fall wreath.

Step 1: Cut off Individual Cattails.

Since my cattails came in bunches, I started off by snipping each individual cattail from the stems. I left a bit of a stem on each one.

Step 2: Use floral wire to attach Cattails to your Wreath Form.

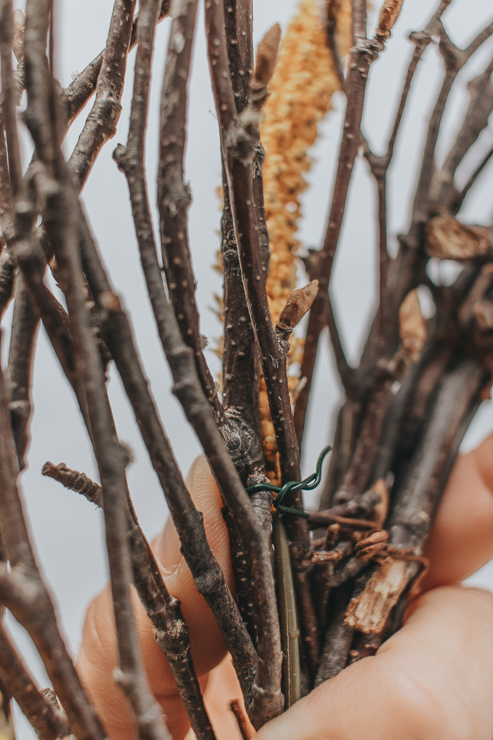
Using small pieces of floral wire, attach your cattails to your wreath form. You can twist the wire in the back to secure each cattail. I wanted my cattails to follow the twisted pattern of the wreath.

You can also try inserting the cattails through the twig wreath wire. Just be careful not to loosen or break the twigs from the wreath.

Step 3: Hang up and enjoy it!

After all your cattails are attached, you just need to hang up and enjoy it!

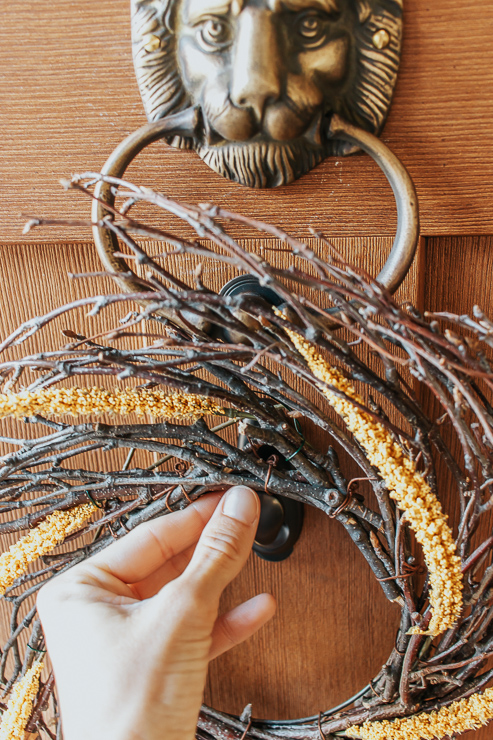
I like to use a 3m wreath hanger to hang them on my front door. If you have a glass door, you can buy a suction door wreath hanger that comes with a little hook.

These wreath hangers allow me to hang it anywhere on the front door and not block the windows. I like to hang my wreaths directly under our new lion doorknocker.

But you can also hang your wreath indoors. I especially love using wreaths for jazzing up an interior door or wall and I love hanging one from our kitchen vent hood around the holidays.

You don’t have to spend a lot to add some Fall Decor to your home. Dollar Stores are a great place to pick up a few florals and keep the cost low. You can always reuse the twig wreaths too!

For more wreath ideas, check out this modern hoop wreath tutorial here.

Until next time!

karen signature

~ See More of Karen’s Tutorials ~


karen from decor hintHello!  I’m Karen, the creator of the Home Decor and DIY Blog: Decor Hint. I’m a Native of the East Coast, but I currently live in beautiful Seattle with my hubby, our two wonderful children, and our spunky wheaten terrier.

You can usually find me with some sort of craft in one hand and a coffee in the other. And I’m always rearranging furniture or moving lamps from room to room. I have a passion (read: obsession) for decorating, DIY, and gardening. In short, I love making my house into a home.

Like many, I’m inspired by what I see in home decor magazines, but I’m not so inspired by the price tags.  Consequently, I love finding and creating beautiful budget-friendly home decor items. In a head to head competition, I bet you’d never know the difference between the designer items and my DIY creations!  Many of my DIY projects focus on sewing, crafting, upcycling and organizing. Some of my favorite projects have been making pretty wreaths, sewing my own tassel hand towels, and crafting these trendy wood bead garlands. I can’t wait to inspire you and spark your creativity through my DIY projects.

You can always connect with me on Pinterest, Twitter or Instagram.


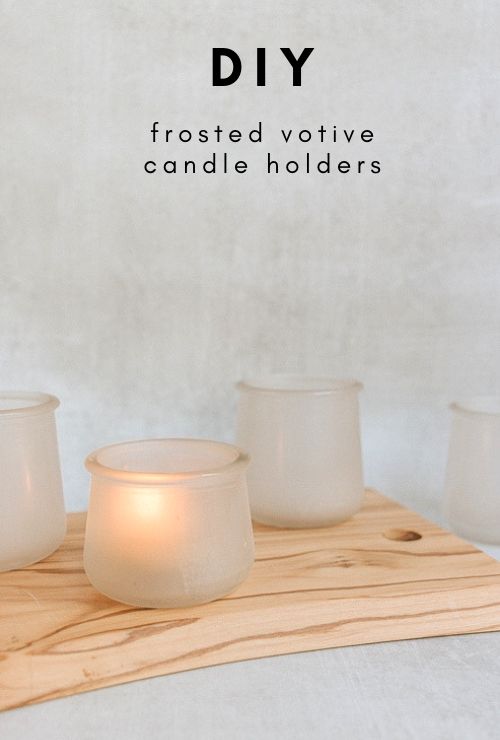
DIY Frosted Votive Candle Holders

Hi, Pretty Handy Girl Readers! I’m back today with a super simple and inexpensive project that you can use for the upcoming holiday season. Or anytime, really!  These DIY frosted votive candle holders are made from old yogurt jars (Yoplait by Oui jars).

This brand of yogurt comes in the cutest little glass jars and I’ve found so many uses for them, like my fairy jar macrame hangers and cinnamon stick candle holders.

Here’s how to make these DIY frosted votive candle holders:

Materials:

(I’ve included affiliate links for your convenience. I earn a small percentage from a purchase using these links. There is no additional cost to you. You can read more about affiliate links here.)

Instructions:

Follow these simple instructions to make these pretty votive candle holders!

Step 1: Clean your Jars

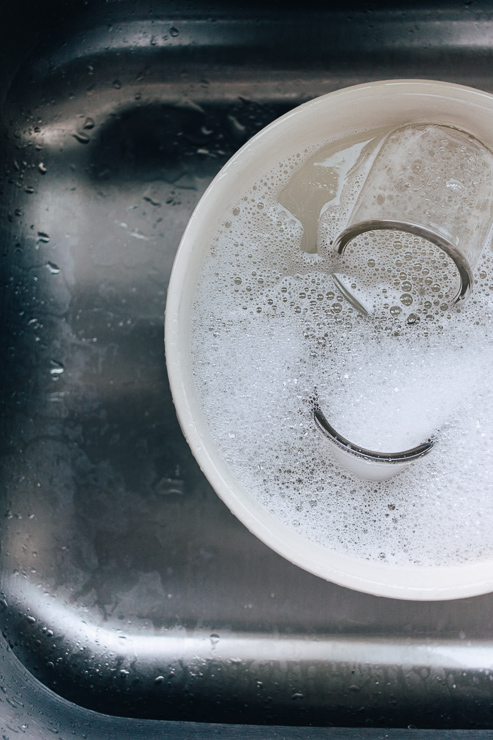
Here’s the easiest way to clean the jars. Place the jars in a bowl filled with hot, soapy water. Let them soak for a bit.

Wash jars in hot soapy water and dry

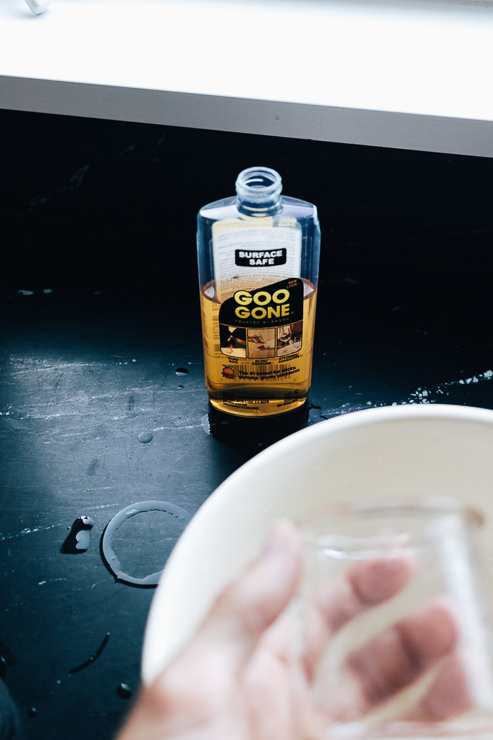
After soaking, use a tea towel to dry them and help remove most (if not all of the) sticker residue. Use Goo Gone to remove any remaining sticker residue.

You will find at this point that most of it will just rub right off. If not, put the jars in the dishwasher to get them nice and clean.

Step 2: Spray Paint your Jars

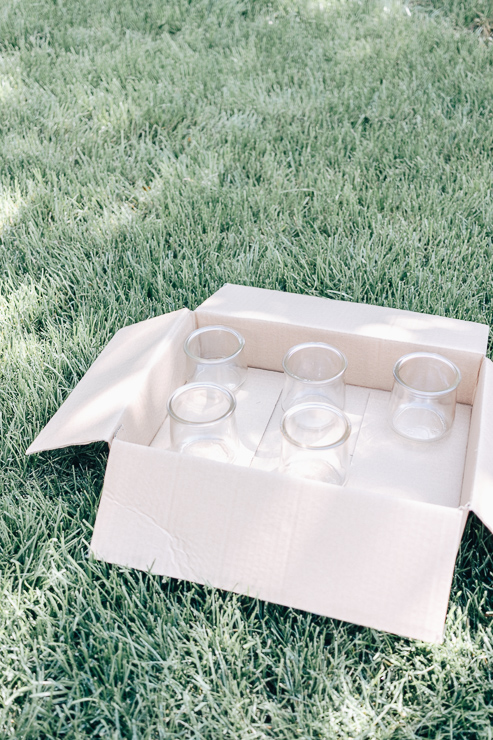
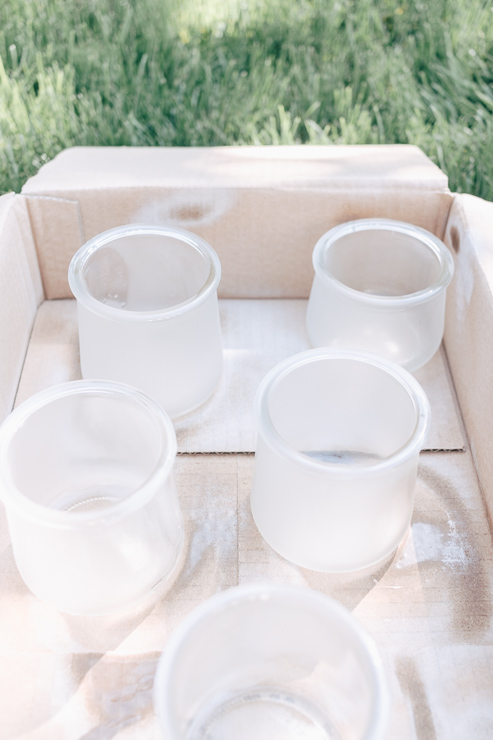
Place jars in a box to prepare for spray painting

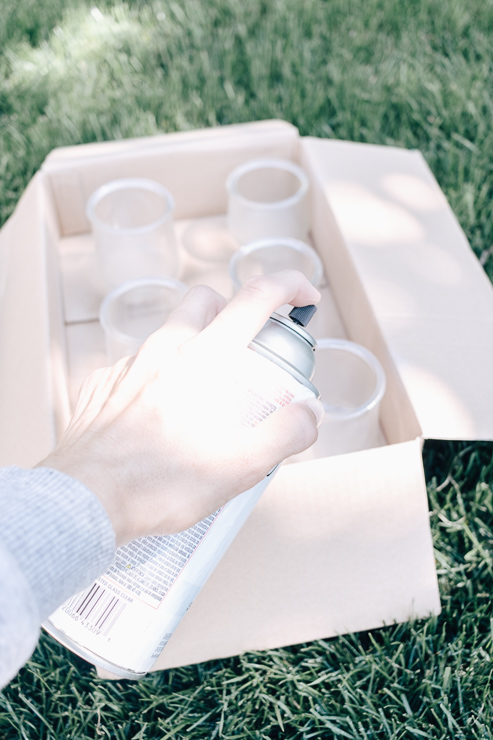
As with all spray painting and painting projects, it’s best to spray outside in a well-ventilated area (and use protective eyewear and a mask).

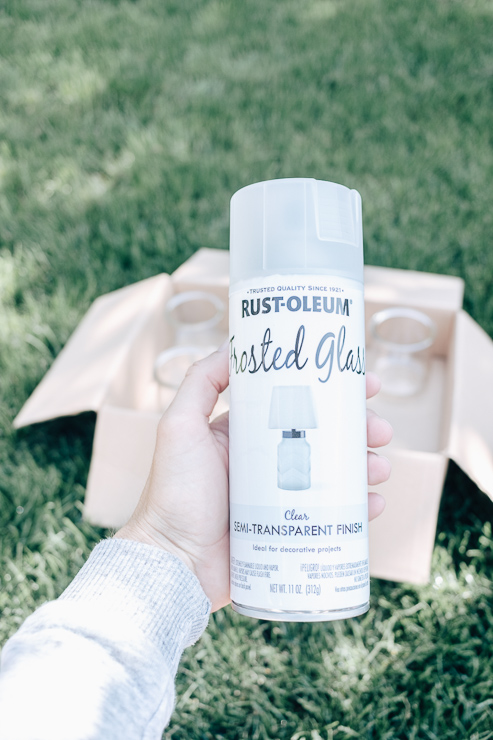
Spray your jars using light and even coats to avoid drips and runs in your paint. It’s best to go easy and commit to building up the paint over time. This spray paint dries in just 5-10 minutes! You will be able to tell where you might need more spray paint after giving it time to dry. Spray your jars with 2 coats for the best coverage.

I spray painted both the inside and outside of my jars, but that might not be necessary depending on the look you want.

Jars become more frosted looking as they dry (2)

As this paint dries, it becomes more opaque and frosted looking. It’s really cool to watch the paint magic happening before your eyes!

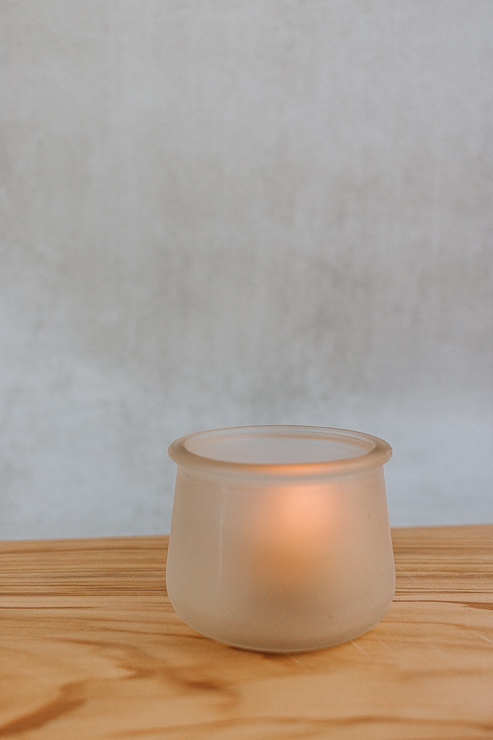
Completed Frosted Votive Candle Holders

Step 3: Enjoy your Jars!

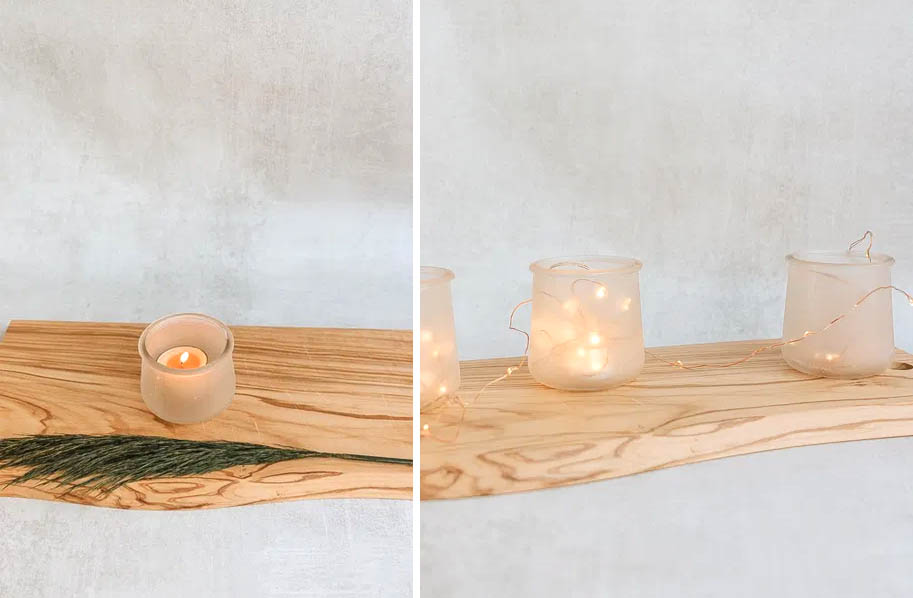
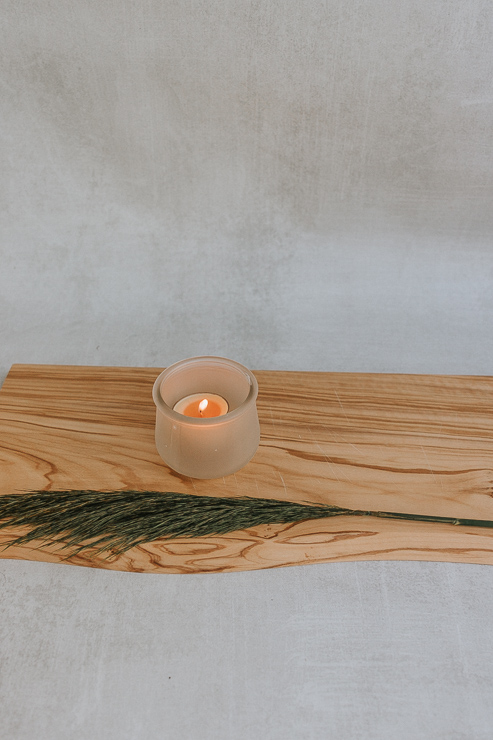
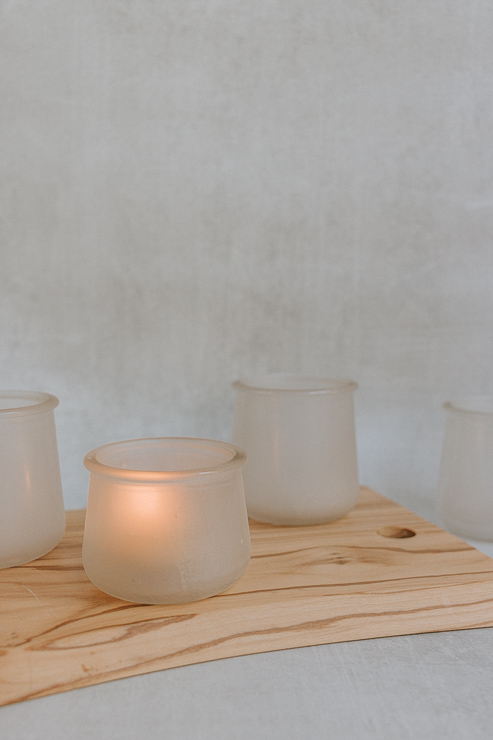
Once your jars are fully dry, you can decorate with them! I love these frosted jars with tea light candles. But you could also use fairy lights for a unique look.

Frosted Candle Holders hold fairy lights too

Buy tea candles in bulk from stores like Amazon or IKEA. You can also pick up seasonal candles from places like Target if you wanted a nice Fall or Holiday scent.

DIY Frosted Votive Candle Holders (1)

Another idea?

I’m a huge fan of the flameless candles, as long as they are realistic and cast a warm glow (not a fake orangey one!) You can buy flameless tea light candles just about anywhere these days. If you want my personal opinion, Pottery Barn and Luminara make pretty realistic ones and the light is very warm and pretty. Amazon is chock full of options for flameless tea lights.

If you are planning a holiday get together or a party (even a wedding), these candles will be the perfect finishing touch for your tables and decor. Bonus: they are so inexpensive and easy to make.

I hope you guys have fun with this one! And I hope Yoplait never stops making this yogurt because I love these little jars!

For even more ideas, check out these festive votive candle holders right here on Pretty Handy Girl!

See you all next month!  Thanks for reading!

karen signature

~ See More of Karen’s Tutorials ~


karen from decor hintHello!  I’m Karen, the creator of the Home Decor and DIY Blog: Decor Hint. I’m a Native of the East Coast, but I currently live in beautiful Seattle with my hubby, our two wonderful children, and our spunky wheaten terrier.

You can usually find me with some sort of craft in one hand and a coffee in the other. And I’m always rearranging furniture or moving lamps from room to room. I have a passion (read: obsession) for decorating, DIY, and gardening. In short, I love making my house into a home.

Like many, I’m inspired by what I see in home decor magazines, but I’m not so inspired by the price tags.  Consequently, I love finding and creating beautiful budget-friendly home decor items. In a head to head competition, I bet you’d never know the difference between the designer items and my DIY creations!  Many of my DIY projects focus on sewing, crafting, upcycling and organizing. Some of my favorite projects have been making pretty wreaths, sewing my own tassel hand towels, and crafting these trendy wood bead garlands. I can’t wait to inspire you and spark your creativity through my DIY projects.

You can always connect with me on Pinterest, Twitter or Instagram.

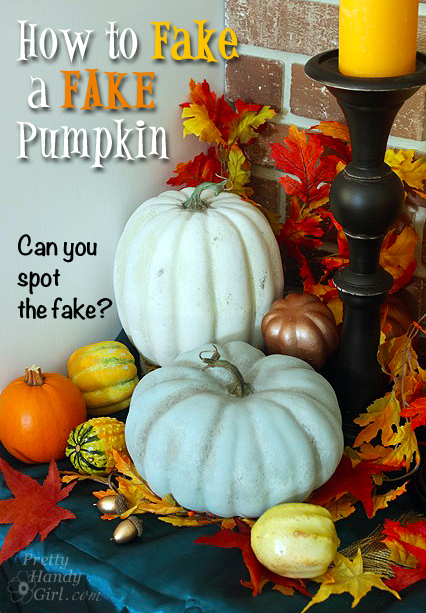
How-to-faux-paint-a-fake-pumpkinHow to Fake a Fake Pumpkin

Have you seen those neon orange fake pumpkins and nearly vomited because you wouldn’t dream of decorating with them. I mean—get real—everyone would know they were fake. Ah ha, but have you seen the price tags? $1 – $6? For that price you might just be willing to take a leap of faith with me, wouldn’t you? Awesome, because I’m going to show you how to faux paint a fake pumpkin so you can decorate with them year after year and fool your friends.

Materials:

(I’ve included affiliate links for your convenience. I earn a small percentage from a purchase using these links. There is no additional cost to you. You can read more about affiliate links here.)

materials

Instructions:

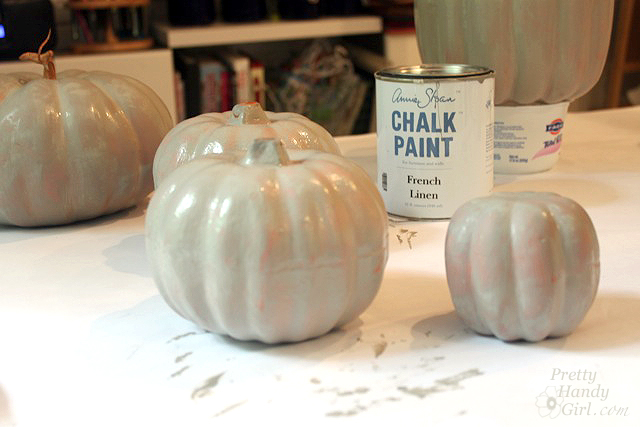
Start by painting all the pumpkins with Chalk Paint (use gray, white, green and blue paint.) Allow the pumpkins to dry.

paint-pumpkins-french-linen


Painting Realistic White Pumpkins:

It helps to look up some pictures of real pumpkins to refer to.

pure-white-country-grey

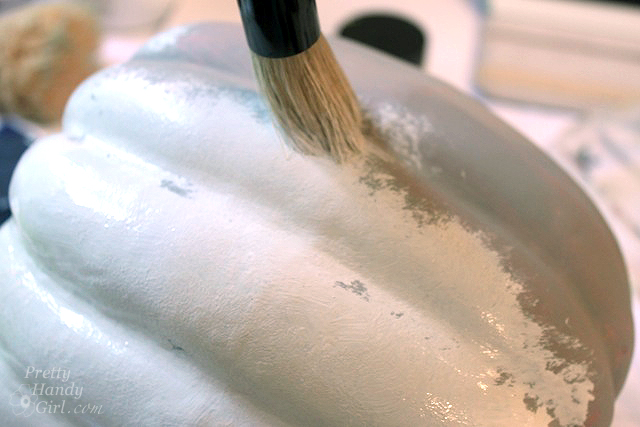
Using the stencil brush, paint a mixture of grey and white on one of the pumpkins.

paint-white-mixture

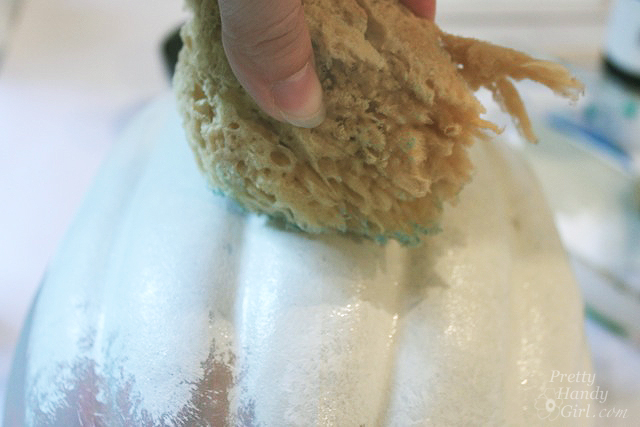
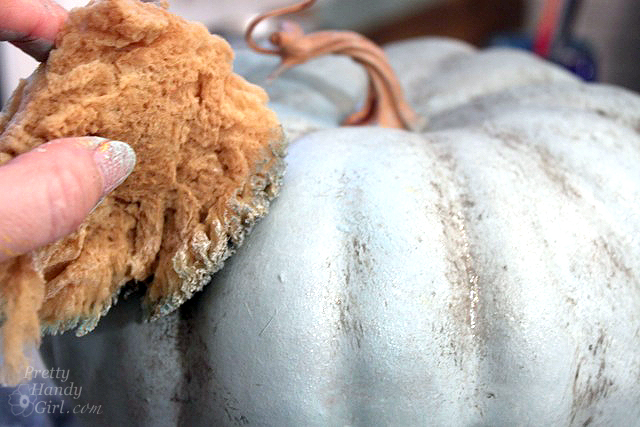
Before the paint dries, dab some of it off with the sea sponge. (Keep your sea sponge dry, not wet during the process.)

sponge-off-white

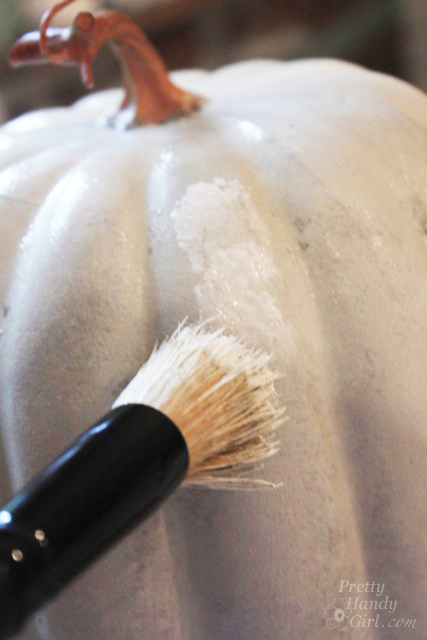
Dip the stencil brush into the white paint and add paint on the outer most bumps on the pumpkins. This is adding highlights.

highlights_on-white-pumpkin

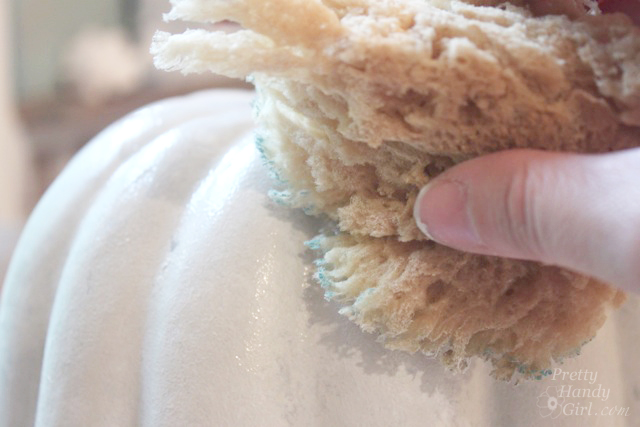
Dab the highlights gently with the sea sponge to blend.

sponge-off-white-2

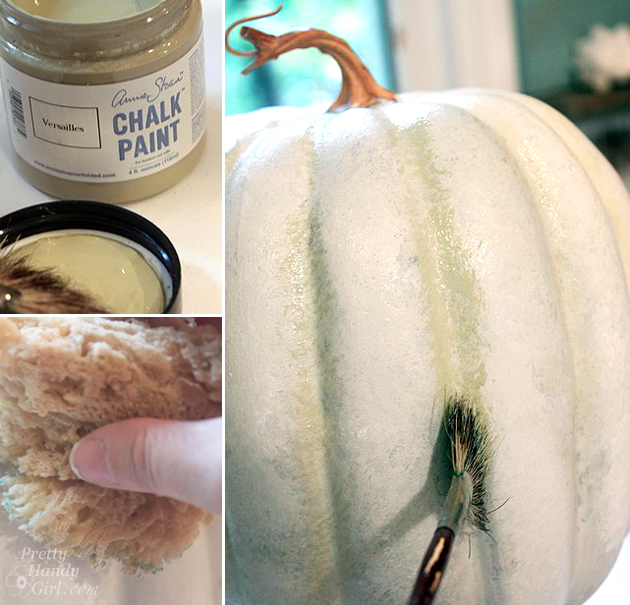
Use the fan brush dipped in a small amount of green paint inside the pumpkin ridges. Dab the ridges with the sea sponge to blend.

white-gourd-pumpkin

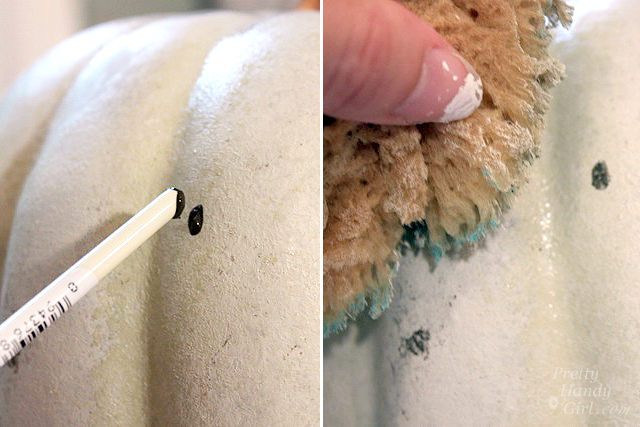
Have you ever seen a truly unblemished pumpkin? I think not. It’s time to add some spots or marks on the pumpkin to truly fool your friends. Dip the end of the paint brush into brown paint and dot it onto the pumpkin. Blot the spot with a sea sponge and maybe even transfer a few new spots with the sponge.

add-blemishes

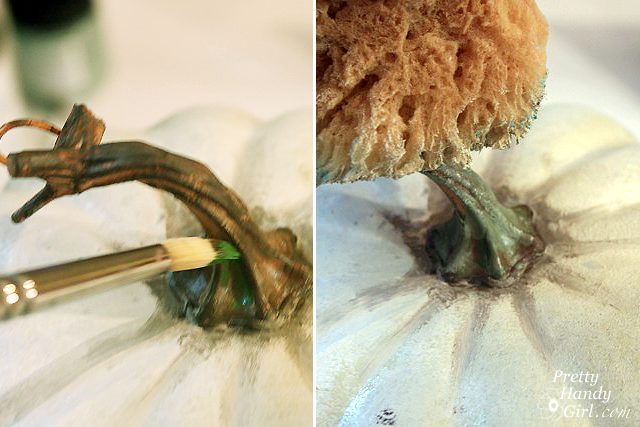
Paint grey around the base of the stem and into the grooves with the round paint brush.

add-dark-depth-around-stem

Paint brown and green paint onto the pumpkin stem. Blend slightly with the sea sponge.

paint-sponge-stem

Can you spot my fake white pumpkin? Well, of course you can because I just showed you how to paint it. But, it will definitely fool your friends!

grouping_left_pumpkins

Painting Realistic Blue Pumpkins:

Painting blue pumpkins uses the same technique as painting the white pumpkins, only using a few different colors.

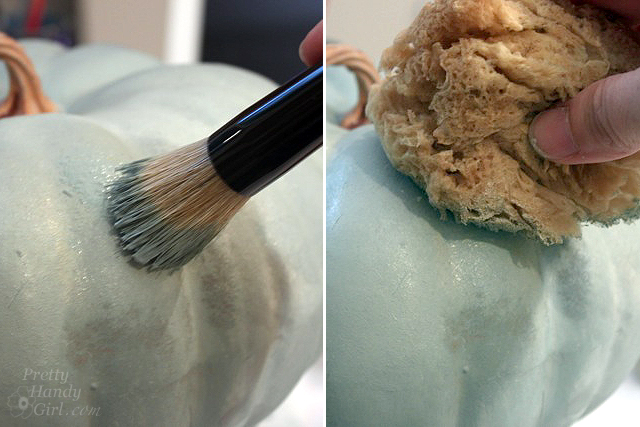
Use the stencil brush to paint blue onto another pumpkin. Dab the blue paint while it’s still wet with the sea sponge.

add-duck-egg-blue-sponge

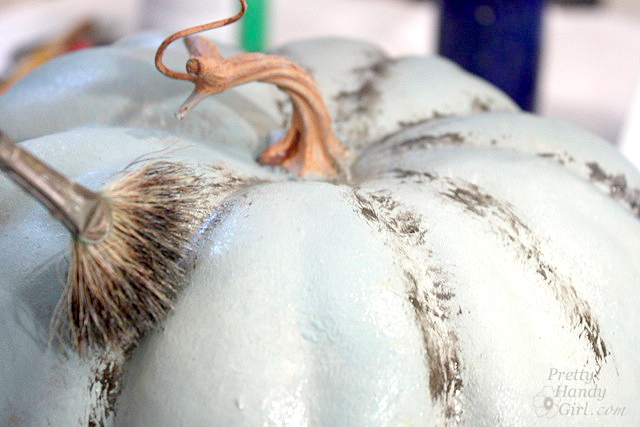
Use the fan brush dipped in gray and brown craft paint to fill in the ridges.

darken-crevices

Dab the paint with the dry sea sponge to blend.

sponge-crevices

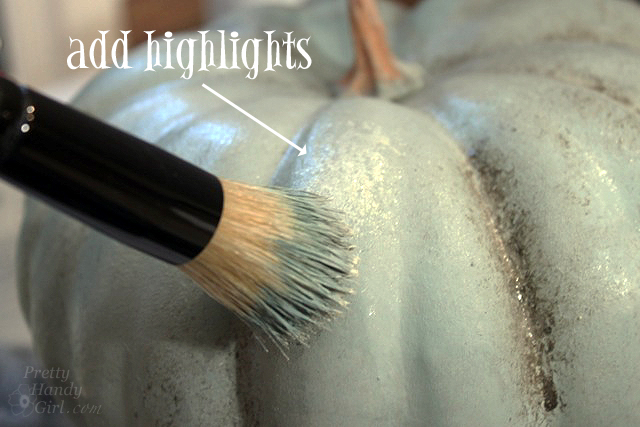
Add some highlights with a mixture of grey and white. This serves two purposes. 1) It adds dimension. 2) It tones down the excess blue on the pumpkin.

add-highlights

Paint the stem the same way you learned above.

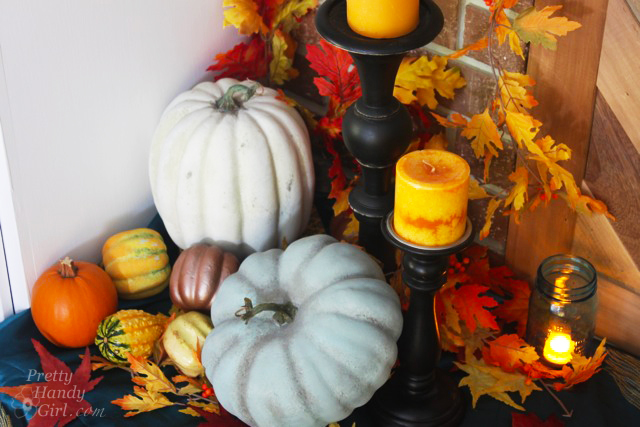
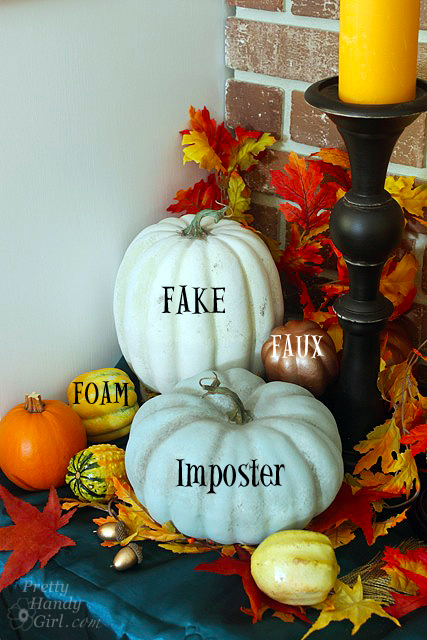
To truly fool people, set up your fake pumpkins with some real pumpkins and real gourds. Sooo, can you spot the fakes?

guess-the-fakes

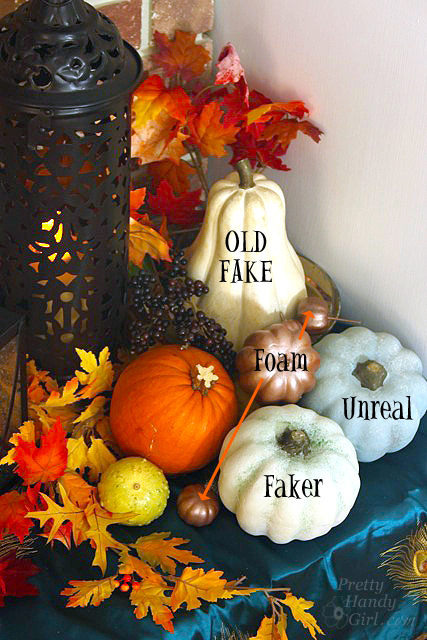
How many did you get right? The metallic gourd is simply spray-painted with copper spray paint. But, I did try my hand at faking a green and yellow gourd using the same technique as the pumpkins, but adding green to the top and yellow to the bottom.

the_fakes

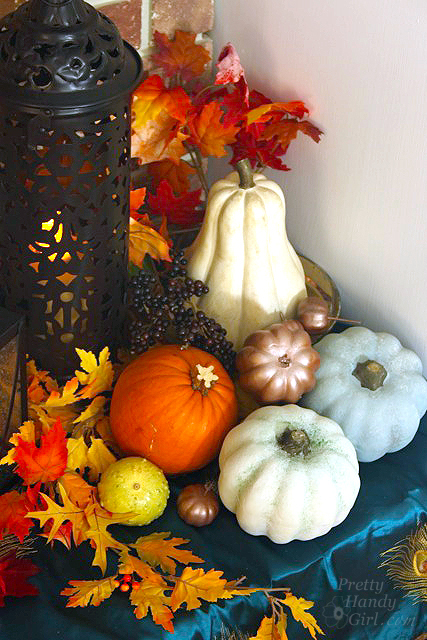
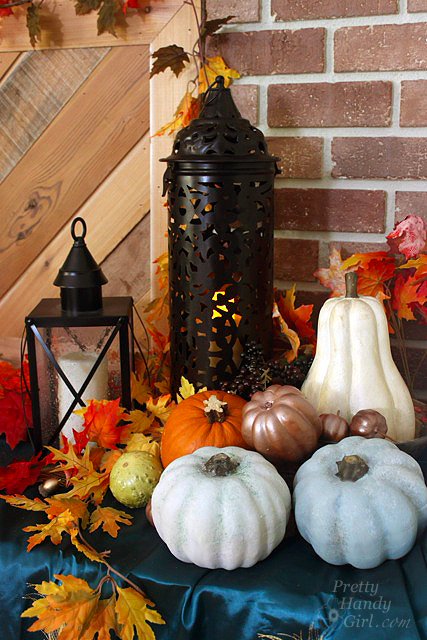
Okay, I’ll give you a second shot. Guess the fakes:

vertical-fall-vignette

How did you do this time? Ha, you can now apply for a job as an art forgery detective ;-).

truth_fake_gourds
Now seriously, how many people will be viewing your pumpkins that close? Umm, next to no one. Normally they’ll view them from afar.

full-living-room-shot

Get your paints and palette out and go fake some fakes! It will be our little secret.

fall-vignette-grouping

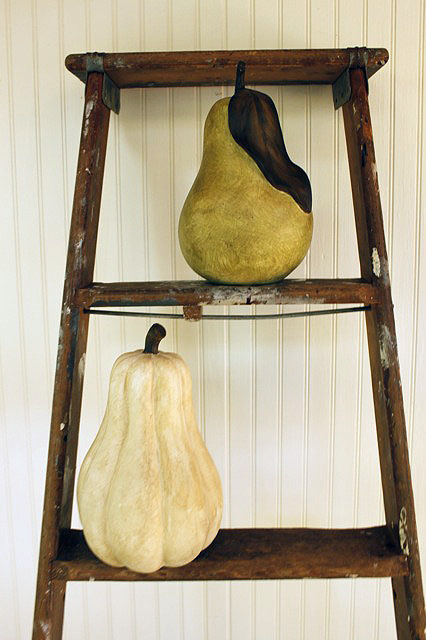
PHGFancySignDid you like this painting post? Ahhh, then I know you’ll like this Ballard Pear painting tutorial:

Or if you’re feeling like taking on a larger scale project…how about Faux painted bricks!

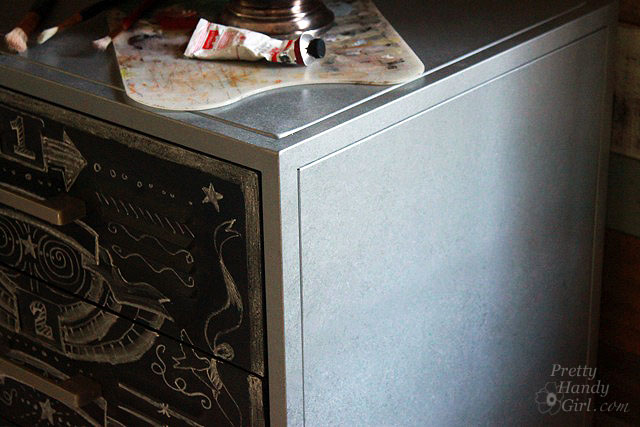
Or perhaps you’d like to perform some faux zinc painting magic:

You can do it! I know you can.