How to Build a Quick DIY Tray & Gift Box | Pretty Handy Girl

Growing up, my parents always told me homemade gifts meant more to the recipient than a store-bought gift. If you’re like me, and enjoy making things and have a lot of wood scraps, you’ll love making many of these Quick DIY Trays and Gift Boxes!
How to Build a Quick DIY Tray & Gift Box | Pretty Handy Girl

How to Build a Quick DIY Tray & Gift Box

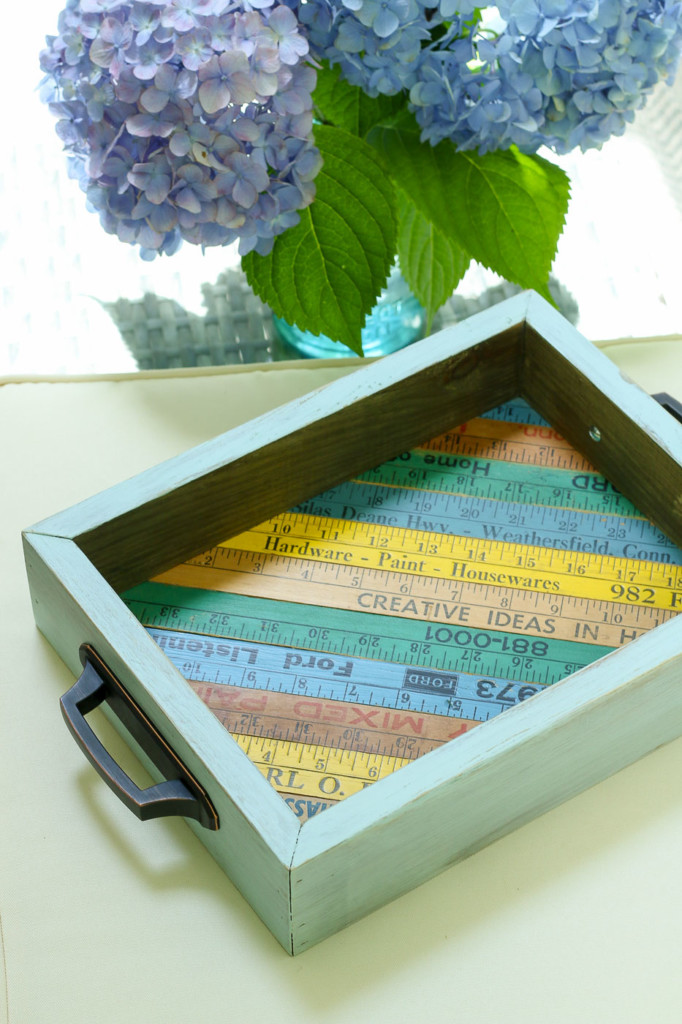
Several years ago I shared this tutorial, but I’m updating the post to show you an alternative base for your tray. You can use a variety of thin woods to cover the plywood for a more decorative look. Previously I used leftover Timberchic end caps. But, this past weekend I whipped up a tray for my girlfriend’s birthday using vintage rulers and I couldn’t be happier with the results.

vintage-rulers-on-tray-bottom

Instead of the self-adhesive Timberchic, use wood glue to affix any thin wood to a plywood base. Then build the sides and you have yourself a beautiful gift tray (or gift box if you make your sides taller.)
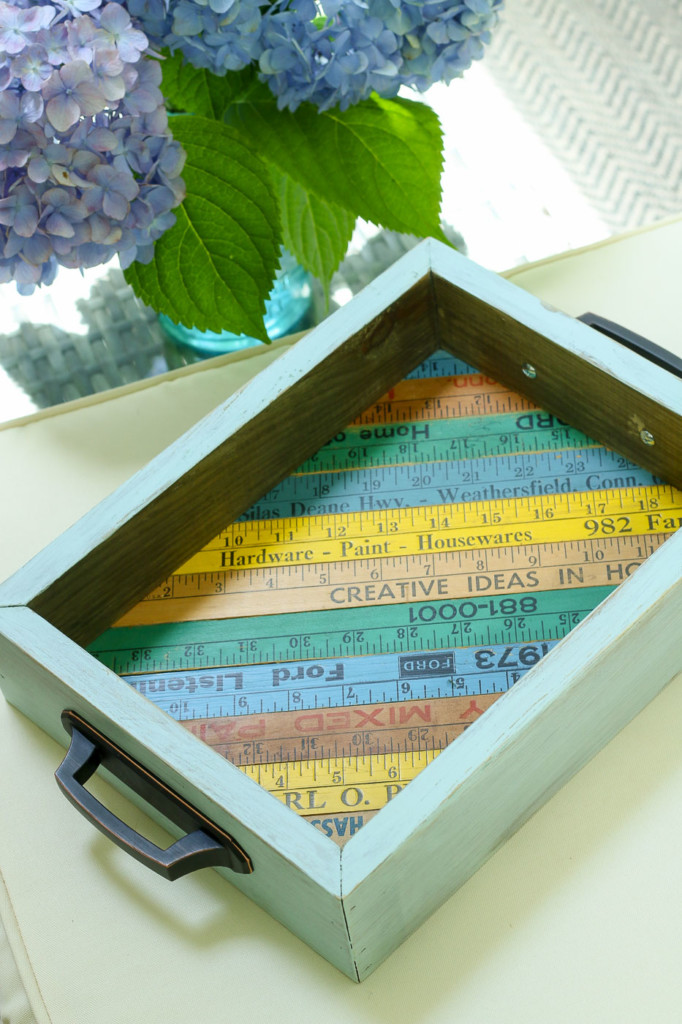
diy-vintage-ruler-tray-on-ottoman

Now it’s time to share the tutorial with you because this will be easy, quick, and frugal (all things I like in a good DIY project!) Let’s learn How to Build a Quick DIY Tray & Gift Box.

Question: What’s better than giving a one-of-a-kind gift? What’s better than giving a gift basket that will be useful long after the contents have been consumed? And what’s better than spending money on a gift basket?

Answer: Building your own Quick DIY Tray & Gift Box that will be used long after the contents are gone and it doesn’t have to cost you an arm or a leg when you are using scraps from your workshop! #Winning

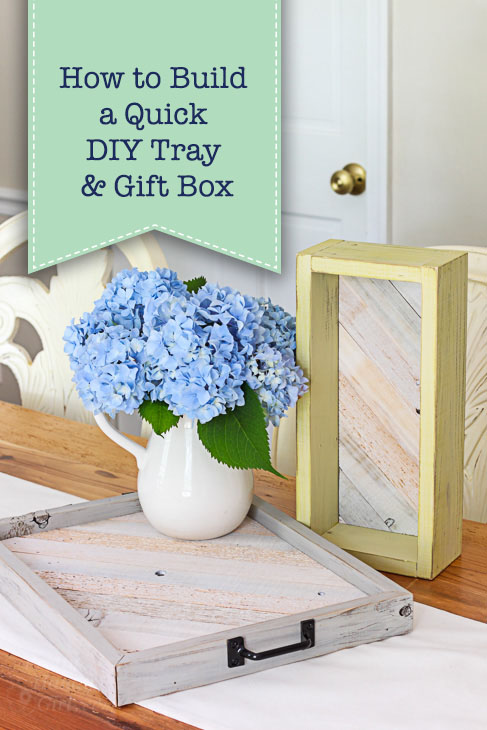
These rustic beauties are perfect for filling with a bottle of wine or to use as the base for a cellophane-wrapped gift basket.
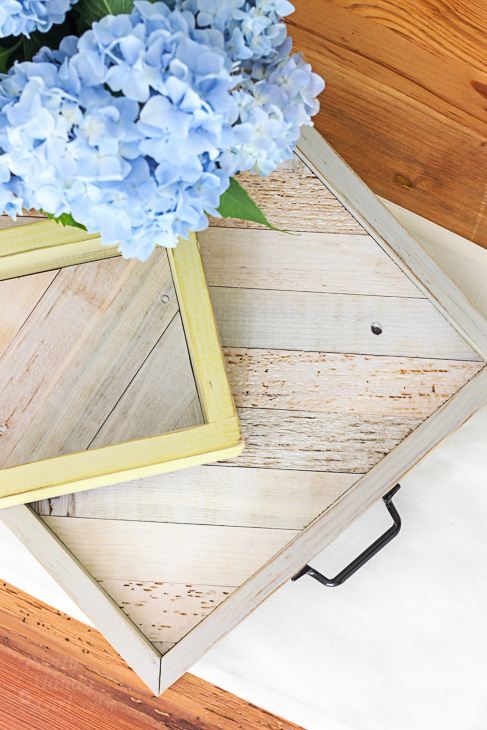
How to Build a Quick DIY Tray & Gift Box | Pretty Handy Girl

The tray is probably my favorite because you can use it to serve lunch on the porch (or breakfast in bed.) And who doesn’t love a good tray to corral loose items in your living room, bedroom, or kitchen?
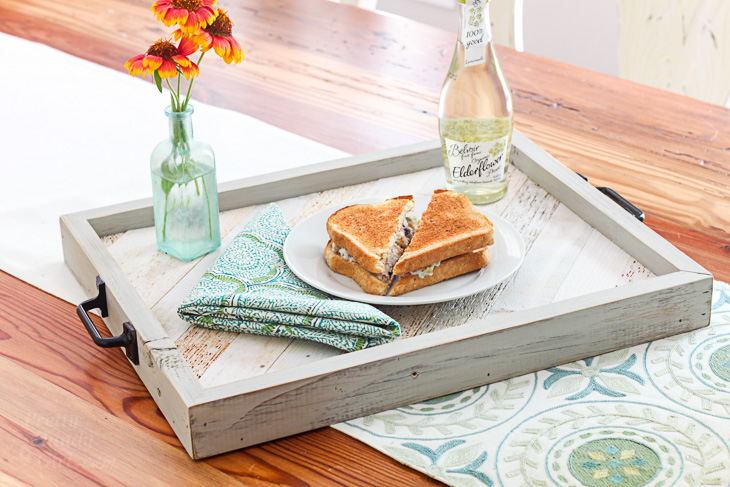
How to Build a Quick DIY Tray & Gift Box | Pretty Handy Girl

The crate is a close second in my heart because it makes the perfect place to store toiletries for a guest. But, we all know it can also be used to organize desk supplies and much much more.
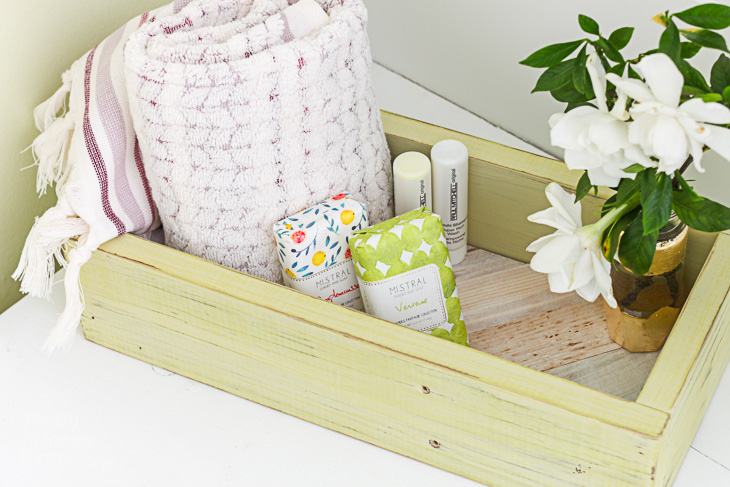
How to Build a Quick DIY Tray & Gift Box | Pretty Handy Girl

What do you need to make this Quick DIY Tray & Gift Box you ask? Well here’s the 411 on this project.

Materials:

(I’ve included affiliate links for your convenience. I earn a small percentage from a purchase using these links. There is no additional cost to you. You can read more about affiliate links here.)
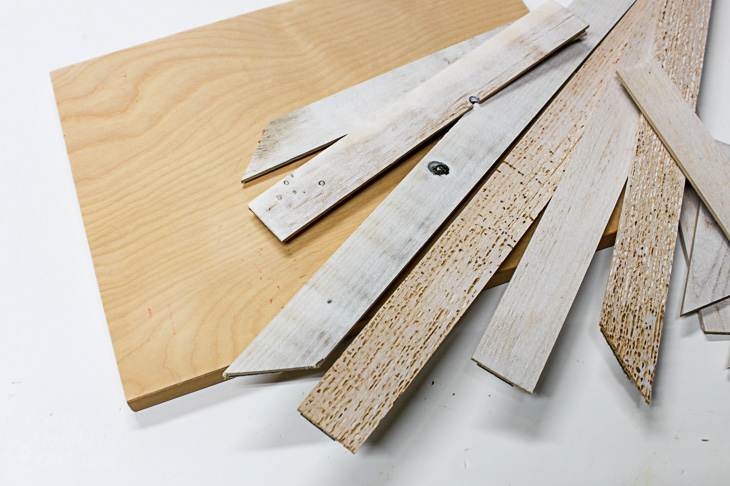
How to Build a Quick DIY Tray & Gift Box | Pretty Handy Girl

Optional:

Instructions:

Cut your plywood base to size. (My tray was 11″ x 15″ and the gift box was 4″ x 10″.)

Set your slats on top of the plywood to figure out their ideal placement.
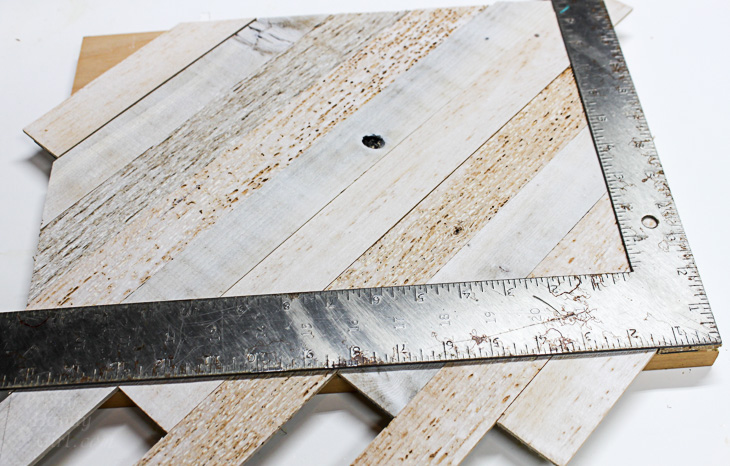
How to Build a Quick DIY Tray & Gift Box | Pretty Handy Girl

Use a ruler or square and your pencil to mark the cut offs.
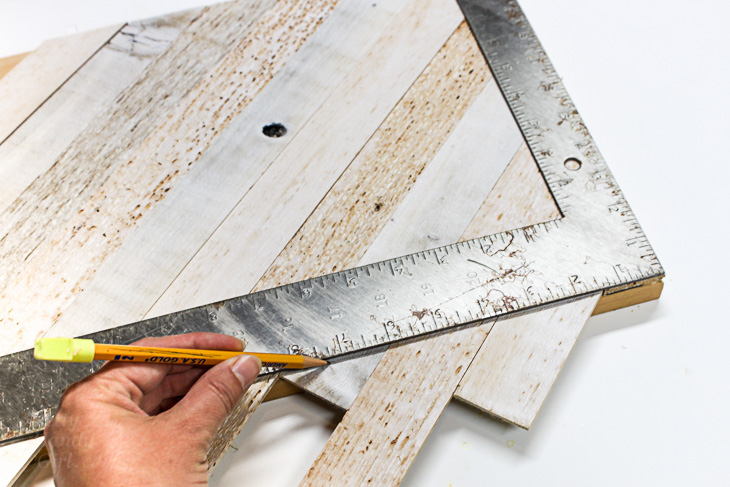
How to Build a Quick DIY Tray & Gift Box | Pretty Handy Girl

Cut the slats and return to the plywood base. If you are using the TimberChic end caps, remove the adhesive backing and place the slat on the plywood. (If using other slats, use wood glue to adhere them to the base.)
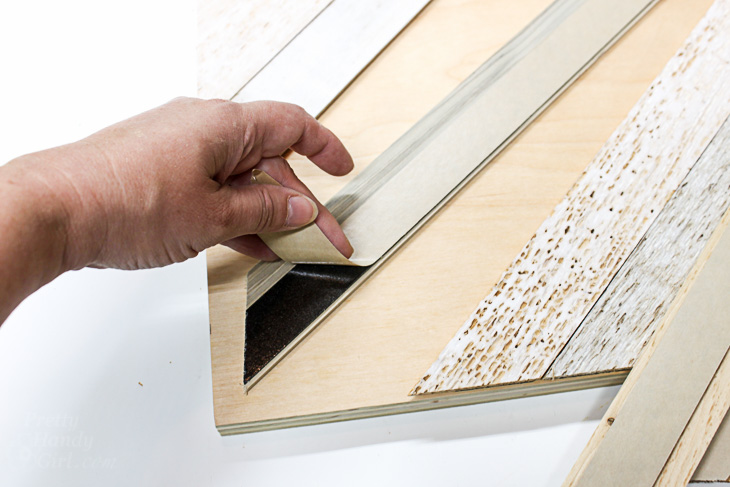
How to Build a Quick DIY Tray & Gift Box | Pretty Handy Girl

For a perfect edge, you can turn your base upside down and trim the edges on the table saw. (Not necessary, but gives you a cleaner edge.)
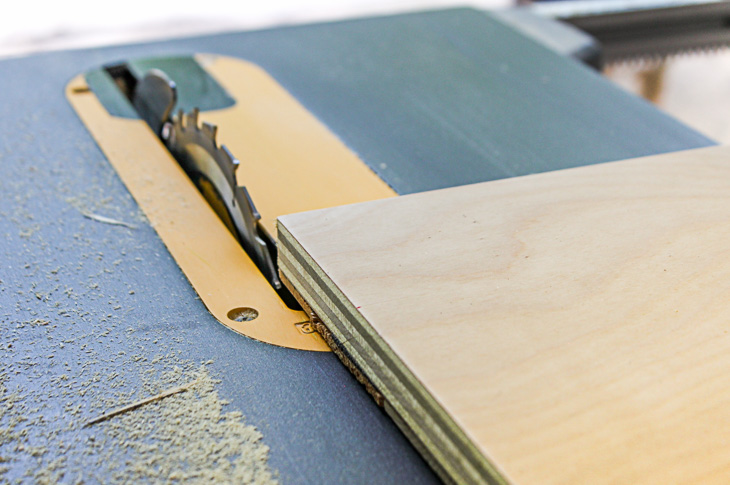
How to Build a Quick DIY Tray & Gift Box | Pretty Handy Girl

Line up your side material against the base and mark where to cut each piece.
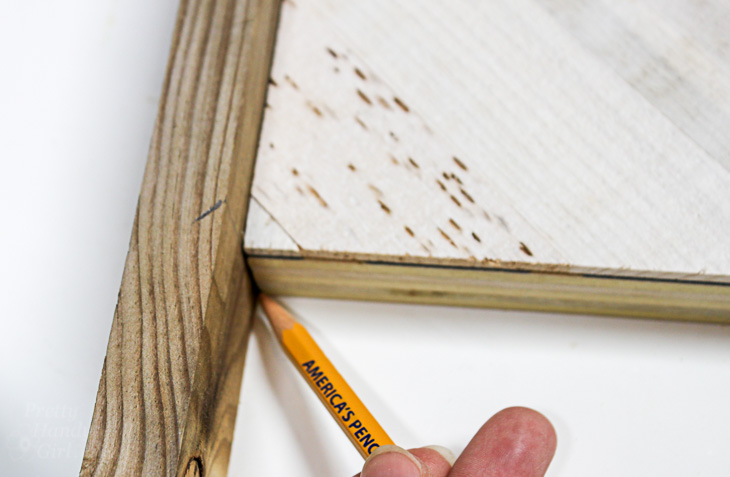
How to Build a Quick DIY Tray & Gift Box | Pretty Handy Girl

Cut the sides at a 45 degree angle to create mitered edges (or simplify the project by cutting 90 degree ends). Test fit the sides to make sure you have a tight miter at each corner. Sand the sides smooth to remove any rough spots.
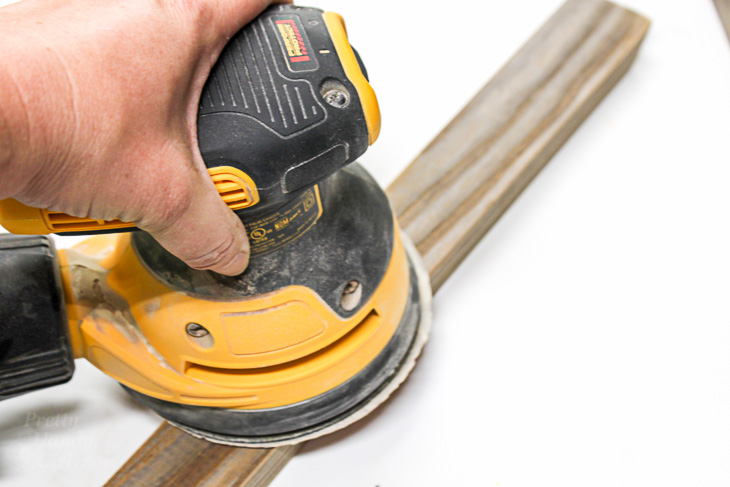
How to Build a Quick DIY Tray & Gift Box | Pretty Handy Girl

Paint your sides with Fusion paint (or chalk paint of your choosing.)
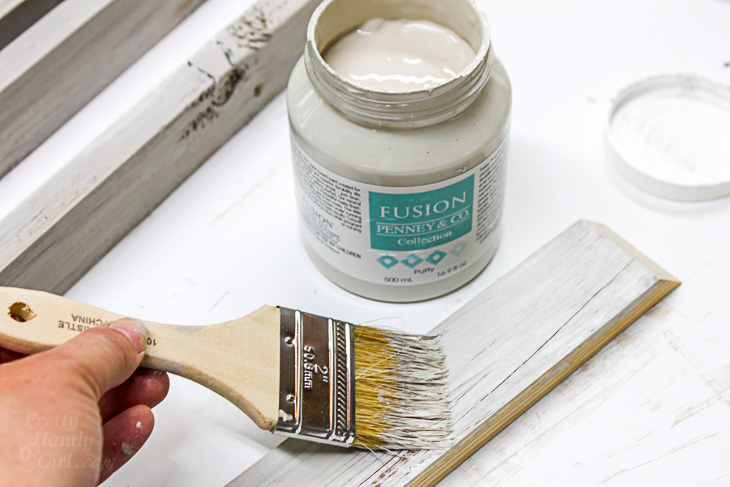
How to Build a Quick DIY Tray & Gift Box | Pretty Handy Girl

Wipe off immediately for a rustic look.
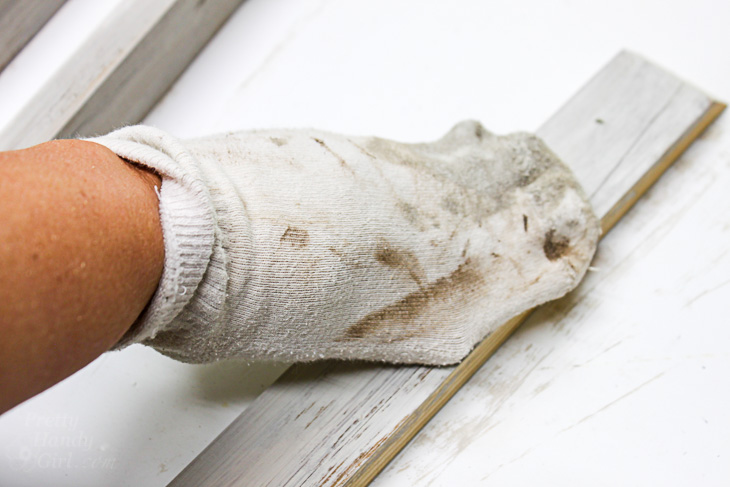
How to Build a Quick DIY Tray & Gift Box | Pretty Handy Girl

Run a line of wood glue along the side of your base.
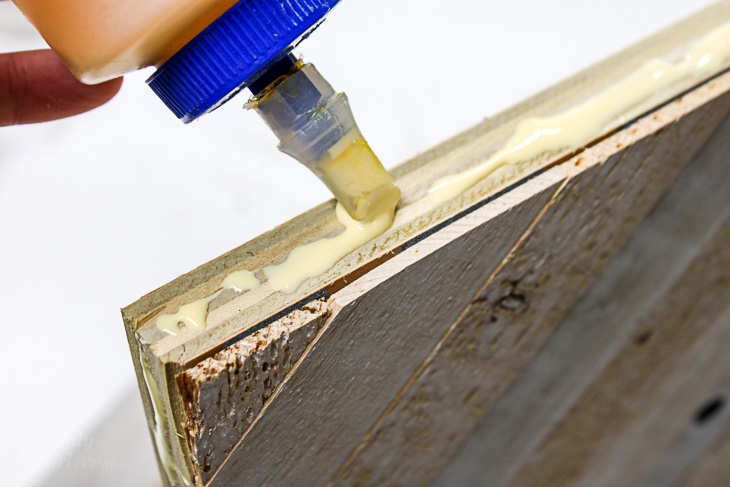
How to Build a Quick DIY Tray & Gift Box | Pretty Handy Girl

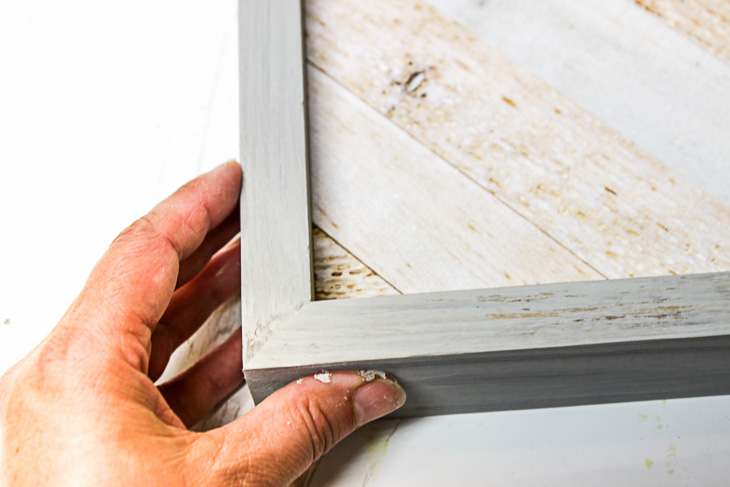
Press the sides in place.

How to Build a Quick DIY Tray & Gift Box | Pretty Handy Girl

Nail brad nails through the sides and into the base to secure the sides while the glue dries.
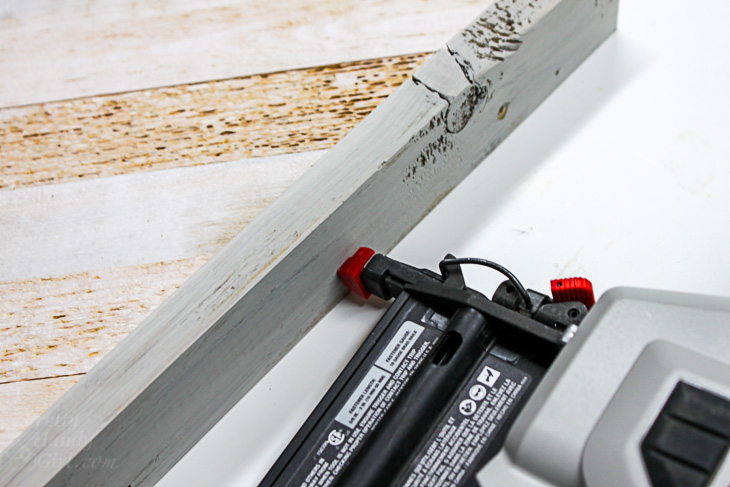
How to Build a Quick DIY Tray & Gift Box | Pretty Handy Girl

Find the centers on the two smaller sides of your tray. Center the door pulls on the sides.
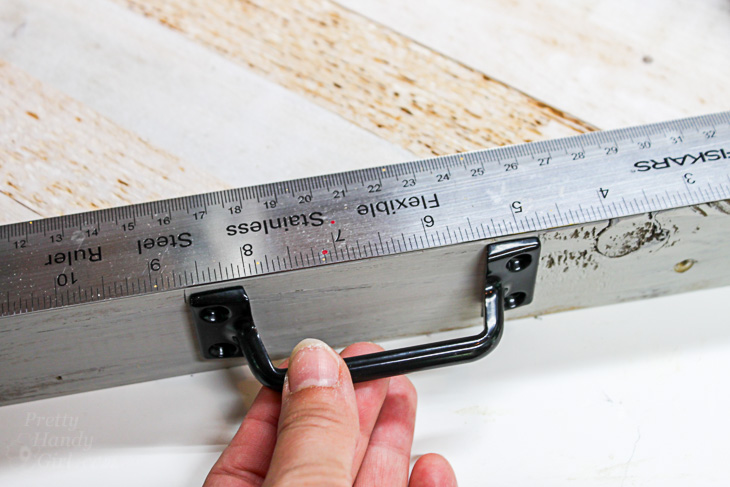
How to Build a Quick DIY Tray & Gift Box | Pretty Handy Girl

Attach the handle to the side of the tray with provided screws.
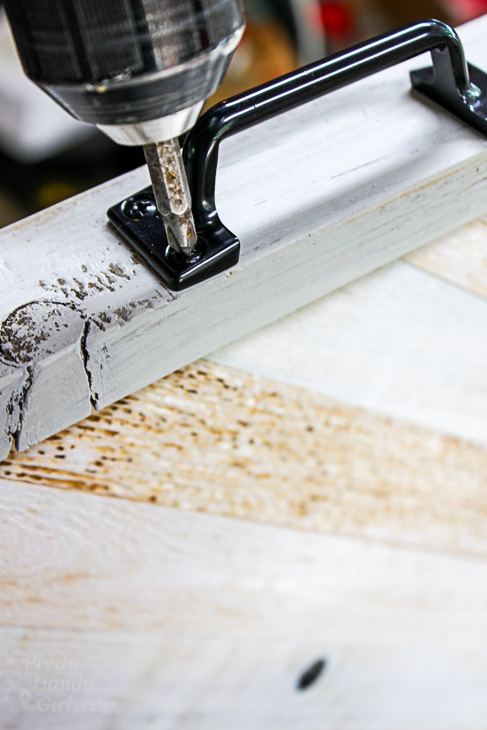
How to Build a Quick DIY Tray & Gift Box | Pretty Handy Girl

Add felt pads to the bottom of the tray to prevent scratching of surfaces.
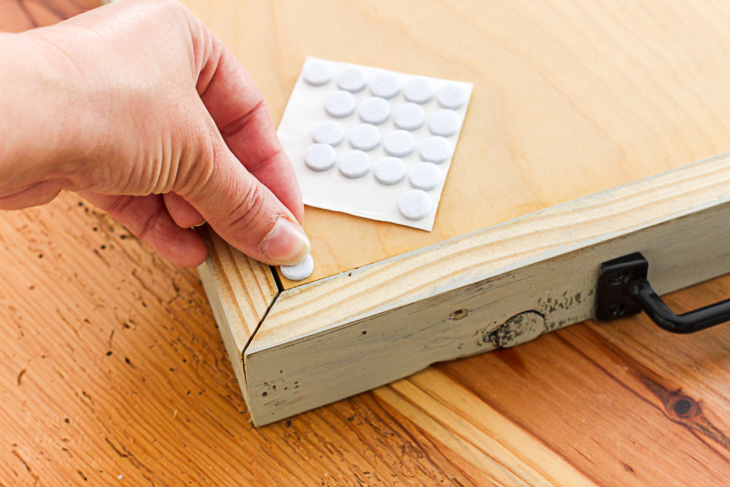
How to Build a Quick DIY Tray & Gift Box | Pretty Handy Girl

Your tray and gift box are done! Fill them up with goodies your recipient will love.
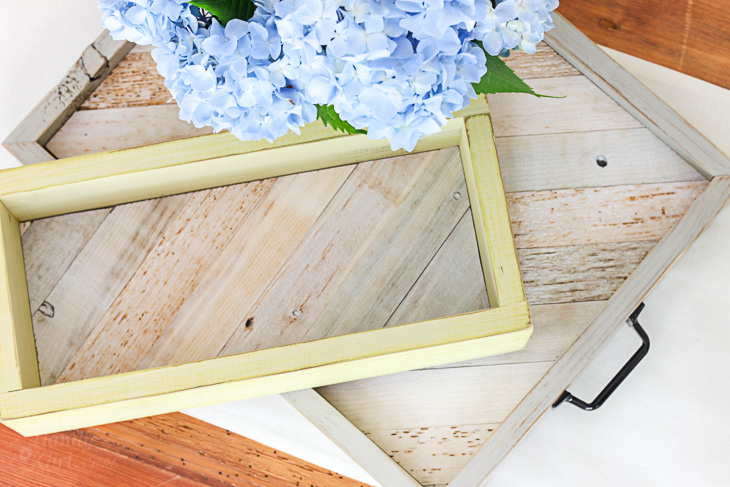
How to Build a Quick DIY Tray & Gift Box | Pretty Handy Girl

diy-vintage-ruler-tray-on-ottoman

A bottle of wine should fit nicely in the gift box:
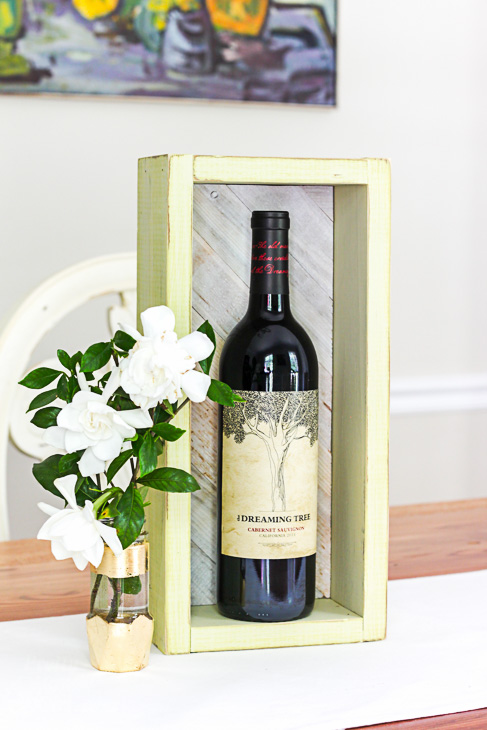
How to Build a Quick DIY Tray & Gift Box | Pretty Handy Girl

And when the gift tray and box are empty, they will be enjoyed for years to come.
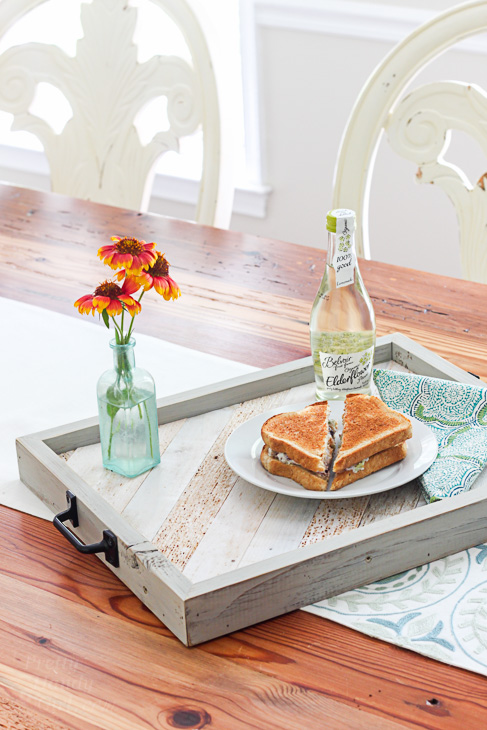
How to Build a Quick DIY Tray & Gift Box | Pretty Handy Girl

How to Build a Quick DIY Tray & Gift Box | Pretty Handy Girl

Did you like this simple gift idea? Well, there’s lots more where that came from! Here’s a gallery of other DIY Gift Ideas!

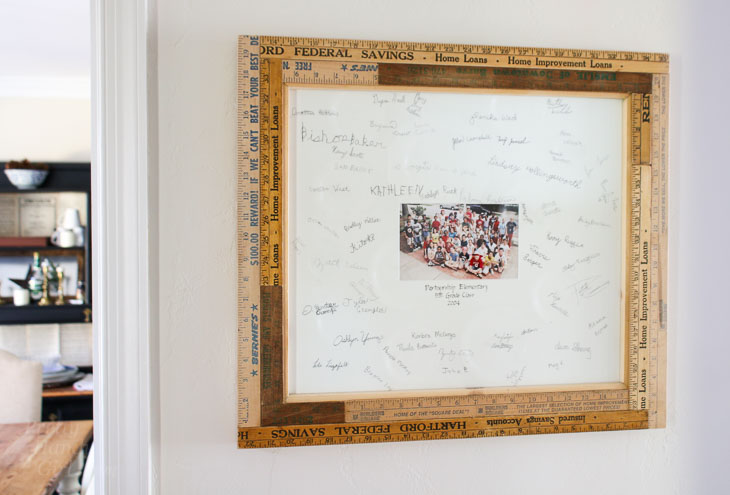
Like using vintage rulers? Check out this frame I made with more vintage rulers:

How to Custom Build a Vintage Ruler Picture Frame

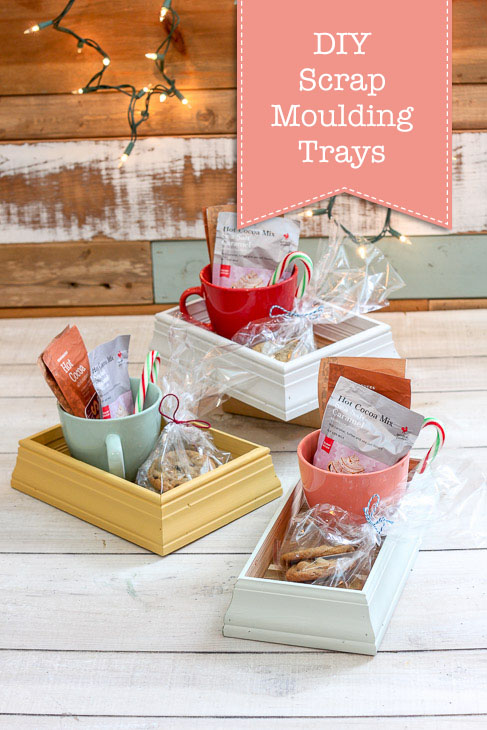
Or these scrap molding trays:

DIY Scrap Moulding Trays | Pretty Handy Girl

Happy gifting!


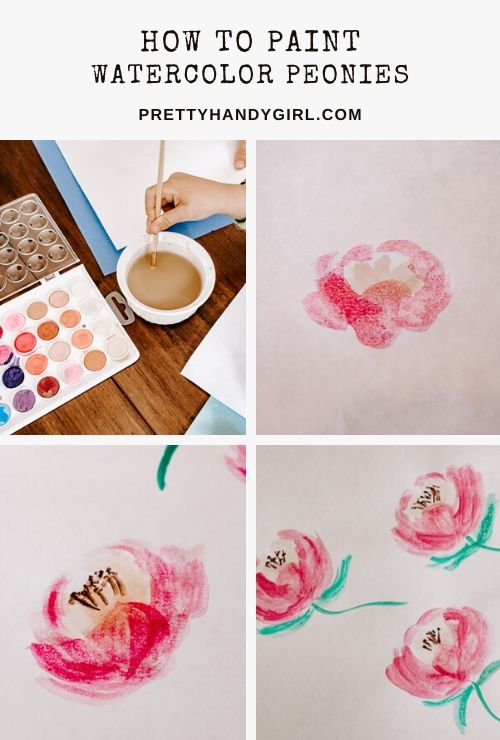
Painting with Watercolors - Peony Flowers

Summer is here and I’m in the mood for some summer flowers.  Instead of gardening – I’m going to teach you how to paint watercolor peonies!

How to Paint Watercolor Peony Flowers

How to Paint Watercolor Peonies

I love painting with watercolors because it’s so forgiving. The watercolor artwork is not supposed to be super perfect – it’s those little imperfections that give your piece so much character!

Today, I thought it would be fun to give you a little lesson in painting watercolor flowers, like some easy peonies. It’s really a step-by-step process and I’m breaking it all down to show you how simple this really is.

How to Paint Watercolor Flowers

You definitely get better at painting with watercolors the more you do it. In just one session, you will be amazed at how much you have improved and you won’t believe that you can paint this good!

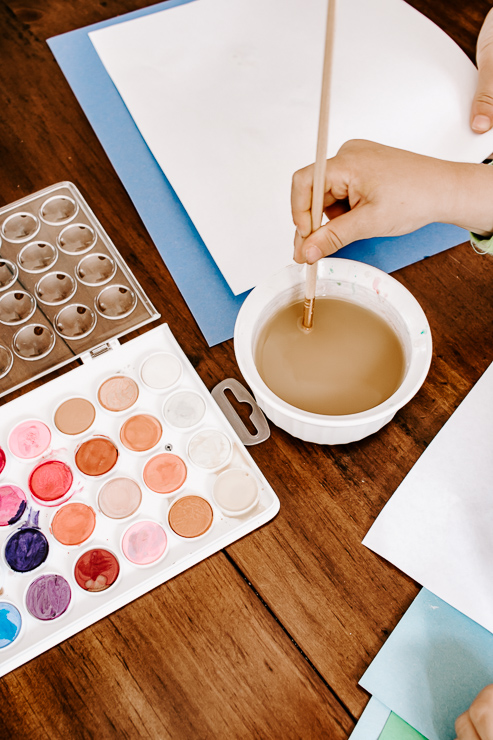
Painting watercolor peonies is great way to keep your mind active and positive in these unprecedented times. All you will need are some watercolors, brushes and watercolor paper. I ordered everything off Amazon so no need to leave the house.

(Here’s a little secret though – you can even use printer paper if you’re just starting out! It may ripple a little, but don’t worry about it!)
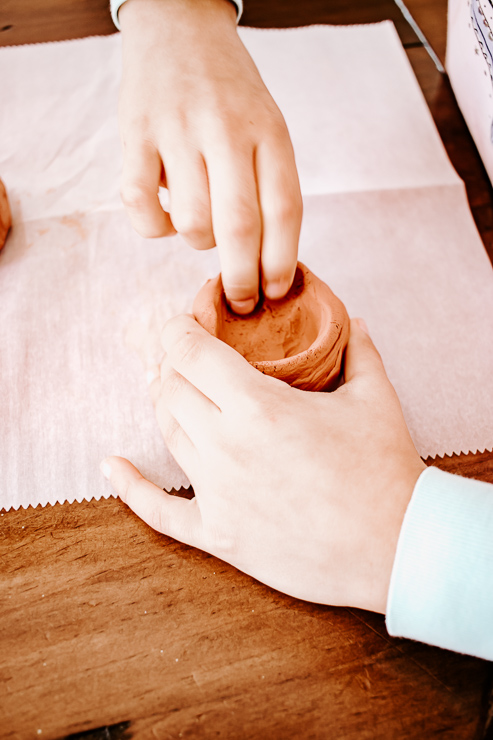
This is a great activity for the kiddos too – so tell them to follow along and let’s dive right in!

Materials:

(I’ve included affiliate links for your convenience. I earn a small percentage from a purchase using these links. There is no additional cost to you. You can read more about affiliate links here.)

I ordered this set of brushes and paints and it’s been the best thing ever! The brush quality is good and the watercolors are vibrant. If you are serious about watercolors, you will want to purchase the watercolor paper eventually – it’s thicker and slightly textured and your artwork will look really good on it.

Instructions:

We are going to make beautiful watercolor peonies. I will show you the colors I used, but once you get the hang of it, you can use whatever colors you want! The steps are the same.

Step 1: Create the center of the peony

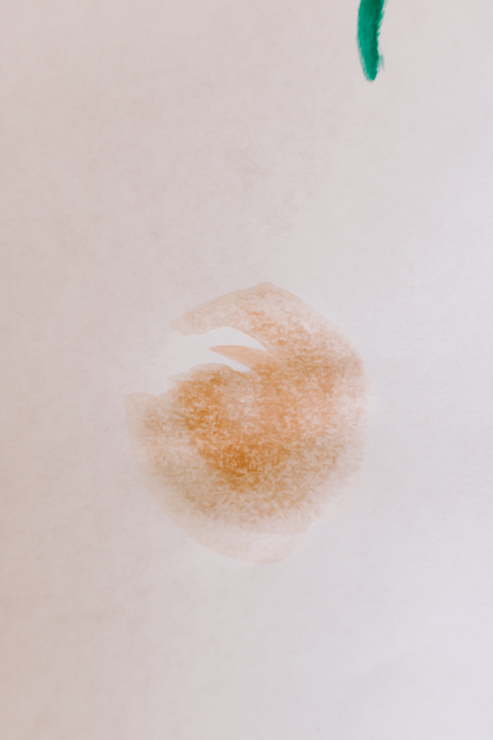
Paint the center of the flower first

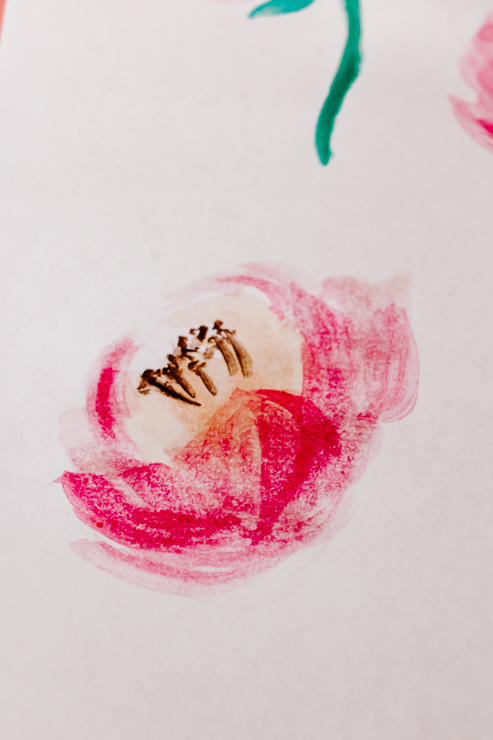
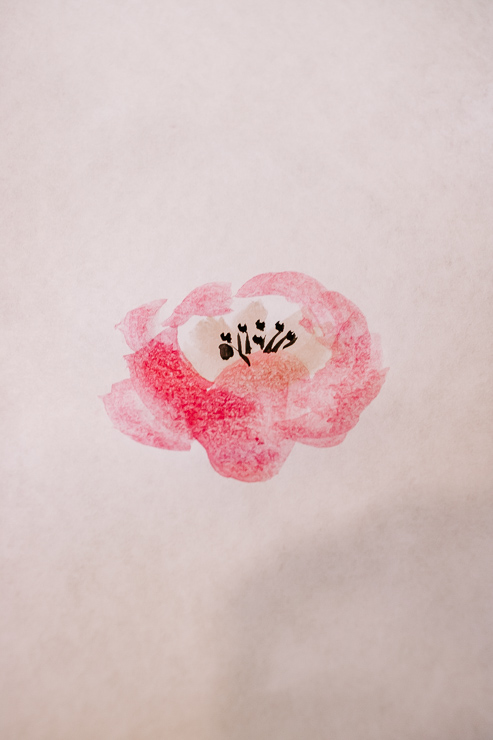
Using a medium-sized brush to dip into a light, watery peachy pink color. With your brush, create a circular backward “C” shape on the paper – it doesn’t have to be perfect! In fact, it shouldn’t be. Keep this part light and airy. This is going to form the center of our open peony flower.

Rinse your brush in the water and wipe it on the paper towel.

Step 2: Create the petals surrounding the center

How to Paint Watercolor Flowers

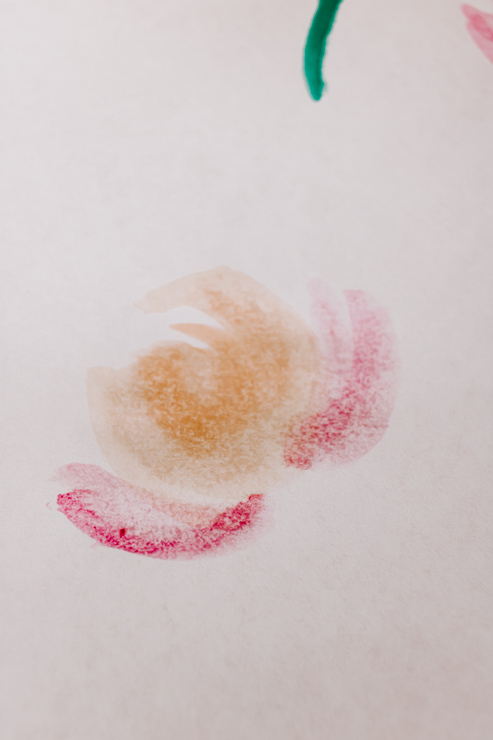
Now grab a darker pink color with the same brush and form little curve shapes all around the “C” shape we created in step 1. These shapes should be rounded, like little smiles, and different in size. You are basically enclosing the center you created with these ‘smiles’. Some of the shapes should go out – like petals opening up.

How to Paint Watercolor Flowers

To give the flower more dimension, paint one petal in the front that’s more rounded in shape. It looks like it’s facing you. You can also add two smaller frown shapes in the back of the center to give the illusion of more petals in the back.

Step 3: Add the stamen

To finish, take a very small watercolor brush and a black or brown color and paint some small dots in the center. Then add a few thin lines coming down from these dots to represent the stamens. This final step will really help your flower come alive!

How to Paint Watercolor Flowers

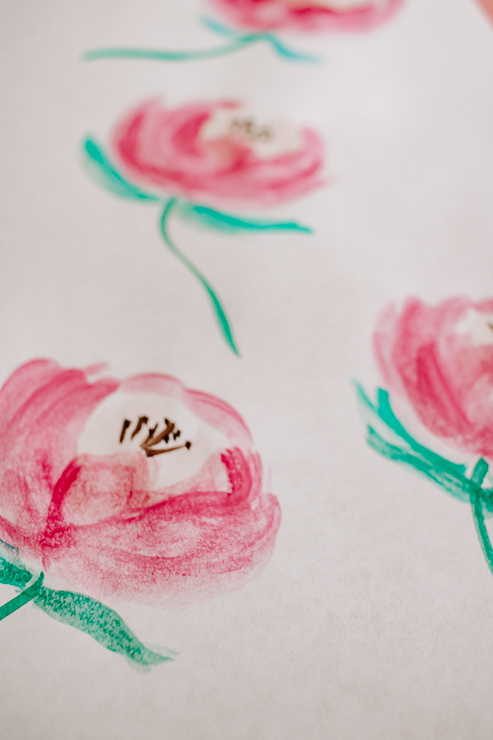
All you need to do at this point is add a light green line down from the flower as your stem. Leaves are optional but are simple to paint. Create a few strokes of green with a medium-sized brush under your flower.

Once you get the hang of it, just changing the shape of the center can create a whole new flower look!

How to Paint Watercolor Flowers

And that’s it! Aren’t these watercolor peonies so beautiful?

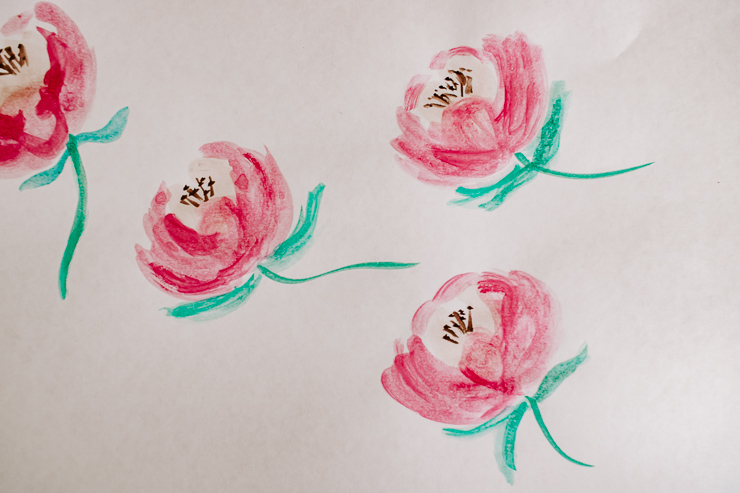
A set of watercolor peony flowers

Paint a whole page of these beautiful flowers and frame it after they dry. I could sit here and paint all day – the time passes so quickly when I’m watercolor painting. I love these activities that help your mind focus, because I always feel so refreshed afterward!

A set of watercolor peony flowers

If you guys like this tutorial, I’d happily create more watercolor flower how-tos in the future, just let me know in the comments below.

Thanks so much for reading, see you next month!

karen signature

See More of Karen’s Tutorials ~


karen from decor hintHello!  I’m Karen, the creator of the Home Decor and DIY Blog: Decor Hint. I’m a Native of the East Coast, but I currently live in beautiful Seattle with my hubby, our two wonderful children, and our spunky wheaten terrier.

You can usually find me with some sort of craft in one hand and a coffee in the other. And I’m always rearranging furniture or moving lamps from room to room. I have a passion (read: obsession) for decorating, DIY, and gardening. In short, I love making my house into a home.

Like many, I’m inspired by what I see in home decor magazines, but I’m not so inspired by the price tags.  Consequently, I love finding and creating beautiful budget-friendly home decor items. In a head to head competition, I bet you’d never know the difference between the designer items and my DIY creations!  Many of my DIY projects focus on sewing, crafting, upcycling and organizing. Some of my favorite projects have been making pretty wreaths, sewing my own tassel hand towels, and crafting these trendy wood bead garlands. I can’t wait to inspire you and spark your creativity through my DIY projects.

You can always connect with me on Pinterest, Twitter or Instagram.

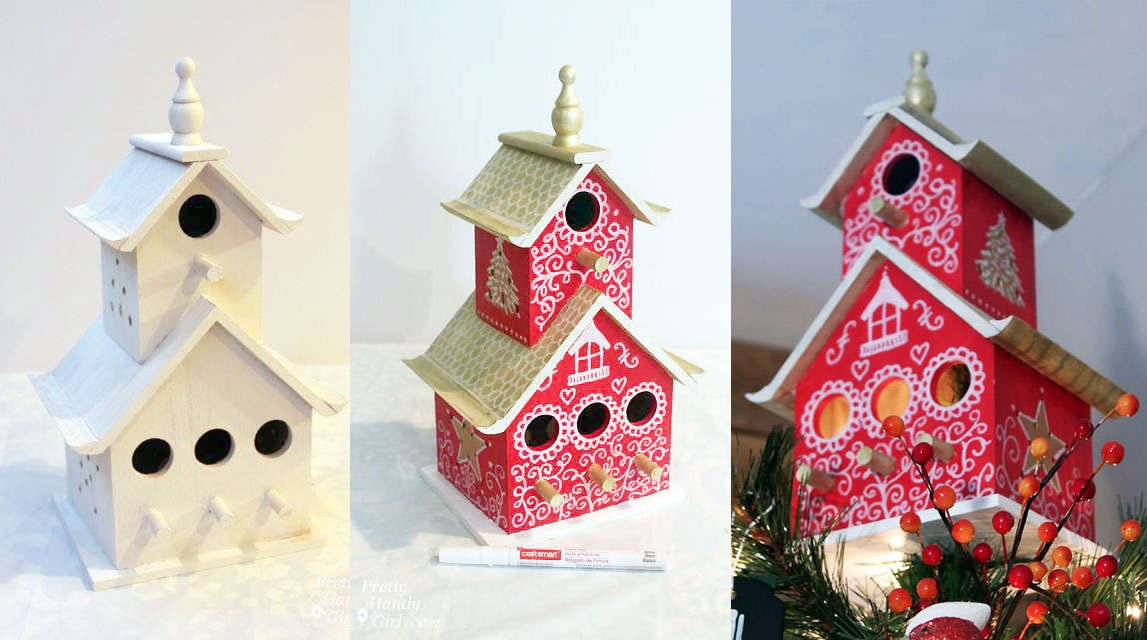
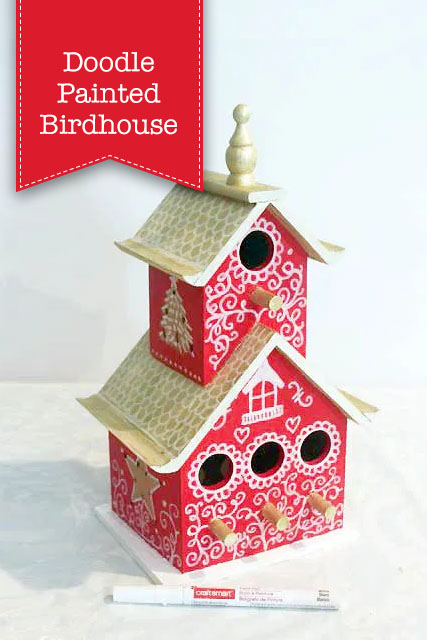
If the birds are out in your area, chances are they are looking for a place to nest. Try your hand at doodle-painting a cute little birdhouse to help them start a family. Who knows, they may be lurking in your yard like a depressed House Hunter’s couple who can’t get past the color on your neighbor’s birdhouse. Check out this cute Doodle-Painted Birdhouse.

Doodle Painted Birdhouse

Doodle-Painted Birdhouse

Have you lost your mind Brittany? This looks like a Christmas tutorial in May? No, I haven’t lost my mind and yes, this is May (for those of us who have lost track of the days. But, this is the perfect project for anyone who has a simple birdhouse that needs sprucing up for those discerning House Hunter birds.

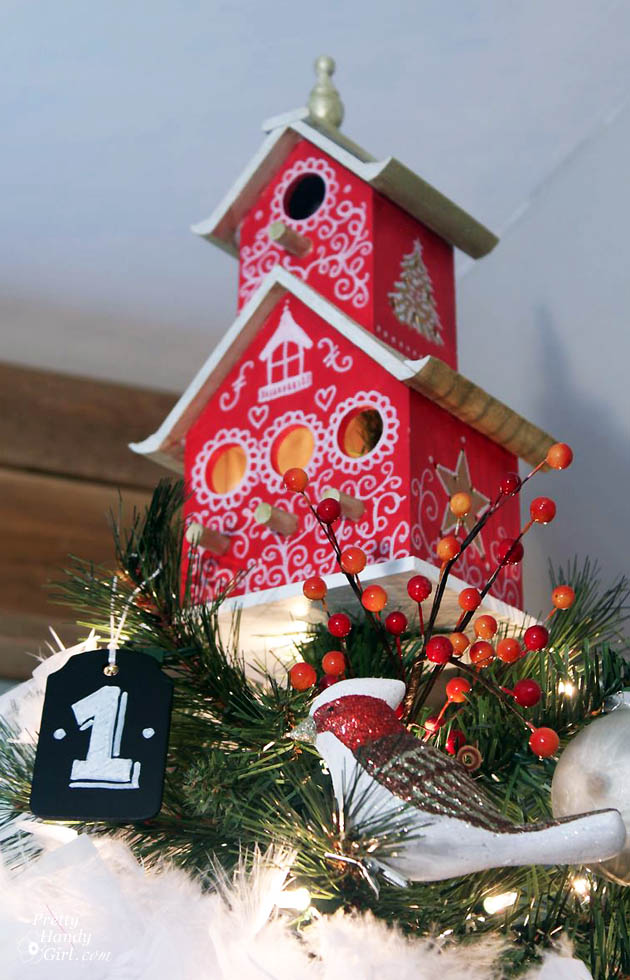
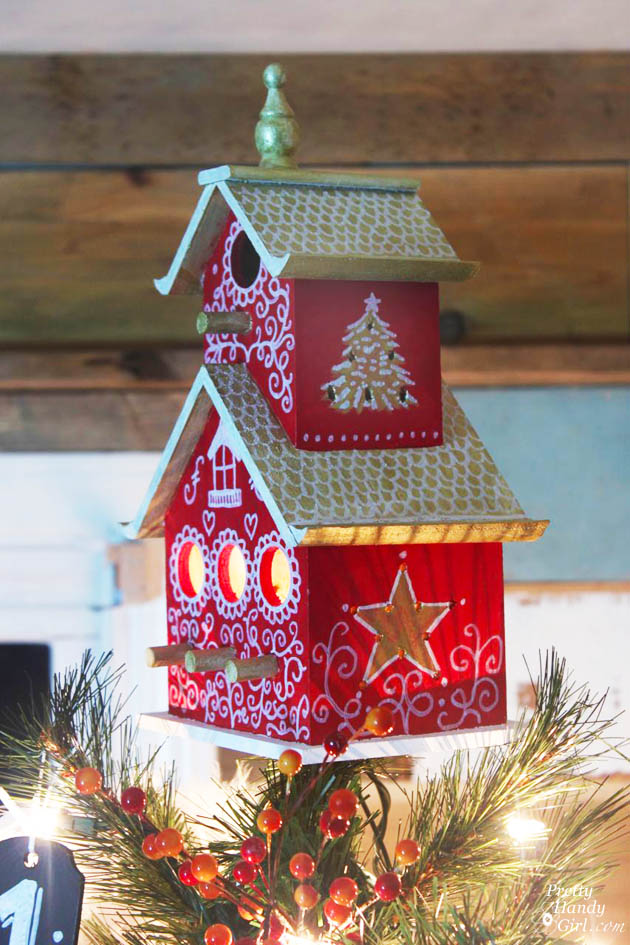
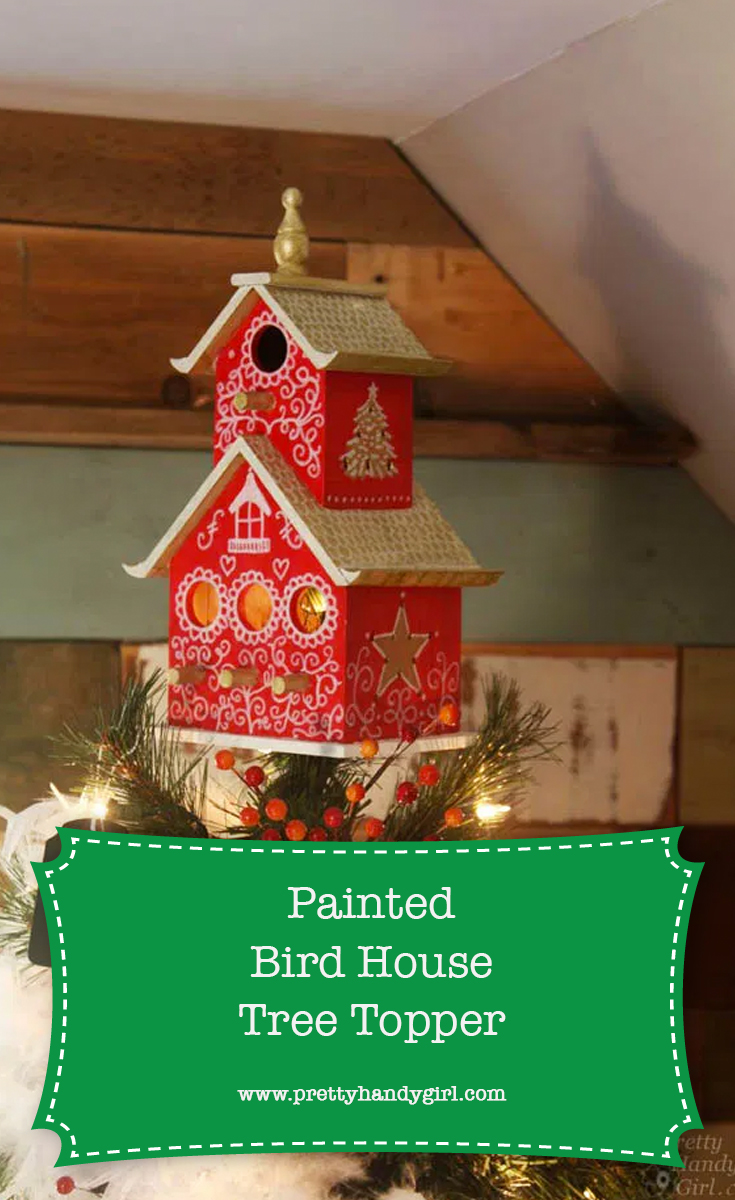
Although I created this little painted birdhouse to function as a tree topper, you can forgo drilling a hole in the bottom and add a hook to have a fully functional birdhouse for those bird watchers in your home.

This is a project you can do for fun or meditation. And kids can also get in the fun. All you need is some acrylic paint and a paint pen and you can have a blast making this Doodle-Painted Birdhouse for yourself or as a gift.

Painted Birdhouse Tree Topper Tutorial | Pretty Handy Girl

Materials:

(I’ve included affiliate links for your convenience. I earn a small percentage from a purchase using these links. There is no additional cost to you. You can read more about affiliate links here.)

Optional:


Instructions:

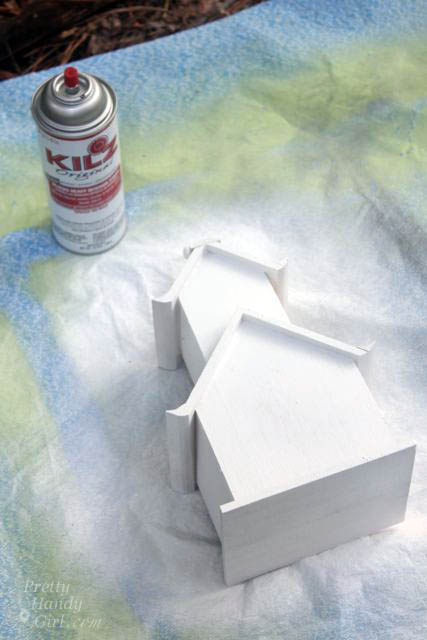
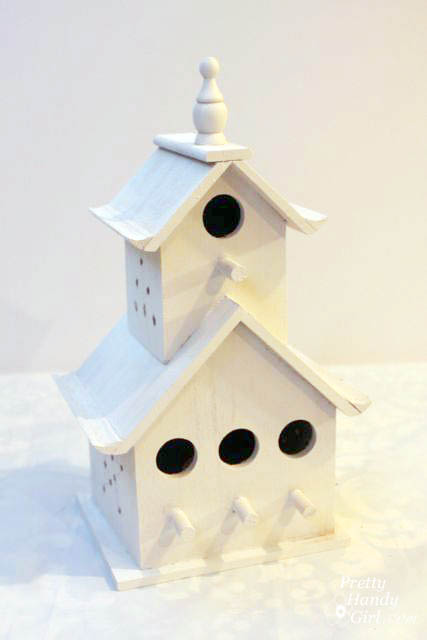
Spray prime the unfinished birdhouse and allow it to dry thoroughly.

Painted Birdhouse Tree Topper Tutorial | Pretty Handy Girl

Sketch a star shape on the sides of the birdhouse. Mark the location where you wish to drill holes. (If you are using this for an outdoor birdhouse, it’s nice to have a little ventilation for the house. But, feel free to skip this step if you wish.)

Painted Birdhouse Tree Topper Tutorial | Pretty Handy Girl

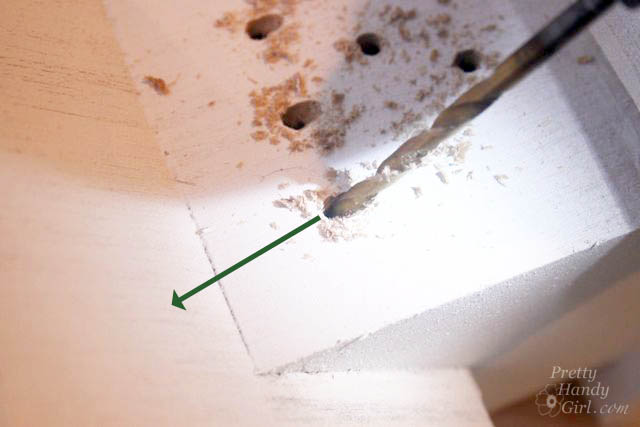
If your birdhouse is a double-decker, you will probably want to drill holes through the sides at angle and down into the first floor roof. This will allow some of the light to come through the top story holes as well.

Painted Birdhouse Tree Topper Tutorial | Pretty Handy Girl

For Tree Topper Only:

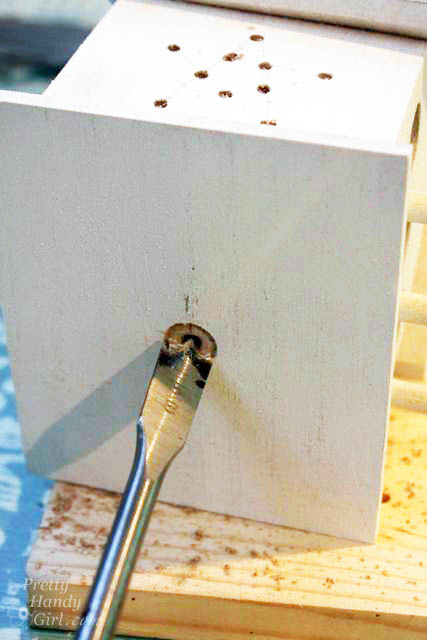
Mark the center location on the bottom and drill a 5/8″ hole through the bottom of the birdhouse. (Skip this step if you want a functional birdhouse.)

Painted Birdhouse Tree Topper Tutorial | Pretty Handy Girl

Dump any wood shavings out of the birdhouse. Set up the birdhouse on the drop cloth for painting.

Painted Birdhouse Tree Topper Tutorial | Pretty Handy Girl

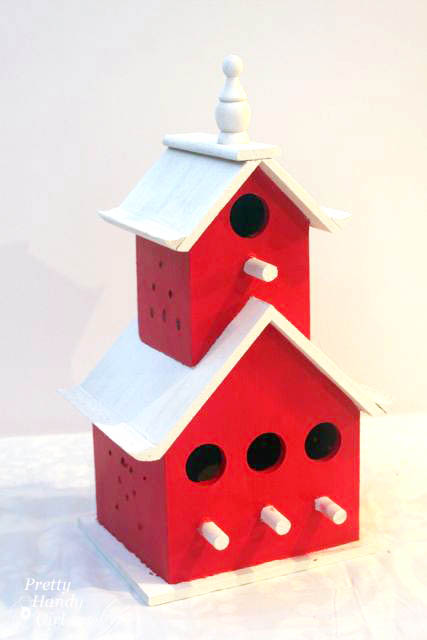
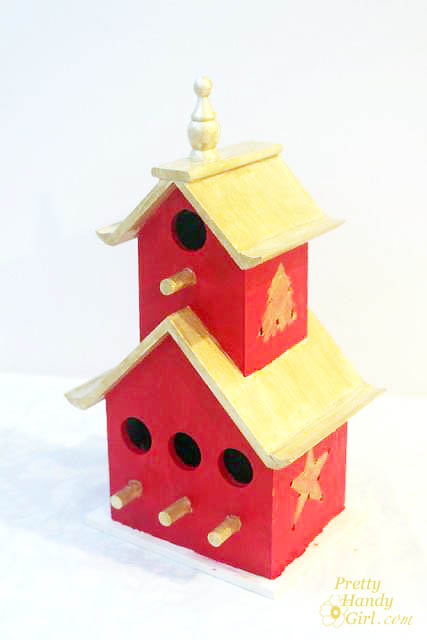
Paint the sides of the birdhouse red (or any color you like.)

Painted Birdhouse Tree Topper Tutorial | Pretty Handy Girl

Paint the roof, steeple, and perches gold. Add a star and tree shape on the sides to accentuate the drilled hole patterns.

Painted Birdhouse Tree Topper Tutorial | Pretty Handy Girl

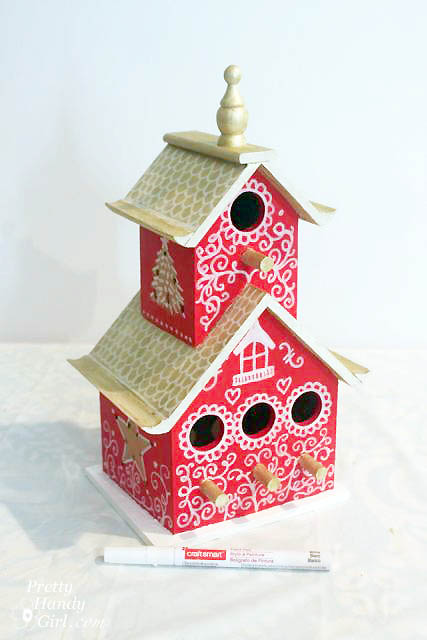
After the gold and red paint has dried completely, use the white paint pen to doodle-paint all over the birdhouse.

Painted Birdhouse Tree Topper Tutorial | Pretty Handy Girl

Afraid to Doodle-Paint?

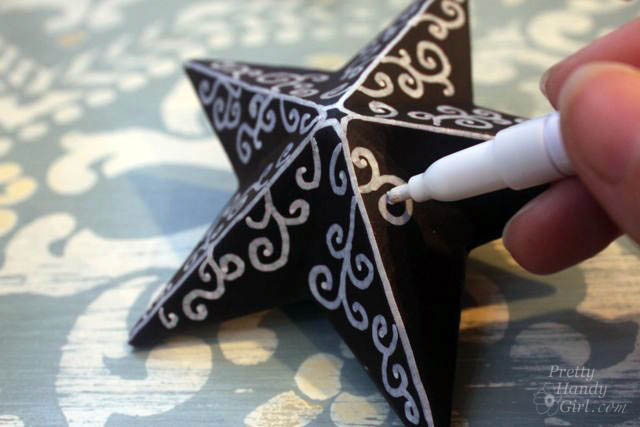
Nonsense, there is no rhyme or reason to the doodling, just make lots of little curly q’s, c’s, and loops. You can start by outlining the window structures. Then embellish them. Regardless of your doodle-painting style, it’s important to have fun!

You can see how I used the same technique on the chalkboard ornaments on my Feathered Nest Christmas Tree and they came out really cute.

Doodle Chalkboard Ornament | Pretty Handy Girl

When the paint pen lines have dried, add a few coats of an outdoor sealant.

Birdhouse Tree Topper:

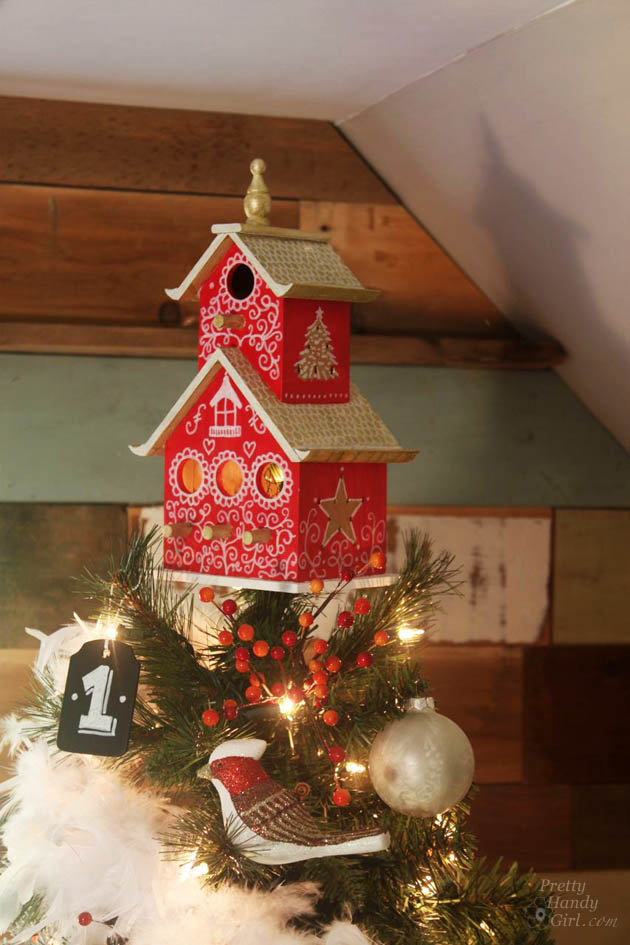
You can use it as a tree topper by feeding the top branch(es) into the hole on the bottom of the birdhouse.

Painted Birdhouse Tree Topper Tutorial | Pretty Handy Girl

Outdoor Birdhouse:

Add the screw eye hook and hang the birdhouse from a tree in your yard.

Painted Birdhouse Tree Topper Tutorial | Pretty Handy Girl

Décor Birdhouse:

If you simply want to display your birdhouse as décor, set a little battery-powered light inside the hole in the bottom and enjoy a homey birdhouse on a shelf.

Painted Birdhouse Tree Topper Tutorial | Pretty Handy Girl

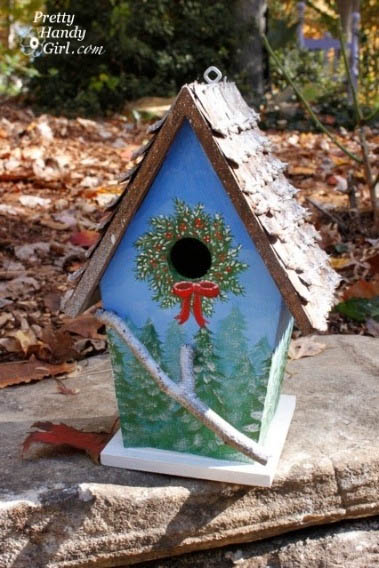
Want to decorate your birdhouse more? You can see how I created this little Christmas painted birdhouse and embellished the roof.

Christmas Wreath handpainted birdhouse | Pretty Handy Girl

Doodle-painted birdhouses are adorable gifts and very frugal. Make it May is almost over, but stay tuned for one more project!

PHGFancySign

Pin for later!

How to Make a Painted Bird House Tree Topper | Pretty Handy Girl

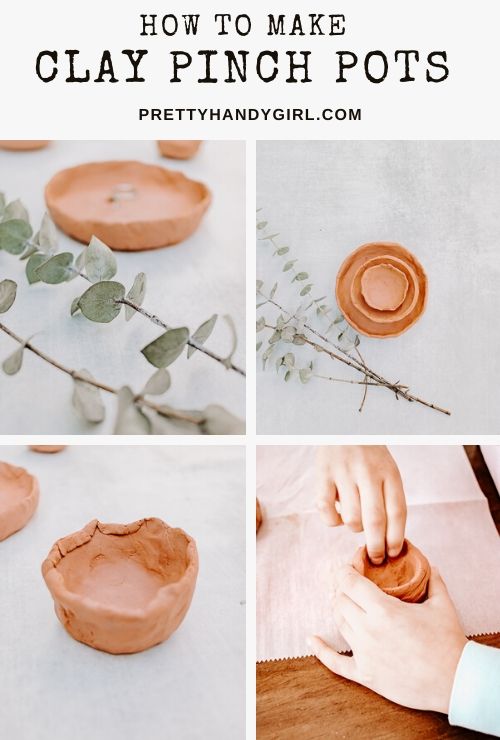
How to Make Pinch Pots from Air Dry Clay

Looking for a simple craft to make and help you decompress? Make these cute clay pinch pots and use them around your house.

How to Make Clay Pinch Pots

How to Make Pinch Pots from Clay

I hope you are ready to get your hands a little messy!  Today’s tutorial is all about making some easy pinch pots out of inexpensive clay.  Right now, it feels like the days are long, and life is still so uncertain. I find that immersing myself in an enjoyable activity really helps to pass the time.  Working with the hands can be good for the soul!

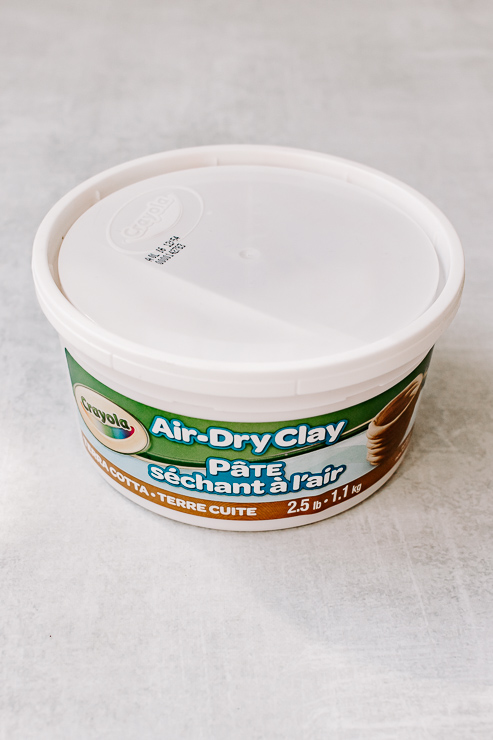
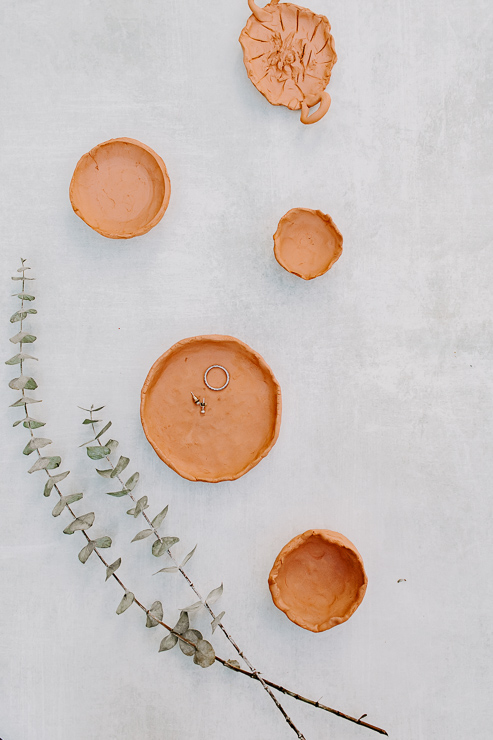
The good news is, you don’t really need anything special other than air dry clay and your hands.  Plus, you don’t have to leave your house to create this project.  The terracotta clay I purchased is from Amazon and was shipped right to my door.

Crayola Air Dry Clay

This is a great craft for the kiddos too, so be sure to involve them with learning how to make pinch pots if they are looking for something to do.

Let’s dive right in!

Materials:

(I’ve included affiliate links for your convenience. I earn a small percentage from a purchase using these links. There is no additional cost to you. You can read more about affiliate links here.)

Instructions:

This project is easy, inexpensive, and very therapeutic! Let your mind focus on shaping the clay and put your worries aside for a little bit.

Step 1: Shape your clay into round balls

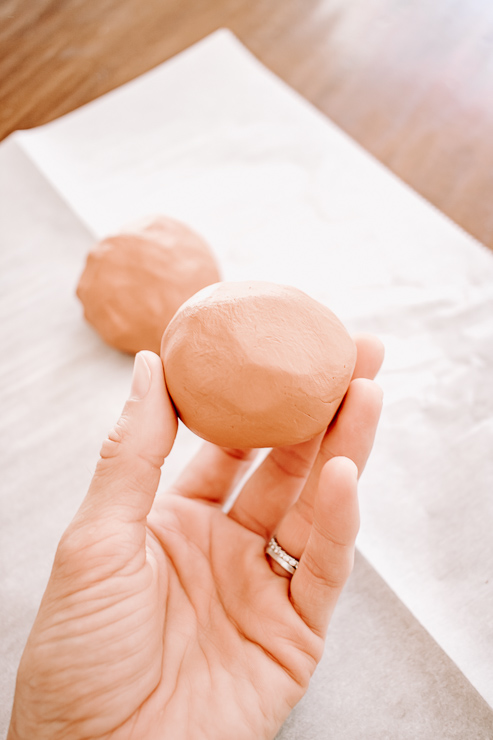
Shape Clay into a Round Ball

Layout a piece of parchment paper.  Grab a hunk of clay and shape/roll it into a nice ball. My clay balls are about the size of the palm of my hand. You can go bigger or smaller, it’s up to you!

Step 2: Form your Pots

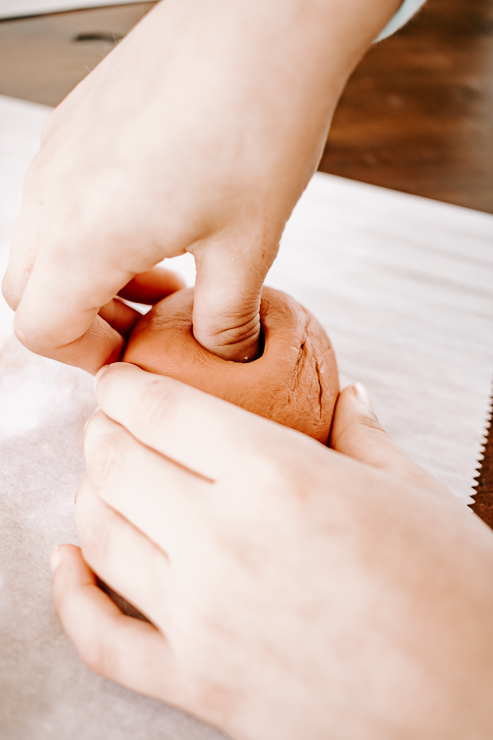
Push thumb into center of clay

Now that you have your clay ball formed, take your thumb or finger and stick it into the center of the ball. Use your fingers to “pinch” the clay outward, slowly creating a bigger hole in the center. Keep going around and around until you are satisfied with the shape and size of your pinch pot.

Use fingers to pinch out sides of pot

Clay is forgiving, you add more if you pinched it too thin. Add a little water to your clay to avoid cracking. The thicker the sides (or bottom), the longer it will take to dry. Keep that in mind when shaping your pinch pot.

Step 3: Dry your Pinch Pots for Several Days

Let pots dry for several days

We left our clay pinch pots to dry on the parchment paper for several days. When they are fully dry, the pots will turn a lighter color and be hard to the touch.  Once dry, you can paint them with acrylic paint or just leave them plain.  Being the simplistic girl that I am, I just left mine plain.  But kids might enjoy a painting project.

That’s it!  As I said, this is a simple, inexpensive project.  Luckily, you should have plenty of clay leftover for next time.

Crayola Pinch Pots How to Tutorial

You might be wondering what in the heck to do with pinch pots?

Aside from the fact that it’s just a fun craft, there are tons of ways to use your new pots! A quick google search will bring up some ideas for you. But I’ll give you a few here to get you started.

  • Plant faux succulents
  • Use as a ring tray on your nightstand
  • A decor dish to decorate with

Since you can’t get the clay wet, planting a real plant in them is not going to work. But that’s ok because those faux succulents have to go somewhere and they look great in these little pinch pots.

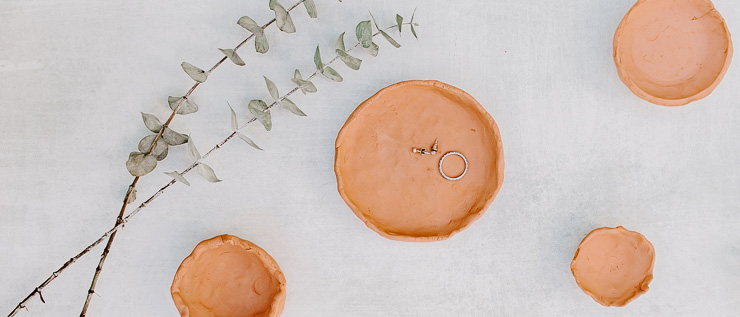
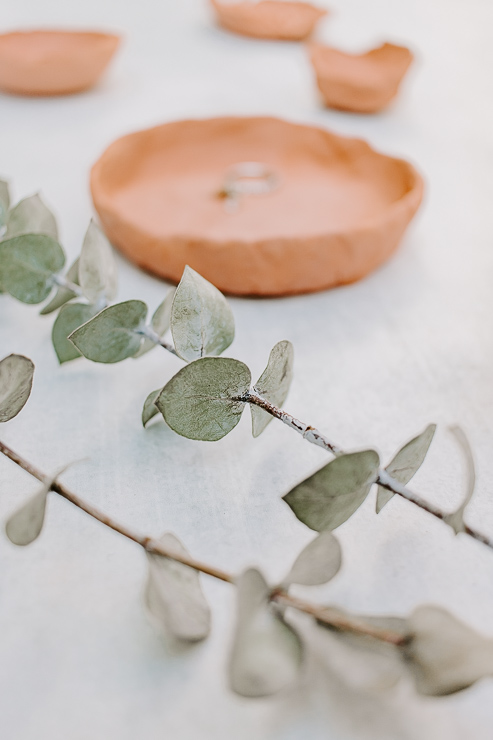
You could also use them as a small catch-all dish on your nightstand or console table. In fact, that’s how I’m using my pinch pots! I have one sitting on my nightstand because I somehow always forget to take off my earrings at night – so this has become the perfect little spot to put them before I go to sleep.

Pinch pots from clay - use as a jewelry dish!

Finally, you can just use them as decor pieces to decorate shelves and bookcases or tables. They look very earthy, so depending on your decor style, they add a nice collected feel to your rooms. Plus – you made them! Take a little pride in your handiwork.

If you like this clay project, be sure to check out my tutorial for a heart-shaped jewelry dish.

Stay safe, stay healthy!

karen signature

~ See More of Karen’s Tutorials ~


karen from decor hintHello!  I’m Karen, the creator of the Home Decor and DIY Blog: Decor Hint. I’m a Native of the East Coast, but I currently live in beautiful Seattle with my hubby, our two wonderful children, and our spunky wheaten terrier.

You can usually find me with some sort of craft in one hand and a coffee in the other. And I’m always rearranging furniture or moving lamps from room to room. I have a passion (read: obsession) for decorating, DIY, and gardening. In short, I love making my house into a home.

Like many, I’m inspired by what I see in home decor magazines, but I’m not so inspired by the price tags.  Consequently, I love finding and creating beautiful budget-friendly home decor items. In a head to head competition, I bet you’d never know the difference between the designer items and my DIY creations!  Many of my DIY projects focus on sewing, crafting, upcycling and organizing. Some of my favorite projects have been making pretty wreaths, sewing my own tassel hand towels, and crafting these trendy wood bead garlands. I can’t wait to inspire you and spark your creativity through my DIY projects.

You can always connect with me on Pinterest, Twitter or Instagram.

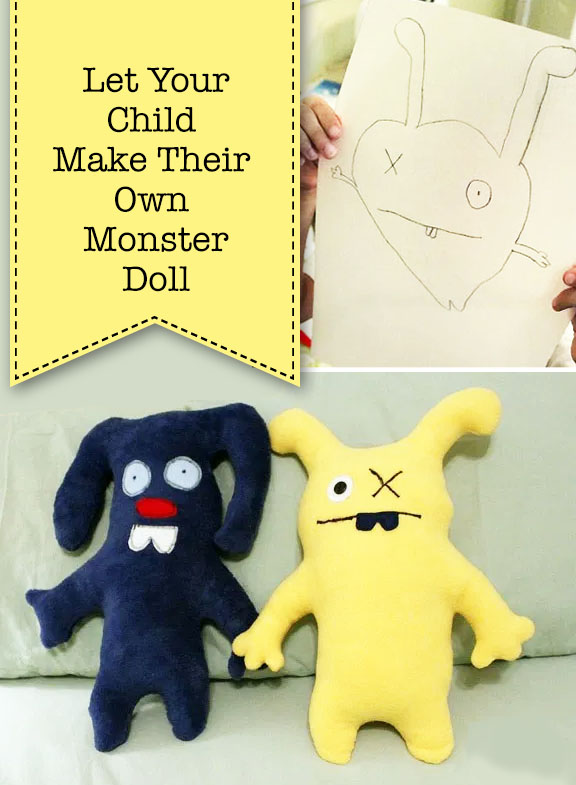
Make Your Own Monster Dolls

Teaching children to sew can be a fun and rewarding lesson if you let them take the lead and design their own monster dolls.

let your child make their own monster doll

Make Your Own Monster Dolls

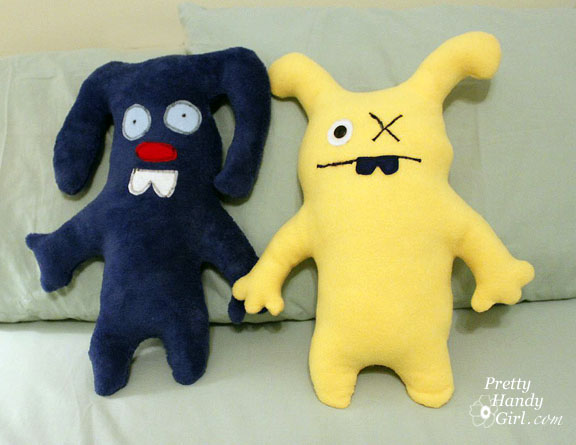
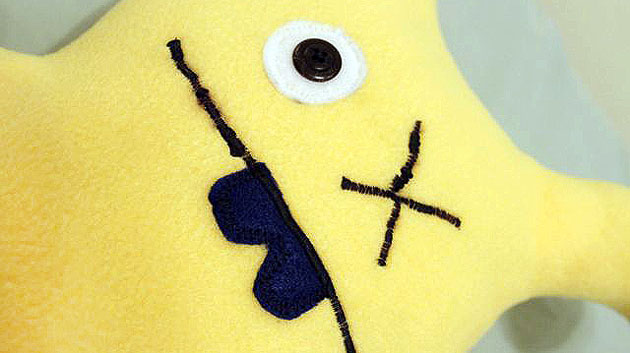
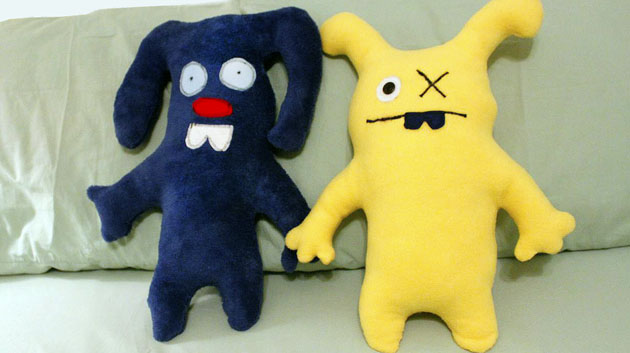
Aren’t they cute?! Okay, they may have a few imperfections, but I don’t want to hear about it because my boys made them! That’s right my 4 and 7-year-old sons made their own Monster Dolls (with a little help from me). It was a perfect way to spend a summer afternoon together. And as a bonus they learned some basic sewing skills.

My 7 year old really dove in and enjoyed every aspect of making his monster. He used the sewing machine with my help. My 4 year old needed a bit more guidance and help. He was very tentative about the sewing machine, but I convinced him to push the pedal. After one time pushing it, he was LOVING puttin’ the pedal to the metal! LOL!

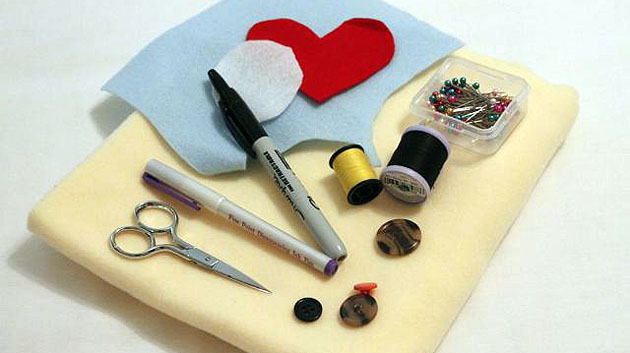
Materials:

Monster Dolls Designed and Made by Your Kids | Pretty Handy Girl

Instructions:

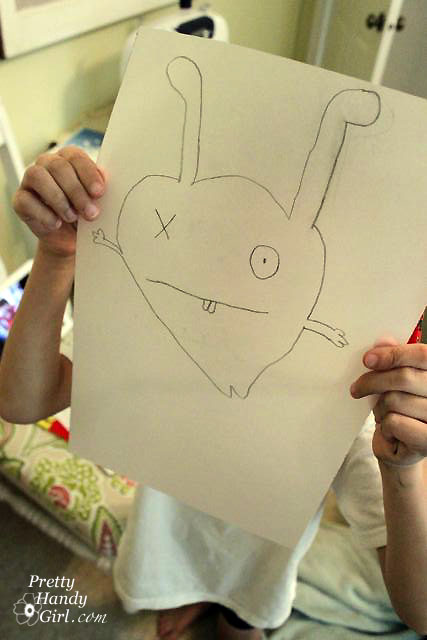
Let your child draw their monster on a piece of paper.

Monster Dolls Designed and Made by Your Kids | Pretty Handy Girl

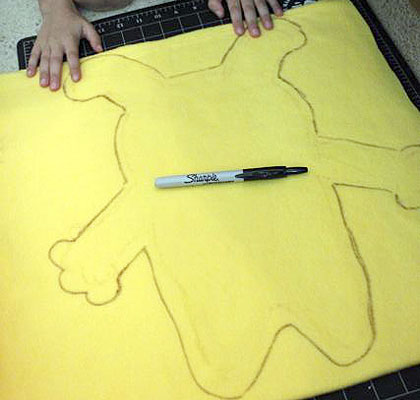
Help your child draw the outline of the monster onto the backside of the fleece. Explain that you might need to fatten up any skinny appendages so you can turn the monster right side out and stuff (him or her) after sewing.

Monster Dolls Designed and Made by Your Kids | Pretty Handy Girl

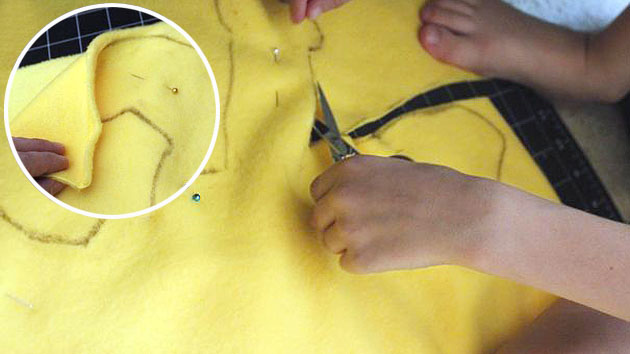
Pin two pieces of fleece together (right sides together.) Help your child cut out around the outline of the monster’s body. This will give you two identical pieces for the monster doll body.

Monster Dolls Designed and Made by Your Kids | Pretty Handy Girl

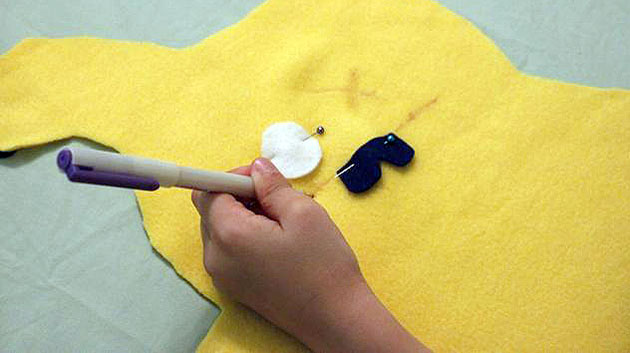
Cut eyes, nose, and mouthparts out of colored felt. Pin the facial features to the right side of one of the body cut-outs. Let your child use the vanishing marker to mark other facial features that will be stitched.

Monster Dolls Designed and Made by Your Kids | Pretty Handy Girl

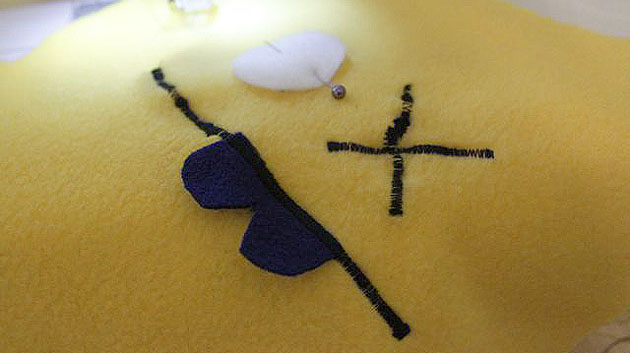
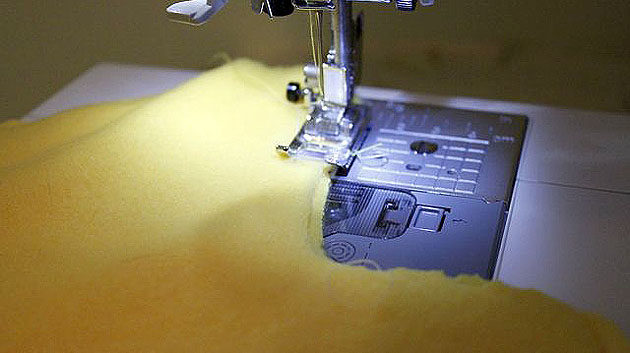
Using the sewing machine, stitch the facial features and attach the felt pieces.

Helping Children Learn to Use a Sewing Machine:

To help my boys learn to sew, I let them depress the pedal on the sewing machine. We focus on light pressure, slowing down, and stopping. Meanwhile, I guide the fabric through the foot.

Monster Dolls Designed and Made by Your Kids | Pretty Handy Girl

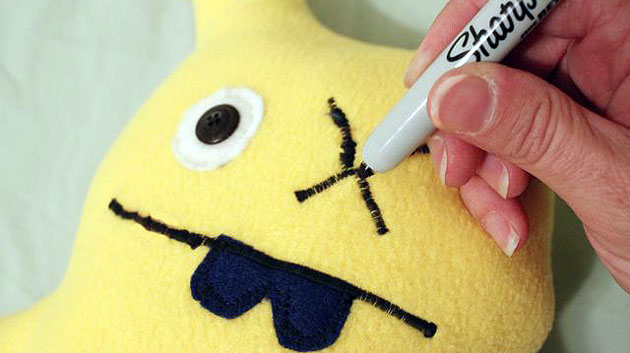
To emphasize the features we drew over the stitching with the Sharpie marker.

Monster Dolls Designed and Made by Your Kids | Pretty Handy Girl

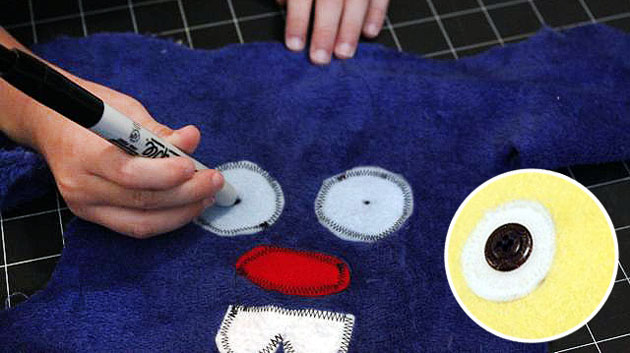
Use buttons or the Sharpie to create pupils for your monster doll.

Monster Dolls Designed and Made by Your Kids | Pretty Handy Girl

Pin the right sides together (facial features inside) of the doll. Stitch around the edge, leaving a small three-inch opening for stuffing.

Monster Dolls Designed and Made by Your Kids | Pretty Handy Girl

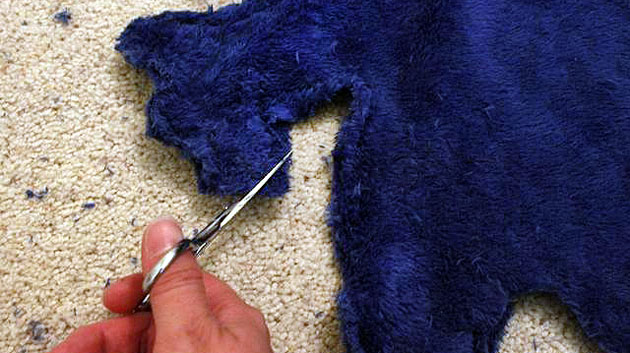
Trim any excess fabric away from the edges before turning the doll right sides out.

Monster Dolls Designed and Made by Your Kids | Pretty Handy Girl

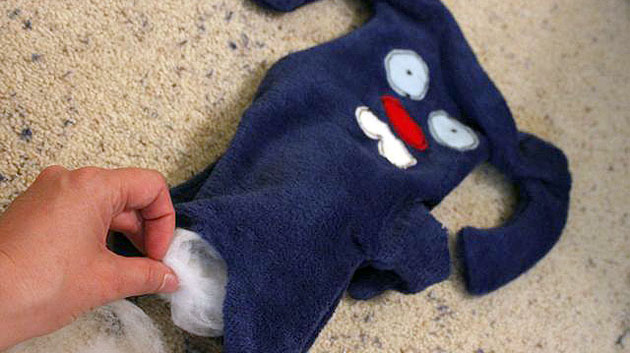
Turn the monster doll right sides out. Use a pencil’s eraser side to poke out any corners and turns. Stuff the monster with polyfill stuffing. Use the pencil to push filling into small areas.

Monster Dolls Designed and Made by Your Kids | Pretty Handy Girl

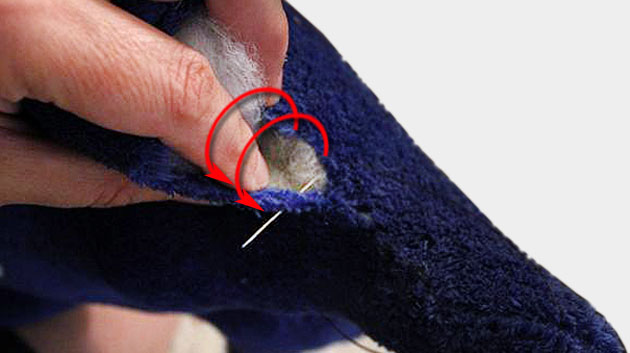
Whipstitch the opening closed after the doll has been fully stuffed.

Monster Dolls Designed and Made by Your Kids | Pretty Handy Girl

Your child’s monster doll is complete!

Monster Dolls Designed and Made by Your Kids | Pretty Handy Girl

Ugly Monsters or Adorable Monsters? What do you think?

Monster Dolls Designed and Made by Your Kids | Pretty Handy Girl

Your child will surely love his creation and will definitely feel a huge sense of pride that he (or she) designed it themselves!

Monster Dolls Designed and Made by Your Kids | Pretty Handy Girl

I let my boys do as much as possible so they could feel a HUGE sense of accomplishment when they were done. They both were so proud of their monsters. They tote their monster dolls everywhere and tell friends and family, “I made it!”


Pin for later!