Hello. You have reached the home of Pretty Handy Girl. We’re not home right now, but you can reach us over at Remodelaholic today! Or feel free to leave us a comment and we’ll get back to you shortly. Beeeeeeep.
It’s true, I’m not here today. Instead I’ll be over at Remodelaholic sharing our Antique Heart Pine flooring in our living room. I hope you’ll swing by to see how we installed them and all the hurdles we jumped over to get them to a finished product.
If you haven’t been to Remodelaholic, you are really missing out. I showed you a few of Cassity’s projects in this post.
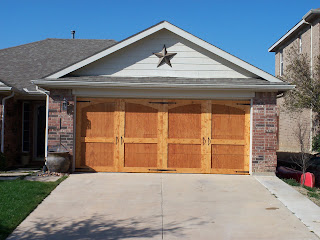
She designed and built her own carriage style garage doors!
What I like most about Remodelaholic is that every day around 4pm EST I get a triple dose of DIY projects. It is like my daily injection of inspiration.
What? You’d like a dose too?! All you have to do is go to Remodelaholic and on the side bar where it says, You’ve Got Mail”, simply enter your email address. You can also receive Pretty Handy Girl posts in your email inbox everytime I publish a new post. Go ahead and enter your email address here:
I’ll be sure to email you whenever I have something new to show you!
I should have another post (or hopefully two) for you this week and then I’m headed out for a special weekend with two very special women in my life!
My sisters: The Architect, The Interior Designer and Me
We’ll be donning our safety goggles, aprons and gloves while we get busy kicking some serious DIY butt for my sister’s birthday present.
Happy Birthday, Alana!
She’s the architect and today is her birthday! So, wish her a Happy Day.
https://prettyhandygirl.com/wp-content/uploads/2021/07/PHG-logo-tagline-2020-1030x211-R.jpg00Brittany Baileyhttps://prettyhandygirl.com/wp-content/uploads/2021/07/PHG-logo-tagline-2020-1030x211-R.jpgBrittany Bailey2010-11-02 23:57:002010-11-02 23:57:00Guest Post on Remodelaholic
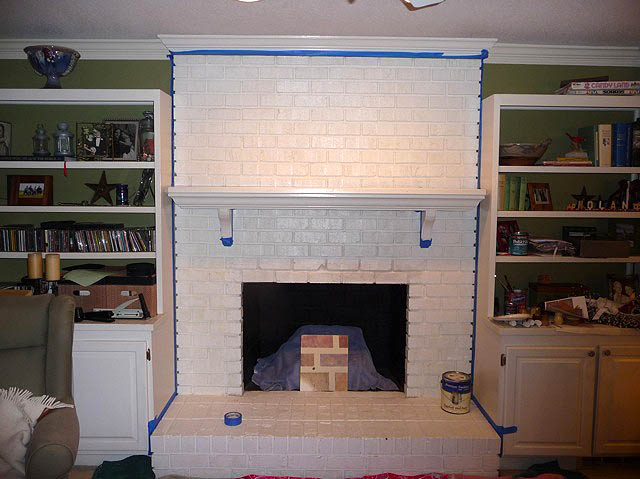
Welcome back! If you are just joining us, we are on the fifth step of a five part series on our living room. A living room that started out as a dark cave of a room:
Before picture shot during daytime with a lamp lit. VERY DARK!
It has been four days since Christmas and we’ve been working like busy beavers on our living room. Only a few more days until Pretty Handsome Guy has to go back to work. Our boys are getting antsy and tired of being shooed from the living room.
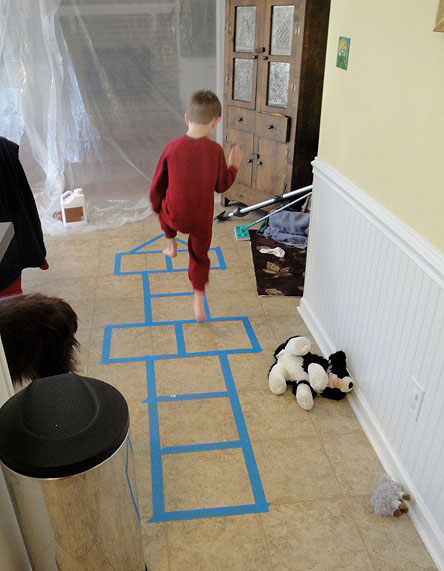
Keeping the troops from getting restless:
I came up with a spur of the moment idea to keep them busy for a little longer! Painter’s tape and a coin made for an instant hop scotch game on the kitchen floor!
I quickly duck into the living room and start the installation process.
When choosing the direction to run the boards, I had to look under the house from our crawl space to see which direction the floor joists ran. We wanted our wood floor to run at a 90 degree angle (or perpendicular) to the joist direction. (This isn’t a rule, but it helps with the stability of your floor.) If you can’t get under your house (or want no part of that underbelly) then study the nail pattern on the plywood subfloor. The nails that are nailed into the floor joists will be in straight lines across the floor.)
To lay the flooring straight, I drew out guide lines in the living room.
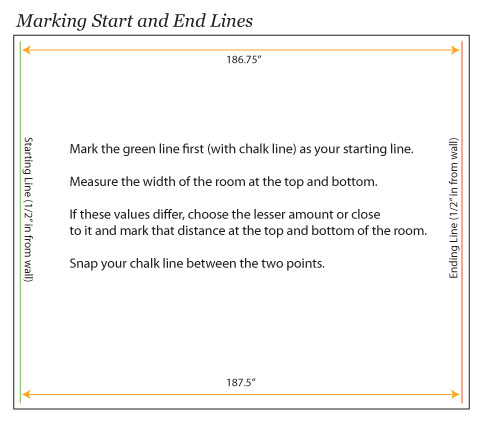
Marking Start and End Lines:
Mark the green line first (with chalk line) as your starting line.
Measure the width of the room at the top and bottom.
If these values differ, choose the lesser amount or close to it and mark that distance at the top and bottom of the room.
Snap your chalk line between the two points.
Figuring First and Last Board Widths:
Before you nail in that first board (because I know you are itching to get started). You will need to do some math to figure out how many board widths you will use across your room. Take the total width of your room, divide it by your floor board width.
For example, our room is 187″ wide. My board widths are 5.5 inches wide. So, here is my equation: 187 ÷ 5.5 = 34″ Oh happy day, a whole number!!! I have room for 34 full width boards in our living room.
This very rarely occurs! Normally you end up with a number that has a fraction, let’s say .3 for example. You will be left with 1/3 of your board width at the end. This board won’t look good being so narrow, and it is harder to work with. If you had .5 or larger, you might be fine depending on your board widths. You will need to be the judge.
So, in the case of the .3 excess, you will need to split the difference between both your starter and end boards. Find out what .3 of your board widths is: 5.5 x .3 = 1.65. Then you will add that width to your standard board width: 1.65 + 5.5= 7.15″. Now divide the 7.15 in half: 7.15 ÷ 2 = 3.575. So, now you know that you need to rip your start and end board to be 3.5″ wide. I hope you followed that.
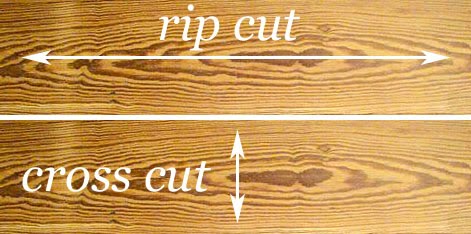
Time to learn two new glossary words:
Rip – ripping a board is cutting with the grain along the length of a board. This is usually done with a table saw, but can be done with a circular saw and a straight edge.
Cross cut – a type of cut that is perpendicular to the grain or along the width of your board. Cross cuts are usually made with a miter saw or circular saw, but can also be made with a hand saw. (I’ve been known to make this cut using my band saw before I had either a miter or table saw. Okay, I’ll have to give you a lesson on types of saws at a later date. I promise!)
Remember how I said we had a whole number, meaning our room will take full width boards. In other words, no ripping needed (guess we didn’t need that table saw after all. But, no way was I returning my Christmas present!)
Cutting and Dry Fitting the floor:
I started by laying out all the boards across the room. Sounds easy right? WRONG!!! It wasn’t really difficult, just time consuming. I had to cut each board to size with the miter saw (this is where I really learned the value of the old adage “Measure twice, cut once.” Then, I moved to the next board. Several rows took two board lengths. I was careful to stagger my seams randomly. I also had to take more time to cut the profiles around door jams, fireplace, heating vents and bookcases. Also, be sure to cut a hole where your heating and A/C vent is (more detailed information on cutting profiles can be found in this post.) Cutting around a vent instructions can be found at OneProjectCloser.com here. Measure, cut, check fit (and repeat about 100 times).
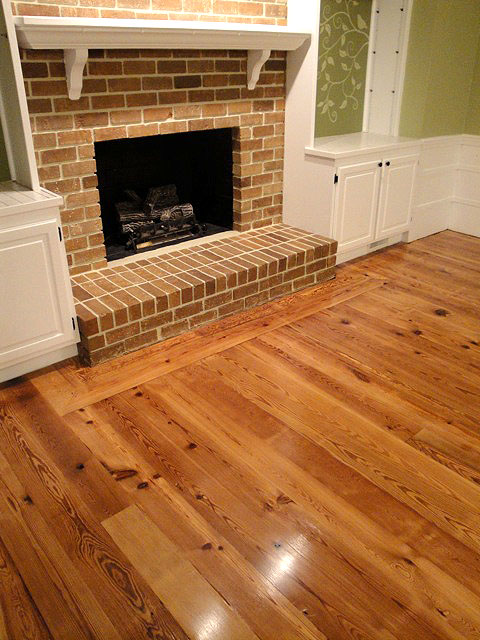
I chose to create a mitered frame around our fireplace. This took a little more measuring and time, but the results were well worth the effort.
Phew, that only took a day and a half! I laid out ALL the floor boards without nailing. Moved a few to stagger seams or put prettier planks in a more prominent spot. When everthing fit, I lightly numbered each board with chalk and stacked them up near the end side of the room.
FINALLY! Install Your Floor:
Okay itchy fingers, now it is time to install that first board! Grab that huge pneumatic nailer, right?! What? No?! The nailer won’t fit close enough to the wall for your first (or maybe even second or third row.) Time to bust out the power drill and predrill your nail holes. I put holes approximately every 18″ about an inch in from the edge. Then hammered the nails in using a nail set to countersink the nails. Before you sand, you will need to add some wood putty to fill and hide the nail holes.
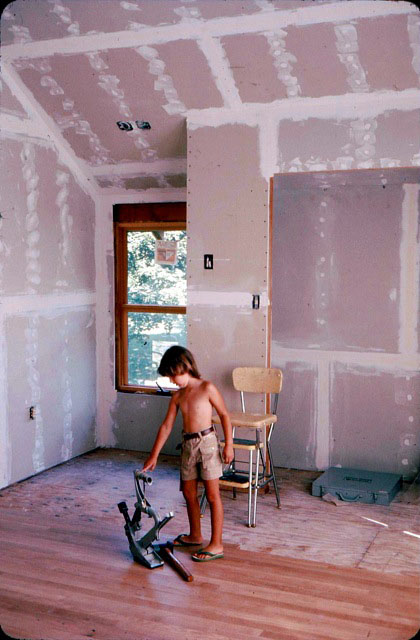
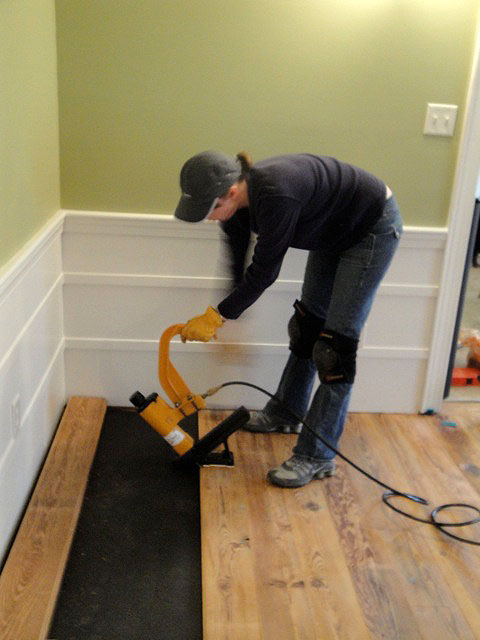
Ah ha, NOW you can grab that nailer! I have to admit I was a little nervous. I had never actually used a floor nailer (although my Dad has pictures to prove otherwise).
Please, please, no comments about my topless internet photo!
I was 5 people! And a tomboy, what can I say.
It is true, I had watched my parents lay wood floors. But, that was many many years ago. Luckily times have changed, and the tools are better. We rented a pneumatic nailer with a compressor so that the nailer would do most of the driving with forced air.
We lined up that second board. Used a scrap block of wood and a hammer to tap it firmly against the installed board. Then Pretty Handsome Guy gave me the nod letting me know I could proceed. I trembled a little as I lifted the rubber mallet. Then stopped, moved my feet wider and clear away from the nailer. Then raised the mallet. It was now or never! And {{WHAM!}} The mallet hit smack in the middle of the black button and a loud bang filled the room. Woot! What a rush! I just love power tools :-).
Back to work, one floor cleat in and about 400 more to go. Plenty of {{WHAM}} for me and Pretty Handsome Guy to share.
When we reached the end of the room, we had to ditch the nailer and predrill holes and hammer in the nails by hand again.
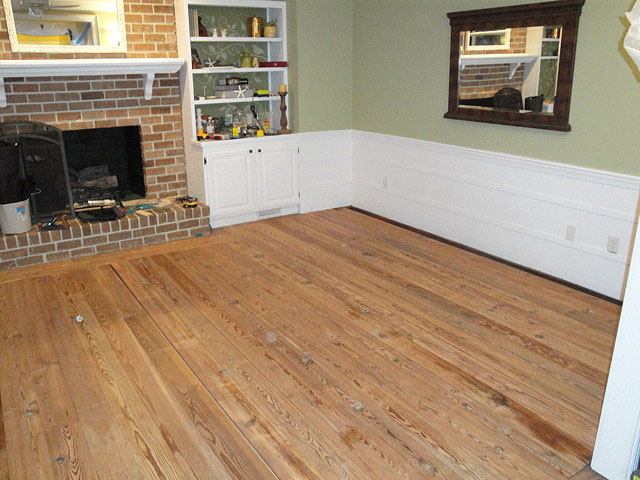
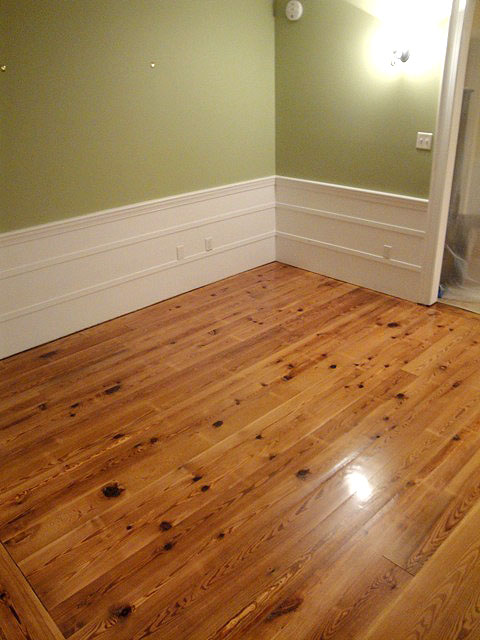
Ooo la la! Step back and admire that beautiful floor!
Because our floor planks were custom planed, they had varying heights. But, that wasn’t a big deal because we were planning on finishing our own floor.
Well, at first we were so scared of ruining our beautiful wood floors that we almost paid a professional to come finish them for us. But, Mark Kegler (the guy who planed the wood for us) reassured me that I could definitely do it myself.
He gave me a few tips on Refinishing Your Own Floors:
Again DO NOT STOP moving it while it is in contact with the floor.
And hang on tight to that puppy, cause it will pull you into the next county if you let it.
A side note on the edge sanders, this thing will really give you a good glute and hamstring workout (just in case you were looking for some added results. Okay, yes, I added this last bullet point.)
Then rent a Square Buffer (or Random Orbital Sander). It will give you your fine sanding and buffing finishes. (Rented at Home Depot)
Yup, you guessed it, watch a video on You Tube. Seriously, how did people learn anything before YouTube?
Buy the most expensive floor finishing system they have (it will last much longer than a cheap polyurethane.) We used ProFinisher Water-Based Floor Polyurethane.
It can be a water based system.
The system should include a sanding sealer and a sealer (polyurethane or varnish).
Follow the directions on the bottle.
This site: www.easy2diy.com has some a great video and information for the whole finishing process. They left off the square buffing step, but it’s your DIY project and you can buff if you want to!
After following all the directions for finishing the floor, we were left with….
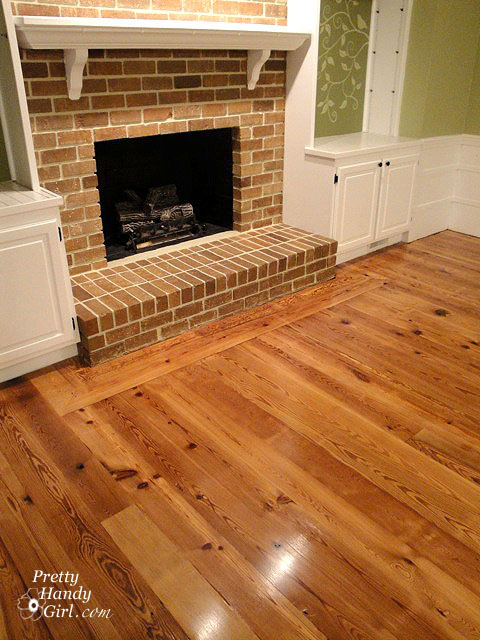
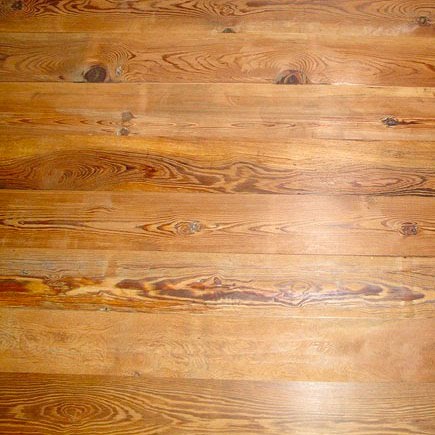
Ta Da! Droolingly Gorgeous Antique Heart Pine Floor
I hope you noticed that I didn’t mention the stain color we used. That is because we didn’t use a stain. This is the actual color of antique heart pine wood! No stain, just glorious amber red heart pine.
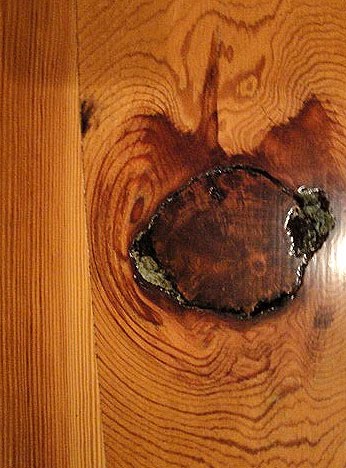
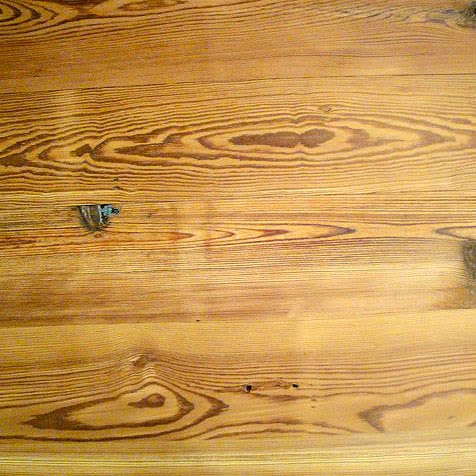
Which we had to cover up with a rug. But, every once in a while I pull back the rug and admire this:
You can just barely see that little spot of turquoise paint in the nooks of this knot.
It is just whispering, “I’m old and I have a story behind me.”
Before I reveal the room to you:
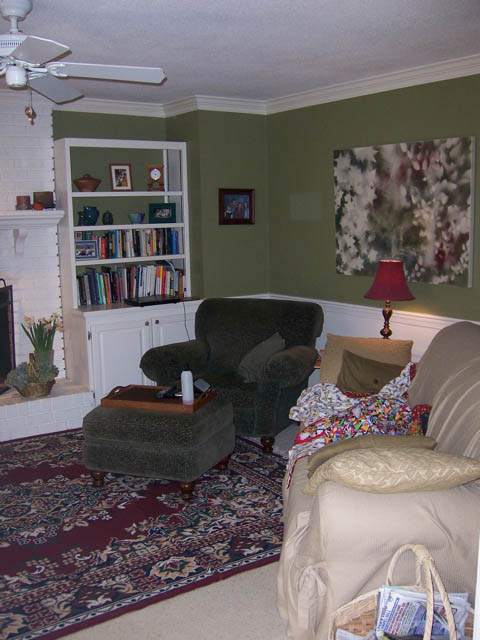
Do you remember the before picture?
Here are a few more:
And this was before we moved in:
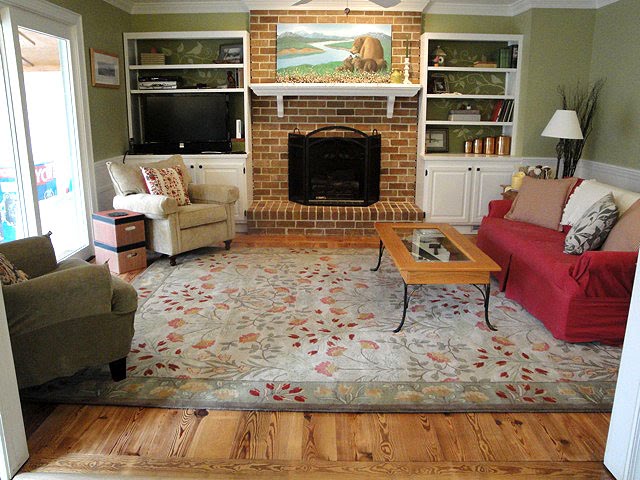
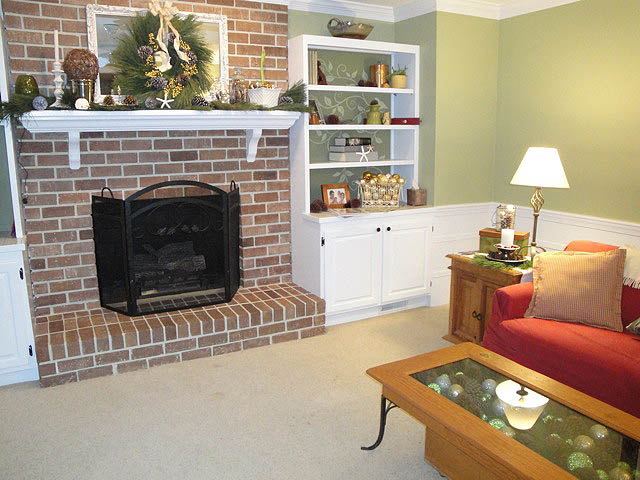
Here is the final reveal of our living room:
I should note that it took another few hours to cut, install, and paint the quarter round molding to hide the edges of the floor. And I had to wait a month for custom transition strips for the doorways and special heart pine quarter round for around the fireplace. But, I’m one proud and happy Pretty Handy Girl now!
Post Note:
Several people have emailed me asking where we got our rug. It is from Pottery Barn and is called Adeline.
https://prettyhandygirl.com/wp-content/uploads/2021/07/PHG-logo-tagline-2020-1030x211-R.jpg00Brittany Baileyhttps://prettyhandygirl.com/wp-content/uploads/2021/07/PHG-logo-tagline-2020-1030x211-R.jpgBrittany Bailey2010-08-26 15:57:002012-08-22 11:42:58Installing the Antique Heart Pine Flooring
While writing this post, I thought about some alternate titles. Here are some of the contenders:
1. How to entertain your kids while installing hard wood floors 2. How to cover your screened porch with debris from demolition 3. When you really should rent a dumpster 4. How to signify that Christmas is over 5. When getting a good deal on antique flooring from Craig’s List really isn’t a “good deal” 6. How to convince Pretty Handsome Guy that I really need a table saw 7. How to use up all of your husband’s Christmas vacation time
I hope you’ve enjoyed our adventures while renovating our living room. This is the fourth step in the ever growing series renovating our living room. Previous parts can be read here:
And now, without further delay, 4. Preparing to Install Antique Heart Pine Floors (and our amazing Craig’s List source!)
When we last left the Pretty Handy Girl Family the stockings were hung with care and Santa had left his tell tale magic snow boot prints.
One day later, December 26th, and we threw out the tree, put away all the decorations, emptied the room and let the demolition begin!
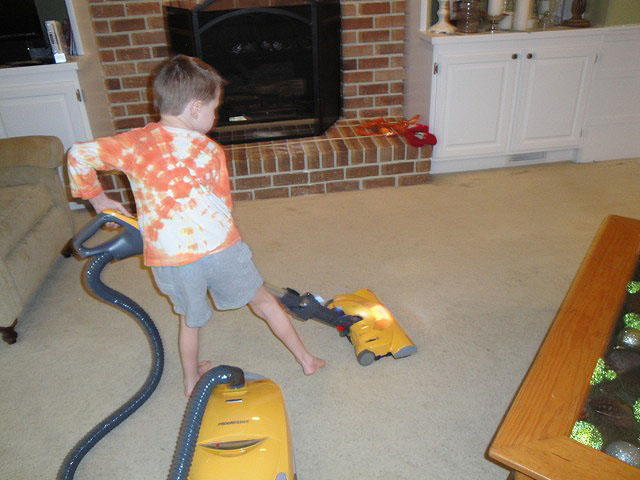
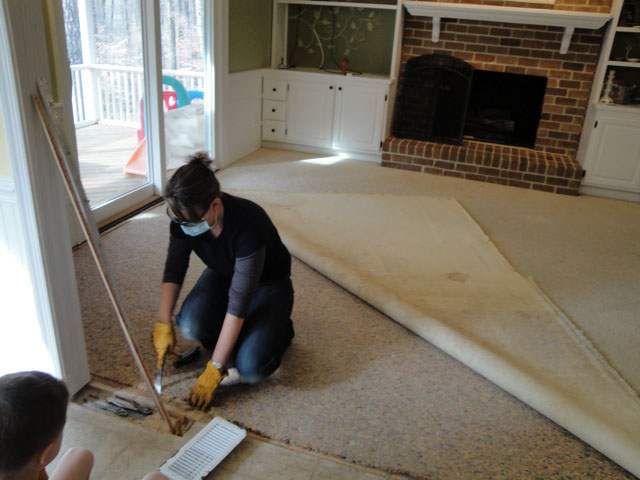
Our living room rug had seen 3 families, 3 dogs, and 6 children. Do I need to say more? It was time to say goodbye to that stained carpet. It seemed like a good idea to vacuum the rug before we removed it. A complete waste of time when we saw the dirt underneath, but whatever, if my son wants to vacuum, who am I to stop him!
To remove carpet, grab some plyers and start pulling up the carpeting from the edges. Then, take a utility knife and cut the carpet in three foot strips, roll them up, try not to gag as you see the stains underneath, and toss them out (we tossed them on the porch adjacent to the living room.) You will notice that I was wearing a mask. I highly recommend wearing gloves, mask and while you’re at it, maybe a hazmat suit!
For some reason, this activity was irresistible to our two boys (notice the cheering section with their chairs pulled up for a front row seat.)
We were thoroughly disgusted to find that one of the dogs (at least I think it was a dog) had been using the fireplace as a fire hydrant. The stench immediately released as we tore up the carpeting.
Next we removed tack strips with a hammer and pry bar and gloves (be careful not to get poked by those tacks! Ouch!) Removed the carpet padding by cutting it into strips too. Threw it on the porch.
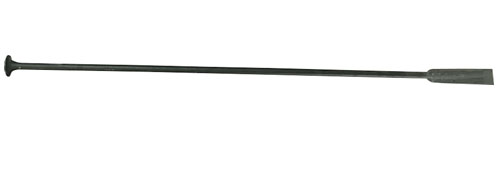
We had standard under-layment (particle board) under our carpeting. This is that type of wood that is made of tiny chips of wood and it flakes very easily. You CANNOT nail a floor into this stuff (unless you want your floor to bow and squeak, don’t do it!) We used a long digging bar (see below) to get some leverage under the under-layment.
Heavy 6′ long digging bar
The boards broke into small 2′ chunks which we also threw onto the porch.
It was at this moment, (while gazing at the 3′ high pile of debris) that we realized that maybe we should have rented a dumpster. I wondered if we would ever see our porch floor again!
Luckily, we were able to fit all the trash in the back of a neighbor’s truck. Pretty Handsome Guy and our oldest son made a trip to the dump. I was told it was quite an experience driving up Mt. Trashmore and pushing the debris out the back as seagulls swooped and swarmed. Yuck!
Back at home, I removed all the nails leftover from the particle board and swept and vacuumed the floor.
After we cleared the porch, we started setting up shop and taking inventory of what we needed for the installation.
Several sheets of 3/4″ plywood to build up our subfloor to the same height as the kitchen
Screws
Tar paper to act as a vapor barrier
Chalk line and chalk (already had)
Staple gun and staples (already had)
Rent a pneumatic floor nailer and hammer
Flooring nails
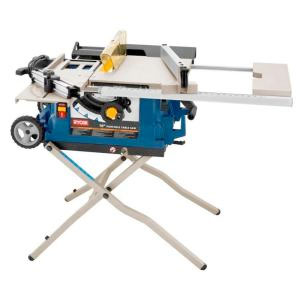
Miter Saw (check)
Table Saw (hmmmm, I didn’t have one, and I would probably need one to rip a board or two when I got to the end of the room. Let’s just say that I got my Christmas present a few days after Christmas!)
We began by measuring the floor and cutting our 4’x8′ sheets of plywood to fit in the room. This is a small room, so we only needed 6.5 sheets of plywood. Then we screwed about a gazillion 500 screws into the plywood until it was squeak-free and wouldn’t move in an earthquake.
How did we ensure that we had removed all the squeaks? Well, we had our oldest son test it out with his new roller skates he got for Christmas.
After the sub floor was built up, we stapled down tar paper over the whole floor. Did you know that tar paper can also become an instant blackboard for two boys? Scribbles and race tracks instantly appeared.
So, speaking of scribbles, you may notice some writing on the left hand side of the picture below. I always like to leave a little note or a story about the renovation for some future homeowner to find. (Although, curse the person that even thinks of removing my beautiful floors!)
This is the message I left:
“These heart pine floors were laid December 2009. The boards were reclaimed from the second floor of an old farmhouse just north of Oxford, NC in Virginia. The nails are antique square cut nails leftover from the construction of my grandfather’s house in Troy, NY.”
This is only part of the whole story about these boards. We have wide plank heart pine floors in most of our downstairs. They are original to the house, and add so much character! We wanted to try to keep the integrity of the house when we added wood floors in the living room, so I had spent hours scouring the web to find a source for wide plank heart pine flooring. The cost for reclaimed lumber with the same width was crazy expensive! $10 – $12 per linear foot. Worth every penny I’m sure, but unless we won the lottery, those floors were going to have to wait.
One day I stumbled across some wide plank heart pine lumber on Craig’s List. Yes, Craig’s List! I agreed to buy the lumber, basically sight unseen because the seller hauled the lumber to our house from Virginia (about an hour and a half away.) My heart sank when he pulled in our driveway. This lumber was filthy! Covered in dirt and grime. I really thought I might be getting ripped off. But, then he pulled one board from the trailer that he had sanded down and showed it to me. That one board was beautiful. It was a gorgeous amber color and had pretty knots in it. He told me that he demolishes old buildings and the owners let him sell anything he can salvage. He promised that this lumber was probably gorgeous underneath the dirt and grime. I took a leap of faith and paid for it.
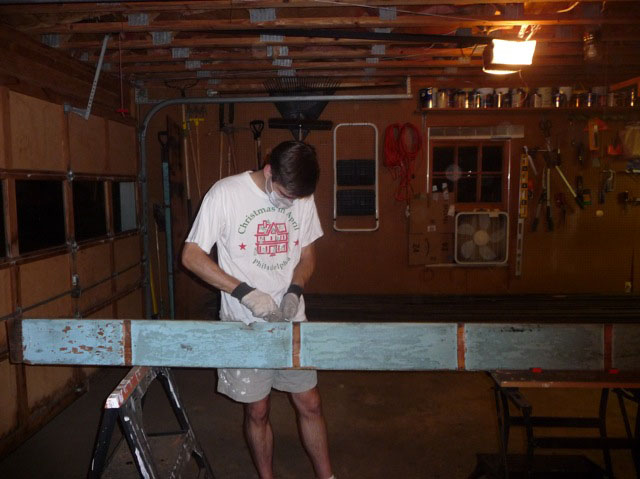
The wood sat in our garage for months until we finally decided to get the ball rolling. We started by scraping the tongue and grooves of the wood. 100 years of dirt and grime poured from the cavities in the boards. Then we removed as many nails as we could find. These were not round nails, they were hand cut and forged square nails.
3 Days of scraping, prying and pulling left a dirty floor and a dirty Pretty Handy Girl and Pretty Handsome Guy.
Next we sent the lumber off with our handyman, who safely removed all the lead paint from the one side of the wood. These were floor boards from the second floor of a farm house, the owners had painted their exposed ceilings (the undersides of the floor boards!) Unfortunately, he wasn’t able to plane the wood (even the tops and bottoms of boards by shaving), since the wax used to finish the floors 100 years ago kept gumming up his planer. (Thank you Steve Bartholomew for your hours of labor on our wood and the numerous blades you ruined for us.)
Enter one fabulous woodworker, Mark Kegler from Kegler’s Woodwerks. He and his father were so wonderful and gave me many tips and words of encouragement since this was my first time installing wood floors. They planed the wood and put new tongue and groove on the boards, which I know helped my installation process tremendously!
When Mark and his father returned the wood to us, I was weak in the knees. I have never seen wood like this before. The patterns, wood grain and coloring was BEAUTIFUL!!! I knew then that the time, effort, and extra money spent planing and removing the paint was well worth it. We had saved a piece of history and preserved wood that few will see in today’s lumber industry.


