Make Your Own Clock Sign | Pretty Handy Girl

Make Your Own Clock Sign | Pretty Handy Girl

Making a clock is an easy project. All you need is a flat surface that you can drill a hole into and BOOM, you can make a clock. Let’s get started and I’ll show you How to Make Your Own Clock Sign.

Materials:

Make Your Own Clock Sign | Pretty Handy Girl

  • Chalkboard sign (I purchased this chalkboard sign at Tuesday Morning.)
  • Clock mechanism
  • Ruler
  • Drill
  • Drill bit
  • Chalk
  • Damp rag
  • Vinyl lettering and numbers
  • Plate or circle template

Instructions:

Use a ruler to mark the center of your chalkboard sign near the top. (Center from the sides and use the same measurement down from the top for a balanced look.)

Make Your Own Clock Sign | Pretty Handy Girl

Use a plate or circle template to trace a circle for the clock face.

Make Your Own Clock Sign | Pretty Handy Girl

Disassemble the clock hands and parts. Lay them out in the order you removed them.

Make Your Own Clock Sign | Pretty Handy Girl

Insert the clock mechanism through the back of the hole. Read more

Metal Number Sign | Pretty Handy Girl

Metal Number Sign | Pretty Handy Girl

Want a quick and easy way to display a favorite number? Create a metal number art sign for your wall; for wedding tables; to commemorate your favorite athlete, etc.

Materials:

Metal Number Sign | Pretty Handy Girl

  • Metal sign (found at Michael’s)
  • Spray Paint
  • Numbers
  • Antiquing Wax
  • Wax brush
  • E-6000 glue
  • Ruler

(Note: You can make your own metal sign by cutting sheet metal and drilling holes into the top. Add some rope to hang it from. I just took the quick route and bought mine.)

Instructions:

Spray paint your numbers any color you like. While the numbers are drying, add some age to the metal sign by pouncing some antiquing wax to the edges.

Metal Number Sign | Pretty Handy Girl

Add glue to the back of the numbers.

Metal Number Sign | Pretty Handy Girl

Center them and line them up using a ruler to help keep them even.

Metal Number Sign | Pretty Handy Girl

Allow the glue to harden and hang your metal number sign anywhere you please.

Metal Number Sign | Pretty Handy Girl

Can anyone guess the significance of #41 on our wall? I’ll save you some time, it’s not my age.

PHGFancySign


Pin for later!

Upcycled Cabinet Door Quote Art | Pretty Handy Girl

Upcycled Cabinet Door Quote Art | Pretty Handy Girl

What do you do with an old cabinet door? Besides keep it with your wood scraps for ten years like I did (not recommended.) You can create pre-framed art! Today I have an easy Upcycled Cabinet Door Chalkboard Art project for you. If you have an old cabinet door, some paint, and a stencil, you can have yourself a unique and personalized art piece for your wall! Easy art!

Materials:

Upcycled Cabinet Door Quote Art | Pretty Handy Girl

  • Cabinet door
  • Chalkboard paint
  • Foam brush
  • Sandpaper
  • Antiquing wax
  • Wax brush
  • Clean rag
  • Craft paint or chalky paint
  • Stencil brush
  • Painter’s Tape
  • Pencil
  • Stencil or cut vinyl

Optional: Stain and foam brush

Instructions:

Paint the inside panel of your cabinet door with chalkboard paint. After the paint has dried, lightly sand any imperfections. Apply a second coat, brushing the paint in the opposite direction as the first coat.

Upcycled Cabinet Door Quote Art | Pretty Handy Girl

If you have an unstained cabinet door, you may want to stain it for an aged look.

Upcycled Cabinet Door Quote Art | Pretty Handy Girl

Apply painter’s tape to the inside face of the cabinet door.

Upcycled Cabinet Door Quote Art | Pretty Handy Girl

Paint the frame portion of the cabinet door. Allow to dry and apply a second coat of paint. Read more

Faux Aged Metal Pulley | Pretty Handy Girl

Faux Aged Metal Pulley | Pretty Handy Girl

Do you love rustic metal pulleys, but don’t like the hefty price tag? Wouldn’t you rather have a rustic metal pulley for less than $5? Ah, I have a secret. That beautiful rustic metal pulley above is actually:

Faux Metal Pulley | Pretty Handy Girl

Plastic! Ready to see how I secretly transformed that black plastic pulley into a gorgeous faux aged metal pulley?

Faux Aged Metal Pulley | Pretty Handy Girl

Materials:

(I’ve included affiliate links for your convenience. I earn a small percentage from a purchase using these links. There is no additional cost to you. You can read more about affiliate links here.)

Faux Metal Pulley | Pretty Handy Girl

Instructions:

Paint Metal Primer onto the plastic pulley. Read more

Plenty 'o Storage from One Board | Pretty Handy Girl

Before we get started, did you enter the $1,000 Build.com #LoveItMoment giveaway? Only a few days left, so get crackin’!

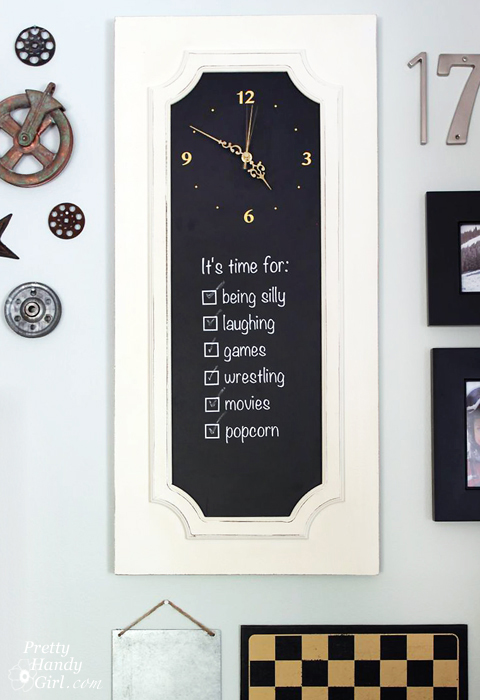
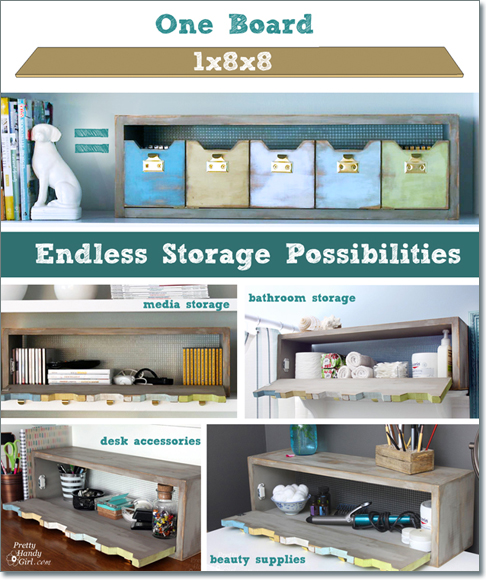
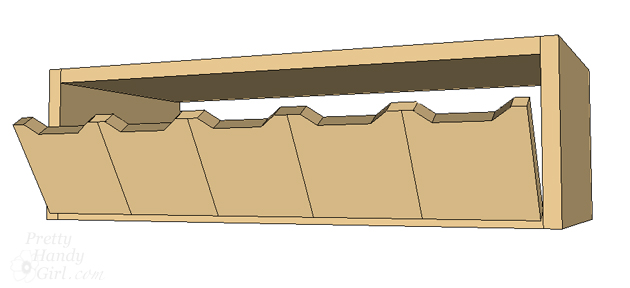
What would you say if I told you that I took one board…one 1″ x 8″ x 8′ board and created a faux cubby box with Plenty O’ Storage that will work in any room in your home!

Plenty 'o Storage from One Board | Pretty Handy Girl

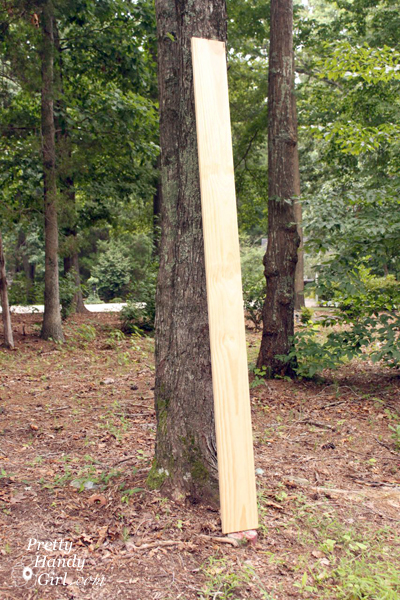
This is a project born out of the #OneBoardChallenge. What’s that you ask? In short, it’s a challenge thrown down by Jen from House of Wood. She challenged 17 bloggers to make something amazing out of one 1″ x 8″ x 8′ board.

One-board-challenge-graphic

I’m here to show you how that one board can be cut up and turned into this beautiful fake cubby storage box:

Plenty 'o Storage from One Board | Pretty Handy Girl

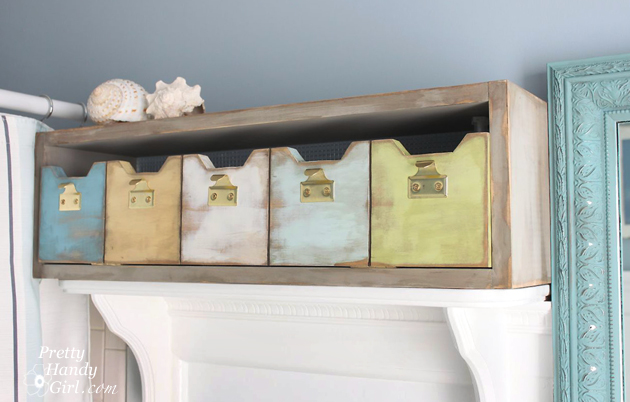
And it can store anything you don’t want in plain sight.

Plenty 'o Storage from One Board | Pretty Handy Girl

Today I’ll show you how to build your own Storage Box with Plenty O’ Storage!

Plenty 'o Storage from One Board | Pretty Handy Girl

Materials:

  • 1 – 1″ x 8″ x 8′ board
  • Drill
  • 3/32 drill bit
  • Philips head screwdriver
  • Wire mesh
  • Tin Snips
  • Staple gun
  • 1/4″ staples
  • Pencil
  • 2 – 2″ hinges
  • Magnetic latch
  • 5 – Sash hook lift hardware
  • 4 – {6 x 2 1/4″} wood trim screws
  • Miter saw
  • Table saw
  • Jig saw or Bandsaw

Cut list:

(Note that a 1″ x 8″ board is actually 3/4″ x 7 1/4″. Cut list sizes are actual sizes.)

Plenty 'o Storage from One Board | Pretty Handy Girl

  • 1 – 5 1/4″ x 25″
  • 2 – 7 1/4″ x 25″
  • 2 – 7 1/4″ x 8″
  • 1 – 2″ x 25″ (optional for hanging cleat or back stop)


Instructions:

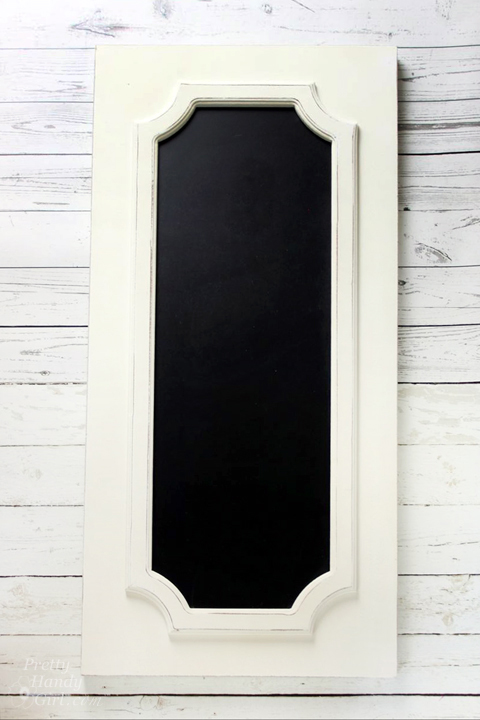
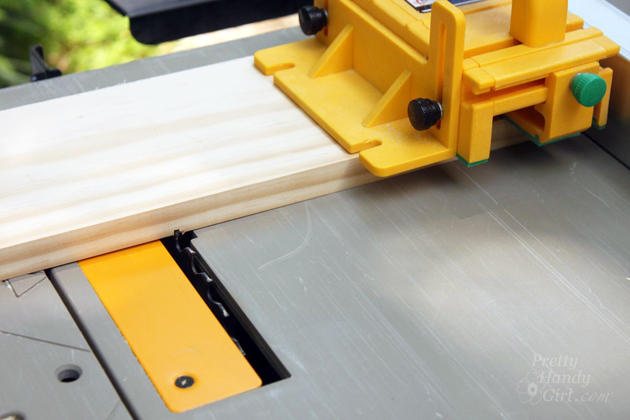
Cut your 1×8″ board into the pieces listed in the cut list above. Most cuts can be made on a miter saw, but you’ll need a table saw to rip the 2″ board and to cut grooves into the face of the storage box. Alternatively, you could skip the fancy details and create a plain face.

Plenty 'o Storage from One Board | Pretty Handy Girl

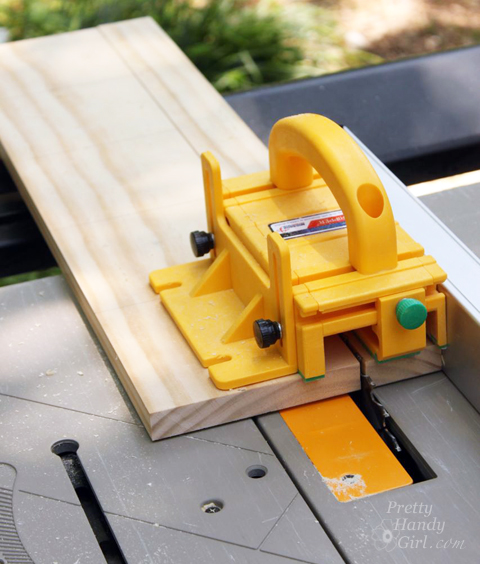
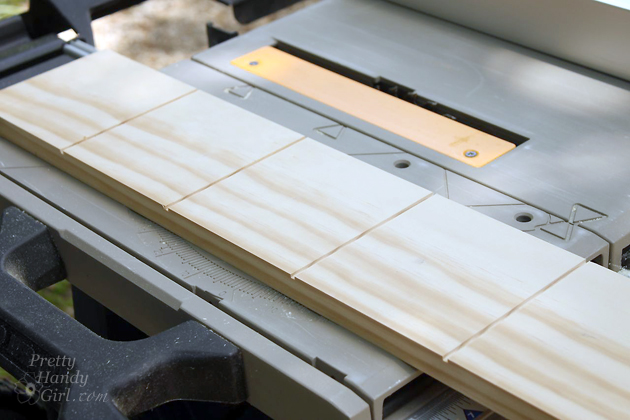
Set the table saw depth to 1/8″ above the saw table. Set the fence at 5″. Cross cut the board along the saw blade to cut grooves into the board. Rotate the board and cut across the other ends of the board. Set the fence at 10″ and repeat on both ends.

Plenty 'o Storage from One Board | Pretty Handy Girl

Your board will look like this when you flip it over:

Plenty 'o Storage from One Board | Pretty Handy Girl

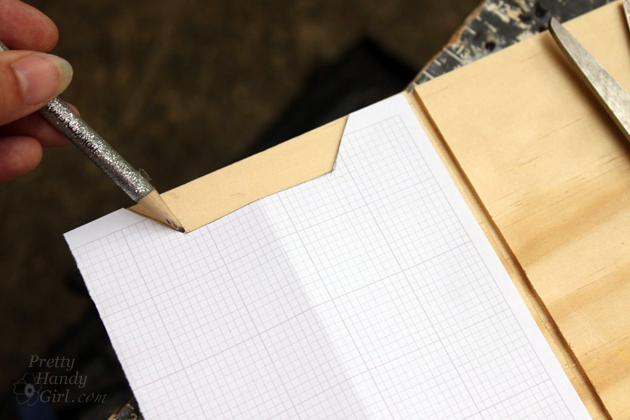
Download the template shown below, print and cut out the shape.

Plenty 'o Storage from One Board | Pretty Handy Girl

Using the template to trace the cut out onto the top of the face sections.

Plenty 'o Storage from One Board | Pretty Handy Girl

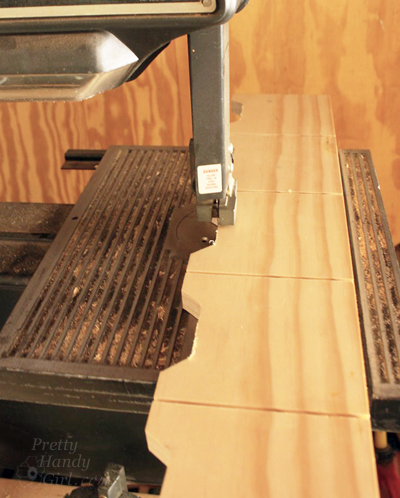
Use a jigsaw or bandsaw to cut the face profile.

Plenty 'o Storage from One Board | Pretty Handy Girl

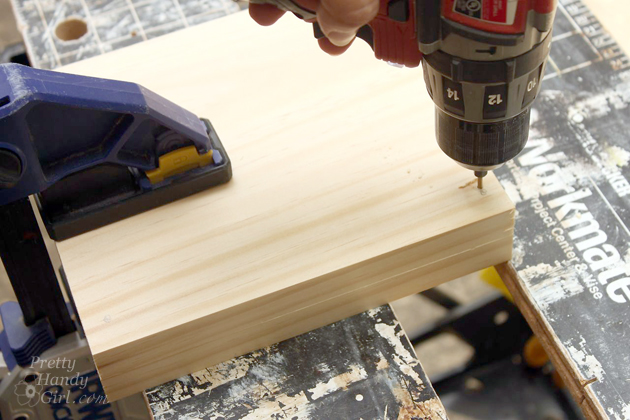
Pre-drill holes into the four corners of the two 8″ x 7 1/4″ boards.

pre-drill-screw-holes

Collect the four sides of the box ( 2 – 7 1/4″ x 25″ and 2 – 7 1/4″ x 8″)

Plenty 'o Storage from One Board | Pretty Handy Girl

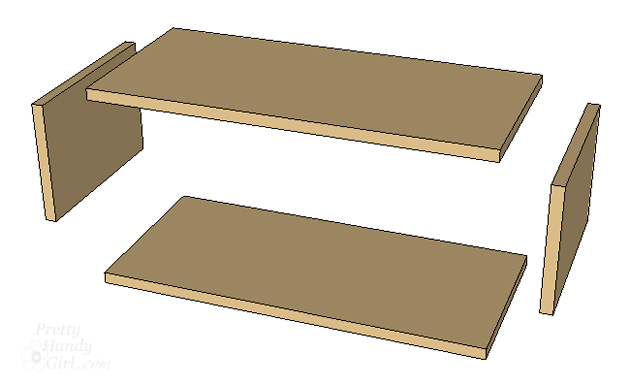
Drive wood screws into the sides and into the base of the box. Read more