
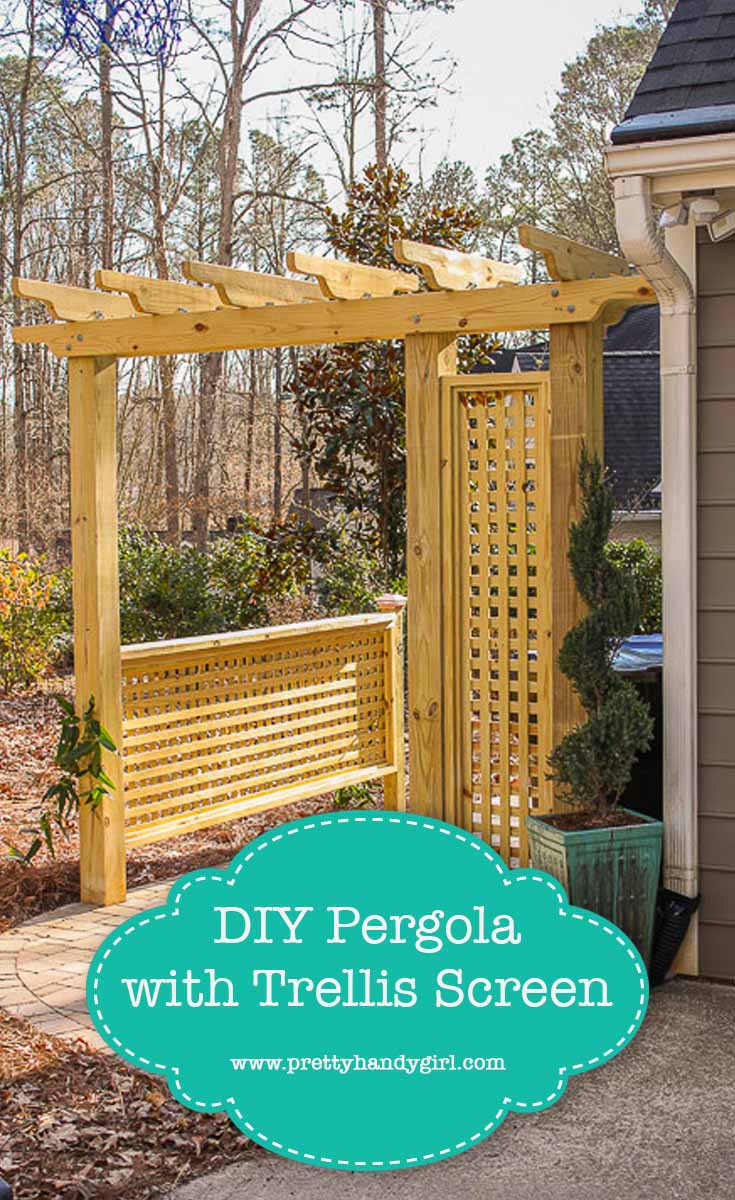
Building a Pergola with Trellis Screens
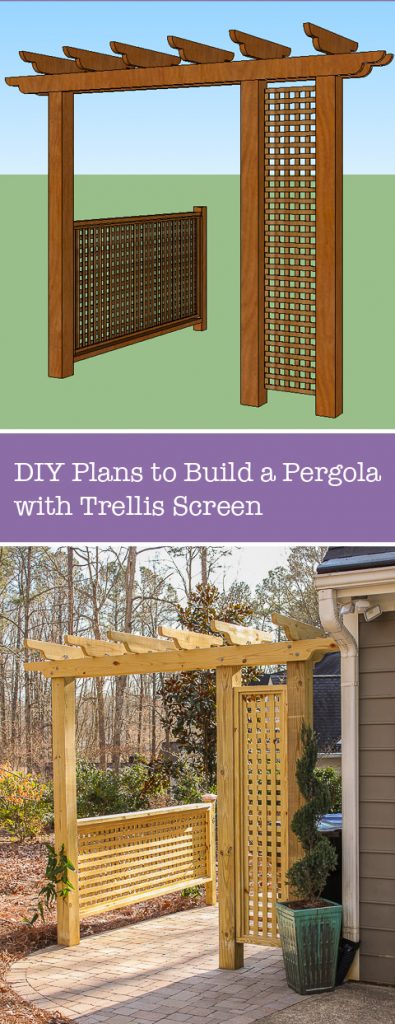
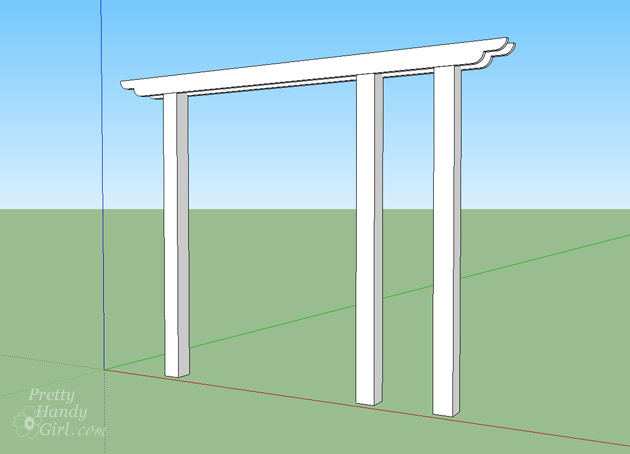
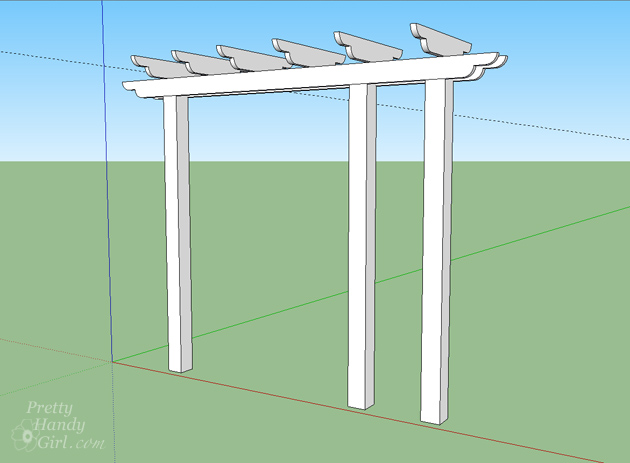
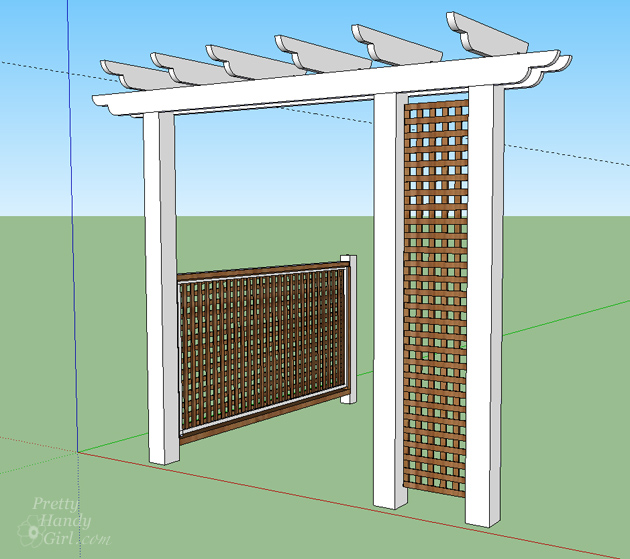
One of the design elements that our landscape designer proposed was Building a Pergola Trellis to screen our trash cans. As soon as I saw the magazine clipping that she gave me, I was in love with the idea.
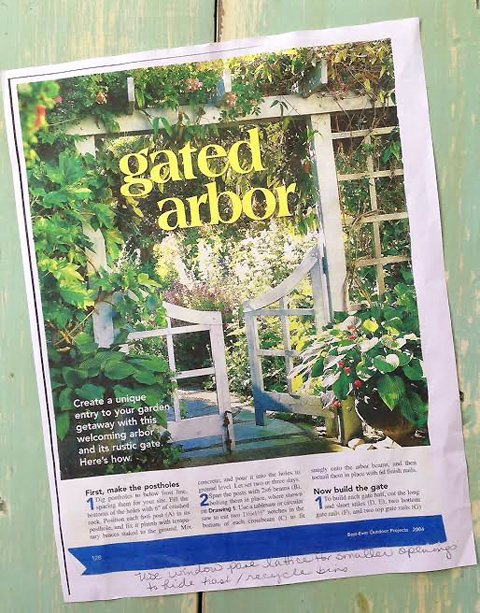
Clipping from WoodMagazine.com
I decided to make a few modifications to the plans and simplify the construction using Simpson Strong-Tie® fasteners. (I chose to partner with Simpson Strong-Tie® in the form of a sponsored post on this project .) This is a DIY project that requires some extra muscle for a few steps. Be sure to recruit someone to help with lifting and holding. Building a Pergola Trellis is a build that can be accomplished over a weekend. Ready to get building?
Tools & Materials:
(I’ve included affiliate links for your convenience. I earn a small percentage from a purchase using these links. There is no additional cost to you. You can read more about affiliate links here.)
- Post hole digger
- Ladder
- Hammer
- Level
- Pencil
- Tape measure
- Power sander
- Drill with 3/8″ drill bit (must be long to go through posts, etc.)
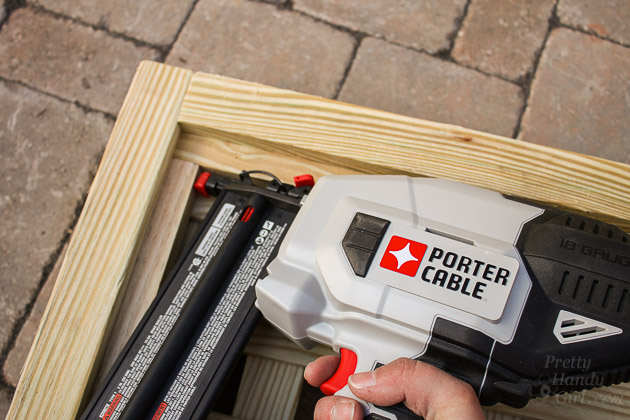
- Nailgun (my newest cordless obsession)
- Jigsaw
- Circular saw
- Speed Square
- Kreg Jig
- 1/2″ Socket wrench
- 4 bags of 80lb. Quikcrete
- 1 bag of drainage rock
- 5 gallon bucket of water
- 6 – 1/2″ x 10″ carriage bolts with nuts and washers
- 16 – 2½” Pocket hole screws
- 10 – 2½” exterior screws
- 2″ finish nails (for nail gun)
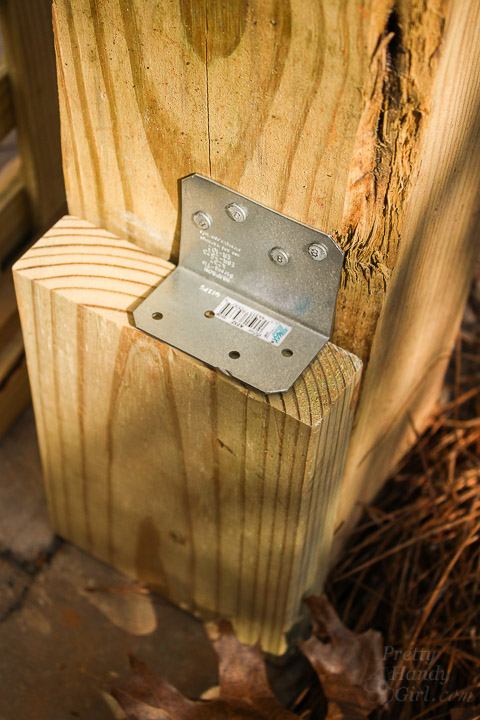
- 12 Simpson Strong-Tie® H4 Hurricane Ties
- 8 Simpson Strong-Tie® A23Z Right Angle Connectors
- 1 Box Simpson Strong-Tie® N8-DHDG 1½” Nails
- 1 Box Simpson Strong-Tie® SD Strong Drive® 1½” Connector Screws
- Post cap
Lumber:
- 3 – 6″x6″x12′ posts
- 1 – 4″x4″x8′ post
- 2- 2″x6″x12′ beams
- 6- 2″x6″x3′ cross beams
- 1 – 2″x6″x8′ top rail
- 2 – 4’x8′ window pane lattice sheets
- 9 – 1″ x 1″ x 8′ boards
- 6 – 2″ x 4″ x 8′ boards
- Download and Print Edge Profile Template
Instructions:
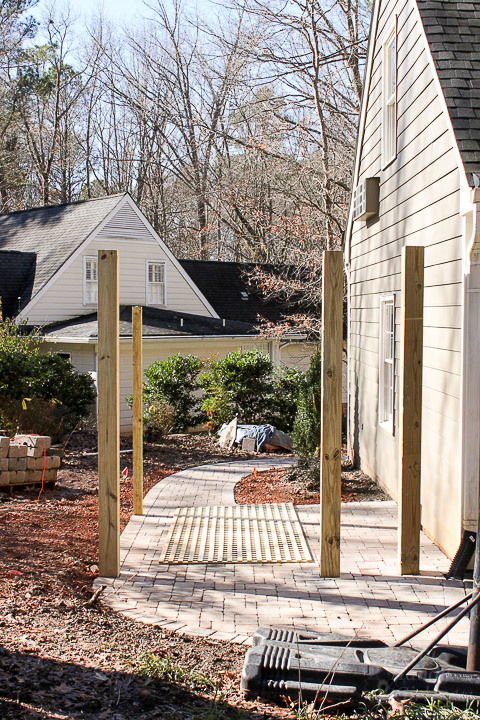
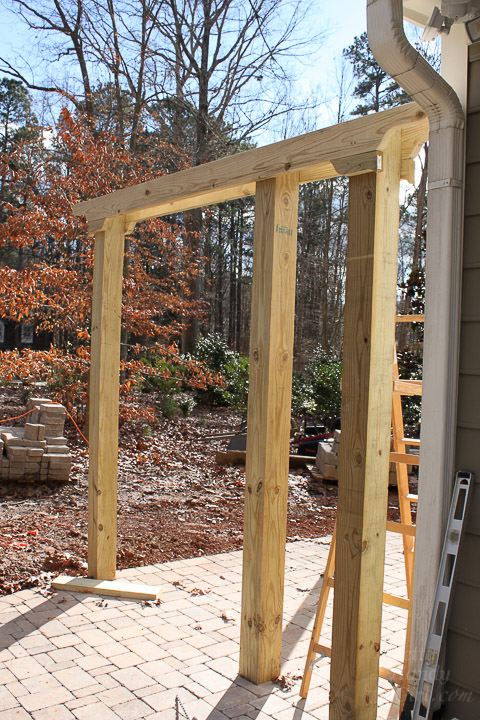
Set three 6×6 posts into holes dug deep enough to go below frost level (check with your local frost level to determine if you need to set the posts deeper.) Holes should be approximately 12″ in diameter.
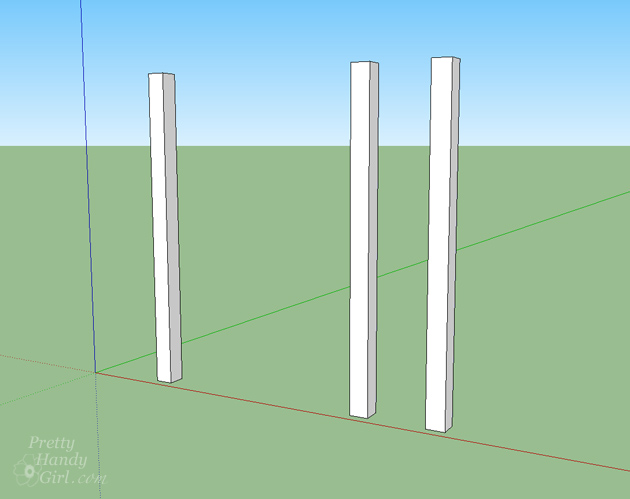
Dig a fourth hole 8″ wide for the 4×4 post.) This is the support for the side railing section and should be located approximately 8′ behind the left side pergola post. Set all posts into the holes on top of 6″ drainage rock. Then fill the rest of the hole with Quikcrete following directions on the bag for mixing and curing times (approximately 2-3 days).
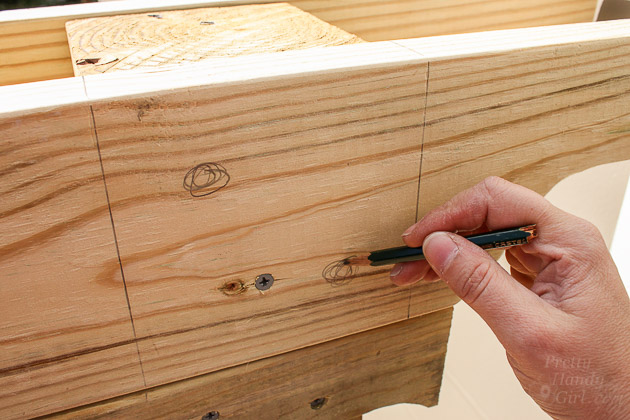
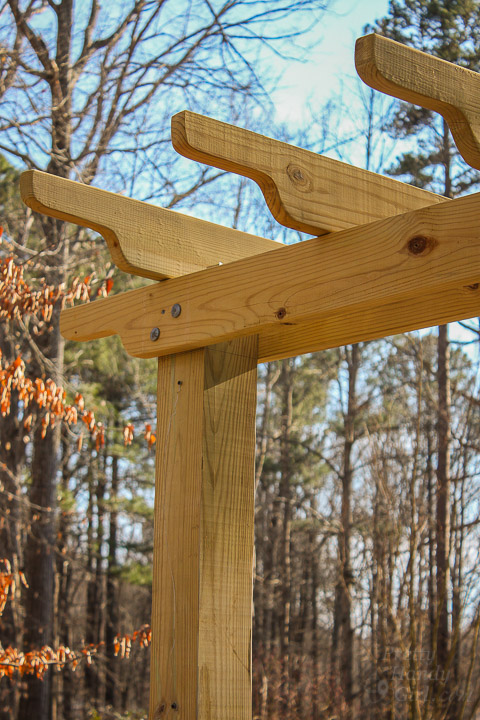
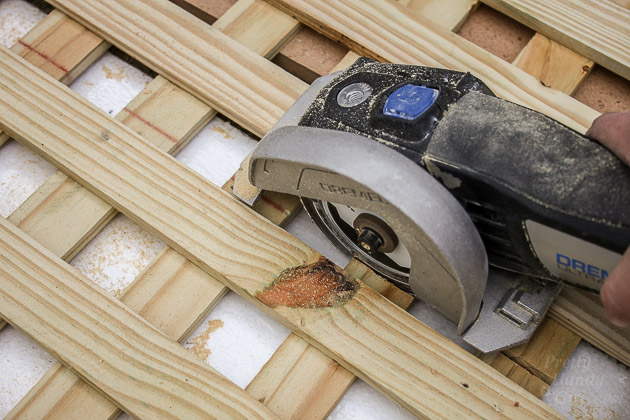
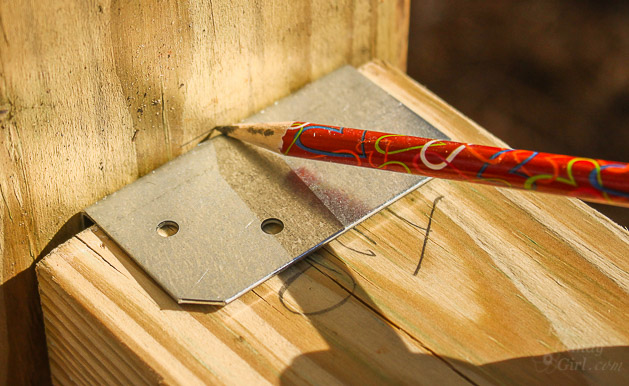
Use a jigsaw to cut the ends of the 2″x6″x12′ beams. You can use this printable profile template.
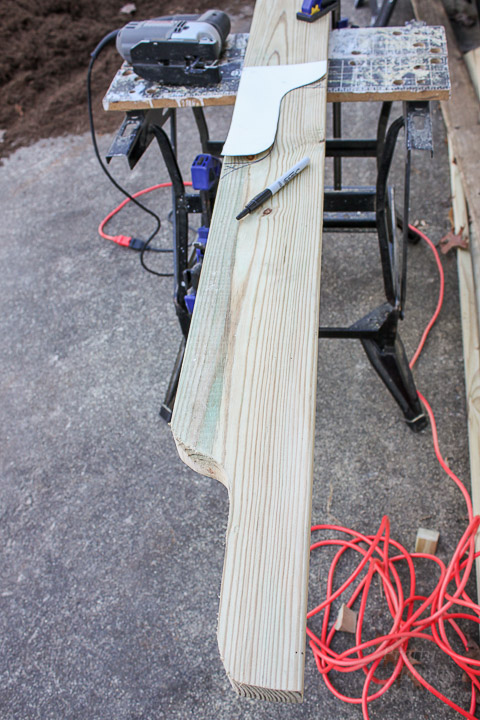
Use the same profile to cut the six 2″x6″x3′ cross beams. Rotate the template 180 degrees to save lumber.
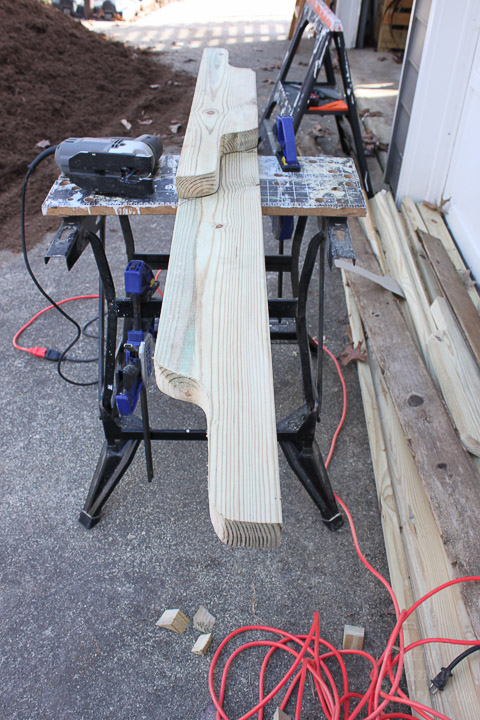
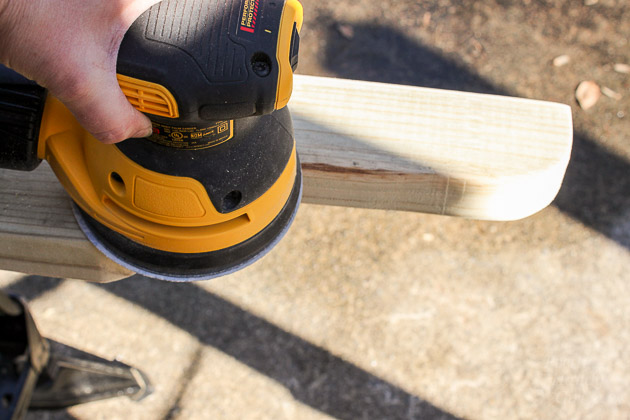
Sand all edges smooth.
Installing the Cross Beams:
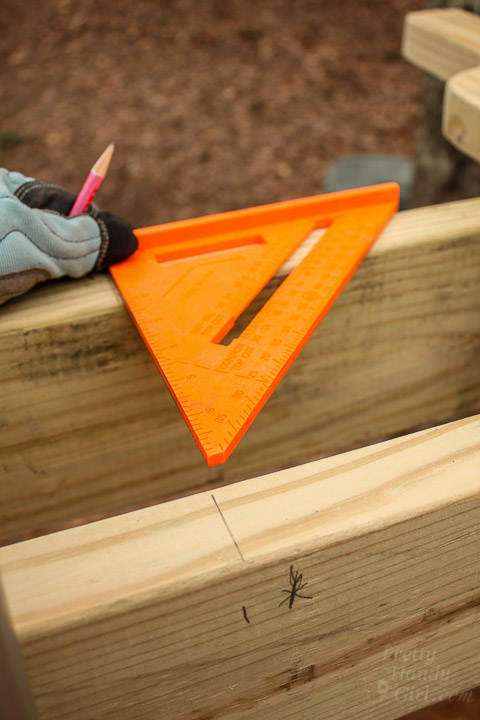
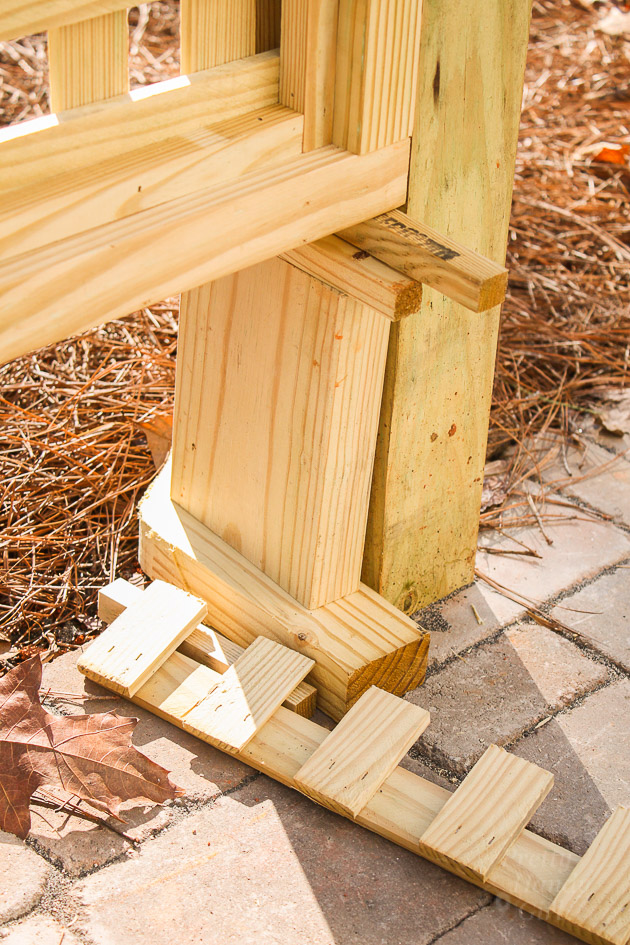
Measure down 5.5″ from the top of the tallest 6″x6″ post. Screw a temporary support into the beam using 2.5″ screws.
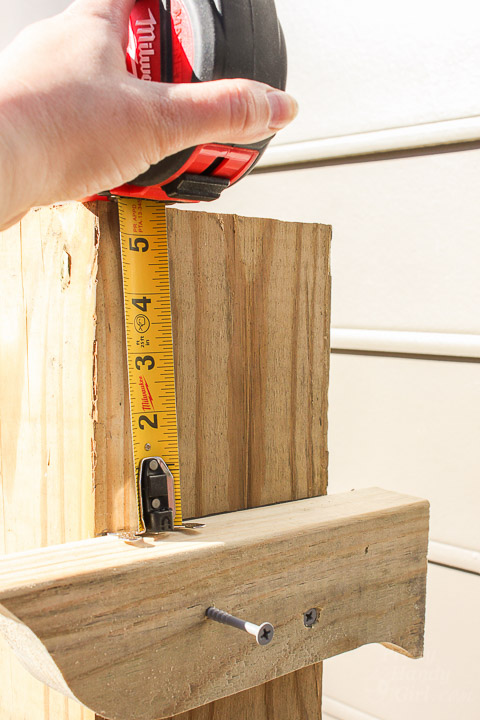
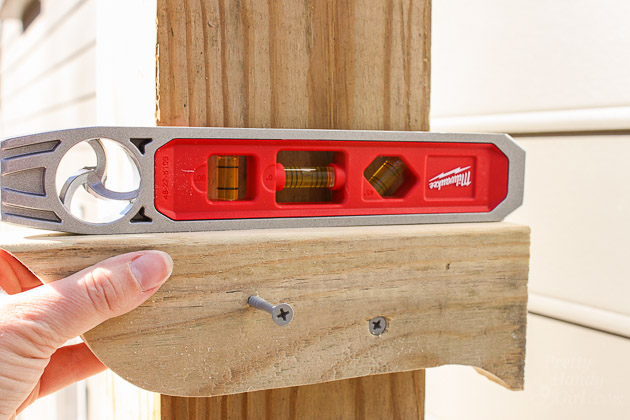
Set the beam on top of the temporary support and level the beam. Mark the bottom of the beam onto the other 6″x6″ posts.
Set and level another temporary block on the opposite side to support the beam.
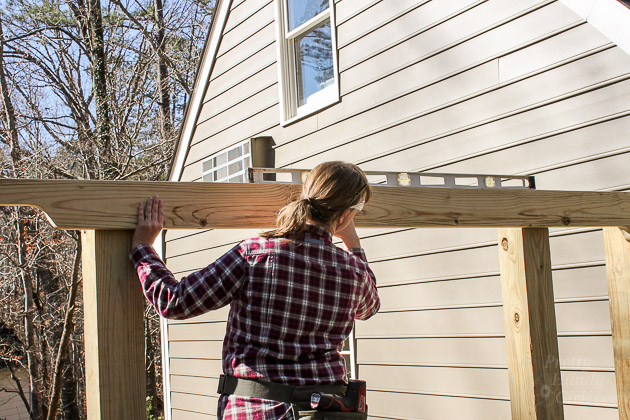
Rest the beam onto the temporary supports. Drill screws into the beam to hold them temporarily.
Repeat for the opposite side.
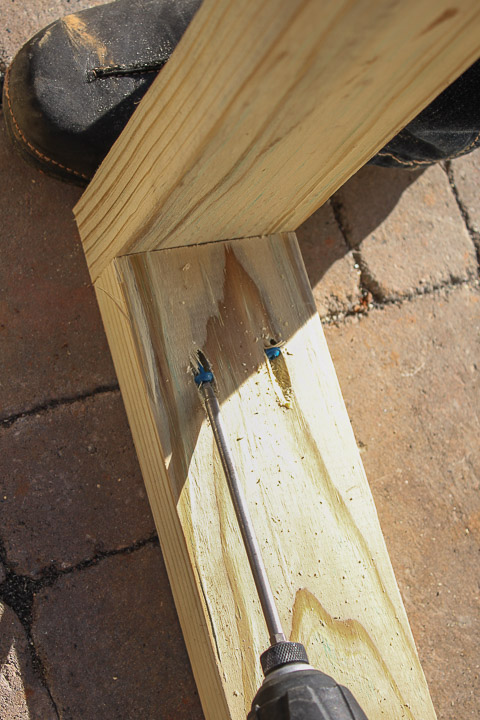
Mark the location of carriage bolts.
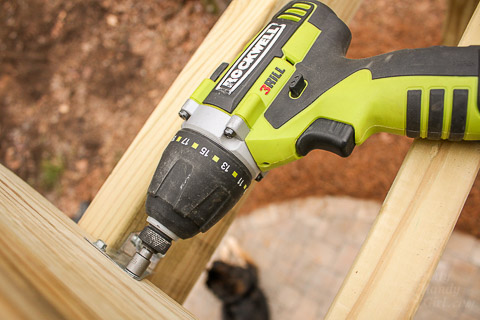
Drill holes for the carriage bolts. You will need a big drill bit and a powerful drill for this step.
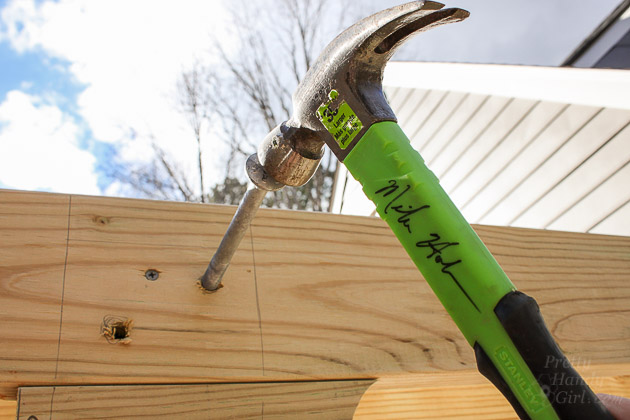
Hammer the carriage bolts through the beams. (I like getting a little encouragement from my hammer signed by Mike Holmes.) 😉
Thread the washers and nuts onto the opposite side.
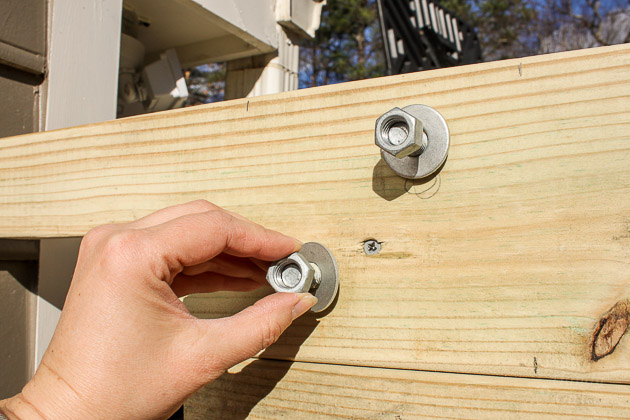
Tighten with a socket wrench.
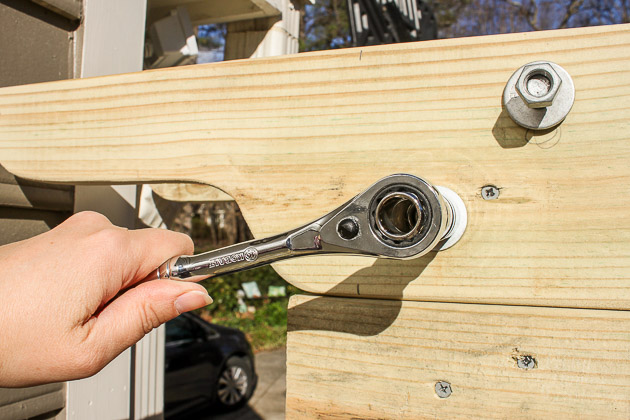
Remove the temporary blocks and screws.
Installing the Top Cross Pieces:
Mark the location of the cross pieces, spreading them out at even intervals.
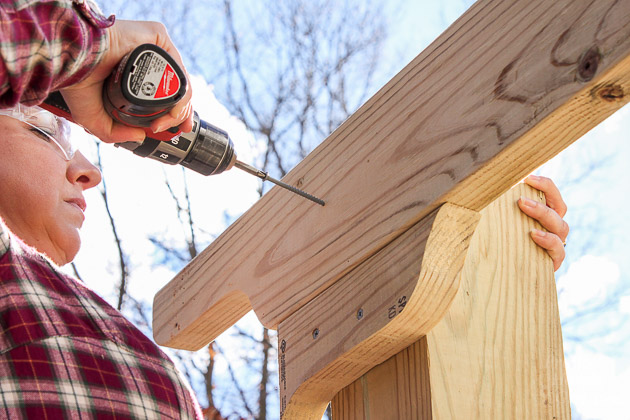
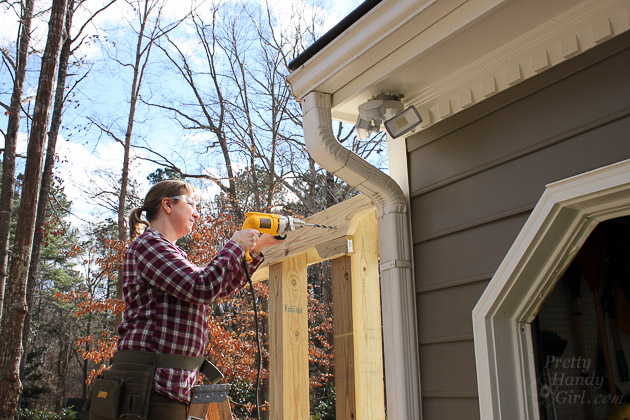
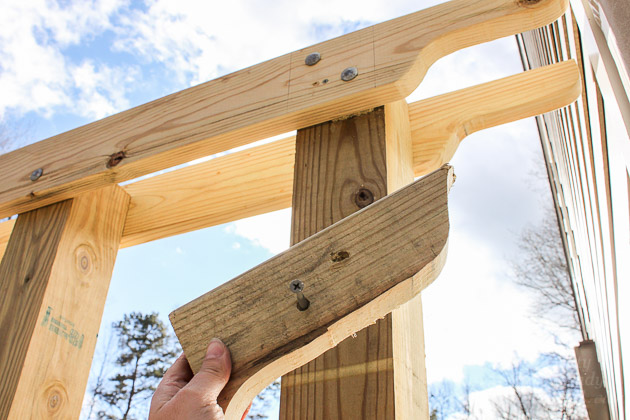
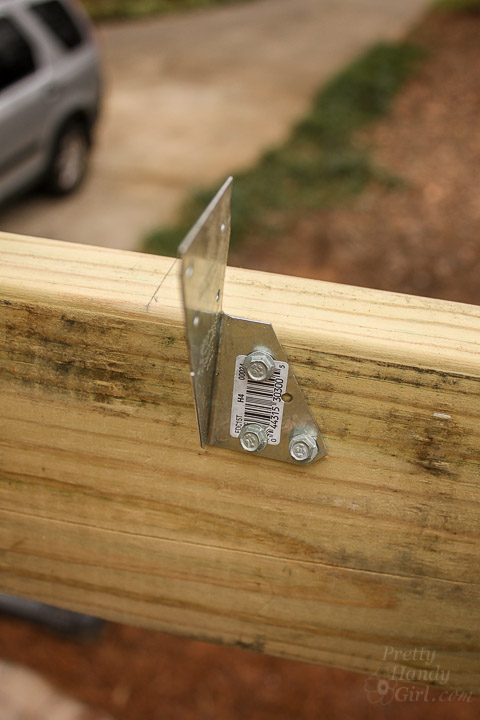
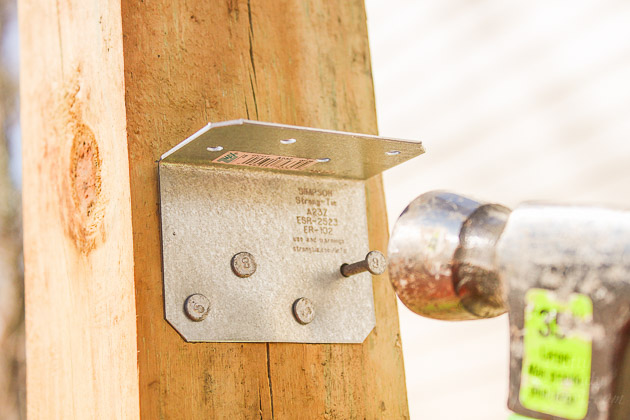
Install one Simpson Strong-Tie® H4 Hurricane Tie using the Simpson Strong-Tie® SD Strong Drive 1.5″ Connector Screws (hammering nails into that tight space will be difficult, unless you choose to install the hangers on the outside of the cross beams.)
Lay the cross piece in place and attach to the hurricane bracket with more screws.
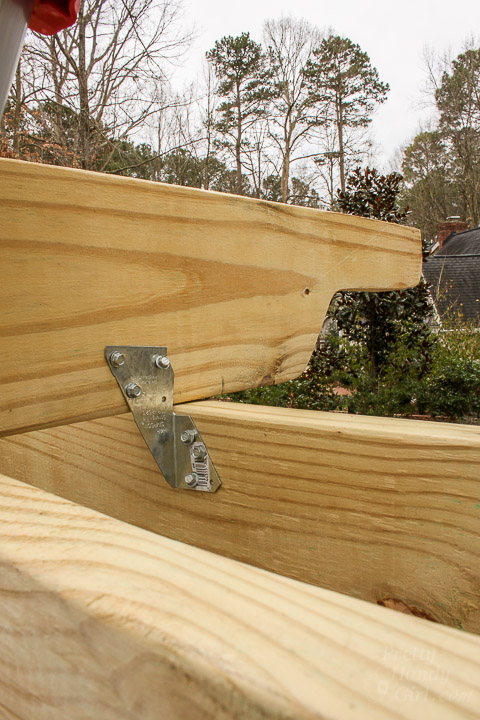
Install a second hurricane tie onto the second beam and the opposite side of the cross piece. Ties should be diagonal from each other.
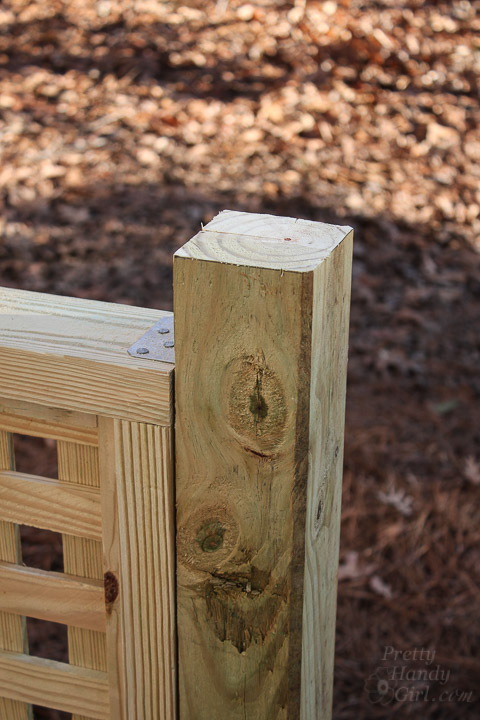
I had to modify one of the connections by attaching the hurricane hangers to the top of the 6″x6″ post.
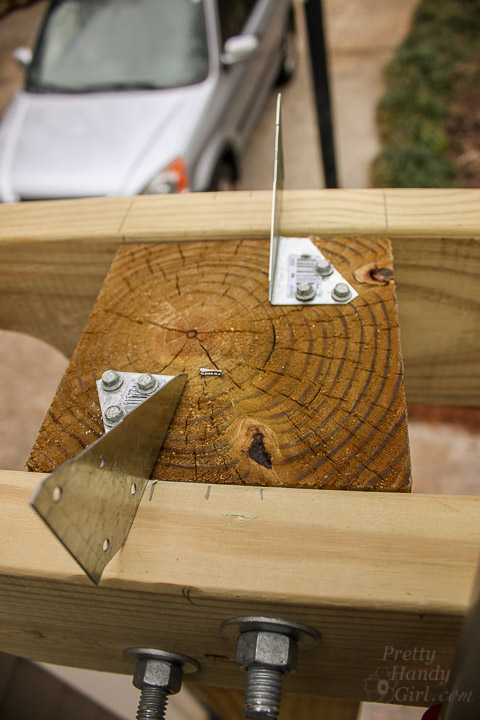
Repeat for remaining cross pieces. Most of the ties aren’t visible from the exterior of the pergola. You can only see them if you are directly underneath looking up.
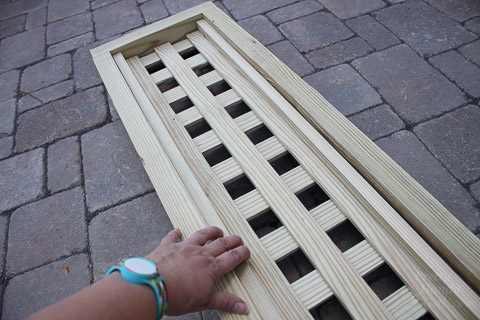
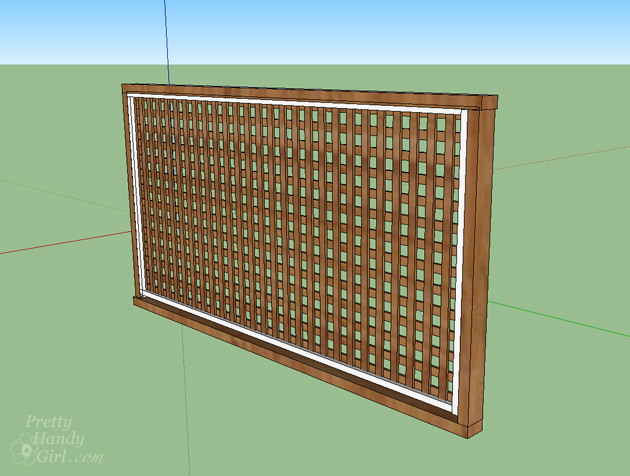
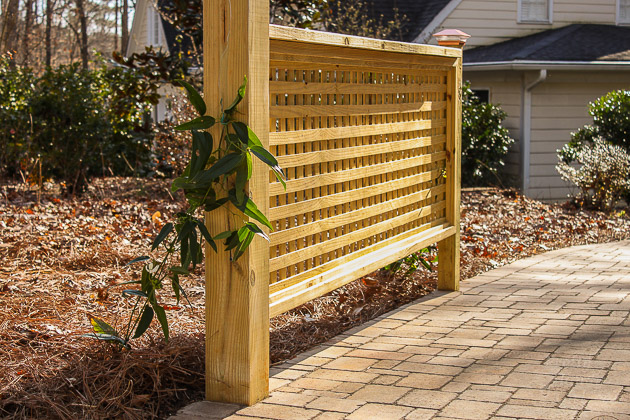
Building Trellis Panels:
Building the trellis panels is an easy project, just make sure your measurements are spot on before you assemble them. I followed this tutorial from This Old House to build the panels.
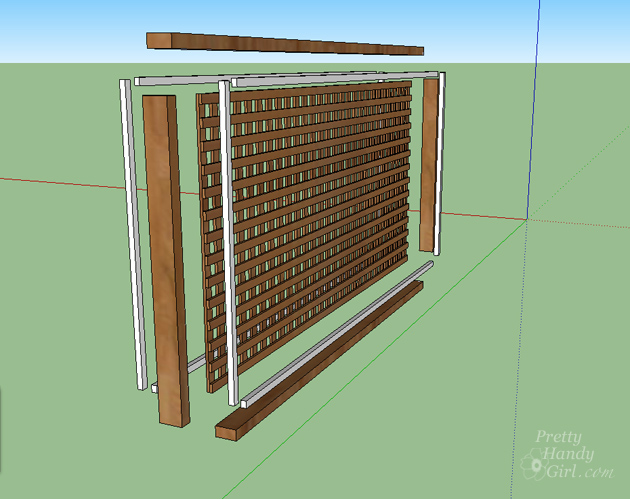
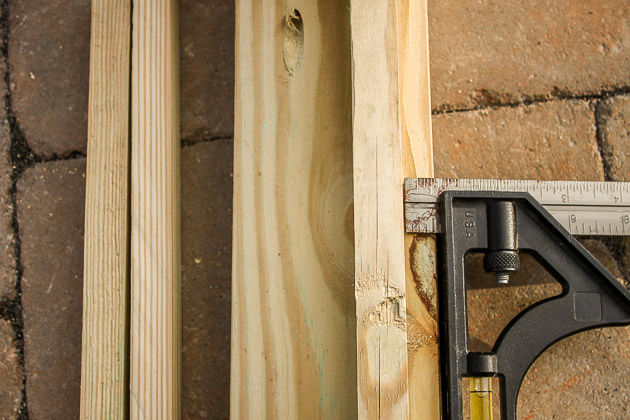
Measure the distance between the posts that will hold the trellis panels. Cut two 2″x4″ boards to the exact width. For the tall vertical panel, cut two more 2″x4″ boards at 74″. The horizontal railing panel will require two 3o” tall side 2″x4″ boards.
Build a frame using pocket hole screws to attach the two tall pieces (side pieces) to the top and bottom pieces.
Measure the dimensions inside the frame and cut lattice to these dimensions.
Cut 1″x1″ strips to fit inside the 2″x4″ frame. Set the strips inside the edge of the frame by 3/4″.
Secure the 1″x1″ strips using 2″ finish nails.
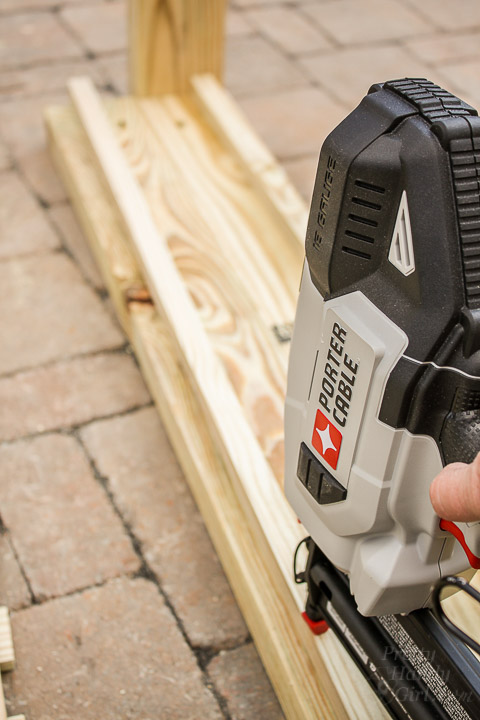
Lay the lattice inside the frame on top of the 1″x1″ strips.
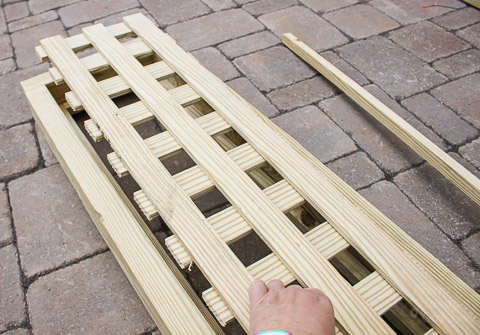
Lay four more 1″x1″ strips on top of the lattice.
Nail these 1″x1″ strips to secure the lattice in place.
Your trellis panels are complete.
Attaching the Trellis Panels:
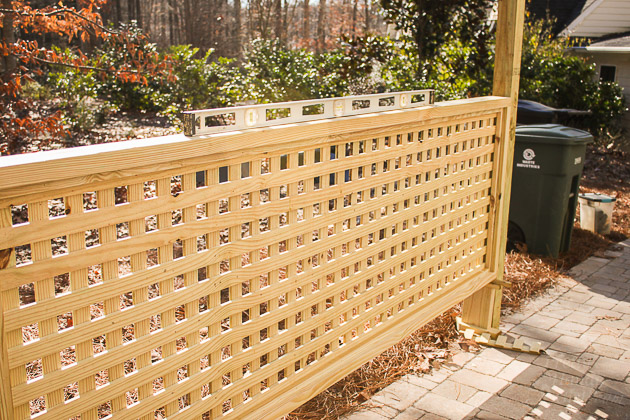
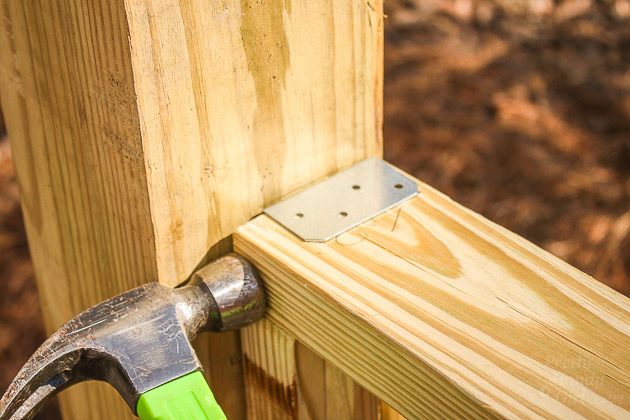
Attaching the trellis panels using Simpson Strong-Tie® A23Z Right Angle Connectors is the simplest way to hang the panels.
Starting with the tall vertical trellis panel, measure 8″ from the ground. You can use a scrap block to use as a guide (and a helping hand holding the bracket.) Inset the bracket 1″ from the front of the post. Hammer one bracket to the 6″x6″ post using Simpson Strong-Tie® N8-DHDG 1.5″ Nails.
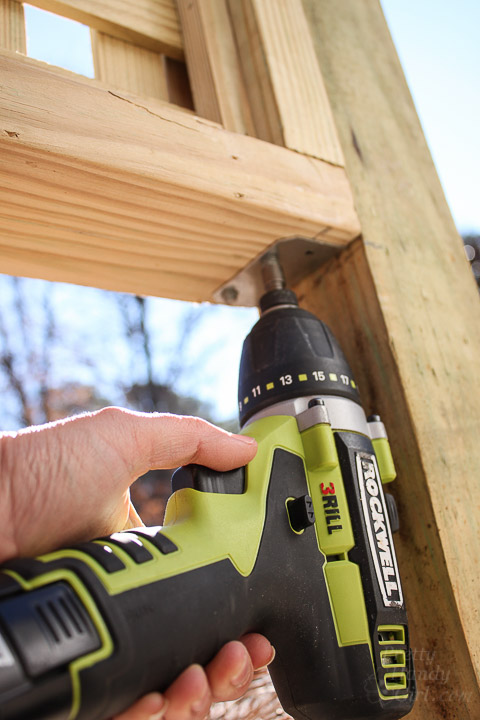
Set the panel on top of the one angle bracket. Level the panel.
If your ground isn’t level, you may have to add a few blocks or shims until you can level your second side.
Mark the bottom of the panel and top of the panel.
Remove the trellis panel and install the top and bottom brackets.
Set the trellis panel between the installed right angle brackets. Nudge the panel into place with a hammer if necessary.
Secure the trellis panel with nails into the brackets.

If you can’t swing a hammer to nail into the lower brackets, you can secure them with screws instead.
Cut off the 4″x4″ post to height. Measure and mark the desired height onto the 4″x4″ post. Be sure to allow 1.5″ for the top rail that will sit on top of the trellis.

Cut off the 4″x4″ with a circular saw. Have an assistant lift the post while you cut.
Cut a 2″x6″ rail the same width as the trellis panel between the 4×4 and 6×6. Cut dog ears into the ends of the 2″x6″.
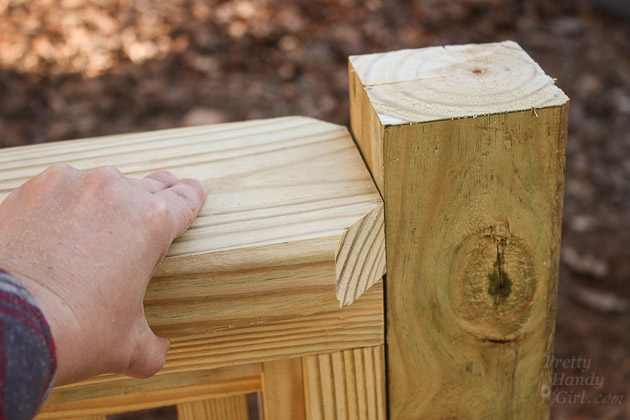
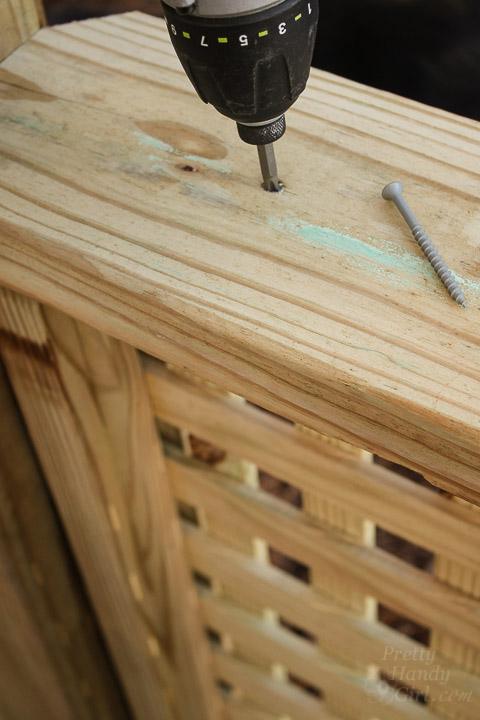
Secure the top rail to the top of the trellis panel with 2.5″ exterior screws.
Add a decorative post cap to your 4″x4″ post for a finished look.
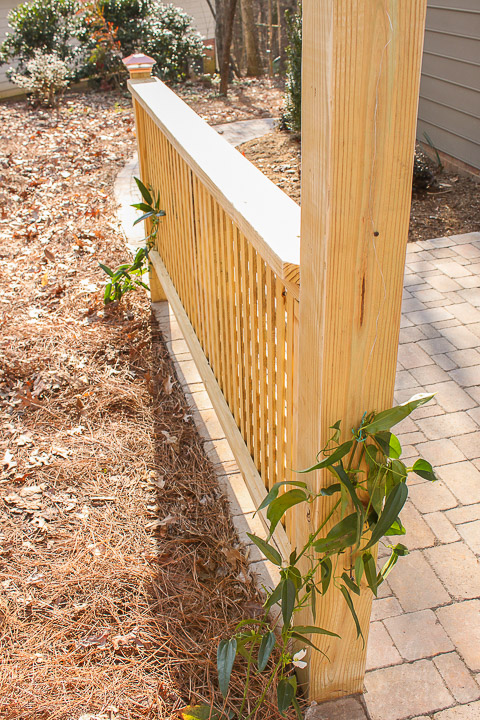
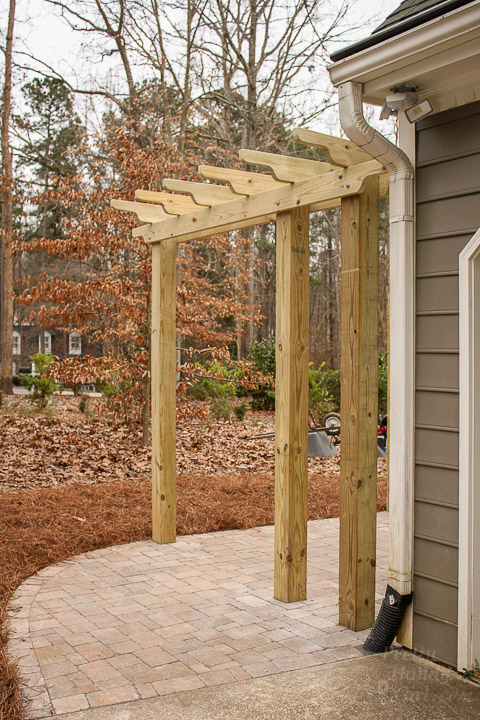
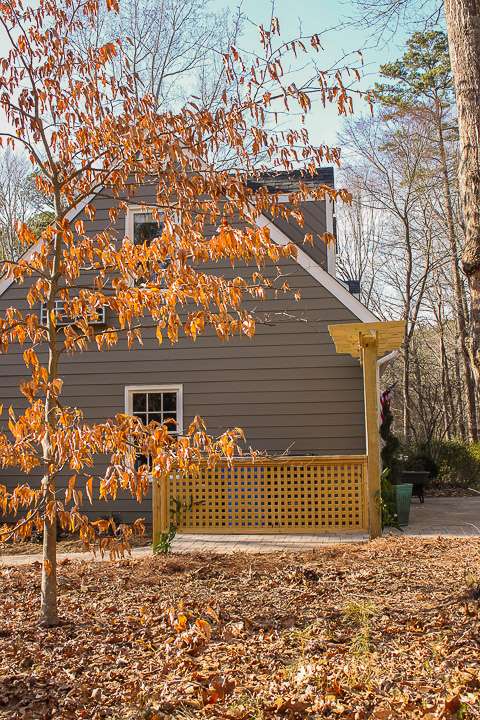
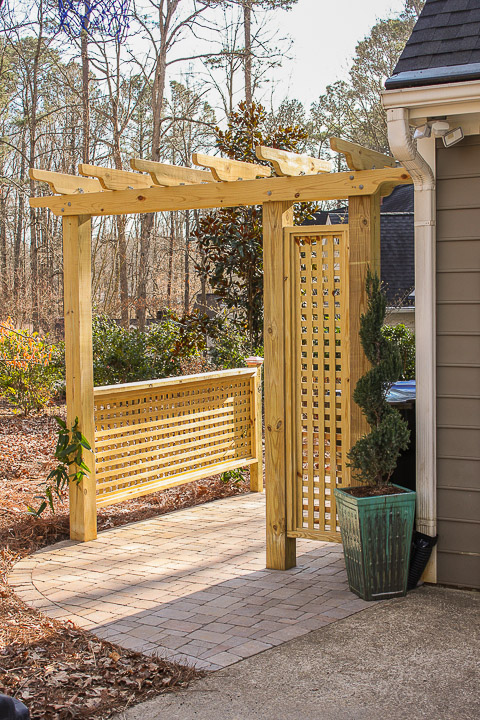
The Pergola with Trellis screens is complete! Plant some climbing vines beside the pergola for future screening. I planted an evergreen clematis for year round foliage and little white flowers in the Spring.
The pergola makes a big difference to the view beside our garage when we pull in the driveway. Plus, it provides a grand entrance to our new landscaped back yard.
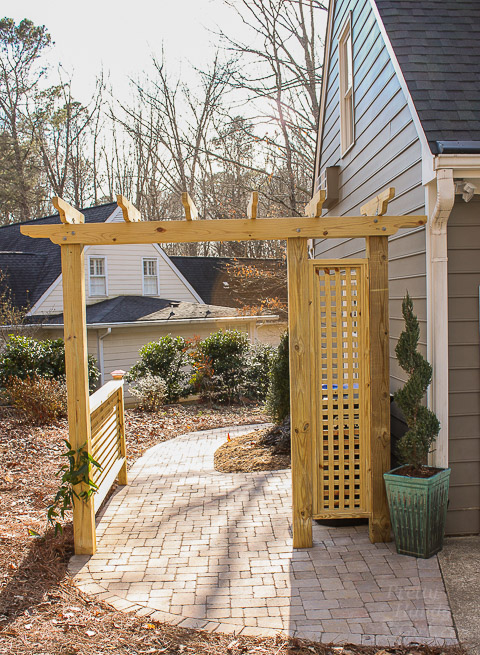
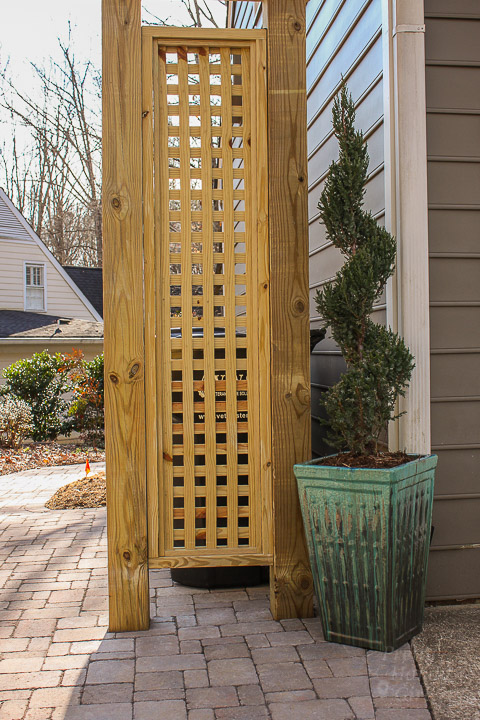
We successfully hide three trash cans behind the trellis screen.
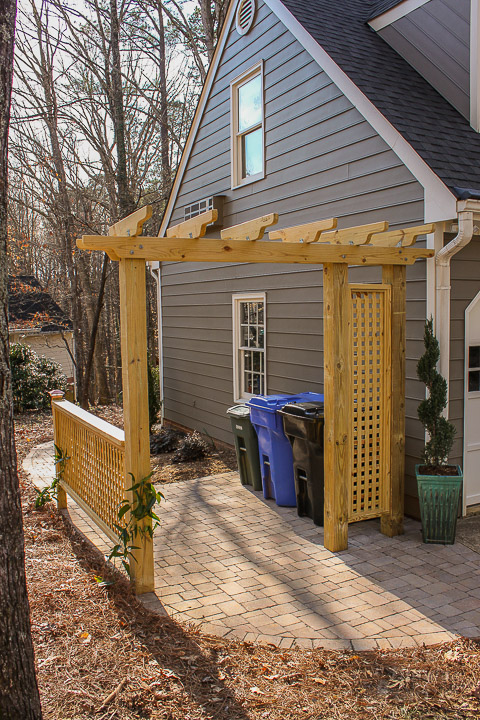
From the side of the pergola, you get additional screening with the second trellis panel.
Until the vine completely covers the pergola and trellis, I placed a potted topiary next to the garage.
That’s it. Do you have an area you want to screen from your guests? Or are you looking for a grand entrance for your yard? This Pergola with Trellis Screening is an impressive DIY project.
![]()
Disclosure: This is a sponsored post for Simpson Strong-Tie® and was compensated for my time and for using their products in my project. I was not told what to write. All opinions are my own. As usual, I am very particular about the brands I work with and will always tell you if you are reading a sponsored post.
Pin for later!

How did you get the holes for the posts to fit so perfectly with the brick? I am going to build a pergola on my brick patio, but I’m not sure how to deal with the brick work as I dig my postholes. Thanks.
The posts were installed in the ground first. Then the landscapers added the pavers around it.
Brittany,
This is just the inspiration I needed to hide the trash at the lake. I have been removing that pesky but necessary blue container from photos with no end in sight. This definitely has .y mind going!
Happy Creating,
Karen Marie
Wow! Your work is beyond professional looking, you are super good girl. I wish you lived near me, so you could become my wing girl, and together we girls could make anything. I truly love your work.
I can hardly wait to see what vines and flowers you train to grow on your trellis and screens. I didn’t used to be the jealous sort, but you make it difficult not to be with your enviable projects. Love you!
Thanks Alana. I planted an evergreen clematis and it has already grown 3 x it’s height!
Love this Brittany!! What trash cans!! 😉
The site looks great!
Thank you very much – great to make an ordinary garden nicer –
Friendly yours
Love the pergola. Where did you find the lattice? All I can find is plastic lattice.
Home Depot.
How much was the total cost for the trellis and pergola.
Maybe about $200? Not sure and lumber costs vary based on your location.
This turned out so awesome! Looks so nice! I hope someday I can have the courage to take on a project like this.
Seriously beautiful job, girl! Pinned!