
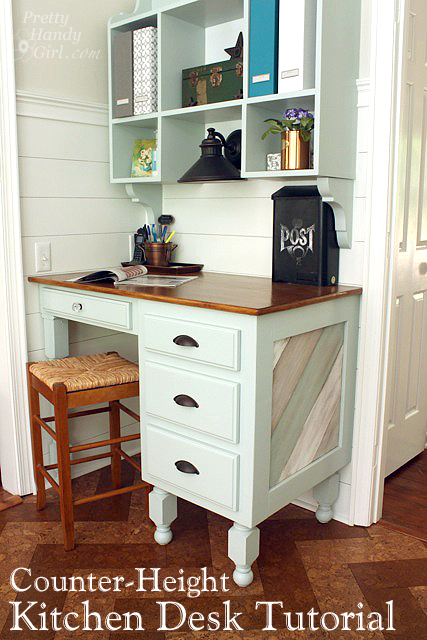
Building a Kitchen Counter Height Desk {Lowe’s Creator Idea}
Where do you drop all your mail, papers, reminder notes, kid’s school notes, business cards, etcetera, etcetera…etcetera? If you answered the kitchen counter, I’m sure you are among many including myself who dropped everything on the counter. And then it piled up there until someone filed the papers and threw away the reminders of events past.
(As a Lowe’s Creative Ideas blogger I was tasked with creating a “drop zone” for my June project. And I was provided with a gift card to purchase the supplies.)
I was determined to keep our countertops clean in our new kitchen. Which meant I had to create a space that would hold it all and act as our drop zone! The idea of a kitchen desk seemed like the perfect spot. However, I didn’t want a regular height desk. I wanted a desk that was counter height so I could stand and write a note, file papers, put away the mail then dash off to complete my next DIY project. This handy girl really doesn’t have the time to sit still ;-).
When I stumbled across a desk marked down to $35 at our local Habitat ReStore, it seemed like it had potential. A quick check of the drawers proved that the desk was still in perfect working order.

I was talking to my friend Holly about my idea of the countertop height desk and she pulled four table legs out of her garage and gifted them to me! And, I had a heavily loved craft table that a neighbor gave away. I thought it would make the perfect top for the desk.
Here’s how I put them all together to make a cottage-style counter-height kitchen desk:
(I’ve included affiliate links for your convenience. I earn a small percentage from a purchase using these links. There is no additional cost to you. You can read more about affiliate links here.)
Materials:
- Kitchen desk
- Table top (or Plywood or your material of choice)
- Legs (1 table and 3 furniture feet)
- Circular saw
- Level
- Ruler
- Kreg Jig
- 3″ wood screws
- Drill with screwdriver bits
- Scrap 1×4″ board
- Clamps
- Painter’s tape
- Wood putty
- Putty knife
- Sander
- Sandpaper
- Primer
- Paint
- Stain
- Optional: new drawer hardware
- (*Maybe a hack saw for stubborn screws)
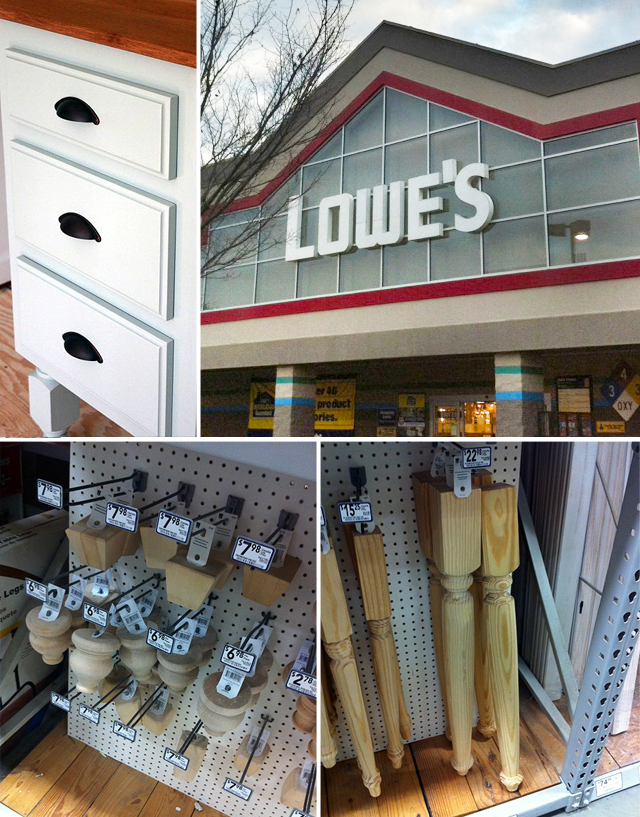
If you don’t have a great friend who can gift you table legs, check your local Lowe’s Home Improvement center. They have a great assortment of legs and cabinet hardware!
Instructions:
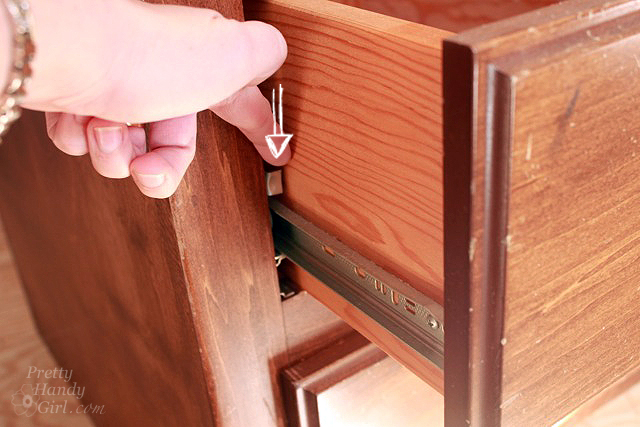
Start by removing all the desk drawers. Usually there is a small lever on the side that needs to be pressed down on both sides before you can remove the drawers.
Remove the end panel from the seated side. Look for interior screws holding it on and try to release it by unscrewing them. If they won’t budge, use a hacksaw to cut through the stubborn screws to remove the side of the desk.
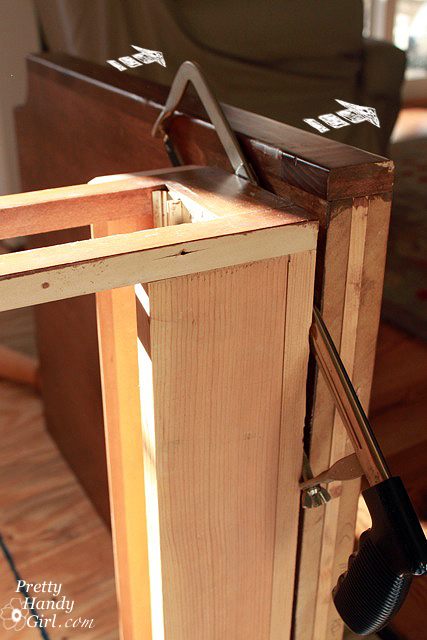
Once the side is off, cut the 1″ x 4″ board to the same depth as your desk. Attach the board with screws to the underside of the drawer. This will be the support for the table leg.

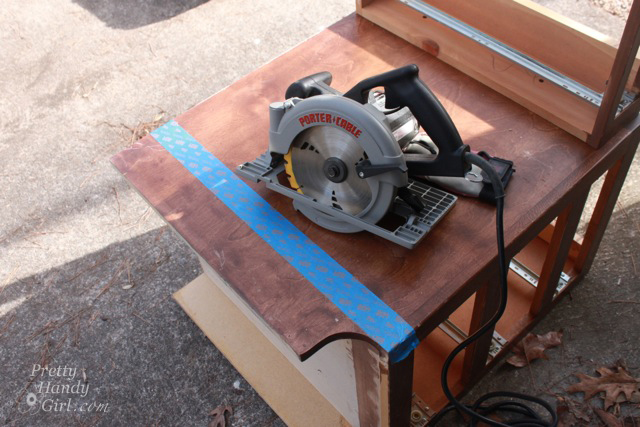
On the side with the drawers, remove the toe kick with a pry bar. Cut off the bottom of the side panels with a circular saw. (I like to mark my cuts with a piece of painter’s tape. It helps keep the wood from splintering.)
Flip the deck upside down. Measure your desk height and your table leg height. Your goal is to create a desk that is 36″ tall. Trim any excess off the table leg first (from the top of the leg). Then measure the height of your desk with the table table leg propped on it. Figure out how tall to cut the remaining three legs to create an even height.
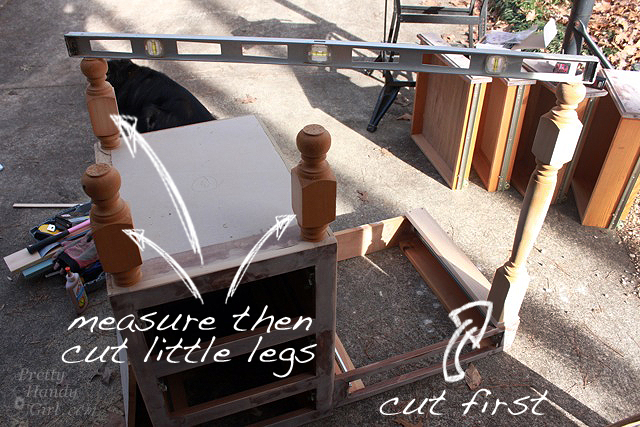
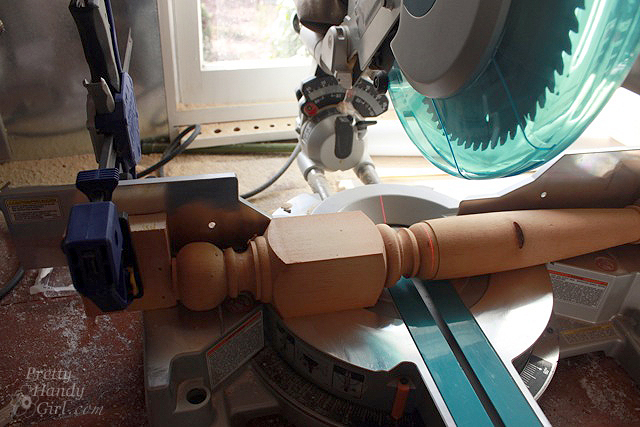
Cut the legs with a miter saw. (Use a stop block to make sure all three small legs are the same height.)
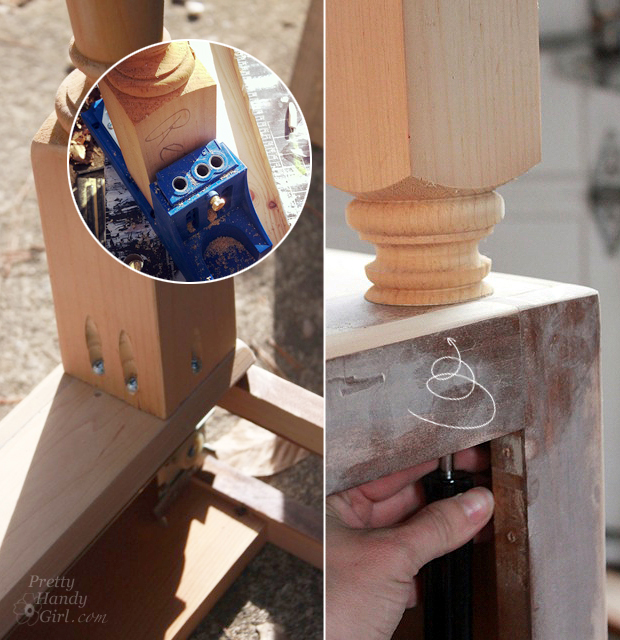
Attach the longest leg to the 1″ x 4″ support with Kreg joinery (you can view my tutorial on using a Kreg Jig here.) Attach the smaller legs by driving the 3″ wood screws through the bottom of the drawer cabinet into the legs.
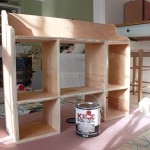
This is how the desk should look after the legs are attached. A little Frankensteinish…but no worries.

Sand, prime and paint the desk and drawers.
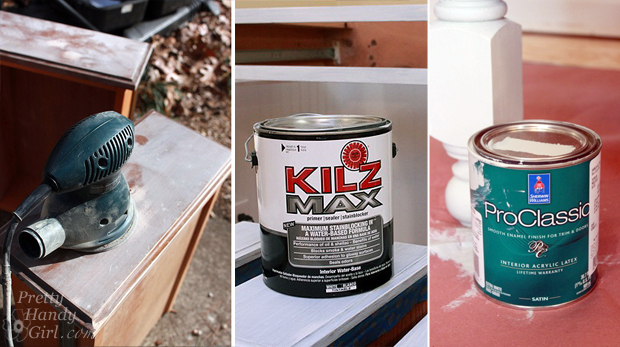
I highly recommend using a cabinet grade paint (Sherwin Williams ProClassic or Benjamin Moore Advance) and coat the desk with two layers of paint.
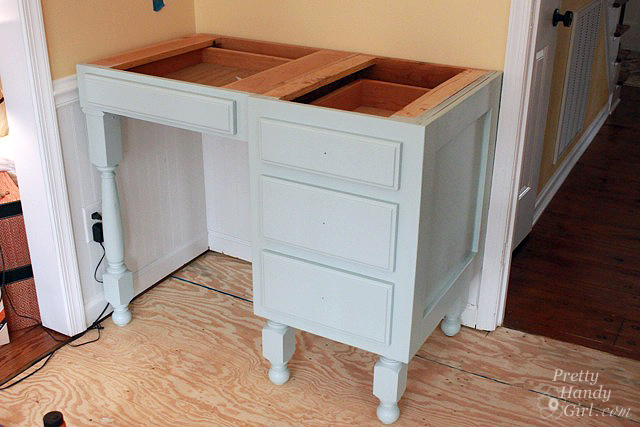
Before setting a desk top on the desk, secure the desk to the wall by driving a few screws into the back and side of the desk (preferably into wall studs.)
Place the desk top onto the desk. You can use an old table top and follow my instructions for cutting and finishing it, or order countertop material that matches the rest of your kitchen. Caulk, glue or screw the top down.
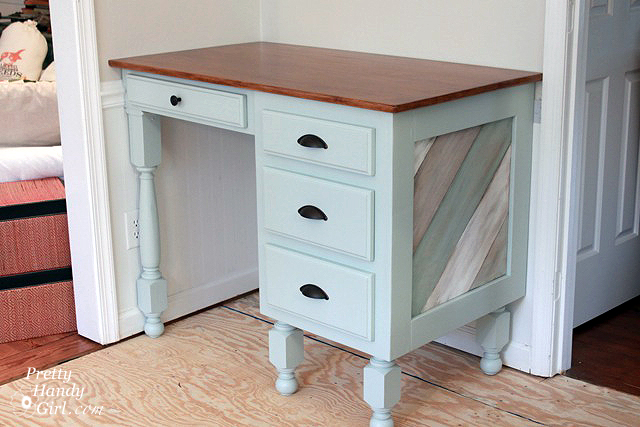
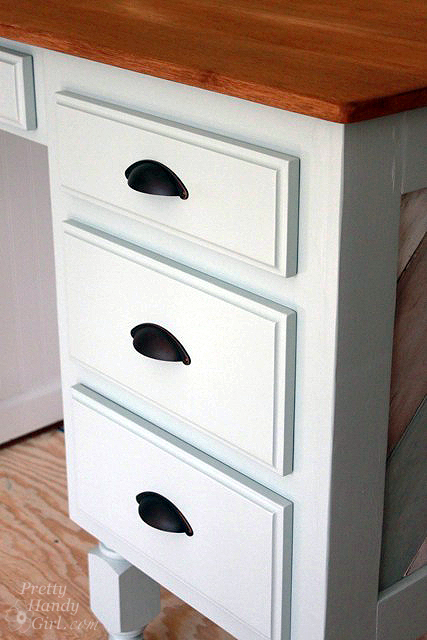
Add drawer knobs onto the desk.
The top drawer on the right is for menus and miscellaneous papers, etc. (It will surely become the junk drawer). The middle drawer is Pretty Handsome Guy’s mail and the bottom drawer holds my mail.
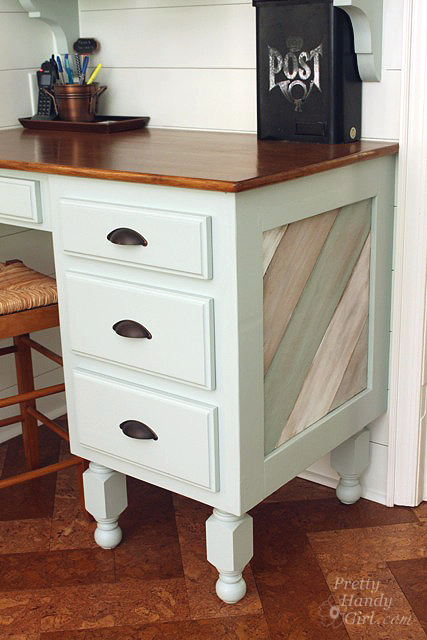
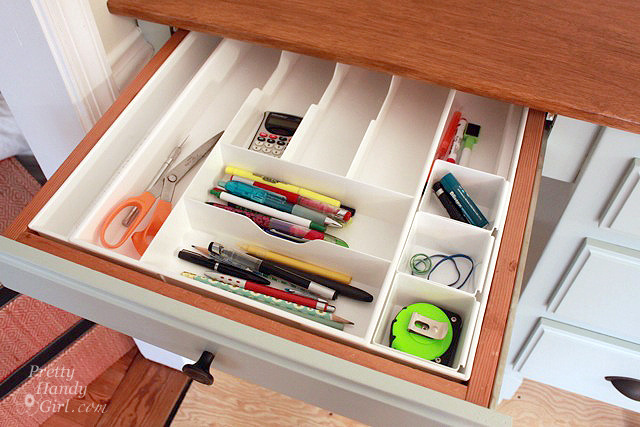
I fit the left top drawer with some organizational dividers from The Container Store.
But, wait until you see what I did to the wall above the desk!
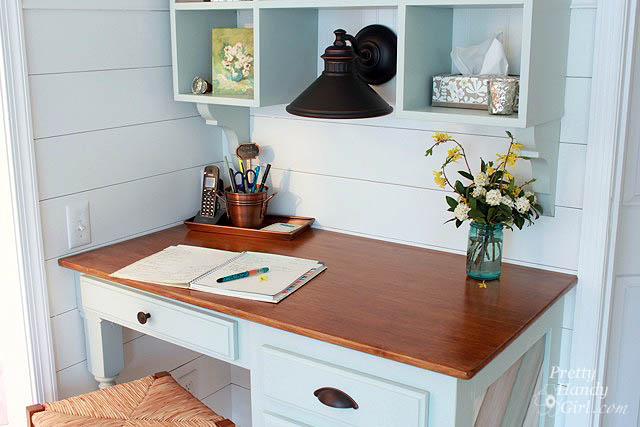
Now we’re talking organized! Each of us has a magazine file to fill!
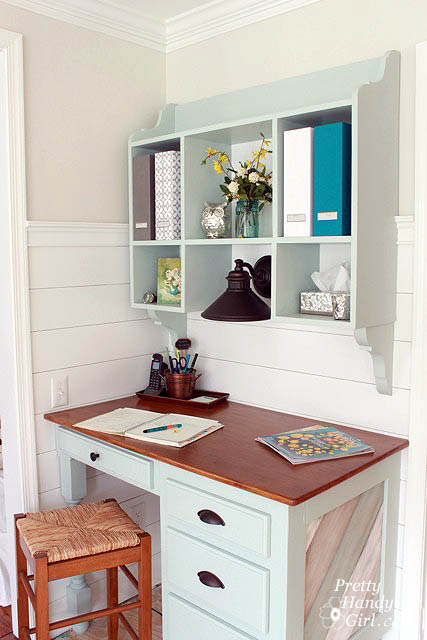
The tutorial to build that wall hutch is HERE! And the special distressed board treatment on the side of the desk tutorial is here!

What do you think? Is this a project you could take on? Does your kitchen need a drop zone? Or a kitchen command center, as I like to call this corner.
You can find loads of other creative storage ideas at Lowe’s Creative Ideas:
![]()

Disclosure: As a #LowesCreator, I was provided with a Lowe’s gift card to purchase supplies for this post. I was not told what to write. All ideas and words are my own.
What are the dimensions of your counter height desk
44″ wide x 25″ deep x 36″ tall
Does it not drive you crazy having to work with the power plugs behind the leg of your new desk?
Love the project though!
Allie, actually I had our electrician install a plug on top of the desk so I can plug the phone and anything else into it. The other plug under the desk rarely gets used since there is a plug literally behind the wall in the living room for plugging the vacuum into. And, per our need to meet new code, we added several new outlets in the kitchen. I have more outlets than I will ever need.
Hi! What is the color that you used on this desk? Thank you!
Sherwin Williams Copen Blue 😉
Love the idea and will try it……but absolutely love the floor. What is it?
Jill, they are cork tiles, you can read more about the installation process and where to buy them here: https://prettyhandygirl.com/2013/04/installing-cork-tile-flooring-in-the-kitchen.html
This is awesome! I absolutely love everything you’ve done!
What a great remake and love the colours!
Amazing! I like the detail with small legs … I love these creative ideas
You blow me away Handy Girl!! THis is frikin awesome! I love counter height desks because I am more comfortable standing than sitting (thanks to sciatica). Will try to find a way to make my own.