How to Build Custom Rustic Wooden Box Crates
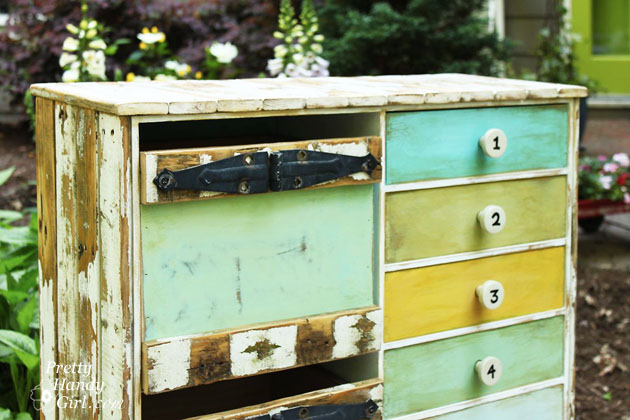
Making custom rustic wooden box crates is super easy. You can build your crates to fit in a book case or use them as drawers in a cabinet. When I was giving my IKEA cabinet a makeover, I chose to remove a door and build custom box drawers instead.
Here’s the super easy tutorial so you can build your own:
Materials:
(some links are affiliate links)
- 4 pieces of 1/2″ Plywood for sides
- 1 piece of 1/4″ Plywood for base
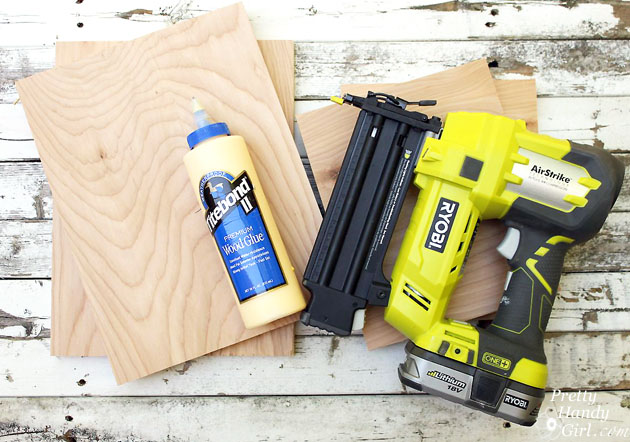
- Wood glue
- 1-1/4″ Finish Nails
- Minwax Walnut Stain Cloth
- Paint
- Scraps of wood for details
- 8″ strap gate hinge
- Wood Screws
- Pencil
- Sharpie Permanent Marker
Tools:
Instructions:
Begin by cutting the 1/2″ plywood into four pieces the size you want for your crate sides.
Test fit the sides together. Add a line of glue to the ends of the plywood.
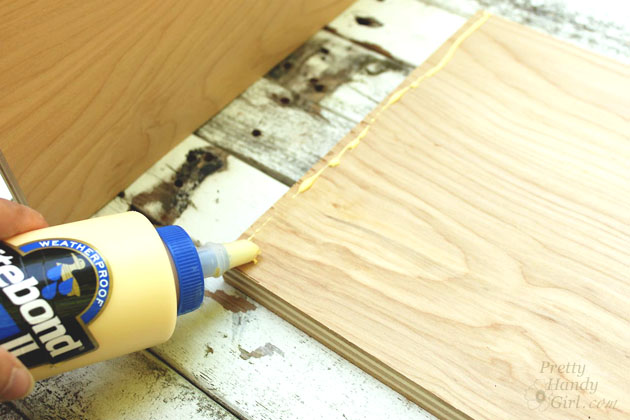
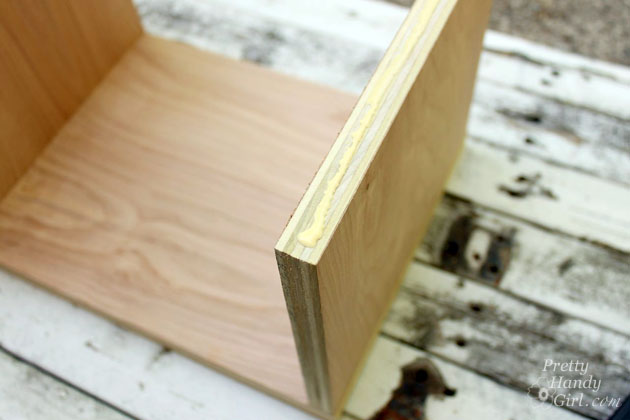
Place the sides of the box in place.

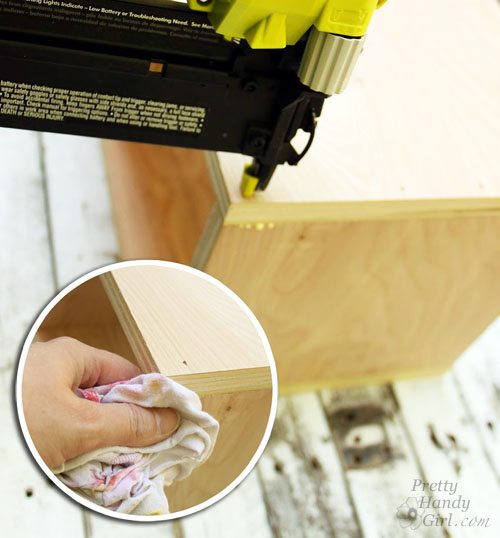
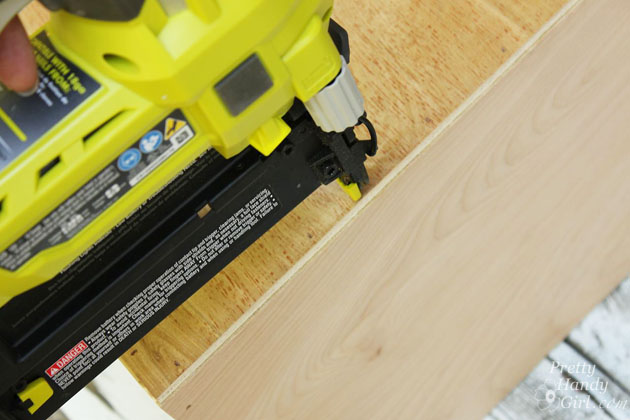
Secure all the sides with finish nails. Wipe off any glue that has oozed out.
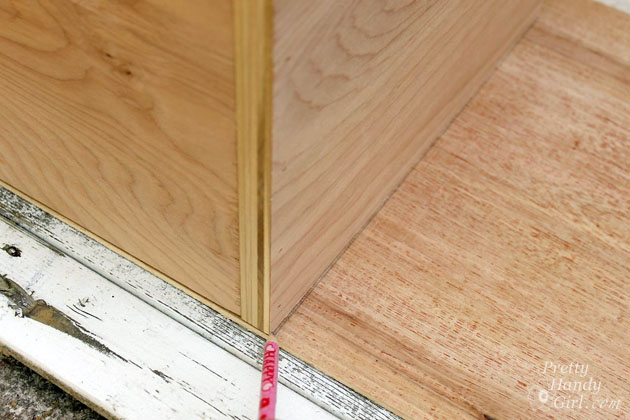
Set the box on top of the 1/4 plywood. Trace the edges and cut out the bottom.
Flip the box upside down. Add wood glue along the bottom of the box edges. Set the 1/4″ piece of plywood in place.
Secure the bottom with finish nails.
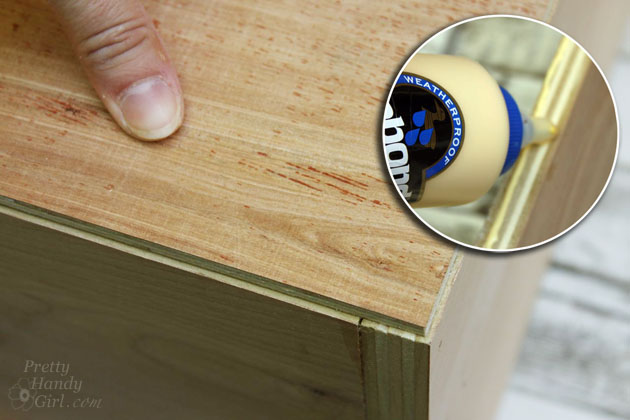
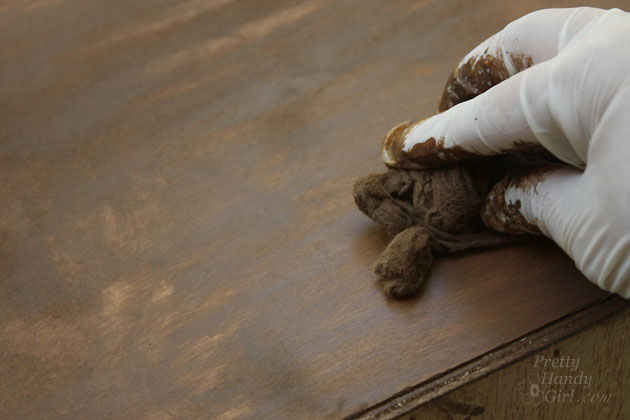
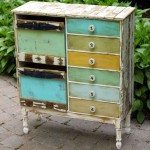
Sand off any rough areas or splinters. Wipe off any sawdust with a damp rag. Stain the exterior of the box with stain cloths (or any dark stain you have on hand.)
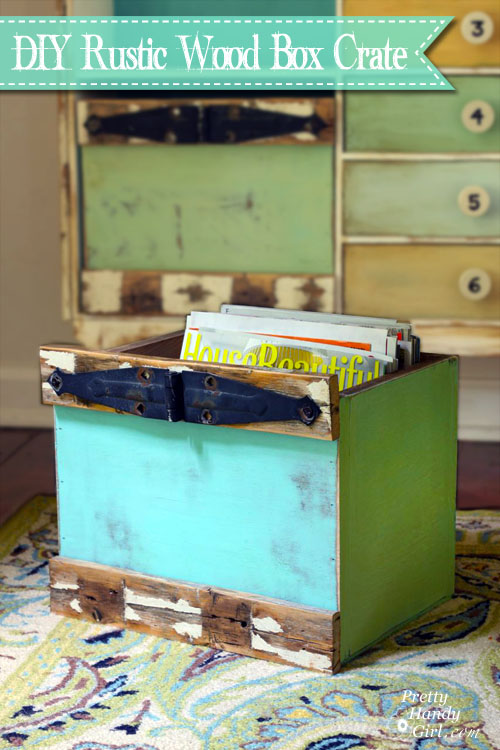
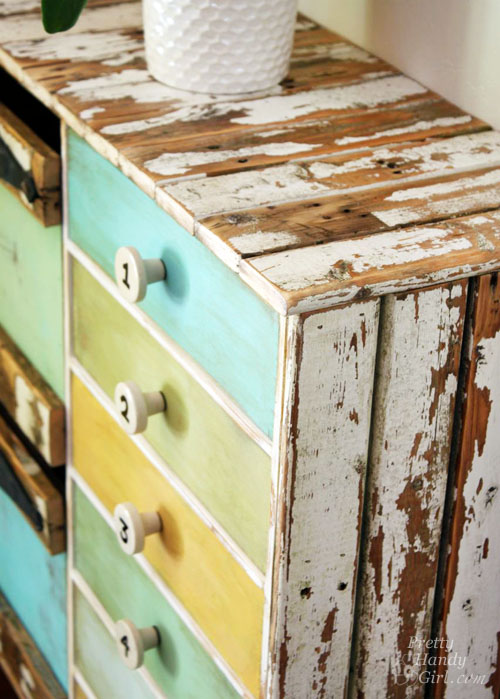
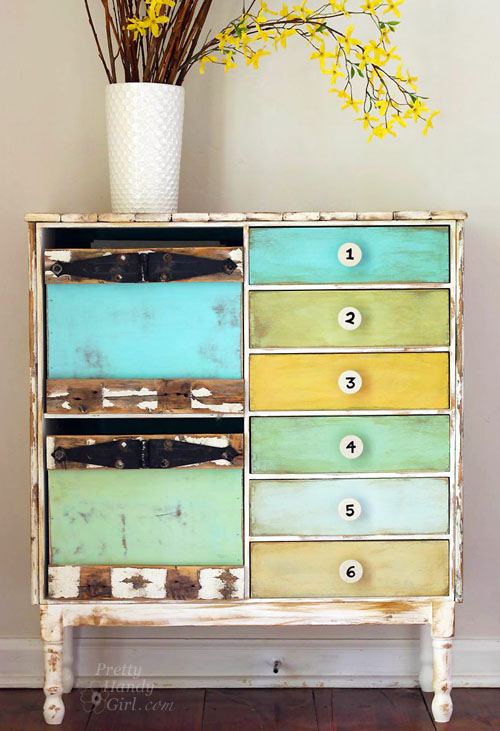
Paint the box. I used Farmhouse paint in Turquoise and Coastal Palm.
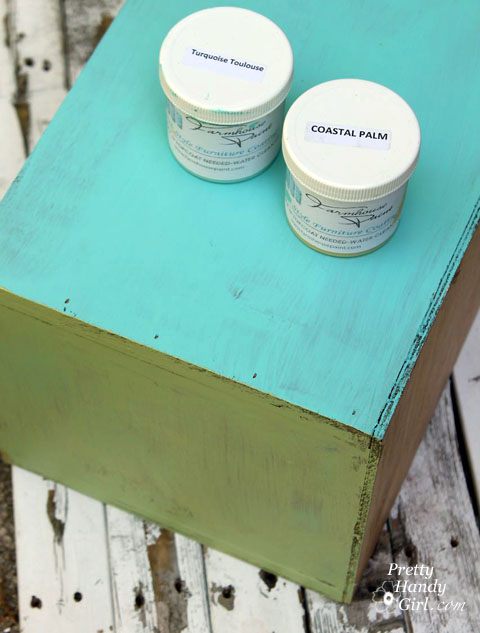
Sand the box to give an aged and distressed look. (View more tutorials for aging and distressing here.)

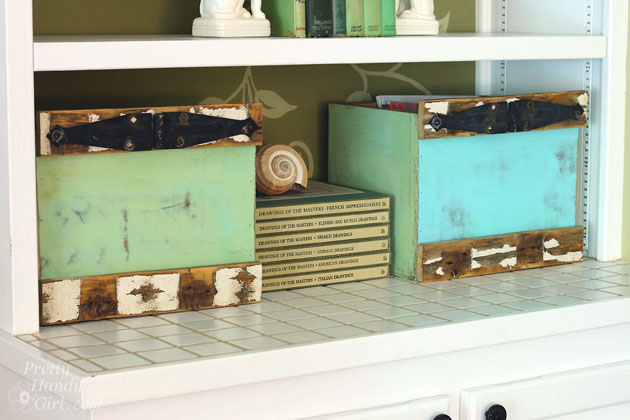
Time to dress up the crates! Add leftover pieces of moulding or picket fence. Run a bead of glue on the box.
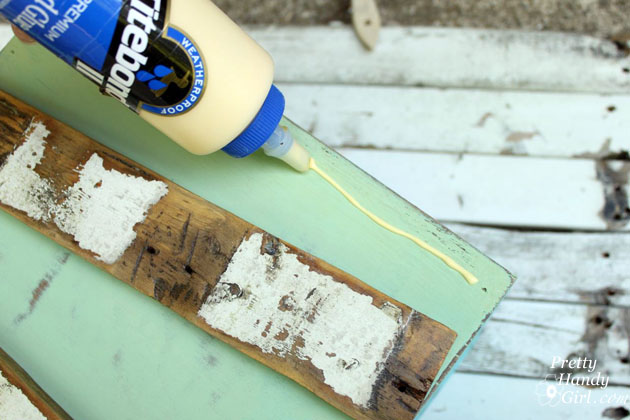
Then, secure the wood pieces with finish nails.

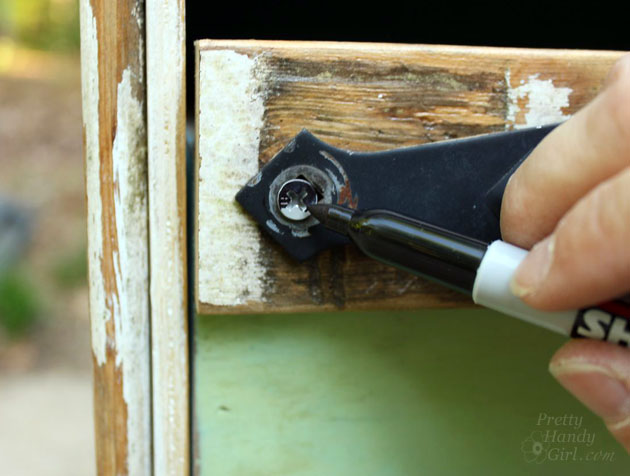
Because the top picket fence piece acts as a handle on my box, I added strength by pre-drilling a hole and then securing it from inside with a few wood screws.
Feel free to add some salvage strap hinges for more visual interest. I particularly love the graphic look of these!

Disguise the wood screw by coloring it with a sharpie marker.
Custom wooden boxes can be used on shelves to keep magazines and other things out of sight.
Or you can use them like I did, by sliding them into a cabinet.
I hope you enjoyed this tutorial. To read more antiquing and distressing tutorials, see my Aging Techniques Gallery.

To read more custom woodworking projects, check out my Built It Gallery.
See you in a few!
![]()

Lovely work! Both the drawers and the dresser.
Those are fabulous looking. Got me thinking here…I sure could use these! Great tutorial.
This is wonderful! I love the colors you chose, and of course, the hardware. You’re awesome. 🙂
Thanks Pauline. I was thinking about you as I built these. I knew you’d appreciate their salvage nature.
Love it! Fantastic job Brittany! You really are a “pretty handy girl”!
Thanks Turtle 😉