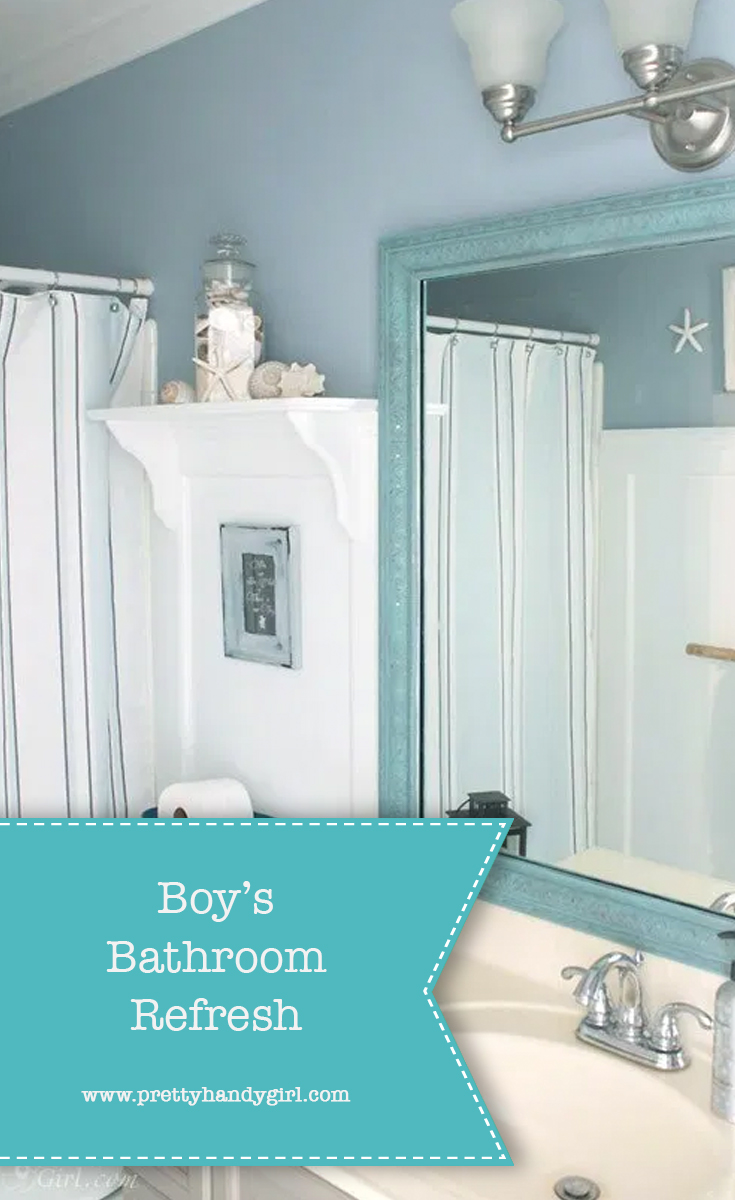
Boy’s Bathroom Refresh {#LowesCreator Project}
You know those projects that you complete 80% of the room and think to yourself, “This is good for now. I’ll do the rest in a day or two.” Yup, the boy’s bathroom was one such 80 percenter. I finally took the time to finish the last 20 percent of this bathroom makeover by giving it a refresh with some paint and new knobs.
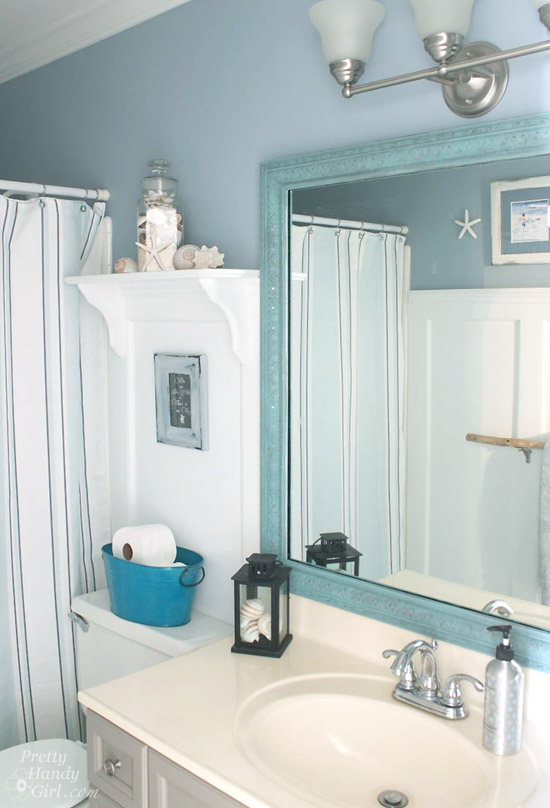
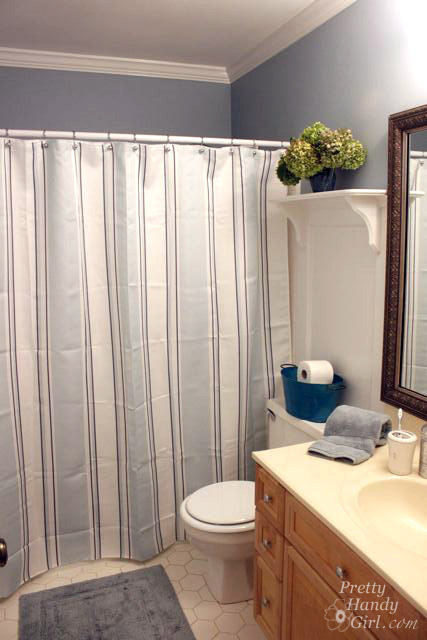
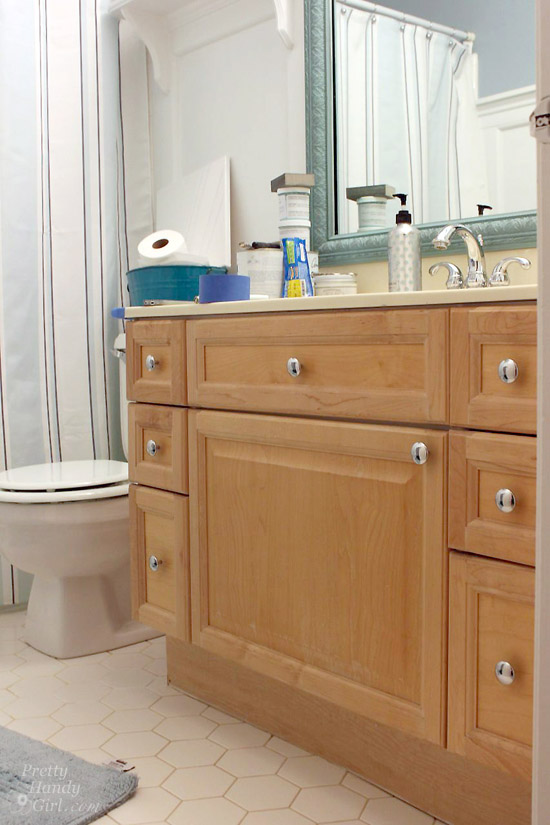
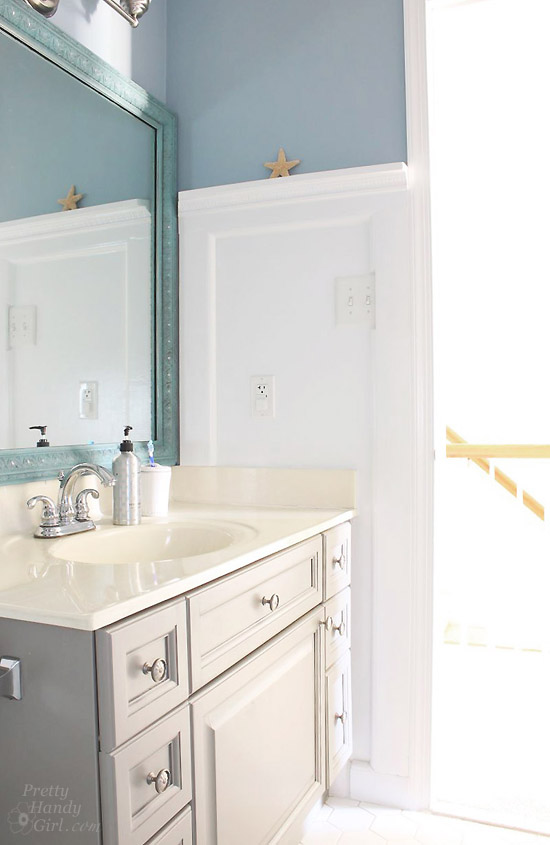
The bathroom used to look like this:
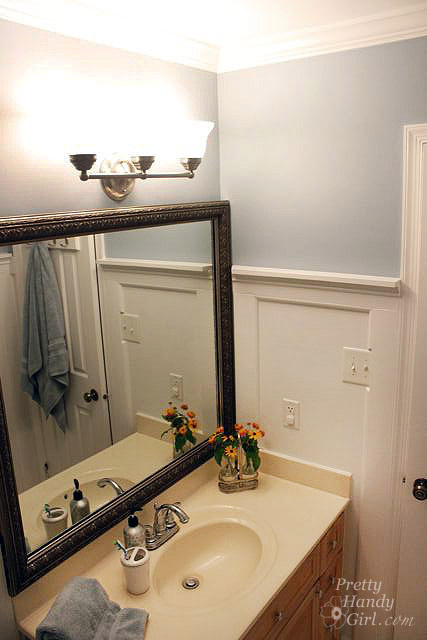
But, before that, it looked like this:
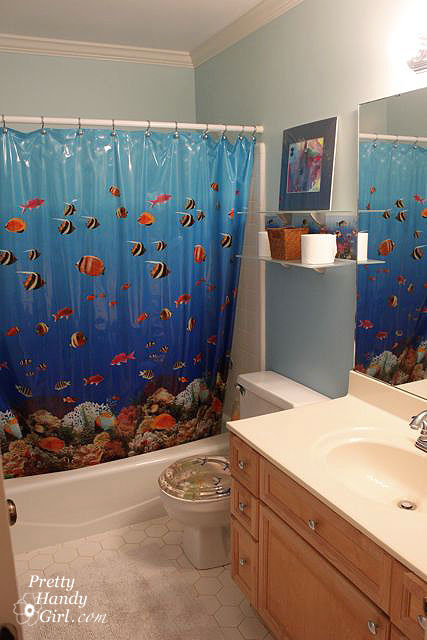
I find it comical that I took an underwater themed bathroom and gave it a seaside retreat feel. I guess you could say I pulled this big whopper from within the ocean and laid it out on the beach. LOL.
Let’s break it down now. Here’s how to paint a bathroom vanity so it will withstand the abuse of two young boys:
I’ve included affiliate links for your convenience. I earn a small percentage from a purchase using these links. There is no additional cost to you. You can read more about affiliate links here.)
Materials:
- Valspar paint + primer – Beige Shadow
- Paint brush
- 3M Sandblaster Pro Sanding Sponge 150 grit
- ScotchBlue Painter’s Tape
- Minwax Polycrylic Satin finish
- Shelf liner
- Sumner Street nickel cabinet knobs
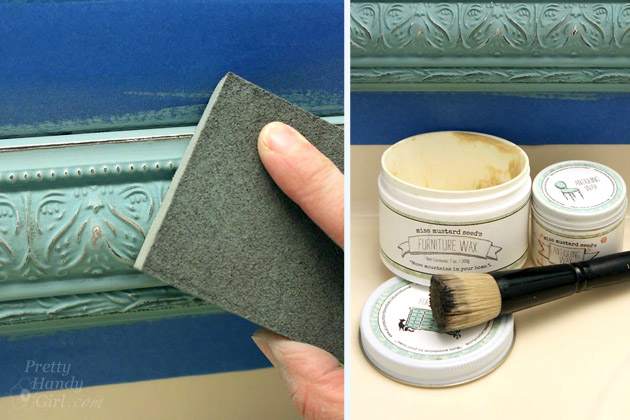
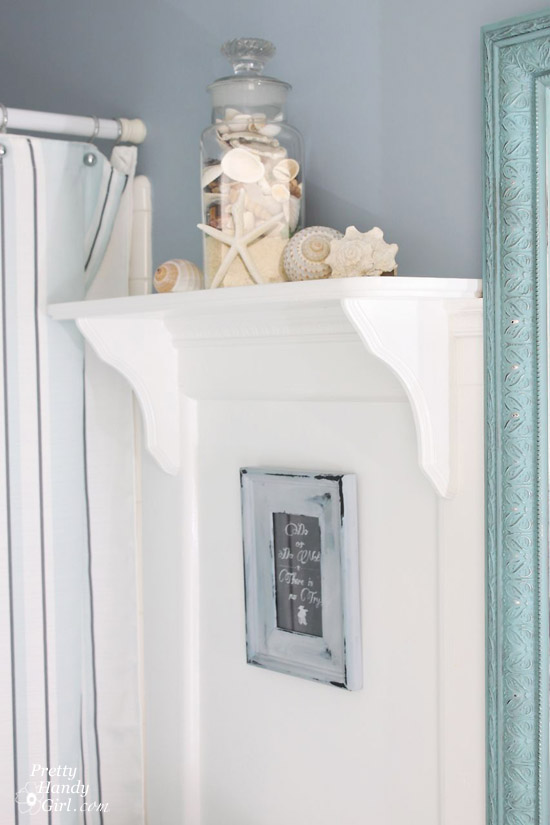
(Before I painted the vanity, I gave the mirror frame a quick coat of Annie Sloan Chalk Paint in Provence. I gently sanded the frame and added Miss Mustard Seed antiquing wax to give it an aged and distressed look.)
Clean off the vanity with a gentle all purpose cleaner or a damp rag.
Remove all the doors and drawers. You can leave the dummy panel on the top if you don’t want to go through the hassle of removing it. Remove any knobs or hardware.

Protect the vanity counter top with painter’s tape. Also, cover the floor and the wall where the vanity meets the wall with painter’s tape.
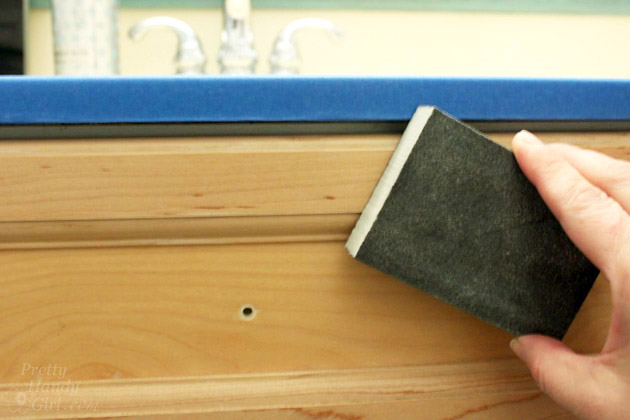
Rough up the vanity surface with the sanding sponge.
Paint the vanity with two coats of Valspar Paint + Primer in Beige Shadow.

Replace the doors and drawers once they are dry. To protect the bottom of the drawers, add adhesive shelf liner. (Because you NEVER know what two young boys will spill or store in those drawers!)

Apply 3-5 coats of polycrylic protective finish to the entire vanity. Allow each coat to dry before applying the next one.

Re-attach or add new knobs to your vanity.
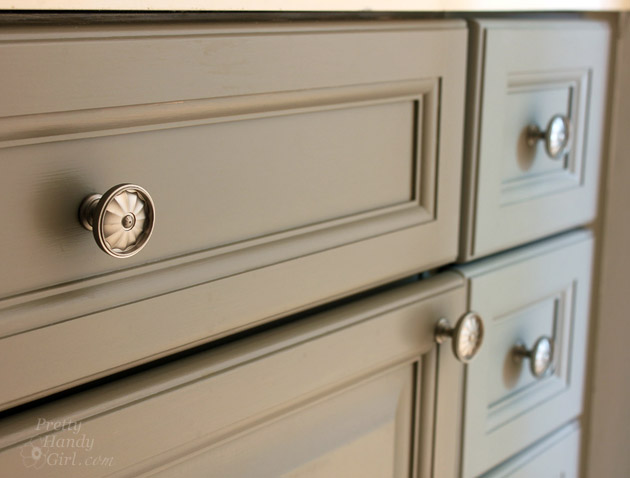
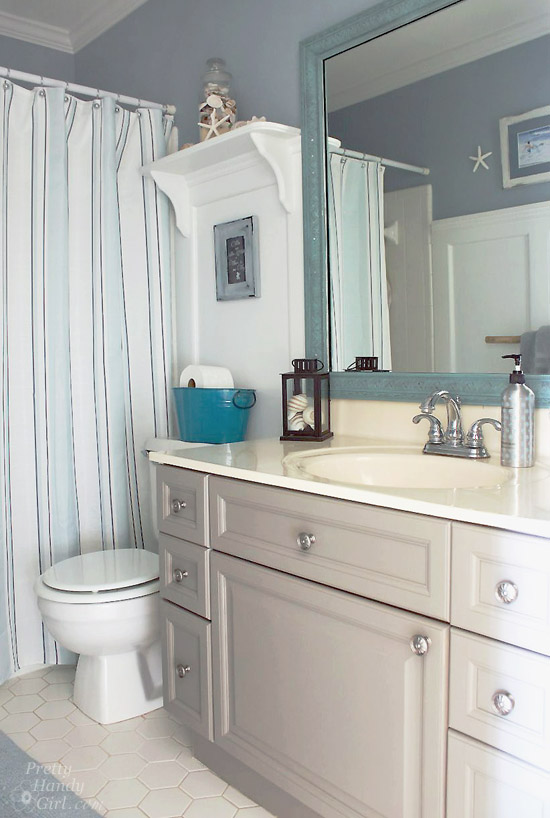
Stand back and admire!
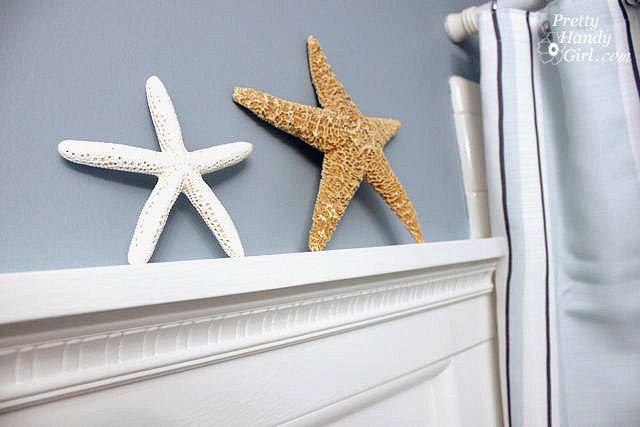
You can read my tutorial for adding a decorative wall shelf.
The opposite wall still has my branch towel bar.
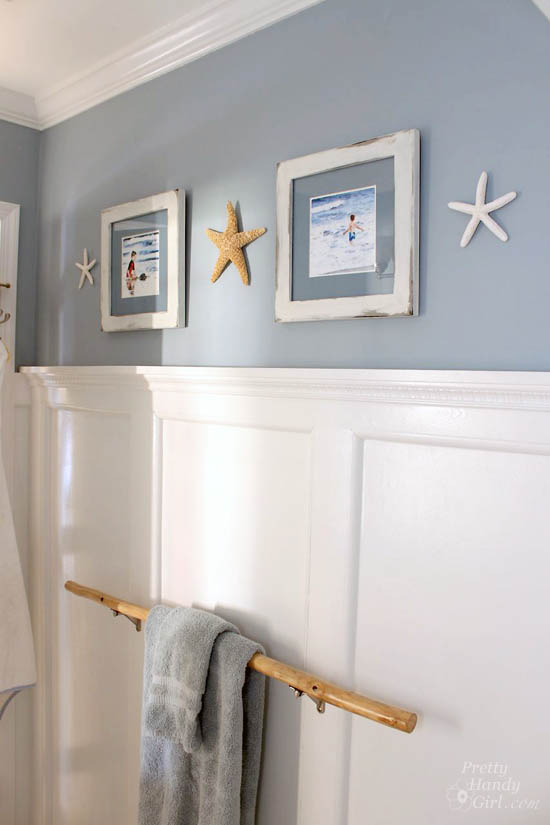
And I recently added those Waterlogue vacation photos. You can read the tutorial for making your own watercolor art and matting it like a pro.
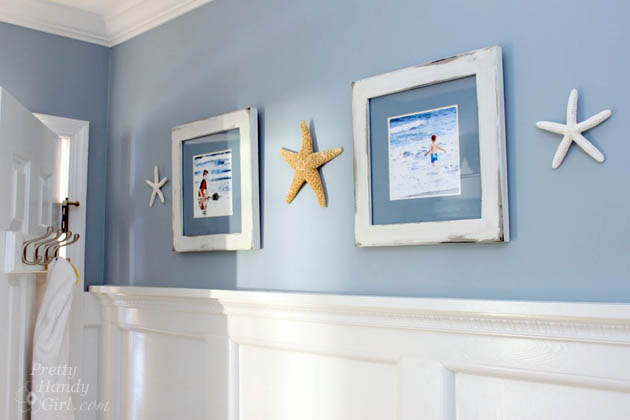
You can also follow my tutorial for installing board and batten and decorative moulding.
I’m not sure why it took me 3 years to finish this bathroom.
The resulting refresh feels soooo…well refreshing!
Want more ideas for giving your bathroom a refresh? Subscribe to the Lowe’s Creative Ideas magazine:

Or view more creative ideas from the Lowe’s Creative Idea bloggers !
There’s also a magazine app so you can have inspiration on the go! And, don’t forget to follow Lowe’s on Pinterest or on Instagram!

Disclosure: As a #LowesCreator, I was provided with a Lowe’s gift card to purchase supplies for this post. I was not told what to write. All ideas and words are my own.
Pin for later!

It looks awesome and thanks for the tutorial on the cabinet. Our boy’s bathroom cabinet is pickled oak and is on my list of paint projects.
Love the decor in the bathroom! It all looks gorgeous! And I love that blue!
Thanks Ashley! Blue and White are classic colors together.
Okay, the original décor of the bathroom made me laugh!! My husband was sent to run some errands with our 4 year old son. One of the items on his list was to pick up a shower curtain for our son’s bathroom. I figured, this shouldn’t be too hard for him to decide. So when my husband and son returned, they proceeded to head over to the bathroom to install the new shower curtain. My heart sank, I was literally taken aback! My husband came home with a bright blue shower curtain which featured dolphins! He looked at me and said, “I didn’t pick it out, he did!” Suffice it to say, it didn’t match the existing décor of the bathroom. I love your bathroom remodel! It’s beautiful.
LOL. Our bathroom came complete with the wallpaper border and “matching” shower curtain. I bet the previous owner’s kids picked it out too. At least they enjoyed it for several years before I changed the bathroom.
My first time here and I already love your blog! Your boys’ bathroom looks so great. Being a designer, I definitely feel like paint is the best way to update or refresh a space.
Best,
Whitney
Thank you Whitney and welcome!
I am in LOVE! Will you come do mine?? 🙂 🙂
Thanks Amanda. 😉 Wish I had the time.
I am a total DIY novice. Could I do the same thing for kitchen cabinets or do you recommend another product and technique?
Joy, I definitely know you could paint your kitchen cabinets. Because there are usually a lot more cabinets to paint, you may want to check into the Benjamin Moore Advance paint or Sherwin Williams ProClassic. They both have a hardener in them to protect the paint from dings, etc. I would also recommend priming. Kitchen cabinets seem to take more of a beating than bathroom vanities.
I have a question about the mirror. Did you hang a different mirror with a frame or did you add a frame to the existing mirror? I have the same one and would like to add a frame or moulding to it.
Debbie, I covered our builder grade mirror with a MirrorMate! You can see all their products at MirrorMate.com
I love the changes. I love the new colors on the vanity and the mirror — so pretty!
Thanks Sandra ;-).
Can you tell me where you got the shower curtain from? Really like the finished product. Beautiful.
Sadly, I bought it about 3 years ago and I think it was either TJMaxx or HomeGoods. Sorry ;-(
This turned out so fresh & inviting Brittany. I think you could excuse yourself for not finishing this before…you’ve been just a little busy. Love the colors as well.
Thank you Colleen! LOL…yes, I need to let it go.
I guess you forgot about your little kitchen project?
I do love the bathroom.
Kitchen? What kitchen? LOL. Oh yeah, 2013 was the year of the kitchen. I forgot ;-D
What is the color on the walls? Love that blue.
Jodie, It’s Slate Blue by Benjamin Moore. You might also find this post of dreamy blues helpful 😉 https://prettyhandygirl.com/25-dreamy-blue-paint-color-choices/
Looks great. Exact lay out of our main bath. Hmmmmm…..
It looks wonderful! I went and looked at your B & B tutorial –great directions. I’d love to do it for my bath off the family room but the walls are concrete–any suggestions?
I don’t know how to nail into the wall –Would just using adhesive work?
Love your blog!
Maggie
Maggie, yes, that’s probably what I’d do in your situation. Good luck.
This is outstanding. I LOVE it. Want to improve our bathrooms like this…but with a snap of my finger. you work so hard! Great before/after!!!
Yup, just a snap of the finger is all it takes. 😉 In all seriousness, this was a relatively quick update (well that final 20% part.)