Adding Grilles to Garage Door Windows
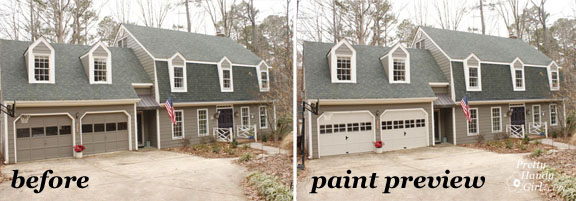
You know that thing about your house that you really want to change, but it takes you a while to mull over how to change it? Well, that thing for me was our garage doors. They are the two giant doormen that greet me at least five times a day as I run errands and taxi my children to and from school. I always thought they could be a little more polished and more inviting. In this mulling over period I dreamt of painting the garage doors and boosting the character factor by adding grilles to the windows. I even created a paint preview to see what it would look like. I fell in love immediately and the hulking gray doors’ fate had been sealed.
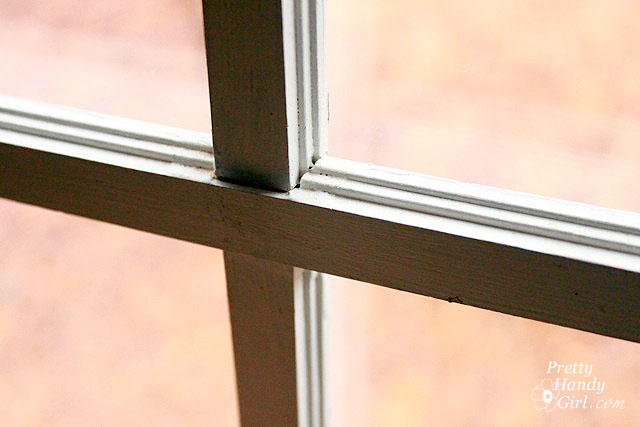
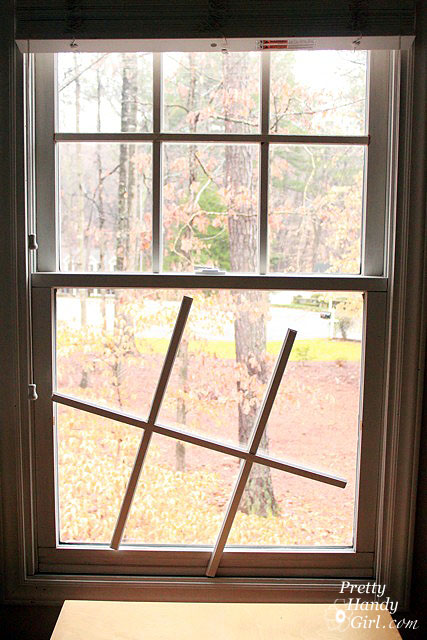
I wasn’t exactly sure how I was going to add the grilles (cross pieces in the windows.) I thought about cutting up paint sticks or just plain strips of square dowels cut to fit, but I REALLY wanted them to look as real as possible and I liked the router profile of the real deal.
A few months later I literally almost tripped on a stack of donated window grilles at my local Habitat for Humanity ReStore. You know, the cheap ones that are pressed up against the window and always fall out. Grrrr!
That was when the “A-ha” moment happened and I figured that I could use them to dress up my garage doors. I carefully measured the panes on the garage then found a set of four grilles that would give me two cross pieces per window! Perfect! And the best part about those grilles is that they only cost $2 a piece. For $8, some paint and glue I was able to transform my garage doors from boring bland to cottage charm!
And here is the tutorial for how to add grilles to plain jane garage door windows!
Materials:
- Reclaimed grilles from Habitat ReStore
- Hand saw
- Pencil
- Tape measure
- Paint
- Loctite Outdoor Sealant Glue
- Windex
- Rubbing alcohol
- 3M painter’s tape
- Razor blade scraper
- Paintable flexible caulk
- Caulk gun
- Wet rag
- Gloves
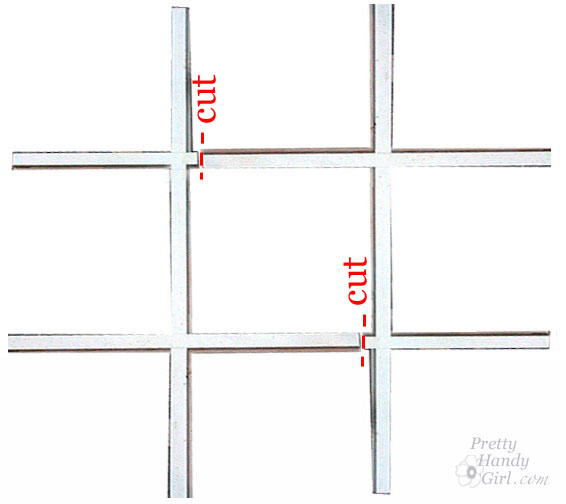
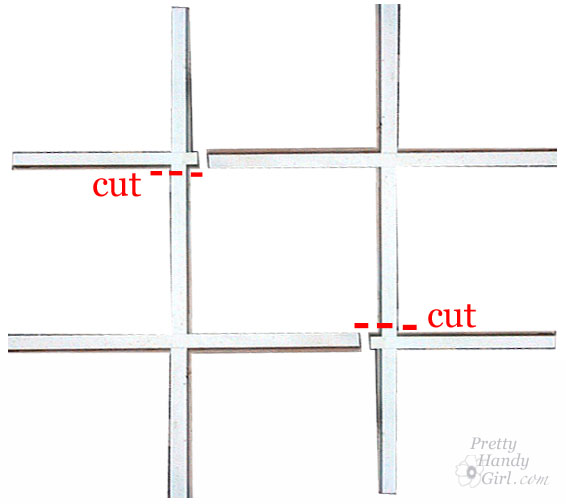
Start by cutting the grilles down to size. This is how I got two crosses from each grille. First, cut the grille into two pieces as shown below:
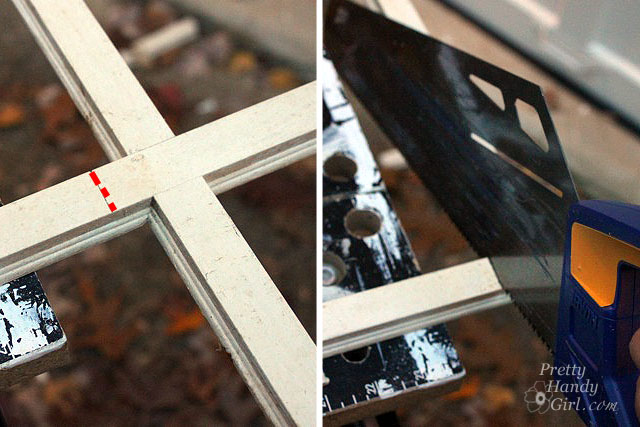
No power tools needed. A handsaw works great.
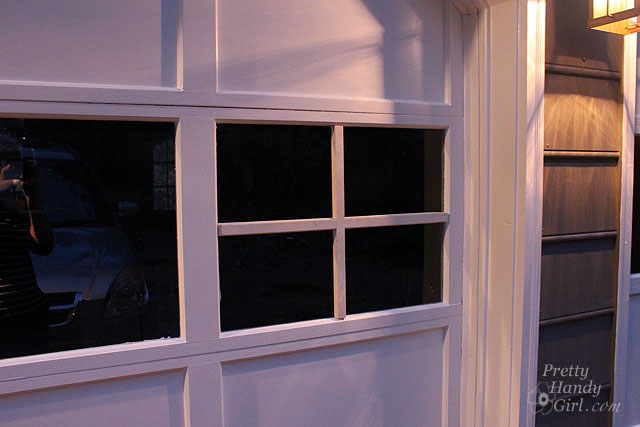
Next, cut off the excess so you are left with two crosses that fit perfectly in the window panes of your garage door.
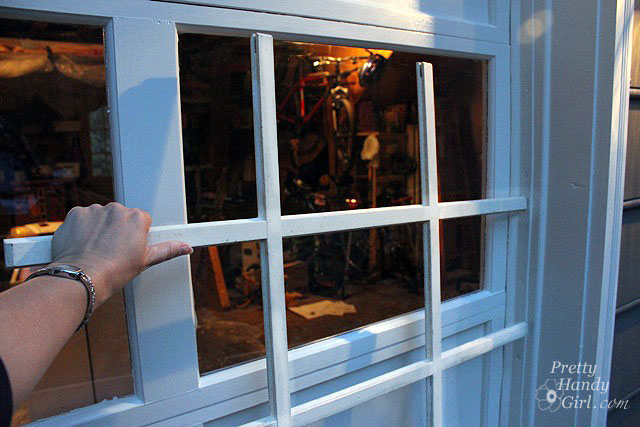
Test fit the cross. If your measurements are off, no worries, 1/2″ gaps can be filled with caulk.
After cutting all of the cross pieces, clean them off. Lightly sand and paint them the same color as your garage doors.
After the paint is dry, clean the glass with windex and then use rubbing alcohol to remove any dirt and debris from the glass.
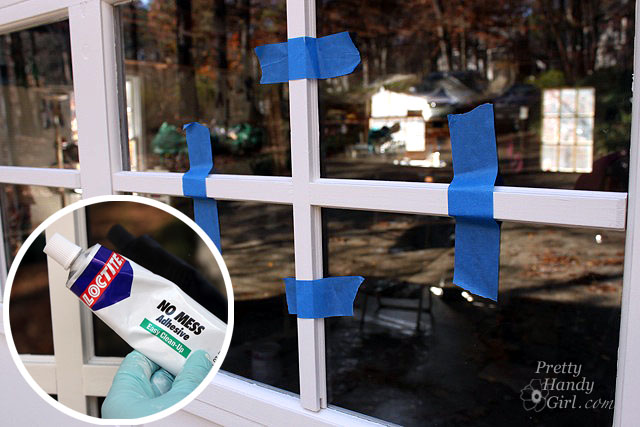
Spread a bead of Loctite Outdoor Adhesive onto the backs of both the vertical and horizontal bars. Center and press the grilles onto the glass. Use painter’s tape to hold them in place.
Wait 24 hours for the glue to harden and dry. Then scrape any excess glue off the glass with a razor blade.
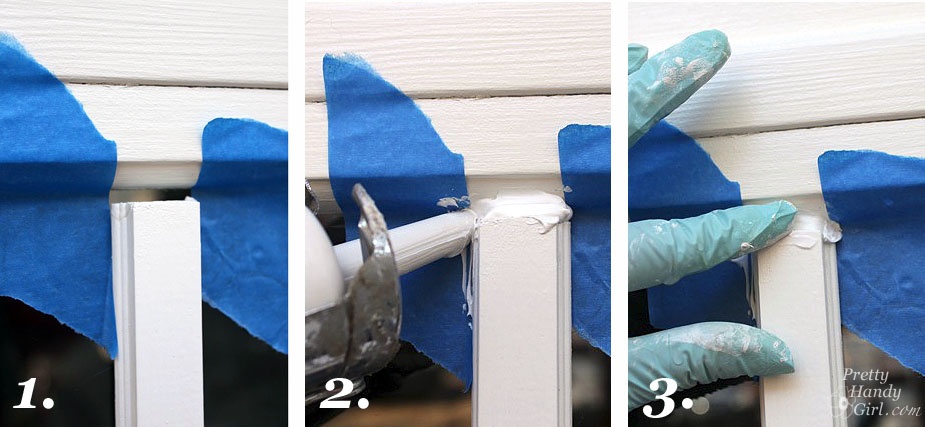
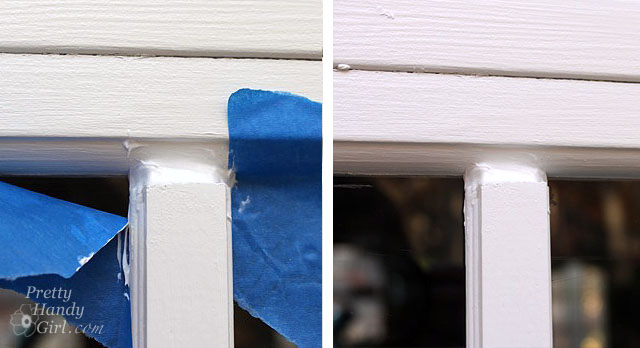
Time to fill in the cracks! Caulk all the seams. For the larger gaps, 1.) Apply painter’s tape on both sides of the void to 2.) keep the caulk off the window and give you a crisp, clean edge. (I’ll have a special caulk gun tutorial for you on Friday!)
3.) Remove the painter’s tape while the caulk is still wet. Let the caulk dry.
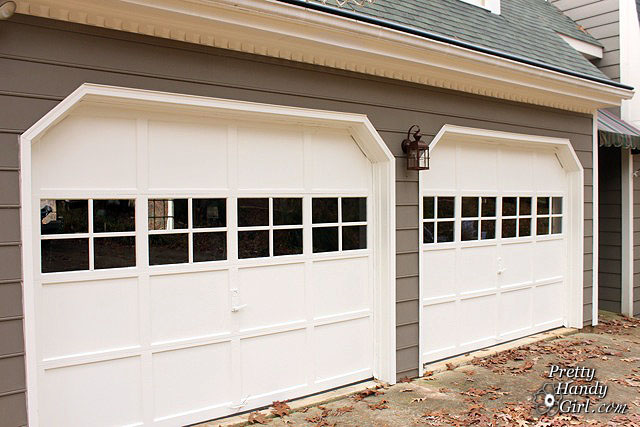
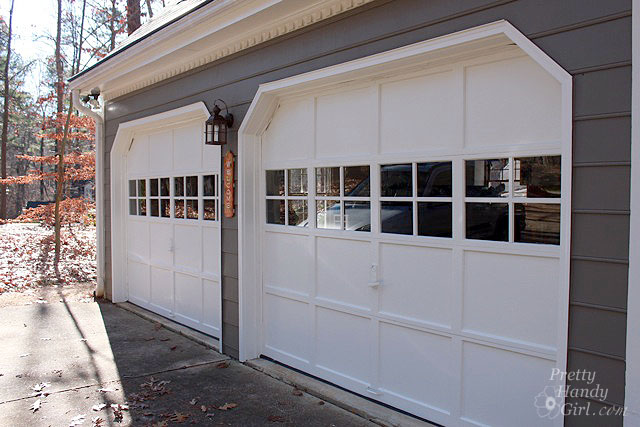
And you’re done! How is that for adding instant character?!
I could kiss these beauties! They are definitely welcoming doormen now.
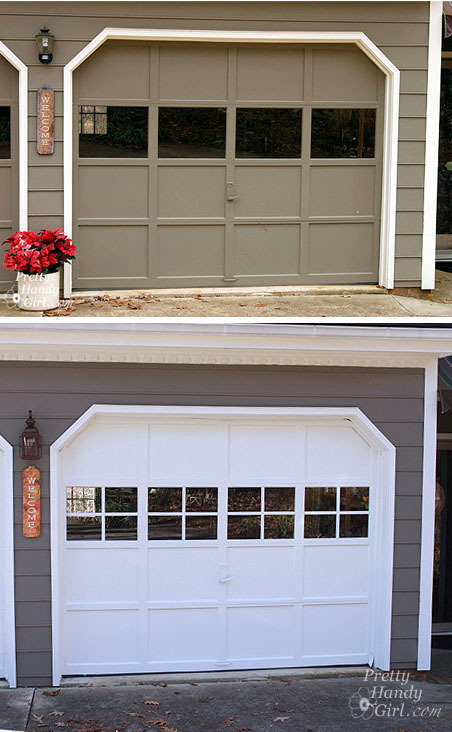
Speaking of welcome, I repainted our faded Welcome sign and hung it back up. Are you an eagle eye reader? What else changed in the pictures below? Five things have changed, can you spot them all? I’ll start you off:
- Painted doors
- Added grilles
- Refreshed welcome sign
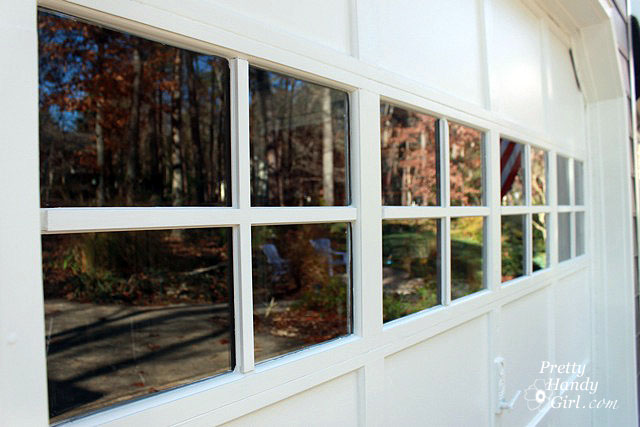
Okay, one more lookey at my beautiful garage door windows and then you have to leave.
I want to give a big shout out and thank you to Waste Management and The Bagster who helped make my garage makeover a possibility. You can see more of my garage transformation here.




Awesome! I planned on doing the same to my garage doors but never got around to it. Now I’m inpsired!
What a difference! And isn’t it great when the most inexpensive projects make a such a big impact?
A small change and your garage door looks so different. Lovely update.
Wonderful idea, and wonderful execution. These are the little things that make a big difference. Thanks for sharing.
Love the transformation! I also LOVE how you craft & do your projects on a budget. I shop the local Habitat store as well, mainly because I love to save money and secondly because I have to. =)
That makes a huge difference, you always have such great ideas. I was pinning garage doors last night, wishing for something more custom- you got it without costing big moolah- yay!
They look great! Oh, and 4. is potted pland is gone, 5. is new light fixture – very nice!
plant, not pland! =)
Wow, Brittany! That looks amazing! What a big difference! You did a great job and really thought outside the box – we just got a new garage door, but our old one was the original to our 1947 house. So, it was pretty bad. Our new door doesn’t have windows, since it’s in the back of the house and not noticed on the street. But, I like the grilles!
Becky B.
http://www.organizingmadefun.com
Organizing Made Fun
That makes an unbelievable difference! Very cool tutorial.
you changed the garage door light and remove the potted plant.
talking about cheap grid that keeps falling off….i totally removed them all from all my windows and kept it at the attic…i didn’t know that could sell $2 a piece!!! reason i removed them is because my windows got lots of condensation and thus causes mold. It is so much easier to clean without those grids.
/jonie
great idea…nice refresh!!
Hollie
Looks fantastic. Great job. And I love the white paint too!
What a smart fix! Great eye to have spotted the grids and realized what they could do to make your garage door look so much better for a few dollars.
My best- Diane
Hi
Nice job, I’ve recently discovered the blog and I love it, congratulations!
See you soon
Thanks Angel.
That looks great! Think you could help me add “windows” to my garage doors?
Ahh, That would be a different post for a different blogger ;-). BUT, if your garage doors are the same thin masonite, I bet you could cut out a hole and add glass (although I might use plexiglass) windows.