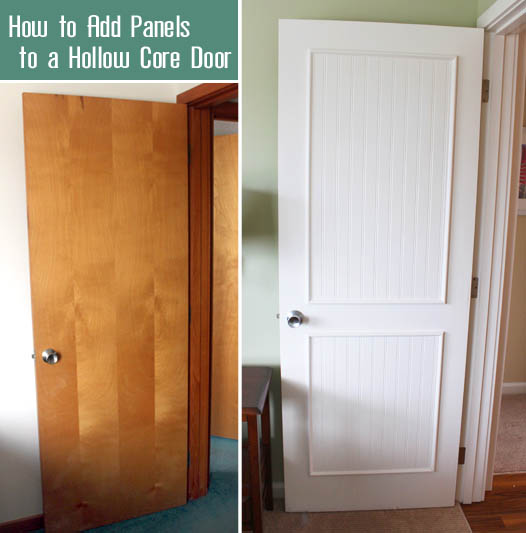
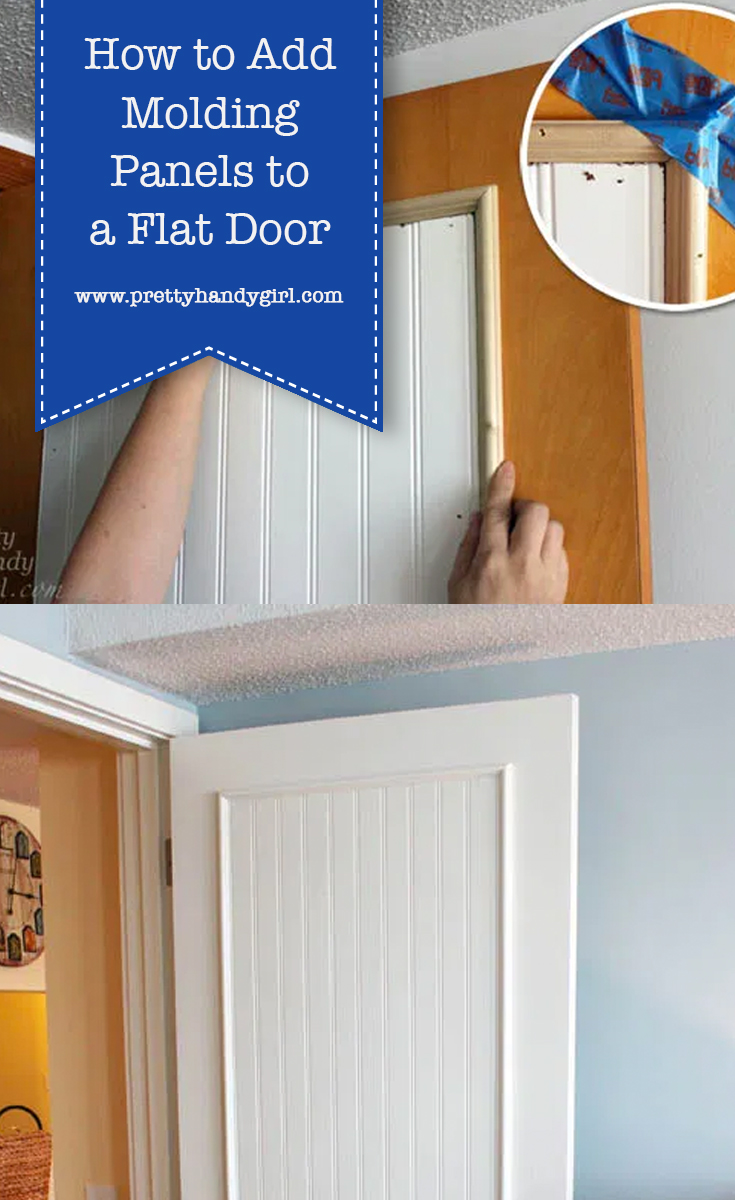
How to Add Molding Panels to a Flat Door
When my sister brought me on to the Topsail Beach condo renovation, she had a laundry list of DIY projects she wanted me to complete. One of them was dressing up the hollow flat doors with moulding panels. She showed me a pin that led to One Life to Love’s DIY beadboard panel doors. After seeing the photo, I knew it would be a great DIY upgrade to make. But, we decided to use real beadboard (instead of beadboard wallpaper) because it had to hold up to the stress of being a rental.
To Begin:
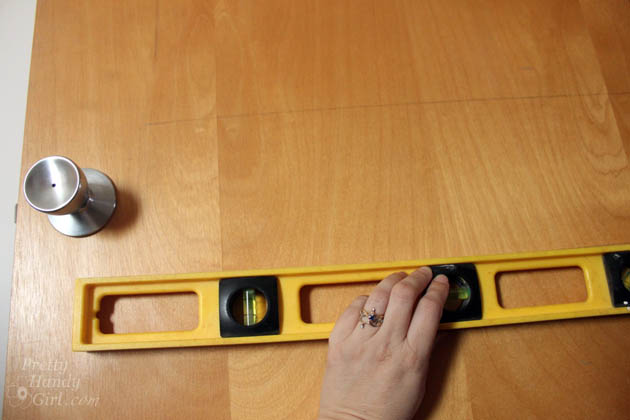
Start by measuring and marking the doors to determine the size of your panels.
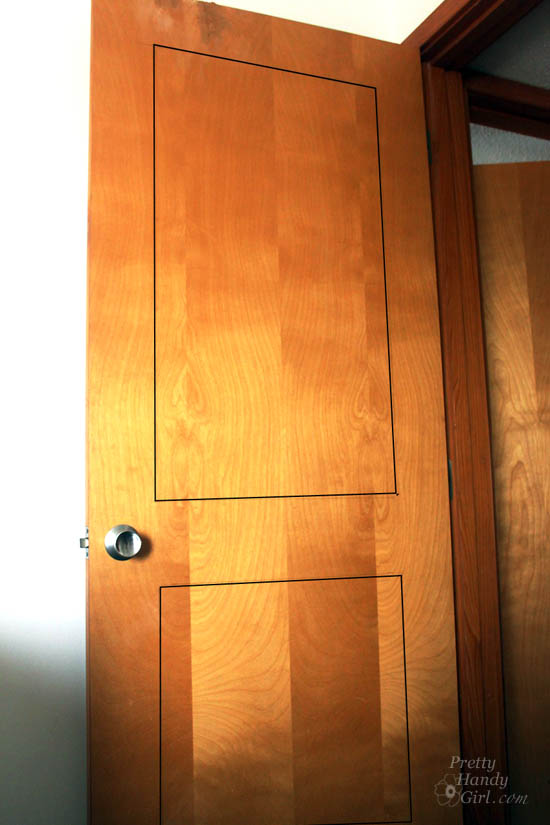
Draw lines 5″ in from the top and two sides of your door. Draw the bottom line 6″ up from the bottom. Finally, leave 5″ between the top and bottom panels.
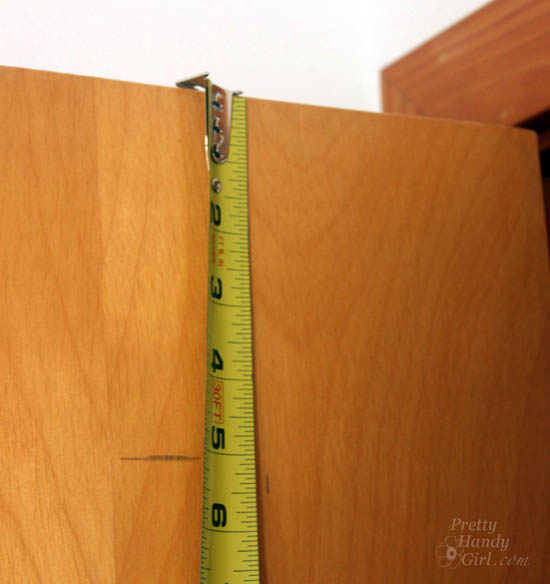
When marking your doors, use a pencil and level to draw your lines.
After we had our panel measurements, Caitlin and I headed to Lowe’s. But, she refused to push me in the cart (party pooper!)

We pulled some 4′ x 8′ beadboard panels and took them to the lumber cutting area. We gave the Lowe’s employer our measurements and asked him to cut the boards for us. While he cut our beadboard, Caitlin and I gathered the rest of our supplies.
Materials:
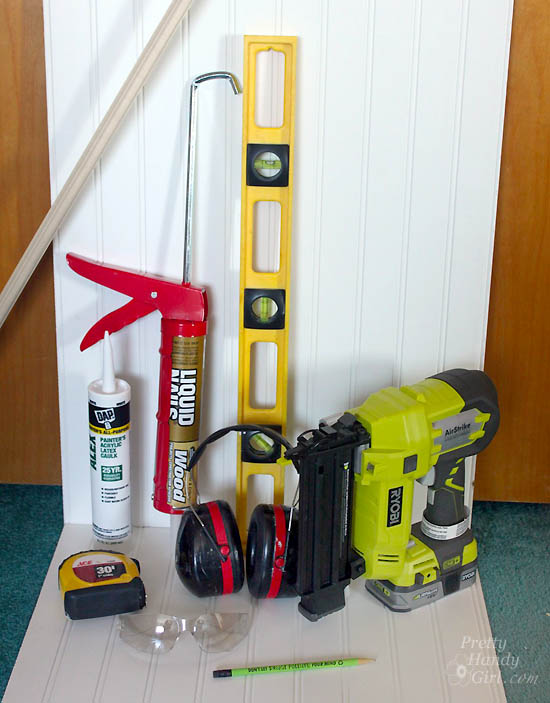
- Beadboard panels
- Moulding to frame panels
- Tape measure
- Pencil
- Level
- Construction glue
- Latex paintable caulk
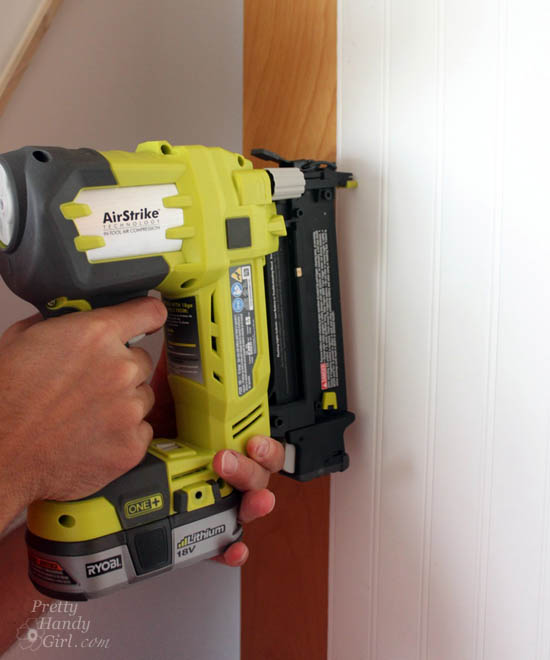
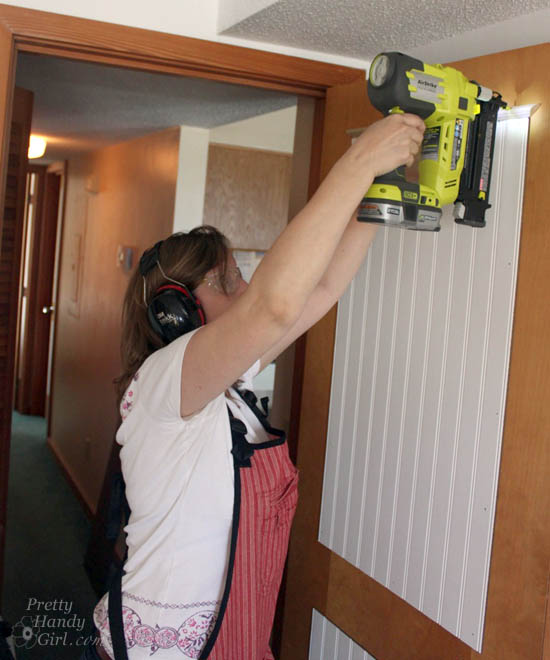
- Finish nailer
- 1 1/4″ finish nails
- Painter’s tape
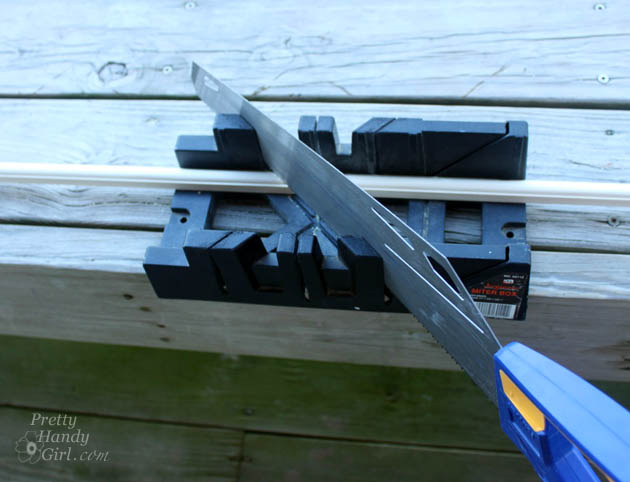
- Hand saw
- Miter box
- Eye protection
- Hearing protection
- Plastic wood putty
- Putty knife
- Sanding block
Instructions:
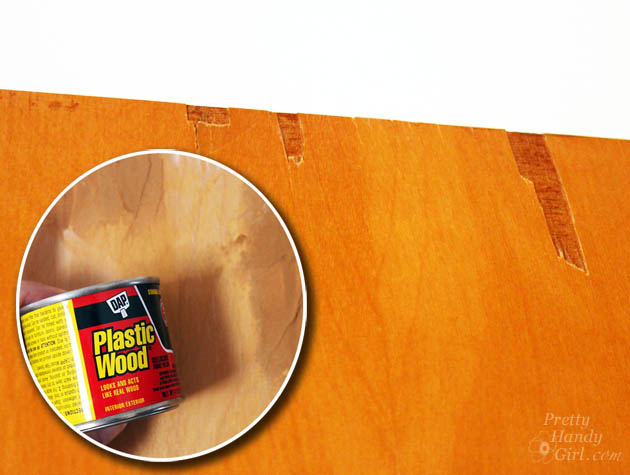
Assess the condition of your door. If there are chips or dings, you need to fix them before proceeding.
Apply wood putty and allow it to dry.
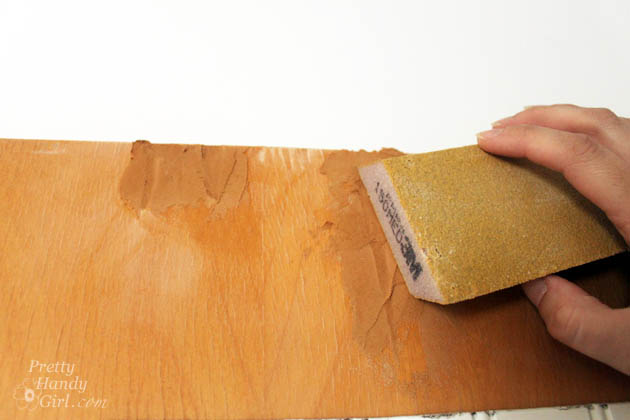
After dry, sand the putty smooth.
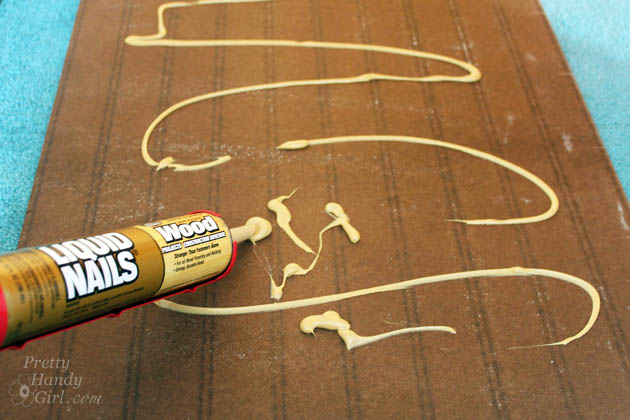
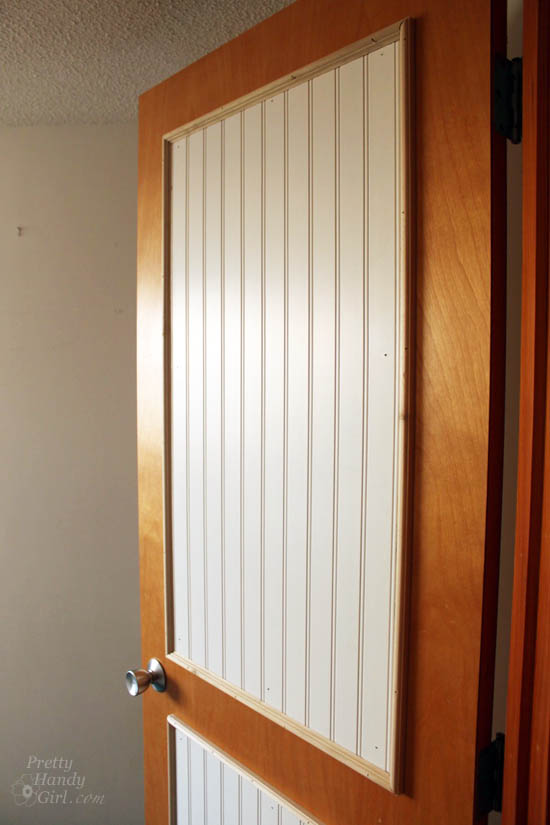
Time to apply the beadboard panels. Squeeze construction glue onto the back of the beadboard panels.
Set the panels on the door and double check the level and plumb of the panel.

Press the panel firmly to spread the glue. Use the finish nailer to secure the panel around the perimeter.

Attach the lower panel next.
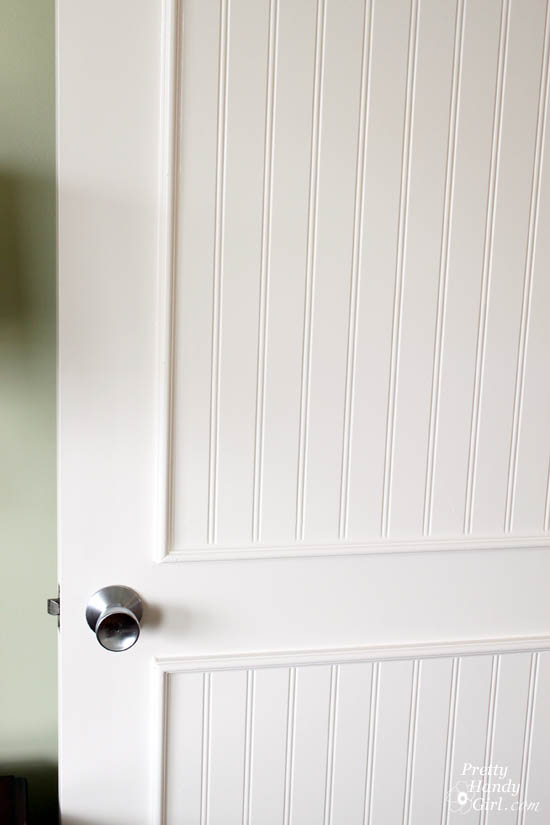
To trim the panel, measure and cut your trim molding to fit around the panel.
Set your top piece in place and secure it with the finish nailer.
Set the side pieces in place. Use painter’s tape to hold the corners tightly. Use more tape to secure the side piece if necessary.
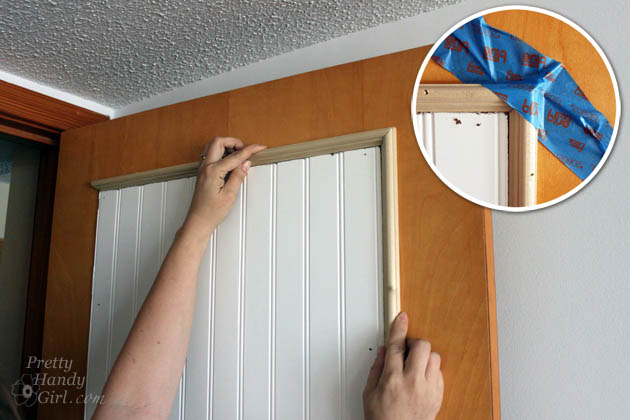
Attach the side molding with finish nails.
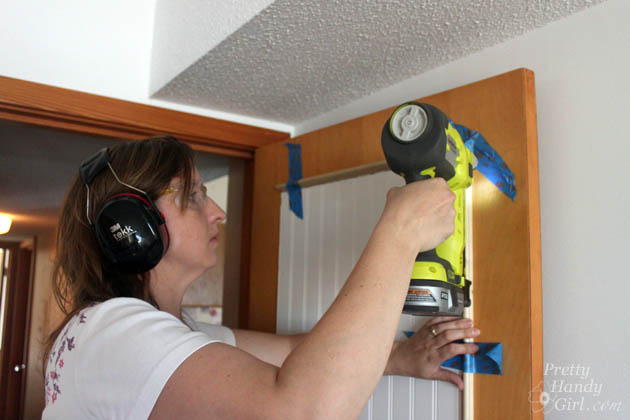
Attach the opposite side and the bottom molding pieces. Putty the nail holes and caulk the seams. Then prime and paint the doors.
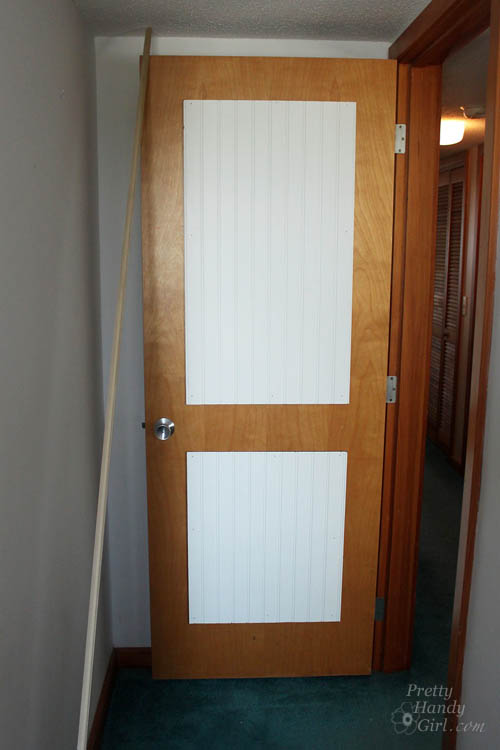
Ooolala. How about that transformation?!
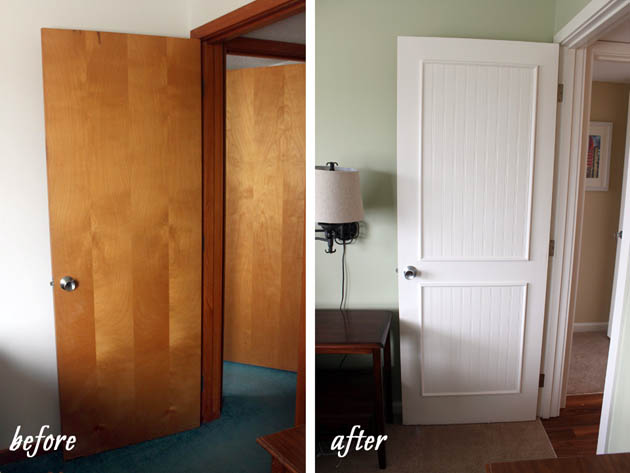
The newly paneled doors make a huge difference in the look of the condo.
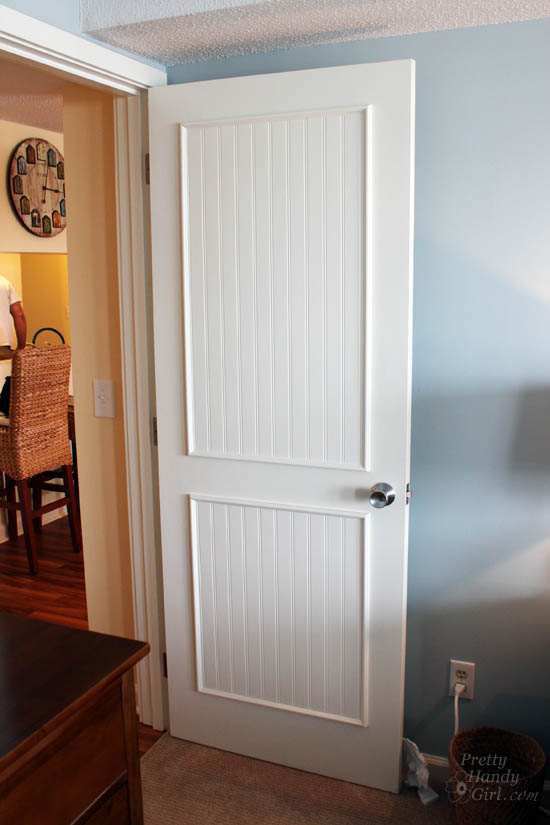
It’s all in the details.
Like what you see? Take the tour of the entire Topsail Beach Condo Renovation for more upgrade ideas.
![]()
Pin for later!

Can this idea be also done to bathroom and kitchen cabinets and what material to replace bottom layer of cabinets. Would it be the same ? i want to get rid of this brown to it is all over this house big project on doors and cabinets , where can i get some good ideas
OMG i am definetly going to try this
Awesome transformation. I like it. And have a doubt for quite a long time. How do things are nailed into the wooden doors so perfectly? It looks like another layer…
Not sure what you mean. The caulk helps hide the seams.
Got it!!! Thank you
Love love love this idea, I’m currently repainting my dark ugly brown doors (all 10 of them!), they already look loads better!
My house was built in the 20’s and nothing is standard size, all my doors are custom size (even the door handles are lower than standard doors!) and the door jams are also custom this saves me thousands of dollars vs replacing them. I’ve seen this done on a few other blogs however I appreciate your instructions as they are much more detailed and answered some questions I had.
Appreciate your post and can’t wait to see how much better my house looks afterwards.
Hi. I want to do 4 panels rather than 2. Does the 5″ measurement from top, sides and in between panels still apply? Thanks
I’d suggest you layout your panels with painter’s tape and see what spacing you want to use.
I have been staring at a door in my kitchen for the last 2 months and thinking, “what am I going to do to this door?” Then, WahLah! I saw you had crafted the perfect solution and gave instructions on your website. I used beadboard above painted cabinets to fill the space exposed when I removed a drop ceiling, so this is the answer. Thank you!
I am renovating the house I am living in – northern NJ, 960 sq and built in 1900. Your Etta project is truly inspirational. So glad I found your site, Brittany.
Hooray Theresa! Glad you found this tutorial. Good luck on your renovations.
Thanks for sharing this DIY Brittany! I know it’s been a while now, but have the doors stood the test of time in the rental?
Quick question: Did you use the nails as well because construction glue alone wouldn’t be strong enough? Or is that just a personal preference?
Also, did you use primer on everything before painting? The door looks shiney, like it had a gloss painted on it before.
I think they came out looking great, and I’ve always thought that real beading looks better, so good choice! 🙂
Did this improve the soundproofing at all?
Pamela, I don’t think so.
Awesome idea! I have hollow doors in my home too and had considered buying and installing new 6 panel doors, one of which would be very expensive since it was not a standard width. The total cost of that upgrade for a total of six doors was quite prohibitive. I plan on trying this but will use stain instead of paint. Thanks again.
I love these! I was trying to get out of fixing he plea in my hollow wood doors, however. How important Ian it to repair Holes before you begin the project?
No need to repair any holes that are under the beadboard.
The inside doors in my house have holes in them from a guy putting his fist through them. Can I cover the holes with patches, like the ones used on walls, then cover with bead board?
If the holes will be behind the beadboard panels, there is no need to patch first.
I’m gonna do this. New house. Someone had anger issues and punched them. I got bread board at Lowe’s. The sheets were damaged. I knew i could figure something to do with them. Put half sheets on bath wall. Now gonna do some doors!
Loved this so much, I am doing something very similar to this on my front door now! Only question I have is did you caulk the inside seams on the panels or just the outside seams? Thanks!
I caulked both then painted. If you don’t caulk all the seams you’ll have a dark line where there are gaps.
Instead of using bead board I’m thinking of using bead board paintable wallpaper. Should I do the trim first or install the wallpaper??