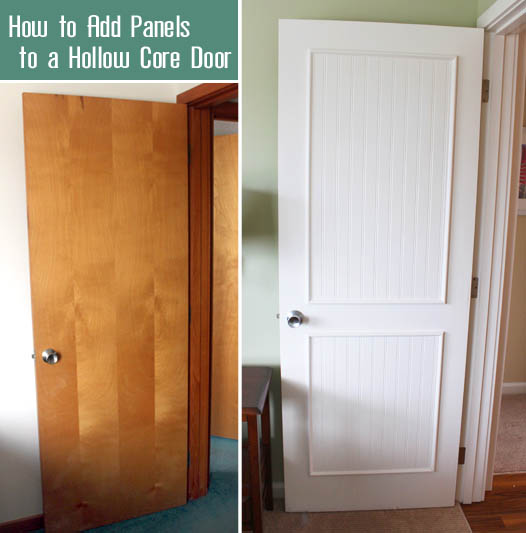
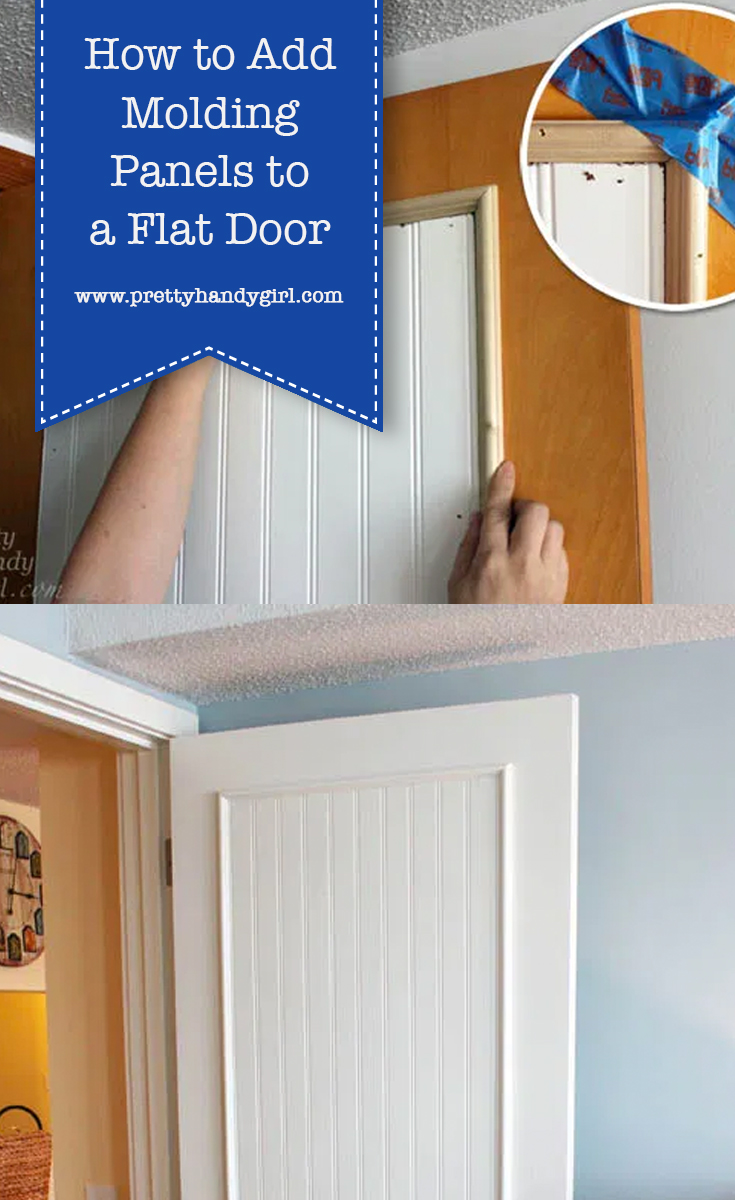
How to Add Molding Panels to a Flat Door
When my sister brought me on to the Topsail Beach condo renovation, she had a laundry list of DIY projects she wanted me to complete. One of them was dressing up the hollow flat doors with moulding panels. She showed me a pin that led to One Life to Love’s DIY beadboard panel doors. After seeing the photo, I knew it would be a great DIY upgrade to make. But, we decided to use real beadboard (instead of beadboard wallpaper) because it had to hold up to the stress of being a rental.
To Begin:
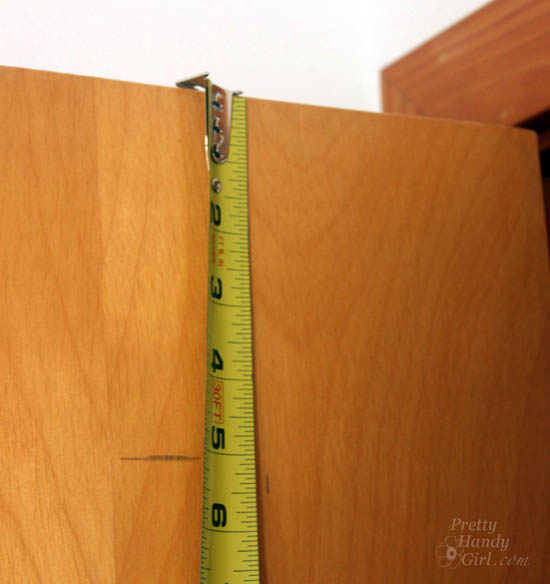
Start by measuring and marking the doors to determine the size of your panels.
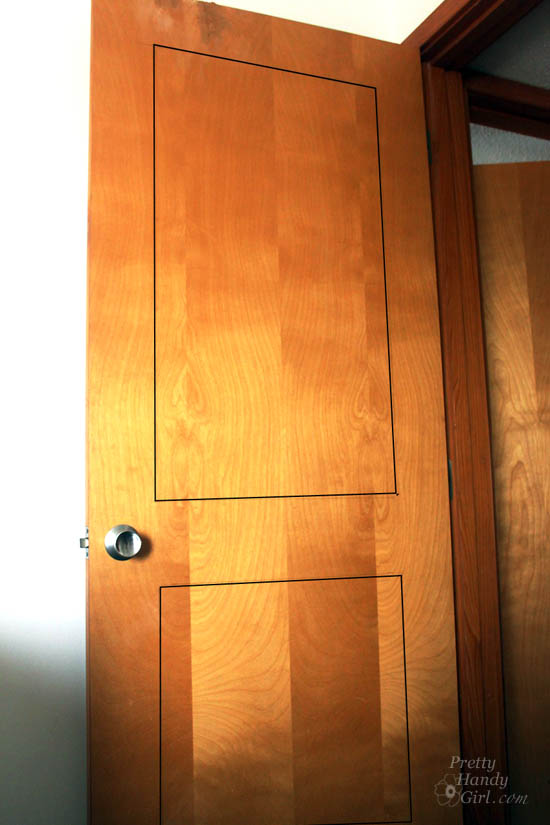
Draw lines 5″ in from the top and two sides of your door. Draw the bottom line 6″ up from the bottom. Finally, leave 5″ between the top and bottom panels.
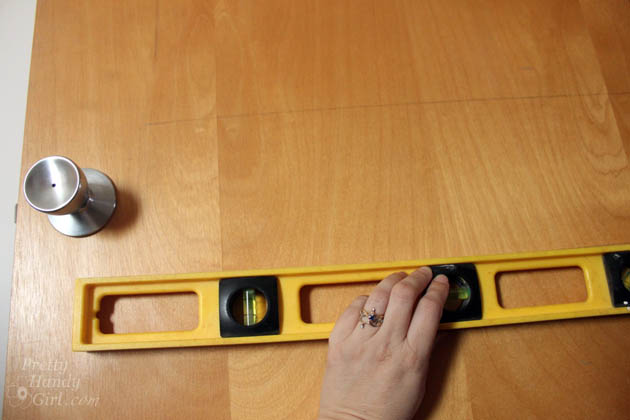
When marking your doors, use a pencil and level to draw your lines.
After we had our panel measurements, Caitlin and I headed to Lowe’s. But, she refused to push me in the cart (party pooper!)

We pulled some 4′ x 8′ beadboard panels and took them to the lumber cutting area. We gave the Lowe’s employer our measurements and asked him to cut the boards for us. While he cut our beadboard, Caitlin and I gathered the rest of our supplies.
Materials:
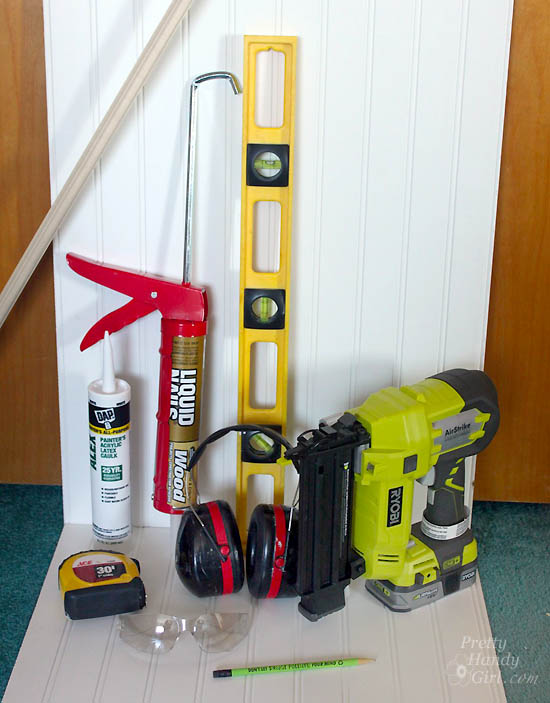
- Beadboard panels
- Moulding to frame panels
- Tape measure
- Pencil
- Level
- Construction glue
- Latex paintable caulk
- Finish nailer
- 1 1/4″ finish nails
- Painter’s tape
- Hand saw
- Miter box
- Eye protection
- Hearing protection
- Plastic wood putty
- Putty knife
- Sanding block
Instructions:
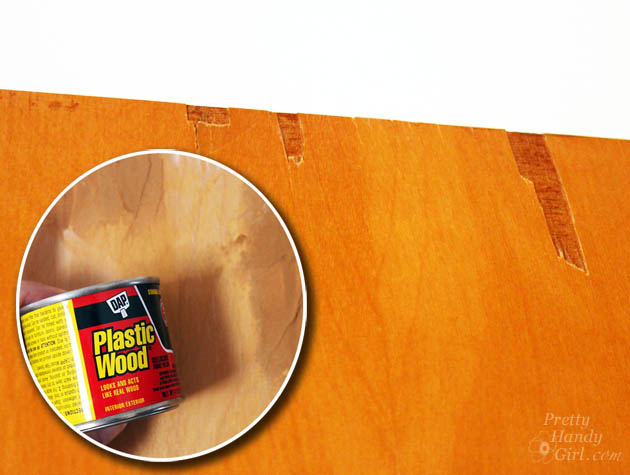
Assess the condition of your door. If there are chips or dings, you need to fix them before proceeding.
Apply wood putty and allow it to dry.
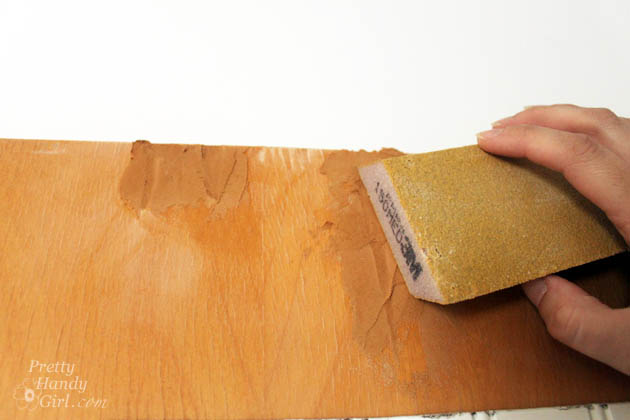
After dry, sand the putty smooth.
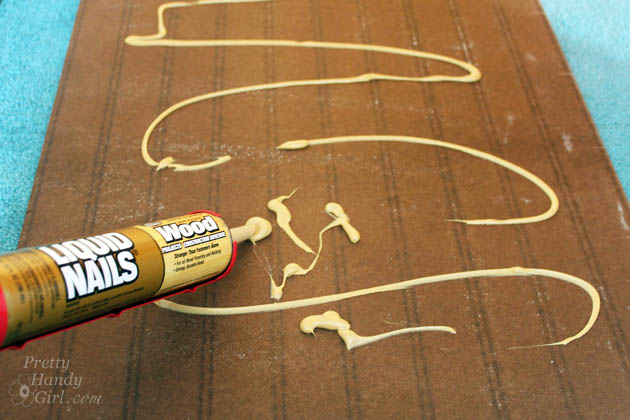
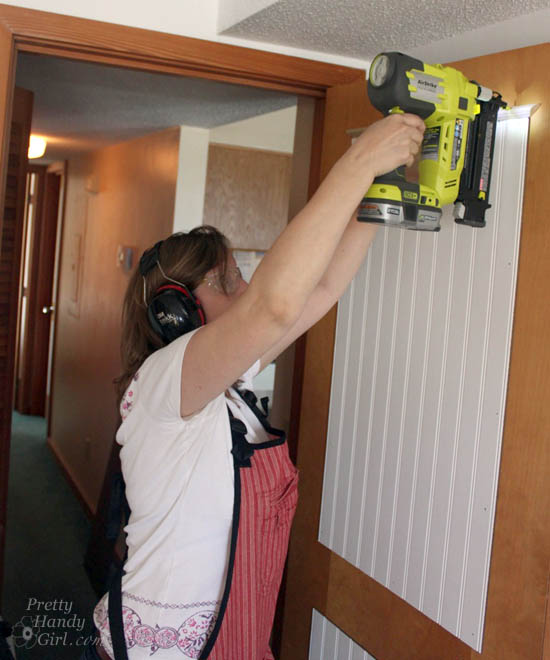
Time to apply the beadboard panels. Squeeze construction glue onto the back of the beadboard panels.
Set the panels on the door and double check the level and plumb of the panel.

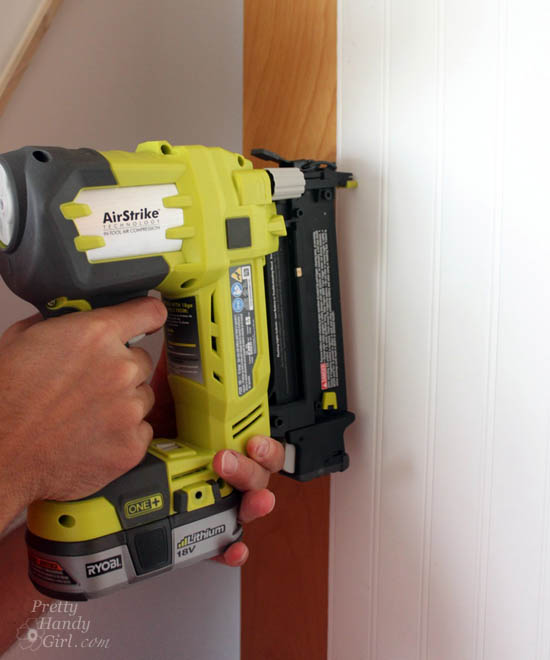
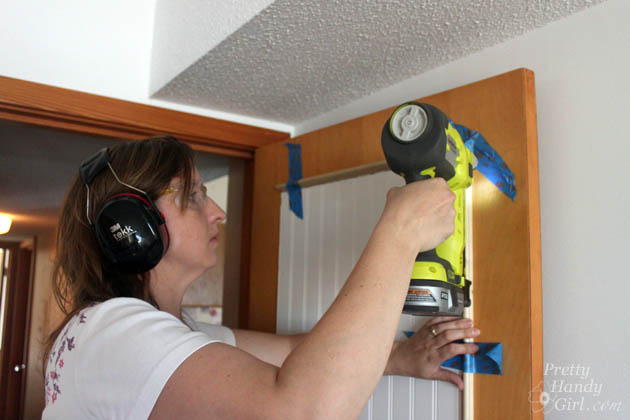
Press the panel firmly to spread the glue. Use the finish nailer to secure the panel around the perimeter.

Attach the lower panel next.
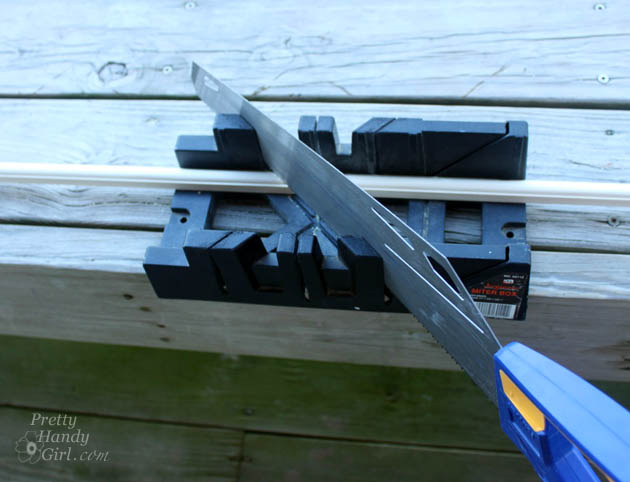
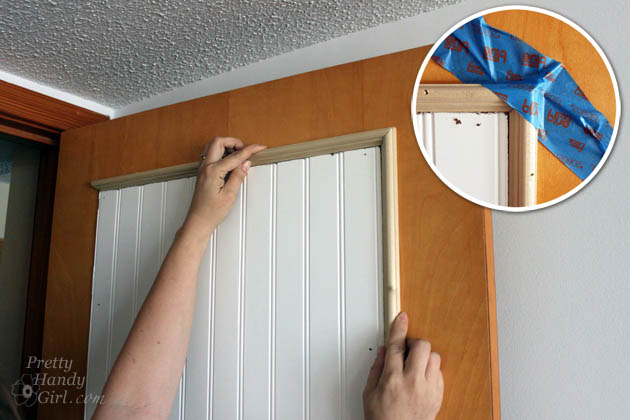
To trim the panel, measure and cut your trim molding to fit around the panel.
Set your top piece in place and secure it with the finish nailer.
Set the side pieces in place. Use painter’s tape to hold the corners tightly. Use more tape to secure the side piece if necessary.
Attach the side molding with finish nails.
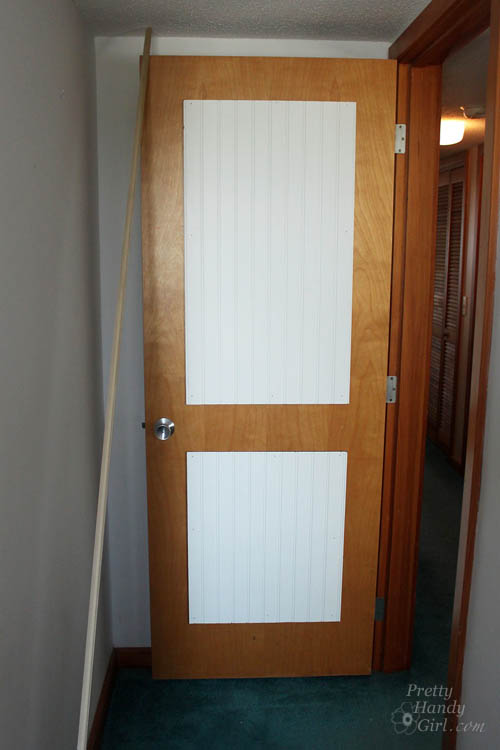
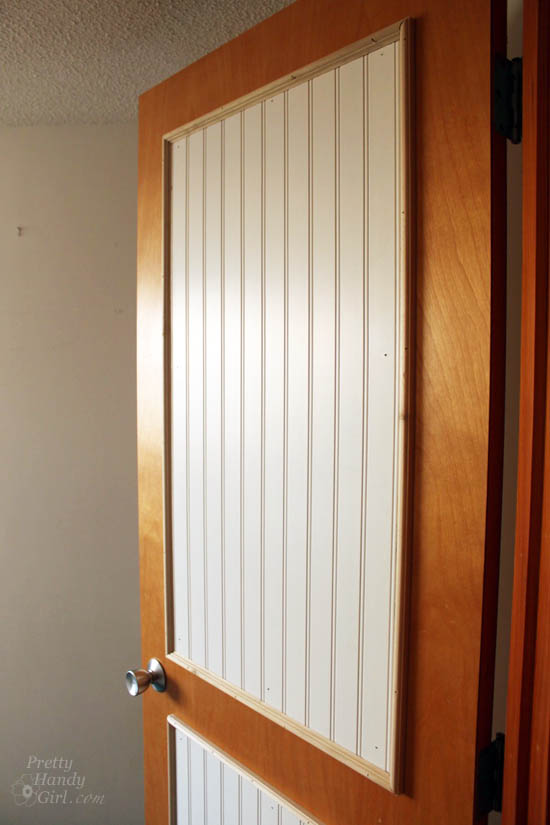
Attach the opposite side and the bottom molding pieces. Putty the nail holes and caulk the seams. Then prime and paint the doors.
Ooolala. How about that transformation?!
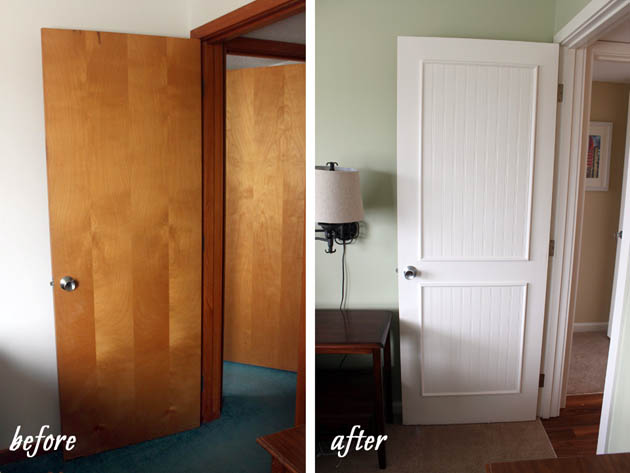
The newly paneled doors make a huge difference in the look of the condo.
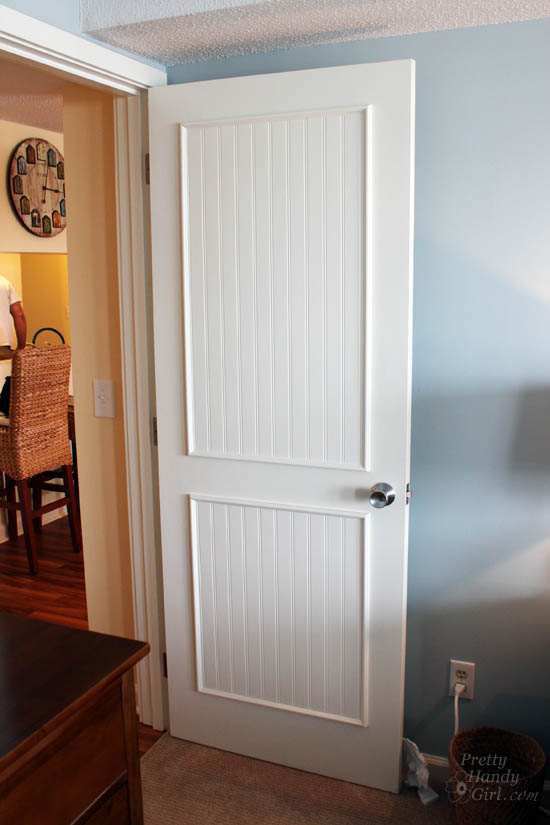
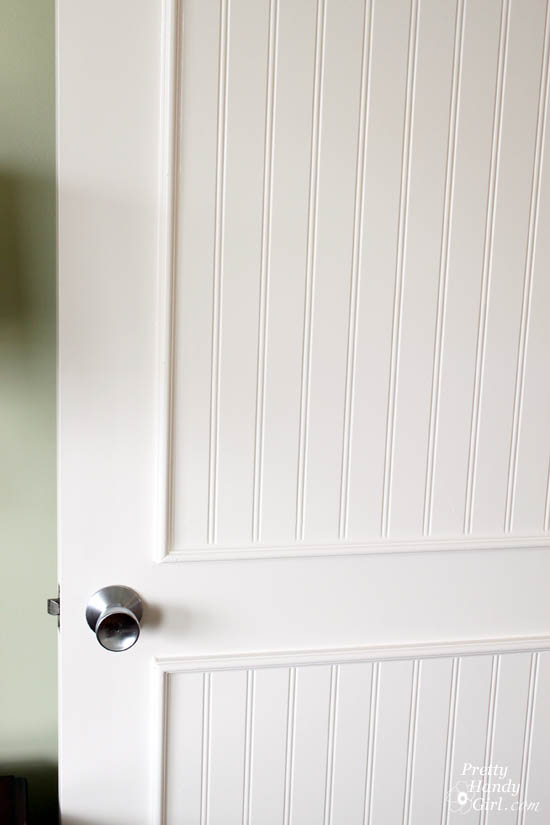
It’s all in the details.
Like what you see? Take the tour of the entire Topsail Beach Condo Renovation for more upgrade ideas.
![]()
Pin for later!

Did you cut the panel to fit within your measurements and the add the trim on the outside of the panel?
I may have missed this, but what is the length of the top board?
Catherine, you need to measure your own door. Here’s what I recommend: “Draw lines 5″ in from the top and two sides of your door. Draw the bottom line 6″ up from the bottom. Finally, leave 5″ between the top and bottom panels.” Then measure the rectangles you drew to get your sizes.
Thank you. My husband explained that he would measure 2.5 inches above and 2.5 inches below center of doorknob to determine where the boards should end/begin. We are looking forward to doing this on our doors. Thanks again!
How did you cut the trim for around the beadboard? I want to do this but I’m not sure if i will know how to cut the trim wwith the angle.
Melissa, I used a miter saw, but you can use a hand saw and a miter box to help cut perfect 45 degree angles.
Just a quick Thank You for posting this project what a great idea! I am just finishing up a door that had seen better days located in my Mom’s Real Estate Office….I made a few additions like I used chair rail trim for the frames, added the wood embellishment and her initials…she almost started crying (for joy) when I revealed it! Keep up the great work and have an awesome summer!
I bet it looks amazing Michael! Thanks for sharing and I like your use of chair rail.
I want to do this!! My doors have like a faux raised wood grain texture to them…do you have any suggestions of how I could fill them in first?
oops… just saw that you already answered this
I know I’m quite late on a response, but I came across this site when trying to update my flat doors. Although I used glue and hand pounded nails instead of a gun, I used many of the same techniques you described above. Thank you so much for making this site. I did two doors in my kitchen just
Ike this and they look awesome!!!
This is an awesome idea. I am getting ready to redo my bathroom and this is perfect for my doors. My only problem is my doors are not flat doors. They have the raised “grain” in them. Any suggestions on how to deal with that along the sides? I hate them but would like to save some money.
Thank you for your posting. I just found you through another post from Pinterest. i will be checking out the rest of your projects.
Sandy, although it will take some time, you can wood putty all your wood-grain and then sand smooth when it’s dry. Then prime and paint after adding the moulding.
others have really said it all. just wanted to add my WOW to the conversation. lots of terrific ideas but the doors have to be the most bang for the buck. I am wondering how it would look with a wood stain look rather than paint. my hsb is usually in horror if I mention painting anything that starts out life looking like wood.