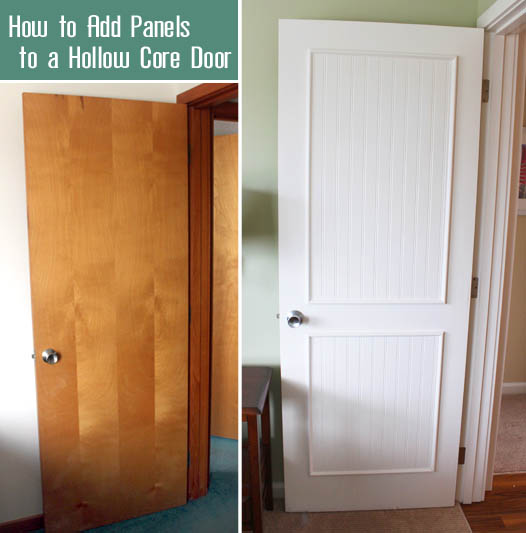
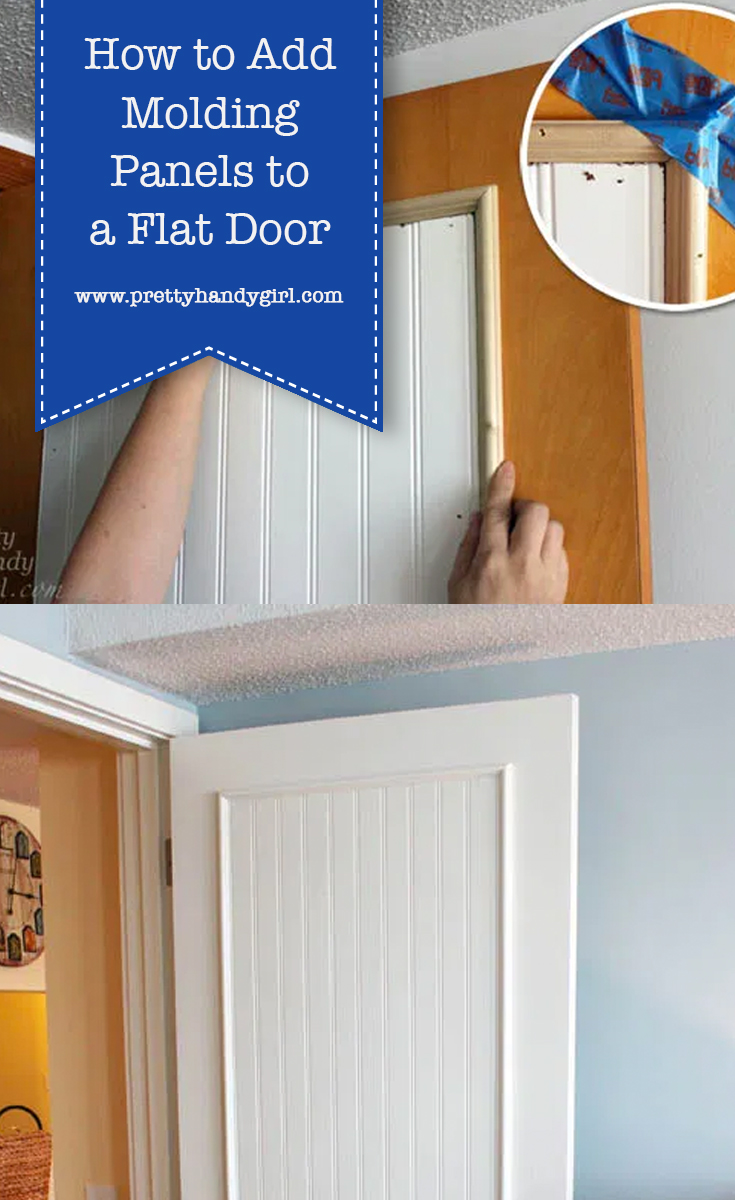
How to Add Molding Panels to a Flat Door
When my sister brought me on to the Topsail Beach condo renovation, she had a laundry list of DIY projects she wanted me to complete. One of them was dressing up the hollow flat doors with moulding panels. She showed me a pin that led to One Life to Love’s DIY beadboard panel doors. After seeing the photo, I knew it would be a great DIY upgrade to make. But, we decided to use real beadboard (instead of beadboard wallpaper) because it had to hold up to the stress of being a rental.
To Begin:
Start by measuring and marking the doors to determine the size of your panels.
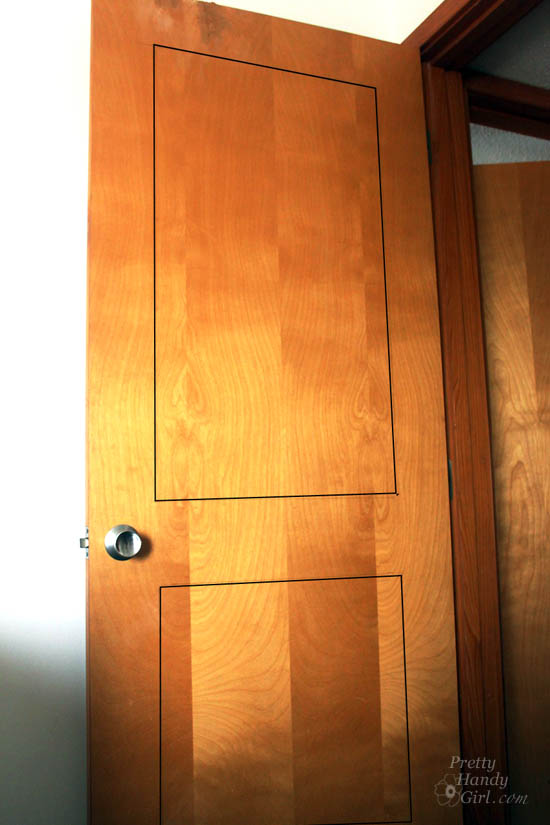
Draw lines 5″ in from the top and two sides of your door. Draw the bottom line 6″ up from the bottom. Finally, leave 5″ between the top and bottom panels.
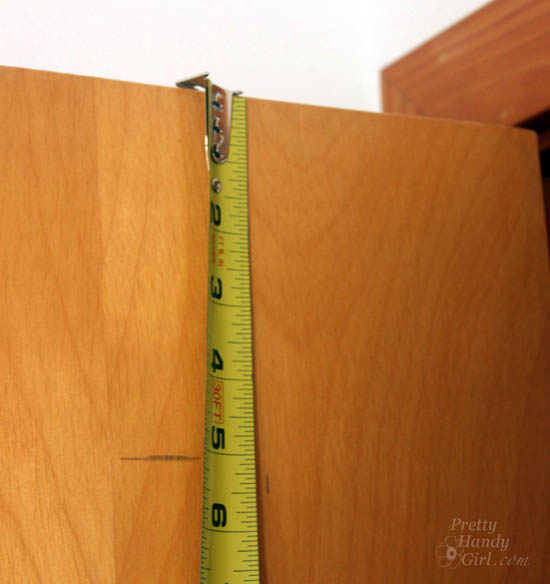
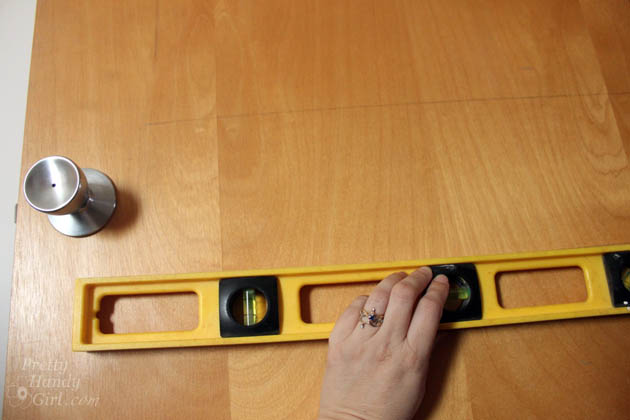
When marking your doors, use a pencil and level to draw your lines.
After we had our panel measurements, Caitlin and I headed to Lowe’s. But, she refused to push me in the cart (party pooper!)

We pulled some 4′ x 8′ beadboard panels and took them to the lumber cutting area. We gave the Lowe’s employer our measurements and asked him to cut the boards for us. While he cut our beadboard, Caitlin and I gathered the rest of our supplies.
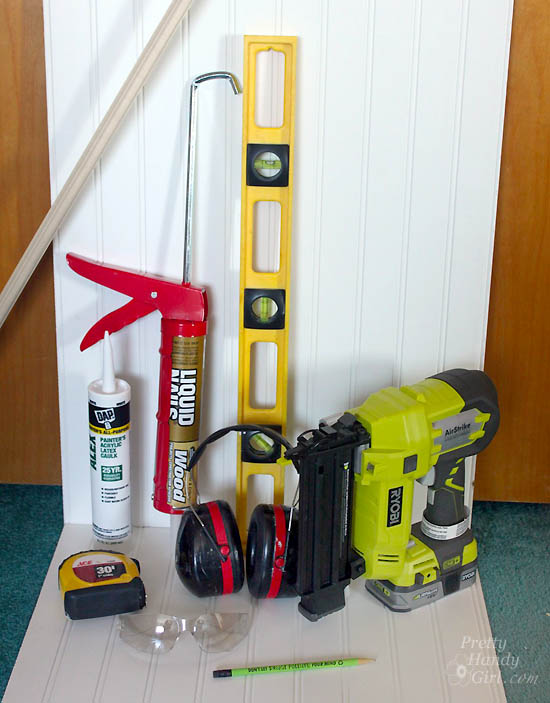
Materials:
- Beadboard panels
- Moulding to frame panels
- Tape measure
- Pencil
- Level
- Construction glue
- Latex paintable caulk
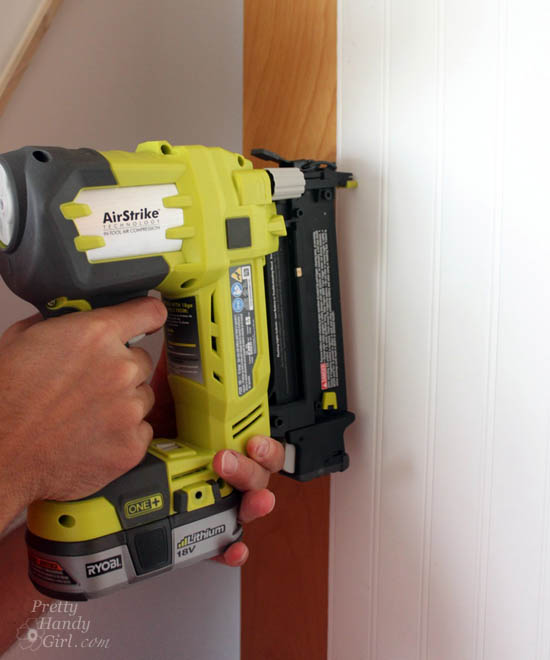
- Finish nailer
- 1 1/4″ finish nails
- Painter’s tape
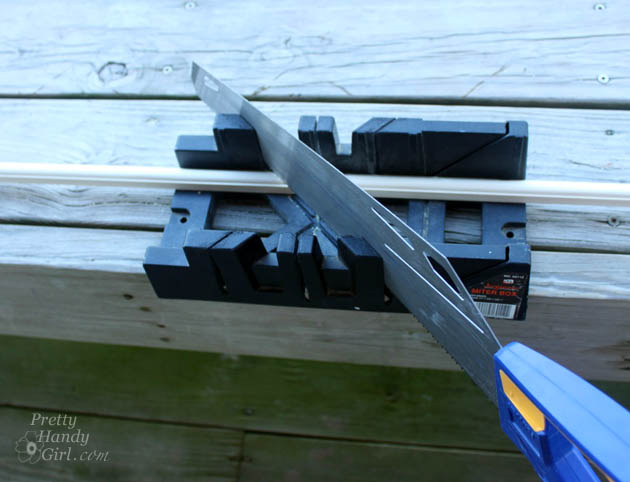
- Hand saw
- Miter box
- Eye protection
- Hearing protection
- Plastic wood putty
- Putty knife
- Sanding block
Instructions:
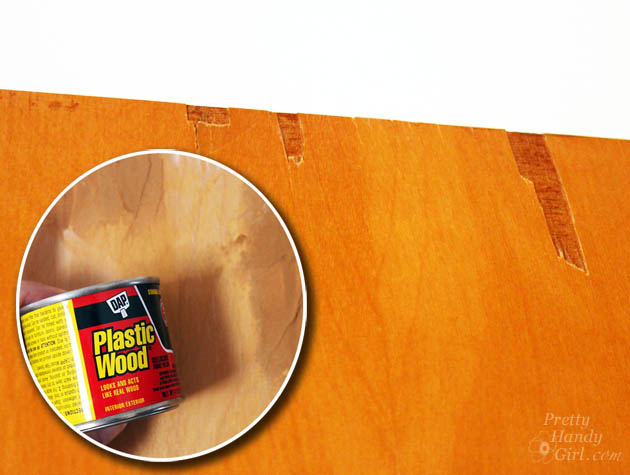
Assess the condition of your door. If there are chips or dings, you need to fix them before proceeding.
Apply wood putty and allow it to dry.
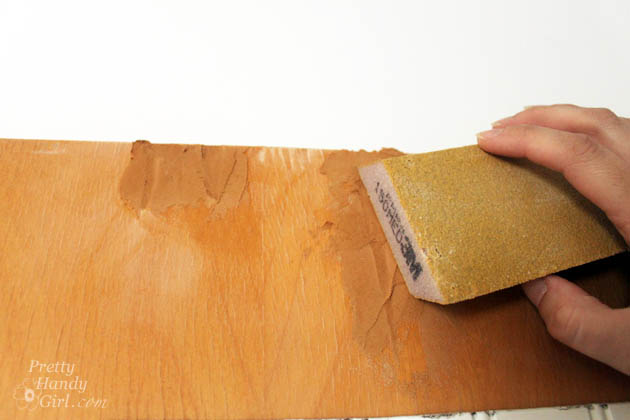
After dry, sand the putty smooth.
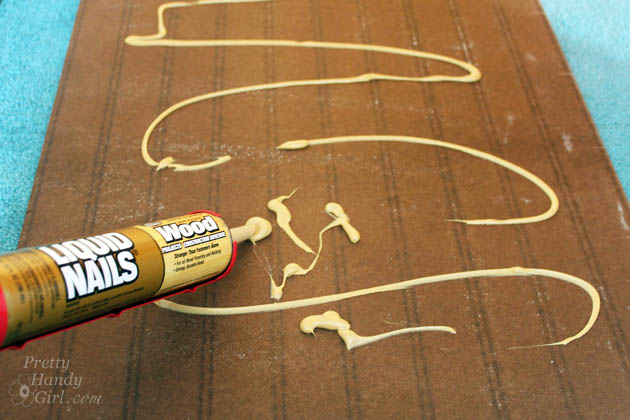
Time to apply the beadboard panels. Squeeze construction glue onto the back of the beadboard panels.
Set the panels on the door and double check the level and plumb of the panel.

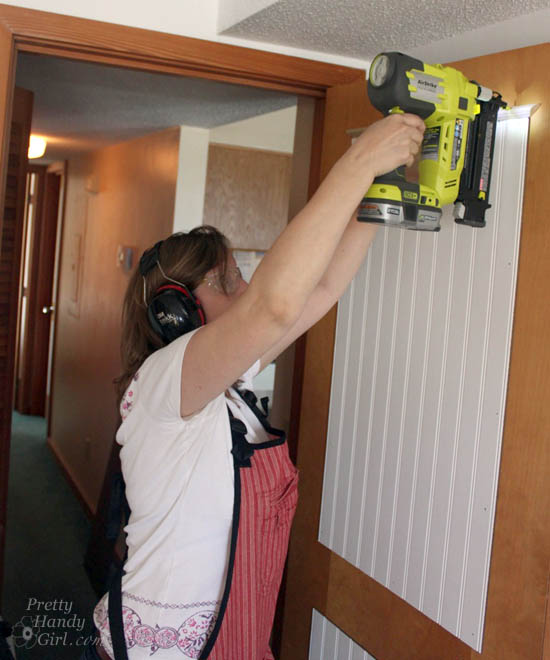
Press the panel firmly to spread the glue. Use the finish nailer to secure the panel around the perimeter.

Attach the lower panel next.
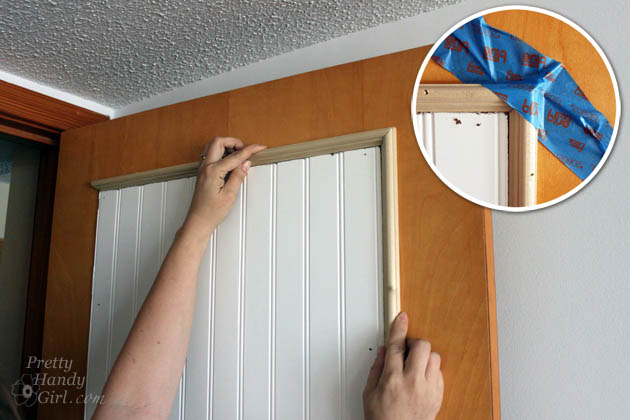
To trim the panel, measure and cut your trim molding to fit around the panel.
Set your top piece in place and secure it with the finish nailer.
Set the side pieces in place. Use painter’s tape to hold the corners tightly. Use more tape to secure the side piece if necessary.
Attach the side molding with finish nails.
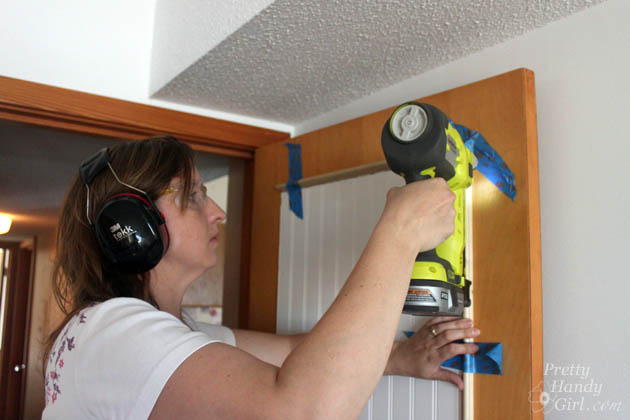
Attach the opposite side and the bottom molding pieces. Putty the nail holes and caulk the seams. Then prime and paint the doors.
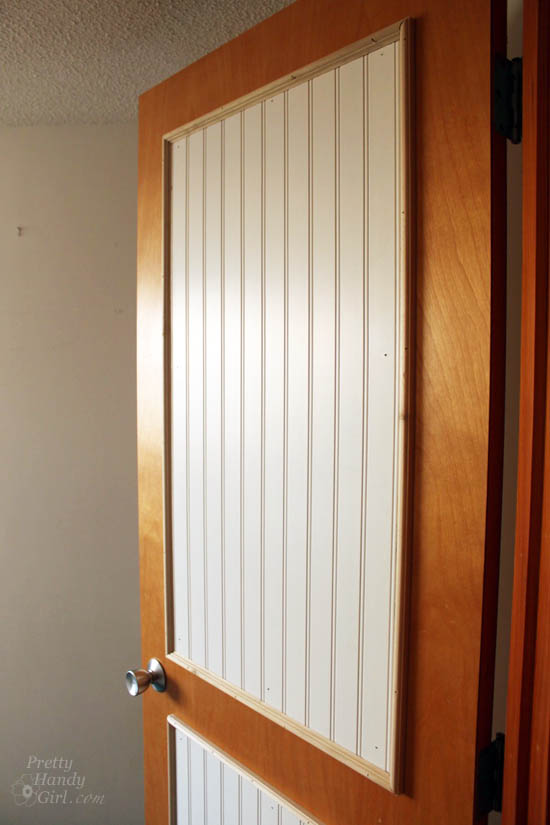
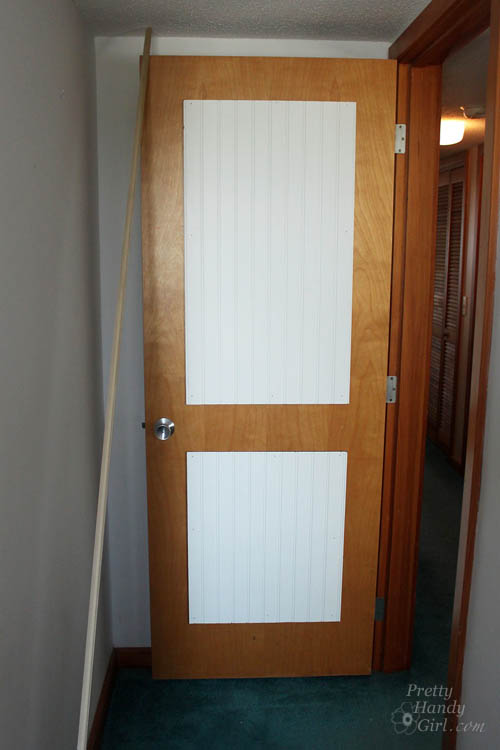
Ooolala. How about that transformation?!
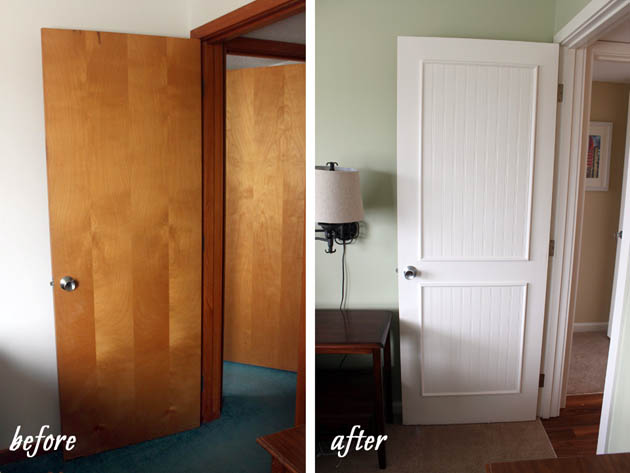
The newly paneled doors make a huge difference in the look of the condo.
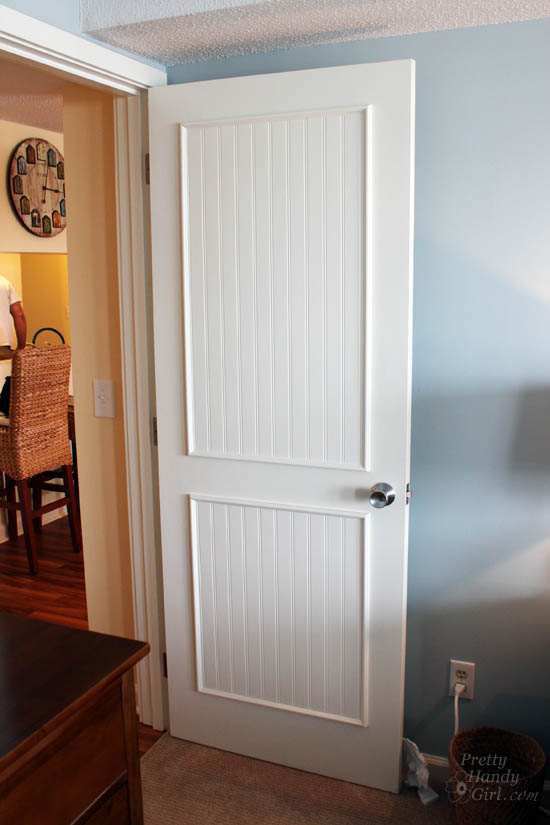
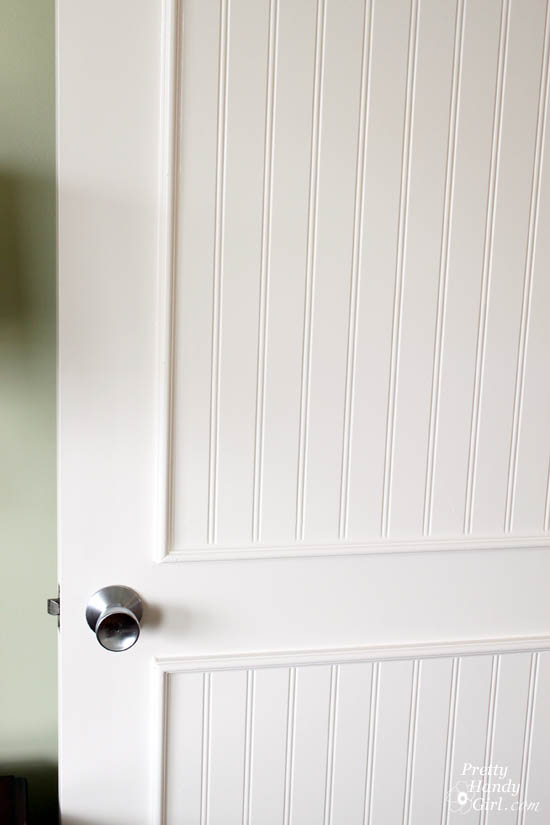
It’s all in the details.
Like what you see? Take the tour of the entire Topsail Beach Condo Renovation for more upgrade ideas.
![]()
Pin for later!

That is a pretty awesome project and the result is amazing! I’m in a new home and don’t need to do any update projects like that, but it’s so fun seeing a transformation like this. The finished door looks like it was made that way.
Nancy
Beautiful transformation on the doors Brittany! I love the beadboard. I would have to buy a finish nailer to do this to my doors and I notice there are different gauges, like 16, 18, 23 gauge. I assume that refers to the size of the nails. Can you give us some advice on how to choose a decently useful but not too expensive finish nailer? Like what gauge is most useful and any other features to look for. Thanks very much. I too have those ugly brown doors and I don’t want to just paint them. I’ve seen pictures of doors with trim added, but the beadboard makes them look so much more special. Thanks for the great idea!
Sharon, yes, gauge is the size of the nails. The higher the number the smaller the nails. I actually did a comparison post on finish nailers. I will be publishing it next week so stay tuned!
🙂
What did you do to the inside of the doors? Just paint them white?
Kelly, yes, we didn’t trim the inside of the doors because we were on a tight budget and were mainly trying to improve the view from the boring hallway of doors. So, yes, we just painted them white.
Amazing. Beautiful. You must look for reasons to walk through those doors, just so you can admire them. Great job!
Do you know what the approximate cost was? And did you do both sides? I have been considering this but a new door is approximately $75 and I started adding up the cost of the trim and other materials and factoring in time and I came up with a figure close enough to the cost of just replacing the door that I thought I must have added everything up incorrectly! I have 9 doors in my house and would want to do both sides for at least 6 of them, so 12 sides and trim….
Thanks!
Chelsea,
We only did the outside of the door that faced the hallway. The insides are just painted white. I’m checking with my sister who purchased the supplies, but I think the cost was definitely cheaper than buying new doors. I will reply when I get the actual cost. And, this is a lot easier than hanging a new door in existing door jamb. And even easier than removing and hanging a new pre-hung door. Plus, I hate to throw things in the landfill, so this is a perfect project that has little environmental impact.
Chelsea, I did a rough estimation on cost, and it cost approximately $25 per door (not including paint.) One 4×8 sheet was cut into 6 panels for three doors. And the molding we used wasn’t very expensive. The other supplies: glue and nails, etc. were minimal cost. And because we already had the tools, I didn’t count that into the estimate.
What size panel I need for door 30/80
Arthur, Draw lines 5″ in from the top and two sides of your door. Draw the bottom line 6″ up from the bottom. Finally, leave 5″ between the top and bottom panels. Then measure your lines to give you the dimensions for the panels you need.
Beautifully done! Thanks for the details on this project!
Awesome idea that I could use in a rental I have. I’ve always hated the hollow core doors & this is a great solution to replacing them. Awesome post!
I wish I had seen this about a year ago!! It would have saved me a lot of money in new doors!! Love this idea and if I ever move into a house with plain doors, this will be done to them!!!!
Great transformation – love the bead board!
I have a silly question, one I’ve wondered about many times – How does anything nailed into a hollow core door hold?
Tati, the small nails will only hold if you angle them when shooting them in. If you angle them at different angles around the beadboard, they will hold fairly well. But, you’ll also notice that I used construction adhesive for added hold on the beadboard.
Oh my goodness! I love this! Thank you for sharing this. I’m doing a redesign on my closet this weekend, I’m going to do this! Thanks so much.
This could not be better timing! I just added this project to my list last week. I love the addition of the beadboard. Thanks!
I love this. I need a make a list of projects and then I need to make it happen. I love this and I think this is awesome. Hi, I am 21 and I work full time, how do you find time to get all your projects done. I am a beginning DIYer any advice?
Brittany, well, considering this blog is my full-time job I make time to finish projects. But, I also make sure to make time for my kids. I don’t watch much TV and I rarely sit still (except when writing posts.) Also, like the HGTV shows, what takes you 5 minutes to read in real life takes several days. But, this is my passion, I love transforming the ugly to beautiful.
Ha ha… I love the door makeover, but even more I LOVE the pic of you in the shopping cart!! I’ll totally push you through the Lowes in a cart any day! Ha ha!!
I kind of thought you’d be the type to do this for me ;-). Next time my friend, next time!
What a great looking project! We’re breadboard fans too. To think I just replaced all our flat doors with six panel doors, when I could have done this instead.