Add Decorative and Functional Gate Hardware
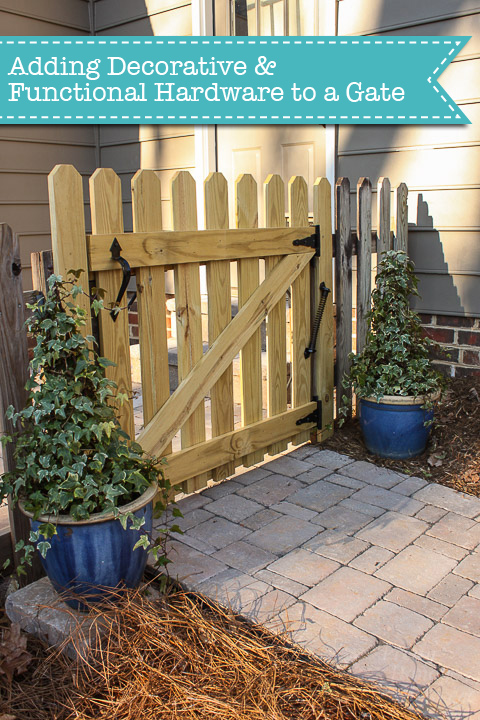
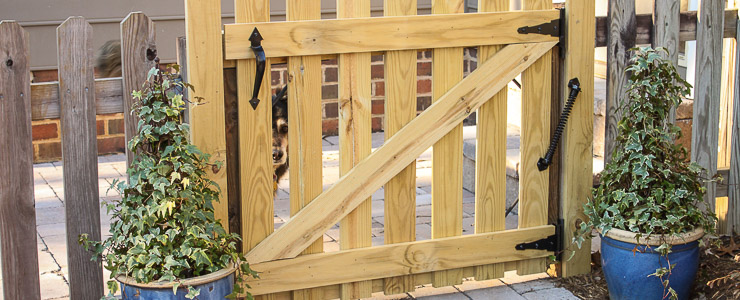
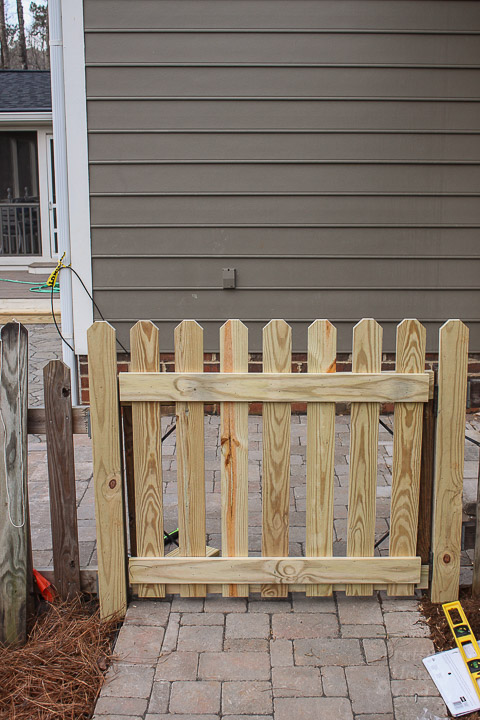
Earlier I showed you how to build a rock solid gate. The gate was solid, but not very attractive or functional. Today I’ll show you How to Add Decorative and Functional Hardware to Your Gate. This will take that ho-hum gate and turn it into a more attractive entrance to your yard. I’ll also show you a few pieces of hardware that will turn your gate into a self-closing and latching gate. This is a must have, especially if you have children and pets.
I’m honored to be representing National Hardware as a brand ambassador this year. I have been compensated for my time and for creating this sponsored post. I’ve been using their hardware for years on our exterior gates and fences. I can honestly say that they continue to hold up to the elements and work as well as when I first installed them.
Ready to get started? Here’s what you’ll need.
Materials:
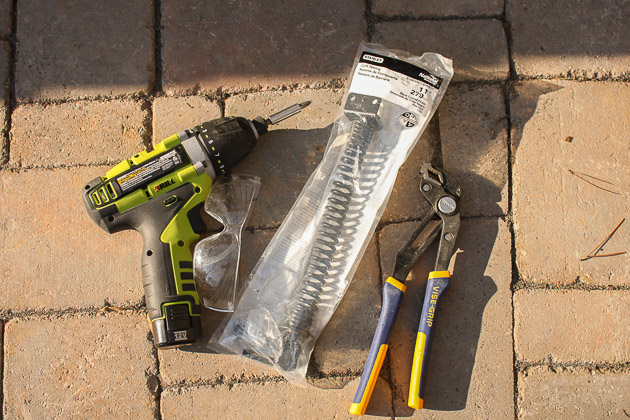
- Drill with philips head bit
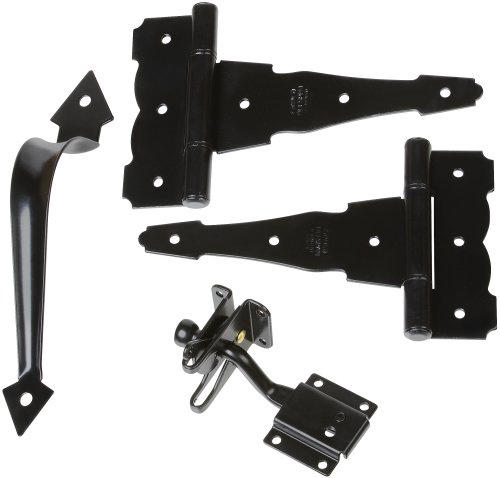
- Decorative Gate Kit
- Self-closing Gate Spring
- Eye protection
- 4″ x 4″ x 2″ block of wood (optional)
- Pliers
(I’ve included affiliate links for your convenience. I earn a small percentage from a purchase using these links. There is no additional cost to you. You can read more about affiliate links here.)
Instructions:
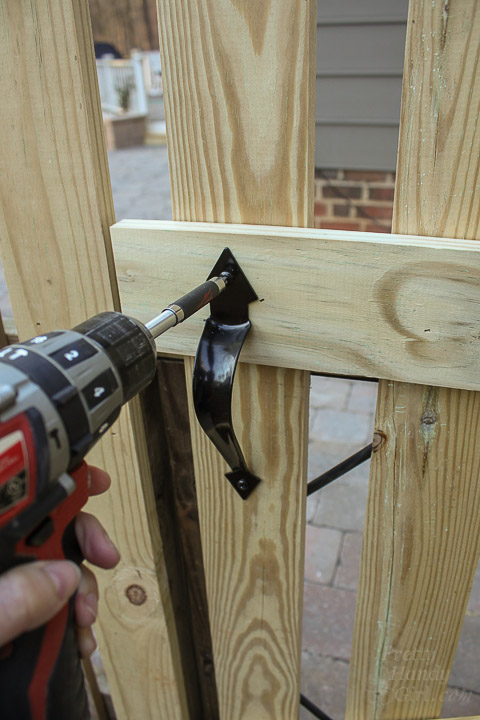
Determine which way your gate opens (inward or outward.) Also determine where you want to locate the handle and separate latch.
I chose to attach the gate handle to the side of the gate that pulls toward me.
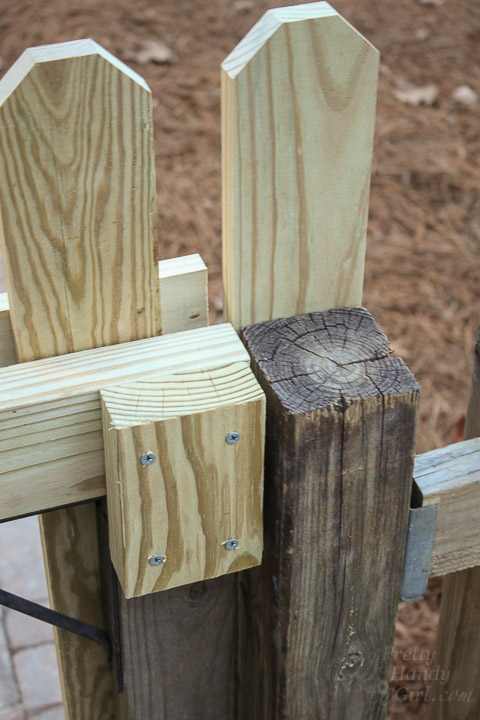
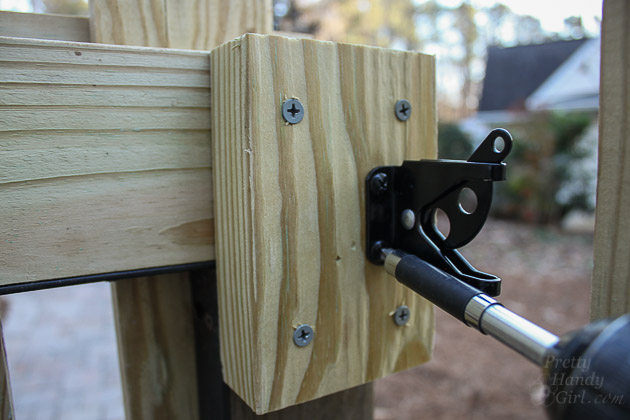
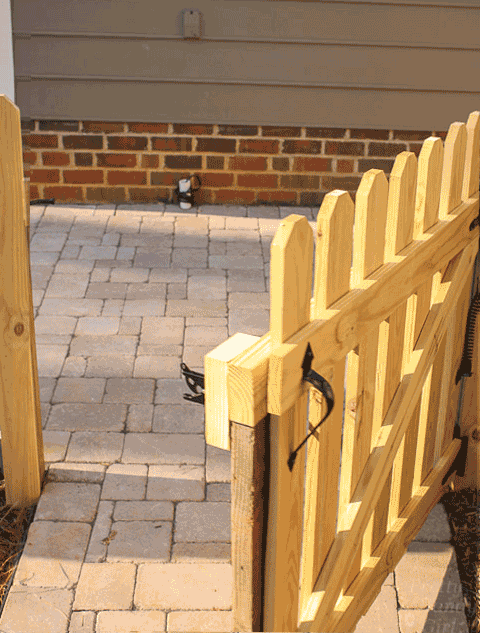
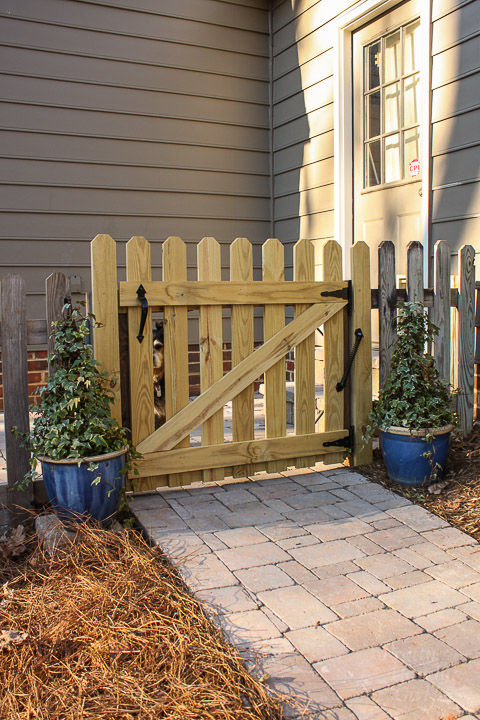
My gate has built in hinges in the gate frame, but I wanted to add extra charm to our gate by attaching decorative hinges to one of the exterior cross supports.

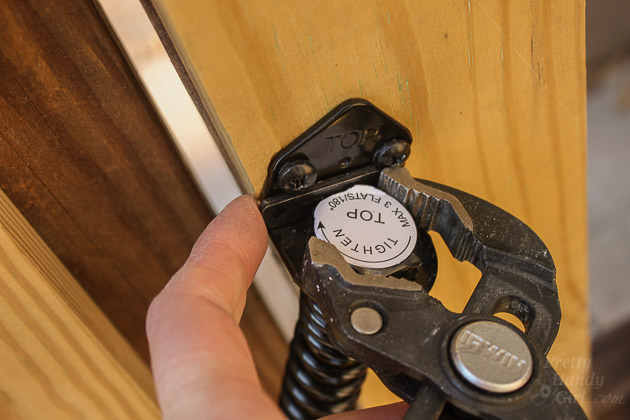
For our specific usage, I installed the latch on the inside of our gate so it won’t be visible to passersby. To bring the latch to the correct depth, you may need to install a scrap wood block onto the back of the gate support.
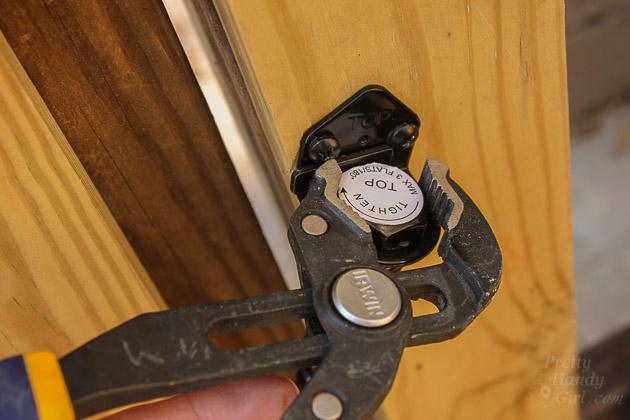
Install the latch onto the outer post. (If you are installing onto the outward opening side, install your latch onto the gate.)
Hold the catch against the latch to determine the proper installation location.
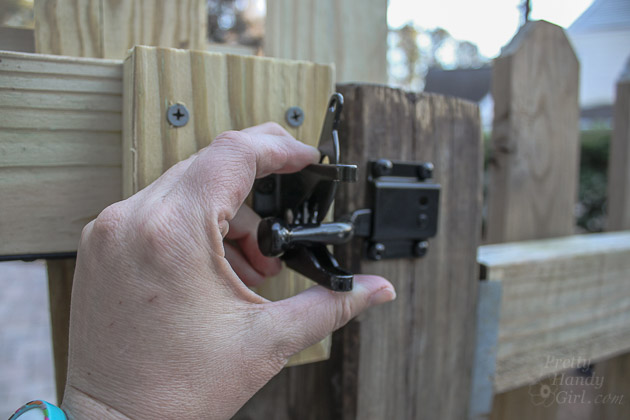
Attach the catch using the provided screws.
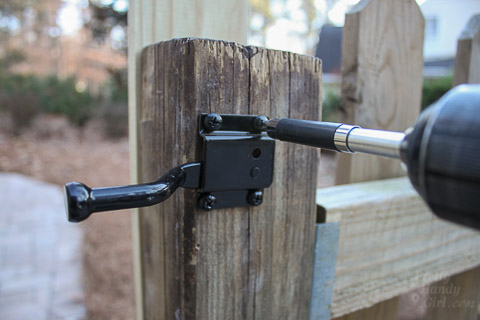
Luckily, the National Hardware latch has a flexible design that compensates for gate sag (or poor catch installation.) When the gate is closed, it will automatically latch.
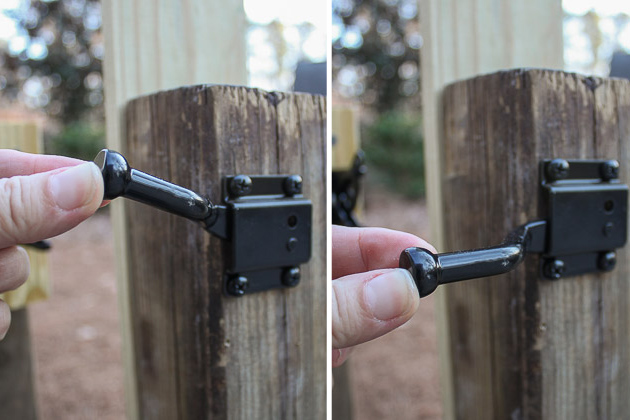
Here’s how the gate closes with the latch on the inside:
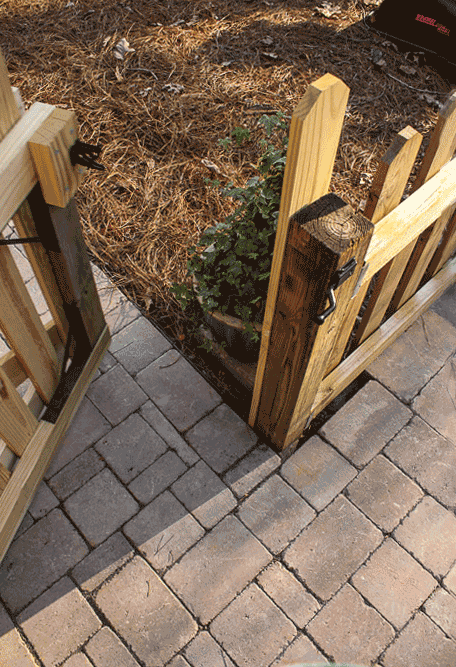
Unfortunately, the gate won’t close itself. If someone is caught up in a high stakes game of tag the gate will inevitably be left open. That’s when Handy Dog will take advantage of his new found freedom. (Luckily he won’t run away, but he will take a field trip to the creek and come back wet and dirty.)

National Hardware has a nifty product that will close the gate every time (no matter how fun that game of tag is!)
Installing a Self-Closing Gate Spring:
Remove the spring from the package and hold up against the hinge side of your gate. The top should be on the side support post, the bottom on your gate.
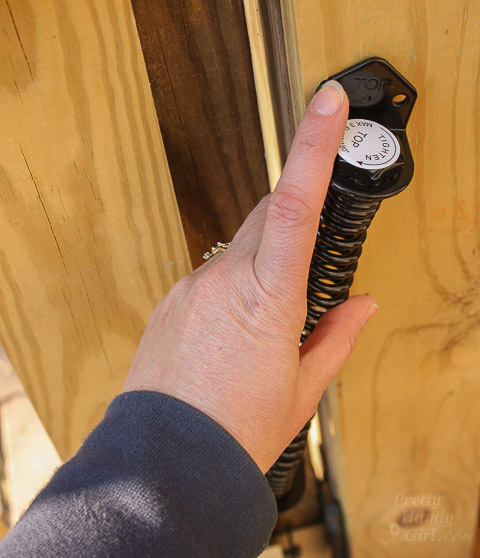
Attach the top with the provided screws.
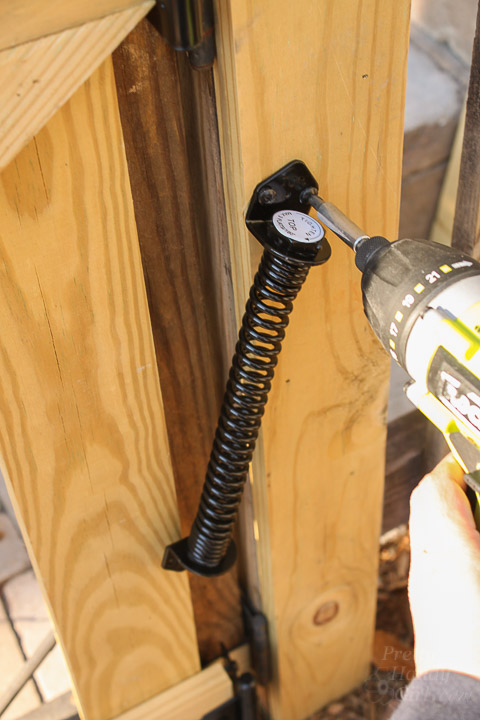
Attach the bottom to the gate with the provided screws.
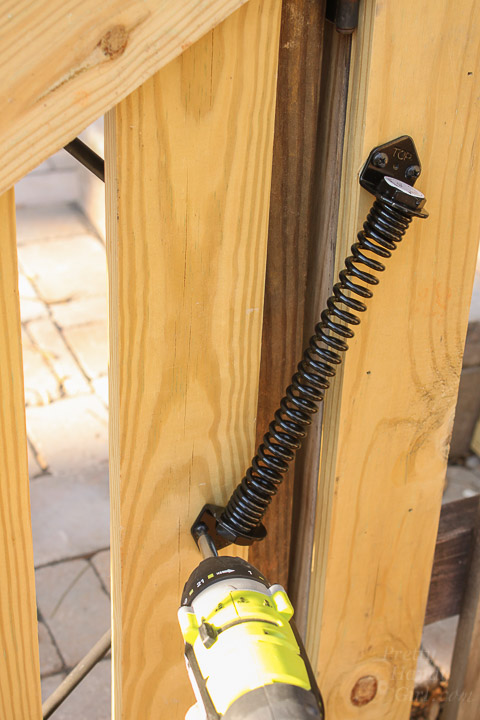
The spring should look like this.
Use the pliers to turn the top of the spring 1-2 flat sides (depending on how heavy your gate is.)
Slip the provided metal bar behind the top nut to hold it in place.
Test your gate by opening it and let ‘er fly! If the gate doesn’t close completely, turn the top nut one more notch. If it slams too hard, loosen one notch.
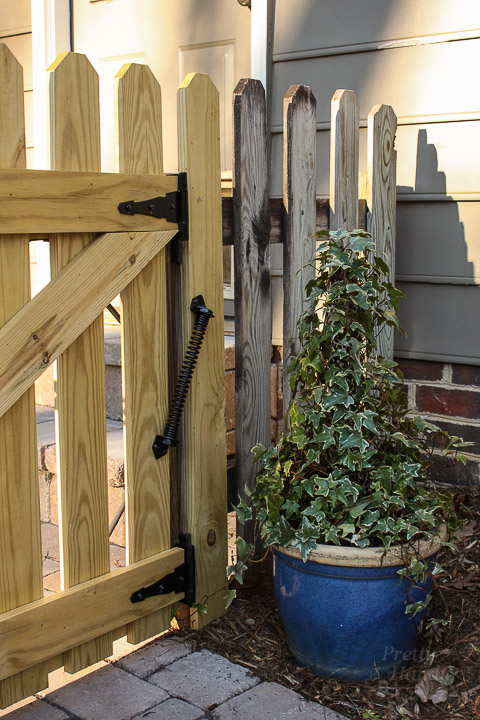
And that’s How You Add Decorative and Functional Hardware to Your Gate!
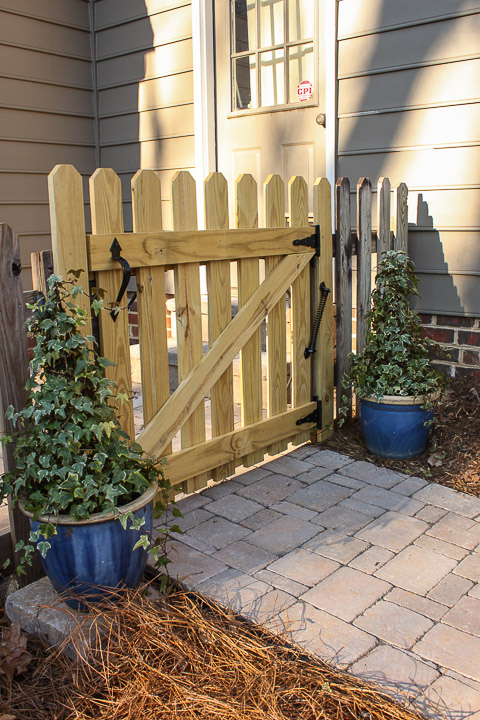
I’m relieved I don’t have to nag my kids to close the gate anymore.

Of course Handy Dog is less than thrilled.
It’s a tough life that Handy Dog has ;-D.
![]()
Disclosure: This is a sponsored post for National Hardware. I was provided complimentary hardware and was compensated for my time and efforts to promote National Hardware. I was not told what to write. All opinions are my own. I am particular about the brands I represent and will always let you know when you are reading a sponsored post.


Hi Brittany – can you please tell us how you open the gate from the handle side? Do you have to reach over the gate and lift the latch?
On this specific latch, yes, I just reach over.
Is your gate sagging yet? The diagonal brace should go from low hinge side to upper latch side to support weight of outside of the gate.
No, it’s not because that’s just a decorative cross piece. The frame has diagonal support from all corners using the gate kit as shown in this post: https://prettyhandygirl.com/build-rock-solid-gate/
But, thanks for your input. I’ll keep it in mind if I ever build another gate without the gate kit.
I don’t know why I didn’t think to put a spring on our gate. The kids and dog will be happy soon!