Saving Etta - One Woman's Journey to Save a House Built in 1900 | Pretty Handy Girl
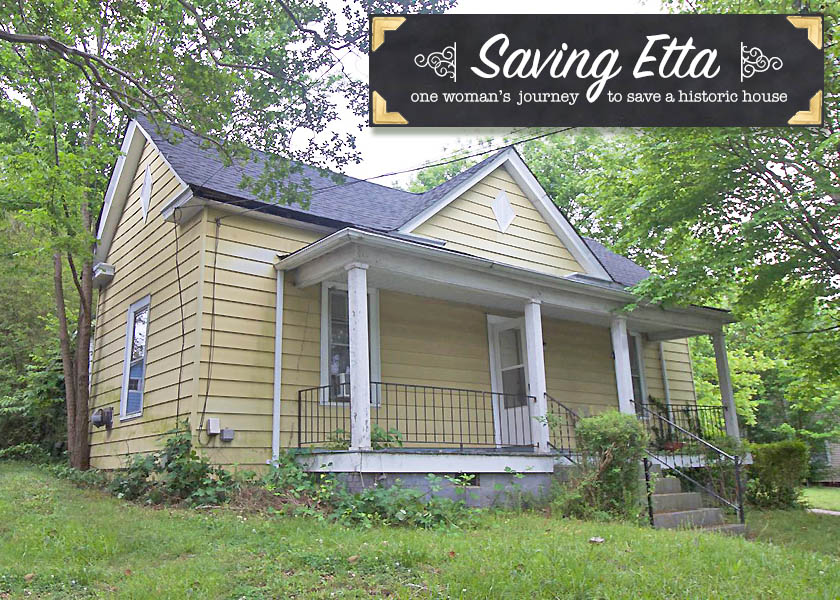
Saving Etta: Chapter 10: The Freezer

This is the true story about a house built in 1900 that is in serious disrepair. It’s also the story about my journey toward becoming a general contractor and my attempt to save a home from being bulldozed. I hope you’ll follow along as I embark on a journey into the unknown perils and rewards of flipping a home in downtown Raleigh, NC.

If you are just joining the story, you may want to read all the Saving Etta chapters for more of the back story.

Be sure to follow me on Facebook and Instagram as I share live updates about this project I’m calling Saving Etta.

It had rained all night and I was up most of the night dreading what I’d find when I walked back into Etta’s interior rooms. Would it be a few drips or huge puddles of water on the floor? In the morning the rain had not quit and as I drove downtown it continued to intensify.

I pulled into the driveway of my investment house and was greeted by a bright orange and yellow port-a-potty that Mike had ordered for me. I laughed to myself thinking, “Awesome, my first bathroom is installed!”

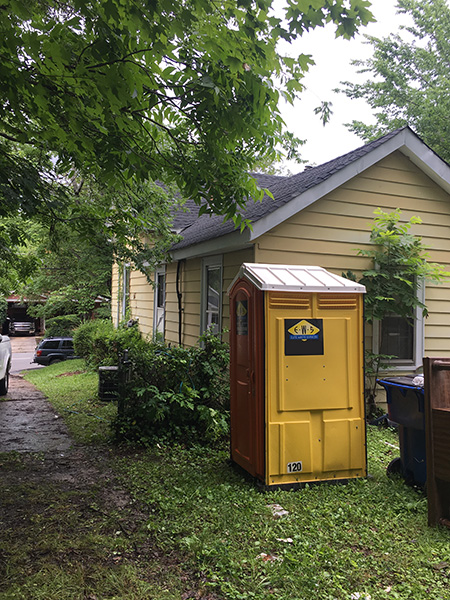
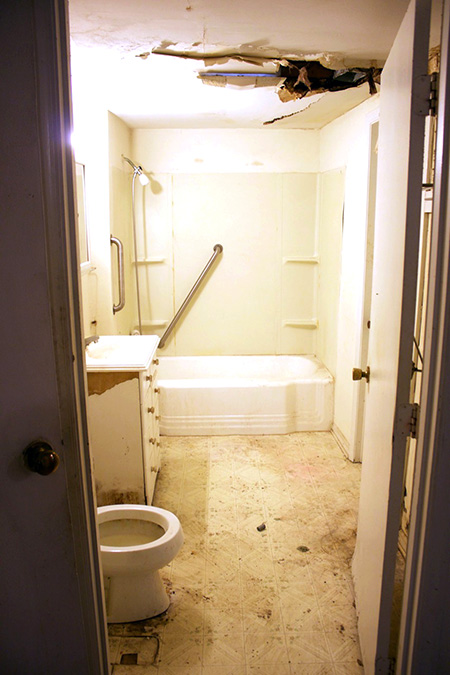
I never thought I’d be so excited to see a port-a-potty, but honestly I couldn’t stomach using the bathroom inside the house. The floor around the toilet was sopping wet, black mold lined the walls, and the ceiling was about to cave in. The port-a-potty was definitely a step up.

Even though the port-a-potty was newly serviced and delivered, there was a thin layer of dust on all the surfaces. It would be fine for all the male tradesmen, but not for me. A quick wipe with some Clorox wipes freshened it up to my standards.

“Ahhh, much better.” I thought. Laughing again that I was so happy to have a port-a-potty.

As I opened the front door, the familiar mold smell hit my nostrils. As expected, I found some puddles in the back utility room, but the front room and hallway appeared to be dry. My cell phone rang from my pocket and as I answered it a voice said, “Mrs. Bailey, this is Raymond. I’m running a little late, but I’ll be there soon”

“Thanks, but who is this?” I questioned the caller.

“It’s Raymond with Junk to Dump.” he replied.

I was momentarily confused, but then remembered I had scheduled a junk hauling company to come out the day after closing.

“Oh good, I have a lot of things for you to take away.” I said.

He was quiet for a second, then asked me exactly what he was picking up.

“Mostly junk, some appliances, carpeting, old car batteries, and leftover stuff in the crawlspace.” I said matter-of-factly (worrying that he might back out of the job.)

Undeterred, he said he’d be there soon. After a good thirty minutes Raymond called back and said, “Are you there?”

“Where?” I asked.

“I’m at your house.” He said and then read off my home address.

I smacked my head, “No, that’s my home. I need you at the jobsite downtown.”

Raymond and his helper arrived 30 minutes later. Raymond was a handsome African American with a thousand watt smile. His teeth were perfect. Having worn braces for 5 years of my teenage life, I tend to notice extraordinarily perfect teeth. He seemed super friendly and ready to get started.

Walking around the house with Raymond, I pointed to piles and the ripped up carpeting that needed to be hauled off. When we got to the back of the house, I pointed at the chest freezer. “And that needs to go too.”

“Is there food in it?” he questioned.

“I’m not sure, there was last time I opened it. But I won’t open it now or it will stink up the whole house.” I explained.

“Uh uh.” Raymond shook his head. “No way, I don’t take food. And I certainly won’t take that moldy freezer.”

I couldn’t believe it. The junk hauler had found something he wouldn’t haul! Not that I could blame him, the freezer was pocked with black moldy dots.  But, I was desperate to get the freezer chest out of the house. So, I made him a deal.

“If I empty it and clean it, do you promise to haul it away?” I asked, extending my hand for him to shake.

“Okay.” he agreed.

I was sure he only agreed because he felt certain I wouldn’t touch the freezer with a ten foot pole.

We headed back toward the front of the house where I remembered to ask Raymond if he had insurance.

He replied, “Oh yes, a 5 million dollar policy.”

Okay then. Glad that’s the case. I thought to myself.

Raymond and his assistant made quick work of one of the rooms removing the piles I had pointed to.

“Shoot!” Raymond yelled and pulled up his pant leg to reveal a small hole that was oozing blood. I looked down at his feet and saw a jagged section of broken mirror that was protruding out of the bag he was holding.

“I have a first aid kit in the car.” I offered. At the truck I pulled out the first aid kit I had the foresight to purchase at the drugstore the day before. (As a previous Girl Scout, I strive to always be prepared.) A split second later, I realized my first mistake. I had not asked for a copy of Raymond’s insurance policy. I hoped to God that he really did have insurance and wouldn’t sue me. Mentally I made a note to get the insurance policy copy or call the insurance company next time!

Raymond cleaned his cut with soap and water. But, we discovered no neosporin or alcohol wipes in the kit. I handed him the hand sanitizer and told him to rub some on the cut. “It will sting.” I warned

Amazingly Raymond barely winced. Most men I knew would make a stink about it, but not Raymond. This guy was tough.

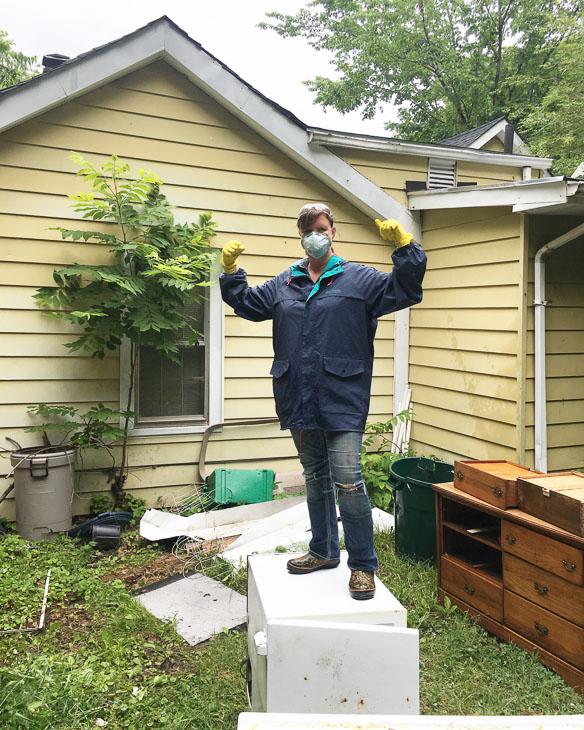
After helping Raymond, I suited up to tackle the freezer chest. I pulled on a rain coat, full coverage safety goggles, disposable dish gloves, and a respirator to cover my nose and mouth. I walked to the back with a purpose, ready to do battle with one moldy freezer chest and whatever lay inside. I looked very much like a surgeon heading into the OR. This was one job I was determined to complete come hell or high water.

I opened the freezer and knew what I’d see. It was filled with TV dinners. I began throwing them into the contractor grade trash bags being careful as the damp cardboard boxes threatened to fall apart.

Through the top layer of TV dinners was a layer of deli packaged ground beef and pork chops. Several of the thin cellophane wrappers were punctured and I barely recognized the cuts of meat displayed on the styrofoam trays. At purchase they were probably red, but now they were gray and green. The bile started to rise in my throat, but I swallowed it back down.

I took a deep breath inside the respirator, making a sound like Darth Vader, and dove my gloved hand into the chest. I fished out a rotting flank steak, pork chops and a whole chicken. I found a few popsicle boxes with just sticks and wrappers. Obviously the sugary treat had thawed and spilled out of the wrapper long ago.

As I hauled a whole chicken out of the freezer, I almost dropped it. Beneath the chicken was a pool of bloody brown-red liquid. If it wasn’t for the respirator blocking the odor, I surely would have vomited. I took another deep breath and continued dipping my gloved hand into the liquid fishing for more food. Finally all that was left was a brown and red pool of meat juice. I grabbed an empty Cool Whip tub and began scooping out the liquid and dumped it directly into the trash bag. When I could barely lift the bag I tied the top closed and dragged it into the back yard. Then I proceeded to fill another trash bag with just the liquid garbage.

After hauling the second bag outside, I quickly sprayed the exterior of the freezer chest with a bleach cleaner and wiped off the mold spores. Then I tossed the dirty paper towels into the trash and left the room in search of Raymond.

“Okay, I’m done.” I declared, as I found him muscling more trash bags into his work van.

He stared at me, the surprise barely hidden from his face.

“You emptied that whole freezer chest?” He asked surprised.

“Yes, all done.” I replied ripping off the gloves and respirator.

He paused a moment and then said, “I’ve only met one other woman as tough as you in my life.” He explained, “And the other woman is my momma.”

We both laughed and I was honored to be in the same company as his mother.

Raymond and I walked back into the house toward the freezer chest. I pulled on a dust mask, happy not to have to wear the respirator any longer. We pulled the freezer across the wet linoleum and hefted it over the threshold into the back yard. I felt a huge surge of accomplishment as we threw the empty chest into the yard with the other junk for Raymond to take. We stopped long enough so that Raymond could snap a picture of me posing victoriously on top of the freezer chest.

A few hours passed as we worked together to bring more leftover furniture and bags into the yard. By the end of the day I drove home feeling physically and mentally exhausted. At home, I walked in the door and Mike could sense I had no energy left to make dinner.

“Want me to cook dinner tonight?” he asked.

“Sure, that would be great.” I replied.

He reached into the fridge and pulled out a package of hamburger meat and set it on the counter. I nearly threw up thinking about all the meat I had cleaned out of the freezer chest.

“On second thought, I might just make myself a salad.” I replied.

. . . continued in Chapter 11.

If you are just joining the story, you may want to read all the Saving Etta chapters.

Are you enjoying the Saving Etta chapters? I’d love to hear from you! What are you enjoying the most?


DIY Corbel Curtain Rod Holders

Hello Pretty Handy Girl readers! You know what costs too much? Curtain rods. Personally, I have a curtain addiction that is matched only by my addiction to accent pillows, but let’s face it, people notice the curtains, not the curtain rod and holders. Amiright?!

It doesn’t have to be. Rachel at Maison de Pax came up with a genius idea for Restoration Hardware inspired curtain rod and holders. Taking off from her ideas I’m going to show you a curtain rod holder idea that goes brilliantly with a wooden rod.

mini corbels osborne wood products

These mini corbels by Osborne Wood Products are a stunning statement piece and look upscale. Let’s get busy making your room look amazing with these DIY Corbel Curtain Rod Holders!

Materials:

(I’ve included affiliate links for your convenience. I earn a small percentage from a purchase using these links. There is no additional cost to you. You can read more about affiliate links here.)

Optional:

  • Paint
  • Stain
  • Paint Brush

(This tutorial assumes you are using a 1 ½” diameter curtain rod with an actual measurement of 1 3/8″).

Instructions:

Step 1:

Protect the bottom side of the corbel as you drill through by layering scrap wood underneath as shown, otherwise the wood will blow out on the other side.

mini corbels

You will need to remove the bottom screw from the top bracket, as shown in the next photo so that it won’t be in the way of the hole saw.

diy corbel curtain rod hangers

Insert the 1 ½” hole saw into your drill. (You can also use a spade bit if you prefer.)

hole saw

Clamp the corbel down and drill through the corbel in the wide spot between the trim and near the top. You may need to drill half way through one side, then flip the corbel and drill from the opposite side.

Don’t worry if the two sides don’t meet up exactly perfect, but do try to be as close as you can.

DIY Corbel Curtain Rod Holders

Step 2:

Stain and/or paint the corbels as desired. You could add whitewashing or distressing or any other technique you like.

DIY Corbel Curtain Rod Holders

Step 3:

Attach the corbels to the wall.

Pro-Tip: An easy way to line up the holes is to place a piece of painters tape over the back and mark where the screws need to go. Transfer the tape to the wall and you have an easy drilling template.

DIY Corbel Curtain Rod Holders

Be sure to space the corbels evenly from your window trim and the ceiling. Drive screws into studs whenever possible. (If you don’t have a stud to sink the screws into, be sure to use good wall anchors.)

DIY Corbel Curtain Rod Holders

Step 4:

Hang the corbels and rod. Be sure the screws are screwed in far enough that the corbel sits firmly against the wall. This will prevent them from moving around and allowing the rod to slip whenever you open or close the curtains.

DIY Corbel Curtain Rod Holders

How lovely is this?! You just added a designer touch to your window treatments.

DIY Corbel Curtain Rod Holders

The corbels look amazing with our new window trim and they add a more sophisticated look to the room.

diy corbel curtain rod hangers

Thanks for reading!


~See More Projects by Sarah~


Disclosure: Osborne Wood Products provided the mini corbels (in our Haven swag bags) that was the inspiration for this project.

If you liked this idea, be sure to check out Brittany’s guide to hanging curtain rods:

and how to make inexpensive romantic curtains!

Easy and Inexpensive Romantic Curtains | Pretty Handy Girl


16 Stunning Green Doors - Social Media imag16e

16 Stunning Green Doors - Social Media imag16eStunning Green Doors:

I admit it, I’m crushing on green doors lately. If you know me well, you know that I painstakingly stripped my front doors a few years ago and repainted them bright green. Now I’ve been thinking more and more about front door colors for Saving Etta. I hope you’ll help me decide by taking a look at all these fabulous green doors!

Did you know that a colorful and vibrant door can make a huge statement in your home? Whether it is exterior or interior, a green door is a great choice. (Hey, if you’re superstitious, it may even bring some cash your way.) Here is a collection of stunning green hued doors to inspire you to paint your door.

Stunning Green Doors - Houseful of Handmade

This lovely, bright green door by Houseful of Handmade adds a dramatic focal point to a room.


This green door near London, looks right at home with all the greenery around it.


Stunning Green Doors - Emily A Clark

Jungle green is a gorgeous contrast to the brick on Emily A Clark’s home.


This arts and crafts style house is the perfect canvas to showcase deep green doors with matching benches.


Stunning Green Doors - The DIY Dreamer screen door

You can add green to your screen or storm door for some major curb appeal like Christine, the DIY Dreamer did on her house.


Stunning Green Doors - Craftivity Designs mint

The extremely light mint green on this Entryway Door by Craftivity Designs is pure perfection in this space.


This bright chartreuse door looks beautiful with neutral ivory siding.


Stunning Green Doors - A Turtles Life for Me bold green

When you want to renovate a room and make a statement, take a lesson from Natalie at A Turtle’s Life for Me: Paint a door (or two) bold spring green.


An aqua blue-green door adds loads of charm to this adorable bungalow in downtown Raleigh, NC.


The Brits really know how to showcase their colorful doors, like this green door spotted in Eaton.


Stunning Green Doors - Pretty Handy Girl green door

This bright green door was formerly royal purple, but after a little stripping it gets a lot more compliments.


Stunning Green Doors - Shabby Fufu

Lighten up your entryway and add curb appeal like Shabby Fufu did with her Seafoam Green doors.


Stunning Green Doors - Farmhouse Made - Olive

This gorgeous  Green Door by Farmhouse Made is perfect for this home.


Stunning green door - Oliver and Rust

An Olive green door by Oliver and Rust gives the entry a fresh, clean look.


Kelly green shows up beautifully against this old stone house. Add some colorful planters to really bump up the curb appeal.


And talk about WOW factor! I found the above green door online here.

I hope this collection gave you some inspiration on how to use green to add some character and pizzazz to your home. If you like this round up of stunning green door inspiration, pin this image to share it:

16 Stunning Green Doors - Pinterest image

Other related posts that you may like:

Bright and Bold Colorful Front Doors

33 Bright & Colorful Front Doors


How to Replace Your Grill Ignitor

Fix Your Gas Grill Igniter 
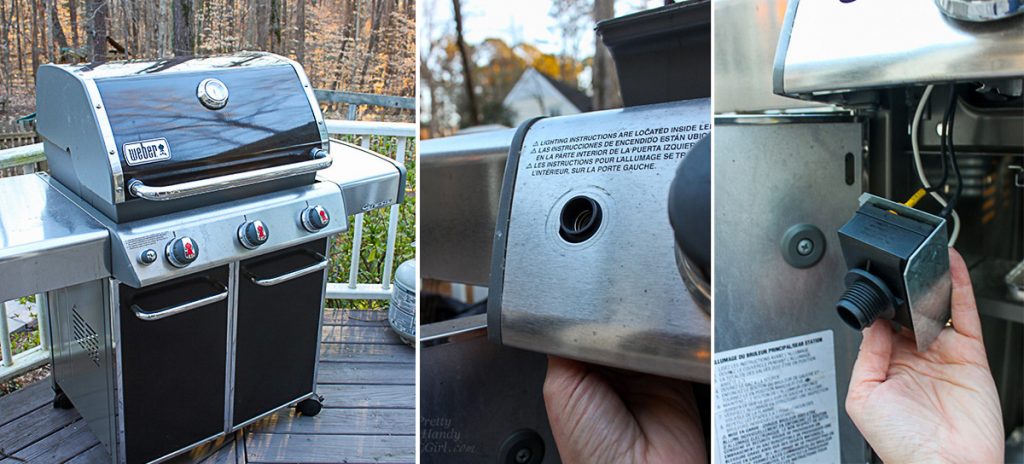
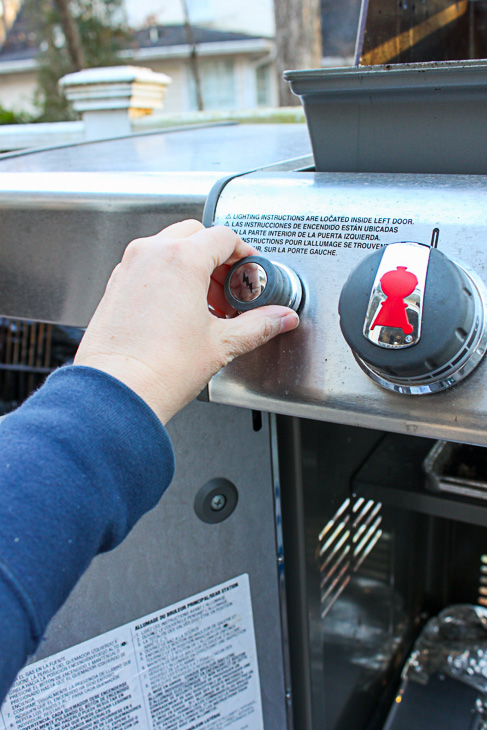
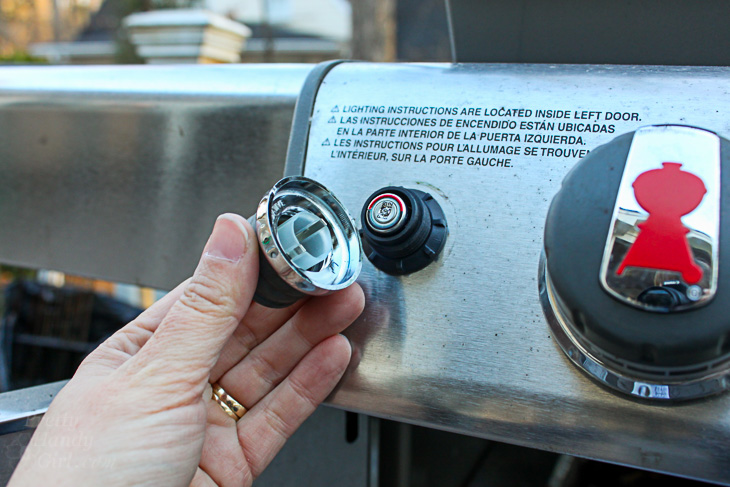
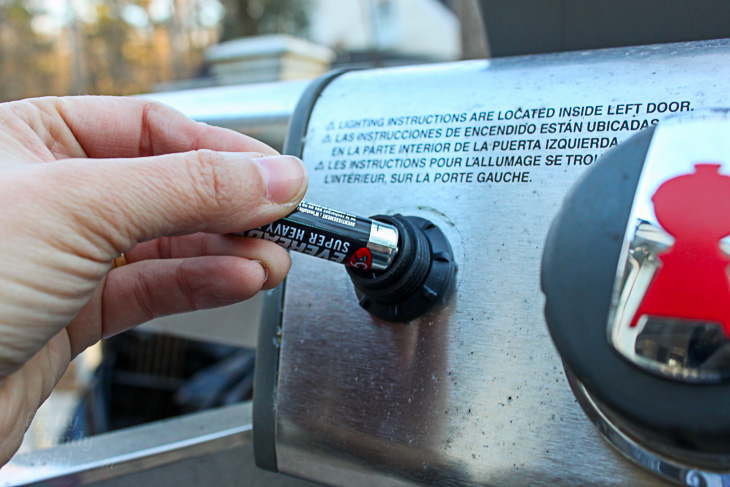
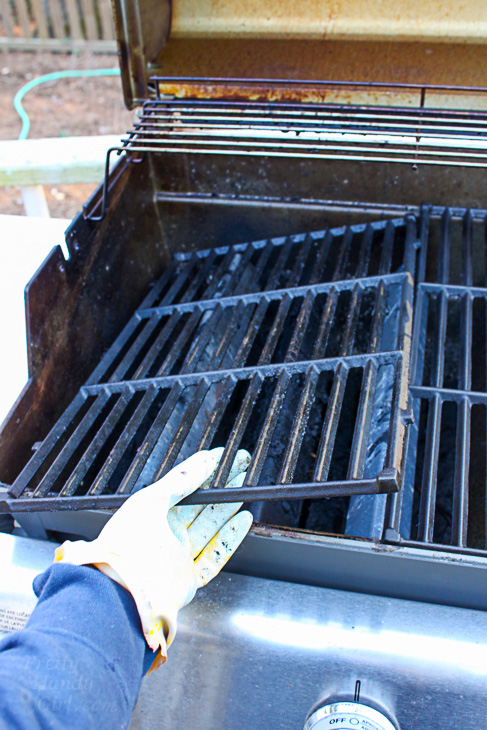
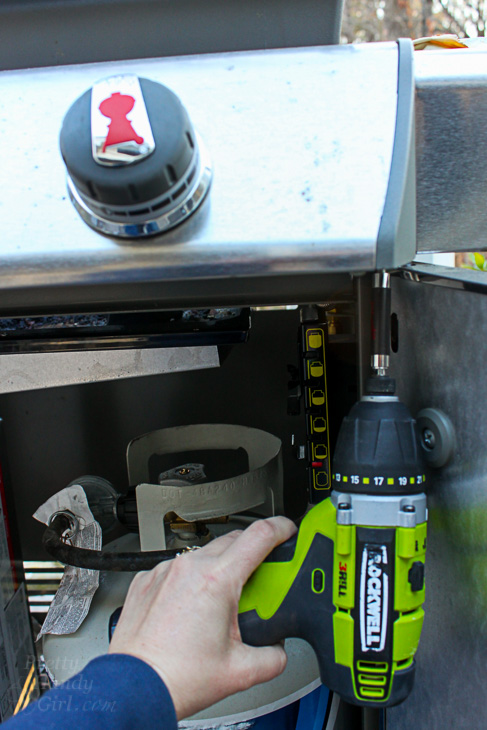
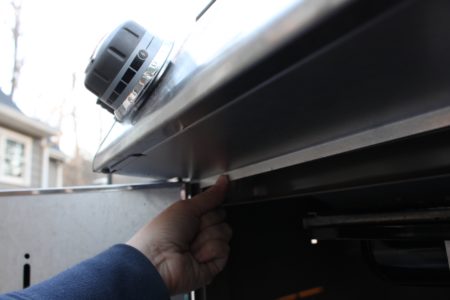
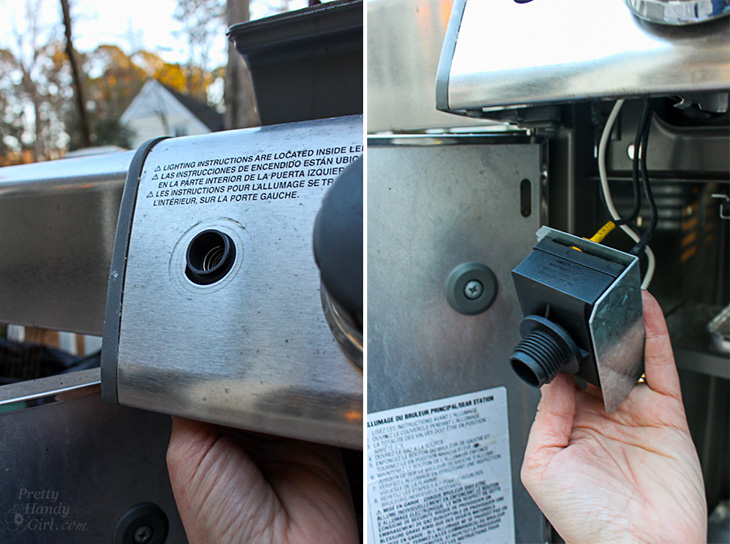
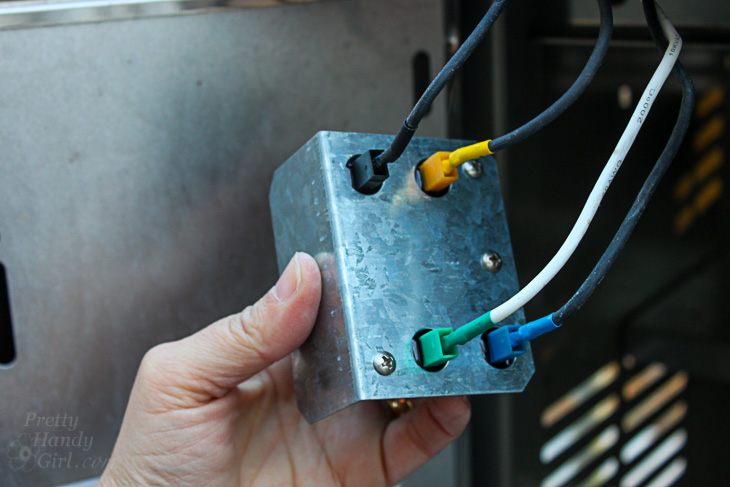
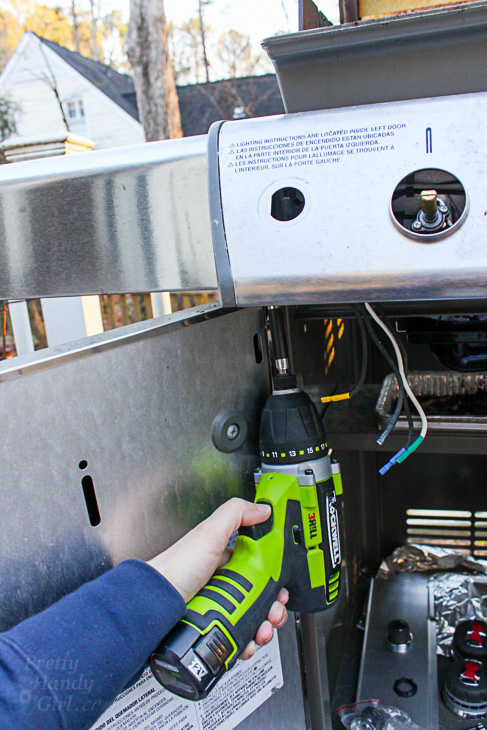
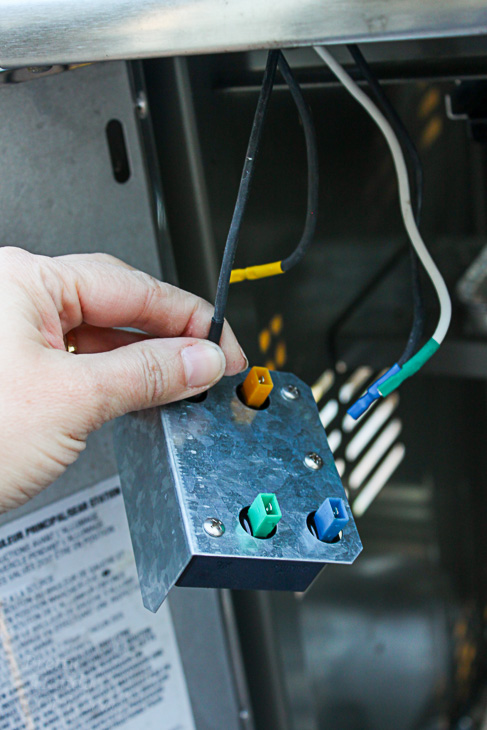
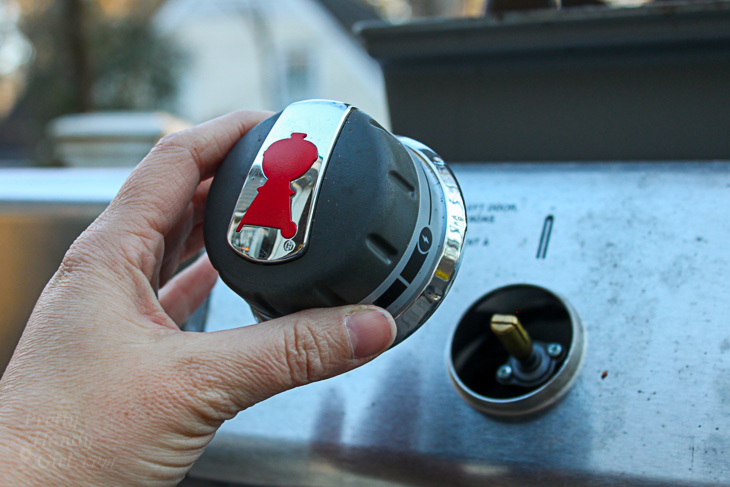
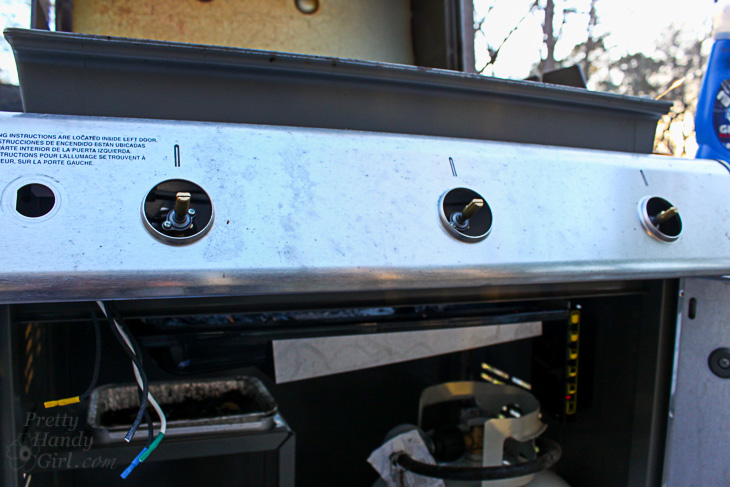
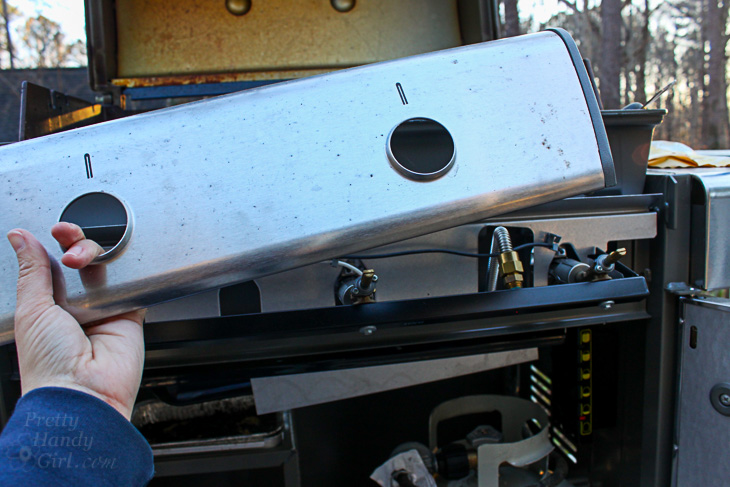
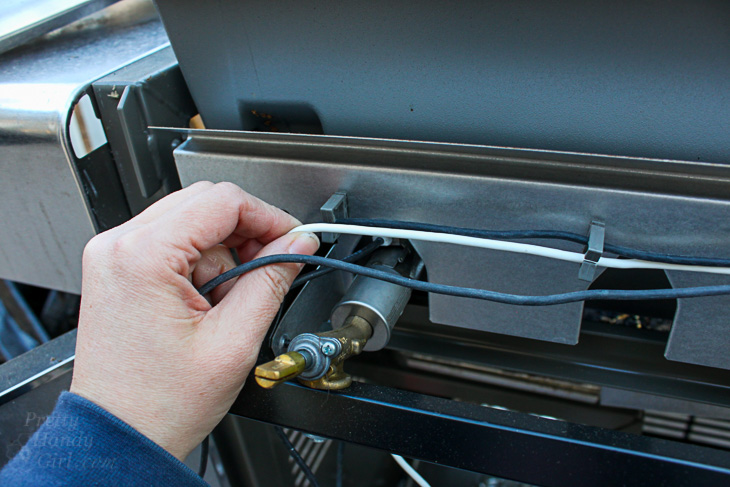
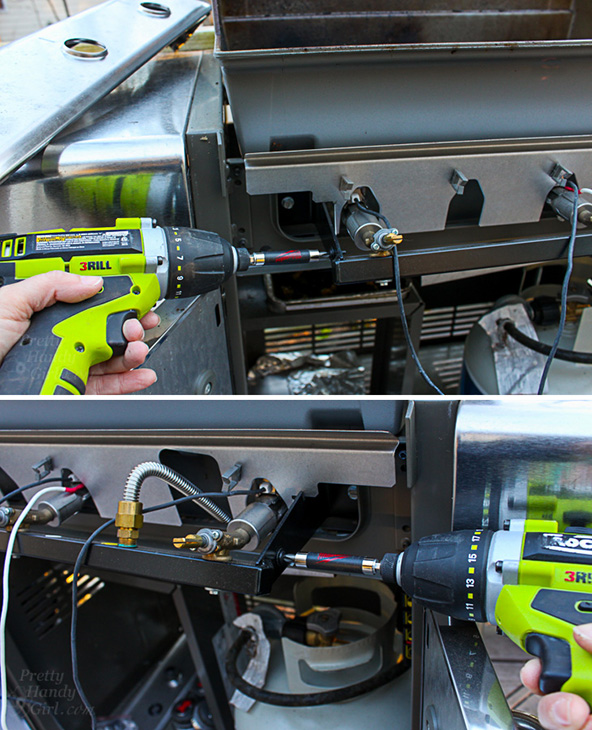
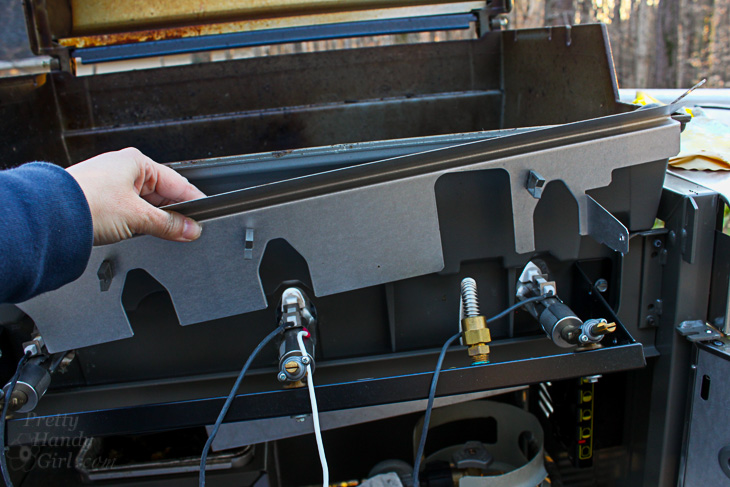
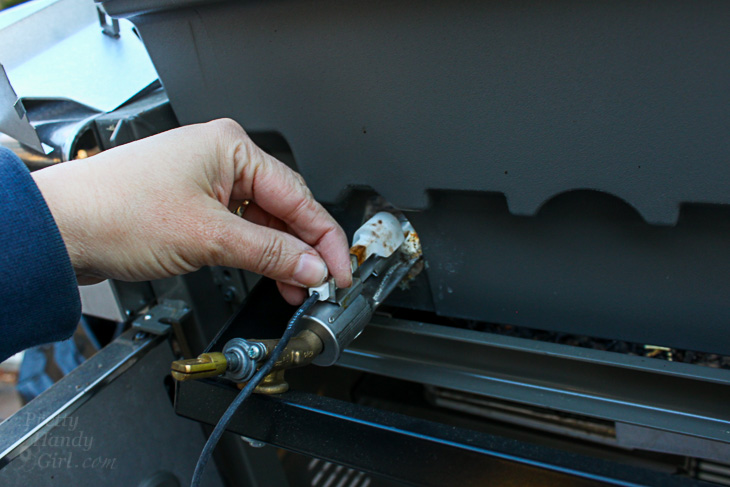
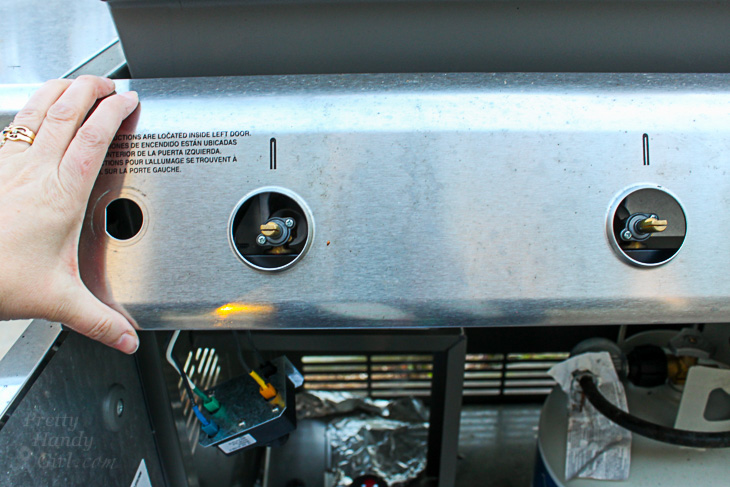
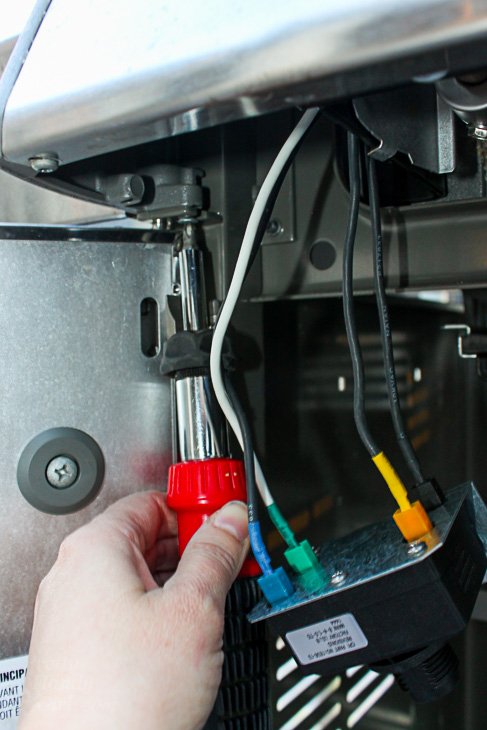
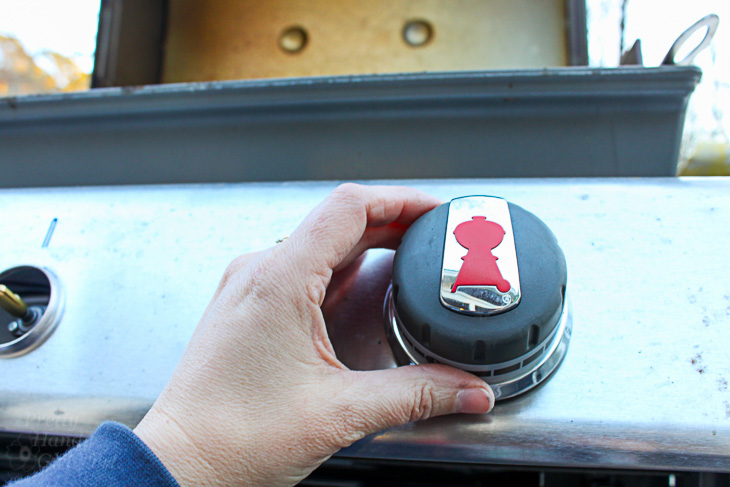
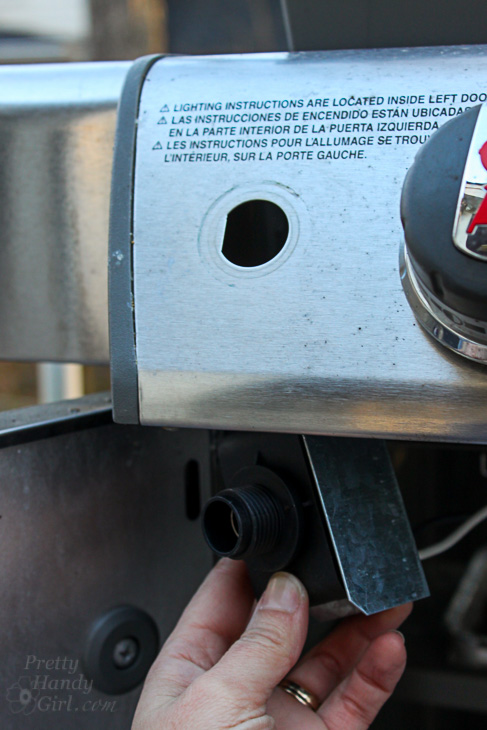
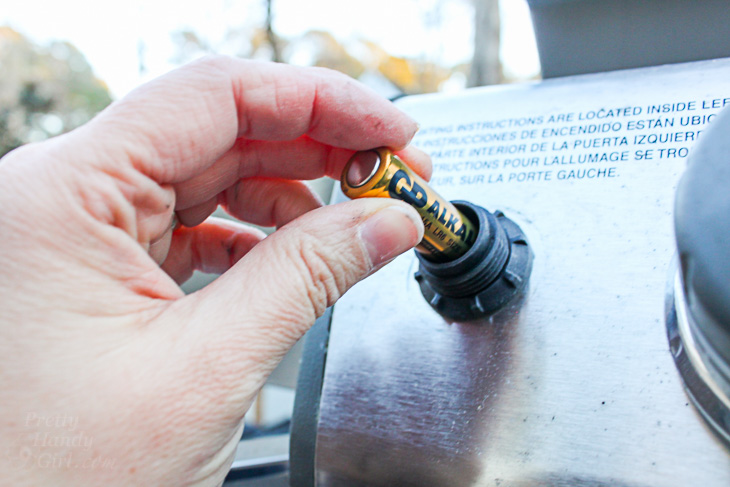
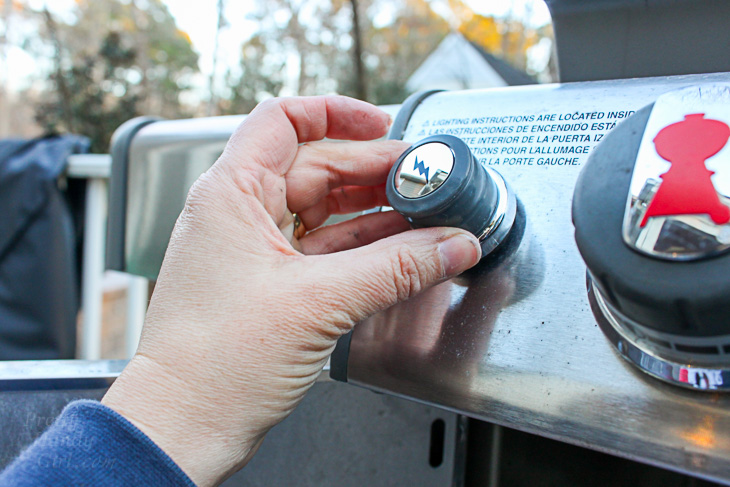
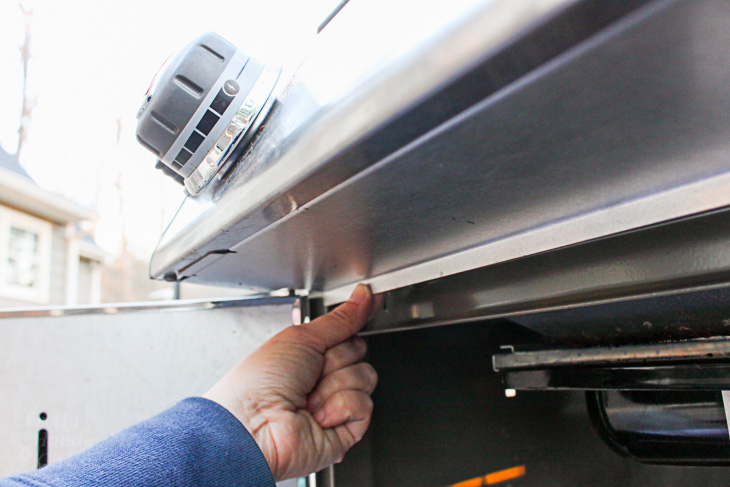
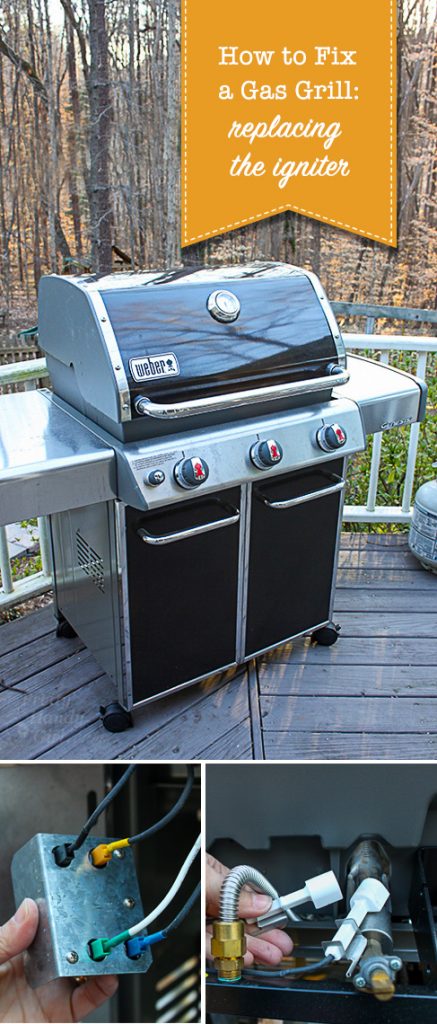
How to Replace a Gas Grill Igniter

Nothing beats using a gas grill to make a quick, delicious dinner! However, when the electric igniter no longer works, you may be tempted to throw up your hands and buy a new grill (or cook inside forever more.) WHOA! Before you go to extremes, I’ll show you how easy it is to Replace a Grill Igniter.

Recently I’ve been ordering parts from SearsPartsDirect.com to fix all our broken appliances. When Sears Parts Direct approached me about writing this sponsored post, I naturally replied “Yes, of course I’d love to share my source for appliance parts!” And, I want you all to know my secret for saving money on appliance fixes. With this legal explanation out of the way, let me show you how easy it is to replace that grill igniter that is no longer working.

(Note: The grill I’ll be repairing is the Weber Genesis 310 model. But, Sears Parts Direct sells parts for all major grill manufacturers and the instructions are similar for replacing the igniter on other models. Be sure to check your owner’s manual for accurate replacement instructions.)

Materials:

Weber grill igniter parts

(I’ve included affiliate links for your convenience. I earn a small percentage from a purchase using these links. There is no additional cost to you. You can read more about affiliate links here.)

Optional: 

How to Replace a Grill Igniter Instructions:

Make sure the gas is turned off, your grill is turned off, and it is cool before proceeding.

Before you go to the effort of replacing the igniter module and wires, check the battery inside the igniter button. Remove the igniter button by turning the cover counter-clockwise.

How to Replace a Grill Igniter

Lift off the igniter button cover to expose the battery.

How to Replace a Grill Igniter

Pull out the AA battery. Replace with a brand new AA battery and replace the cover. Check to see if your grill will light. If yes, great! If no, keep reading.

How to Replace a Grill Igniter

Put on your rubber gloves and remove the cooking grates and place them on newspaper or plastic to protect the surface from grease.

How to Replace a Grill Igniter

Remove the heat deflectors.

How to Replace a Grill Igniter

Remove the igniter retention nut by turning it counter-clockwise.

How to Replace a Grill Igniter

Set the retention nut aside where you won’t lose it.

How to Replace a Grill Igniter

Remove the screws for the wind deflector that are underneath the control panel. There are two screws that need to be removed, one on the far right and one on the far left.

How to Replace a Grill Igniter

Remove the wind deflector. You’ll need to tilt the back of it down and then slide it out toward the back to remove.

How to Replace a Grill Igniter

Remove the igniter module by reaching underneath the control panel and gently lowering module.

How to Replace a Grill Igniter

There are wires connected to the back of the igniter module. Make a note of where each wire goes so you will be able to connect the new module properly when the time comes. Let the module hang to the side while you remove the control panel.

How to Replace a Grill Igniter

Remove the screws underneath the control panel that are holding it on. These are inside a bracket just above the door hinge.

How to Replace a Grill Igniter

Unplug the wires from the back of the igniter module.

How to Replace a Grill Igniter

Remove the control knobs on the front of the control panel by firmly lifting them straight off.

How to Replace a Grill Igniter

Remove all three control knobs from the control panel.

How to Replace a Grill Igniter

Lift the control panel off the grill and set aside.

How to Replace a Grill Igniter

Remove the igniter wires from the wire clips.

How to Replace a Grill Igniter

Remove the two screws on either side of the manifold that hold the heat shield in place.

How to Replace a Grill Igniter

Lift the heat shield up and set it aside.

How to Replace a Grill Igniter

Remove the old ceramic igniter assemblies from each burner.

How to Replace a Grill Igniter

Replace with the new ceramic igniter assembly (pay attention to the length of the wires, installing the longest wire igniter on the right side.) Make sure you hear an audible click when inserting the assembly onto the burner tube.

How to Replace a Grill Igniter

Replace the heat shield and screws you removed.

How to Replace a Grill Igniter

Gently press the wires into the clips on the heat shield.

How to Replace a Grill Igniter

Plug the igniter wires into the igniter module.

How to Replace a Grill Igniter

Replace the control panel.

How to Replace a Grill Igniter

Replace the screws to secure the control panel.

How to Replace a Grill Igniter

Replace all three control knobs.

How to Replace a Grill Igniter

Lift the igniter module back in place.

How to Replace a Grill Igniter

Reattach the igniter button retention nut to hold the module in place.

How to Replace a Grill Igniter

Insert a brand new AA battery.

How to Replace a Grill Igniter

Replace the igniter button cover.

How to Replace a Grill Igniter

Replace the wind deflector and the screws to hold it in place.

How to replace grill ignitor image grill

Replace the heat deflectors and the grates.

How to Replace a Grill Igniter

Fire up that grill to make sure it lights. Then make some amazing grilled corn pesto pizza. . .

How to Replace a Grill Igniter

. . . some grilled fruit kabobs,

How to Replace a Grill Igniter

. . . or a variety of other grilling favorite recipes!

Is there something else on your grill that needs repairing? Check out Sear’s Parts Direct to find help with your most common grill repair issues.

What appliance have you been putting off fixing? You really need to check out SearsPartsDirect.com to find that part to make it work again! Also, be sure to follow Sears Parts Direct on Facebook, Twitter, or YouTube to see a variety of repair articles and videos.

Share with a friend, pin this image:
Fix Your Gas Grill Igniter - Pin me!How to Replace a Grill Igniter

Disclosure: This is a sponsored post for Sears Parts Direct. I was not told what to write. All opinions are my own. I was compensated for my time and efforts to create this tutorial. I am very particular about the brands I represent. Because I value your trust, you will always be notified when you are reading a sponsored post on PrettyHandyGirl.com.

Make a custom industrial display frame using corrugated metal and wood. It is an easy and quick project and makes a perfect gift too.

Make a custom industrial display frame using corrugated metal and wood. It is an easy and quick project and makes a perfect gift too.
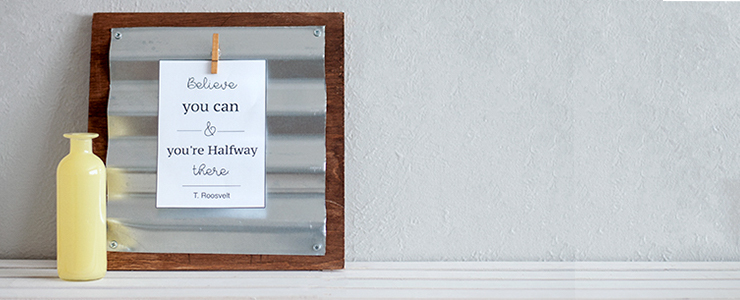
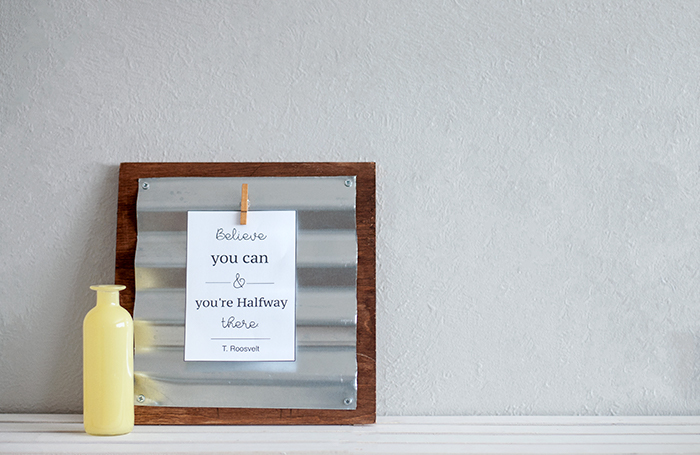
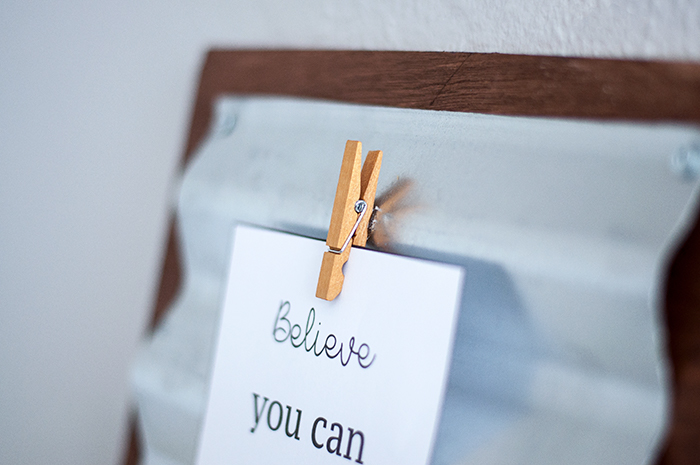
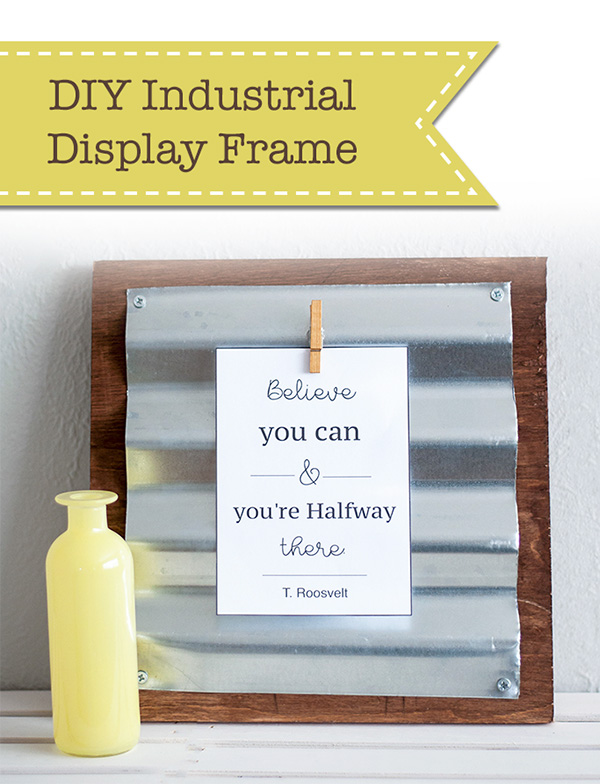
Easy DIY Industrial Display Frame

Hello Pretty Handy Girl readers, Anika here from Anika’s DIY Life with an industrial metal and wood display frame for you to make!

Lately, I find myself drawn to the industrial style with the metal and wood combinations. A couple of weeks ago, I made this sign for my workshop using corrugated metal and I think it turned out amazing.

How to make a custom industrial sign

I loved it so much that I wanted to make something similar for my office. I came up with a simple display frame. This is a super easy and quick project. And DIY Industrial Display Frames would make a great handmade gift for anyone!

How to make a custom industrial display frame

Materials:

(I’ve included affiliate links for your convenience. I earn a small percentage from a purchase using these links. There is no additional cost to you. You can read more about affiliate links here.)

  • Corrugated metal sheet – cut to 11.5″ x 11.5″
  • ¾” plywood – cut to 12″ x 12″
  • [amazon_textlink asin=’B000KWKQTS’ text=’¾” Spax screws’ template=’ProductLink’ store=’prett-wp-001-20′ marketplace=’US’ link_id=’0e9701a6-acfd-11e7-96d4-3f296134737b’]
  • Stain in color of your choice (I used Early American)
  • [amazon_textlink asin=’B003BXE6ZI’ text=’Mini clothespin’ template=’ProductLink’ store=’prett-wp-001-20′ marketplace=’US’ link_id=’f894d98c-acfc-11e7-83c3-1d6e95b98e44′]
  • Hot glue
  • Drill
  • Tin snips or Jigsaw with metal cutting blade
  • Gloves
  • [amazon_textlink asin=’B01AWK1XAS’ text=’Eye protection’ template=’ProductLink’ store=’prett-wp-001-20′ marketplace=’US’ link_id=’e1f16864-acfc-11e7-8b07-2d86581d9e35′]

Instructions:

Step 1 – Cut your plywood to size. Cut your corrugated metal sheet slightly smaller than the plywood board. Use tin snips or a jigsaw with a metal cutting blade. Be sure to take appropriate precautions (wear work gloves and safety glasses because the metal is really sharp.)

How to make an industrial picture frame

Step 2 – Stain the plywood in the color of your choice.

Stained plywood for a metal and wood industrial frame

Step 3 – Attach the corrugated metal sheet to the plywood using the Spax screws. Leave ½” on each side to prevent the screws from splitting the metal.  (Why Spax screws? They go through metal and wood easily without the need to pre-drill.)

How to attach metal to wood

Step 4 – Decide if you want the display frame in landscape or portrait orientation and attach the mini clothespin using hot glue.

Making a simple industrial metal and wood picture frame

I chose the portrait orientation and popped in one of my favorite quotes. The size is perfect for a 5×7 picture and I can easily switch out the quote for a picture when I want.

How to make a custom industrial display frame

I hope you liked this fun DIY Industrial Display Frame. Until next time!

~ View more of Anika’s DIY Tutorials ~

Did you like this project? If so, I think you’ll love these simple DIY Plywood Frames:

Simple Plywood Frames