Pretty Handy Girl Fall Tablescape 2016

Pretty Handy Girl Fall Tablescape 2016

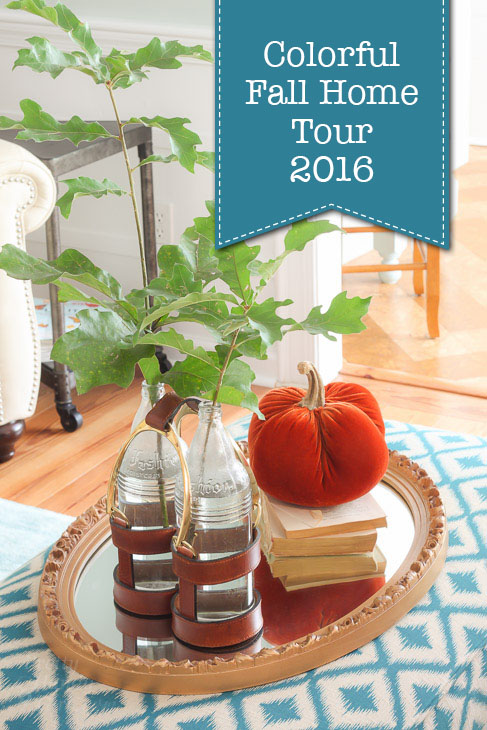
Welcome back. If you were here for the tour on Friday, I’m so happy to see you again. I have the table set and would love to have you join me for some good food and great conversation. Today we are going to be sharing part 2 of the Colorful Fall Tablescape Home Tour.

Pretty Handy Girl Fall Tablescape 2016

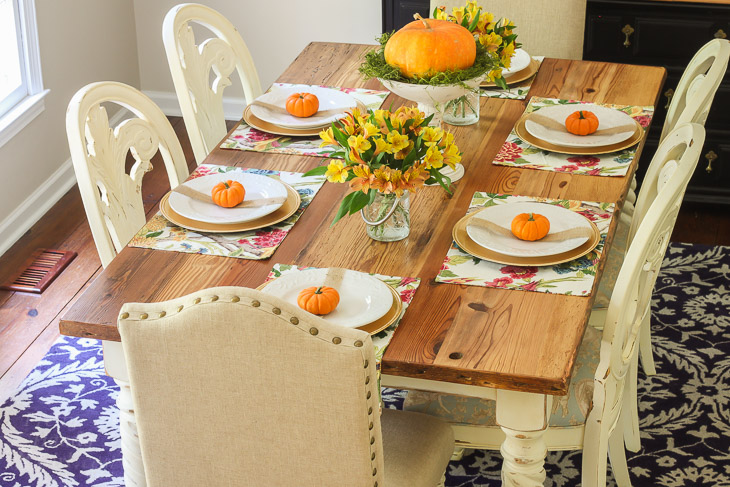
If you’re new around here, I built my own farmhouse table last year and love the rustic look and feel. I scoured Craig’s List until I found chairs that I love. The chairs came with a table that was painted white, but I quickly turned around and sold it on Craig’s List. I don’t have any interest in keeping chairs and tables as a set. (Throw rotten tomatoes at me, go ahead.) I tend to like the collected and eclectic look. Which explains the nailhead trim head chairs I purchased at World Market (see below for source links.)

Pretty Handy Girl Fall Tablescape 2016

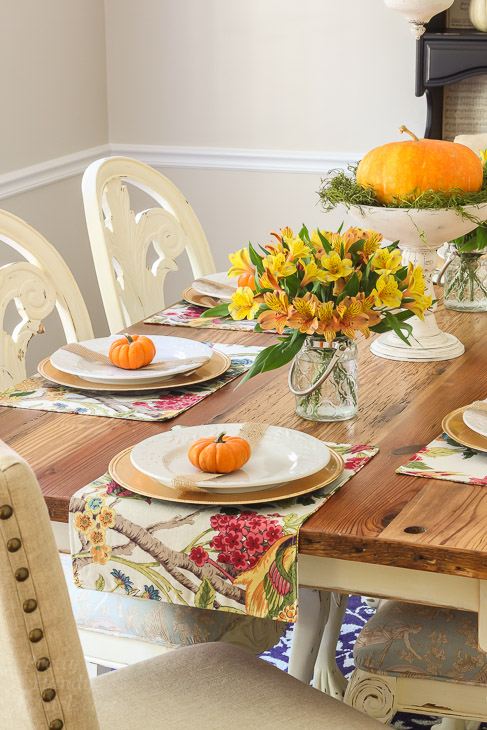
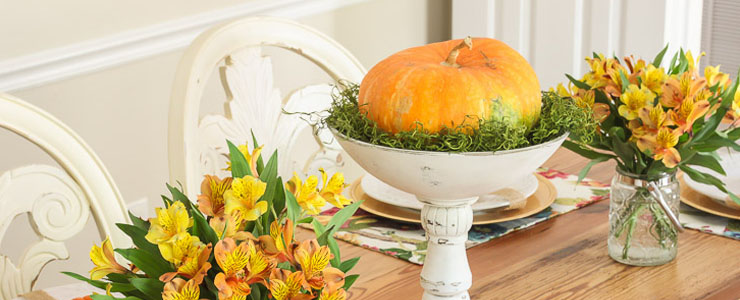
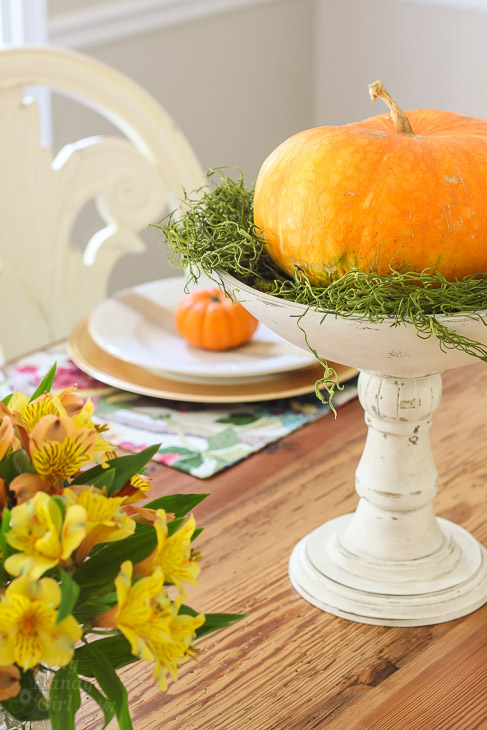
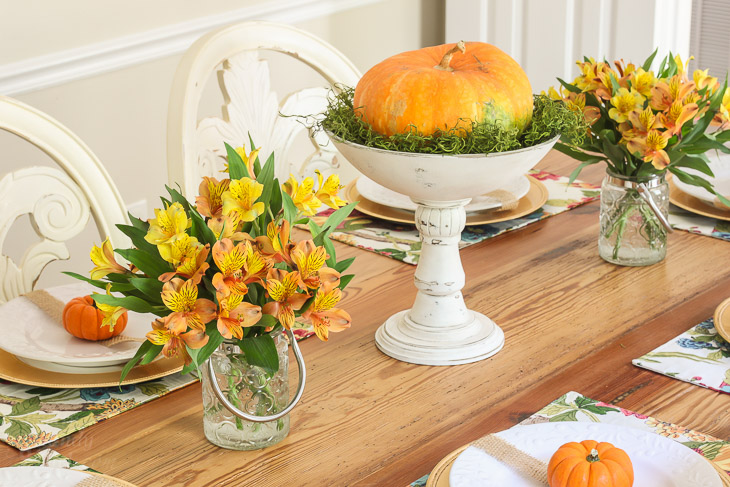
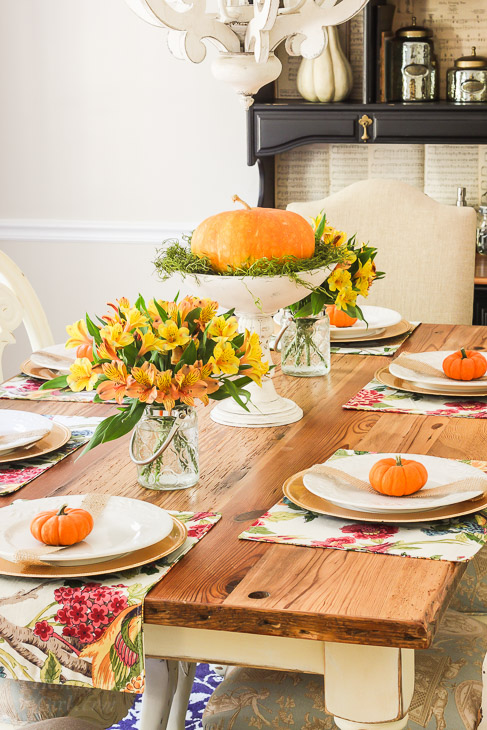
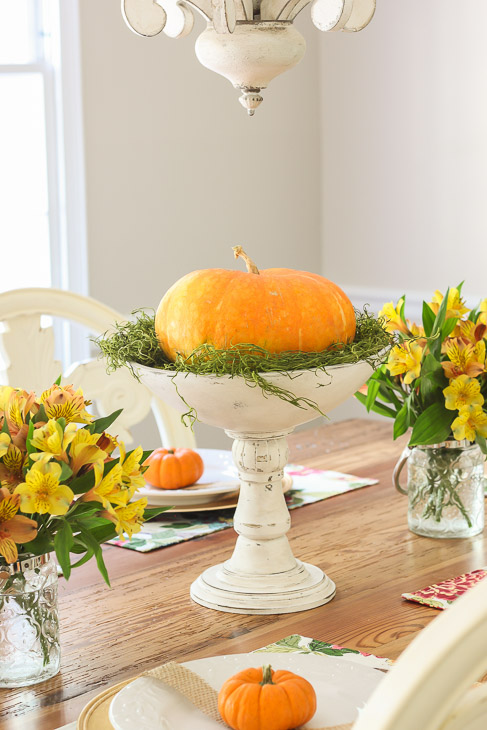
The pedestal fruit bowl used to be dark walnut, but it had fallen out of favor in my decorating so I added two coats of chalk paint and distressed it. Now I love it again!

Pretty Handy Girl Fall Tablescape 2016

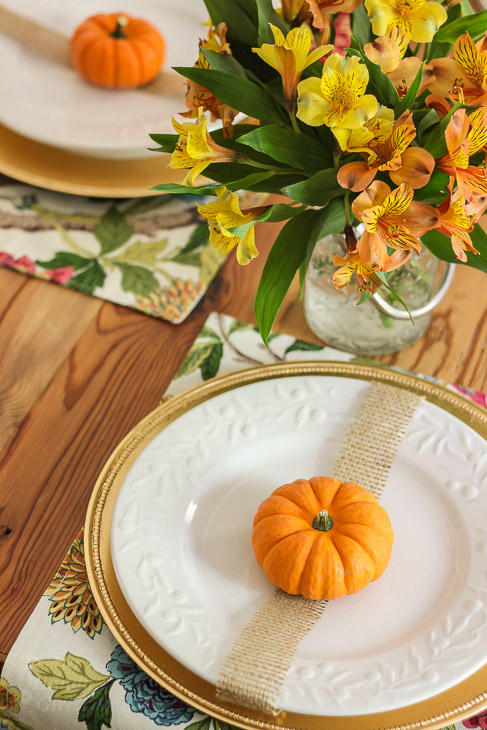
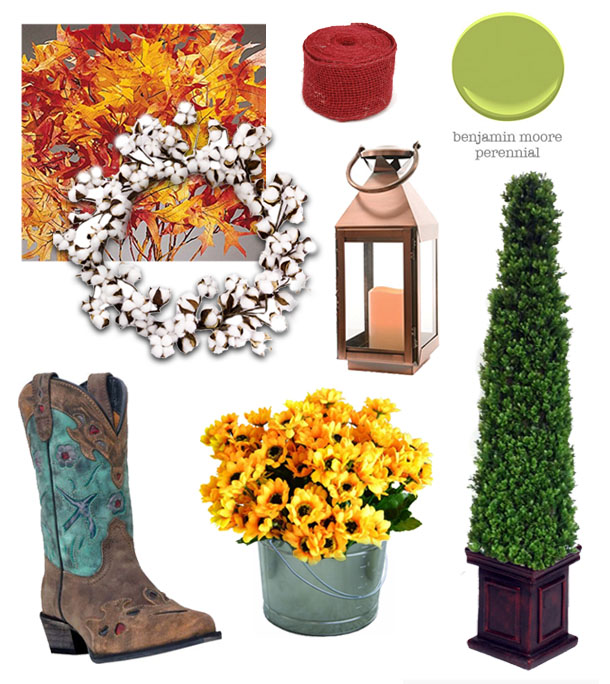
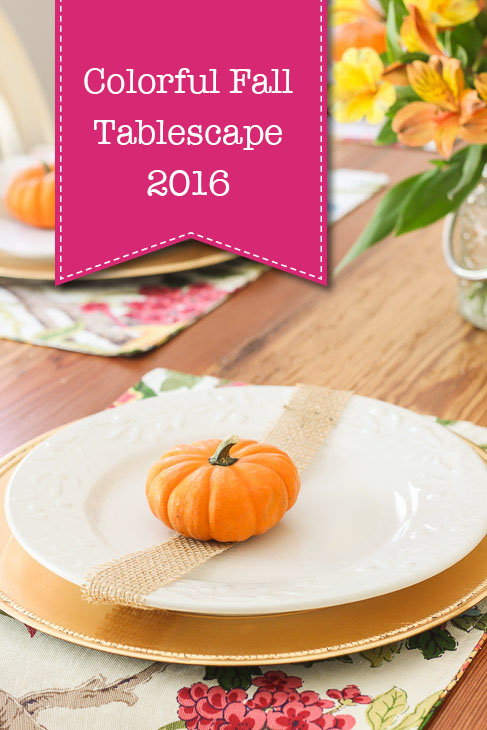
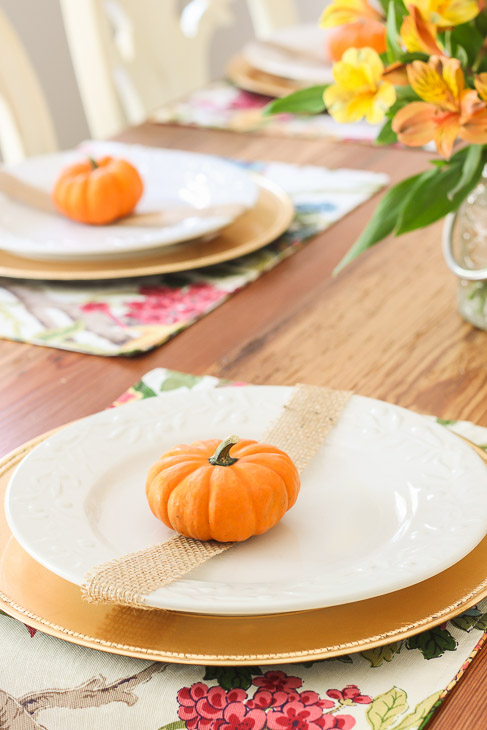
The place settings were left simple with a burlap ribbon around the plates and a mini pumpkin on top.

Pretty Handy Girl Fall Tablescape 2016

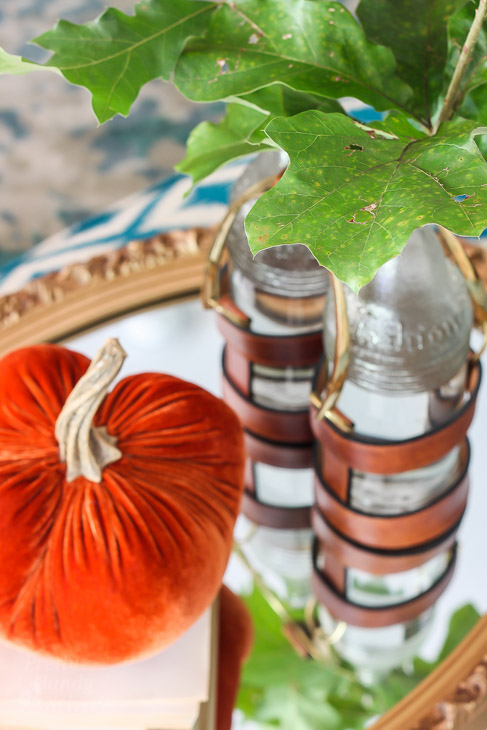
I used some alstroemeria flowers in little votive jars because I knew they last longer than other flowers. Unfortunately the peach colored flowers already dropped their pedals but the yellow ones are holding strong.

Pretty Handy Girl Fall Tablescape 2016

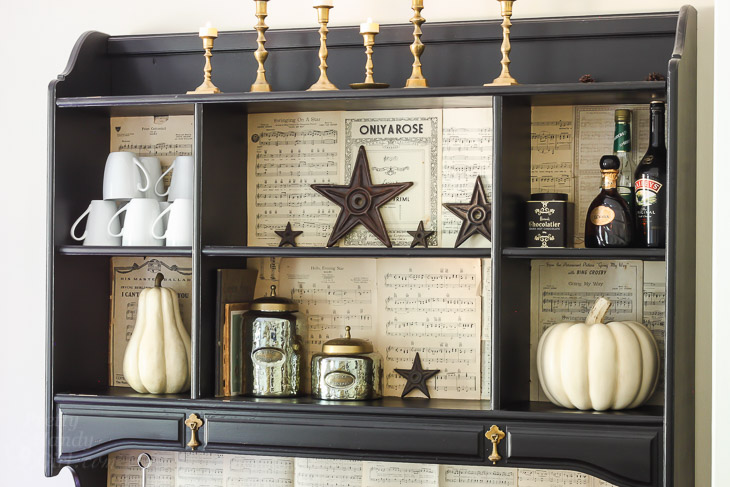
A few years ago I temporarily taped antique sheet music into the back of the buffet hutch. It’s funny how temporary sometimes becomes more permanent. I added the fake white gourd and pumpkin to the shelves. Don’t mind those two pinecones peeking out from the top shelf. I guess I couldn’t see them when I was decorating. Oops.

Pretty Handy Girl Fall Tablescape 2016

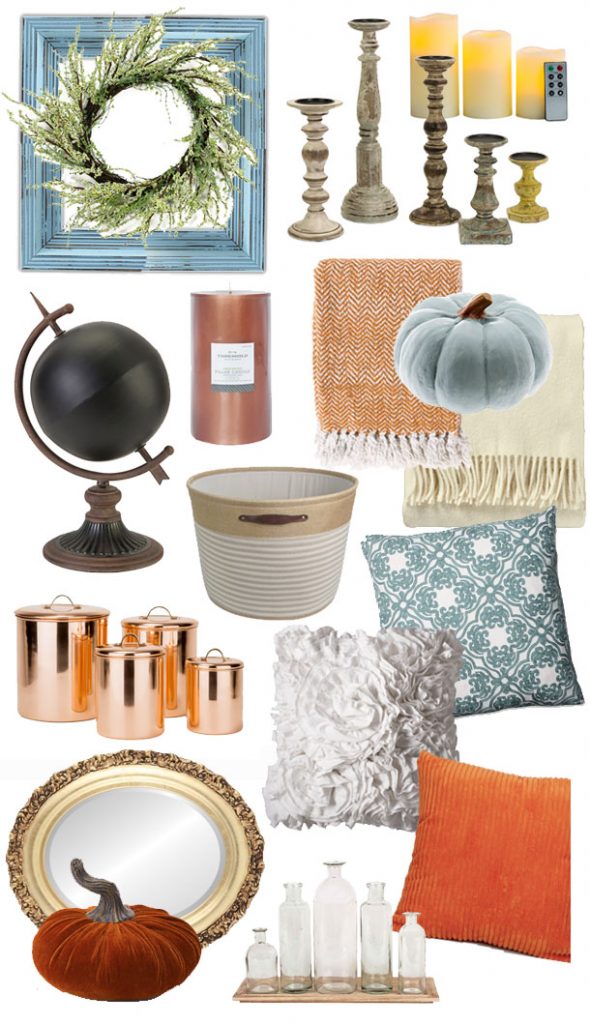
Do you like anything you see? Want to use one of these things in your own home? I pulled together a few links so you can shop my dining room look. (I’ve included affiliate links for your convenience. I earn a small percentage from a purchase using these links. There is no additional cost to you. You can read more about affiliate links here.)

Farmhouse Fall Dining Room Decor

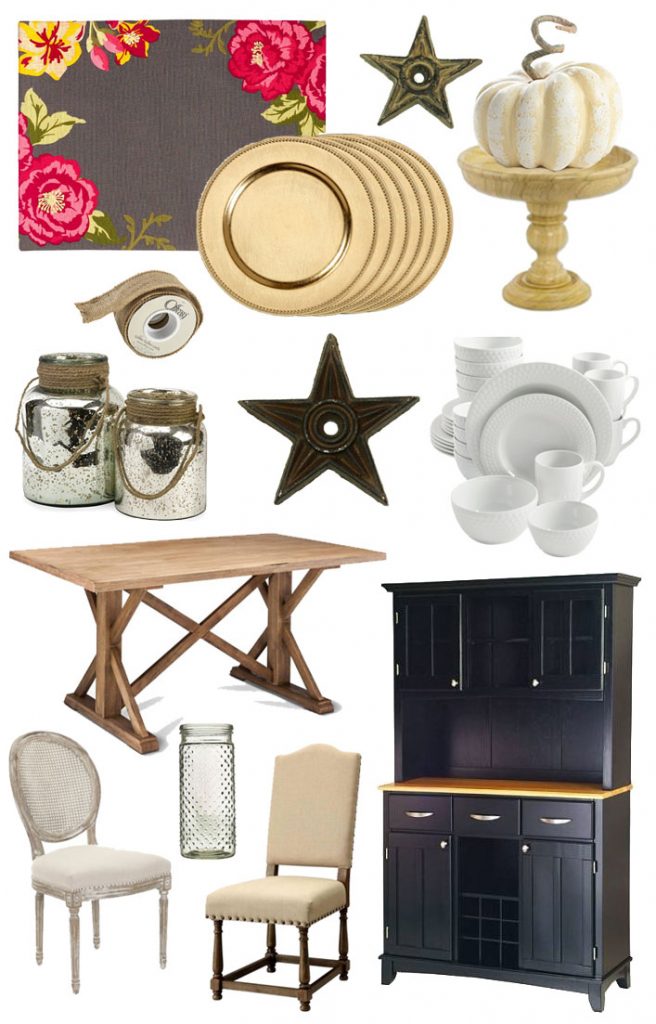
Black Buffet with Hutch | Gold Chargers | Embossed White Plates | Burlap Ribbon | Wood Pedestal Fruit Bowl | Embossed Glass Jar | Floral Placemats | Mercury Glass Canisters | Cast Iron Stars: Medium and Small | Faux White Pumpkin | Nailhead Trim Head Chairs | Cane Back Chairs

Pretty Handy Girl Fall Tablescape 2016

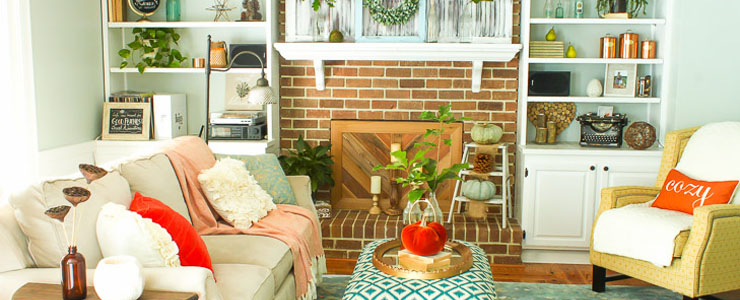
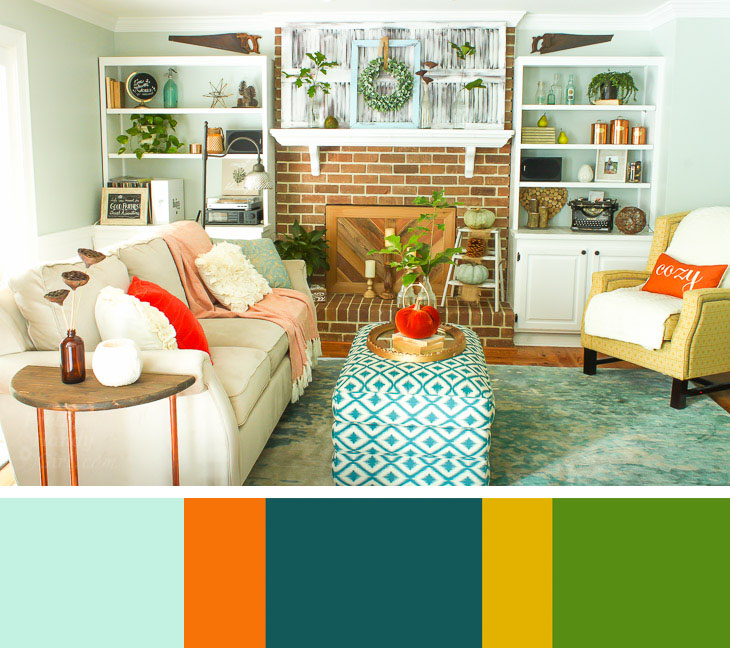
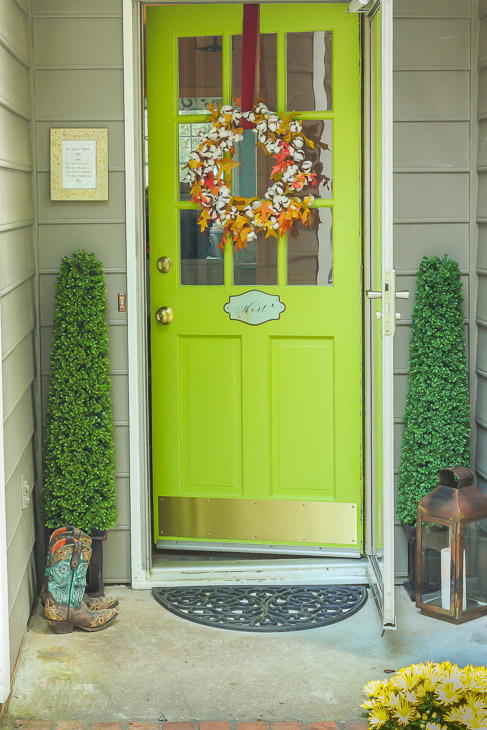
Doorway & Living Room | Master Bedroom | Kitchen

Do you decorate your dining room for fall? I’d love to see your decor, leave a link in your comment below.

PHGFancySign

Pretty Handy Girl's Colorful Fall Home Tour

Pretty Handy Girl's Colorful Fall Home Tour

I love Fall! I look forward to the break from the heat and humidity. I can’t wait to pull out flannel shirts and boots. But, most of all, I love Fall because I like using colors that invoke thoughts of Autumn (orange, green, blue, gold and brown.)

Last year I played it safe with an aqua, white and yellow color pallet.

Cory Rolling Storage Ottoman from La-Z-Boy | Pretty Handy Girl

This year I decided to have fun with more Autumn leaf colors.

Pretty Handy Girl's Fall Home Tour

Do you love using color when decorating for Autumn? Yes? Color Lovers Unite!!! Well, come on in and enjoy the tour.

Pretty Handy Girl's Fall Home Tour

This isn’t our front door, but it’s the entrance our friends and family use. Since you’re a friend, I’ll beckon you in this way.

Pretty Handy Girl's Fall Home Tour

(FYI, I’ve included affiliate links for your convenience in this post. I earn a small percentage from a purchase using these links. There is no additional cost to you. You can read more about affiliate links here.)

Most of the decor items I’ve collected from different places. But, if you like something you see, you can shop my entryway below. I found links to similar items and provided them to help you save the time searching the interwebs. The boots were just for the photo shoot ;-). But, I get so many compliments on them when I wear them around town.

Pretty Handy Girl's Fall Home Tour

Copper Lantern | Cotton Wreath | Preserved Leaves | Red Burlap Ribbon | Galvanized Pail (use this tutorial to age it quickly)| Topiaries | Cowboy Boots | Yellow Flowers

Make your own wreath with a base cotton wreath, then tuck some preserved leaves into the wreath. Finish by looping a red burlap ribbon through the wreath. I used a flat thumbtack to hang it from the top of the door.

Pretty Handy Girl's Fall Home Tour

Inside our mudroom, I added some sunflowers to the wooden hook sconces I made.

Pretty Handy Girl's Fall Home Tour

Pretty Handy Girl's Fall Home Tour

In the living room I used a lot of natural elements, including a little oak sapling I cut out of a flower bed. I’m happy to report it looks the same as it did when I cut it last week. Free lasting decor for the win!

Pretty Handy Girl's Fall Home Tour

Pretty Handy Girl's Fall Home Tour

Pretty Handy Girl's Fall Home Tour

Pretty Handy Girl's Fall Home Tour

During this tumultuous time, a little reminder that love makes the world go round helps me feel hopeful.

Pretty Handy Girl's Fall Home Tour

Pretty Handy Girl's Fall Home Tour

The yellow wingback chair is the Cosmopolitan from La-Z-Boy. It’s nice and firm but comfortable. And let’s be honest, the nailhead trim is dreamy! Speaking of dreamy, the rug is definitely my favorite rug in the house! It has a soft silky feel, it doesn’t shed much and it changes color depending on where you stand. It’s by Surya and called the Watercolor 5004 pattern.

Pretty Handy Girl's Fall Home Tour

I love the colorful variety of pumpkins and gourds available in the stores. Can you spot the fake above? Learn how I painted one of them.

Pretty Handy Girl's Fall Home Tour

While looking for more gold to decorate with, I grabbed a thrift store oval mirror and used it as a tray on the ottoman. I think it’s a fun way to decorate. But, Pretty Handsome Guy likes to make fun of the “Tree sprouting out of the ottoman.”

Pretty Handy Girl's Fall Home Tour

The leather chair in the background is our favorite recliner. It’s the Bradley from La-Z-Boy and we love to nap in it.

Pretty Handy Girl's Fall Home Tour

Of course that’s when the sofa is occupied. This is the Bree. And she’s just as comfortable to lounge on. You can read more about how we chose this sofa and the other furniture in our living room here.

Pretty Handy Girl's Fall Home Tour
As the weather cools off, we all like to cuddle under blankets. I used half a ladder propped in the corner to hold a variety of throw blankets.

Pretty Handy Girl's Fall Home Tour

Did you like some of the decor items I used? Here’s some of the sources if you want to shop my living room:

Pretty Handy Girl's Fall Home Tour

Chalkboard Globe | Copper Canisters | Copper Candle | Wool Blanket | Orange Chevron Throw Blanket | Wooden Candlesticks | Battery-operated Candles | Blue Pumpkin | Leather Handle Basket | Distressed Blue Picture Frame | White Ruffle Pillow | Orange Velvet Pillow | Spa Blue Embroidered Pillow | Gold Oval Mirror | Velvet Orange Pumpkin | Glass Bottle Vases with Wooden Tray

Pretty Handy Girl's Fall Home Tour

I hope you enjoyed the tour! Continue on the tour by following these links:

Dining Room | Master Bedroom | Kitchen

What’s your favorite season? If it’s Fall, why do you love it?

PHGFancySign

Disclosure: This posts contains some affiliate links. I earn a small percentage from a purchase using these links. There is no additional cost to you. You can read more about affiliate links here.) I worked with La-Z-Boy last year and was provided with complimentary furniture in exchange for my time and several sponsored posts. You can read more about how I chose to work with La-Z-Boy here.

DIY Framed Pumpkins | Pretty Handy Girl

framed-pumpkins-title

Hooray, Fall is on the way and that means it’s time to bring out all the pumpkins.  Jaime here from That’s My Letter sharing this DIY Framed Pumpkins artwork which is easy, fast, and makes a very big statement for little cost.

I scoured my scrap wood pile for this project but if you were to go out and purchase the supplies I’d estimate it to cost about $20, including paint for this jumbo pumpkin wall art.  I made five pumpkins because odd numbers are always better when decorating and I have five people in my immediate family so everyone is accounted for.

framed-pumpkins-2

My best advice to make this project easy and fast would be to scour google for a good pumpkin shape that has simple lines.  Once you have your shape, you can adjust the size to fit your background board.  I used a 1″ x 8″ pine board (which is actually 7 1/4″ high) so my pumpkins are about 5″ height and 6″ width each.

framed-pumpkins-3

Amazingly I had five different shades of orange paint on hand, but you could paint them all the same color, add some personalization or even spell out a fun Fall word.

framed-pumpkins-4

(I’ve included affiliate links for your convenience. I earn a small percentage from a purchase using these links. There is no additional cost to you. You can read more about affiliate links here.)

Materials:

Cut list:

  • 1″ x 8″ pine board cut to 40″ length
  • 2 – 1″ x 2″  frame edges cut to 40″ long
  • 2 -1″ x 2″  frame edges cut to 8 ¾” long

Instructions:

Step 1: Print out pumpkin clip art to desired size and cut out shape using scissors.

framed-pumpkins-step-1

Step 2: Trace around pumpkin shape onto 1/4″ plywood scrap piece.  Using a scroll saw cut out pumpkin shapes and sand edges smooth.

Step 3: Prepare background piece (the 1″ x 8″ pine board cut to 40″ length). Lay the two long 1″ x 2″ frame pieces on top and bottom. Lay the short 1″ x 2″ frame edges on the sides.

framed-pumpkins-step-3

Step 4: Paint pumpkins in various orange colors.  Paint frame pieces off white.

framed-pumpkins-step-4

Step 5: Sand the pieces to distress them.  Apply stain along edges using the cloth. (I used Varathane in summer oak.)

framed-pumpkins-step-5

Step 6: Attach 1″ x 2″ frame pieces to the edges of the 1″ x 8″ board using wood glue and 1 ¼” finish nails.

framed-pumpkins-step-6

Step 7: Attach pumpkins to 1″ x 8″ background board using wood glue.  Start at center and measure for equal spacing.

framed-pumpkins-step-7

Let the glue dry and then place framed pumpkins on a ledge, your mantel, or add a sawtooth hanger to hang above a doorway.

framed-pumpkins-1

So many possibilities and just the perfect touch of Fall!

Jaime signature

~Read more of Jaime’s tutorials~

Heathy Sugar Busters Coffee | Pretty Handy Girl

Heathy Sugar Busters Coffee | Pretty Handy Girl

Raise your hand if you are addicted to sugar! (Hand raised high here.) I’ve been trying to give up sugar and developed this Healthy Sugar Busters Coffee based loosely on a Bullet Proof Coffee recipe I found. Research has shown that we all need healthy fats to support our brain function and a healthy diet. Healthy fats can be found in coconut oil, grass-fed butter, MCT oil, avocados and much more. You can read about a diet rich in healthy fats and oils in Dr. Mark Hyman’s Eat Fat Get Thin book (affiliate link.)

Instead of grass-fed butter and MCT oil, I used coconut oil and almond creamer plus almond milk to make my Healthy Sugar Busters Coffee. You will not believe how tasty this coffee is. And the frothiness of this drink makes you forget there’s little to no sugar in it.

Heathy Sugar Busters Coffee | Pretty Handy Girl

Ready to indulge in a luxurious Healthy Sugar Busters Coffee with me?

(I’ve included affiliate links for your convenience. I earn a small percentage from a purchase using these links. There is no additional cost to you. You can read more about affiliate links here.)

Ingredients:

Heathy Sugar Busters Coffee | Pretty Handy Girl

Start by brewing your favorite cup of coffee. (I’ve switched to decaf per my doctor’s suggestion. But, occasionally I’ll add a little caffeine coffee to my drink.)

While the coffee is still hot, add one tablespoon of coconut oil to your coffee.

Heathy Sugar Busters Coffee | Pretty Handy Girl

Add one tablespoon of creamer. (Note: the Califia Almond creamers have a few grams of sugar per tablespoon. If you want zero sugar, buy the unsweetened Califia Almond Creamer.)

Heathy Sugar Busters Coffee | Pretty Handy Girl

Add Almond Milk to taste. (Zero grams of sugar in the Almond Breeze Vanilla Unsweetened, so feel free to add more if you like a light colored coffee.)

Heathy Sugar Busters Coffee | Pretty Handy Girl

Poor the coffee mixture into your blender.

Heathy Sugar Busters Coffee | Pretty Handy Girl

Put the blade attachment (or lid) on your blender cup and give it a whirl. The Magic Bullet doesn’t take more than 15-20 seconds to whip the coffee up to a beautiful froth. (I used to use a Ninja before, it took longer, didn’t froth as much and ultimately the blender died. Plus, the cup started to leak at the blade attachment. Boo.)

Heathy Sugar Busters Coffee | Pretty Handy Girl

Check out how much beautiful froth your drink has after being blended! If you like lattes, this has the consistency of a Starbucks latte.

Heathy Sugar Busters Coffee | Pretty Handy Girl

Pour your Healthy Sugar Busters Coffee into a mug and indulge!

Heathy Sugar Busters Coffee | Pretty Handy Girl

Want iced coffee instead? Pour it over a glass full of ice. Or brew decaf and store it in the fridge.

This is what I live for every morning. I can’t wait to wake up and make my Healthy Sugar Busters Coffee each morning. Have you caught on to the healthy fat diet? How do you feel? Have you lost any weight?

PHGFancySign

4 Ways to Remove a Broken Light Bulb | Pretty Handy Girl

4 Ways to Remove a Broken Light Bulb | Pretty Handy Girl

Have you ever found yourself staring down the base of a broken light bulb? You must resist the temptation to reach up and unscrew it with your fingers. Not a smart idea. Instead you can safely remove it using one of these 4 Ways to Remove a Broken Light Bulb.

Let’s get to it! Before you begin, make sure the light switch is turned off or the power has been turned off to the light.

The Potato Method:

4 Ways to Remove a Broken Light Bulb | Pretty Handy Girl

The old method that has always been touted as the best way to remove a broken light bulb has been to use a potato. Push the potato onto the broken shards and turn clockwise to remove. This works well if there’s enough shards, but if the glass is gone you’ll need to try another technique.

The Sponge Method:

4 Ways to Remove a Broken Light Bulb | Pretty Handy Girl

Similar to the potato method, if you have some shards showing, simply push the sponge onto the broken bulb and turn counter-clockwise. Depending on how tight the bulb is, the sponge may just tear.

The Newspaper Method:

4 Ways to Remove a Broken Light Bulb | Pretty Handy Girl

The newspaper trick works well for bulbs that have short or long shards. Ball up a wad of newspaper and grasp the bulb through the newspaper. Then turn counter-clockwise to unscrew the bulb. Then ball up the glass inside the newspaper and discard.

The Needle-nose Pliers Method:

4 Ways to Remove a Broken Light Bulb | Pretty Handy Girl

Finally, if all else fails (or you don’t have any shards), you can use the needle-nose pliers method. You must remove any glass carefully with the pliers. Then grasp opposite sides of the bulb base. Gently twist each base to bend the metal. Then turn both pliers to remove the broken bulb base.

Removed-bulb-end

Hope these tricks help! If you have any other tricks for removing a broken light bulb, I’d love to hear them.

PHGFancySign

Like this tip? You might find more useful tips in my 31 Days of Handy Home Fixes!