Tealight Centerpiece

12 Upcycled Holiday Decor Ideas

Are you getting excited for the upcoming holiday season? Want to know how you can add new decorations and holiday decor but not spend a lot of money? Upcycle it, Baby! I have 12 Great Upcycled Ideas for Holiday Decor that you will want to whip up this weekend!

Most of the project materials can be found at a Habitat ReStore or salvage store near you. You can also find many of the items on Craig’s List or the dollar store. Happy hunting.

tealight_centerpiece_promo

Turn that old Hollywood strip light into a centerpiece!


Rustic Pallet Serving Tray

Reuse those old crates to make a rustic serving tray.


Mosaic Tile Coasters | Pretty Handy Girl

Use leftover glass mosaic tiles as drink coasters.


Easy Wooden Chalkboard Sign | Pretty Handy Girl

Create a Christmas countdown sign from scrap wood.


lantern_view

Paint an old light fixture to make a colorful lantern.


Make a Tray from a Cabinet Door | Pretty Handy Girl

Make a serving tray from an old cabinet door.


laura-makes_ornaments

Craft ornaments from tree branches.


snowman_placemat_flag_promo

Create a Snowman Flag from a Dollar Store placemat.


Beveled Glass Ornament from Old Brass Light

Make beautiful photo ornaments from an old light fixture.


scrap_wood_christmas_tree

Build a decorative Chrismas tree using scrap wood.


beauty_shot_vintage_map_light

Glue an old map to a lampshade for a cozy new lamp.


wine_crate_turned_flower_box

Make a window box with an old wine crate.

Hope you found something to dress your home for the holidays. Have a Happy Holiday, y’all!

PHGFancySign


Pin for later!

Holiday decorating doesn't have to break the bank with the 12 great upcycled ideas for holiday decor from Pretty Handy Girl! | #prettyhandygirl #holidaydecor #holidayhome #upcycleddecor

The App That Saved My Butt | DIYZ | Pretty Handy Girl

The App That Saved My Butt | DIYZ | Pretty Handy Girl

Just the other week we had a situation in the Handy Household. It was a recurring issue and was bound to get out of control resulting in a big mess sooner or later. Fortunately, the situation happened while Handsome Guy was traveling so I had a few days to try to resolve the problem. Ultimately I ended up doing some research to find a solution and that’s how I discovered The App that Saved My Butt: DIYZ App Review.

The App That Saved My Butt | DIYZ | Pretty Handy Girl

DIYZ App Review

I have to admit, when I first heard about this app it didn’t sound like anything revolutionary. You can get a ton of DIY tutorials all over the web and YouTube. But, when I tried the DIYZ app, my mind was changed forever. This is where I should mention that this is a sponsored post for DIYZ. But, I wouldn’t write about any app unless I truly thought it is a good resource for you, my loyal handy readers.

Now that we got that out of the way, here’s how the story unfolded. We have a toilet downstairs that has always been temperamental. It usually acts up when we have company and then it’s embarrassing for all parties concerned. But, this toilet was usually set right with a few healthy plunges. Hopefully you understand that we put up with this cycle (clog-yell-plunge-solved) for nine years.

Fast forward to a few weeks ago as I tried unsuccessfully to clear that problem toilet once again. I plunged and plunged (while silently cursing my boys who were probably guilty of clogging it) until the plunger broke. I went over possible solutions in my head:

  • Hire a plumber – No, too expensive.
  • Replace the toilet – Maybe as a last resort.
  • Search the web for ideas to unclog a toilet – Free, but it’s hard to know which advice is good advice.

The App That Saved My Butt | DIYZ | Pretty Handy Girl

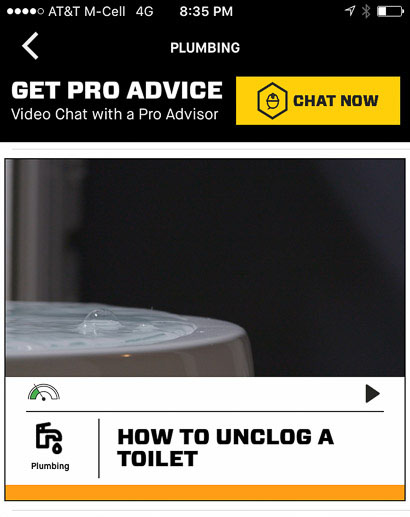
I happened to remember the DIYZ app (that I downloaded this summer) and figured, what the heck. I found a tutorial for How to Unclog a Toilet.

The App That Saved My Butt | DIYZ | Pretty Handy Girl

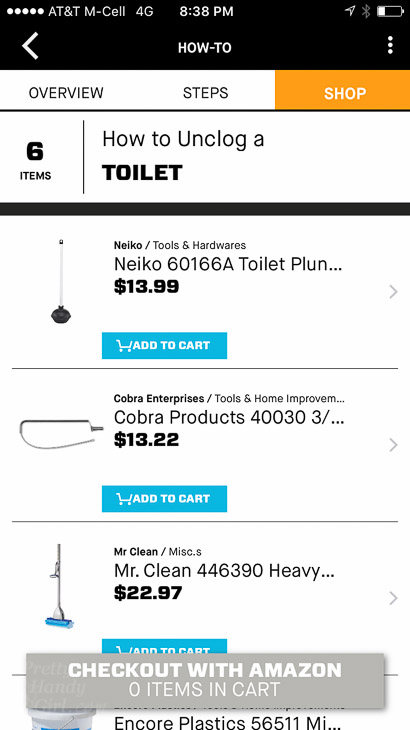
Within the app, you can shop for all the tools you need for the job.

The App That Saved My Butt | DIYZ | Pretty Handy Girl

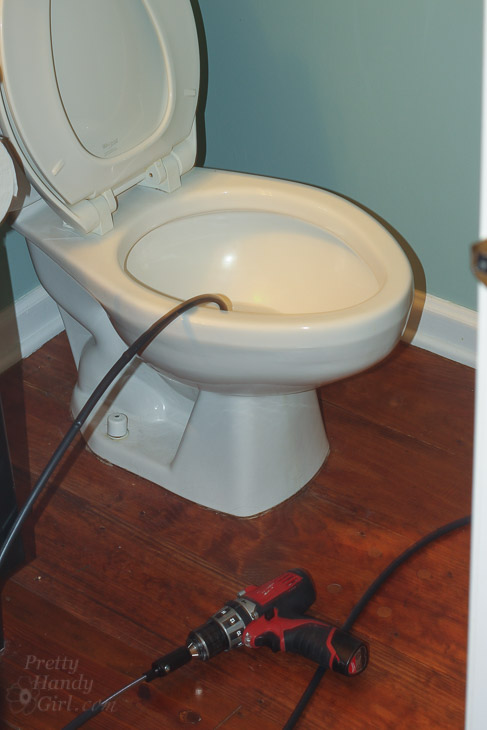
I purchased an auger and tried to clear the clog, but still had no luck. DRAT!

The App That Saved My Butt | DIYZ | Pretty Handy Girl

I knew it was time to take more drastic measures. I looked through the plumbing tutorials on DIYZ until I found the one I needed:

The App That Saved My Butt | DIYZ | Pretty Handy Girl

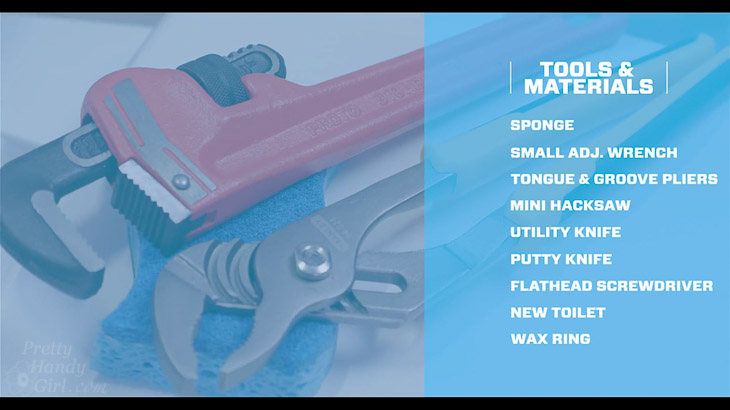
The tutorial was a quality video that included a list of tools and materials I’d need.

The App That Saved My Butt | DIYZ | Pretty Handy Girl

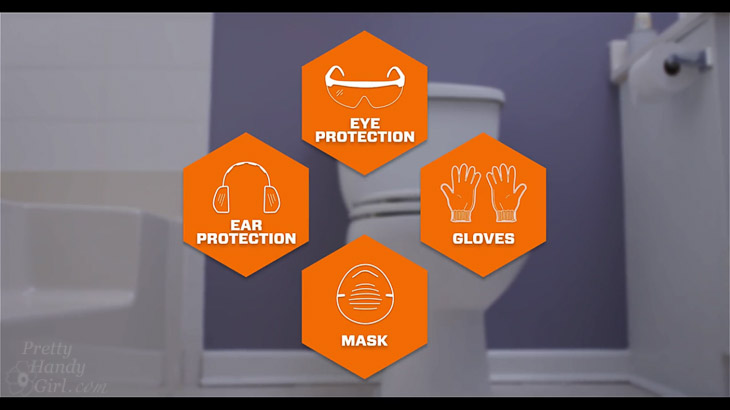
The required safety gear is well illustrated. (Any tutorial that mentions the suggested safety measures gets a gold star from me!)

The App That Saved My Butt | DIYZ | Pretty Handy Girl

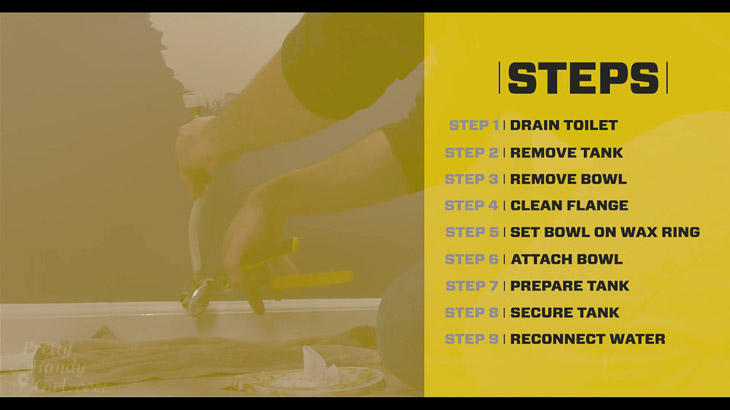
A list of the steps were spelled out in the beginning.

The App That Saved My Butt | DIYZ | Pretty Handy Girl

After watching the video I felt confident to take on the task by myself. (Of course it would be easier with a helper, but no one was around to help me.)

The App That Saved My Butt | DIYZ | Pretty Handy Girl

I starting by turning off the water.

The App That Saved My Butt | DIYZ | Pretty Handy Girl

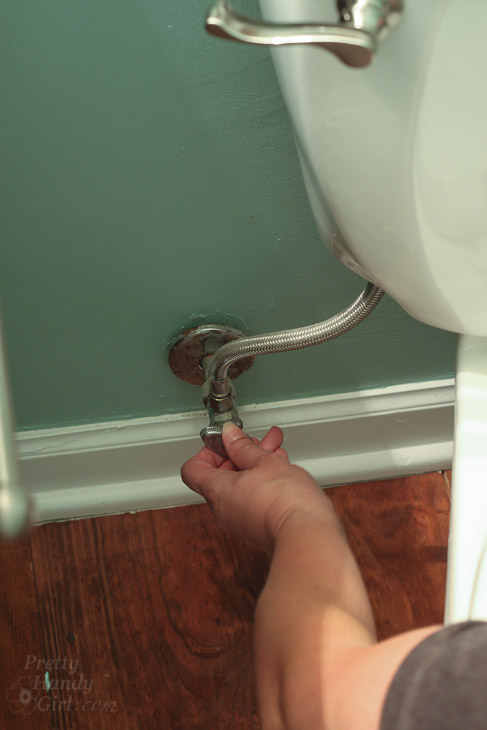
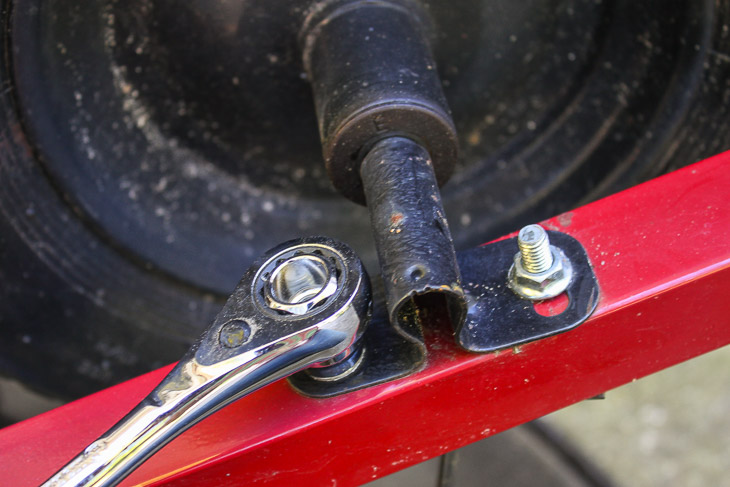
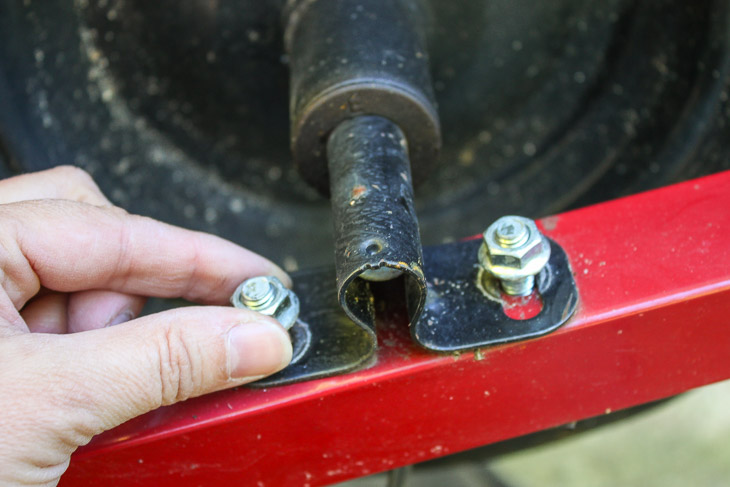
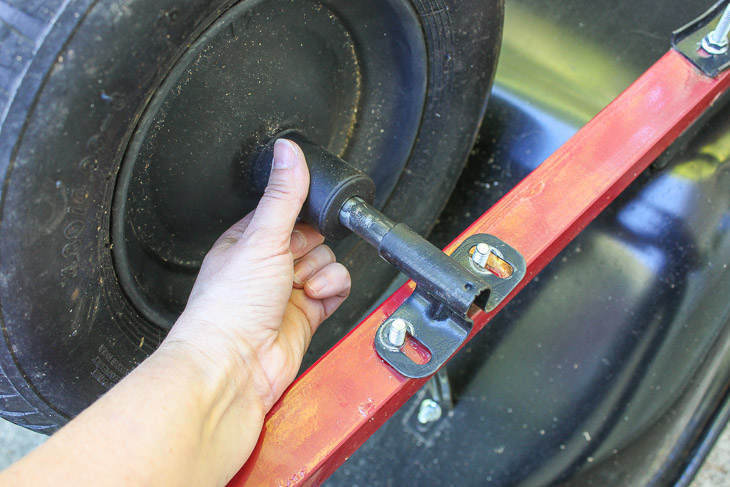
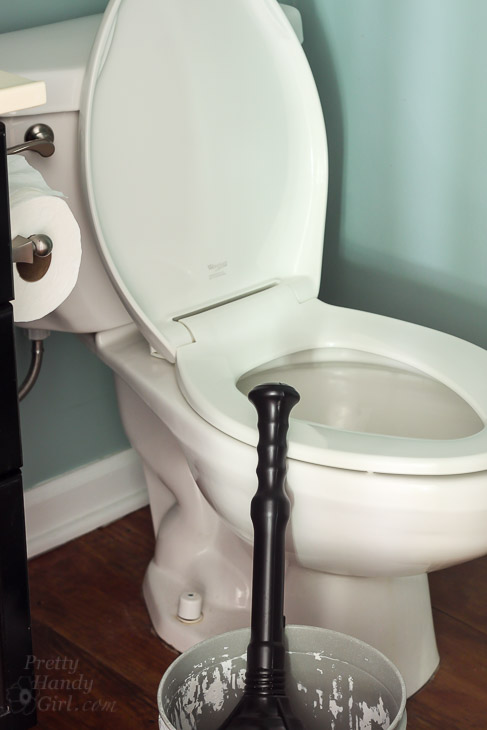
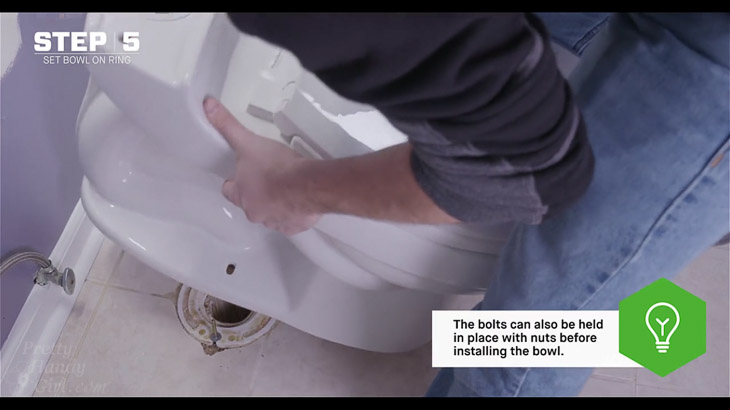
Then I followed the step-by-step tutorial from DIYZ. Thanks to this app, we had a working toilet downstairs within a few hours. And it saved my butt because I know Handsome Guy would not have been happy to come home from his trip to this sight:

The App That Saved My Butt | DIYZ | Pretty Handy Girl

Let me tell you why I really think the DIYZ app rocks. Have you ever gotten stuck in the middle of a project and need an answer from a pro? Or have you wanted someone to double check your work? This is the feature that sets DIYZ apart from the any other DIY tutorial source:

The App That Saved My Butt | DIYZ | Pretty Handy Girl

If you need a pro, you can have a licensed professional on the phone to help you in a minute. This is a revolutionary service. Think about it — you can get instant advice. Just send photos or switch to video chat to show the licensed pro the issues you’re dealing with. No more wondering who you can trust and who you can call. No more rushing back to the home improvement store to try to hunt down someone to answer your question. And no more watching YouTubers who may or may not give you the answers you need.

The App That Saved My Butt | DIYZ | Pretty Handy Girl

How much do you think this service costs? Remember licensed contractors can charge up to $150 per hour. For that reason, you’ll be thrilled to hear that this service is free until the end of the year! In 2017, the Get Pro Advice will begin charging $10 for the first 10 minutes and $1 a minute after that. Definitely more cost effective than hiring a pro!

The app is now available for free download in the Apple App Store for iPhone and Google Play for Android.

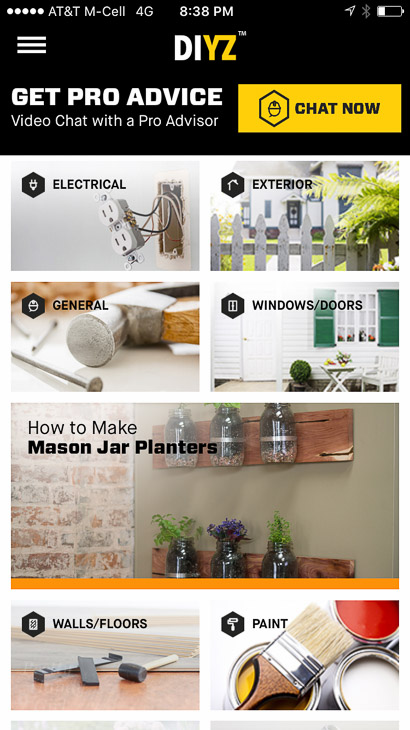
DIYZ also has more than just plumbing tutorials. Learn how to fix or update just about anything in your home from the DIYZ app.

The App That Saved My Butt | DIYZ | Pretty Handy Girl

Go ahead, download the app right now! What are you waiting for? It’s free and you have nothing to lose.

You can watch lots of tutorial videos in your free time. Educate yourself and learn how to complete your own home repairs and improvements. I can’t even begin to tell you how much money you’ll save doing it yourself.

page_break_2

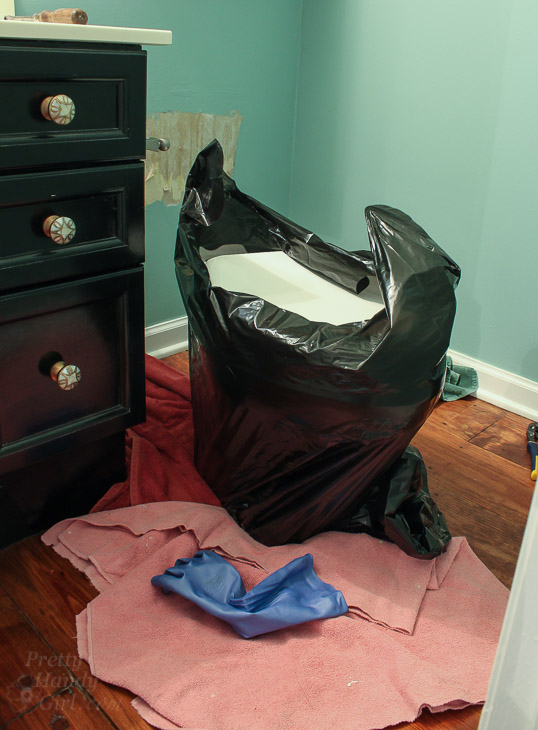
Handy Hints: If you do have to replace your toilet, I have a few tips for you if you are flying solo.

  1. Have a large lawn and leaf bag sitting next to the toilet.

The App That Saved My Butt | DIYZ | Pretty Handy Girl

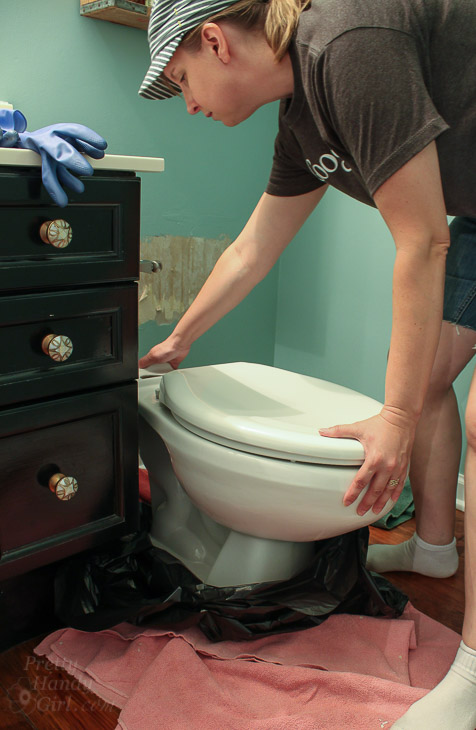
Set the toilet inside the bag to catch any drips as you escort your toilet out of the house.

The App That Saved My Butt | DIYZ | Pretty Handy Girl

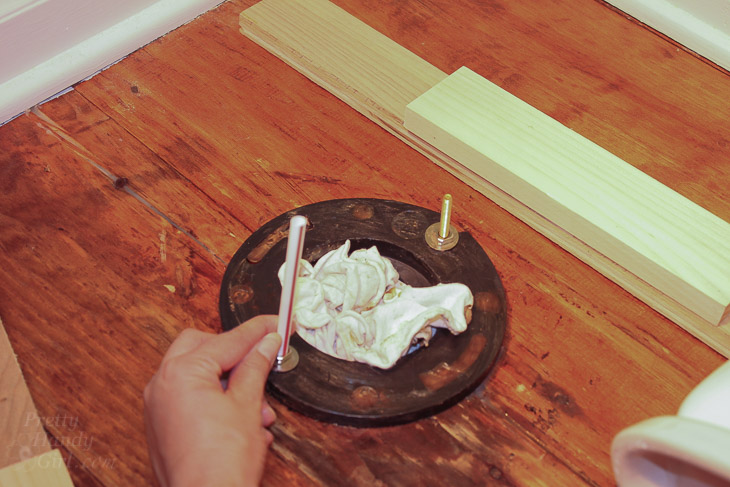
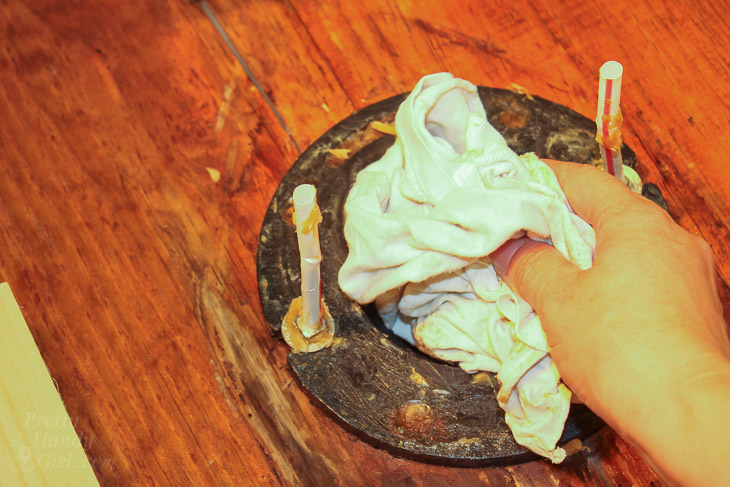
2. If you are installing the toilet yourself, it can be difficult to line up the toilet on the bolts. Cut a drinking straw in half and put a straw on each bolt. This makes it a little easier to line up the holes in the toilet base with the bolts.

The App That Saved My Butt | DIYZ | Pretty Handy Girl

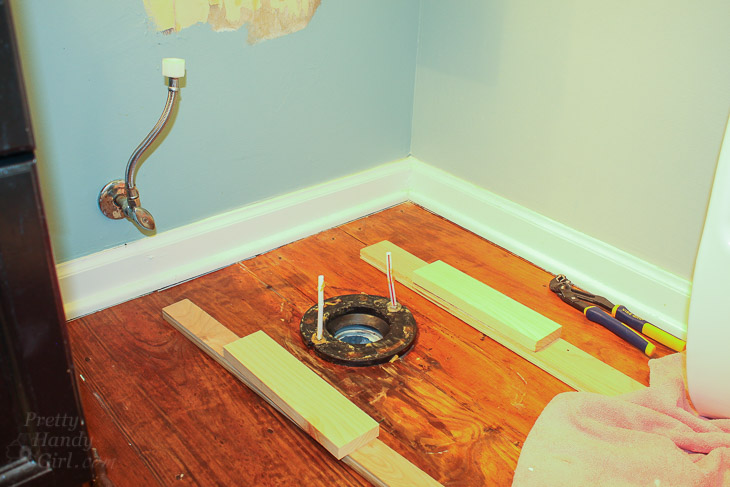
3. Add scrap boards on either side of the waste pipe to rest the toilet on top of before seating the toilet and compressing the wax ring. This will allow you to line up the bolts, then remove one board at a time to slowly lower the toilet while double checking that it is still lined up with the bolts.

The App That Saved My Butt | DIYZ | Pretty Handy Girl

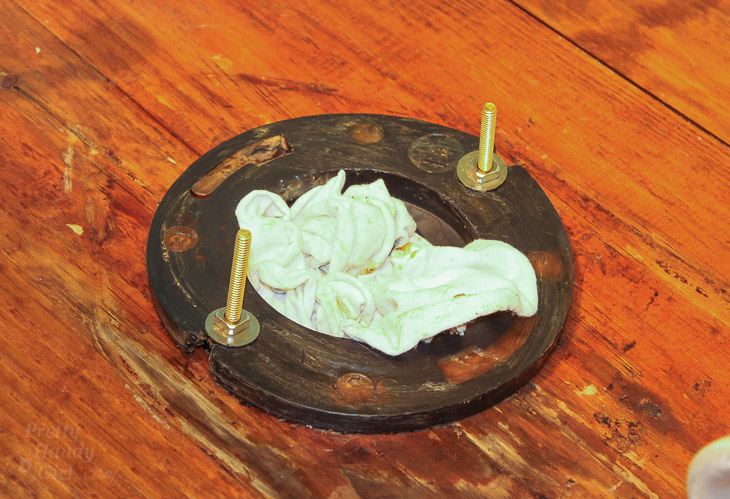
One last tip. Don’t forget to remove the rag before setting the toilet (ask me how I know.)

The App That Saved My Butt | DIYZ | Pretty Handy Girl

Are you curious about what caused our toilet to clog beyond fixing? Well, it was actually my fault. Unbeknownst to me, my camera remote fell out of my pocket and into the toilet. For once I couldn’t blame it on any of the boys or men in my life. It was my fault!

The App That Saved My Butt | DIYZ | Pretty Handy Girl

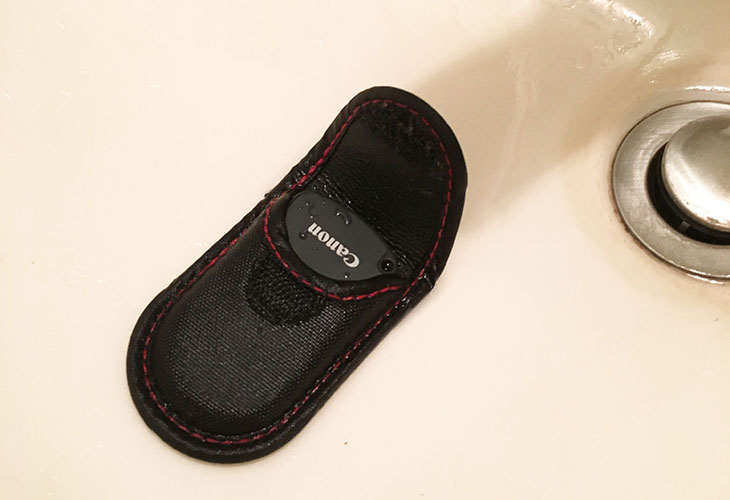
I had no idea, but it had wedged itself in the toilet. Even though I could have re-set the old toilet and called it a day, I decided to replace the toilet with a newer dual flush toilet and save water in addition to saving our guests any more embarrassment.

The App That Saved My Butt | DIYZ | Pretty Handy Girl

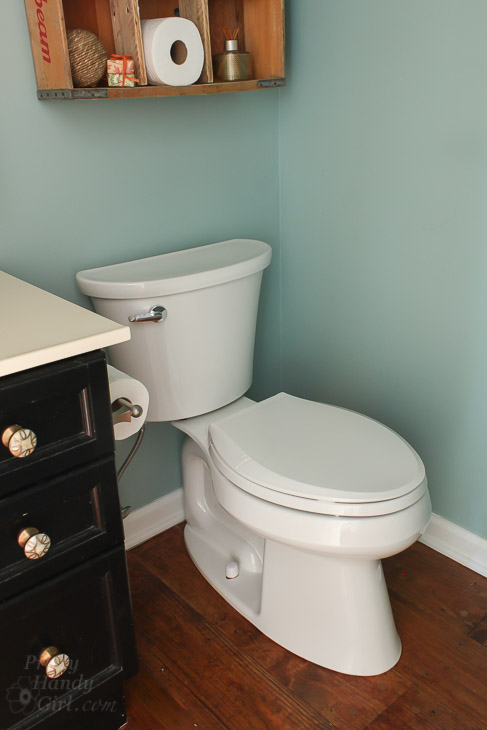
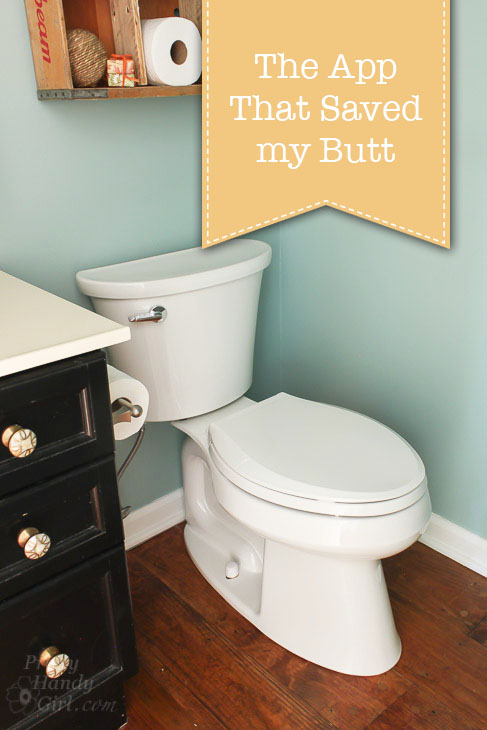
I’m happy to say the new toilet works perfectly! And that’s how a little app called DIYZ saved my butt! 😉

PHGFancySign

Disclosure: This is a sponsored post for DIYZ. I was approached about working with DIYZ, but didn’t agree until after I found the app extremely helpful while replacing our toilet. I was not told what to write. All opinions are my own. I am particular about the brands I represent and will always let you know when you are reading a sponsored post.

How to Build Window Boxes | Pretty Handy Girl

If you have a house that needs a little charm and character, adding window boxes is an easy way to add instant charm and curb appeal to your home. But why settle for standard off-the-shelf window boxes when you can make your own window boxes that have beautiful lattice details! Learn How to Build Lattice Window Boxes below!

How to Build Lattice Window Boxes

Today I’m over at Angie’s List sharing the tutorial for how to build custom window boxes. You can make them in no time and add beautiful charm to your home. You can also customize these window boxes to your own style! Best of all these boxes don’t require any painting or staining! To learn How to Build Lattice Window Boxes, head over to Angie’s List to read the tutorial.

How to Build Lattice Window Boxes

If you like this project, you’ll probably love this easy scalloped centerpiece tutorial by Her Tool Belt:

How to Build Lattice Window Boxes

Scalloped Box Centerpiece

Have a Happy Fall Y’all!

PHGFancySign


Love this DIY Jewelry Holder! Perfect use for those old corks!

Hi everyone! This is Lindi, visiting again from Love Create Celebrate. I admit it, I’m a hoarder. Aren’t all DIYers? I have trouble throwing anything away that could be “useful” one day (wine corks included!) When I was trying to plan out some DIY projects for my Master Bedroom Closet Renovation, I saw the old corks in a mason jar on my counter and was immediately struck with inspiration. Maybe my DIY Jewelry Holder will inspire you to keep your corks too!

Love this DIY Jewelry Holder! Perfect use for those old corks!

I finished this entire project in just a few minutes! It’s amazing what you can do with a few old corks!

(I’ve included affiliate links for your convenience. I earn a small percentage from a purchase using these links. There is no additional cost to you. You can read more about affiliate links here.)

Materials: 

Tools:

Love this DIY Jewelry Holder! Perfect use for those old corks!

Instructions: 

Grab your pliers and eye hooks. Use the pliers to open up some of the eye hooks so that you can hang jewelry on them. Use one set of pliers to hold the eye hook in place. This is much easier than trying to stabilize the hook with your hand.

Love this DIY Jewelry Holder! Perfect use for those old corks!

Using the needle-nose pliers, pull the eye hook open. You only need an opening of approximately 1/4″.

Love this DIY Jewelry Holder! Perfect use for those old corks!

Grab your drill and drill a hole into the center of the corks (as shown below). You can just eyeball it because it doesn’t have to be perfect. Two of your corks should only be drilled half way through (they will be the corks on either end of the jewelry holder.)

Love this DIY Jewelry Holder! Perfect use for those old corks!

Once your holes are drilled, you can put the eye hooks in place. Twist an open eye hook into each cork. For the end corks, twist two closed eye hooks into the top of the corks.

Love this DIY Jewelry Holder! Perfect use for those old corks!

Line up the corks side by side and measure their total width. Measure the length of dowel you need and use a saw to cut the dowel to the correct length. Slide the corks onto the dowel rod. Cap the dowel off with the two end corks.

Love this DIY Jewelry Holder! Perfect use for those old corks!

Tie a piece of rope into the closed eye hooks for hanging your jewelry holder.

Love this DIY Jewelry Holder! Perfect use for those old corks!

Wouldn’t this make a great gift? Sometimes our family has a DIY gift exchange at Christmas time. I just might have to make a second one to throw in for some family members that would love it!

Love this DIY Jewelry Holder! Perfect use for those old corks! Love this DIY Jewelry Holder! Perfect use for those old corks!

This DIY Jewelry Holder is going to find a permanent home in my Dream Closet. I’m in the middle of the six-week long Dream Closet Renovation, and I’d love for you to come check out the progress!

dream-closet-inspiration-board-copy

For more DIY decor inspiration visit Love Create Celebrate.

You might also like these jewelry holders:

Branch Jewelry Holder

Branch Jewelry Holder

DIY Jewelry Organizer

DIY Jewelry Organizer

DIY Jewelry Holder

DIY Ring Holder

Lindi Signature~ view more projects by Lindi ~

Pin for later!

How to Replace a Wheelbarrow Tire in 5 Minutes | Pretty Handy Girl

How to Replace a Wheelbarrow Tire in 5 Minutes | Pretty Handy Girl

What happens when you are ready to do some work in the yard and discover your wheelbarrow has a flat tire? You pump it up. But, then you realize the tire is dry-rotted and no air will stay in the wheel. Trust me when I say you don’t want to muscle the tire off to replace it (because that is a pain in the “you know what” and it’s much faster to replace the whole wheel.) Have no fear, I have a tutorial for How to Replace a Wheelbarrow Tire in 5 Minutes!

How to Replace a Wheelbarrow Wheel in 5 Minutes | Pretty Handy Girl

Grab two items and let’s get to it.

(I’ve included affiliate links for your convenience. I earn a small percentage from a purchase using these links. There is no additional cost to you. You can read more about affiliate links here.)

Materials:

How to Replace a Wheelbarrow Wheel in 5 Minutes | Pretty Handy Girl

Instructions:

Flip the wheelbarrow over and loosen the nuts on the axle bracket.

How to Replace a Wheelbarrow Wheel in 5 Minutes | Pretty Handy Girl

Remove the nuts from the bolts. Repeat for the opposite bracket.

How to Replace a Wheelbarrow Wheel in 5 Minutes | Pretty Handy Girl

Lift the wheel off the wheelbarrow frame.

How to Replace a Wheelbarrow Wheel in 5 Minutes | Pretty Handy Girl
Remove the axle from the old wheel.

How to Replace a Wheelbarrow Wheel in 5 Minutes | Pretty Handy Girl

Slide the new wheel onto the axle.

How to Replace a Wheelbarrow Wheel in 5 Minutes | Pretty Handy Girl

Set the wheel back onto the frame, replace the bracket and the nuts. Tighten the nuts.

How to Replace a Wheelbarrow Wheel in 5 Minutes | Pretty Handy Girl

Flip the wheelbarrow back upright and get to work!

How to Replace a Wheelbarrow Wheel in 5 Minutes | Pretty Handy Girl

And that’s the easiest way to replace a wheelbarrow flat tire in 5 minutes or less.

PHGFancySign